
This is one of those things that isn’t really explained much, I know I’ve written ‘and tie off your thread’ in kit guidance a few times.
Most of people will have one preferred way to finish off, secure or tie off a thread when you’ve come to the end of the length or have finished stitching with that colour.
Over my years of stitching I’ve come across a few different methods for tying off a thread. I’ve tried them all and I do have a preference but it’s good to know the different methods as there are circumstances where one may be a better option than your normal methods.
Weaving in
Traditionally embroidered pieces didn’t have any knots to secure threads and the ends were woven under other stitches on the back of the work to secure them and stop them unravelling.
This method works really well if you have a lot of stitching visible on the back of the piece. The more stitches you can weave under the more secure the finishing.
To finish in this way, complete your last stitch and flip your hoop over so you are looking at the back of the work. Find a patch of stitches close to where the thread has come back through the fabric and pass the needle under and over this patch (without piercing the fabric) a few times.
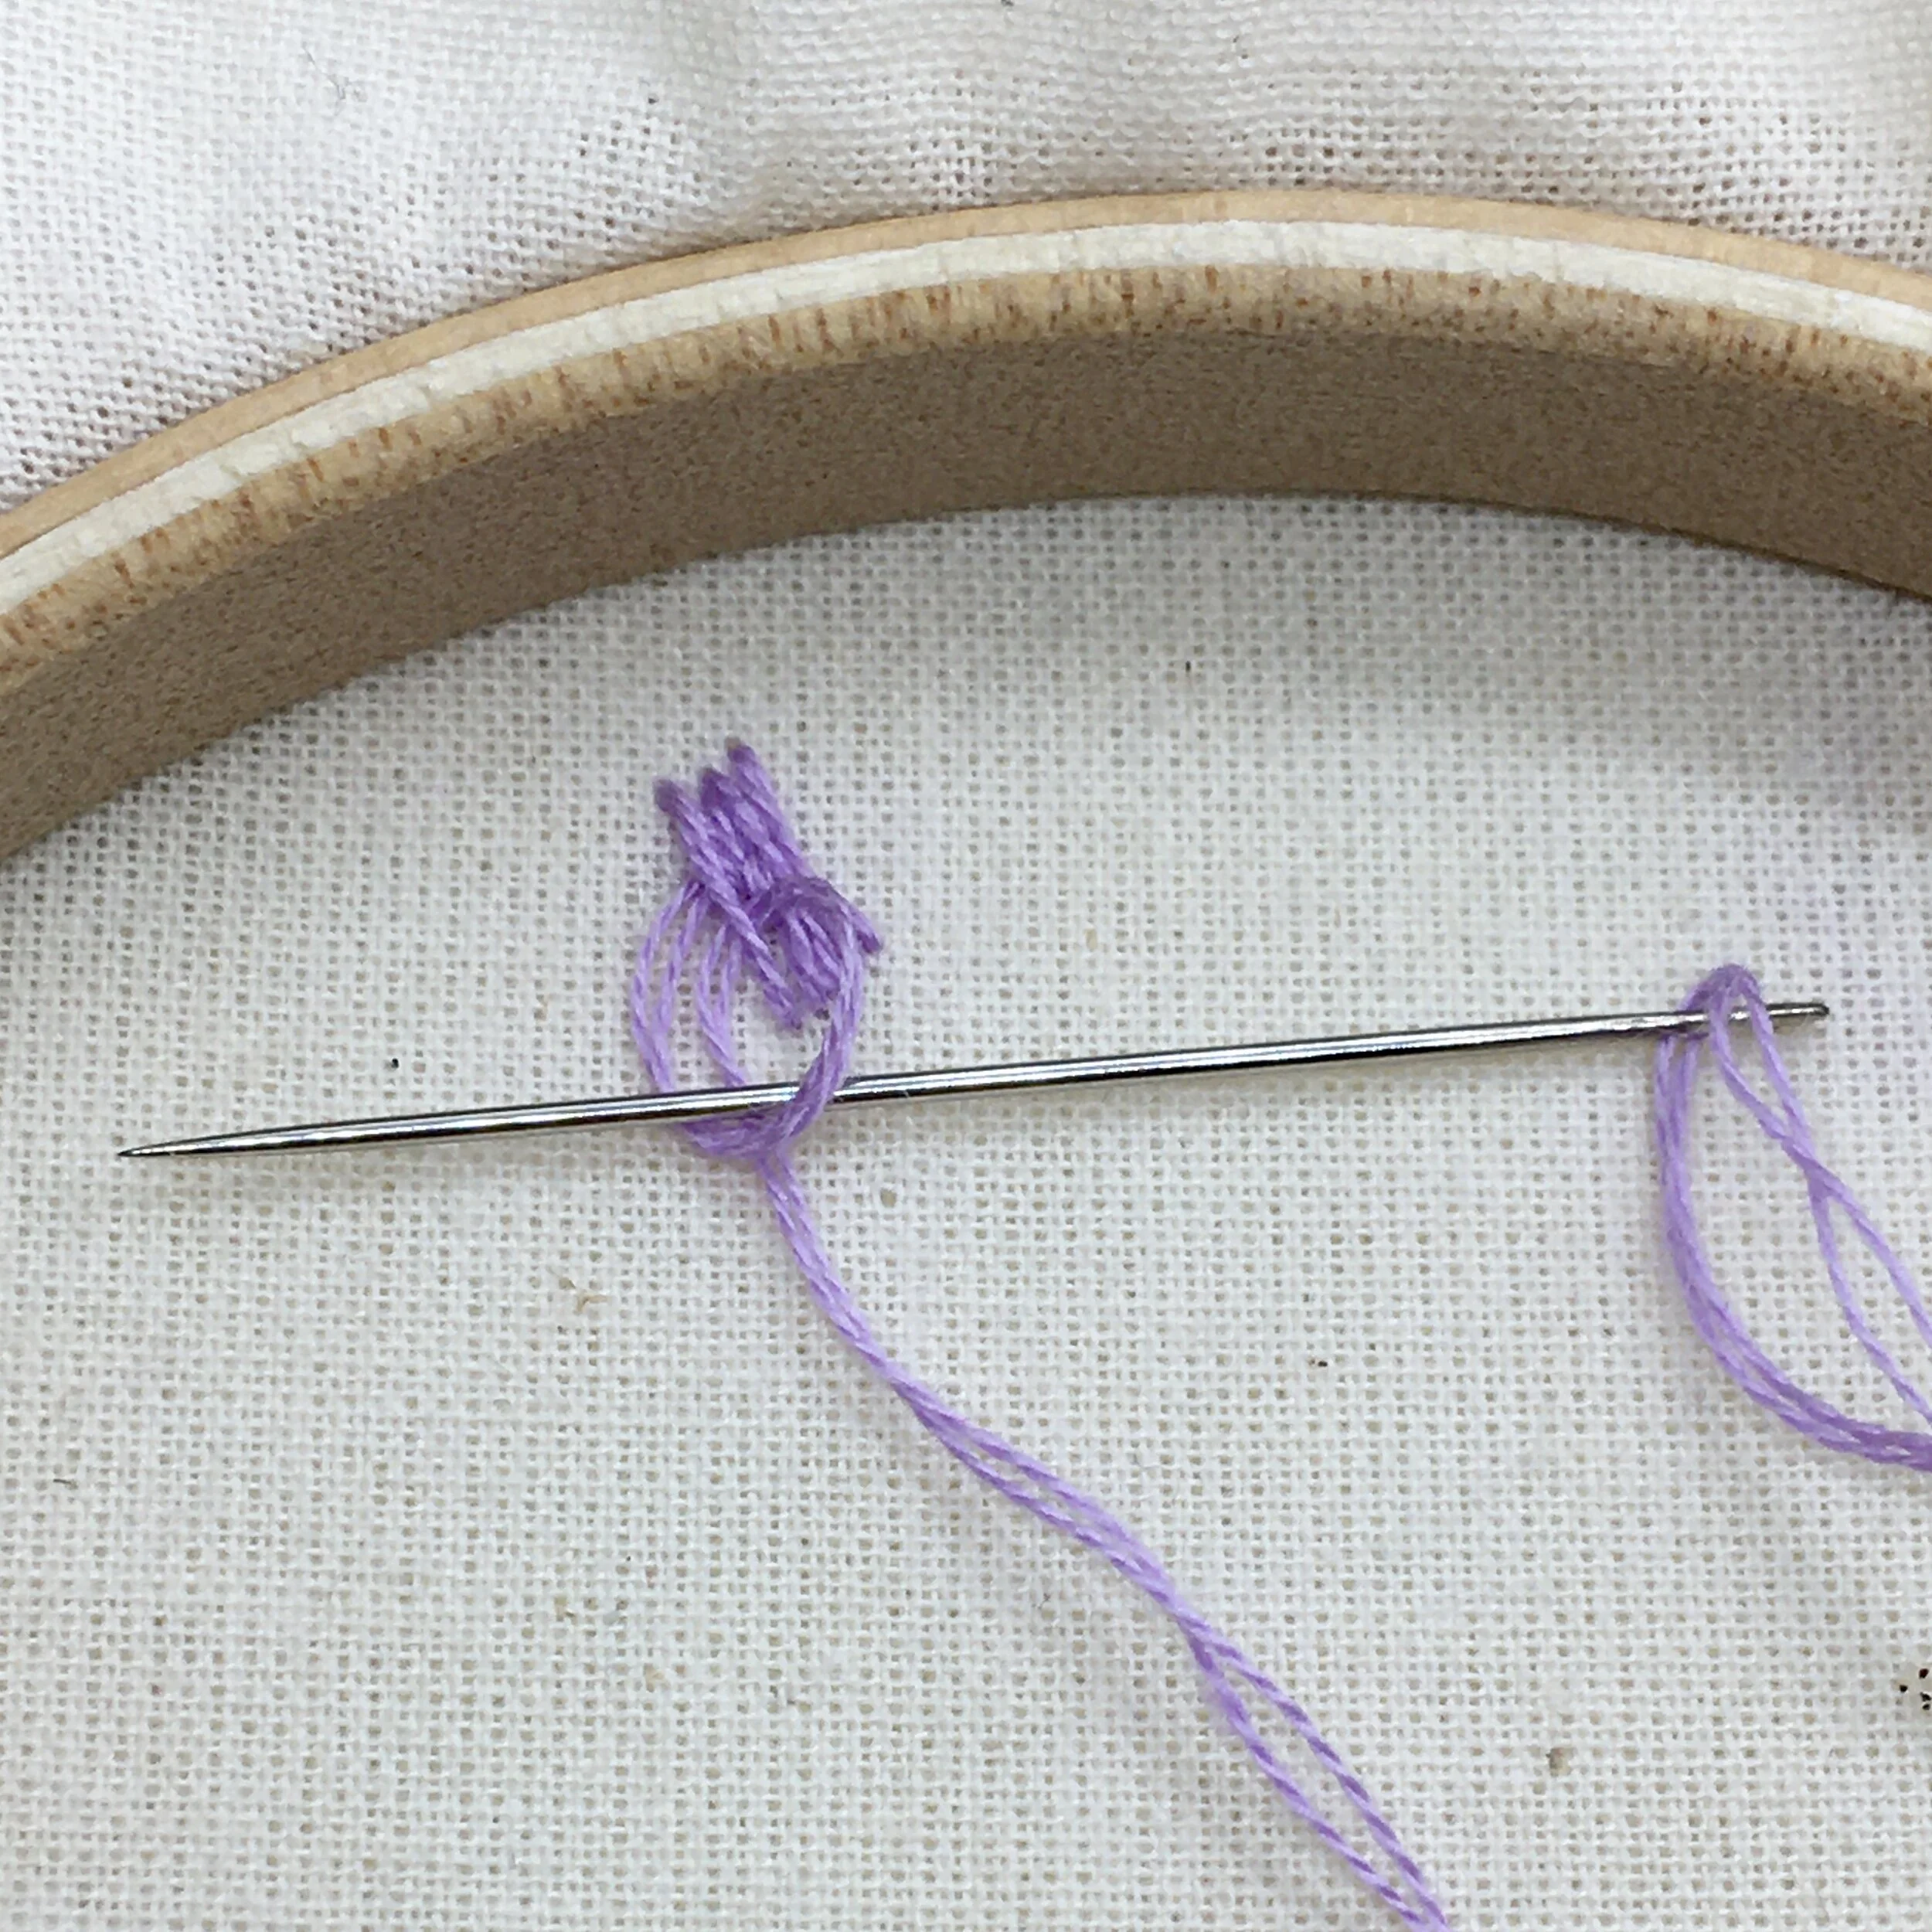
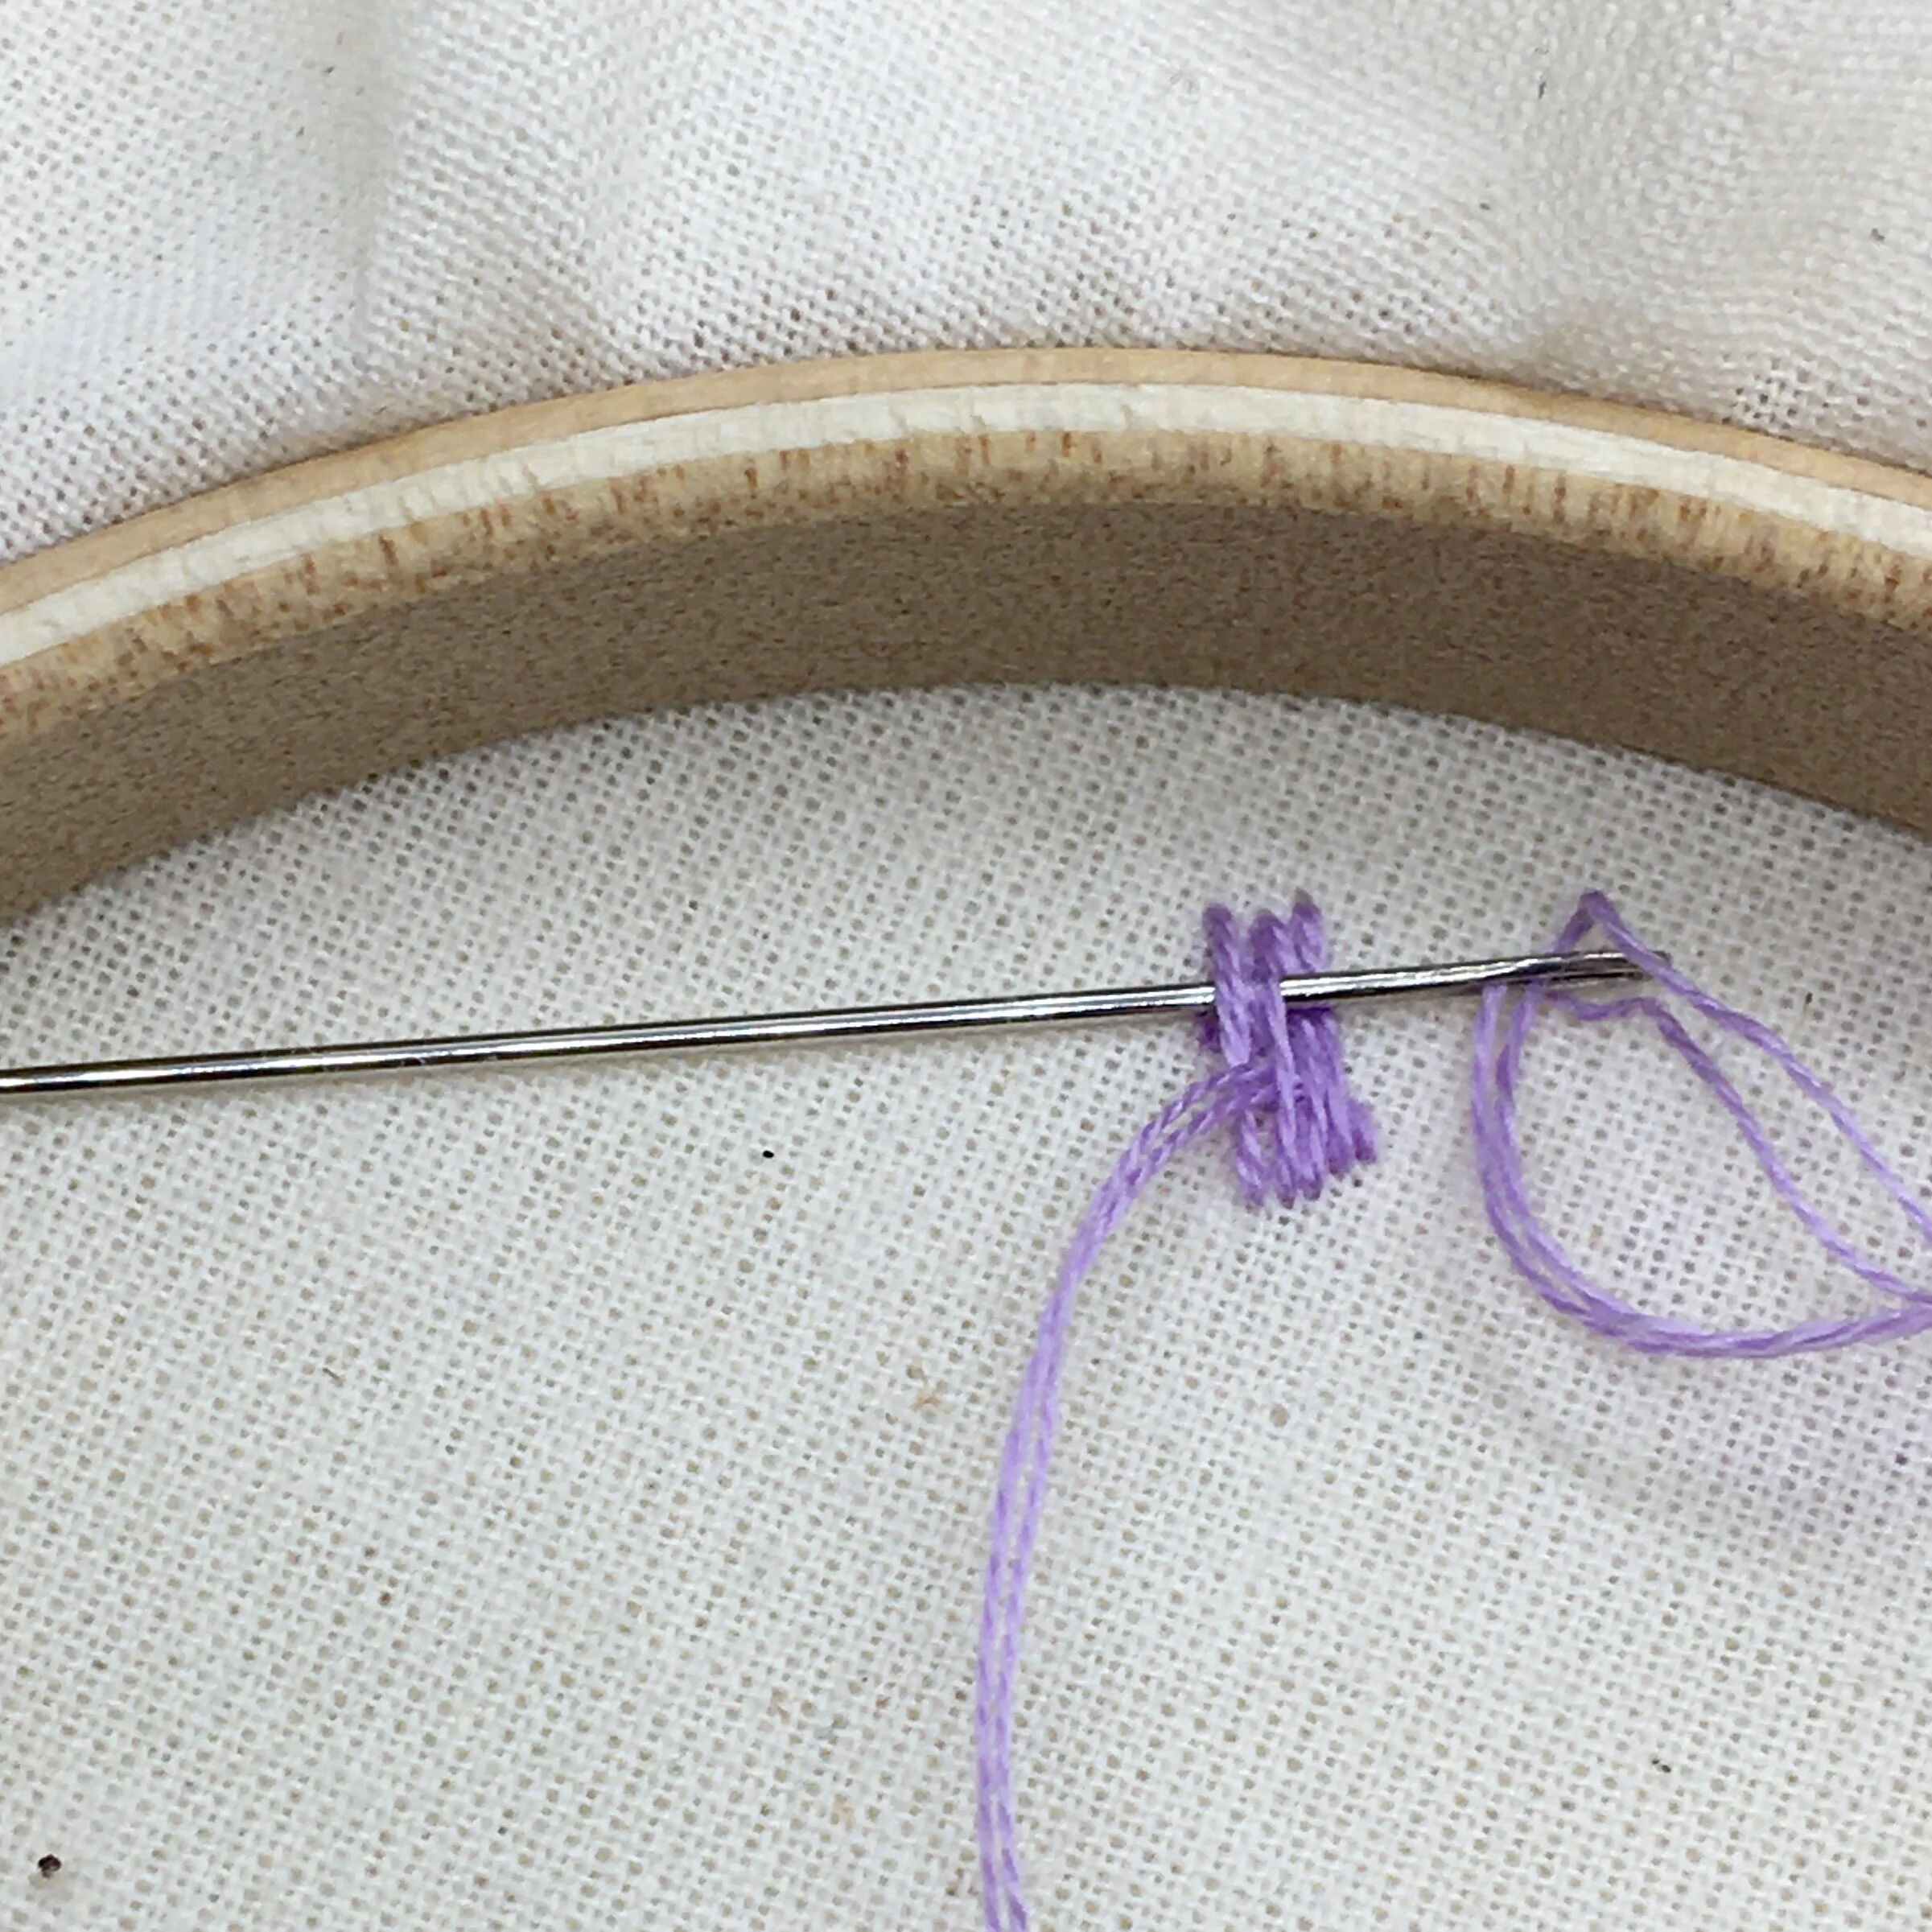
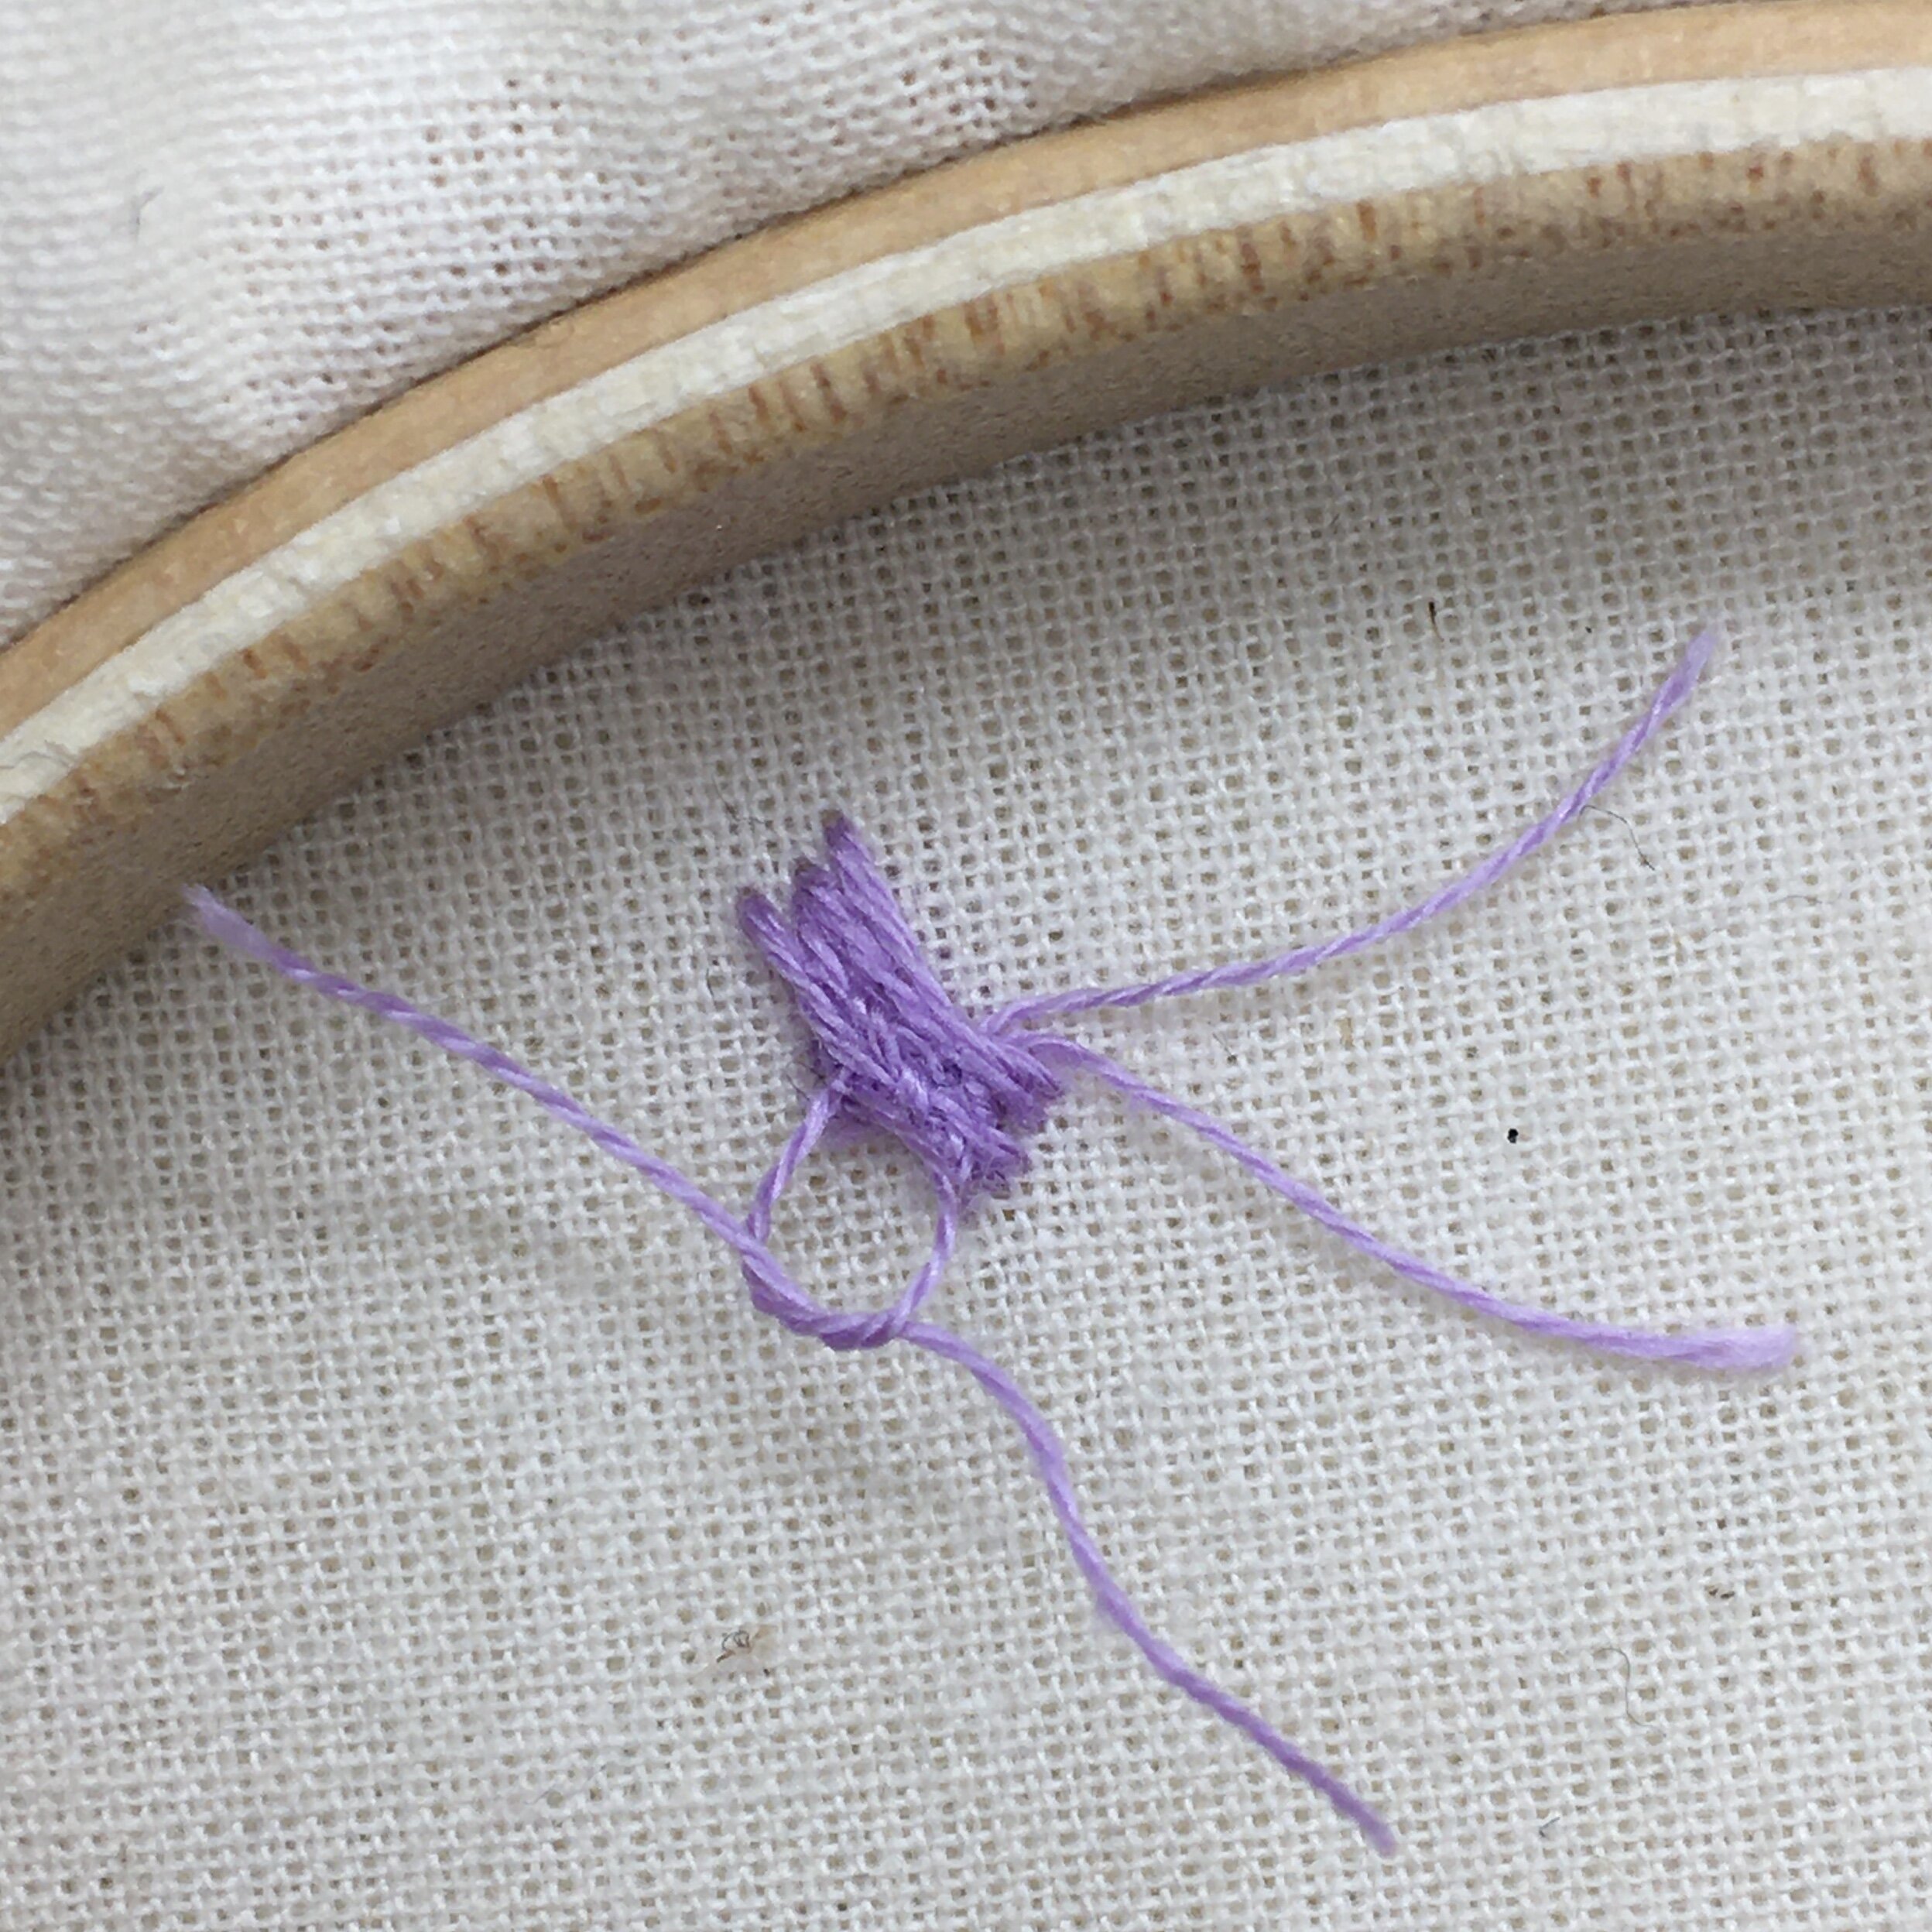
Loop and knot
This is the method I use most of the time as it’s nice and quick and simple way to knot the thread.
To finish in this way, complete your last stitch and flip over your hoop so you are looking at the back of the work. Find some stitches close to where the thread has come back through the fabric and pass the needle under the patch (it doesn’t have to be a big patch it could be just one stitch). Create a loop and pass the needle through the loop. Pull the thread tight to create the knot. You can repeat this again to create a double knot or weave the end in a bit before trimming the end.
Try not to knot around the last stitch that was completed as this can sometimes make this stitch a bit loose on the front of the work.
Tie ends together
I use this method most often when stitching with yarn. I start my stitches by leaving a longish end and using my thumb to stop pulling this through. If when I finish my stitching the end is near to a loose end then I will secure the threads by tying the two ends together. You can tie the tails of two different threads together too.
I’ve sometimes used this method too when stitching with multiple strands of floss where other methods are not an option. I just split the thread and tie the ends together a couple of times (as one knot could pull through the fabric).
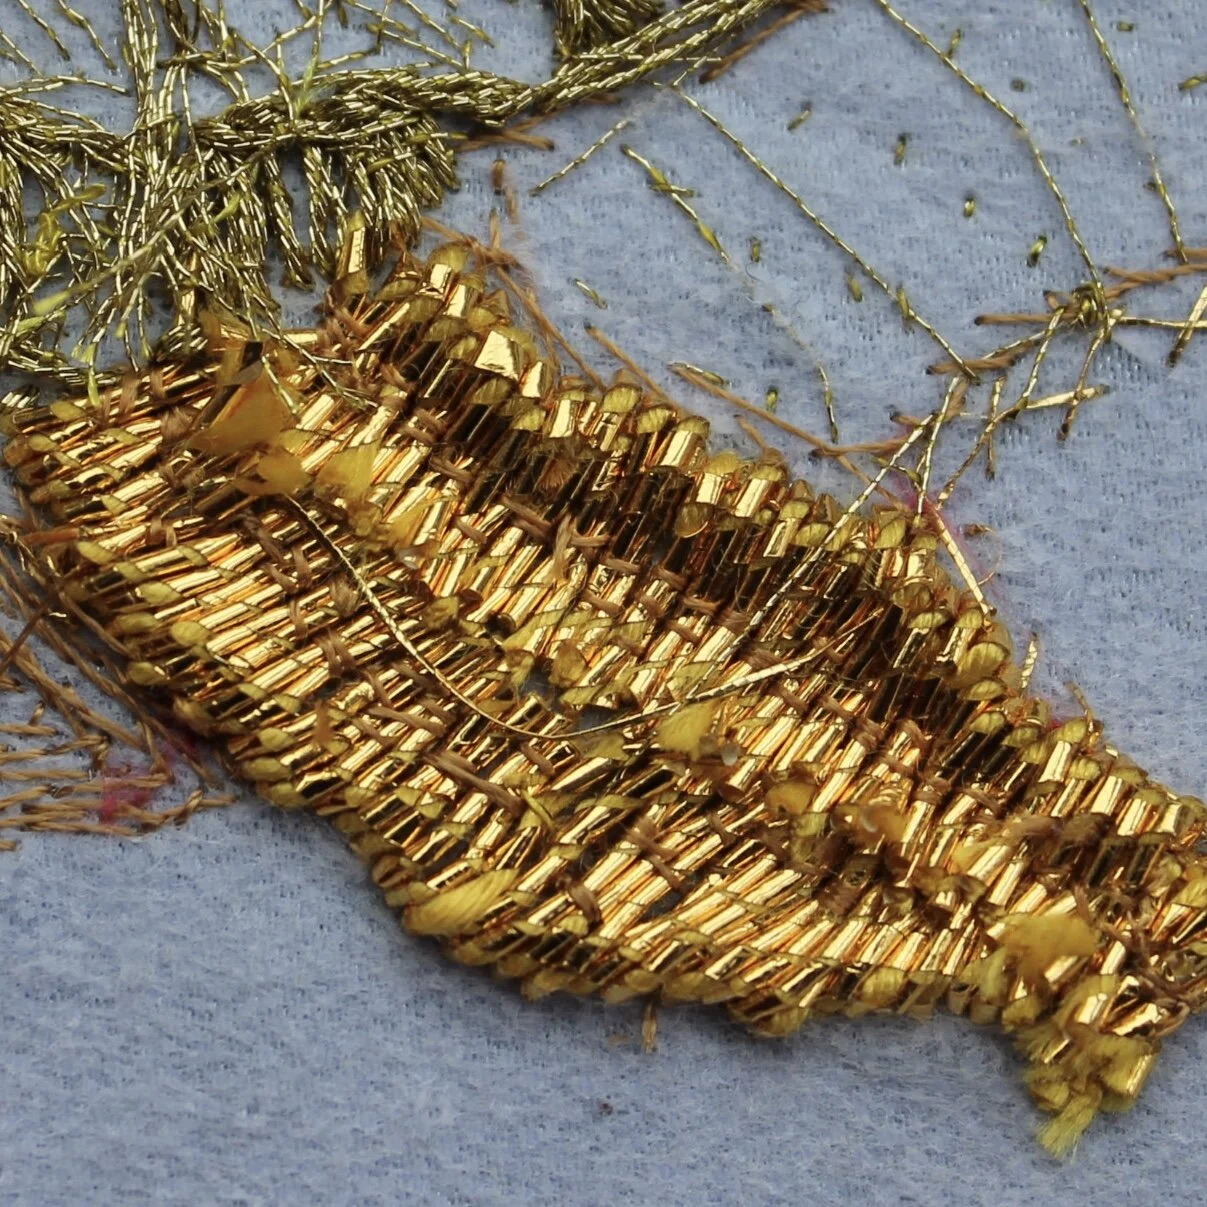
Sew in place
I learnt this method when practising gold work as the gold work threads can’t easily be woven or knotted.
To secure threads like this you take a thinner sewing thread and gently work from side to side catching the fabric and looping over the thread you are securing. Because you need to catch the fabric you need to be aware of what is showing on the front of the embroidery.
Enjoyed this blog post? I share embroidery tips and a free embroidery pattern in my monthly newsletter. Sign up here to receive the newsletter on the 1st of each the month.