• Home
  • Shop
  • Stitch Showcase
  • Embroidery tips
  • Freebies
  • About
  • Contact
Menu

Embellished Elephant

  • Home
  • Shop
  • Stitch Showcase
  • Embroidery tips
  • Freebies
  • About
  • Contact
An image of blue fabric with silver stitches and beaded embellishments. Overlaid is a blue square with white text saying - stitch showcase, six-pointed star stitch, www.embellishedelephant.co.uk

Stitch Showcase: Six-pointed star stitch

November 1, 2024

The six-pointed star stitch (also known as Dutch cross stitch) is a basic cross stitch with an extra horizontal stitch.

  • Make a straight stitch in any direction.

  • Imagine you are cutting a pie into 6 parts.

  • About one sixth of the way around from the top of the first stitch, bring the needle up through the fabric.

  • Take the needle back down diagonally opposite this point. This will create a slim X shape.

  • To finish the stitch, create another stitch diagonally over the previous one.

  • The length of the stitches used for each layer of the star can be the same or longer or shorter stitches can be used.

an illustration of how to create an embroidery stitch
In stitch showcase 2 Tags Stitch Showcase, Line Stitch
Comment

Stitch Showcase: Whipped Wheel Stitch

September 27, 2023

This is a little more complex than the woven wheel stitch as in each round the thread is wrapped around the base stitches. Try experimenting with a half wheel shape to create a fan like effect. Most commonly this is stitched with the woven lines pushed together to create a fully filled shape, but it can also be stitched in an open approach to create a spiders web.

  • Start by laying down the base stitches, there can be an odd or even number of base stitches

  • Bring the thread up at the centre of the wheel

  • Pass the thread under the nearest base stitch and then over and under the base stitch to create a whole wrap around

  • Repeat with each base stitch and keep on going round and round until the base stitches are completely covered

  • At the end, or if the thread runs out and needs to be changed, take the thread down through the fabric after completing one wrap. It should be slightly under one of the base threads and, if needed start a new thread from the same place.

In stitch showcase 2 Tags Stitch Showcase, Isolated Stitch
Comment
A photo of burden stitch in light brown thread stitched on an orange felt background. Overlayed is a blue square graphic with the text stitch showcase burden stitch

Stitch Showcase: Burden Stitch

March 9, 2022

With my houseplant collection of craft kits, I’m always on the look out for stitches that would look good as pot or basket decorations. When I came across this stitch, I knew I wanted to try it out.

  • Lay down parallel rows of horizontal stitches (A to B)

  • Start at the bottom corner, add a stitch at right angles ending just below the next horizontal stitch (C to D)

  • Keep adding vertical stitches, evenly spaced, with enough gap between each to fit a stitch on the next row

  • For the next and subsequent rows, place the vertical stitches between those of the previous row.

An illustration of an embroidery stitch labelled as Burden Stitch. There are three lines of parallel horizontal stitches. At right angles shorter vertical stitching are overlayed over the long horizontal stitches.

Want to have a go at this stitch? Keep an eye out for the palm house plant kit that it heading into my shop very soon. Alternatively, you could use this stitch instead of any of those I recommend in the guidance for any of my houseplant kits. You can find the full range of houseplant kits here.

Enjoyed this blog post? I share embroidery tips and a free embroidery pattern in my monthly newsletter. Sign up here to receive the newsletter on the 1st of each the month.

In stitch showcase 2, 100days Tags Stitch Showcase, Couching Stitch
Comment
A close up of green embroidery thread on calico fabric. The thread is stitched in fan stitch to create palm leaves. Overlaid is a blue square with the text Hand Embroidery - Fan/Ray stitch

Stitch Showcase: Fan Stitch

February 23, 2022

Fan stitch is also commonly called ray stitch, I prefer the name fan as I thing it really describes what it looks like. To me this stitch conjures up images in my mind of large palm leaves and this stitch can be used to represent leaves.

  • Create the base of the fan by stitching one long straight stitch. It is generally about half the length of the fan centre line

  • Now create the central fan line. It should be in a straight line with the base stitch

  • Either draw on guide lines or imagine the shape of a diamond

  • Bring the needle through the fabric a few mm down from the top of the centre line and a few mm away from the centre line. Complete this stitch at the point at which the base and centre lines meet.

  • Repeat on the other side of the centre line, making a mirror image stitch.

  • Repeat for a further two pairs of lines so there are 7 lines in total coming from the base stitch (the centre line and 3 pairs of stitches)

An illustration of how to create the embroidery stitch fan stitch. The illustration is in shades of blue and grey on a white background.

Want to have a go at this stitch? Sign up to my newsletter to hear when the palm houseplant kit that uses a variation of this stitch will be launched.

In stitch showcase 2, 100days Tags Stitch Showcase, Isolated Stitch
Comment
an image of four waves of scroll stitch using blue thread on a calico background. Overlaid is a blue square with text that says - hand embroidery, scroll stitch, www.embellishedelephant.co.uk

Whatever it is, the way you tell your story online can make all the difference.

Stitch Showcase: Scroll stitch

January 26, 2022

Scroll stitch comprises a knot and a tail and gives a beautiful curved look. Like a lot of stitches it takes a bit of practice to get into the rhythm but once you’ve got the steps you’ll be scrolling onwards.

My top tip if you want to make sure your scrolls are all in the same direction then make sure that you bring the needle through the fabric the same direction each time.

  • Bring the needle up through the fabric at the start of the stitch (A)

  • At the point where you want the scroll part of the stitch to be placed (B) bring the needle down and up through the fabric as close together as possible

  • Leave the needle threaded through the fabric and wrap the floss around the needle from the eye end of the need to the point of the needle

  • Pull the needle through slowly to prevent any thread tangles

  • Repeat for the rest of the scrolls

an illustration of how to create a scroll stitch. The illustration is in blue on a white background and there is a grey needle showing where this should be placed on the fabric

Want to try this stitch? It’s not one that is currently included as a recommended stitch for any of my kits but you can switch this for any of the stitches that decorate the pots in the houseplant collection of kits that you can browse here.

Enjoyed this blog post? I share embroidery tips and a free embroidery pattern in my monthly newsletter. Sign up here to receive the newsletter on the 1st of each the month.

In stitch showcase 2 Tags Stitch Showcase, Line Stitch
Comment
a picture of yellow fabric with yellow layered lazy daisy stitches in rows. Overlaid is a blue square with text saying - stitch showcase, layered lazy daisy stitch, www.embelllishedelephant.co.uk

Stitch Showcase: Layered Lazy Daisy Stitch

January 12, 2022

Layered lazy daisy stitch is a variation of lazy daisy stitch and can be used if you want to fill in the centre of a lazy daisy stitch .

  • I recommend working this stitch by creating the inner lazy daisy and then then outer one

  • Bring the needle up through the fabric at the point where you want your stitch to start (A)

  • Take it back down as close as possible to the original hole

  • Gently pull the thread through until you have a small loop - don't pull fully tight at this point

  • Push the needle up through the fabric at the point where you want the stitch to end, 5mm is a good length (B)

  • Create a tiny straight stitch over the loop so it can’t come loose (C)

  • Repeat the steps above creating the start and end points of the stitch just a millimetre away from the first.

an illustration of the steps to follow to create layered lazy daisy stitch. The illustration is blue on a white background with a blue border

Want to try this stitch? It’s not one that is currently included as a recommended stitch for any of my kits but you can switch this for any of the stitches in the floral stitch sample kit that you can find here.

Enjoyed this blog post? I share embroidery tips and a free embroidery pattern in my monthly newsletter. Sign up here to receive the newsletter on the 1st of each the month.

In stitch showcase 2 Tags Isolated Stitch, Stitch Showcase
Comment
An image of close up of green stitching on calico fabric. Overlaid is a blue square and on it in white text is - stitch showcase, double layer whipped backstitch, www.embellishedelephant.co.uk

Stitch Showcase: Double Layer Whipped Backstitch

December 29, 2021

I came across this variation on whipped backstitch recently and it was a bit of a lightbulb moment. Whipped backstitch is a favourite of mine and with this version you can stitch thicker lines without needing to increase the number of strands of thread being used.

The main difference to whipped backstitch is that rather than laying down just one row of backstitches, you lay down two or three rows as the base to whip around.

  • Backstitch is the foundation and then floss is wrapped around each of these stitches to create a cord effect

  • Start by backstitching the complete length of the line you want to embroider (see here for how to create a backstitch line)

  • Create another row or two alongside the first row

  • To wrap the backstitch, bring the needle up at the end of the backstitch length (B)

  • Pass the needle under the first backstitch from right to left (E)

  • Repeat on the next backstitch again passing from right to left

  • Continue until the floss is wrapped around all the backstitches

  • To finish push the needle back down through the fabric.

An illustration of how to create the double layer whipped backstitch embroidery stitch. The illustration is in blue on a white background.

Whipped back stitch is one of my favourite stitches and I recommend it for many of my houseplant kits. You can switch in double layer whipped backstitch to give the plant stems some extra width.

Enjoyed this blog post? I share embroidery tips and a free embroidery pattern in my monthly newsletter. Sign up here to receive the newsletter on the 1st of each the month.

In stitch showcase 2 Tags Line Stitch, Stitch Showcase
Comment
A picture of a close up of an embroidered leaf stitched in blue floss on calico. Overlaid is a blue square with the text - stitch showcase, open fishbone stitch, tutorials for embroidery stitches and ideas for ways to use them,

Stitch Showcase: Open Fishbone Stitch

December 22, 2021

There are a few different variations on the fishbone stitch, including open fishbone stitch and raised fishbone stitch.

  • At the top of the shape bring the needle up close to the centre top

  • Take the needle down through the fabric at a diagonal angle, completing the stitch just slightly to the other side of the centre of the shape

  • Bring the needle up through the fabric in line with the first stitch but on the other side of the centre line

  • Take the needle down through the fabric at a diagonal angle completing the stitch in line with the first one

  • Repeat all the way down the shape, alternating sides A to B then C to D.

  • Leave a small gap between each pair of stitches and aim to have the same sized gap all the way down the shape.

an illustration of how to create open fishbone stitch. The illustration is in blue on a white background

Enjoyed this blog post? I share embroidery tips and a free embroidery pattern in my monthly newsletter. Sign up here to receive the newsletter on the 1st of each the month.

In stitch showcase 2 Tags Stitch Showcase, Filling Stitch
Comment
A close up image of an embroidery with bright pink flowers and green leaves. Overlaid is a blue square saying - hand embroidery, fishbone stitch, www.embellishedelephant.co.uk

Stitch Showcase: Fishbone Stitch

December 8, 2021

There are a few different variations on the fishbone stitch, including open fishbone stitch and raised fishbone stitch.

  • At the top of the shape bring the needle up close to the centre top

  • Start by creating a vertical line down the centre of the shape about 1cm long

  • Take the needle down through the fabric at a diagonal angle, completing the stitch just slightly to one side of the centre of the shape

  • Bring the needle up through the fabric in line with the first stitch but on the other side of the centre line

  • Take the needle down through the fabric at a diagonal angle completing the stitch in line with the first one

  • Repeat all the way down the shape, alternating sides A to B then C to D.

An illustration of how to create the fishbone embroidery stitch. The illustration is in blue on a white background.

Enjoyed this blog post? I share embroidery tips and a free embroidery pattern in my monthly newsletter. Sign up here to receive the newsletter on the 1st of each the month.

In stitch showcase 2 Tags Stitch Showcase, Filling Stitch
Comment
A picture of wheatear embroidery stitch in black on calico fabric. Overlaid is a blue square with white text saying, stitch showcase, wheatear stitch, www.embellishedelephant.co.uk

Stitch Showcase: Wheatear Stitch

October 20, 2021

I was inspired to revisit this stitch one August morning when I went for a walk and my way back to the house was to pass through a field of wheat. I also think this stitch looks a bit like a millipede - especially when stitched in black or brown thread!

I look at this stitch as being a combination of an arrowhead stitch and a lazy daisy stitch.

  • Start by creating an arrowhead stitch

  • Bring the needle up through the fabric a few millimetres below the point of the arrow

  • Pass the needle under both arms of the arrow without piercing the fabric

  • Take the needle down through the fabric in the same hole it came up through

  • If creating a chain of wheatears, then start the next arrow at the base of the loop of the first stitch.

An illustration of how to create wheatear embroidery stitch. The illustration is in shades of blue and grey on a white background

The sample below was stitched with the aim of representing wheat blowing in the wind. The fabric is naturally dyed using turmeric and onion skins.

On hand dyed yellow fabric is stitched columns of wheatear stitch in yellow thread

Enjoyed this blog post? I share embroidery tips and a free embroidery pattern in my monthly newsletter. Sign up here to receive the newsletter on the 1st of each the month.

In stitch showcase 2 Tags Stitch Showcase, Line Stitch
Comment
A picture of yellow fabric with small yellow stitches in the shape of tulips scattered. Overlaid is a blue square with white text saying - stitch showcase, tulip stitch, www.embellishedelephant.co.uk

Stitch Showcase: Tulip Stitch

October 6, 2021

I’ve been experimenting with a few stitches that I’ve not tried before - there are so many different stitches.

Tulip stitch is so called as it is meant to look like a tulip flower (I think it looks more like a flower bud!).

When I was designing my free tulip pattern earlier in the year, I considered trying to come up with a design to use tulip stitch but in the end went in a different direction.

It’s based on a lazy daisy (or single chain) stitch, so if you are familiar with these, then this stitch just needs one extra element.

  • Create the lazy daisy stitch

  • At the bottom of the lazy daisy stitch add a small straight stitch, this will be the stem of the tulip so can be a little bit longer than the straight stitch normally used in a lazy daisy stitch

  • To create the leaf element, bring the needle up through the fabric to one side of the tulip

  • Pass the needle underneath the ‘stem’ but don’t pierce the fabric

  • Take the needle down through the fabric to the other side of the tulip as symmetrically as you can.

An illustration showing step by step guide to tulip stitch

Enjoyed this blog post? I share embroidery tips and a free embroidery pattern in my monthly newsletter. Sign up here to receive the newsletter on the 1st of each the month.

In stitch showcase 2 Tags Stitch Showcase, Isolated Stitch
Comment
A picture of pink bead couching rows. Overlaid is a blue square with white text saying - stitch showcase, bead couching, www.embellishedelephant.co.uk

Stitch Showcase: Bead Couching

September 22, 2021

Beads were my first crafting love affair. One summer holiday I went to a workshop on bead weaving and was hooked. My first craft business was selling bead woven bracelets to classmates at school.

As my interest in beads developed I learned more about the techniques Native Americans used beads to decorate their belongings. One of the techniques used is bead couching.

Couching in embroidery is when small stitches are used to hold a thread on the surface of fabric. The principle with bead couching is very similar.

  • Bring the needle up through the fabric (A), thread on a small number of beads (between 3-6 is ideal)

  • Take the needle down through the fabric at the end of the row of beads (B) as close to the last bead as possible

  • Bring the needle up through the fabric about 2 or 3 beads along and make a tiny stitch over the string of beads to couch the string to the fabric.

An illustration of how to couch beads. The background is white and the illustration is shades of blue

An alternative method is:

  • Bring the needle up through the fabric (A), thread on a small number of beads (between 3-6 is ideal)

  • Take the needle down through the fabric and bring it up through the fabric about 2-3 beads along

  • Pass the needle through these two beads and then thread 3 or 4 beads onto the needle and repeat

This technique of passing the needle through the string of beads helps to make sure the beads sit flat to the fabric and there are no gaps between each bead.

A close up image of some native american beadwork in the shape of stars and flowers on leather

If you would like to have a go at bead couching, then why not take a look at my floral sampler kit where you can try this technique alongside a range of other stitches.

Sign up to my email newsletter to get a monthly free embroidery pattern and a round up of Stitch Showcase blogs.

In stitch showcase 2 Tags Stitch Showcase, Line Stitch, Filling Stitch
Comment
a picture of lavender embroidery stitched using granitos. Overlaid is a blue square with white text saying - stitch showcase, granitos stitch, www.embellishedelephant.co.uk

Stitch showcase: Granitos stitch

September 1, 2021

I see this stitch as a textured variation on a satin stitch. It creates a raised bump on the fabric and looks like a grain (hence the name granitos).

  • Create a straight stitch slightly shorter than the finished length of stitch

  • Bring the needle up through the fabric as close to the first stitch as possible without going through the same hole. Complete the stitch as close to the first stitch as possible

  • Add another stitch the other side of your first stitch so there are three stitches lying right next to each other

  • The final step is to layer some stitches over this base. Working at the centre of the base stitches, bring the needle up a tiny bit away from the base stitch to create a little point. Bring the needle back down a tiny bit away from the base stitches at the other end

  • Stitch through these exact holes a couple more times to create more of a bump. Try using a different shade of thread for these layering stitches for some definition.

An illustration of how to create granitos stitch - it is white background with blue illustration and text
An image of blue stitching on calico showing how to create granitos stitch

Want to try this stitch? It’s a stitch I suggest using in my lavender kit.

Sign up to my email newsletter to get a monthly free embroidery pattern and a round up of Stitch Showcase blogs.

In stitch showcase 2 Tags Stitch Showcase, Isolated Stitch
Comment
An image of basket weave embroidery stitch in brown. Overlaid is a blue square with white text saying - hand embroidery, four texture stitches for embroidery, www.embellishedelephant.co.uk

Four Texture stitches for embroidery

August 25, 2021

What do I mean by texture stitches? My definition are stitches that stand away from the fabric in some way, that give an added dimension to embroidery that other stitches may not.

A close up image of needle weaving stitch in blue

Needle Weaving

If you’ve ever woven with a loom then needle weaving is a version of this just on a much smaller scale. It’s also the same technique you’ll use if you need to darn a sock or jumper.

A close up image of woven wheel embroidery stitch in pinks and purples.

Woven Wheel

This is created by laying down 5 base stitches and then weaving the thread under and over etc until the base stitches can no longer be seen.

A picture of felt circles in pink and purple with stitching on them. In between these are green sections stitched using woven picot stitch and satin stitch

Woven Picot

Another woven stitch, the base is created by making a triangle using a pin. The thread is then woven under and over the 3 strands of base stitch.

The picots are attached at the base and the tip can be left free or held down by a tiny stitch.

An abstract embroidery using sections of satin stitch, bead work and turkey work stitch

Turkey Work

This stitch is unlike any other as first create a series of loops which you snip into to create the strands. It can be densely packed or wispy - that’s the beauty of this texture.

Enjoyed this blog post? I share embroidery tips and a free embroidery pattern in my monthly newsletter. Sign up here to receive the newsletter on the 1st of each the month.

In tips 3 Tags Stitch Showcase, Texture Stitch
Comment
A picture of abstract embroidery shapes stitched in satin stitch in shades of yellow, orange, pink and red on a yellow background. Overlaid is a blue square with white text saying - hand embroidery, five filling stitches for embroidery,

5 filling stitches for embroidery

August 18, 2021

My default stitch for when I need to fill an area in an embroidery pattern is satin stitch but I don’t particularly enjoy stitching it so I’ve been enjoying trying out a range of different filling stitches.

A picture of waves stitched in satin stitch in different shades of blue with black lines between each wave and a beach at the bottom of the piece

Satin Stitch

The stitch that is used the most when areas need to be filled in. It is formed of long straight stitches laid close together.

A picture of a monstera leaf stitched in long and short stitch with light green floss at the edges and darker green floss filling the leaves

Long and Short Stitch

This is really just satin stitch split into different sections to fill an area. This gives a much more textured effect that satin stitch and is much better for filling larger areas.

An image of 3 sections of brick stitch in different types of blue thread.

Brick Stitch

Lines of backstitch next to each other and slightly offset to create a brick effect. This stitch just makes you want to touch the embroidery.

A picture of a plant in a basket with the basket stitched using rows of chain stitch close together

Chain Stitch

A chain stitch is a series of small loops and can be used to fill areas or in a line.

a close up of some long thin leaves stitched with leaf stitch

Leaf Stitch

This is a variation on satin stitch. The stitches are angled towards the centre of the leaf and the angle of the stitch is maintained along the length of the stitch.

Enjoyed this blog post? I share embroidery tips and a free embroidery pattern in my monthly newsletter. Sign up here to receive the newsletter on the 1st of each the month.

In tips 2 Tags Stitch Showcase, Filling Stitch
Comment
A picture of small single stitches in different colours stitched on pink dyed fabric. Overlaid is a blue square with white text saying - hand embroidery - five isolated embroidery stitches  - www.embellishedelephant.co.uk

Five isolated stitches for embroidery

August 11, 2021

I love working with isolated stitches, just picking a colour and placing a stitch where I think it will look great. My heart embroidery kit is designed to work in this way. Here are some of my favourites:

A picture of seed stitch in black thread on calico - this is lots of different small stitches in different directions

Seed Stitch

A series of straight stitches placed at different angles to create a scattered seed effect. The seeds can be the same length or varied. They can even be overalapped.

An embroidery on calico with thin brown stitches creating branches. At the end of each branch are clusters of pink french knots

French Knot

One of my favourite stitches, it is unlike any other on this list and is great for bringing texture to embroidery but it does take a little bit of practice!

A close up on a purple circle with bullion knots stitched in a random way in purple floss

Bullion Knot

If you think French Knot is hard, then beware of bullion stitch. I’ve been stitching it as much as I can lately as practice really helps. And it is worth the wait as it looks great when you’ve perfected it.


A picture of lavender embroidery stitched using lazy daisy stitch in different shades of purple

Lazy Daisy Stitch

Lazy daisy is just a single chain stitch. It is a series of small loops secured by a tiny straight stitch. It’s great for floral embroidery.

An image of calico background with blue embroidery stitches in the shape of an arrow. The needle is halfway through the fabric in creating the second part of an arrowhead stitch

Arrowhead stitch

A simple V shaped stitch which can also be worked in a line of stitches.

The angle of the V can be varied and the addition of a small straight stitch can create a flock of birds!

Enjoyed this blog post? I share embroidery tips and a free embroidery pattern in my monthly newsletter. Sign up here to receive the newsletter on the 1st of each the month.

In tips 2 Tags Stitch Showcase, Isolated Stitch
Comment
A picture of lines of embroidery stitches in a curved shape, black stitches on calico. Overlaid is a blue square with white text saying - hand embroidery, five line embroidery stitches, www.embellishedlephant.co.uk

Five line stitches for embroidery

July 28, 2021

Of the many and varied embroidery stitches available this group do exactly what they say, they are stitched in a line.

Line stitches are great for borders, outlines and lettering. Below are five types of line stitches that are great for beginners.

A picture of a purple blob appliqued on a pink checked background. Around the blob is running stitch in purple.

Running stitch

A line of stitches with gaps between each stitch. It’s really useful for gathering the fabric at the back of the hoop. It can also be used on the front of the fabric!

On a brown greetings card is stitched concentric circles in back stitch in a heart shape. The outer most heart is in a Burgundy colour with the inner most heart a light pink

Backstitch

This is probably the stitch you learnt if you did any sewing at school. It’s simply a line of straight stitches.

It is a classic embroidery stitch but I prefer the variation on this - whipped backstitch.

A picture of a felt monstera leaf with a needle coming up through to create a row of stem stitch

Stem Stitch

As the name suggests, this stitch it is often used for stems but can also be great for lettering. It creates a rope like effect.

A picture of a leave with the stem and veins stitched using split stitch

Split Stitch

Great for outlining stitching or as an alternative to backstitch. The needle pierces through the thread and ‘splits’ it.

A picture of rows of couched blue threads showing different methods of couching

Couching

Couching is when a thread or cord is attached to the fabric using small stitches to hold it in place. The couching stitches can be really close together or much further apart depending on the desired effect.

Enjoyed this blog post? I share embroidery tips and a free embroidery pattern in my monthly newsletter. Sign up here to receive the newsletter on the 1st of each the month.

In tips 2 Tags Line Stitch, Stitch Showcase
Comment
A picture of applique and quilting sampler in shades of purple. Overlaid is a blue square with white text saying - hand embroidery - ten embroidery stitches for beginners - www.embellishedelephant.co.uk

Ten embroidery stitches for beginners

July 21, 2021

There are lots of different styles of embroidery and hundreds of stitches. Here I’m focussing on 10 stitches that I use the most and that I think are most handy to know the majority of projects that you come across. For guidance on how to create each stitch click the link to read more. There are guides to plenty more stitches on the Stitch Showcase series on my blog.

A picture of a greetings card with concentric hearts stitched in backstitch in shades of burgundy to light pink

Back Stitch

This is probably the stitch you learnt if you did any sewing at school. It’s simply a line of straight stitches.

An applique purple blog on a pink checked background. Around the blob is rows of running stitches

Running Stitch

A line of stitches with gaps between each stitch. It’s really useful for gathering the fabric at the back of the hoop.

A sampler of seed stitch in black floss on calico fabric.

Seed Stitch

A series of straight stitches placed at different angles to create a scattered seed effect.

A picture of rows of brick stitch in three sections, each section is stitched using a different blue thread

Brick Stitch

Lines of backstitch next to each other and slightly offset to create a brick effect.

A picture of waves stitched using satin stitch. At the top is darker blue and the bottom is a beach

Satin Stitch

The stitch that is used the most when areas need to be filled in. It is formed of long straight stitches laid close together.

A picture of lavender embroidery stitched using lazy daisy stitch in purple thread with light green stems on light pink fabric

Lazy Daisy & Chain Stitch

I’ve included both of these together as lazy daisy is just a single chain stitch. A chain stitch is a series of small loops and can be used to fill areas or in a line. It's a great stitch for creating flowers too.

An embroidered monstera leaf in long and short stitch. On the edges a light green is used with the rest filled with a darker green floss.

Long and Short Stitch

This is really just satin stitch split into different sections to fill an area.

A left shape in felt with stems and veins stitched in split stitch

Split Stitch

Great for outlining stitching or as an alternative to backstitch. The needle pierces through the thread and ‘splits’ it.

A green felt monstera leaf. The needle is poking upwards through to complete the next stem stitch in a row in green

Stem Stitch

As the name suggests, this stitch it is often used for stems but can also be great for lettering. It creates a rope like effect.

On calico fabric are stitch branches in a brown floss. At the end of each branch are clusters of pink french knots representing blossoms

French Knot

One of my favourite stitches, it is unlike any other on this list and is great for bringing texture to embroidery but it does take a little bit of practice!

Enjoyed this blog post? I share embroidery tips and a free embroidery pattern in my monthly newsletter. Sign up here to receive the newsletter on the 1st of each the month.

In tips 2 Tags Stitch Showcase
Comment
A picture of rose embroidery stitched in peach satin stitch with an outline in a slightly darker shade of peach. Overlaid is a blue square with white text saying - hand embroidery - do you outline satin stitch - www.embellishedelephant.co.uk

Do you outline satin stitch?

July 14, 2021

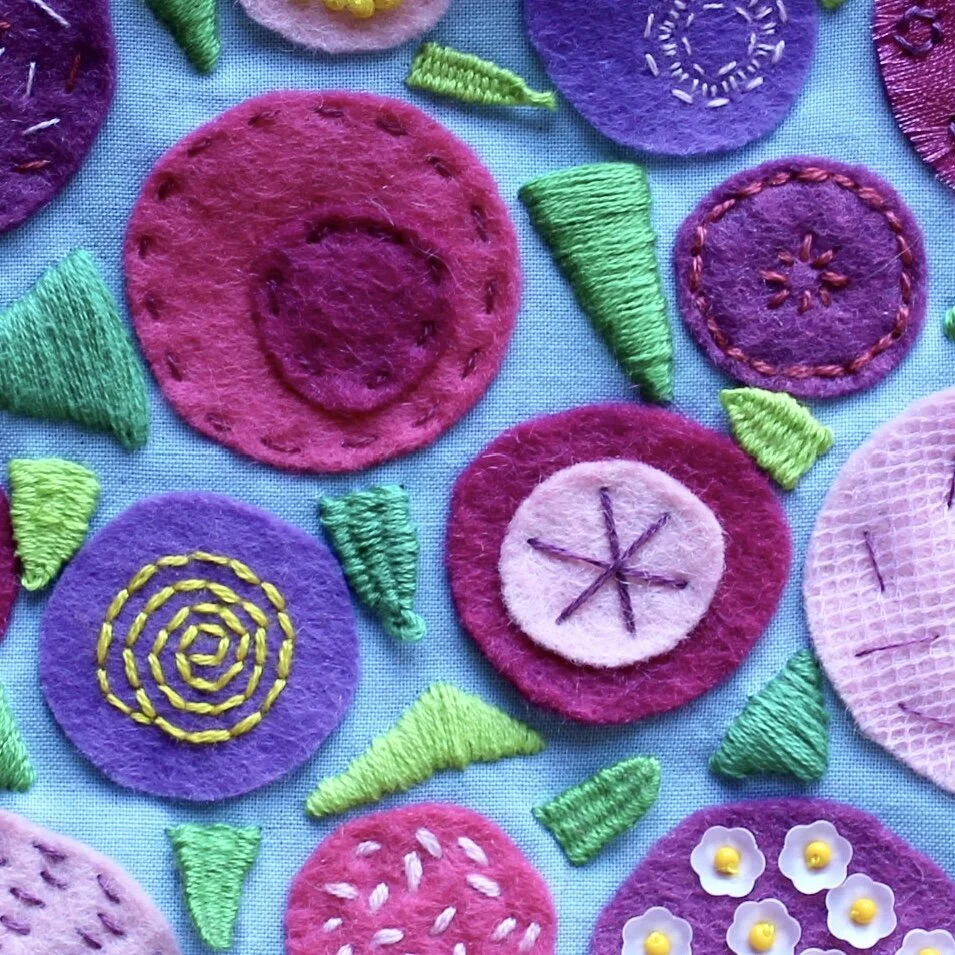
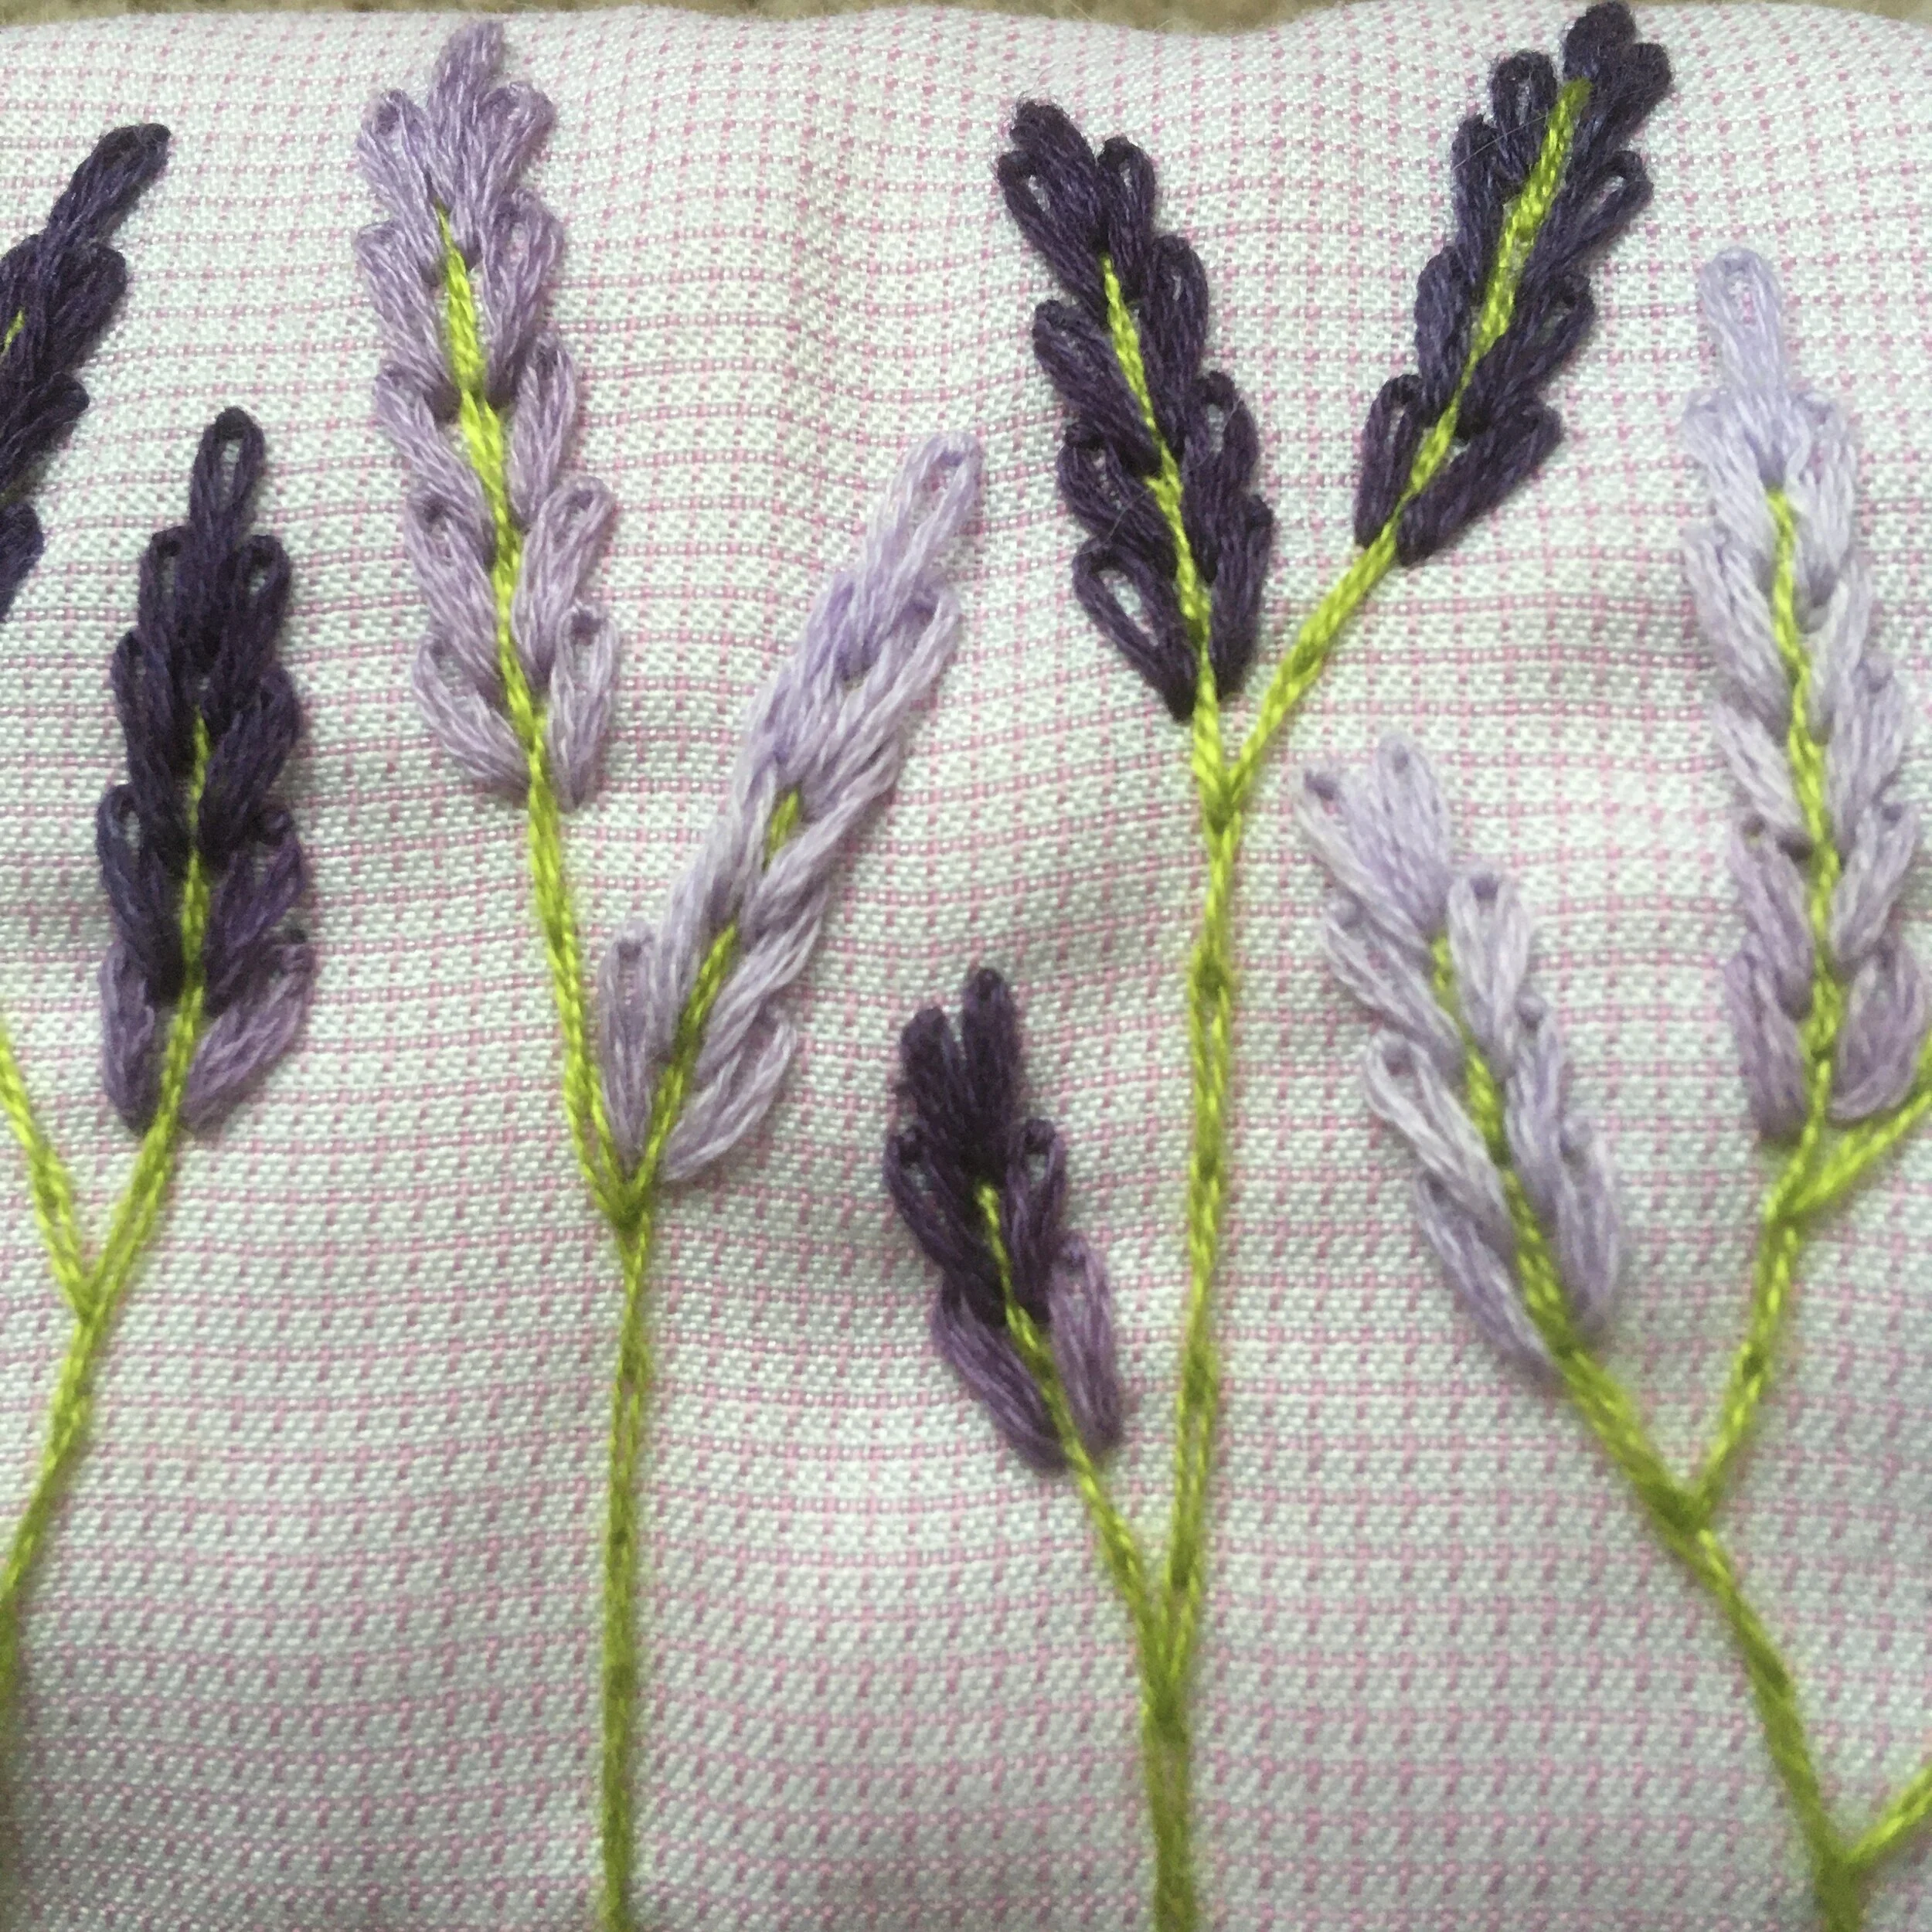
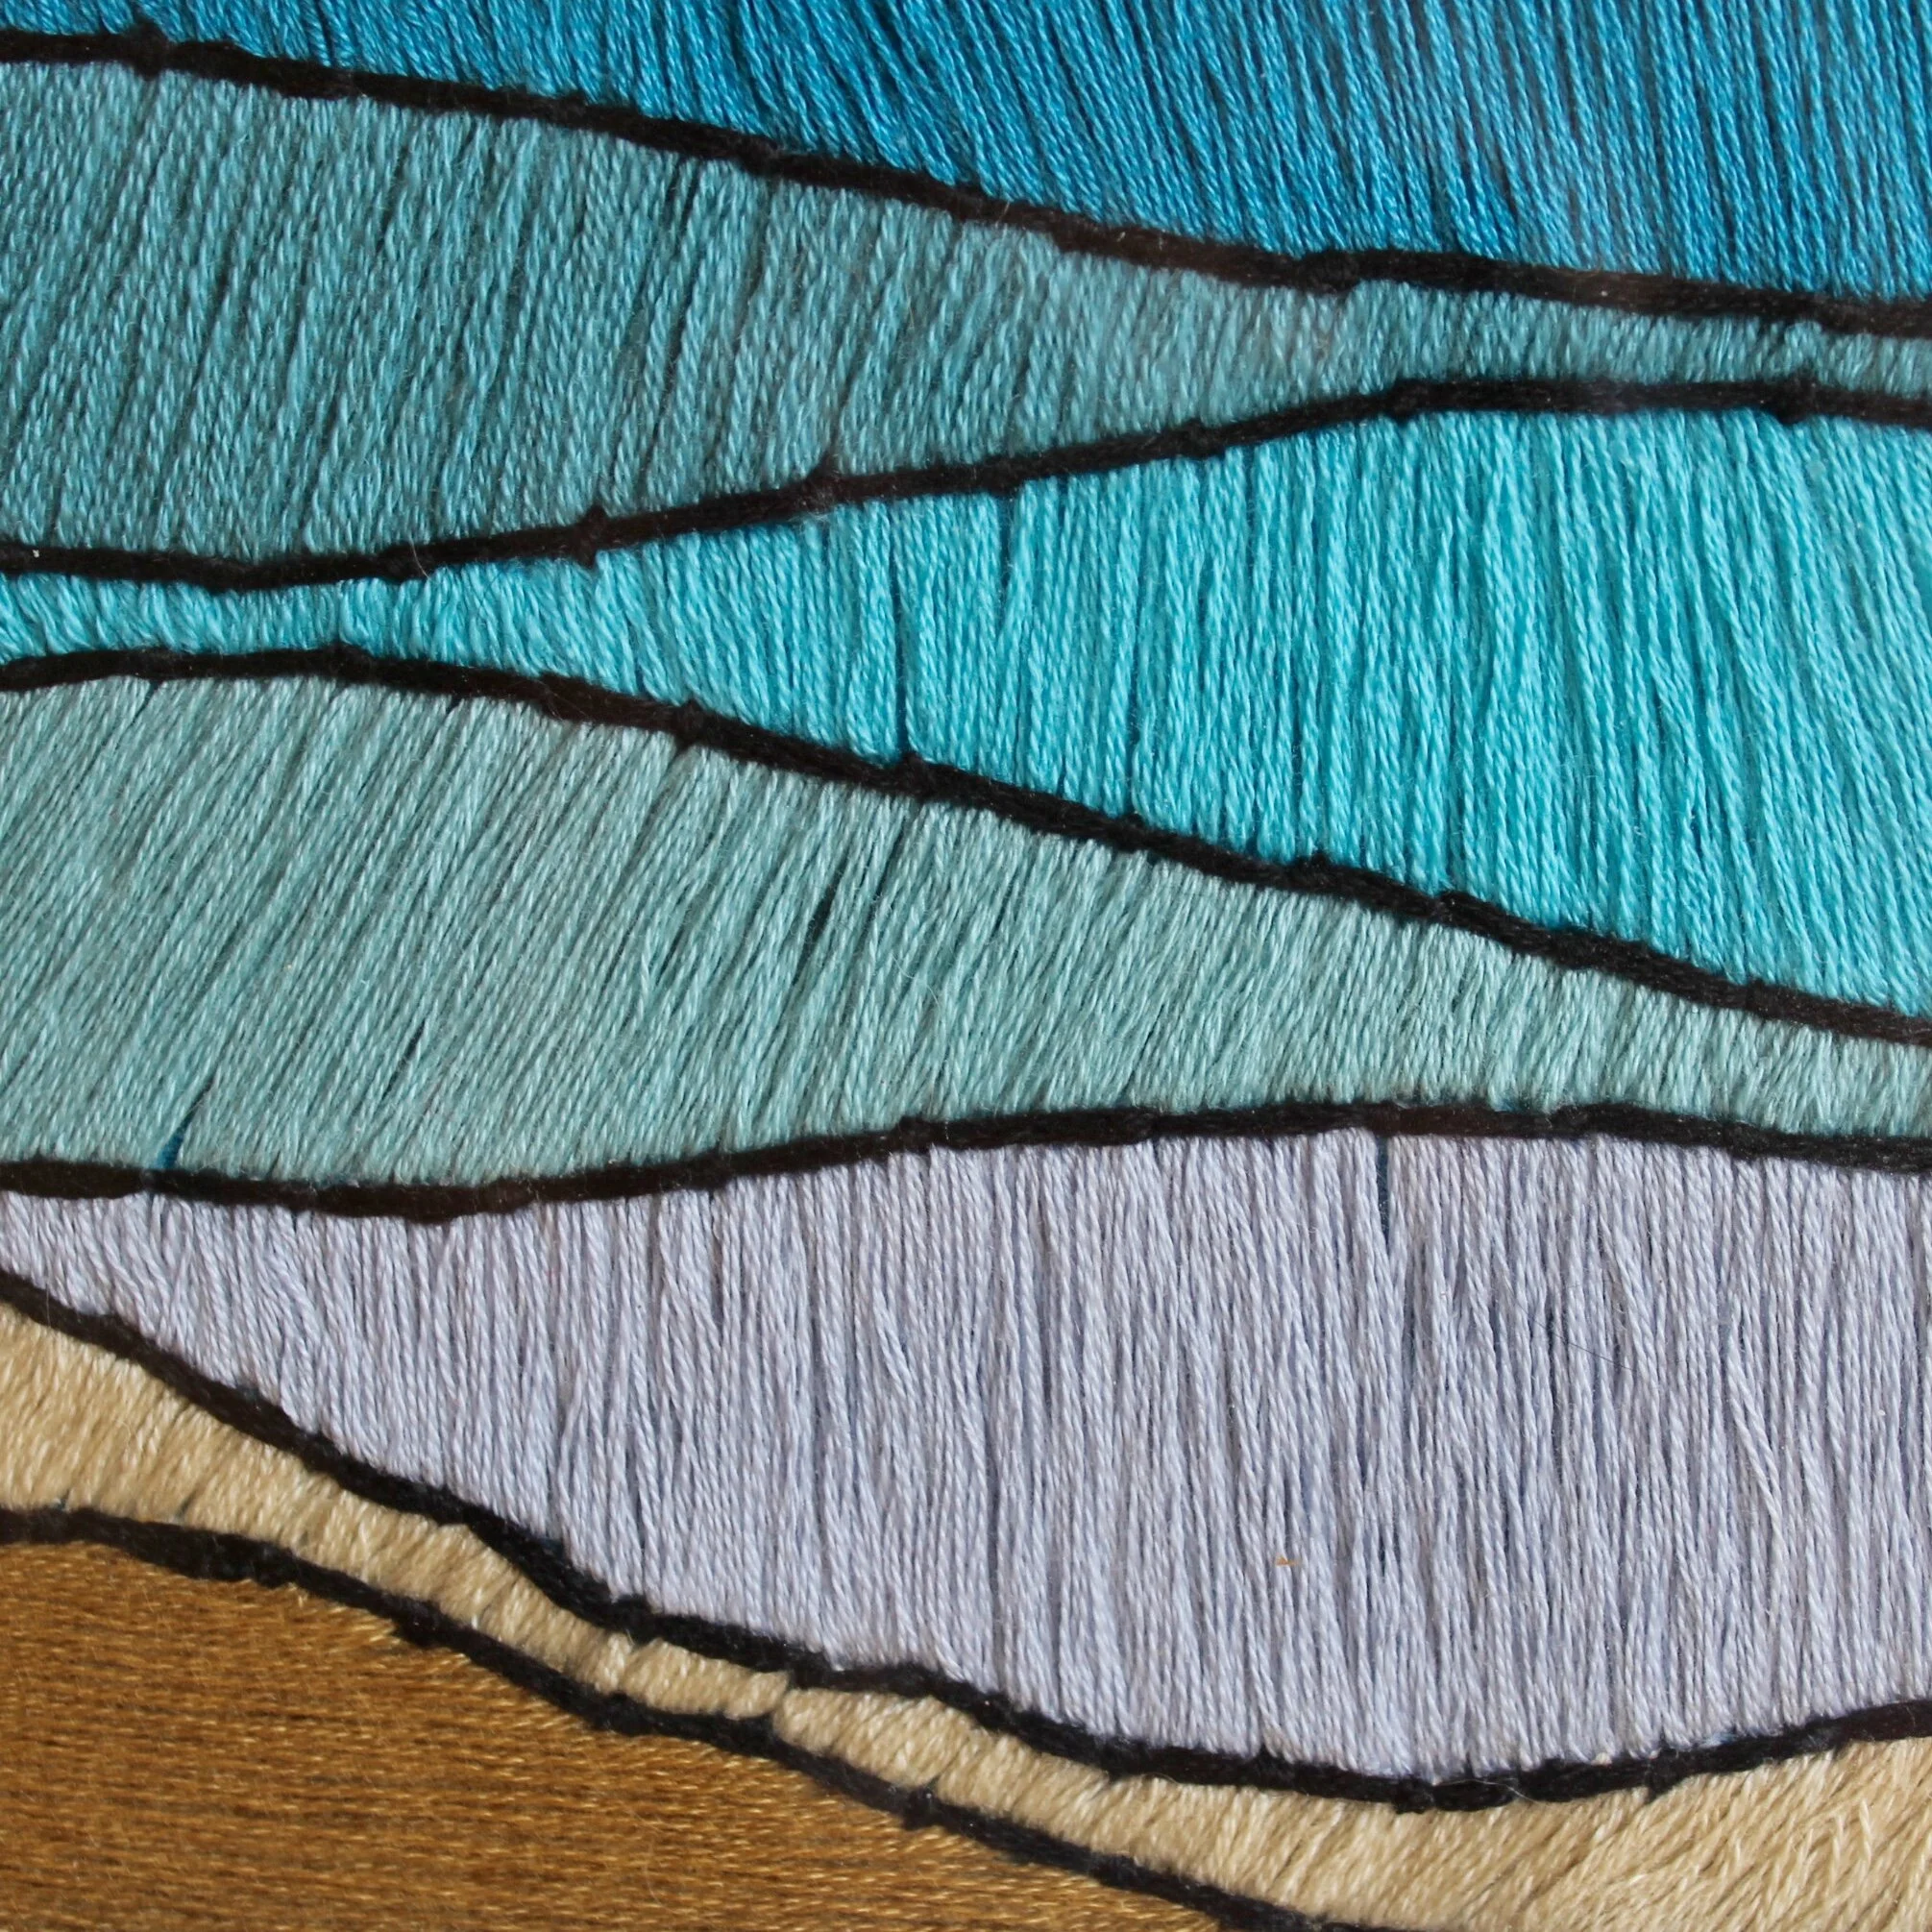
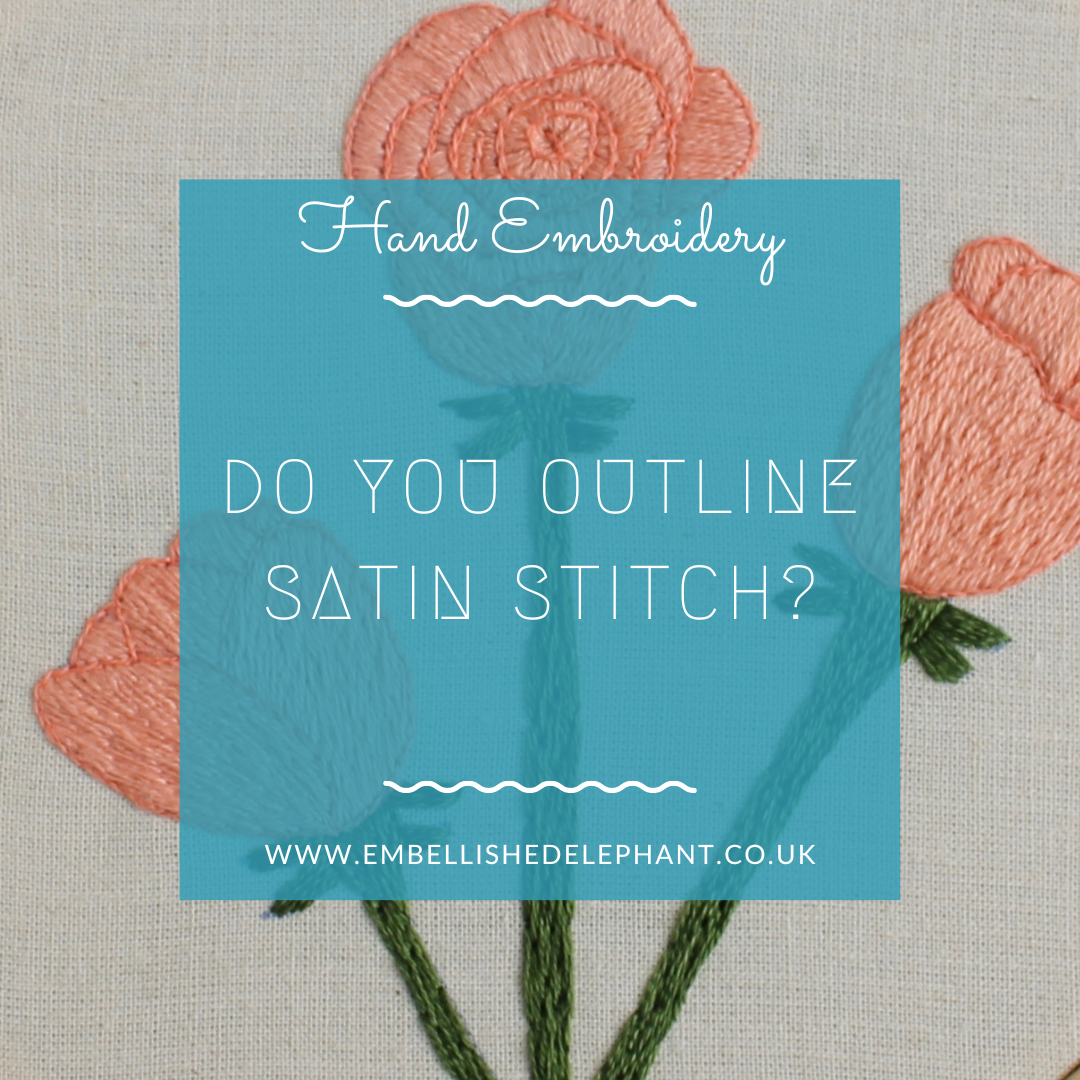
My short answer is ‘it depends’. Traditionally satin stitch is used to fill an area with long flat stitches and doesn’t have any outline.

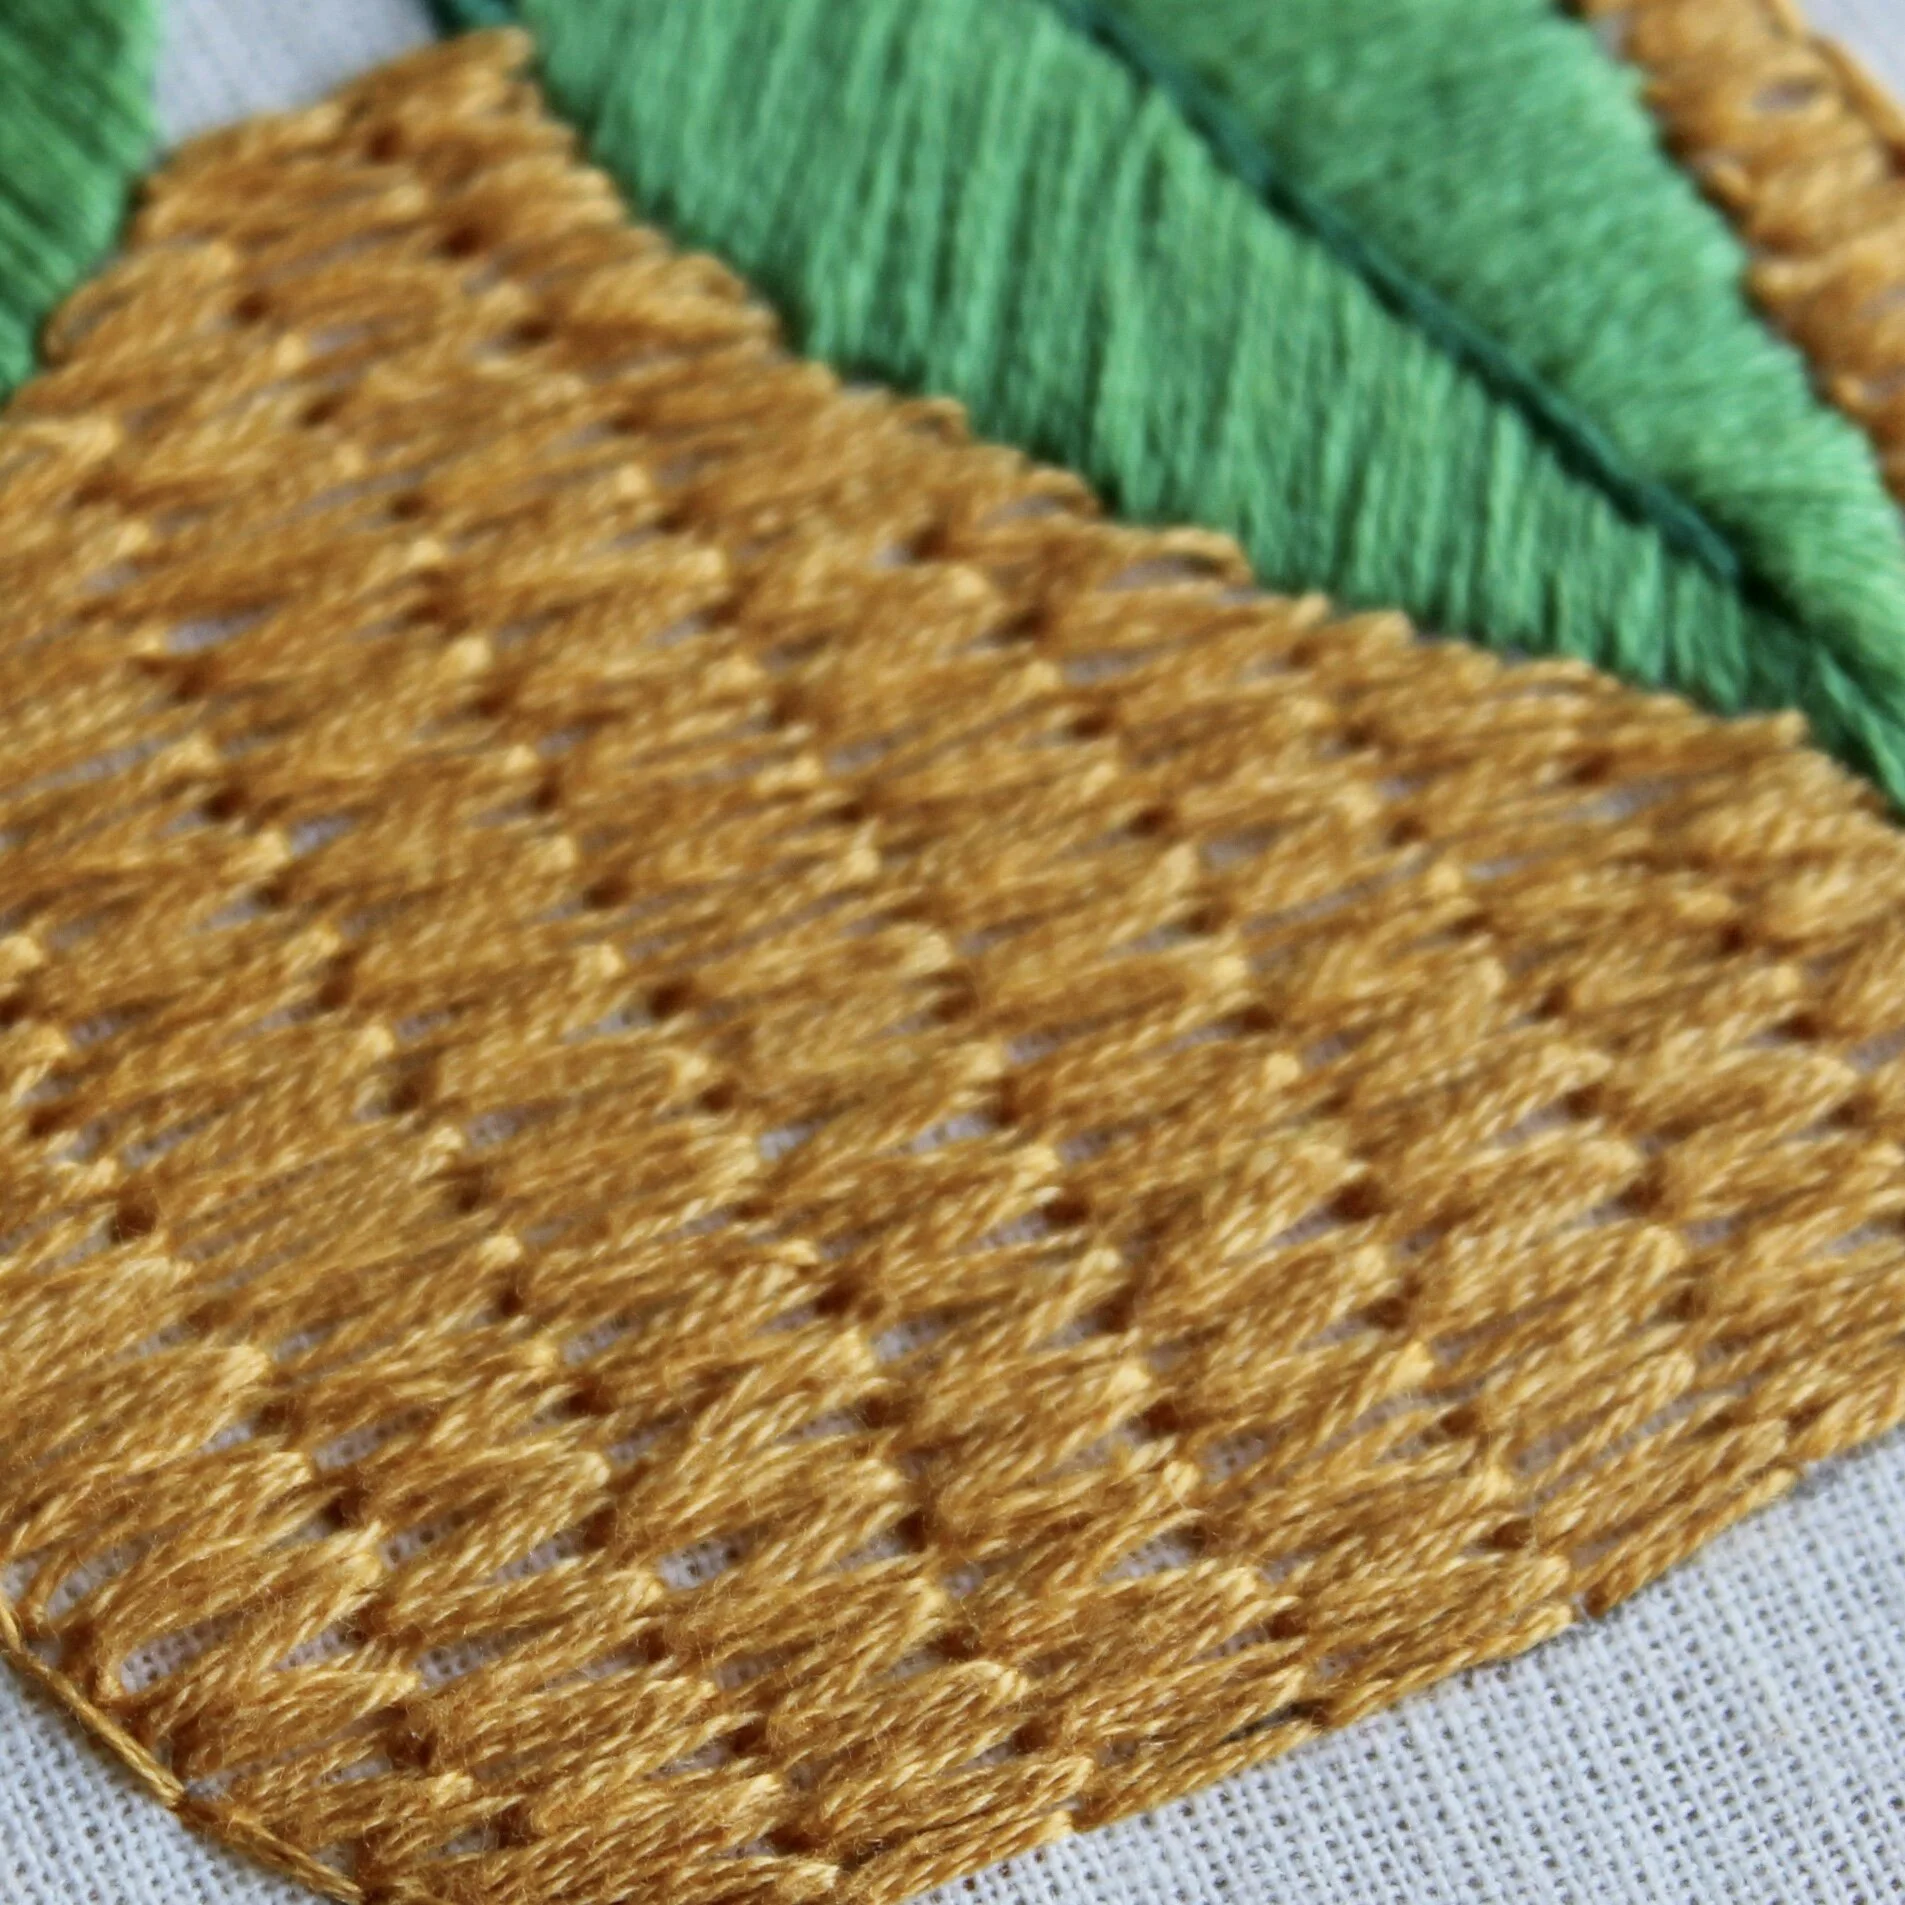
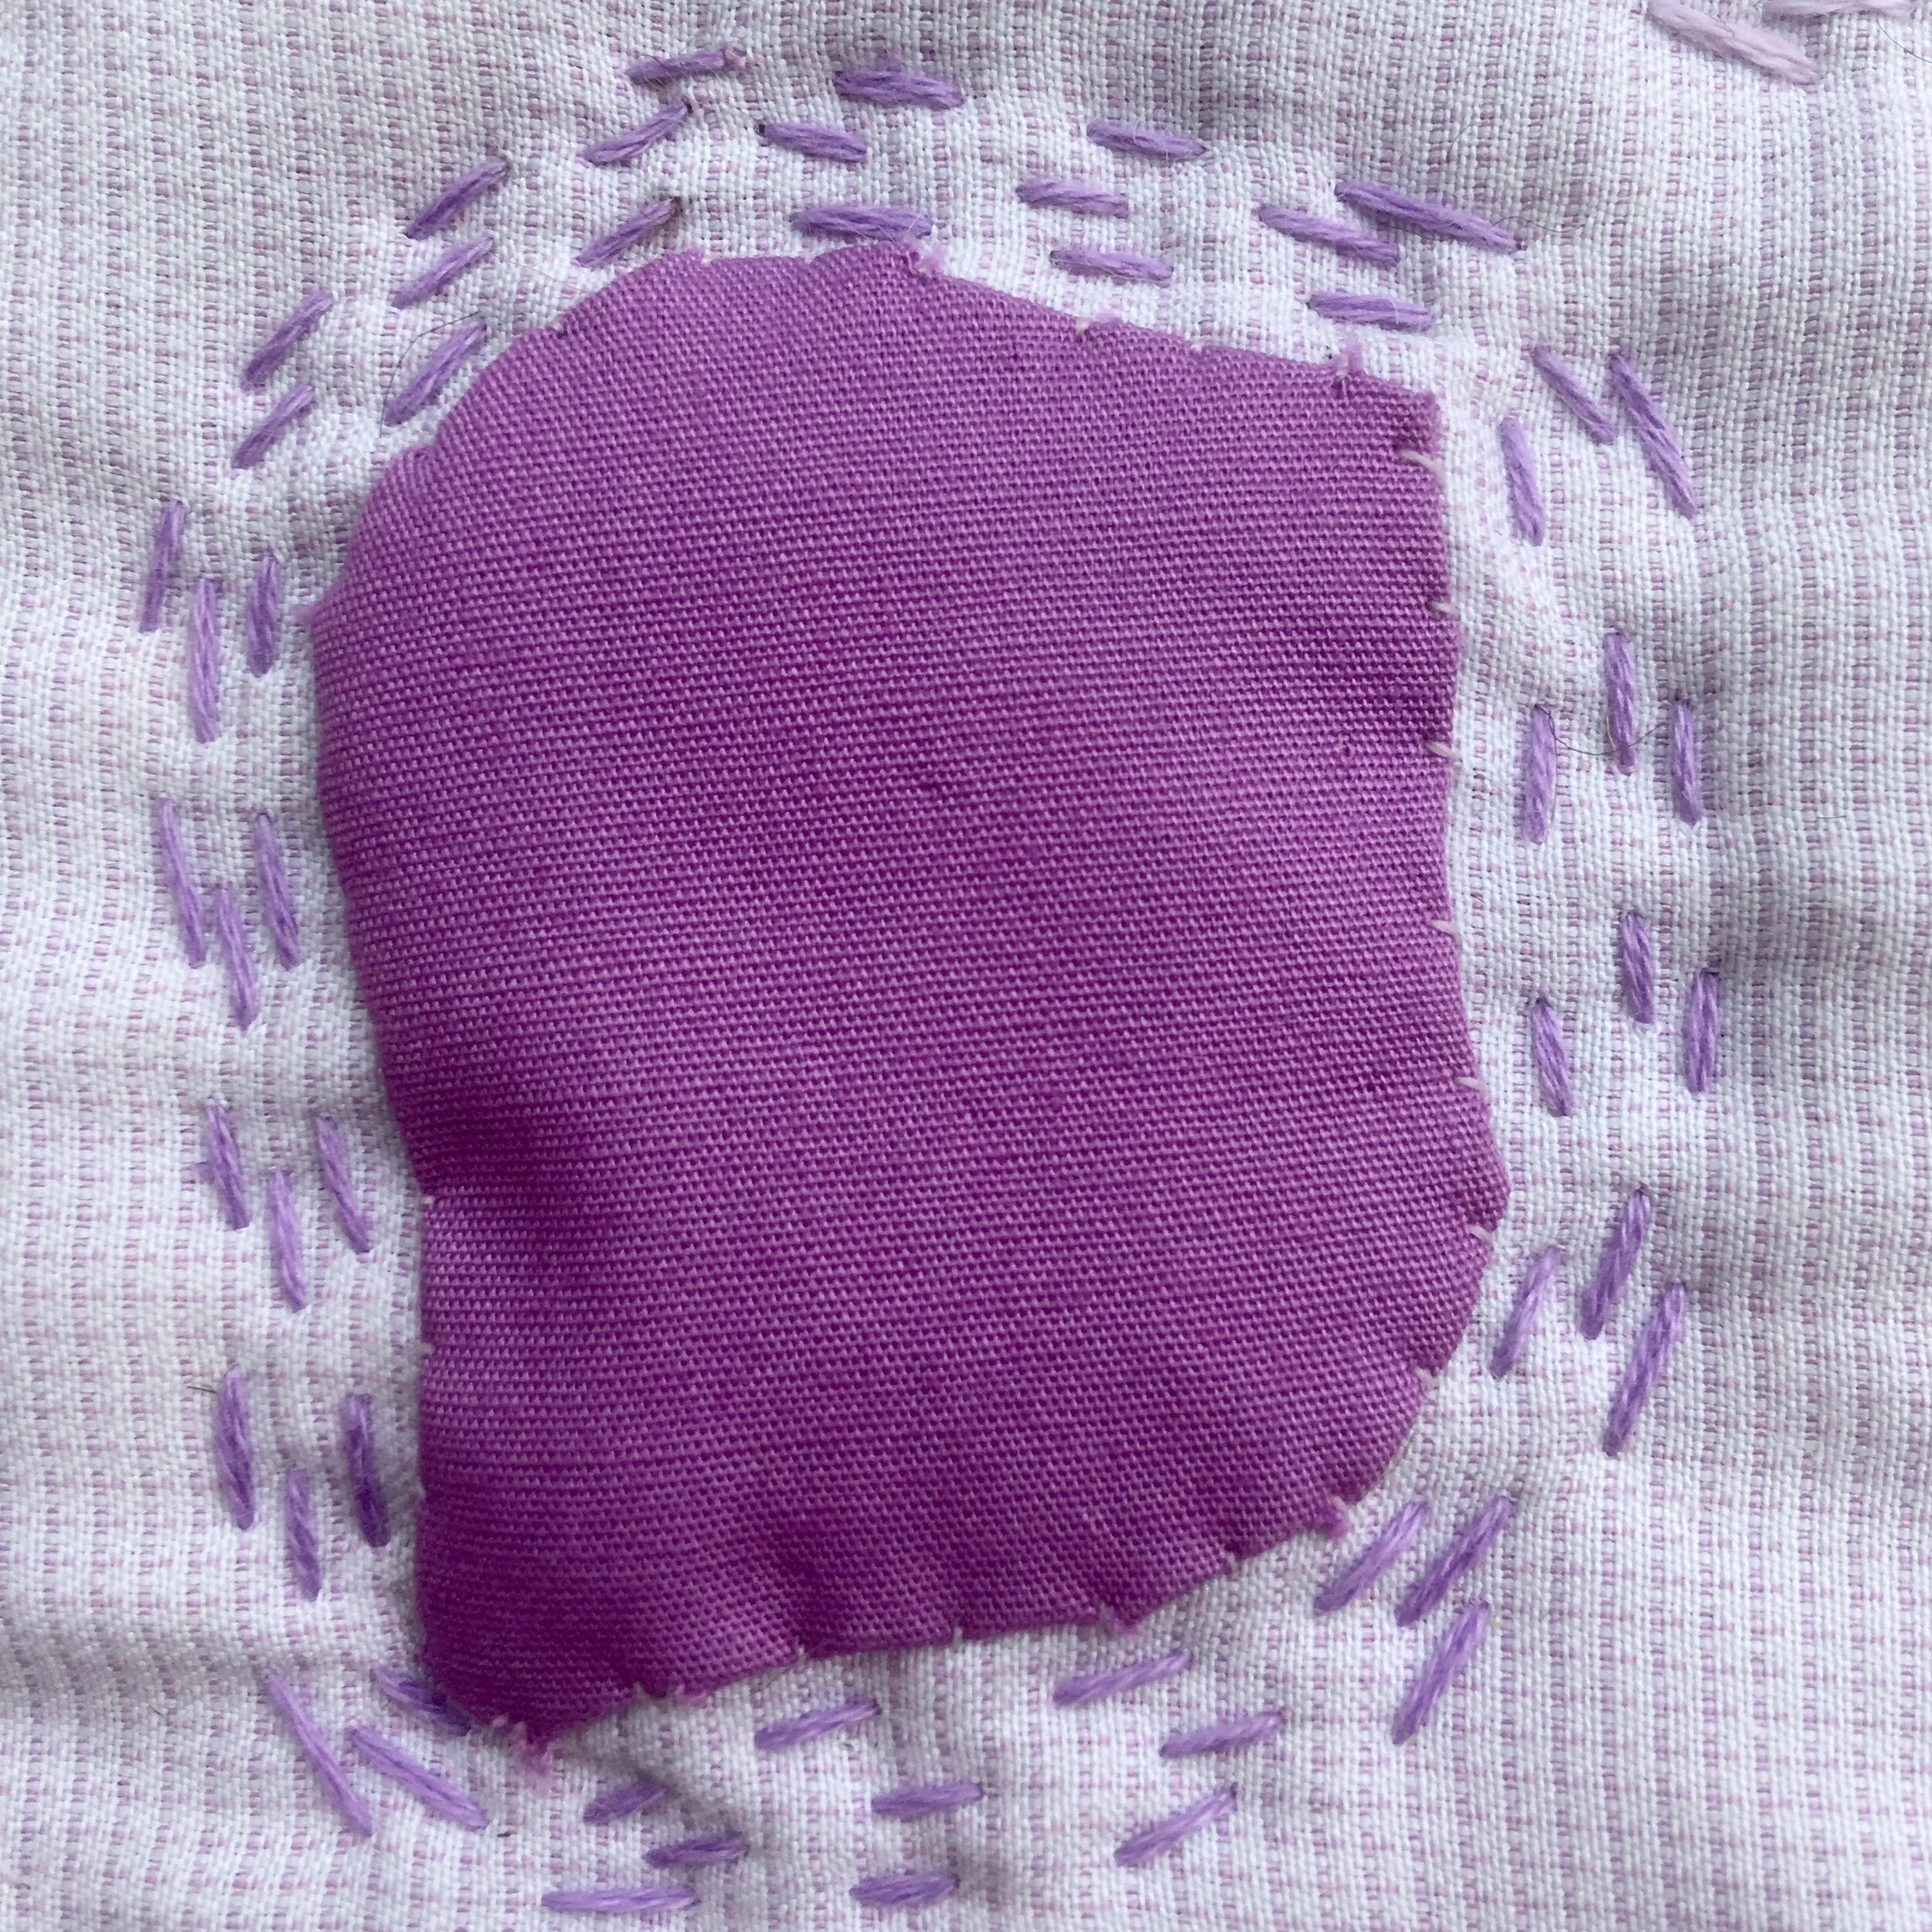
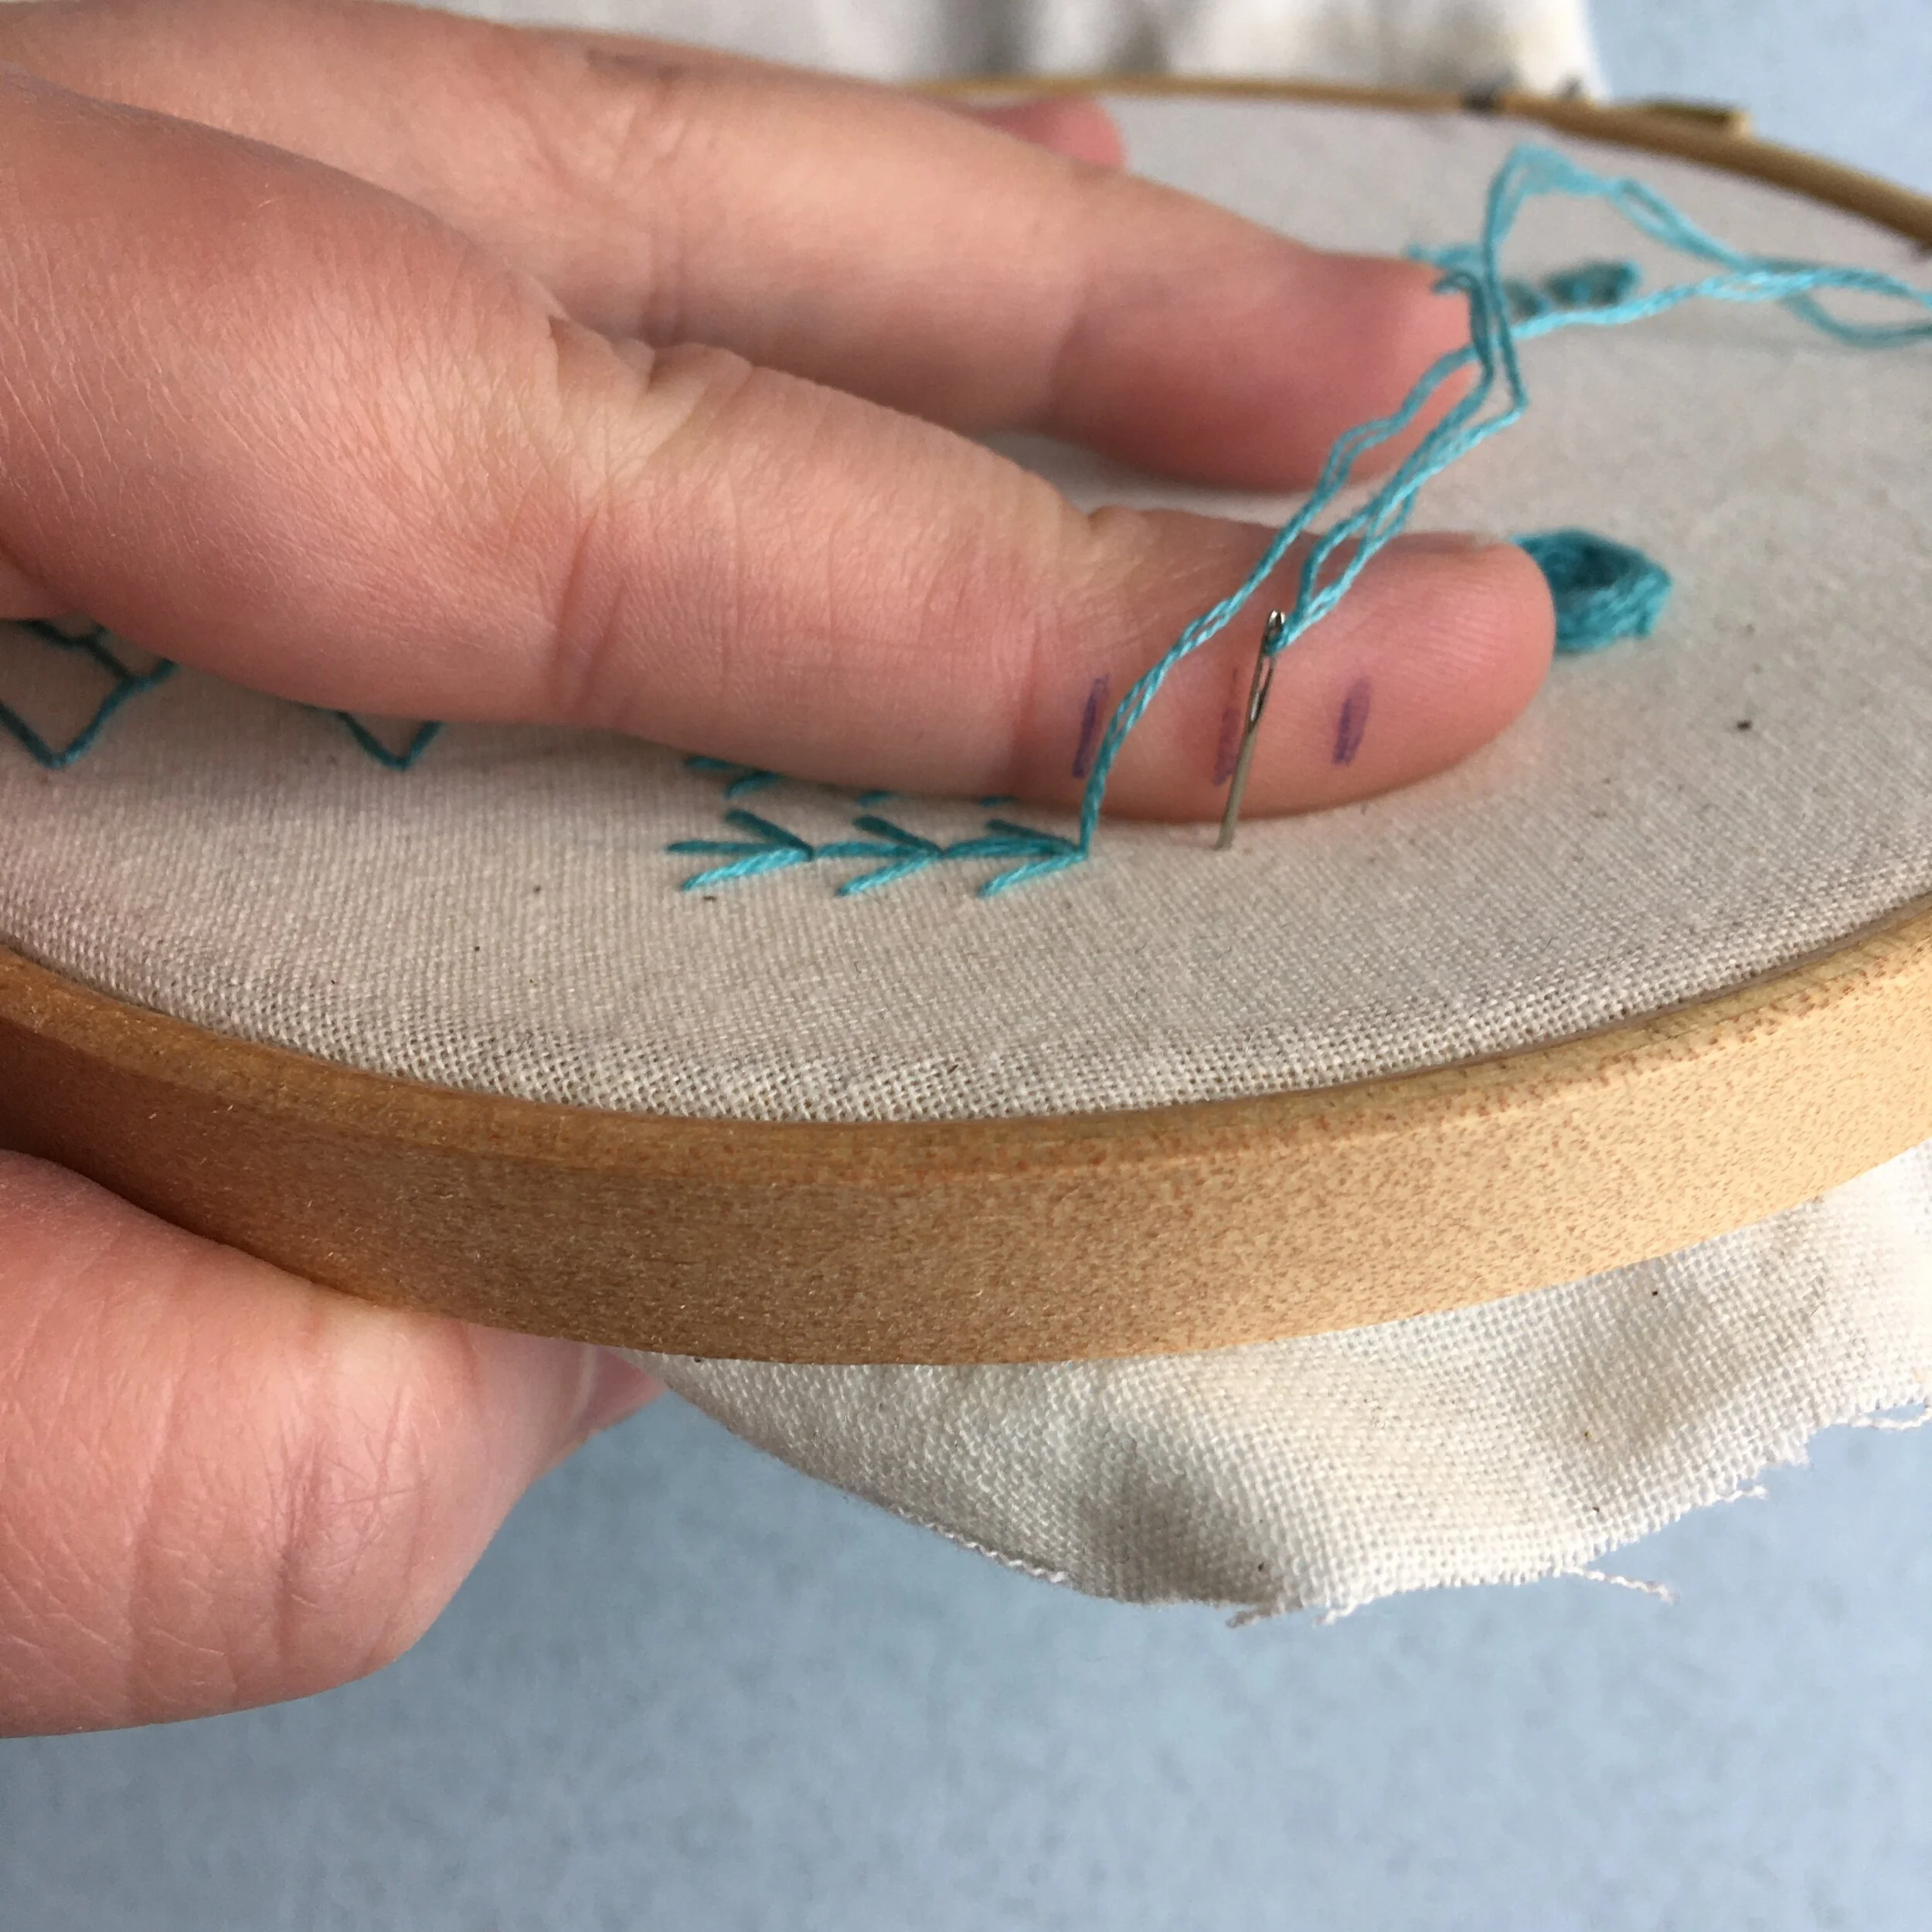
But it can be tricky to get a smooth edge to the filled area of satin stitch whatever your level of embroidery skill or experience. This is because of the way the pattern is placed on the thin warp and weft threads of the fabric. Generally when you create an embroidery stitch the needle pokes through the fabric in the little hole between the warp and weft threads. However, if your transferred pattern means that the ideal placement for the end of the stitch isn’t in one of these gaps it can be tricky to get the stitch in the exact place you need it to be. As a result you may get small patches of the edge of satin stitch that aren’t in the smooth line you were hoping for.

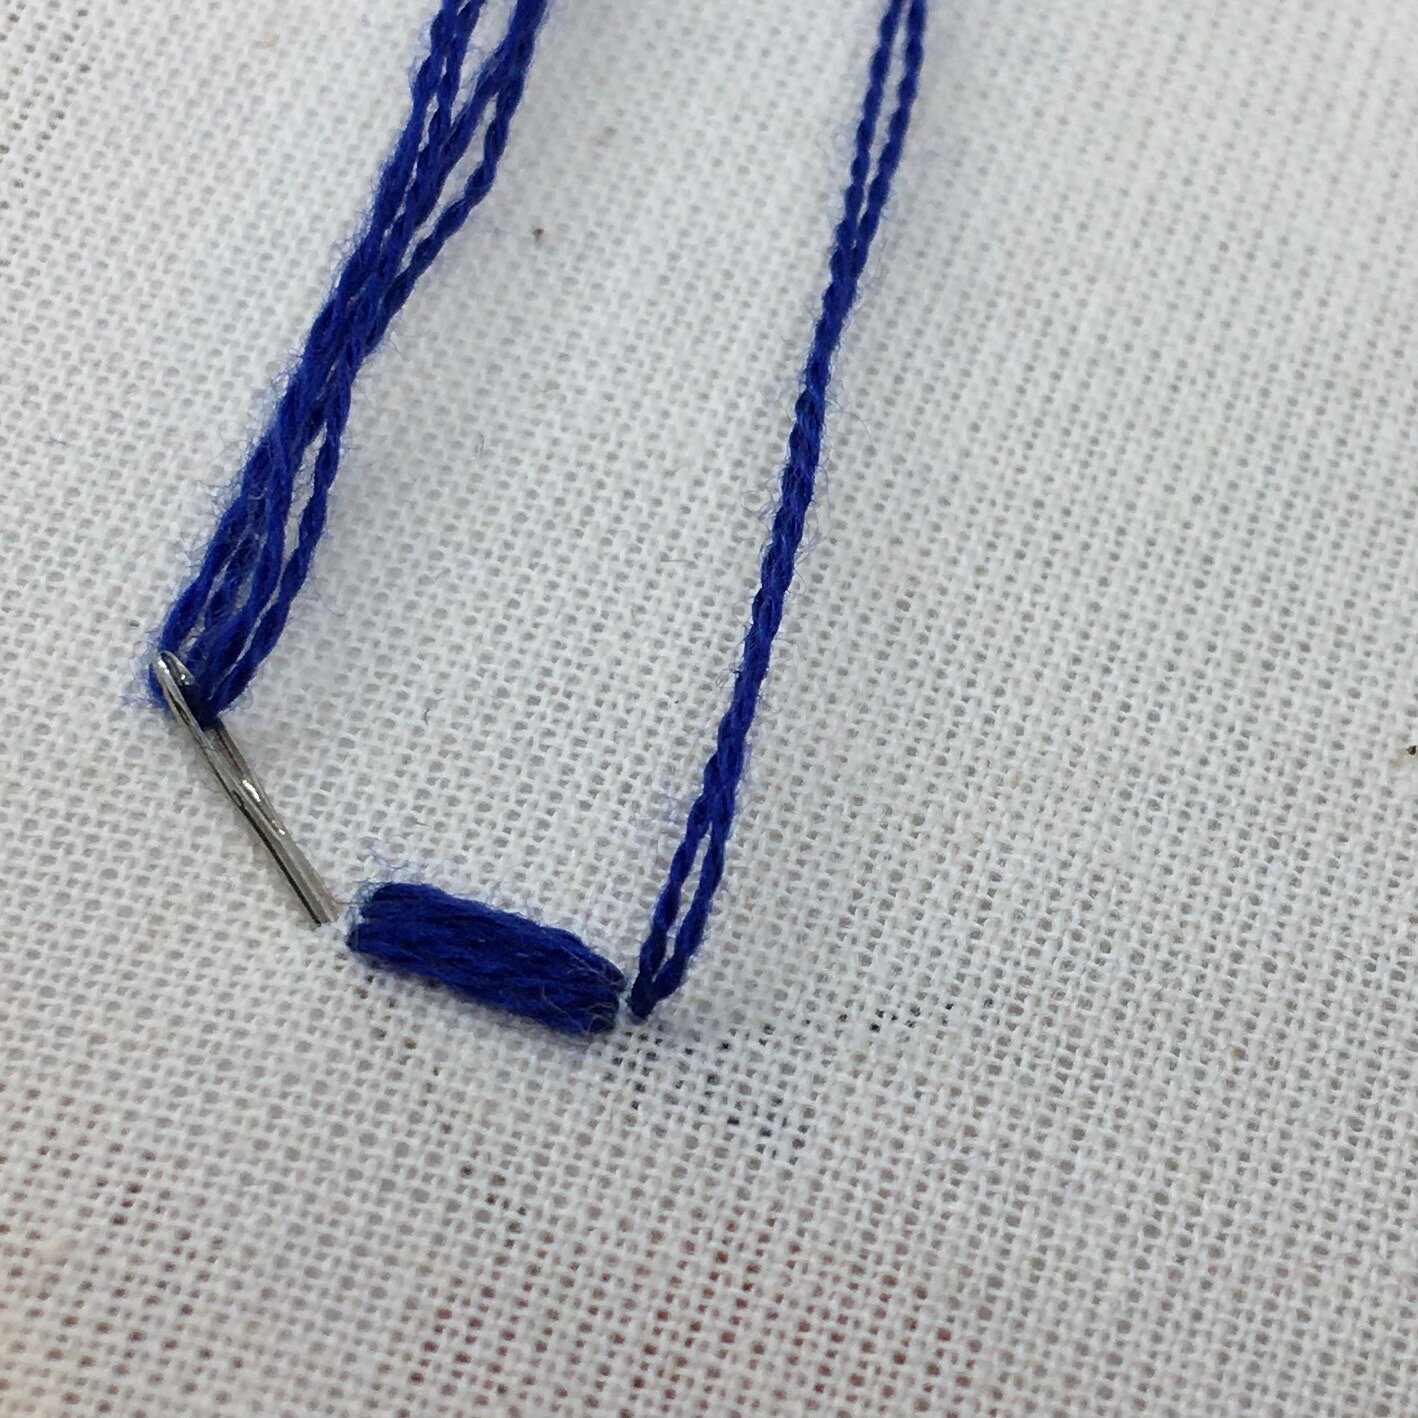
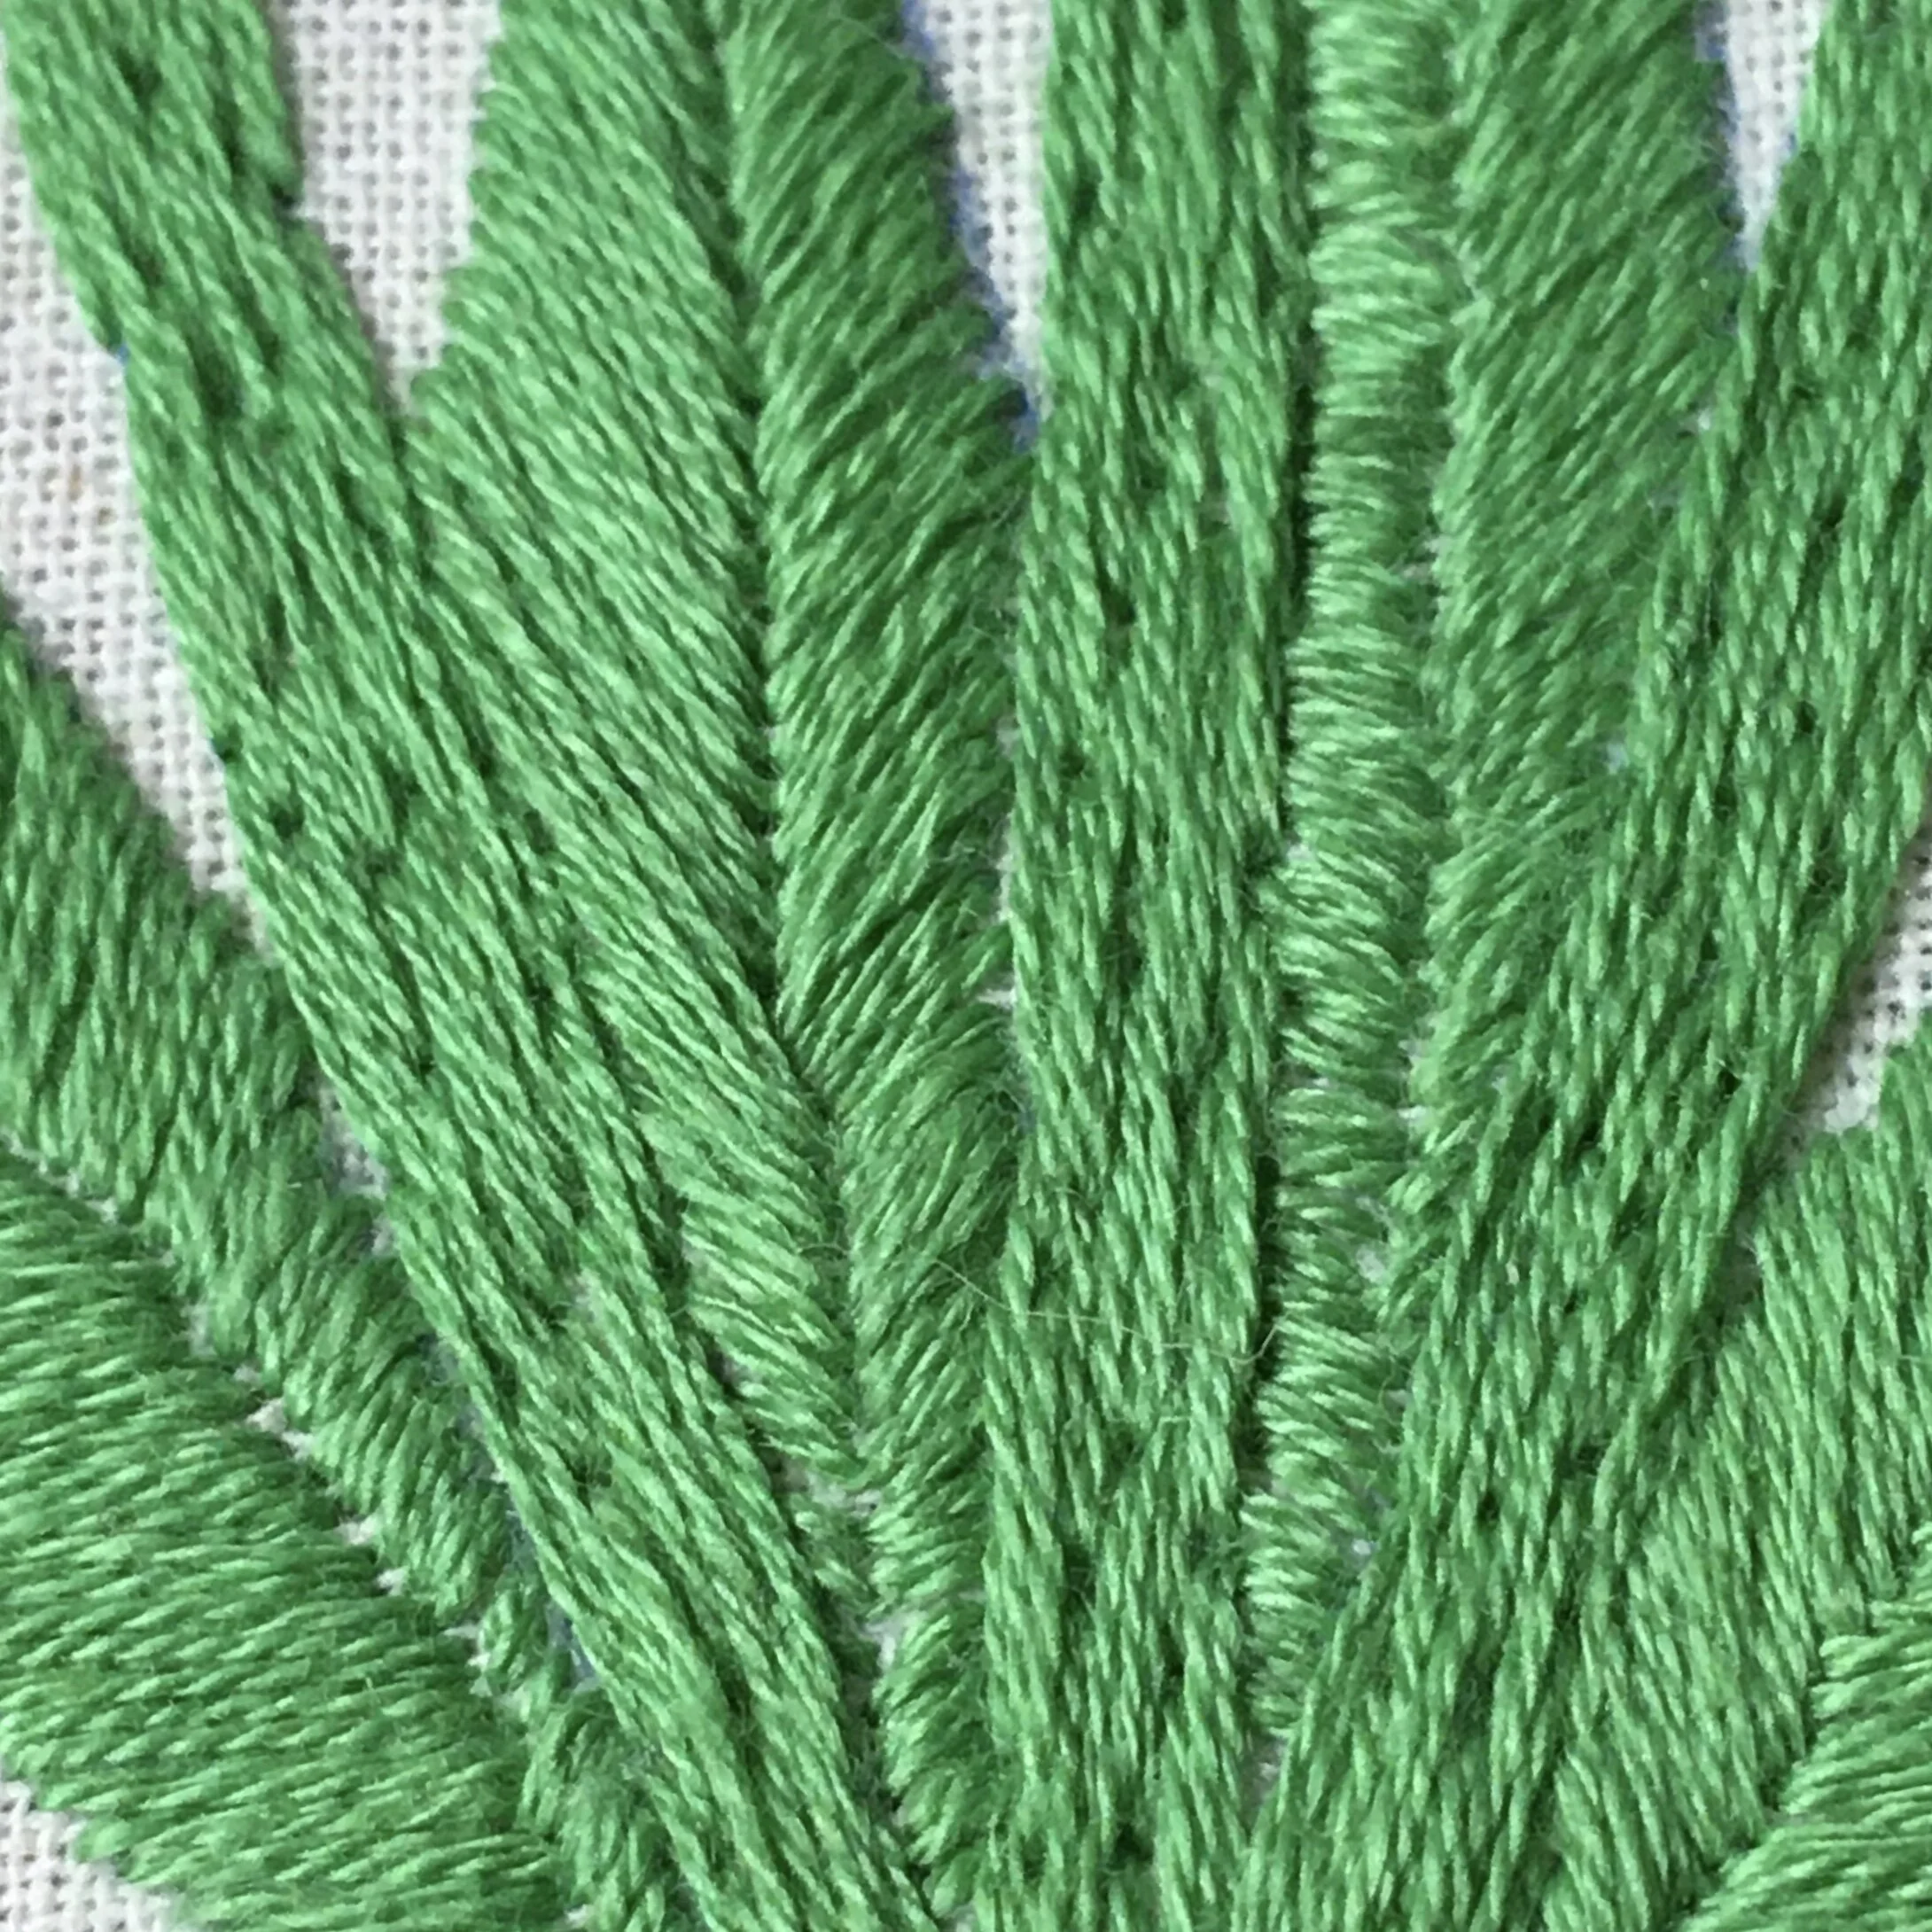
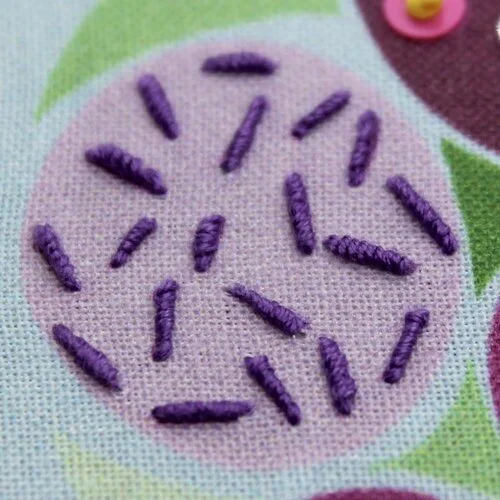
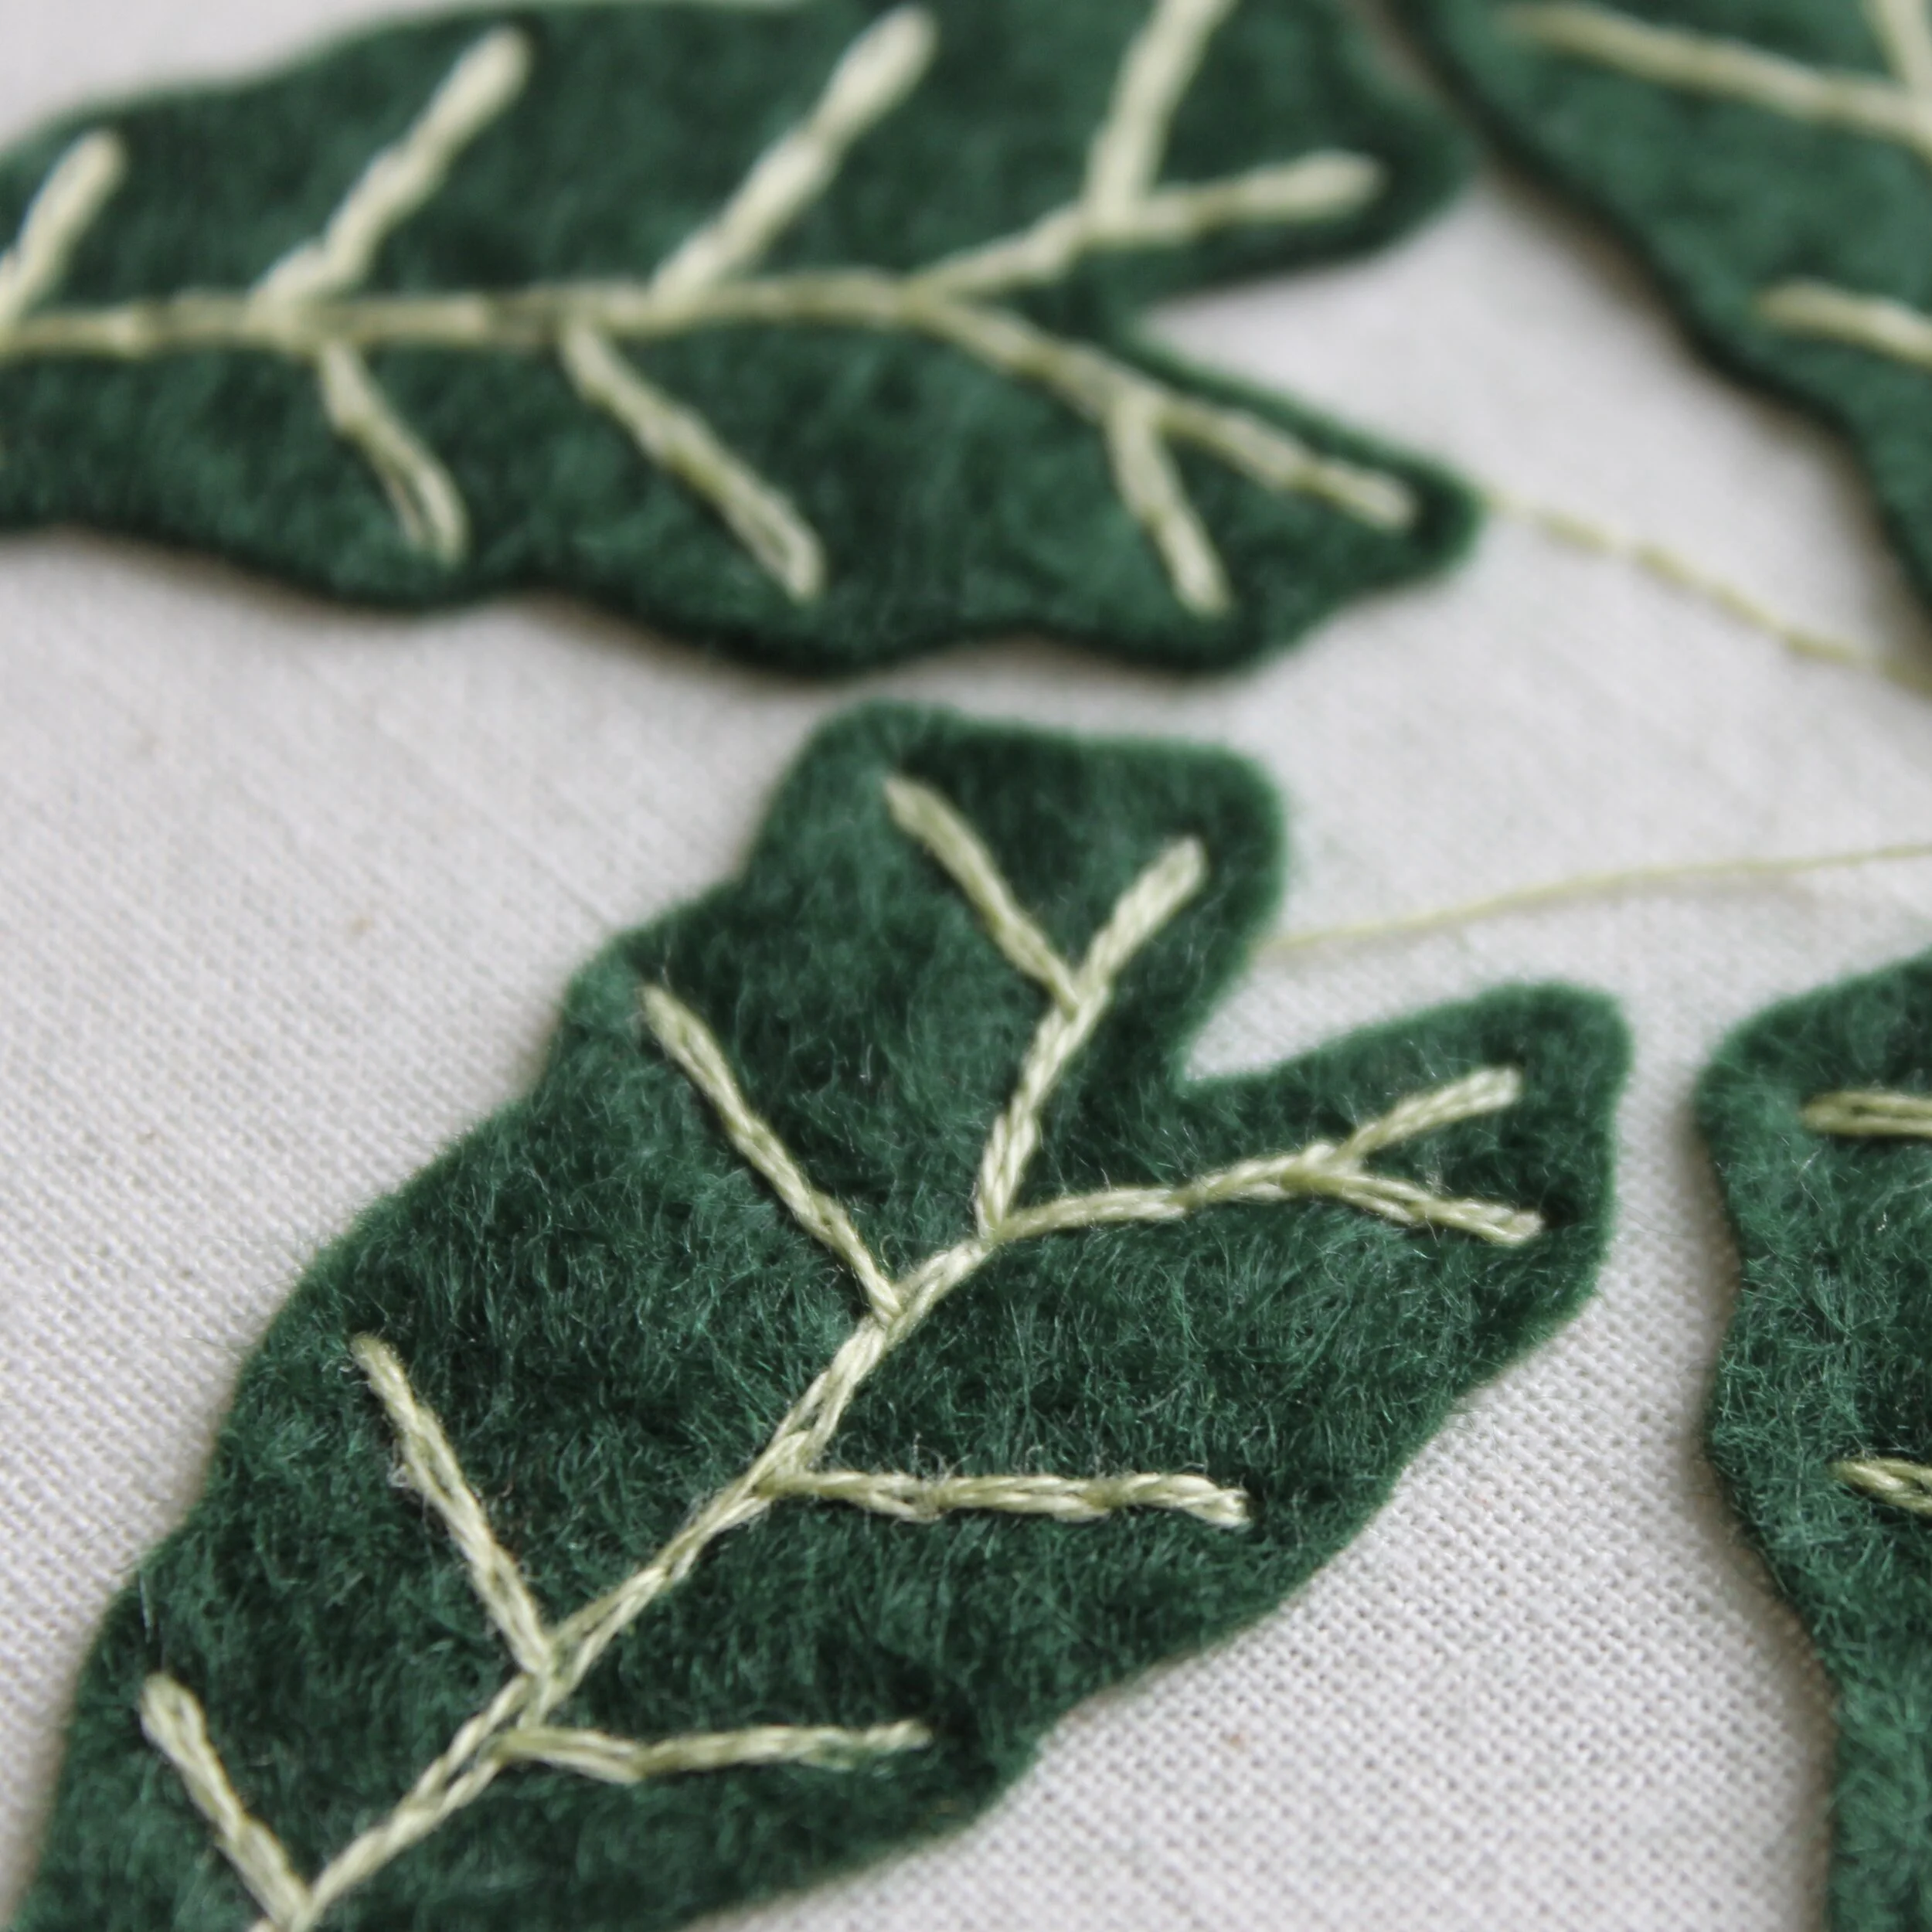
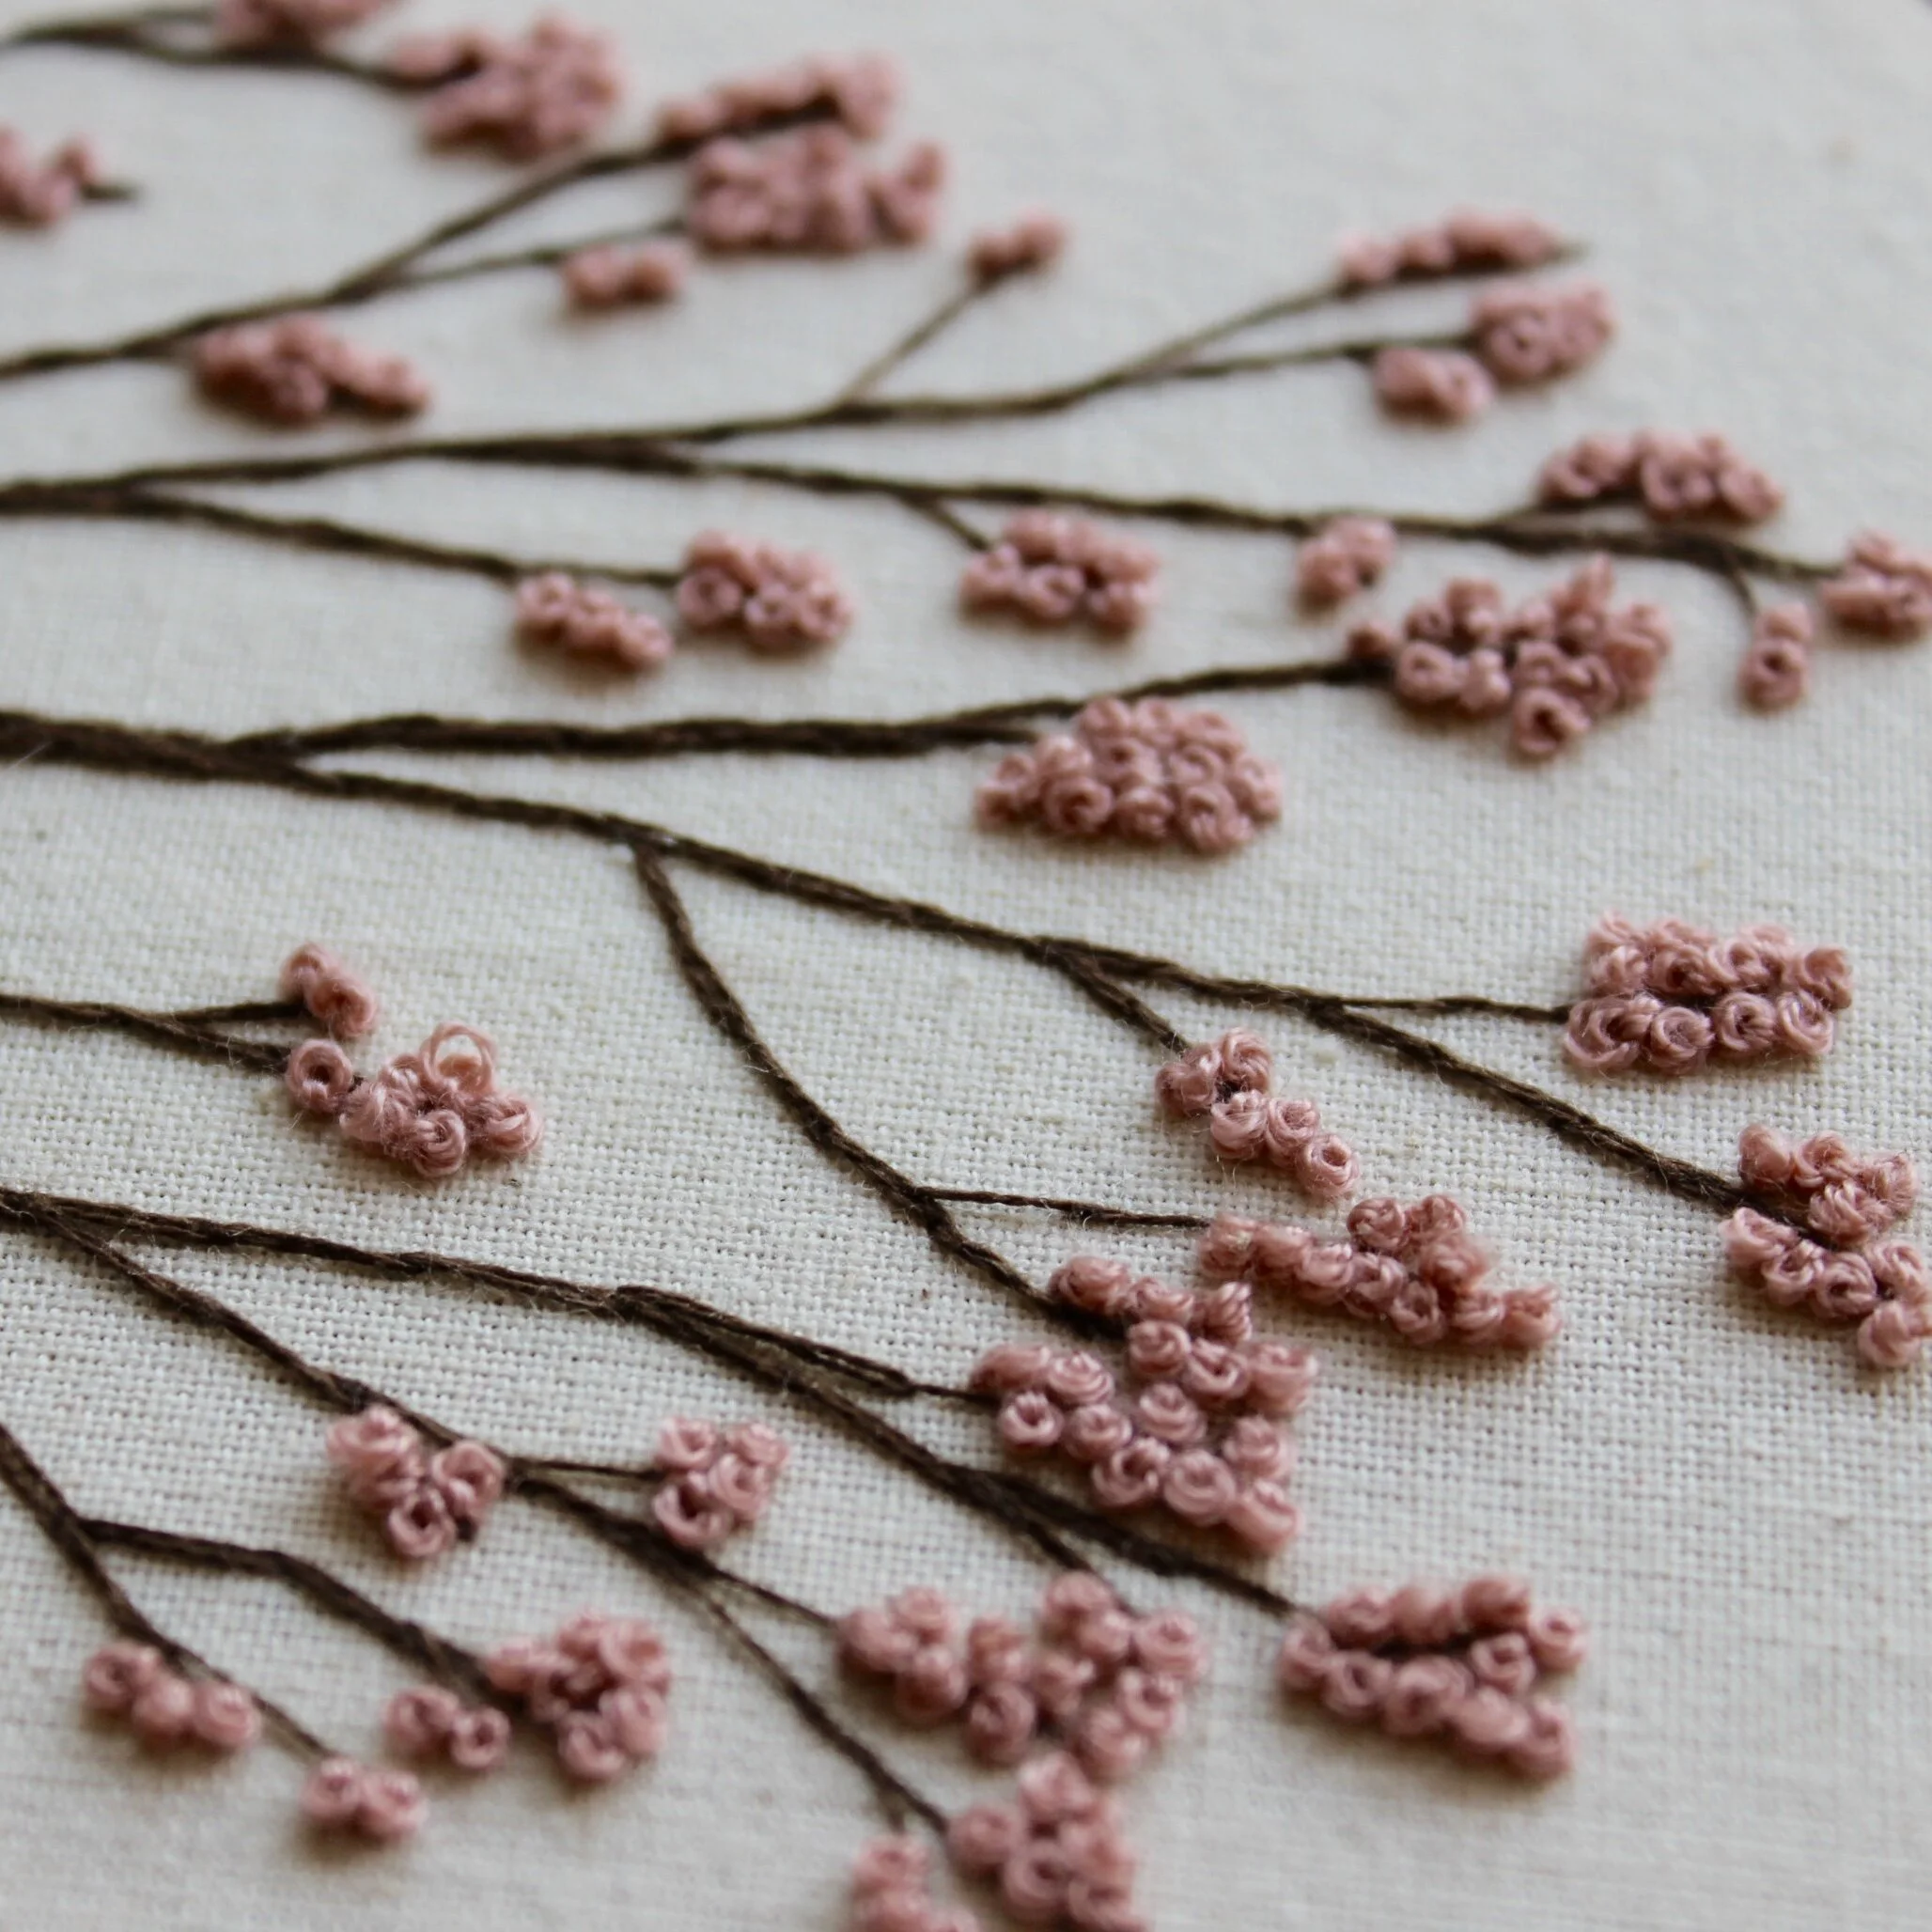
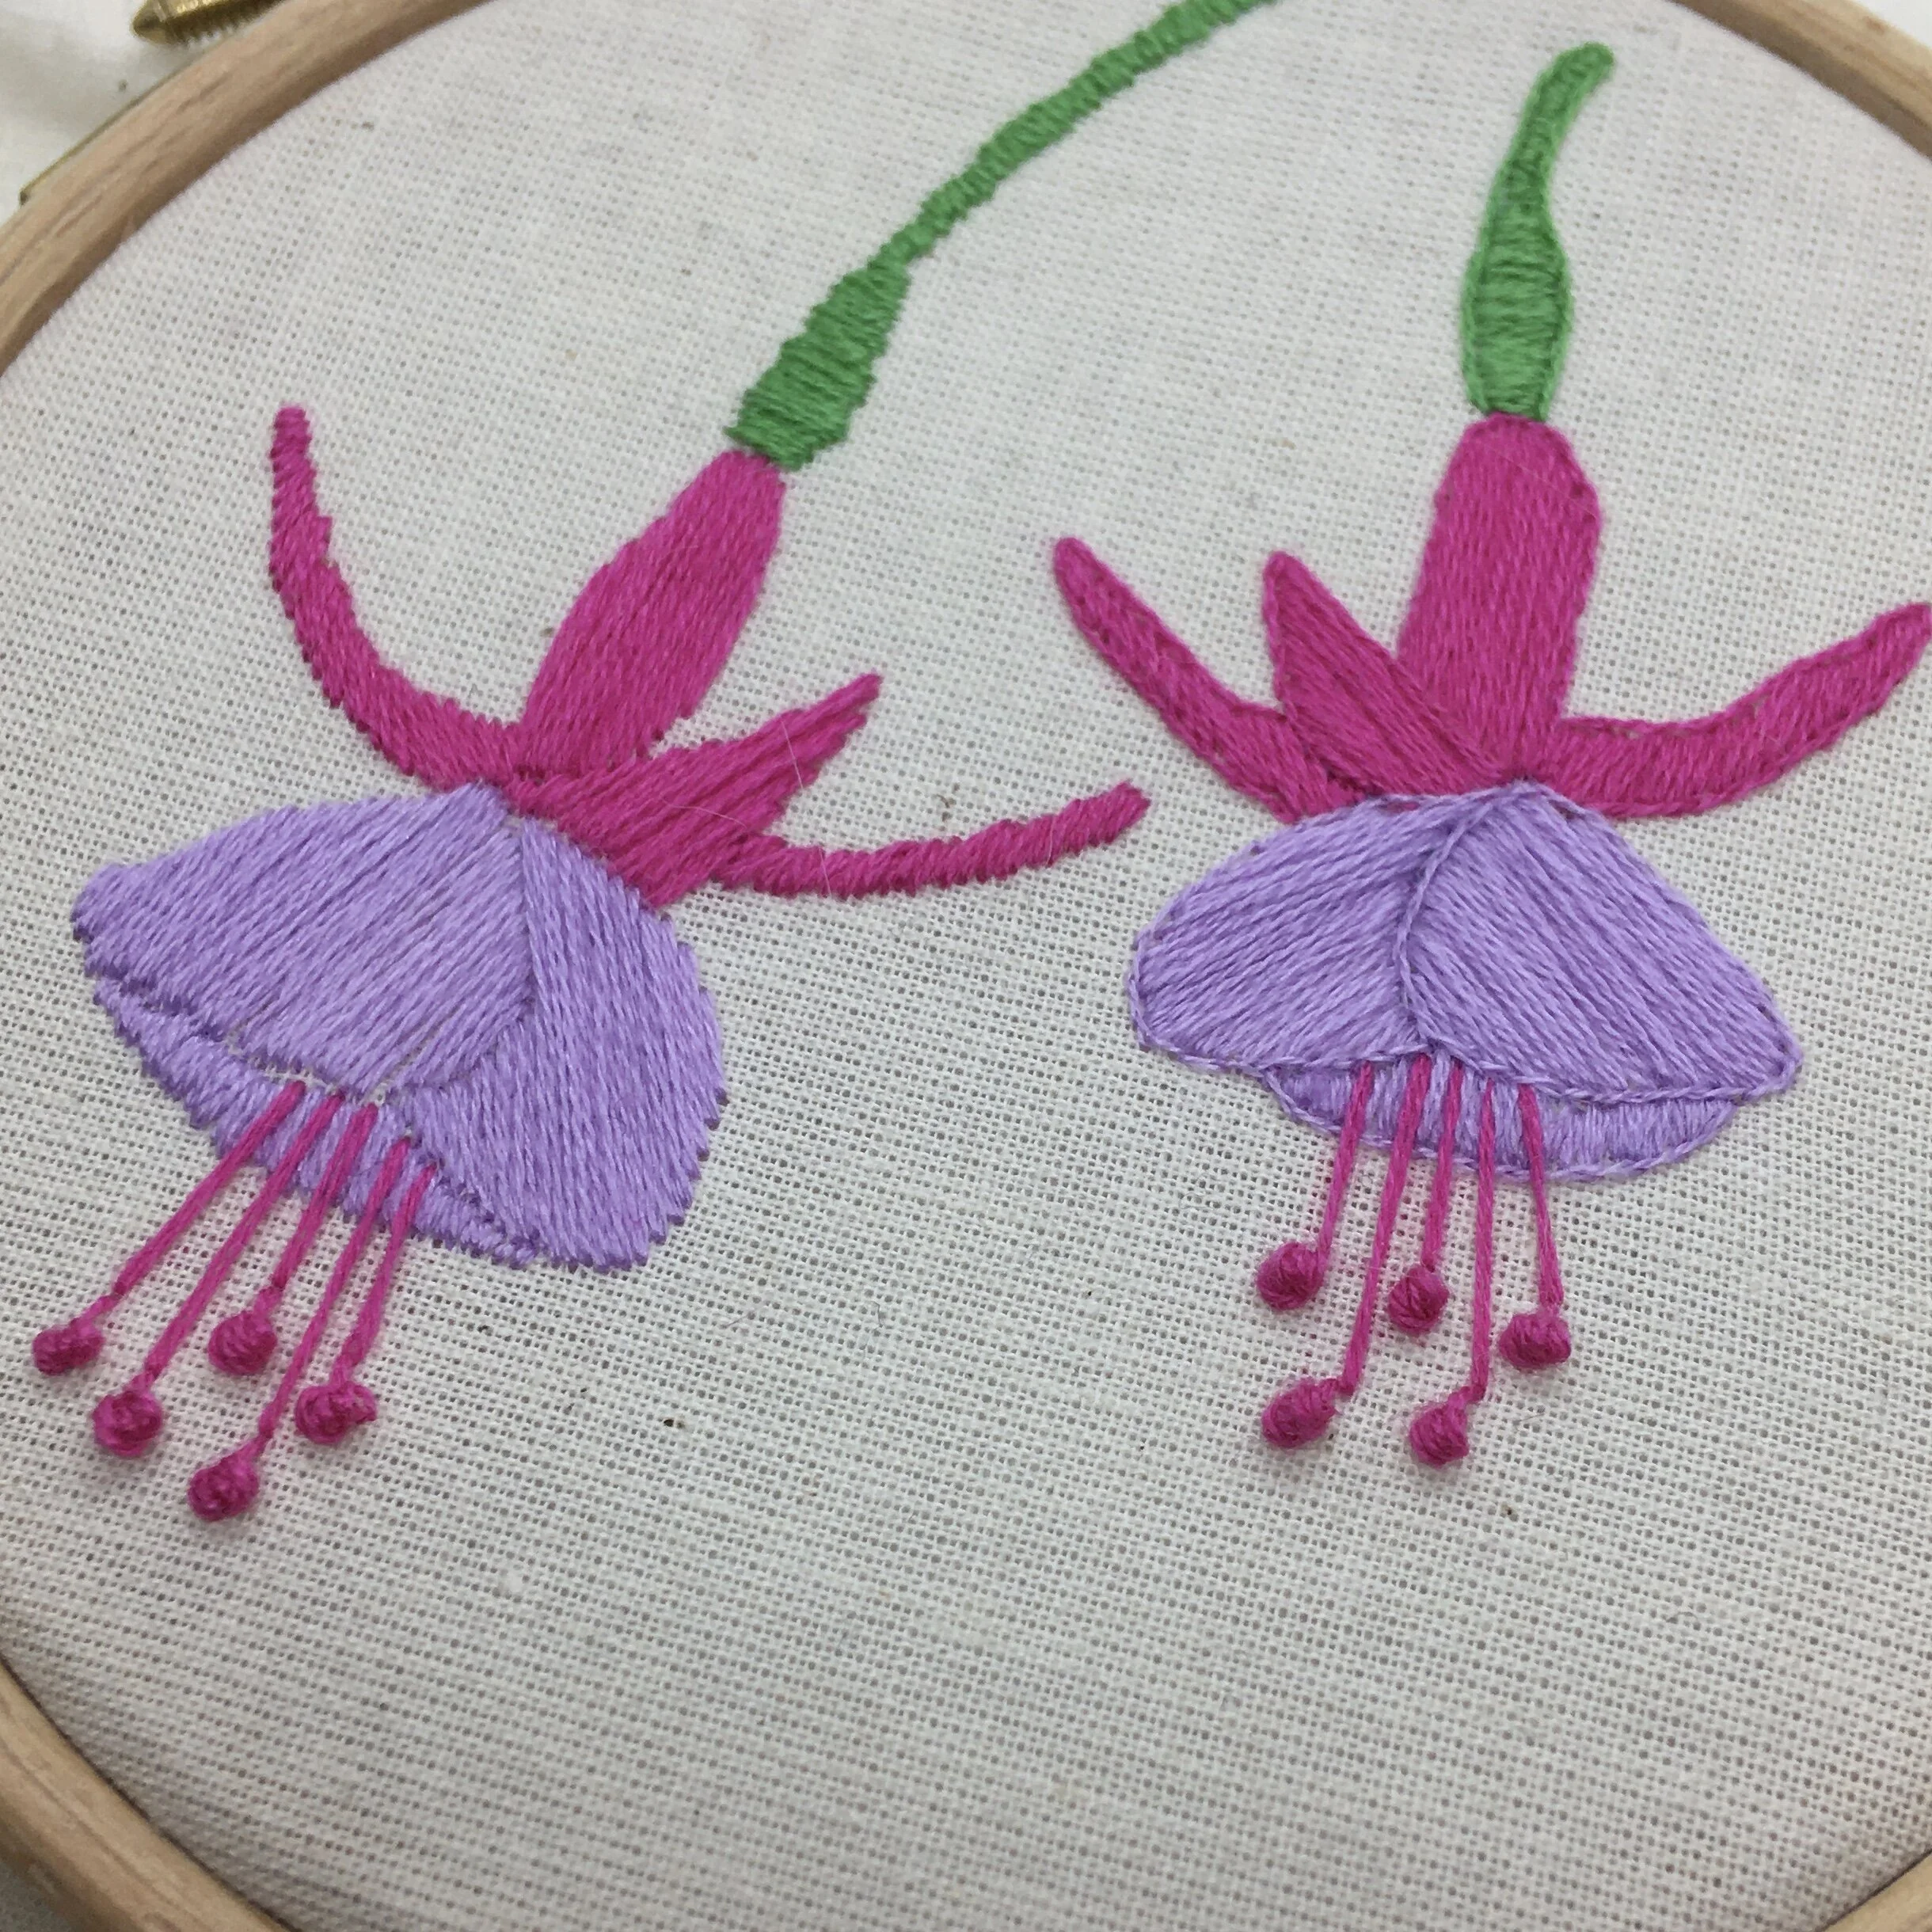
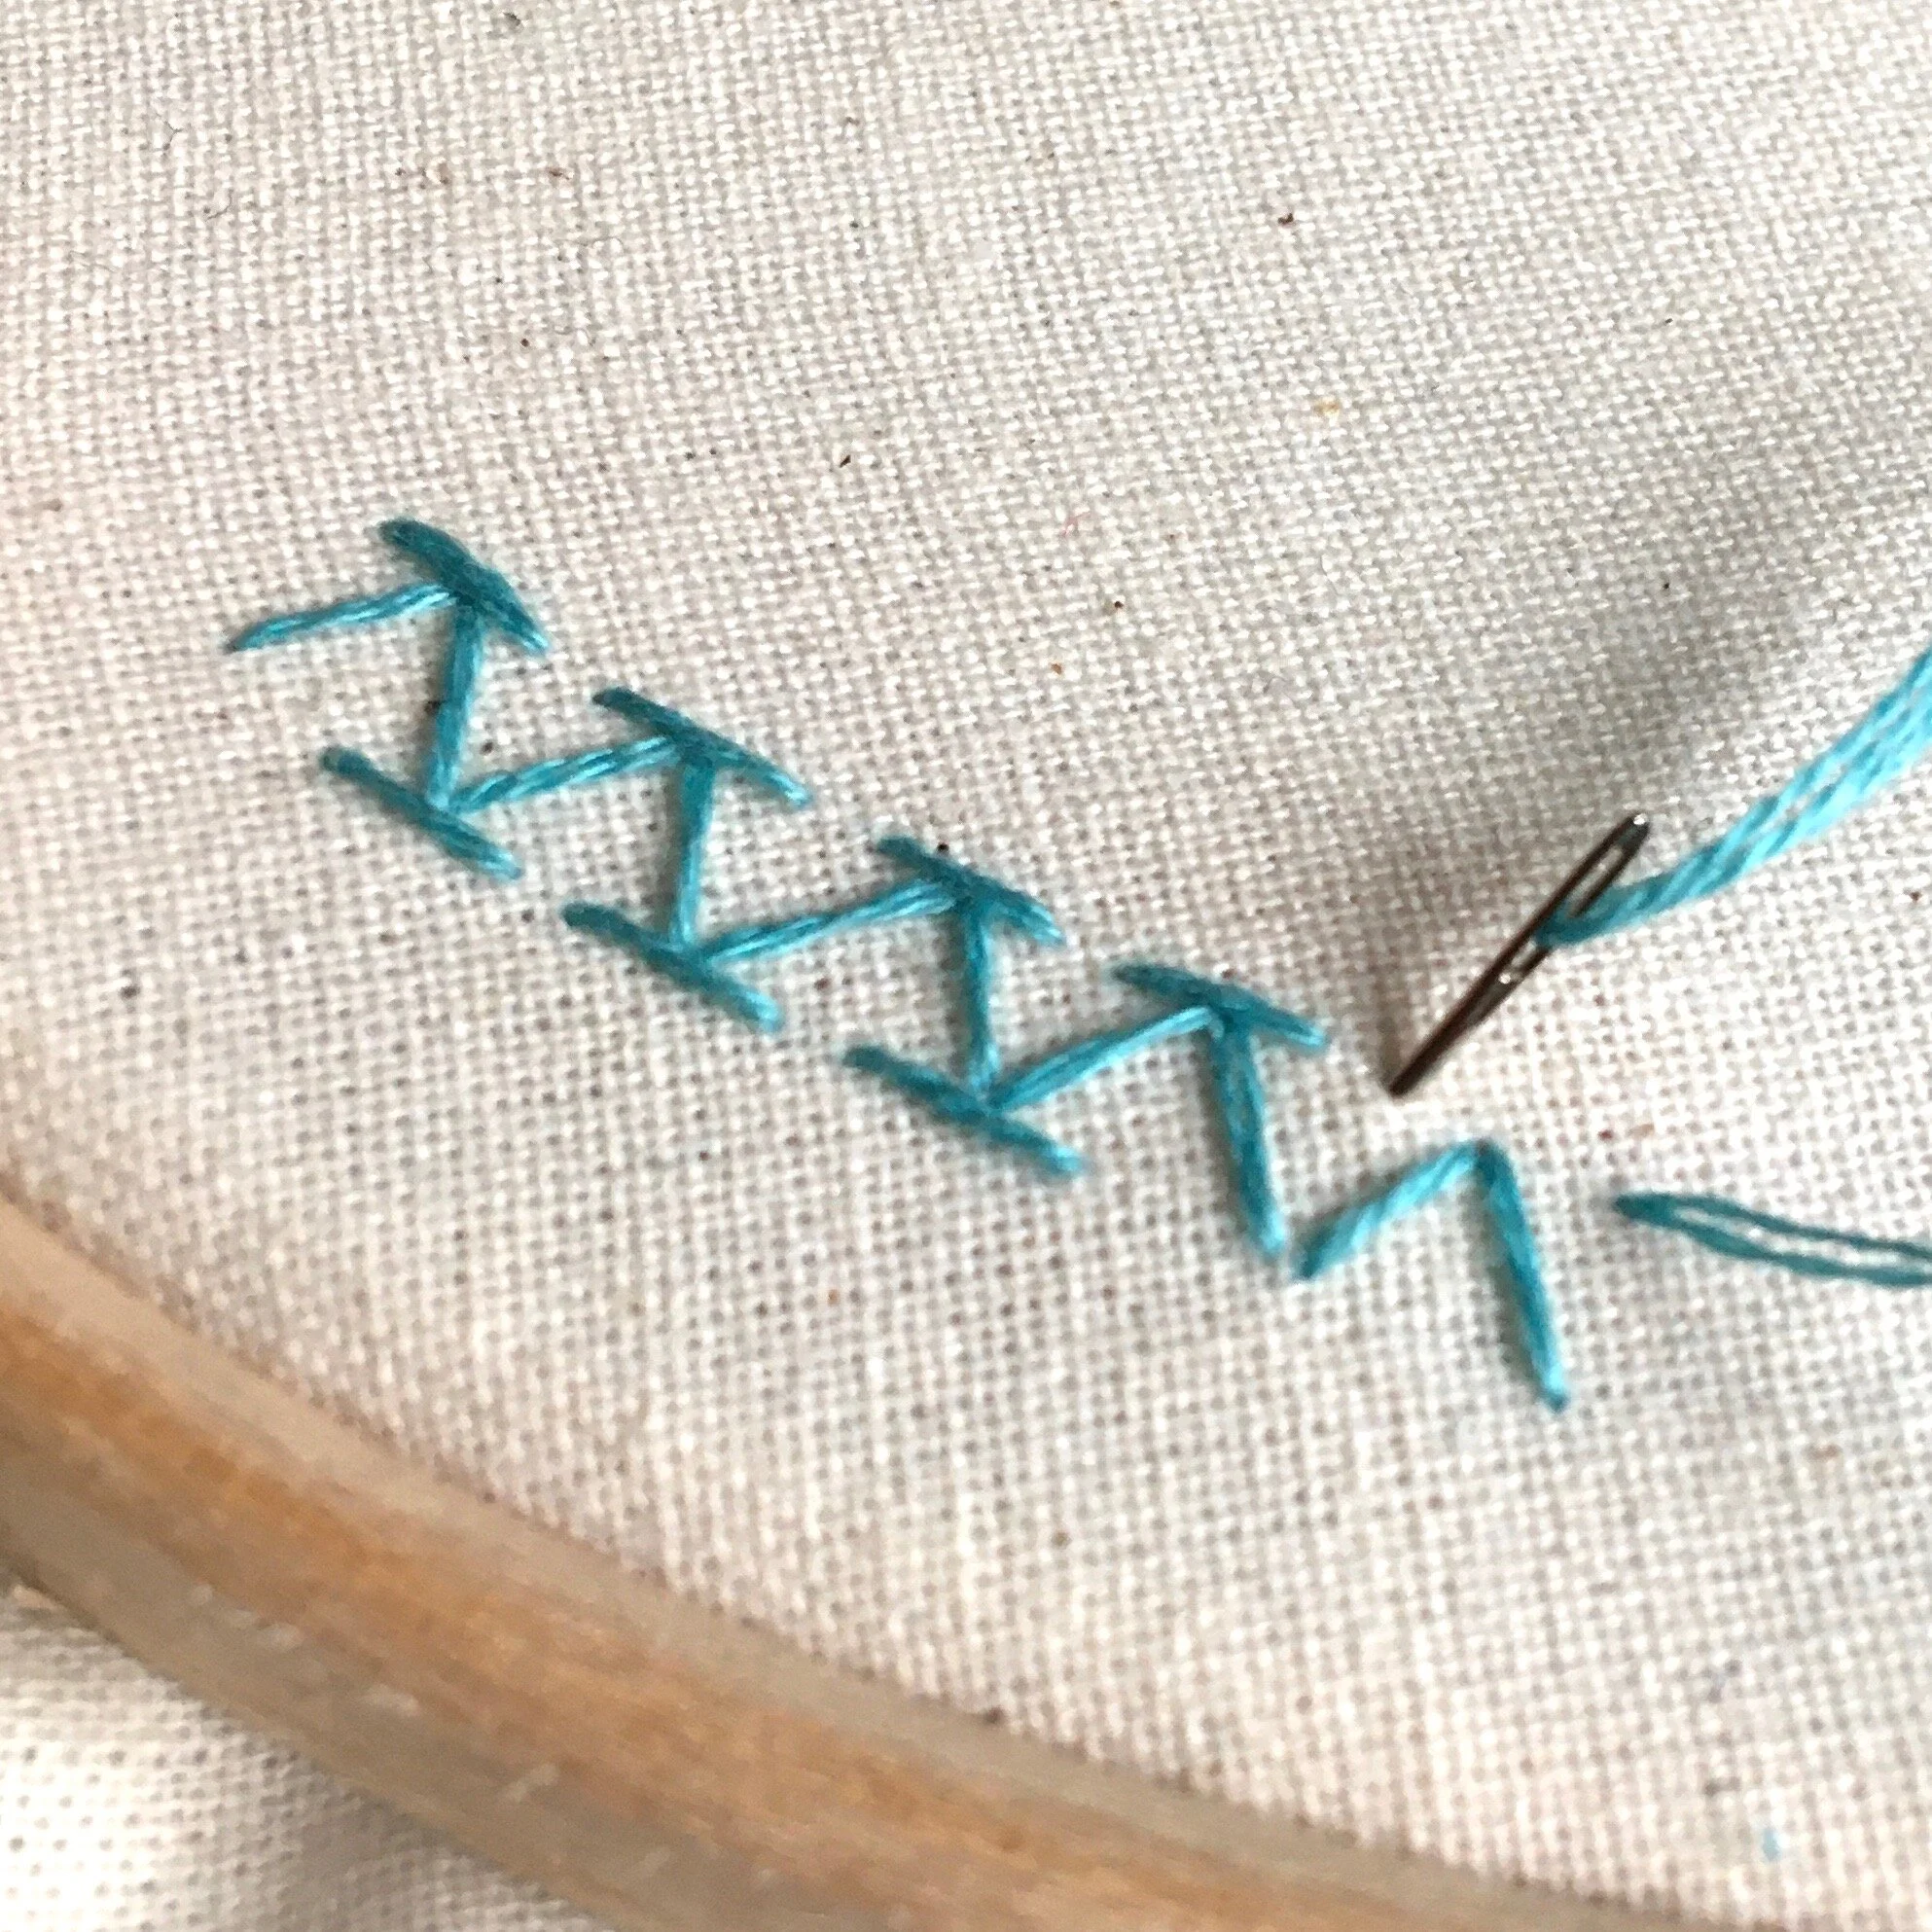
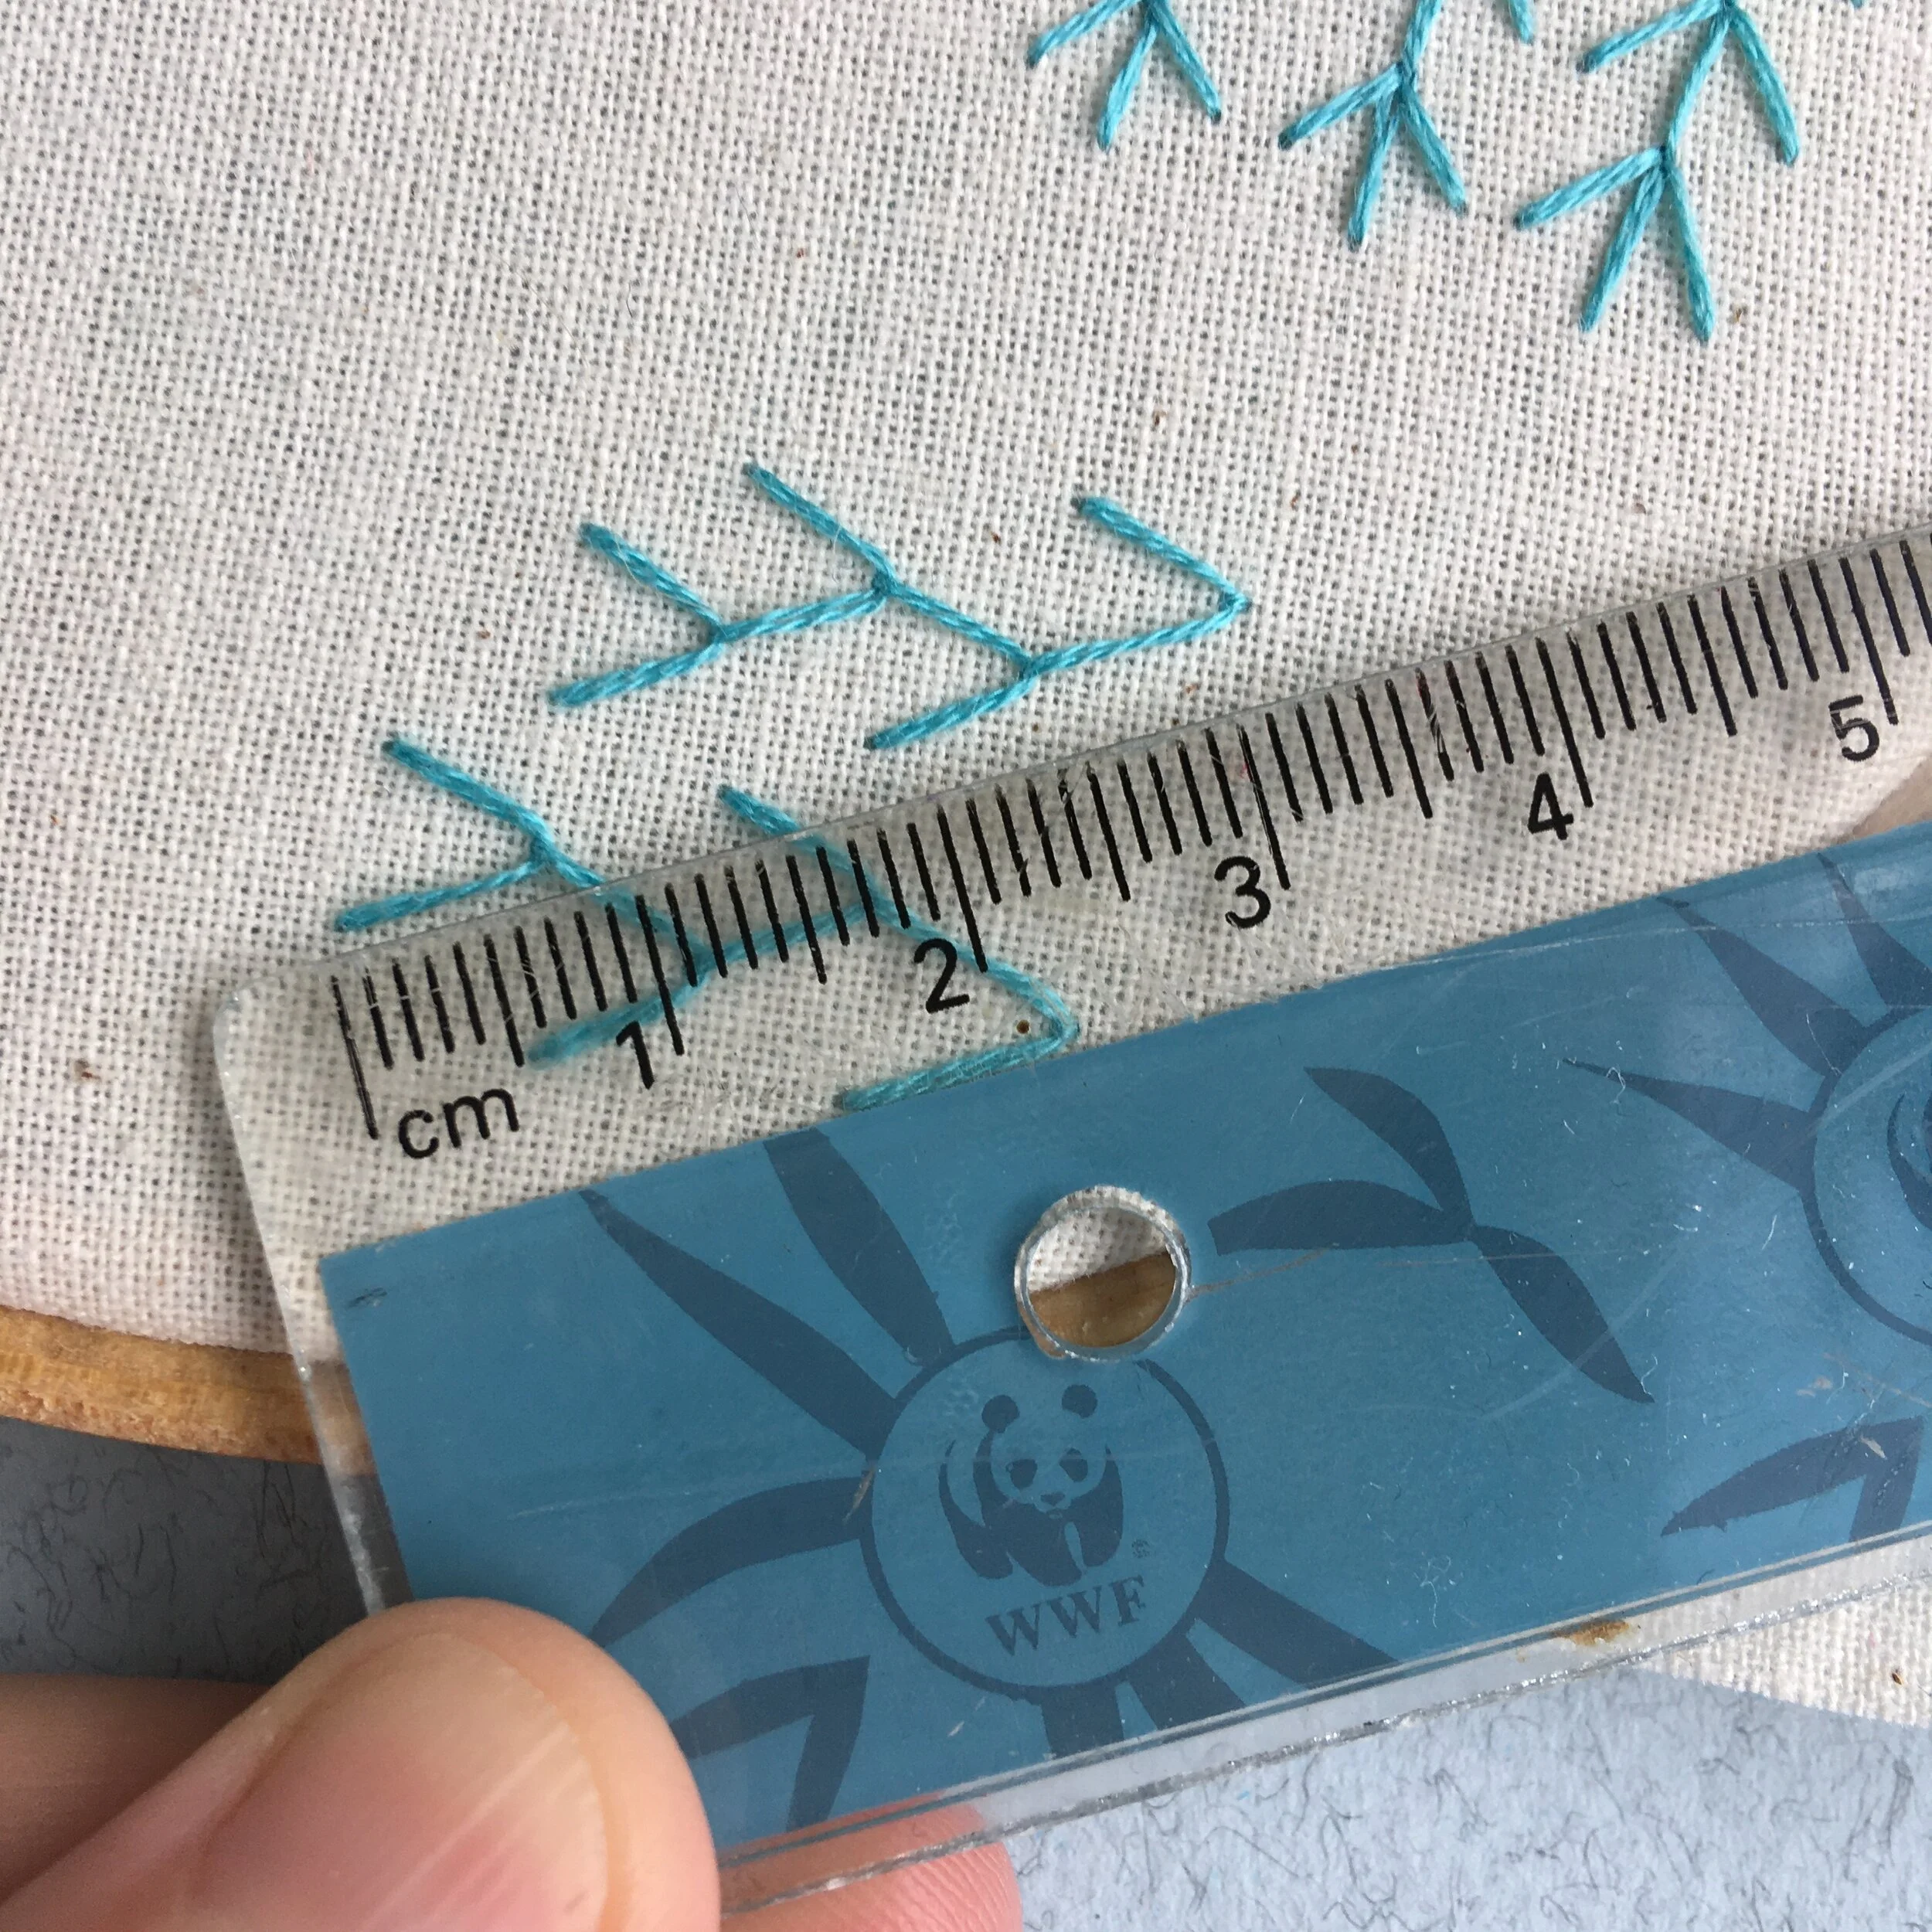
Stitching very short satin stitches can be particularly difficult to stitch as well, often resulting in an uneven edge (see the stems of the fuchsias below!)

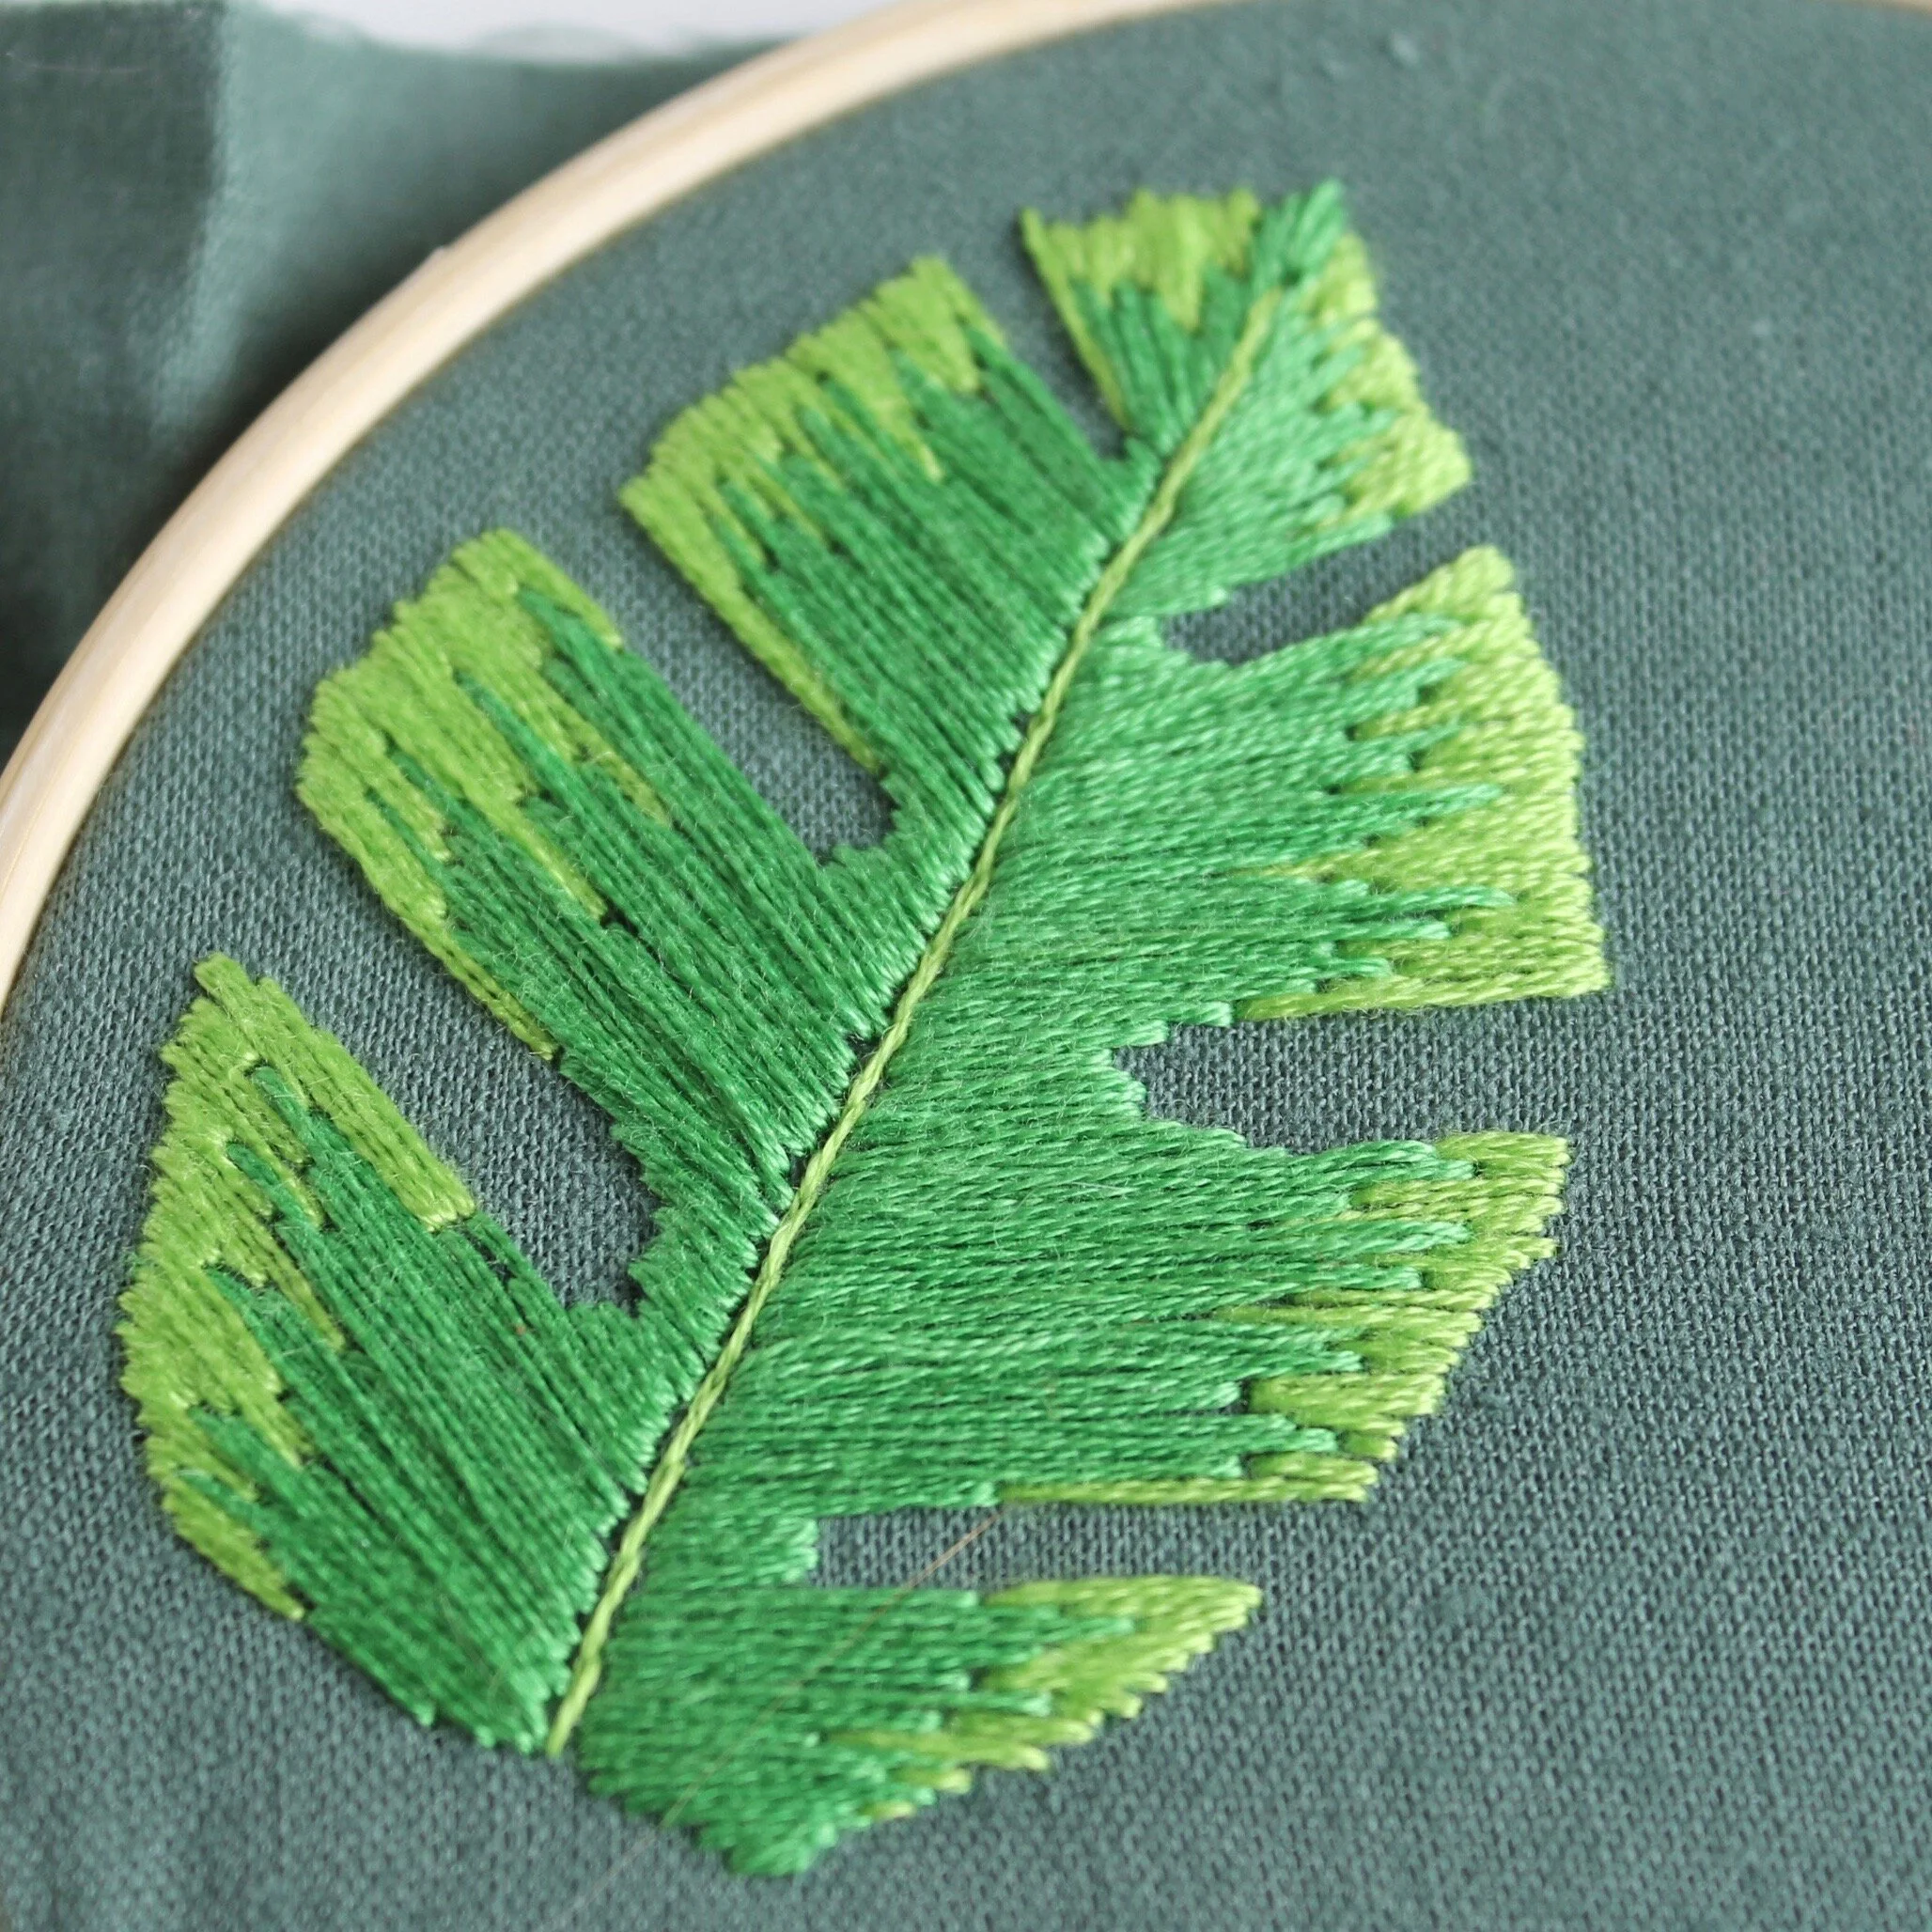
Using an outline stitch covers up some of this unevenness to give a smooth looking finish. You can see below two fuchsia flowers, one with no outline and one outlined using a single strand of floss and split stitch. Which of the two do you prefer?

A close up picture of an embroidery of two fuchsia flowers in pink and purple. Both flowers are stitched using sating stitch, but one is outlined with split stitch

I often also use outline stitches when I’ve got blocks of filled colour next to each other. The filling stitch helps the eye to separate these blocks. I also love using a slightly different shade to help with this definition. The rose you can see at the top of this page is stitched with a slightly darker shade of peach for the outline, that looks great at a distance and close up.

Any line stitch can be used to outline filled in areas. My personal preference is split stitch as you don’t get any gaps between each of the stitches which you sometimes get with backstitch. Couching is another way of outlining but the thread is couched down with tiny stitches which can sometimes distract the eye.

This is one of the very first pieces I embroidered and the outlines and stems are outlined with couching. (It also shows how you shouldn’t give up if you’re stitches aren’t perfect when you first start.)

An embroidery of a greenhouse with the outline of the greenhouse stitched in black couching stitch

I always decide whether to add an outline after I’ve completed the satin stitch. But there are some embroiderers who add the outline first and then fill in. I’ve tried this method but I find it tricky to get the satin stitches under rather than through the outline. I’d suggest you have a go and determine which method works best for you.

Enjoyed this blog post? I share embroidery tips and a free embroidery pattern in my monthly newsletter. Sign up here to receive the newsletter on the 1st of each the month.

In tips 2 Tags Stitch Showcase, Filling Stitch, Line Stitch
Comment
An image of a ruler measuring some embroidery stitches on fabric. Overlayed is a blue square with the text hand embroidery, how to get your stitches the same size, www.embellishedelephant.co.uk

How to get your stitches the same size

June 9, 2021

There are some designs where you want stitches to be an identical size to give a polished finished. But how do you achieve this? Here are five techniques that might help.

A picture of  some fabric in an embroidery hoop. On it is being stitched a row chevron stitches in blue thread

By eye

I have to admit this is normally the method I use. I feel fairly confident about judging small distances. I tend to stitch slowly and make sure that with each stitch I’m happy with the position of the needle before I complete a stitch. I also look back at the past few stitches to check I’m happy with the consistency and unpick if anything looks out of place.

For slightly longer stitches I use the needle and my finger to help judge the length of the stitch.

A picture of a ruler next to some embroidery, measuring the size of stitches

Use a ruler

This can really help with getting the right stitch length but you still need to make sure the position of the needle is accurate.

Working with a ruler can also be a bit cumbersome (even if it is my trusty WWF ruler I’ve had for 25 years).

A close up picture of a design printed onto fabric for embroidery

Draw guidelines

This is a great alternative to to ruler especially if you are able to remove or stitch over the guidelines that you make. It means you don’t need to keep picking up/putting down the ruler with each stitch.

The type of guideline you use will depend on the stitch you are making but if I use this method I tend to use tiny dots rather than full lines as these are easier to stitch over.

In this picture the guidelines are pre-printed onto the fabric which makes it even easier!

A picture of a hand holding an embroidery hoop. Marked on the index finger of the left hand are three pen marks showing the stitch length needed

Marks on your finger

I saw this ingenious method on Instagram as a tip for stitching blanket stitch. I’ve not tried it myself yet but in taking this photo I did find that I had to hold the hoop a bit funny to get the markings to be where I needed them. A bit of trial and error might be needed for this one!

a picture of hardanger embroidery in white on evenweave fabric

Evenweave fabric

The clue is in the name - this type of fabric has an even number of warp and weft threads per inch. It means that if you stitch is five holes in length you can count this number of holes for every stitch you make to get stitches of identical length. It’s the fabric used for techniques such as blackwork and hardanger but you can also use high count evenweave fabrics for standard embroidery too (higher count means more warp/weft threads per inch and smaller gaps inbetween).

Enjoyed this blog post? I share embroidery tips and a free embroidery pattern in my monthly newsletter. Sign up here to receive the newsletter on the 1st of each the month.

In tips 2 Tags Fabric, Thread, Stitch Showcase
Comment
Older Posts →

Tags

  • About me
  • Artists/Designers
  • Basics
  • Christmas
  • colour
  • Couching Stitch
  • Fabric
  • Filling Stitch
  • Finishing
  • Hoops
  • Isolated Stitch
  • Line Stitch
  • London
  • My Makes
  • Needles
  • Stitch Showcase
  • Texture Stitch
  • Thread
  • Transfer
  • Travel

Latest Posts

Featured
May 1, 2025
How to manage your backlog of craft projects
May 1, 2025
May 1, 2025
Apr 1, 2025
What to do if you don't like what you've stitched
Apr 1, 2025
Apr 1, 2025
Feb 15, 2025
How to decide which embroidery stitch to use
Feb 15, 2025
Feb 15, 2025
Feb 1, 2025
Focus on stitches for flowers
Feb 1, 2025
Feb 1, 2025
Jan 1, 2025
Focus on stitches for leaves
Jan 1, 2025
Jan 1, 2025
Nov 1, 2024
Stitch Showcase: Six-pointed star stitch
Nov 1, 2024
Nov 1, 2024
Oct 1, 2024
Focus on transferring or tracing patterns
Oct 1, 2024
Oct 1, 2024
Sep 1, 2024
Focus on hoops
Sep 1, 2024
Sep 1, 2024
Aug 1, 2024
A focus on needles
Aug 1, 2024
Aug 1, 2024
Jul 1, 2024
Focus on threads
Jul 1, 2024
Jul 1, 2024

Home — Shop — Stockists — Wholesale — Portfolio — Contact — Reviews — Policies — FAQs