
An embroidery hoop is the one piece of equipment you need to get started with embroidery. So understanding a bit about the hoop helps (but isn’t essential).
There are three main parts to an embroidery hoop that it is useful to recognise. The inner hoop, the outer hoop and the screw fitting. The materials the hoop is made from and the size are also important considerations
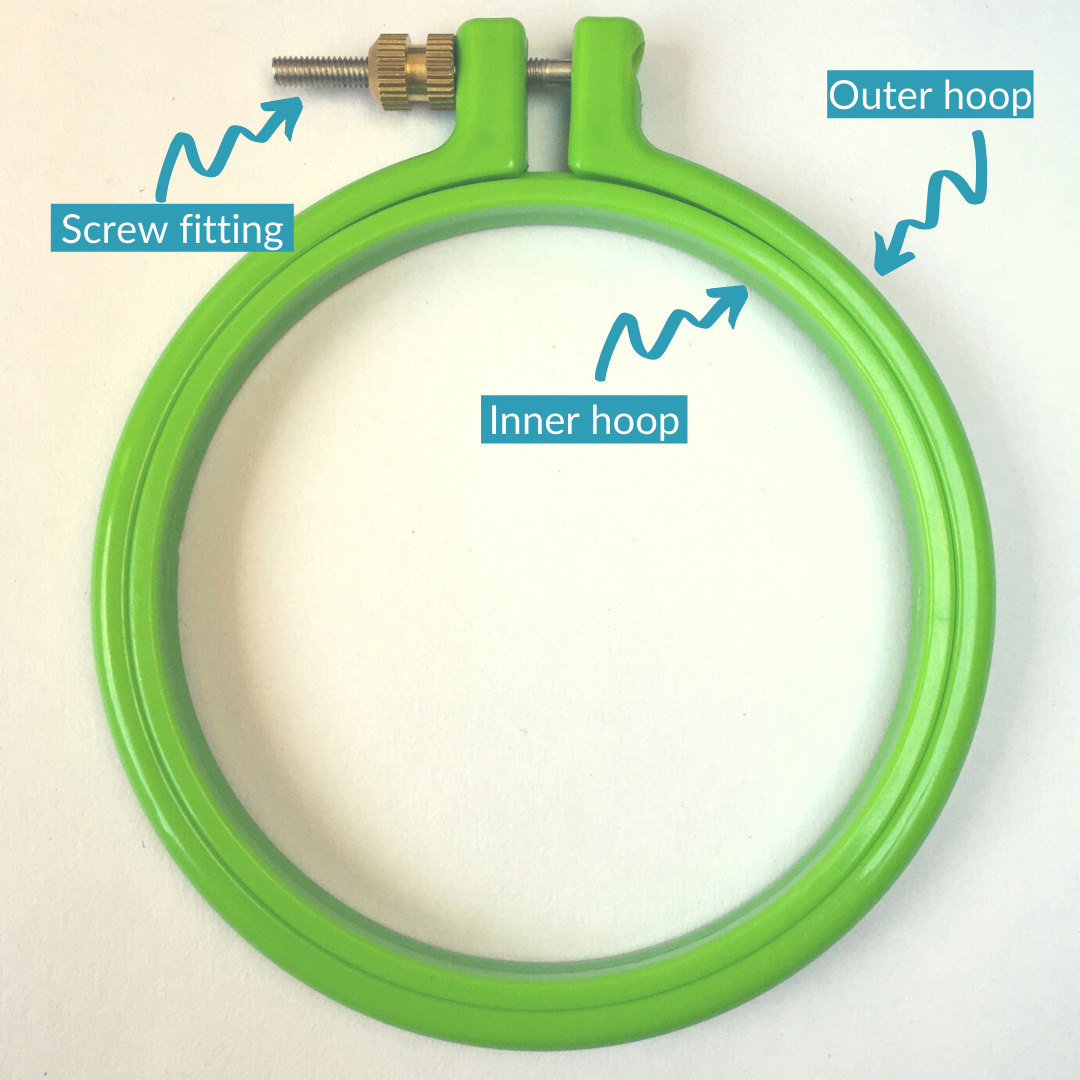
Inner & outer hoop
An embroidery hoop has two parts, an inner hoop and an outer hoop. The inner hoop fits snuggly inside the outer hoop (if it doesn’t then you will have problems when stitching). The inner hoop is fully circular, you shouldn’t be able to see any joins! The outer hoop has a screw fitting and isn’t fully circular.
I recommend that you embroider with the fabric laid over the inner hoop and the outer hoop pressed on top. This will mean that there will be a few millimetres right at the edge of the embroidery hoop where you can’t stitch but it is easy to embroider this way up than flipping the hoop over and having the inner hoop on top.
Screw fitting
The screw fitting is there to tighten the hoop to create tension in the fabric. You can fully unscrew the screw but normally this isn’t needed.
On some hoops if you look at the end of the screw you’ll see an indent that you can use a screwdriver with. Most of the time you can tighten the screw tight enough with your fingers but if you need that little extra grip then for this style of hoop you can use a screwdriver.
Materials
Embroidery hoops are most commonly made from wood, bamboo or plastic.
My preference is to use a wooden hoop as I find that these type of hoop grips the fabric really well creating great tension. I use wooden hoops in all of my kits for this reason.
Bamboo hoops are also great for the same reason but I’ve found that some of the bamboo hoops I’ve bought (especially from eBay) are mis-shapen. When a hoop isn’t perfectly round then it doesn’t hold the fabric tight and causes problems with stitching.
I’ve also found two different types of plastic hoops - those that have a screw (like the wooden/bamboo hoops) and those that have some flex. Personally I find that when I stitch in plastic hoops the fabric slips around too much. I am also trying to reduce the amount of plastic in my life so am not buying any more of this type of hoop. Any that I have left in my stash I'm using just for framing finished pieces.
Size
Embroidery hoops come in different sizes and will be measure by diameter so a 6 inch hoop will be that measurement across (not around). Some designs work best in certain sized hoops. In addition sometimes it can be better to stitch a design in a slightly larger hoop than you will display the finished work in (so you can stitch right to the edge of the available space.
Enjoyed this blog post? I share embroidery tips and a free embroidery pattern in my monthly newsletter. Sign up here to receive the newsletter on the 1st of each the month.