

This is one of the trickiest stitches in embroidery but I’ve been stitching it as much as I can lately as, much like the French knot, practice really helps.
There are two methods for creating a bullion knot. The method I prefer isn’t the one that you’ll find in most stitch tutorials. I like it as I with the traditional method my knots are often thicker at one end than the other, but give them both a try and see which works for you
Traditional method
Create a straight stitch but leave a loop when you complete the stitch, then poke the needle through the fabric at the start of the stitch, but don't push it all the way through.
Using the loop, wrap the loop around the needle enough times to match the length of the stitch.
Carefully pull the rest of the loop so the needle lies flat, then push the needle through (holding onto the wraps) and finally complete the stitch.
My method
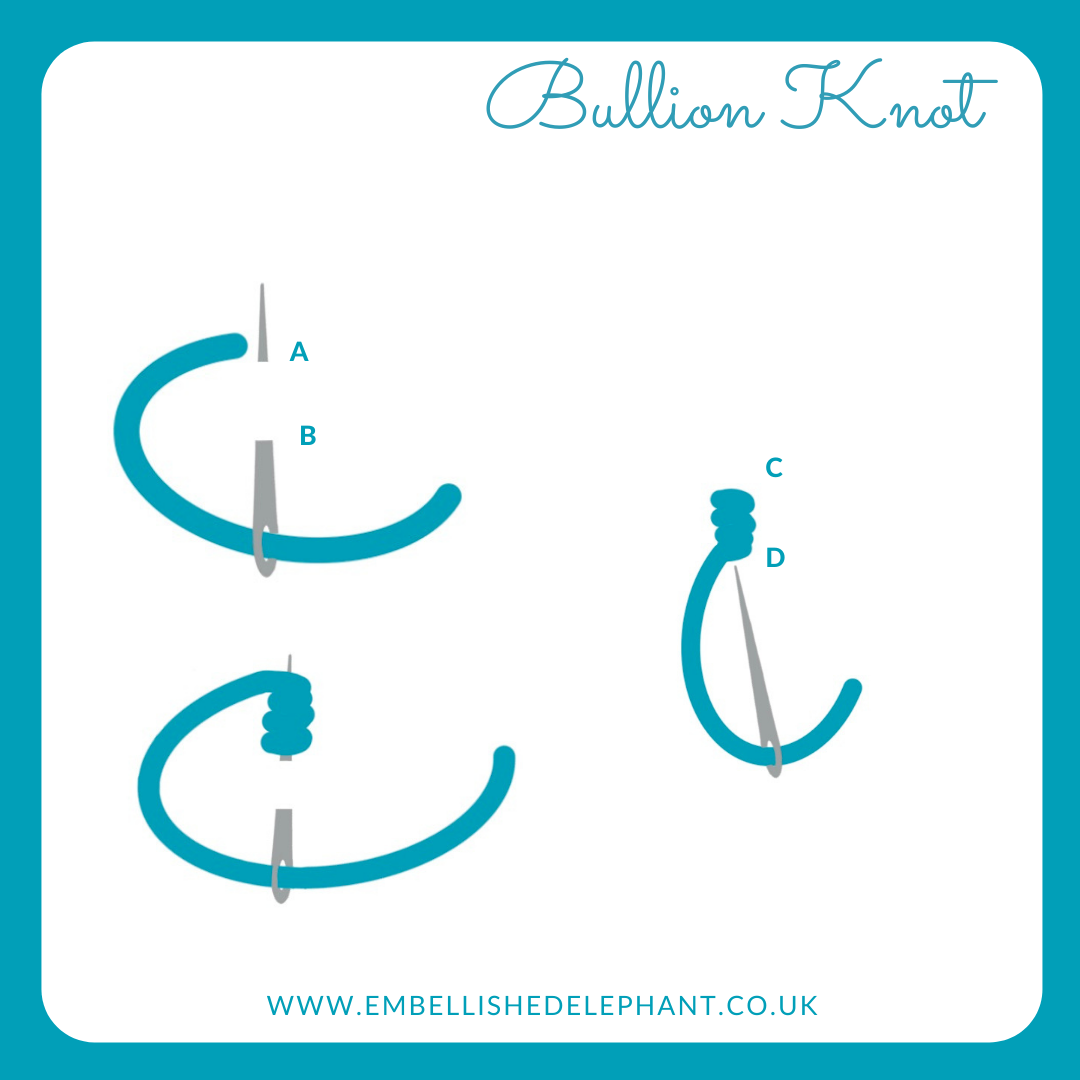
Bring the needle up through the fabric at the point you want the knot to start, then pass it back through the fabric where you want the stitch to end, don't pull the thread all the way through.
Push the needle back up through the fabric at the starting point of the stitch, but don't push it all the way through. Wrap the thread around the needle enough times so the wraps are the same length as the stitch will be, you can flip the needle down to check.
Using your thumb to hold the wraps in place, pull the needle back slightly so you can push the tip of the needle through the fabric at the end point. Pull the excess thread on the top of the fabric through to the back then pull the needle through carefully to complete the stitch.
In both these examples below, the bullion knot has been used as an isolated stitch - in combination with other stitches and on its own.
Want to try this stitch? It’s one of the stitches I suggest in my heart stitch sampler kit and my floral stitch sampler kit.


Enjoyed this blog post? I share embroidery tips and a free embroidery pattern in my monthly newsletter. Sign up here to receive the newsletter on the 1st of each the month.