

Jacobean couching is a stitch that originated in the 17th Century and requires precision and time to get both the laid down threads and the cross stitches that couch them down lying evenly.
Start off by laying down the vertical threads evenly spaced across the area. (The closer together the threads the more couching you'll need to do.)
To help get each stitch straight lie the thread on top of the felt and get the correct angle before you complete the stitch.
Now repeat the same process for laying down horizontal threads. The effect looks best if these are spaced out at the same distance as the vertical threads but play around with the spacing for different effects.
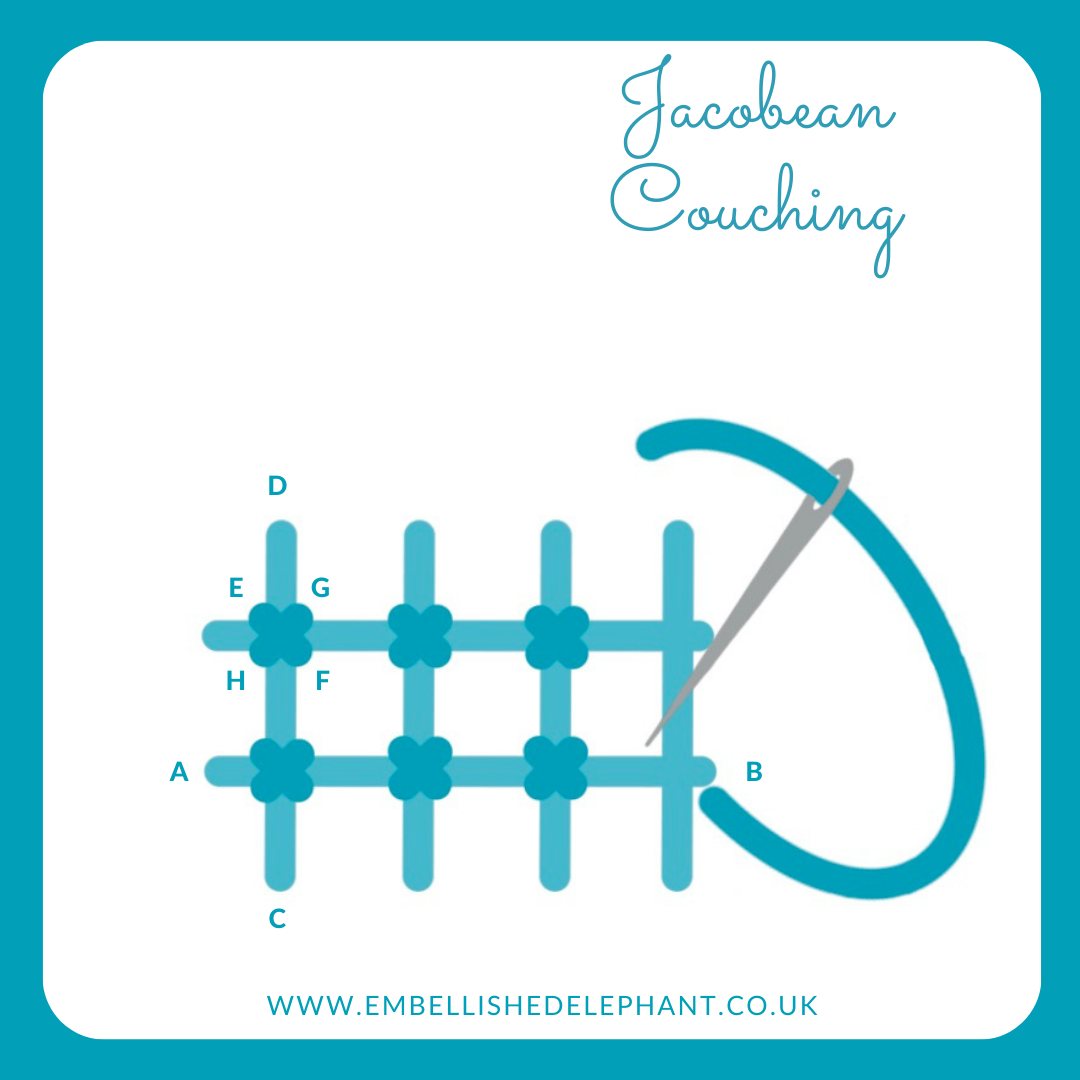
The intersection of each vertical and horizontal thread is where a small cross stitch will be added to secure or couch the threads.
To add these, start by bringing the needle up at the top left of the intersection and then taking it down over the threads at the bottom right to complete a half cross stitch. To complete the cross, work from top right to bottom left.
My preference is to complete all the half crosses first and then go back and complete the rest of the cross, but you can complete each cross before moving on. I'd suggest you always work the first part of the cross in the same direction for the best finish.
You can work methodically from one side to another. Alternatively work every few stitches on each row to tack the threads in place which helps maintain the even spacing, before going back and filling in the gaps.
This is a great stitch to experiment with different thread thicknesses and colour combinations. The sample below is stitched with one strand of embroidery floss and a single strand of metallic sewing thread.
Want to try this stitch? It’s one that I suggest using in my monstera kit.
Enjoyed this blog post? I share embroidery tips and a free embroidery pattern in my monthly newsletter. Sign up here to receive the newsletter on the 1st of each the month.