• Home
  • Shop
  • Stitch Showcase
  • Embroidery tips
  • Freebies
  • About
  • Contact
Menu

Embellished Elephant

  • Home
  • Shop
  • Stitch Showcase
  • Embroidery tips
  • Freebies
  • About
  • Contact
A pink background with a hand holding a knot in the end of a thread to the left hand side. Overlayed is a blue square with the text how to create a quilters knot

How to create a quilters knot

March 16, 2022

I used to create a knot at the end of a thread by taking a few centimetres at the end, folding it over into a loop and then knotting that to get a big enough knot. It used up quite a lot of thread and left me with four ends that could be caught up in my subsequent stitching.

And then at a workshop someone demonstrated a quilters knot - it was like magic, so quick and simple and I’ve not looked back!

Traditionally it is used in quilting as it is small enough to pop through one layer of fabric but big enough to say put and not pop through the second layer therefore remaining hidden.

It’s a similar technique to the once used to create a French knot, just without the fabric.

A pink background with a close up of a hand holding a needle. White thread is wrapped around the needle three times

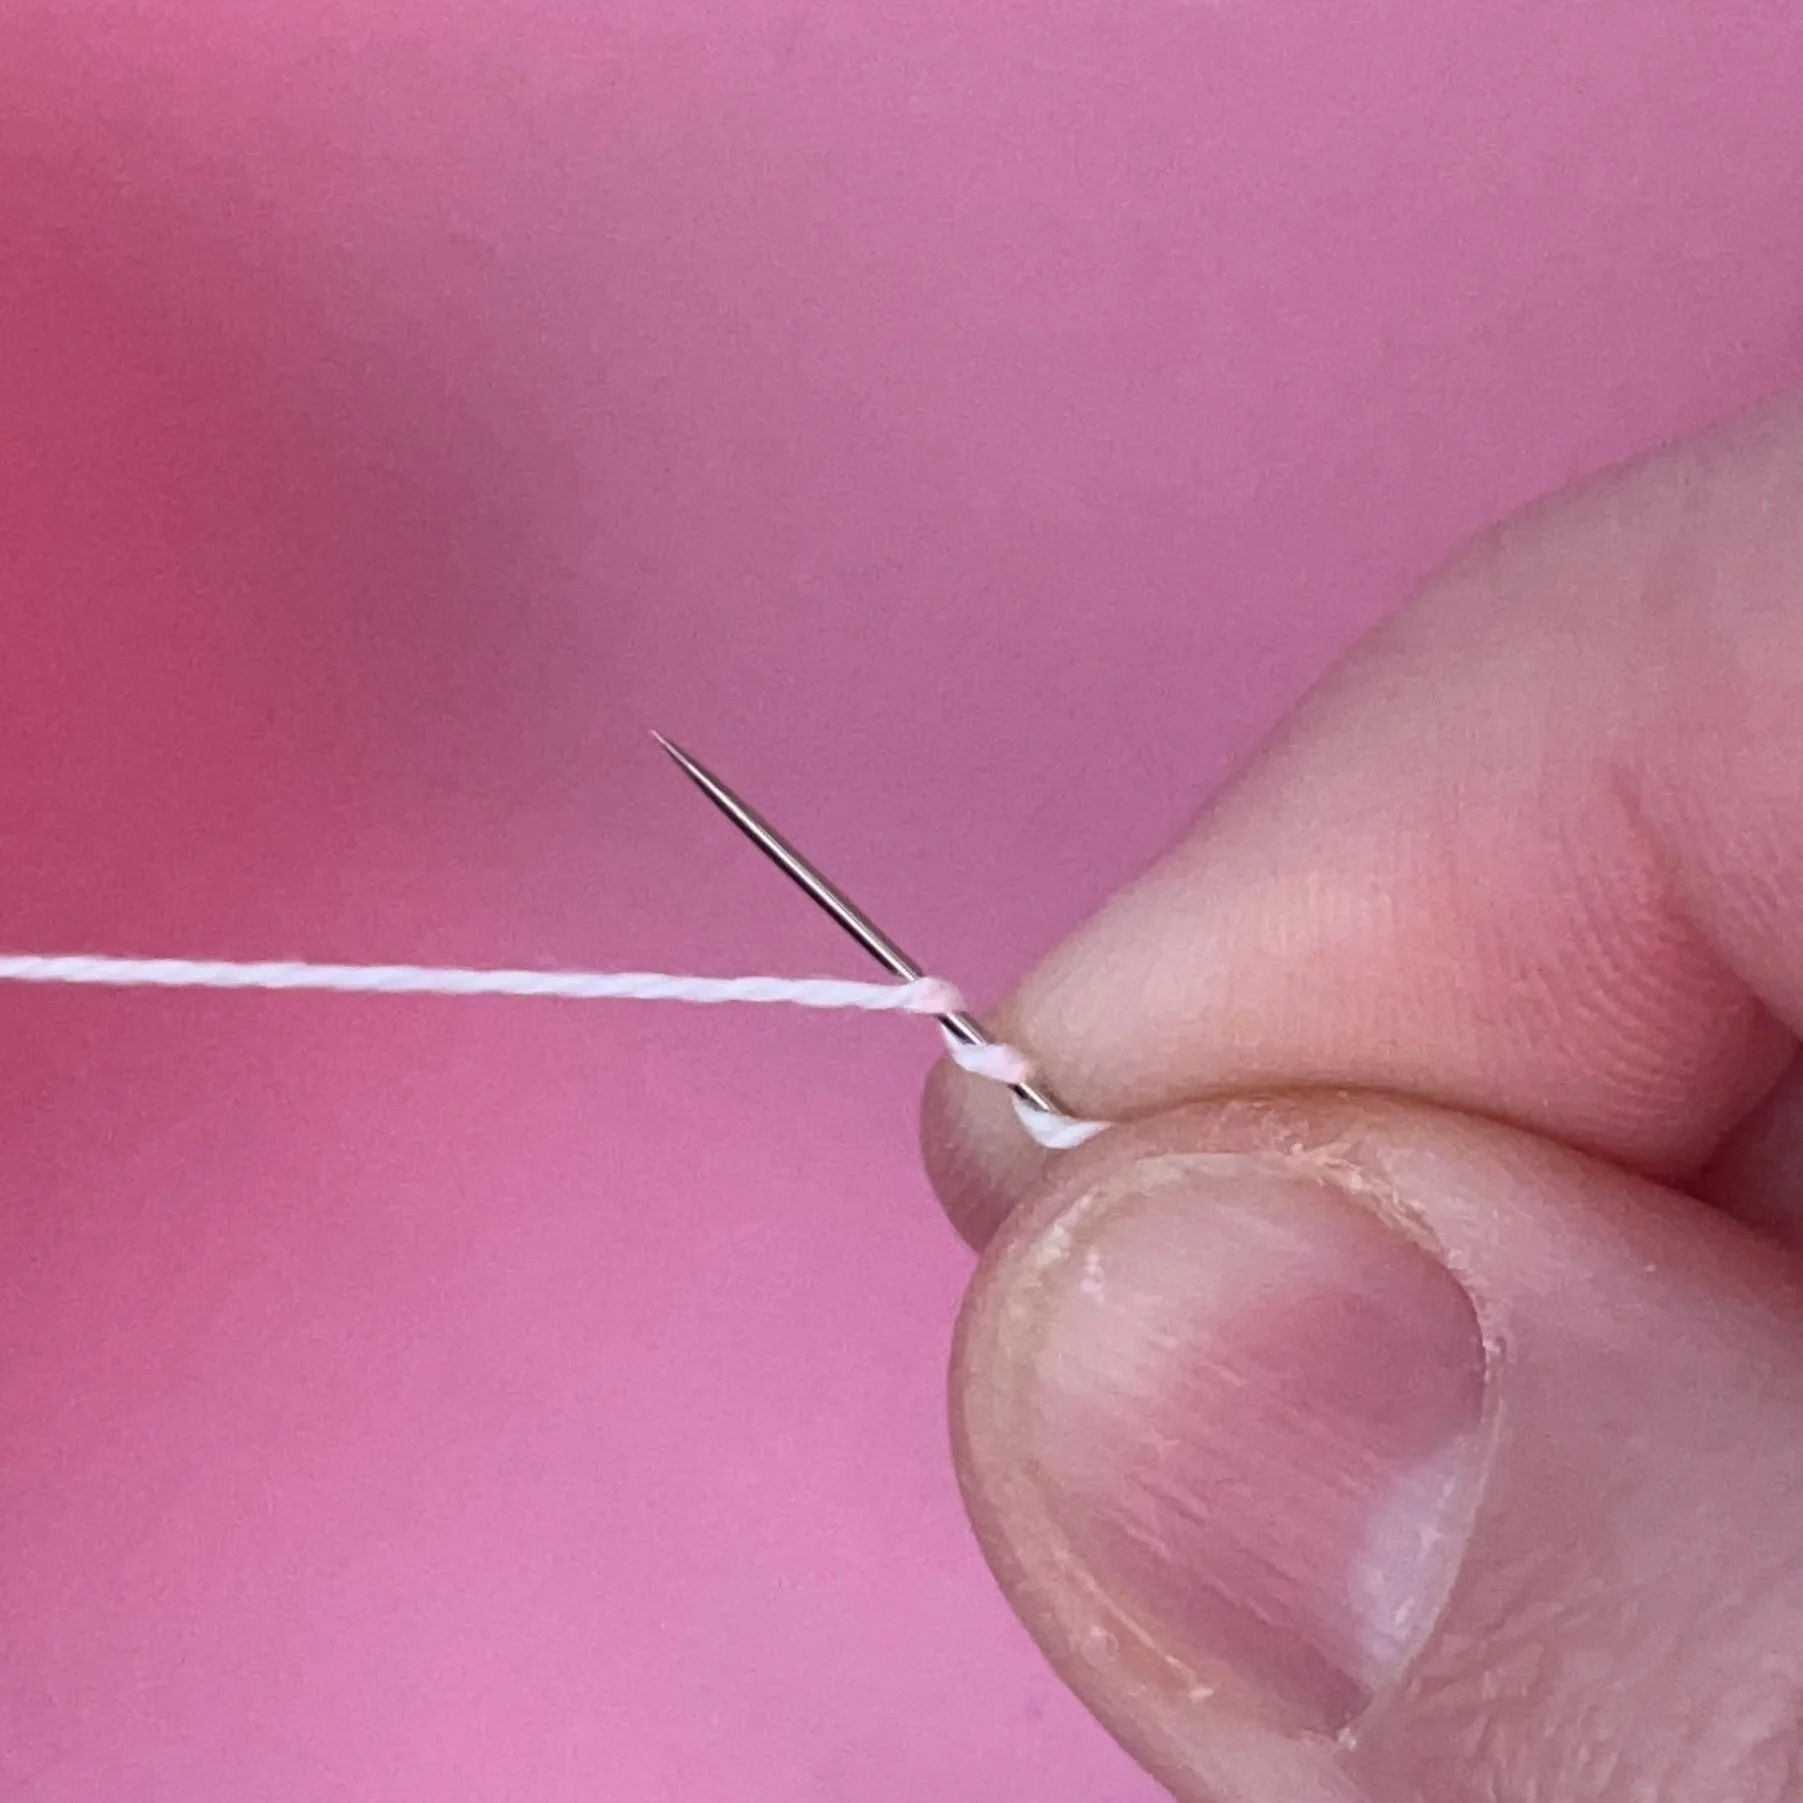
Wrap around the needle

Take the end of the thread (furthest from the needle) and wrap it round the needle a few times.

Use the thumb and finger of one hand to hold the end against the needle and your other hand to create the wraps.

The more wraps there are, the larger the knot. I find at least four are needed for most fabrics.
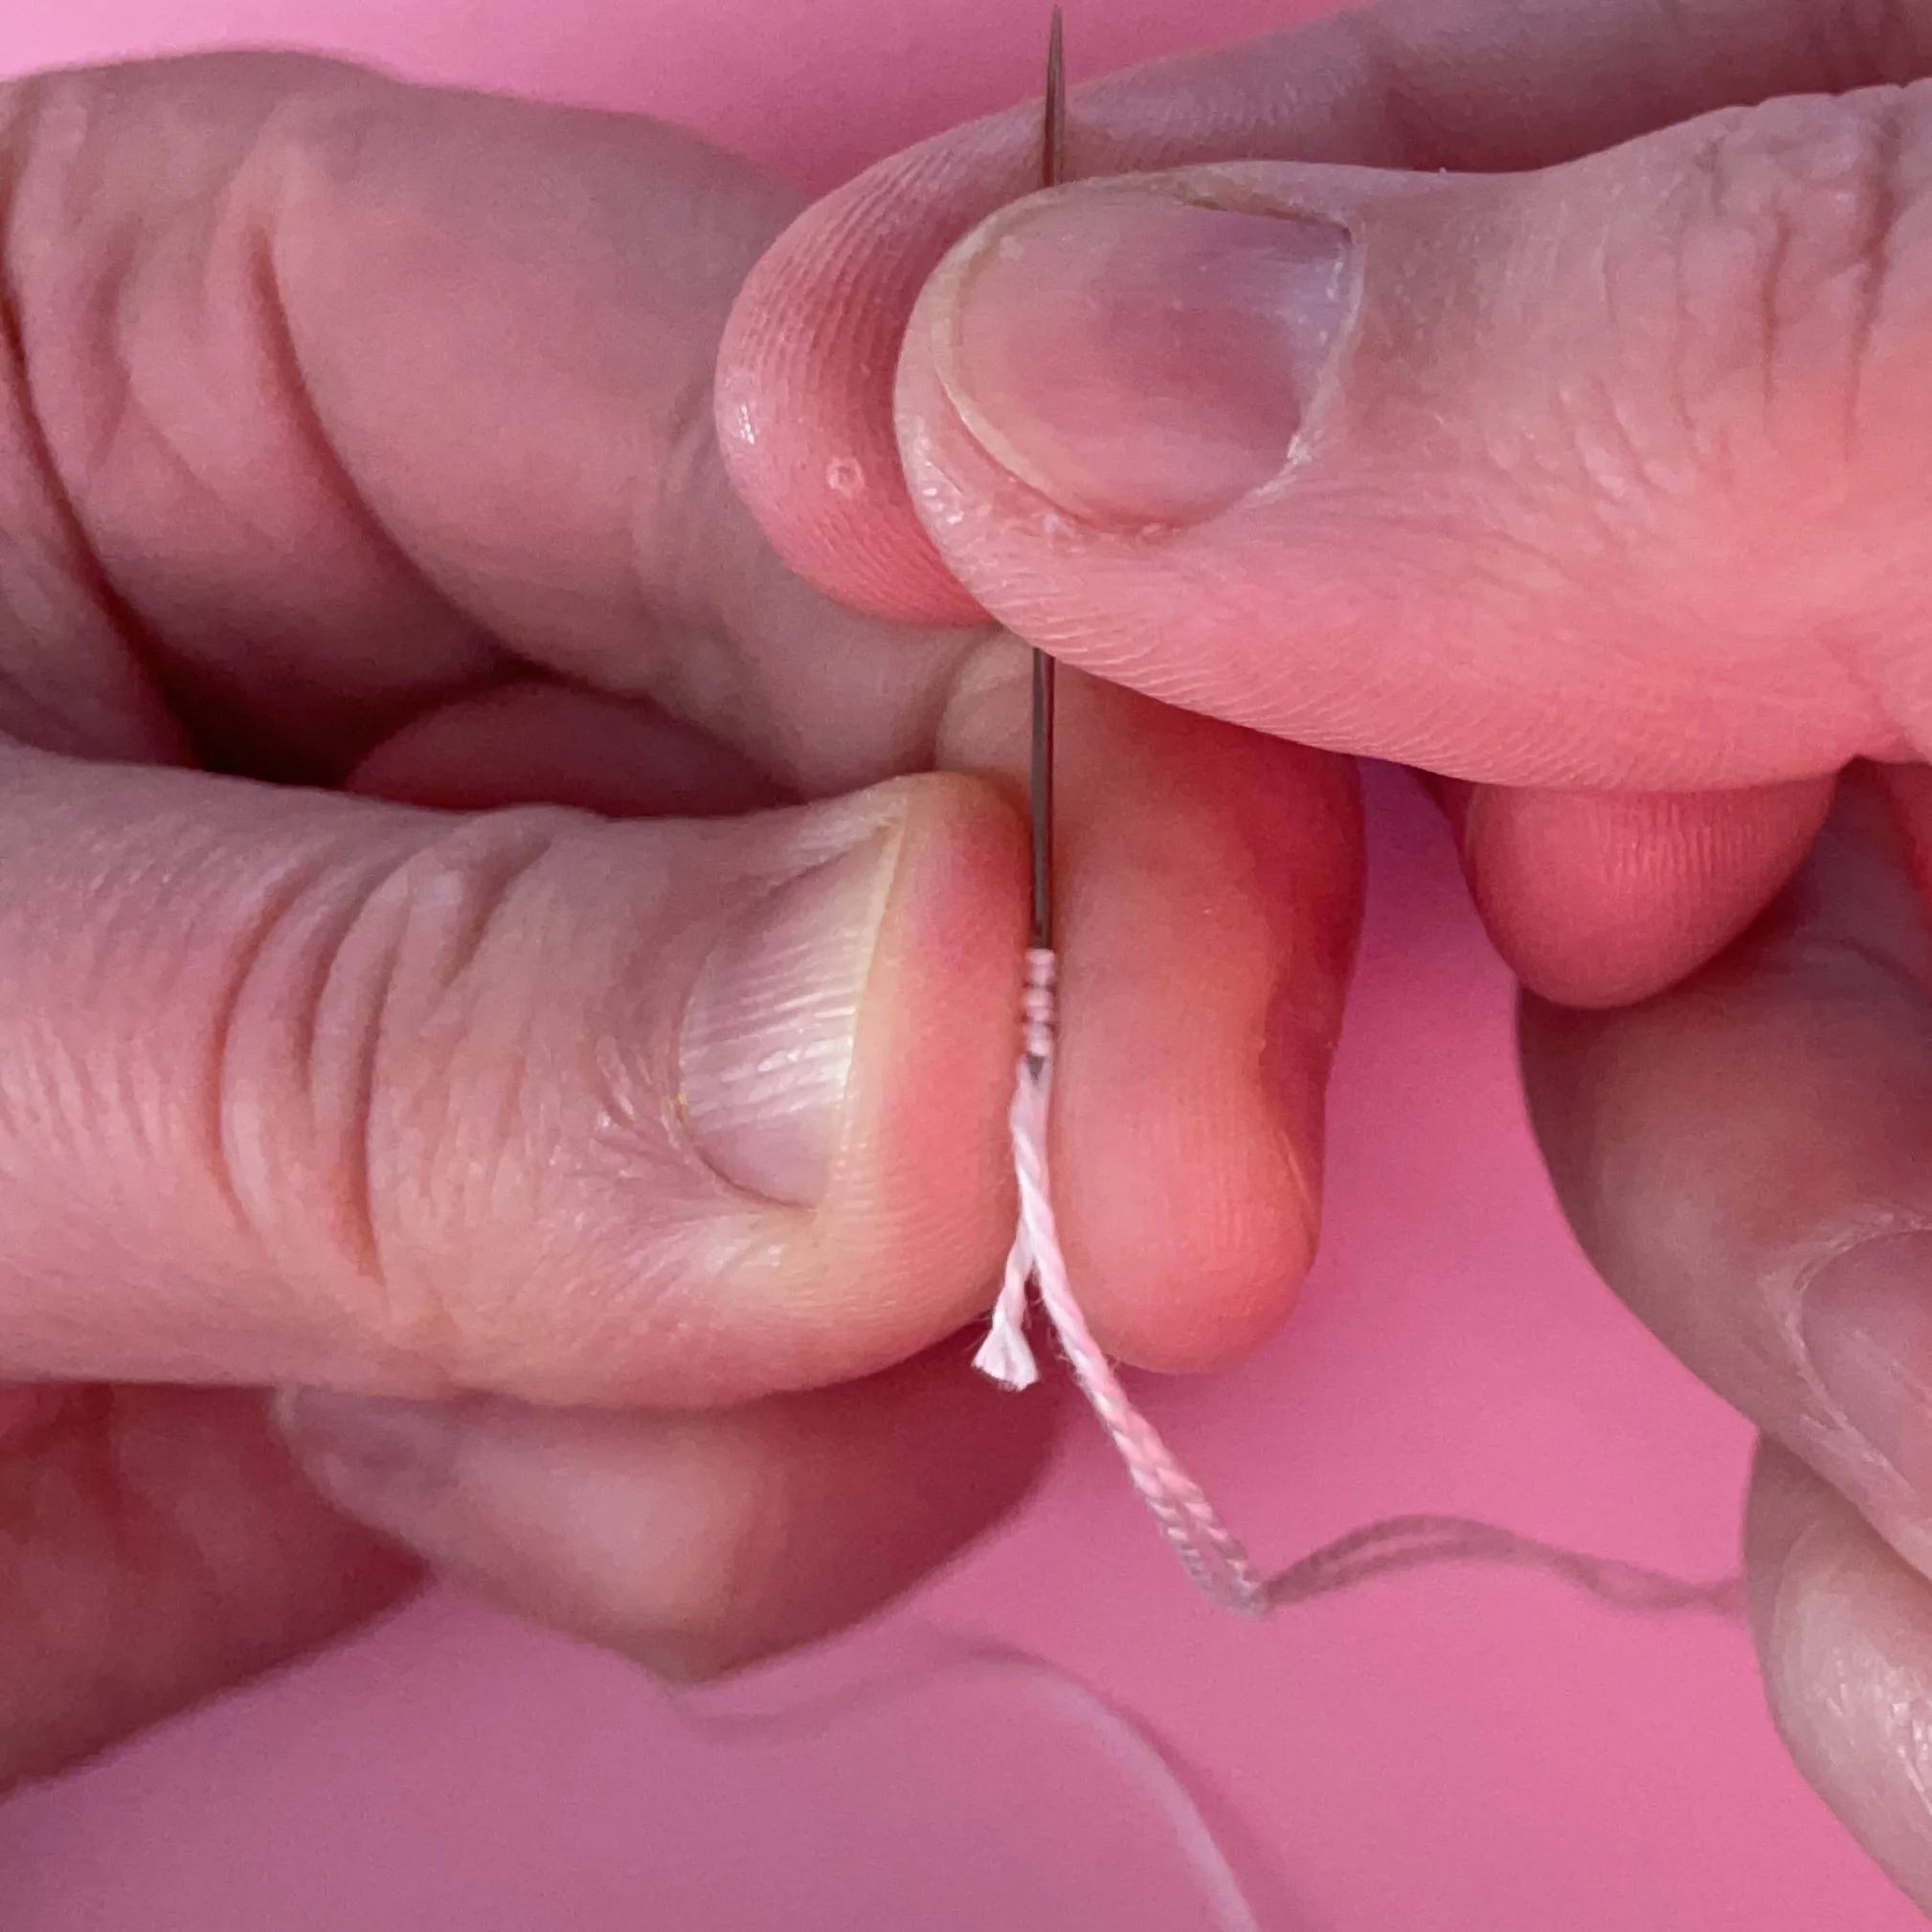
on a pink background a close up of two hands, the right is holding the top of a sewing needle while the left is pinching the thread that is wrapped around the needle

Move the wraps

With one hand holding the needle, use the other to hold the wraps together. Then carefully move the wraps down the needle, over the eye and down to the end of the thread.
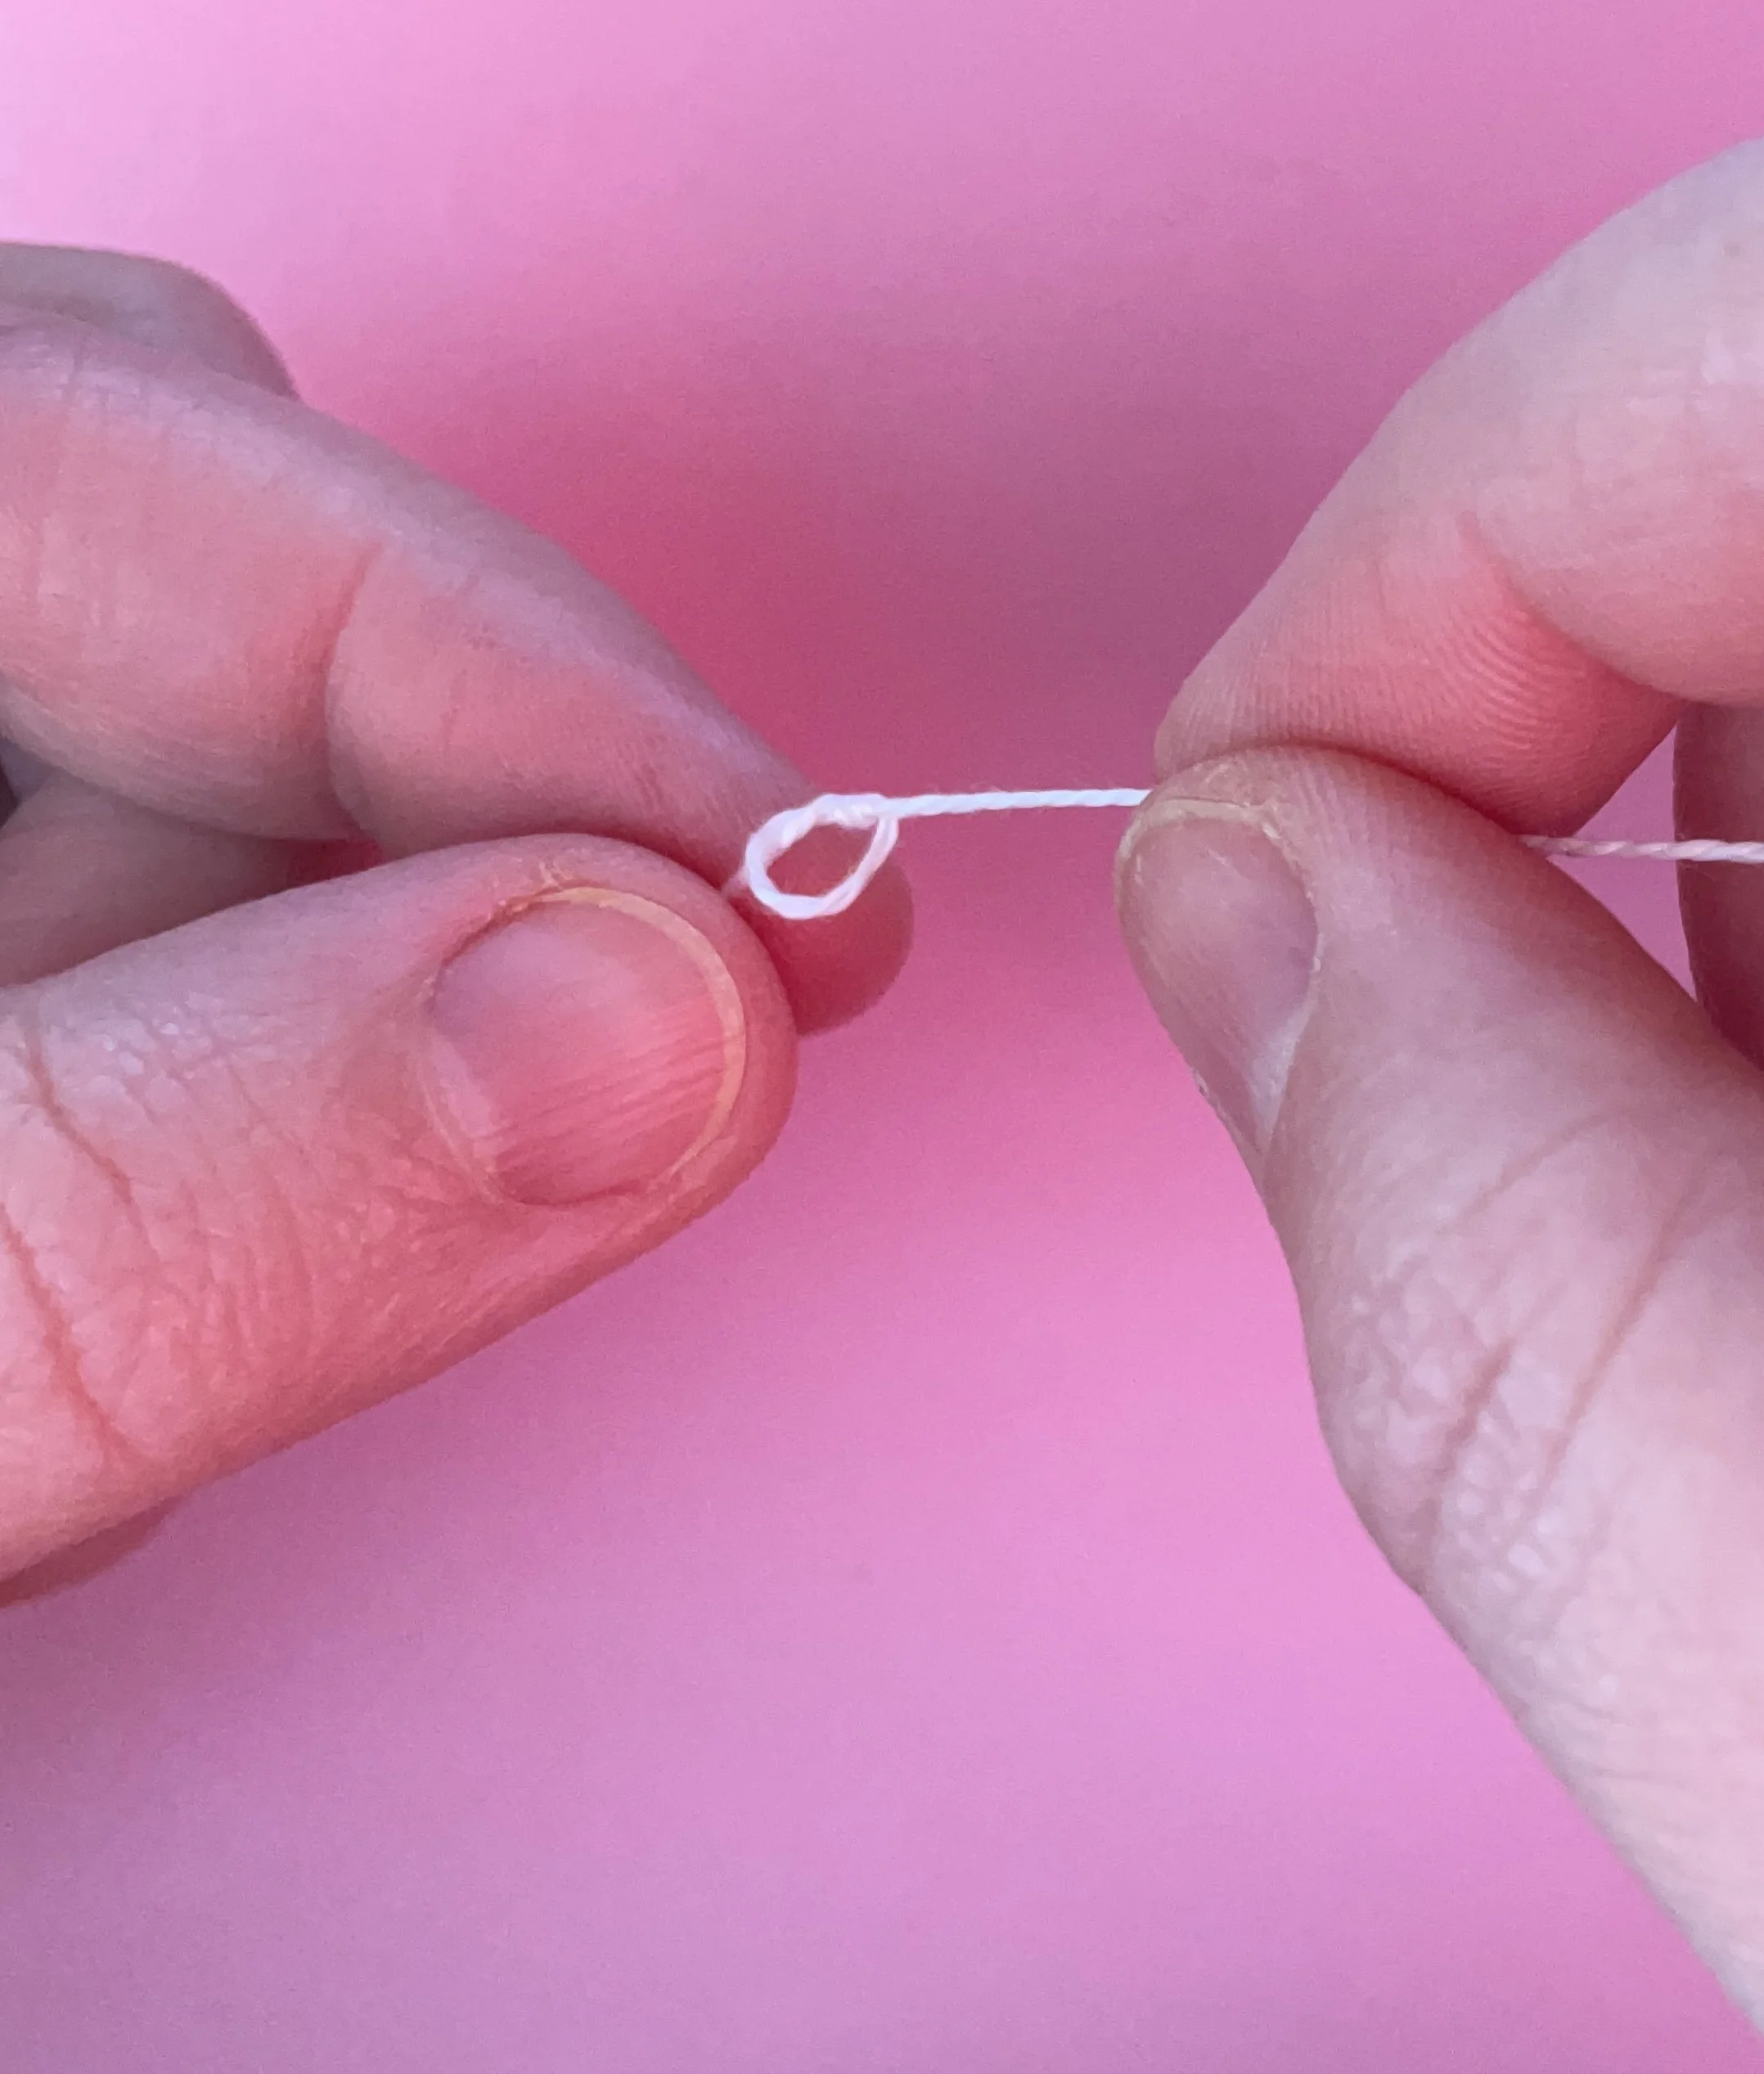
On a pink background a close up of two hands holding a white thread with a loop about to be pulled tight to create a knot

Pull the knot tight

When the wraps reach the end of the thread, pull them tight and they will form a knot.

Want to practice your quilters knots? Then head over to my shop and browse the kits I have on offer and before you know it you’ll be knotting and stitching like a pro!

Enjoyed this blog post? I share embroidery tips and a free embroidery pattern in my monthly newsletter. Sign up here to receive the newsletter on the 1st of each the month.

In tips 3 Tags knots
Comment

Tags

  • About me
  • Artists/Designers
  • Basics
  • Christmas
  • colour
  • Couching Stitch
  • Fabric
  • Filling Stitch
  • Finishing
  • Hoops
  • Isolated Stitch
  • Line Stitch
  • London
  • My Makes
  • Needles
  • Stitch Showcase
  • Texture Stitch
  • Thread
  • Transfer
  • Travel

Latest Posts

Featured
May 1, 2025
How to manage your backlog of craft projects
May 1, 2025
May 1, 2025
Apr 1, 2025
What to do if you don't like what you've stitched
Apr 1, 2025
Apr 1, 2025
Feb 15, 2025
How to decide which embroidery stitch to use
Feb 15, 2025
Feb 15, 2025
Feb 1, 2025
Focus on stitches for flowers
Feb 1, 2025
Feb 1, 2025
Jan 1, 2025
Focus on stitches for leaves
Jan 1, 2025
Jan 1, 2025
Nov 1, 2024
Stitch Showcase: Six-pointed star stitch
Nov 1, 2024
Nov 1, 2024
Oct 1, 2024
Focus on transferring or tracing patterns
Oct 1, 2024
Oct 1, 2024
Sep 1, 2024
Focus on hoops
Sep 1, 2024
Sep 1, 2024
Aug 1, 2024
A focus on needles
Aug 1, 2024
Aug 1, 2024
Jul 1, 2024
Focus on threads
Jul 1, 2024
Jul 1, 2024

Home — Shop — Stockists — Wholesale — Portfolio — Contact — Reviews — Policies — FAQs