
When I first started embroidering I used patterns from books and designs I found for free or purchased which I downloaded and printed. However, in order to know what elements to stitch and where you need to transfer the pattern onto the fabric. This is one of the most challenging steps for a novice embroiderer so in this blog post I’ll walk you through how to go about transferring paper patterns onto fabric.
This method works best for thinner and lighter coloured fabrics, if the fabric is too dark or too thick then you’ll need to use another method of transfer such as carbon paper, tissue paper or water soluble paper (blog posts to come on these).
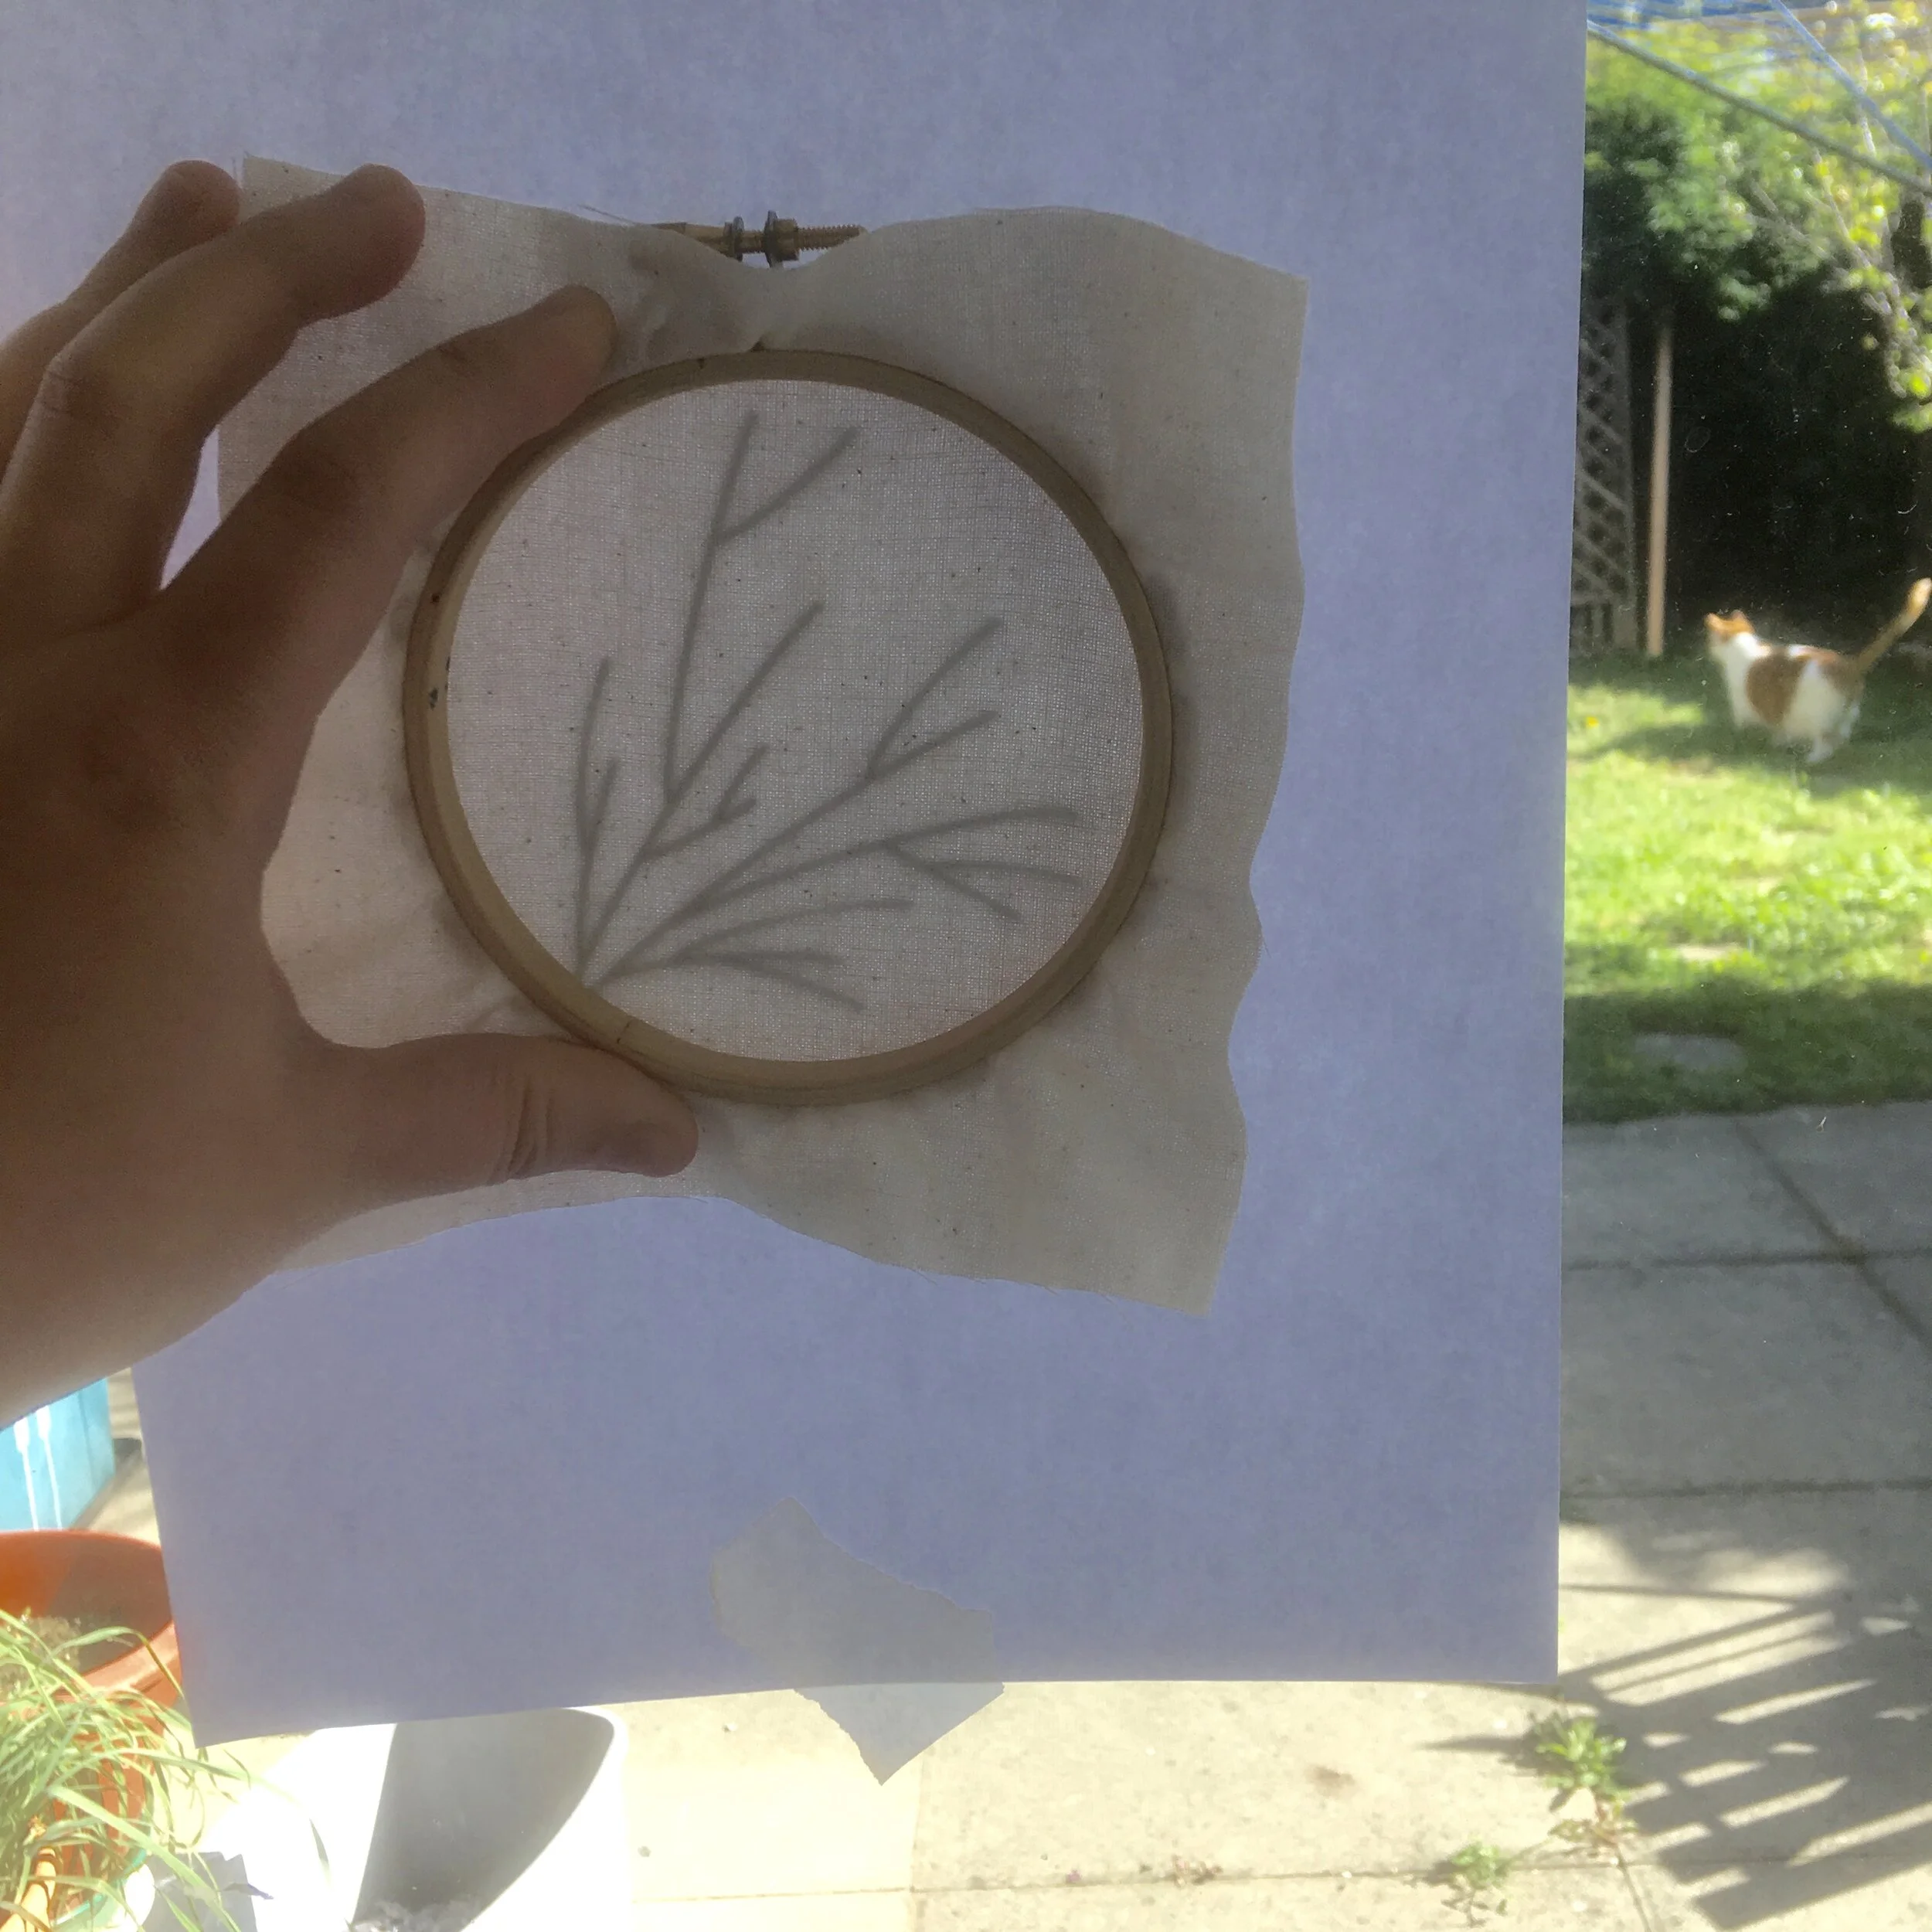
In order to transfer a paper pattern you need a source of light. There are two main options a light box (or light box app on a tablet device) and a window.
I’ll walk you through using a window, if you want more information on using a light box app on a tablet device head over to this blog post that takes you through this method (the only difference being you would just lay the paper pattern on top of a plain white screen in the app).
The benefit of using a window is that you can trace much larger patterns than you can on a tablet.
I recommend using an air, water or heat soluble pen for tracing, for more information about the different pens you can use for transferring patterns take a look at this blog post.
Start by making sure that you have the ‘right’ side of the fabric facing towards the inner hoop and stretching the fabric in the hoop as tight as possible
Tape the paper pattern to the window
Press the hoop up to the window and line it up with any guidelines on the pattern
Start by tracing the main elements
If you need to move the hoop to see whether you have missed anything use the main elements to help re-align the fabric on the pattern
Trace any smaller elements or details
Loosen the hoop and turn the fabric over so that the ‘right’ side is on the same side as the outer hoop
Enjoyed this blog post? I share embroidery tips and a free embroidery pattern in my monthly newsletter. Sign up here to receive the newsletter on the 1st of each the month.