• Home
  • Shop
  • Stitch Showcase
  • Embroidery tips
  • Freebies
  • About
  • Contact
Menu

Embellished Elephant

  • Home
  • Shop
  • Stitch Showcase
  • Embroidery tips
  • Freebies
  • About
  • Contact
An image of split stitch in light green used on dark green felt leaves. Overlaid is a blue square with white text saying - stitch showcase, split stitch, www.embellishedelephant.co.uk

Stitch Showcase: Split Stitch

October 28, 2020

When I first encounter split stitch I wasn’t a big fan but as I’ve used it in more projects it’s one I now love. At its basic level it is a backstitch with a bit of variation in where you bring up the needle to start each stitch. It’s a great stitch for any botanical based embroidery, so if you are a plant lover then this is one to practice.

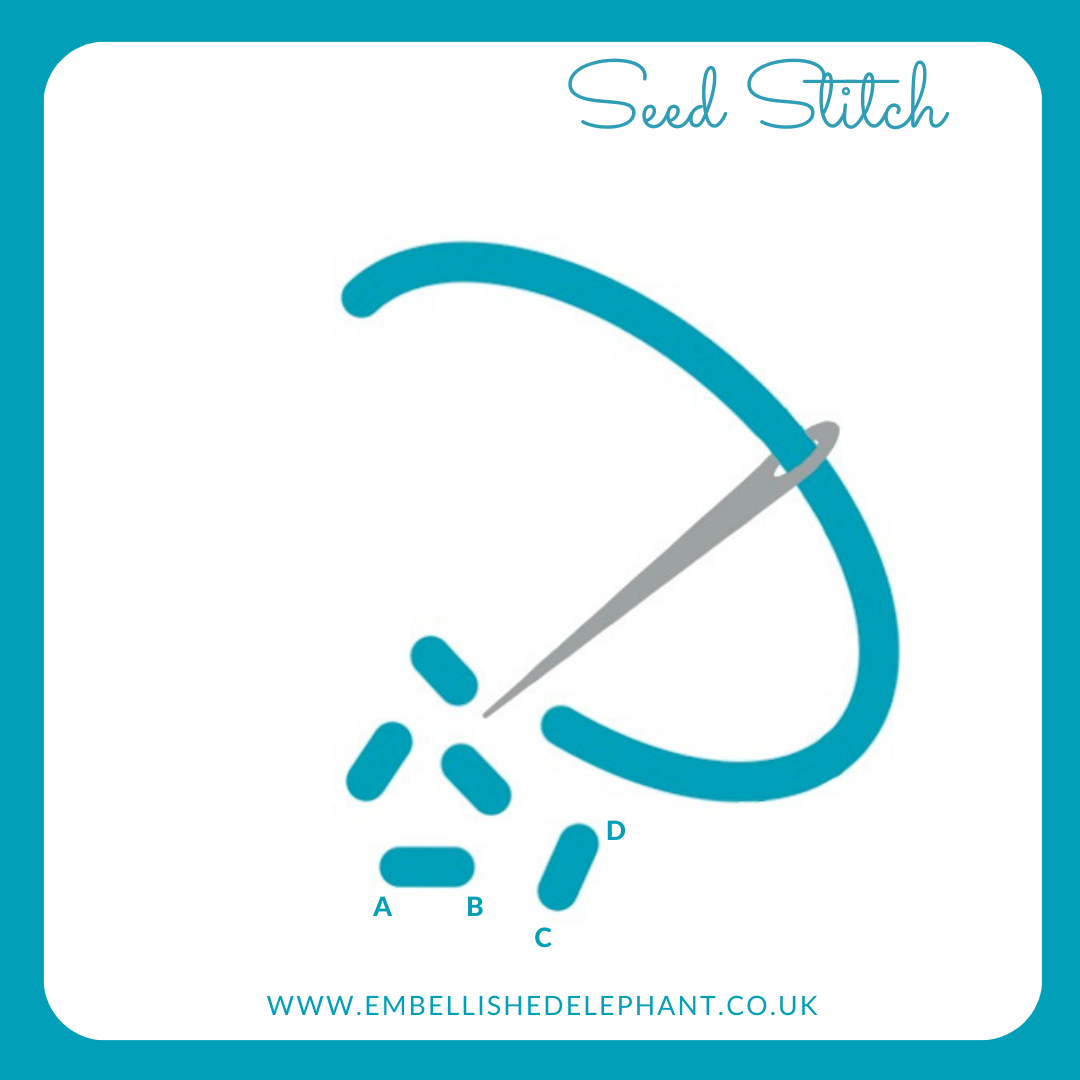
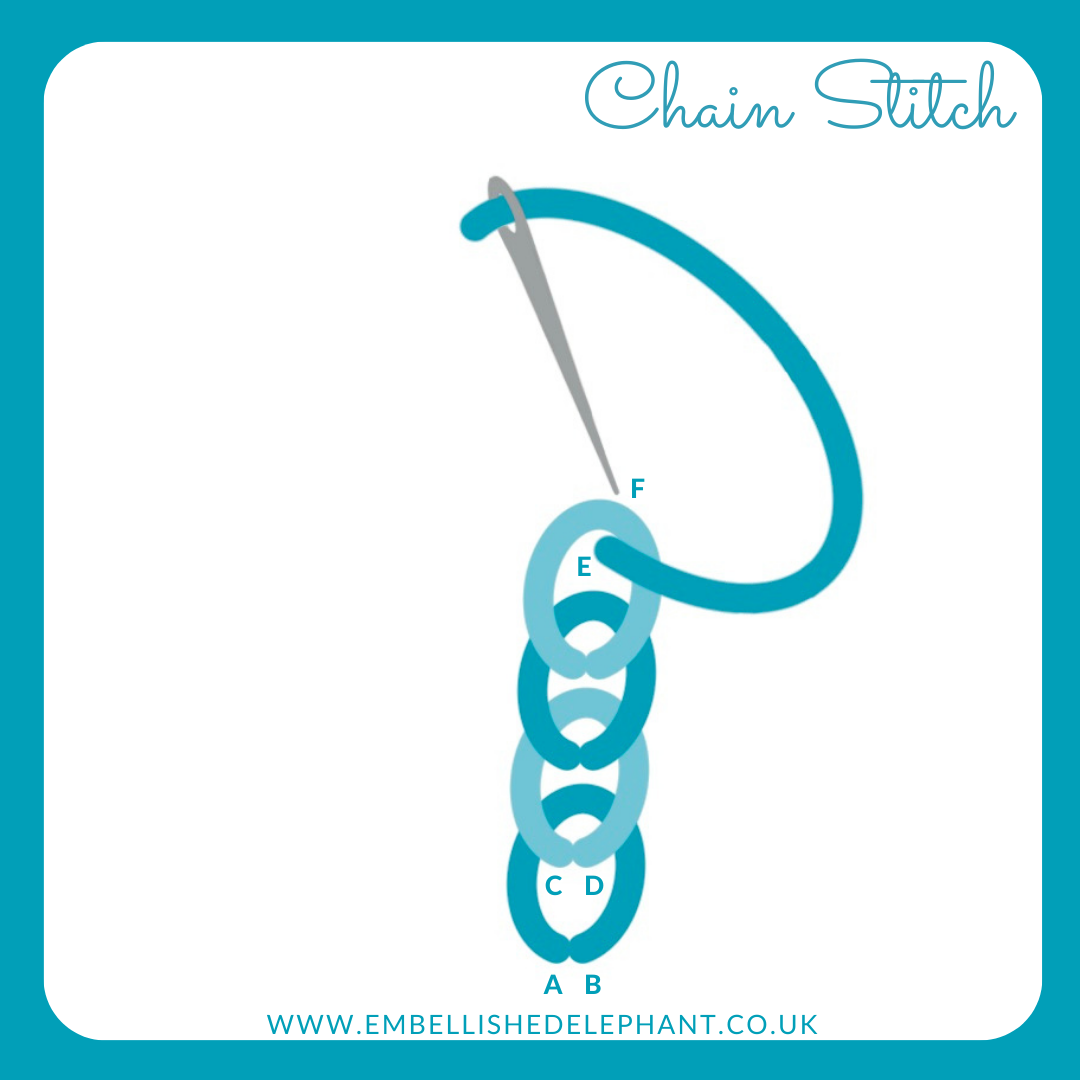
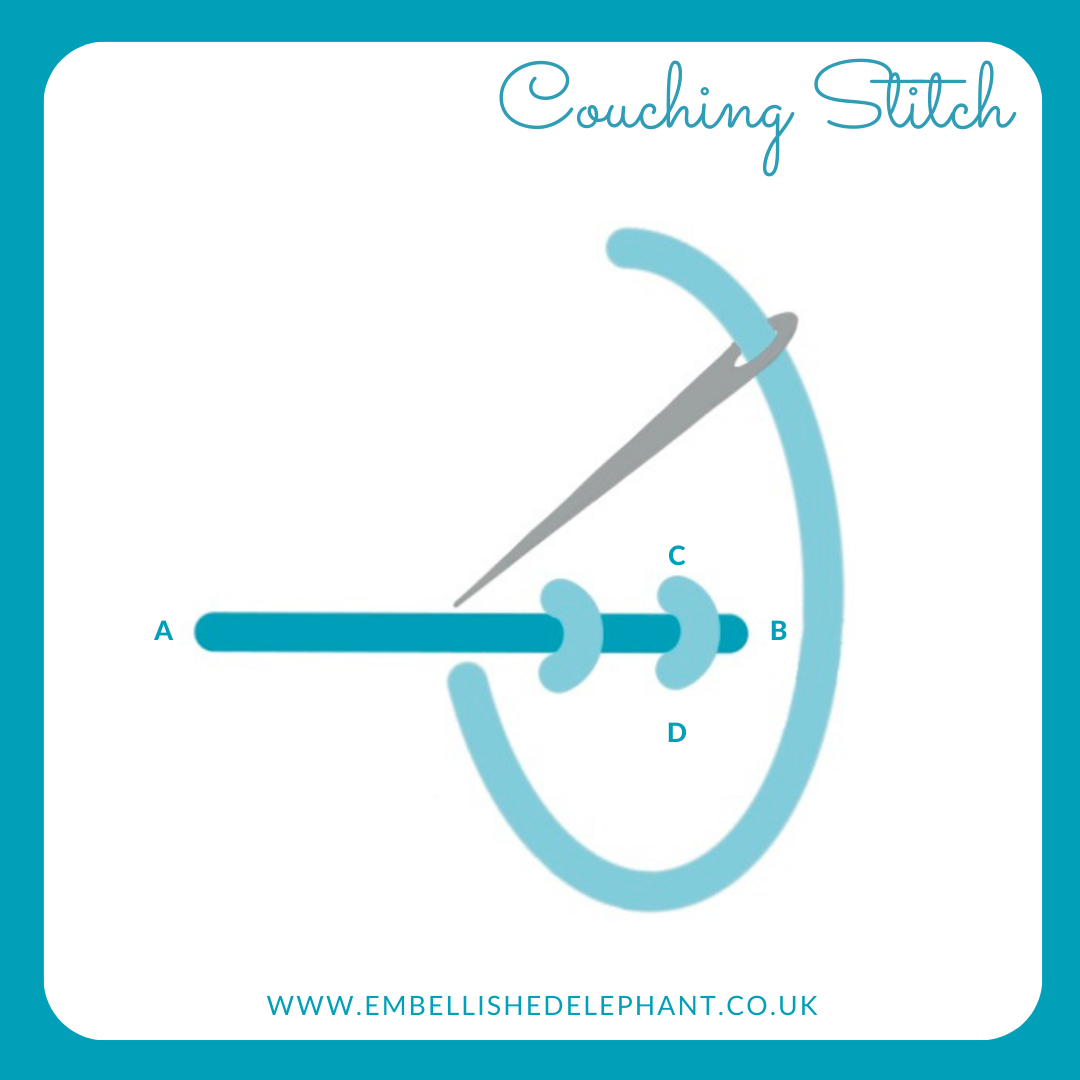
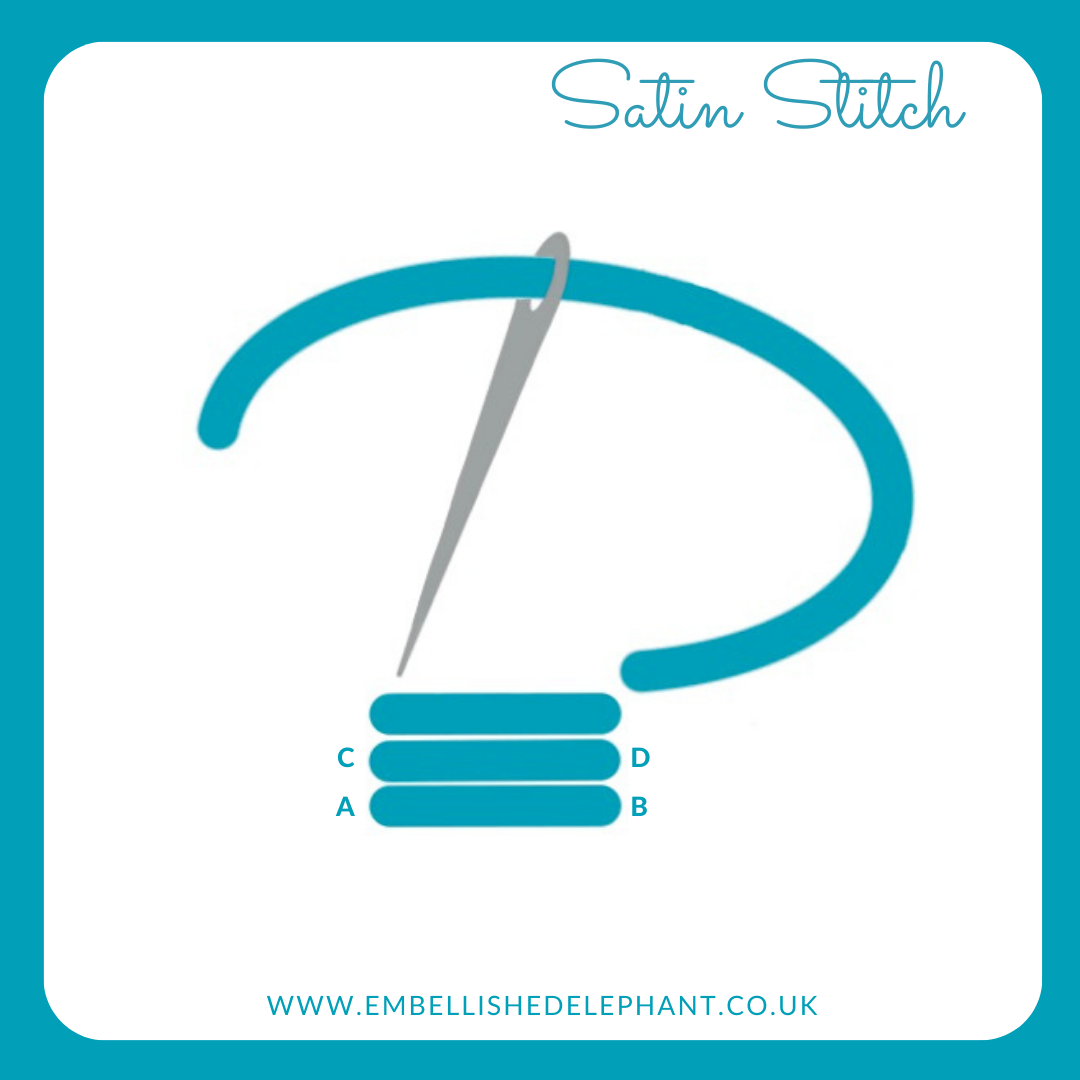
  • Create a stitch as if you were starting running or back stitch (A to B)

  • Then bring the needle back up through the fabric about 1mm along the stitch you just made (C)

  • Carefully poke the needle through the fabric and through the thread so that you 'split' the strand/strands evenly

  • Complete the stitch (D) making it the same length overall as the first stitch.

  • This method can be a bit tricky so an alternative method that I find a bit easier is to create the first stitch, then bring the needle up through the fabric at the point where you want the next stitch to end (D). Then poke it back down through the thread to split the strand/strands into two even parts (C).

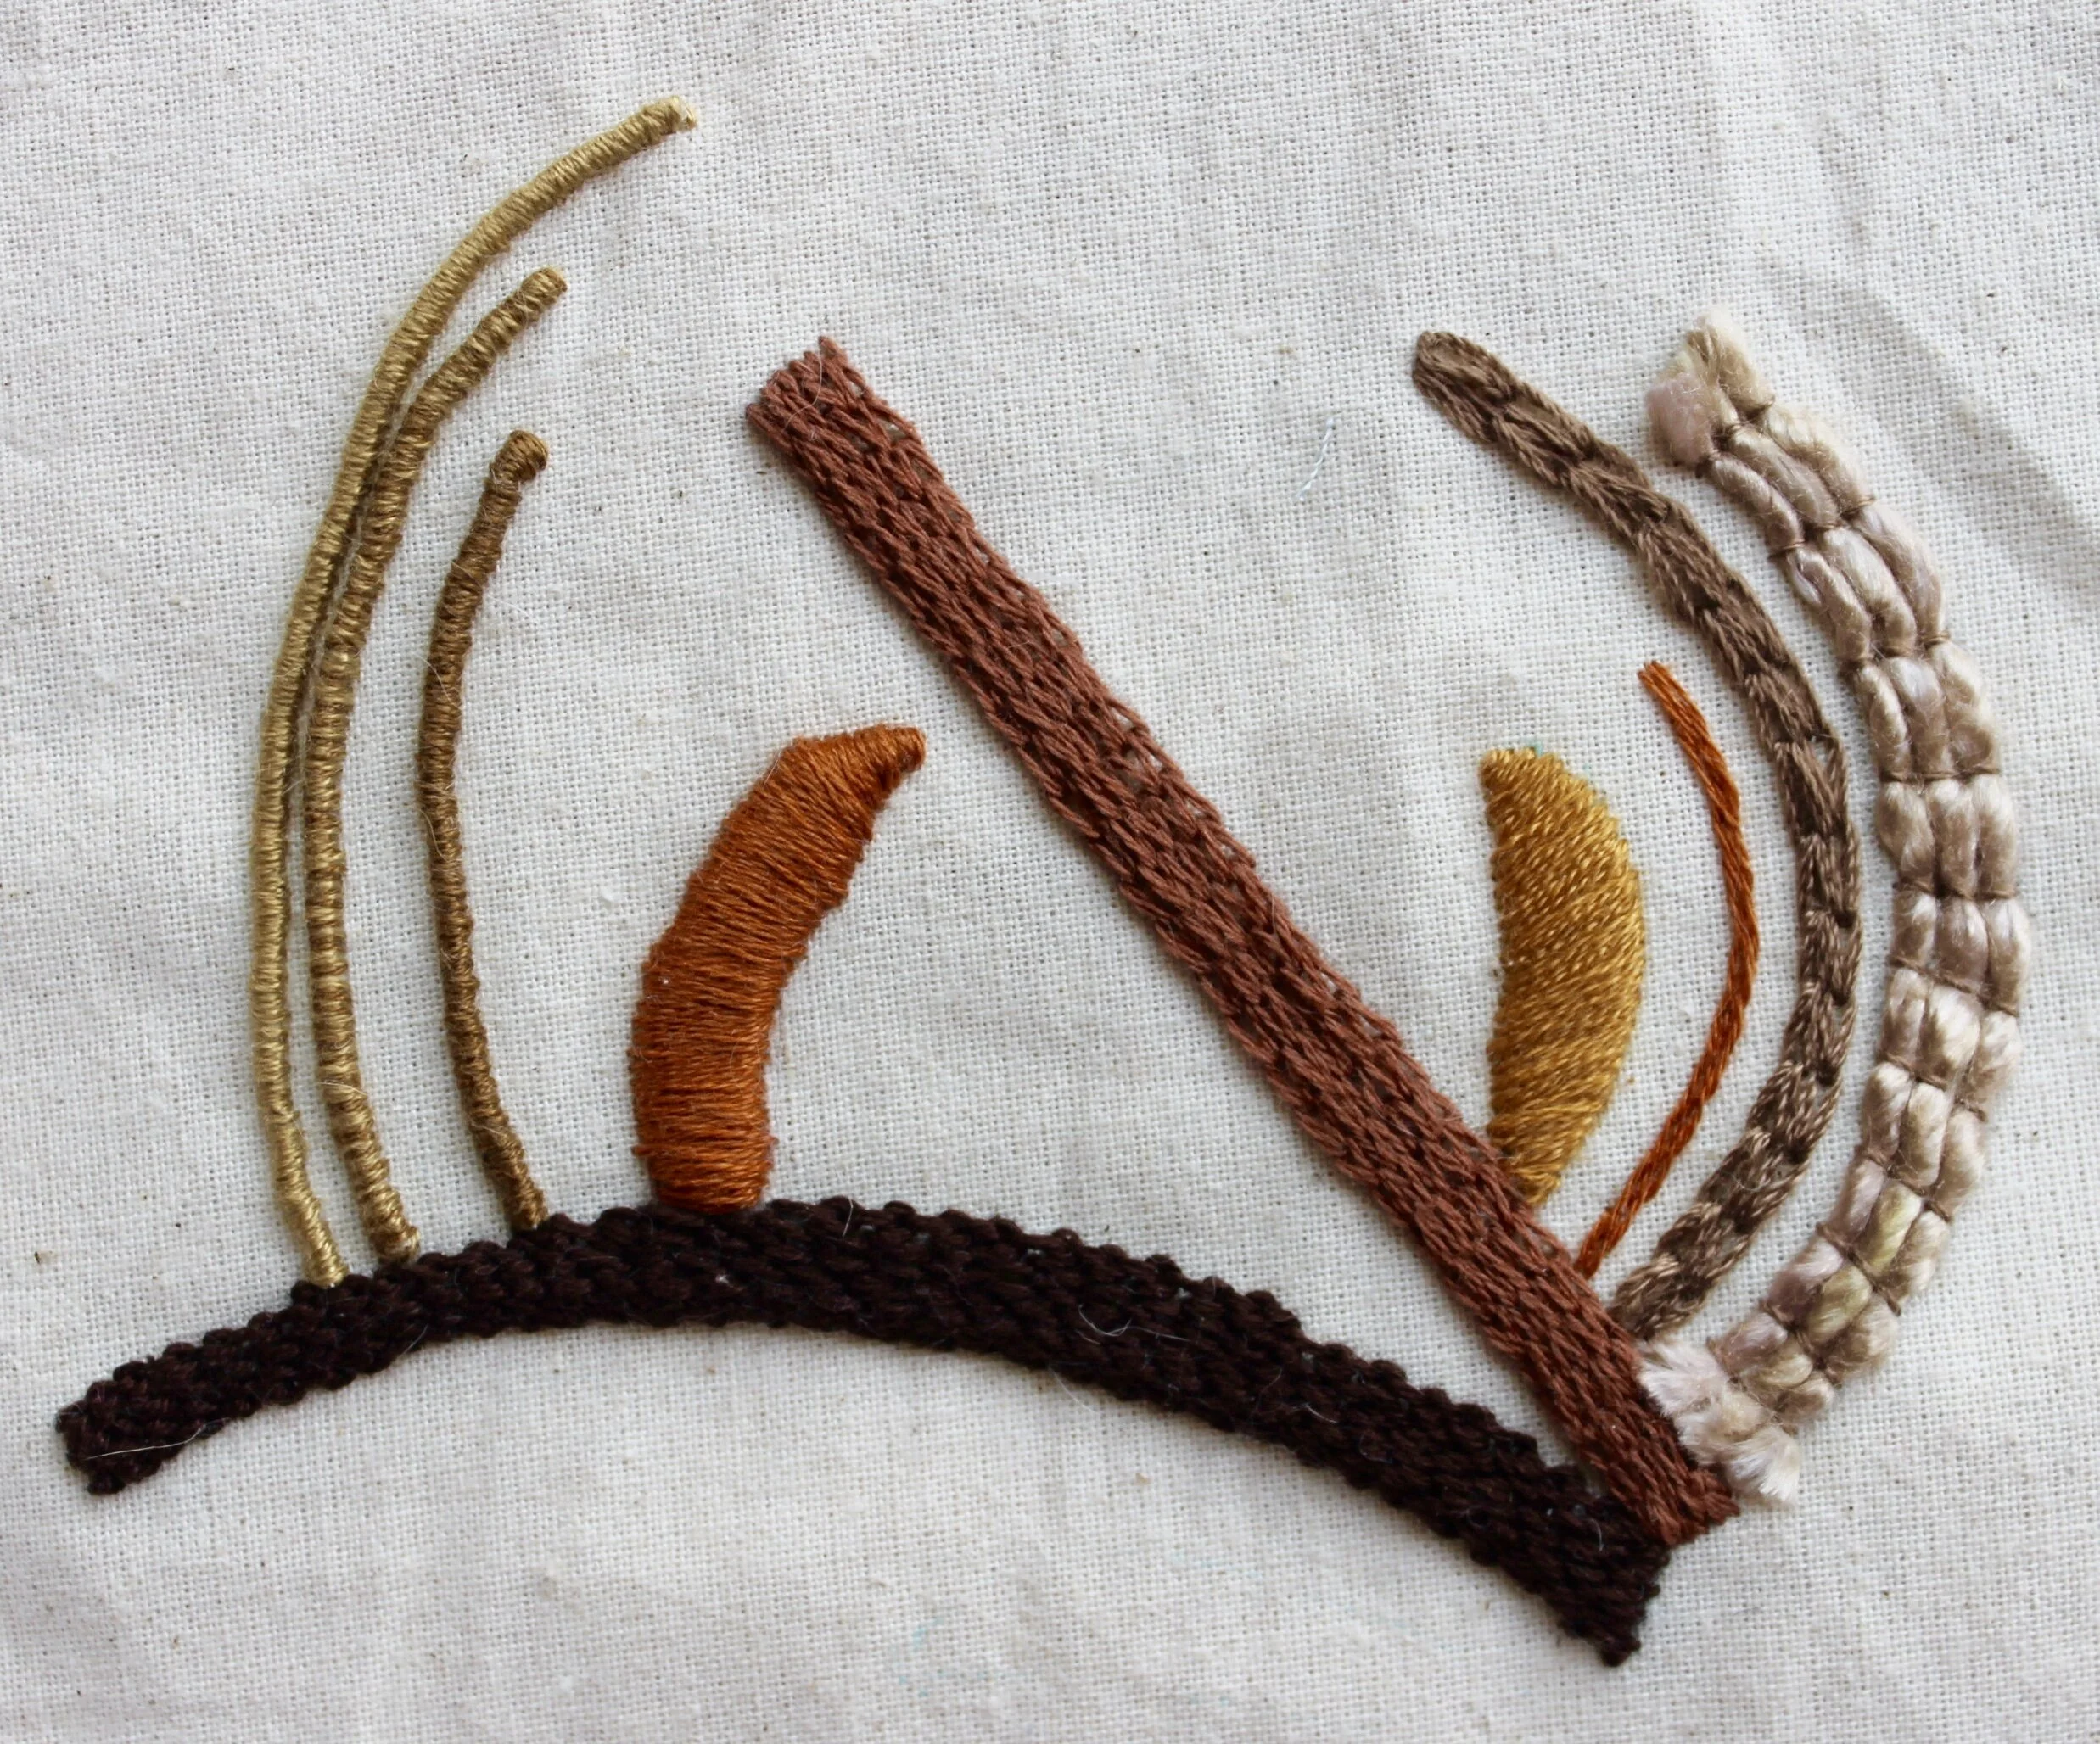
  • This stitch can be worked with just one strand of thread. If working with multiple strands it is best to have an even number otherwise there is a slightly lopsided split

French Knot, seed stitch, split stitch illustration.png

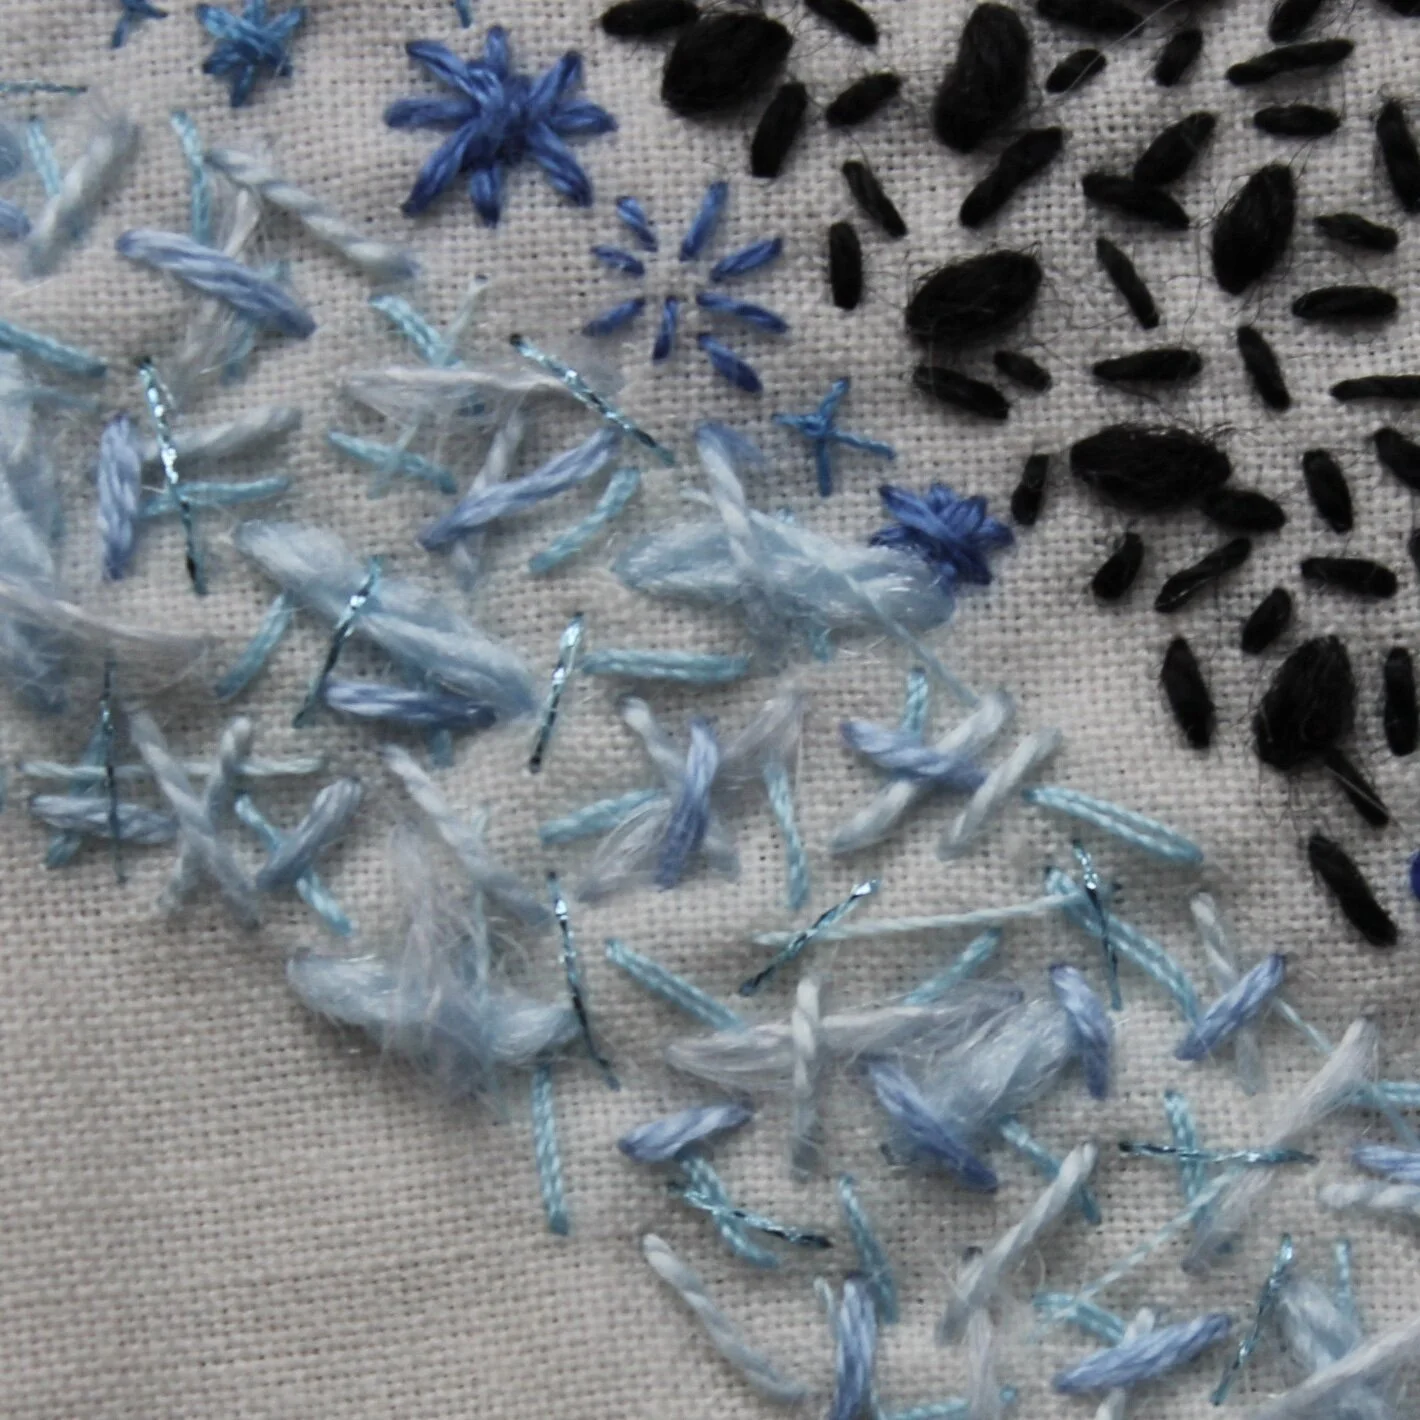
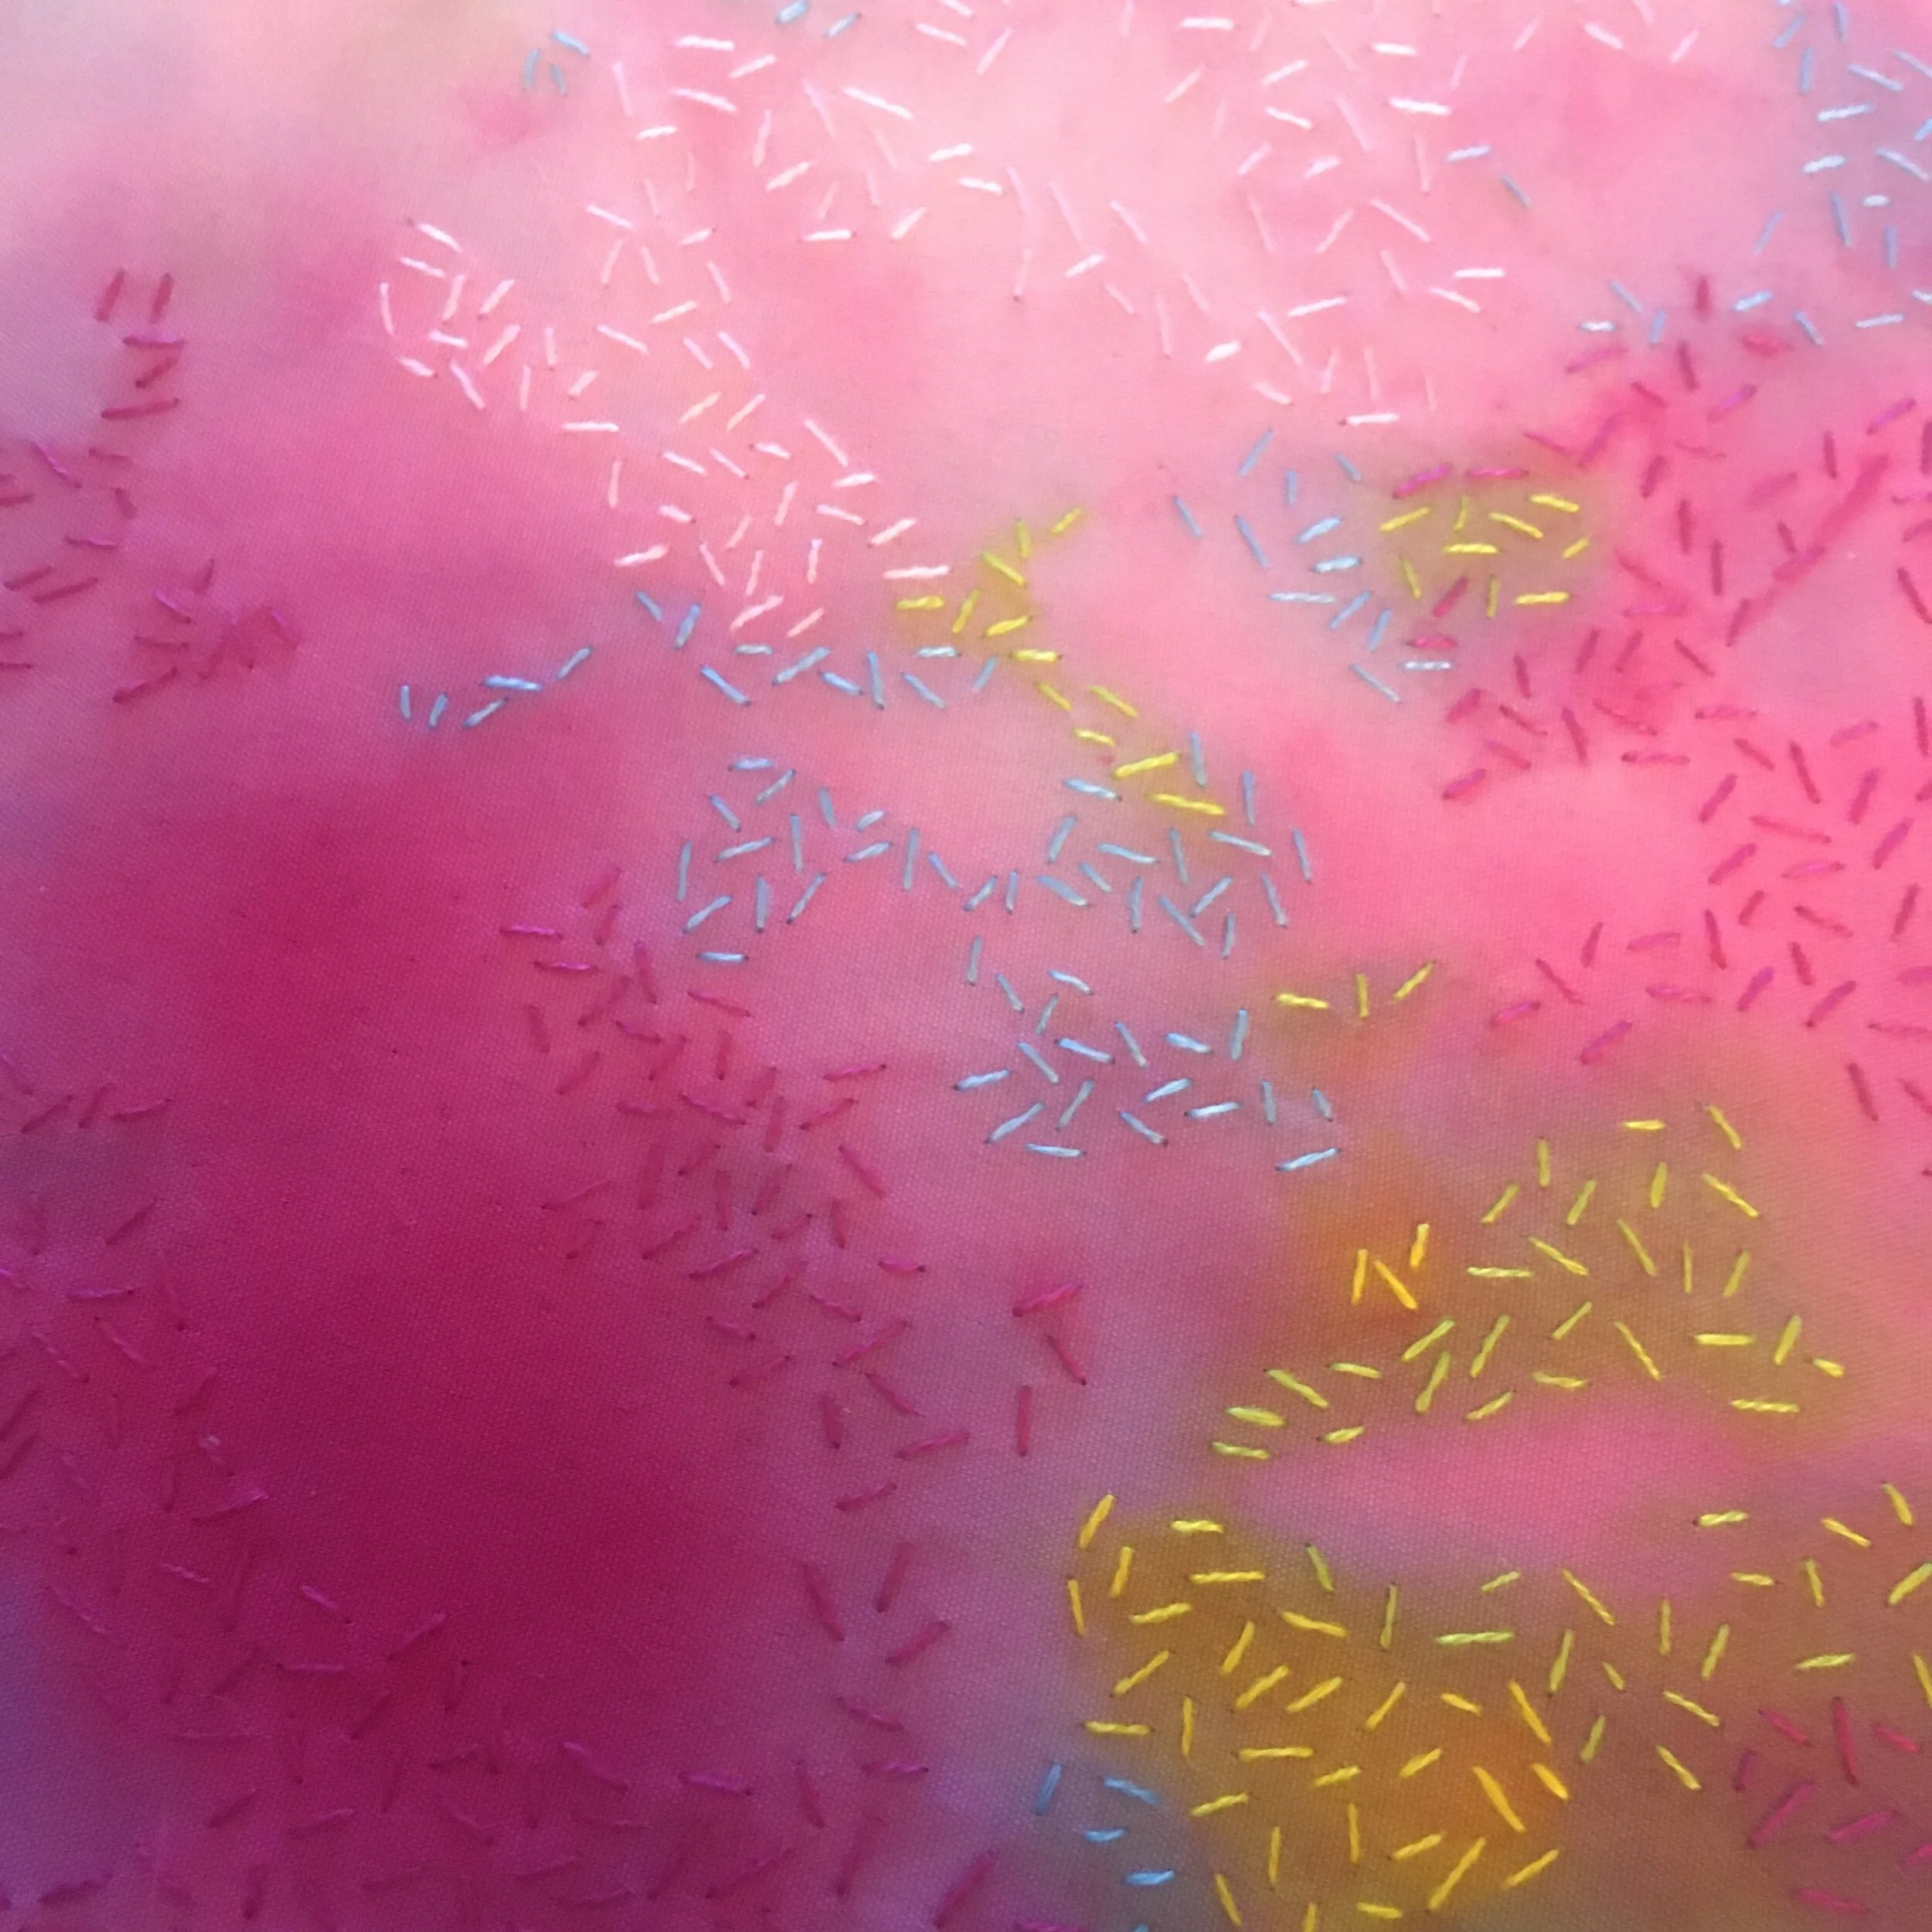
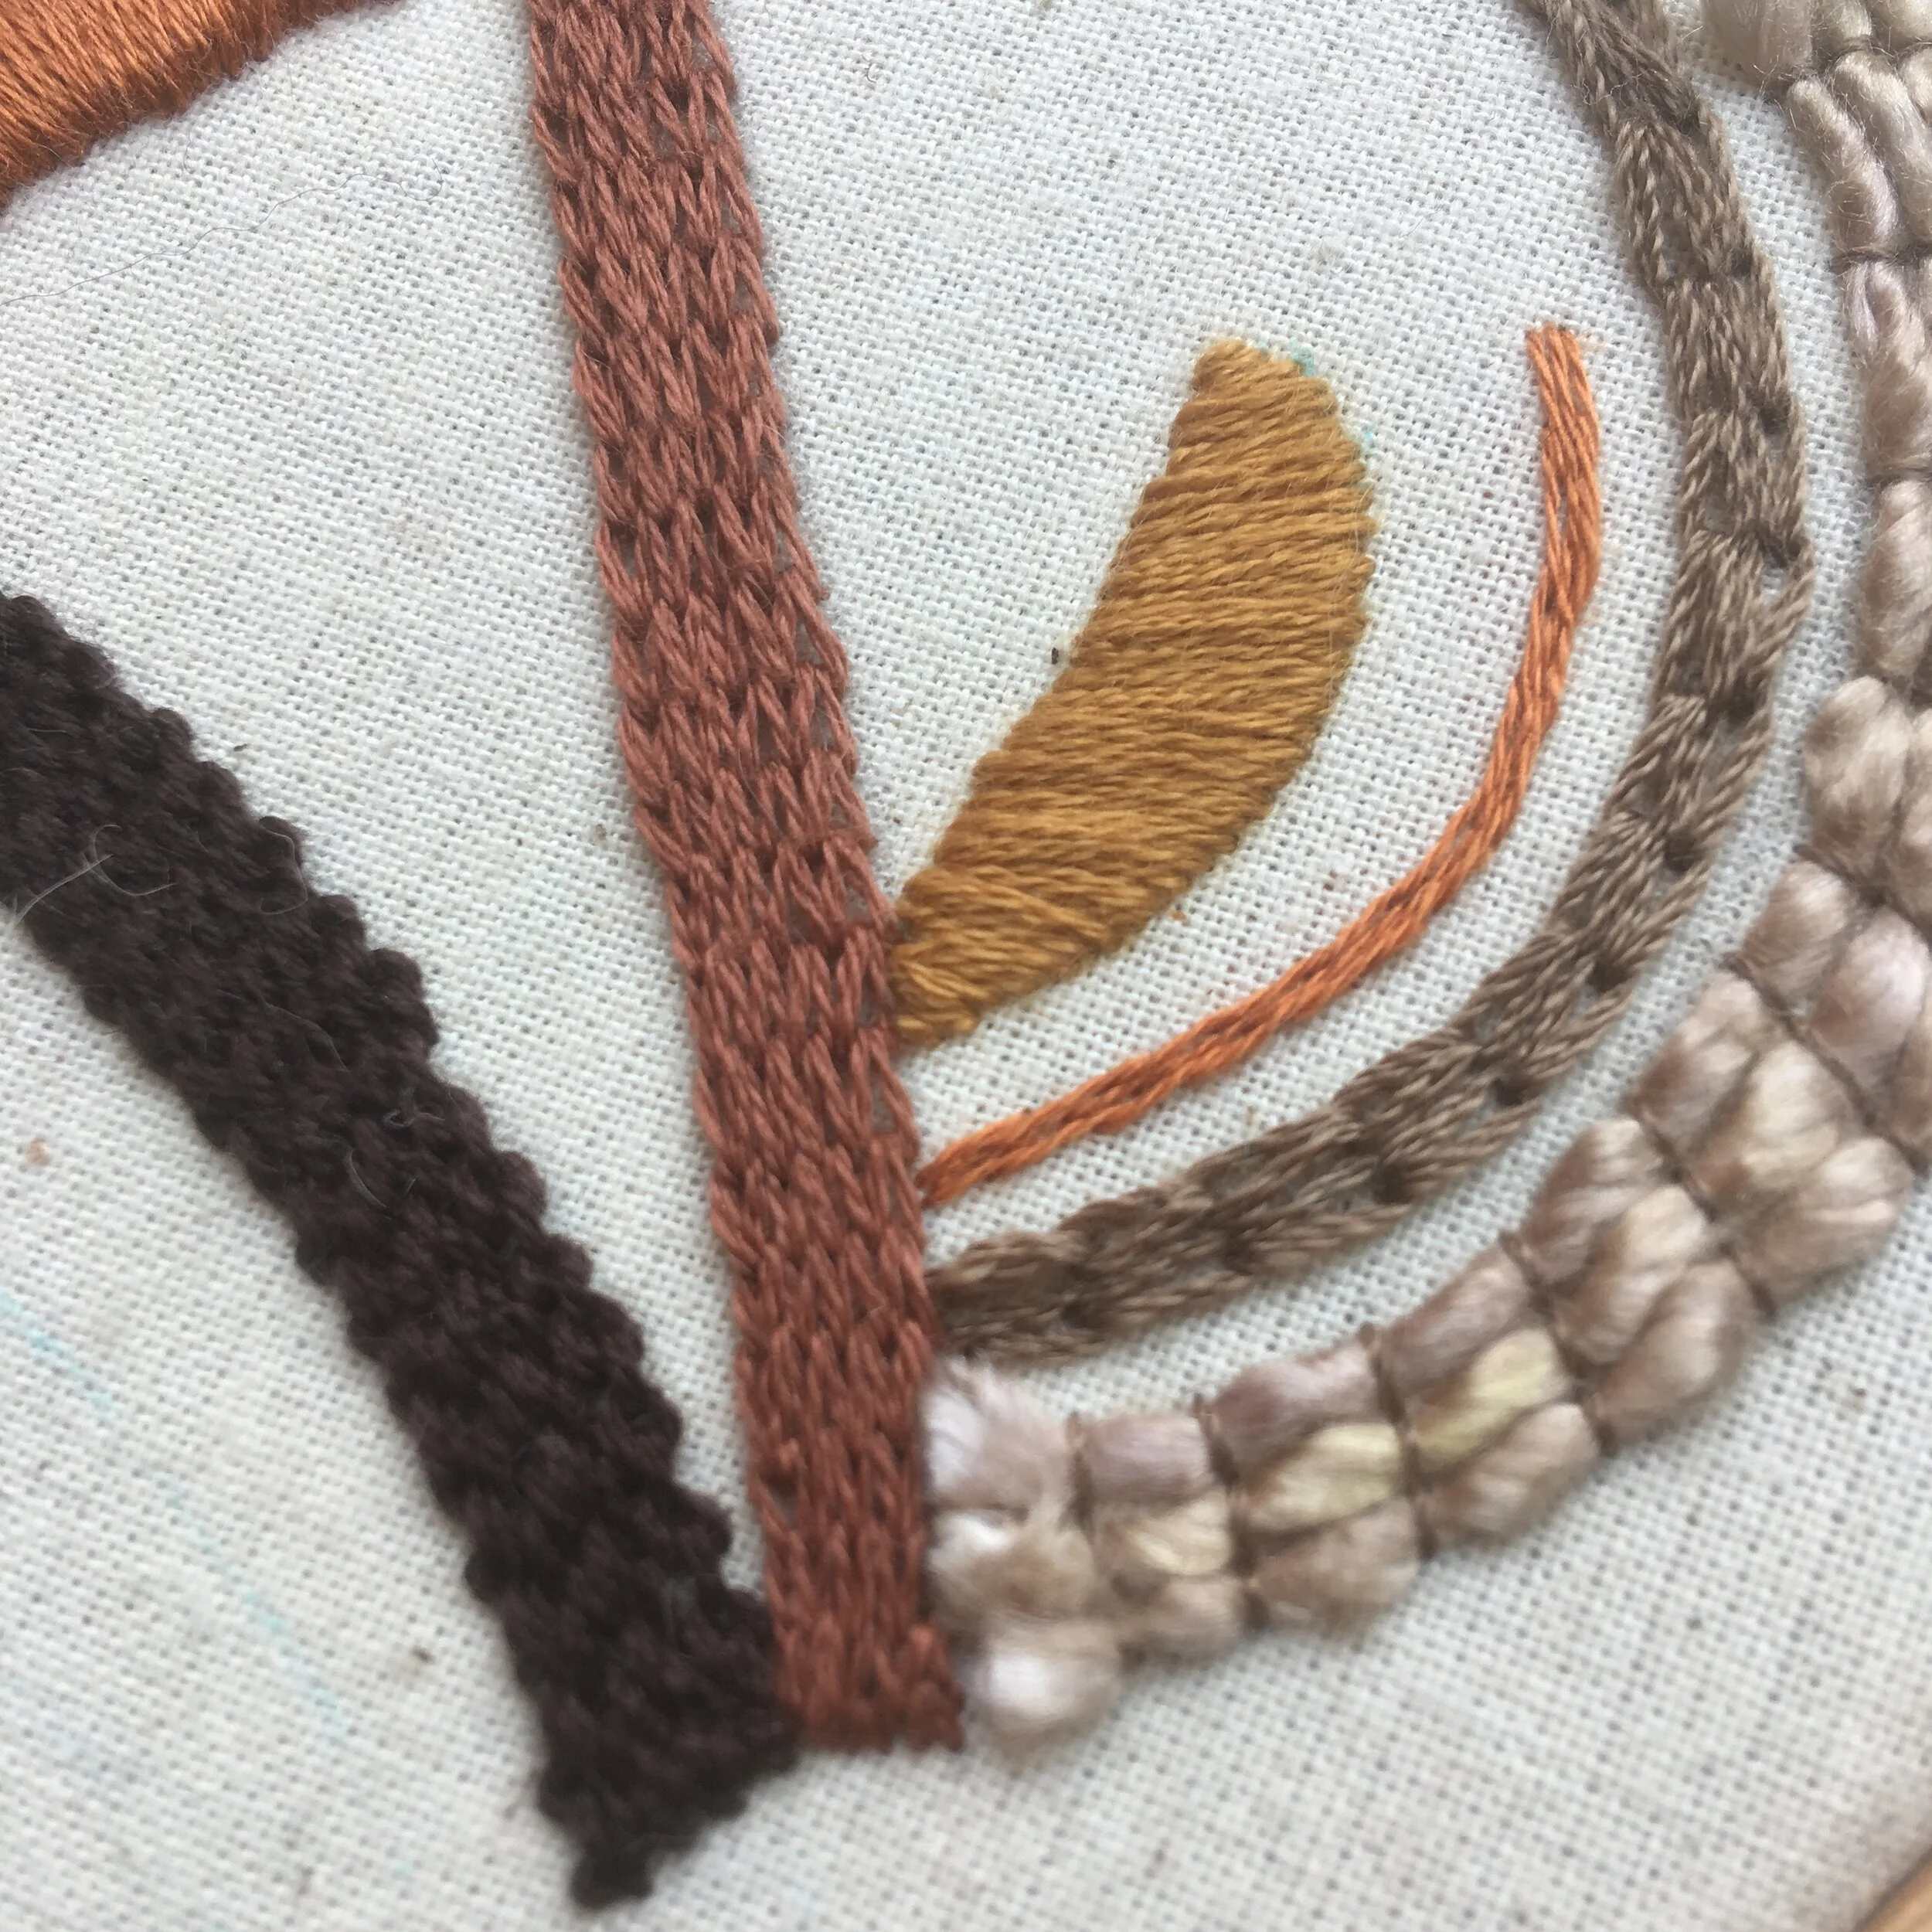
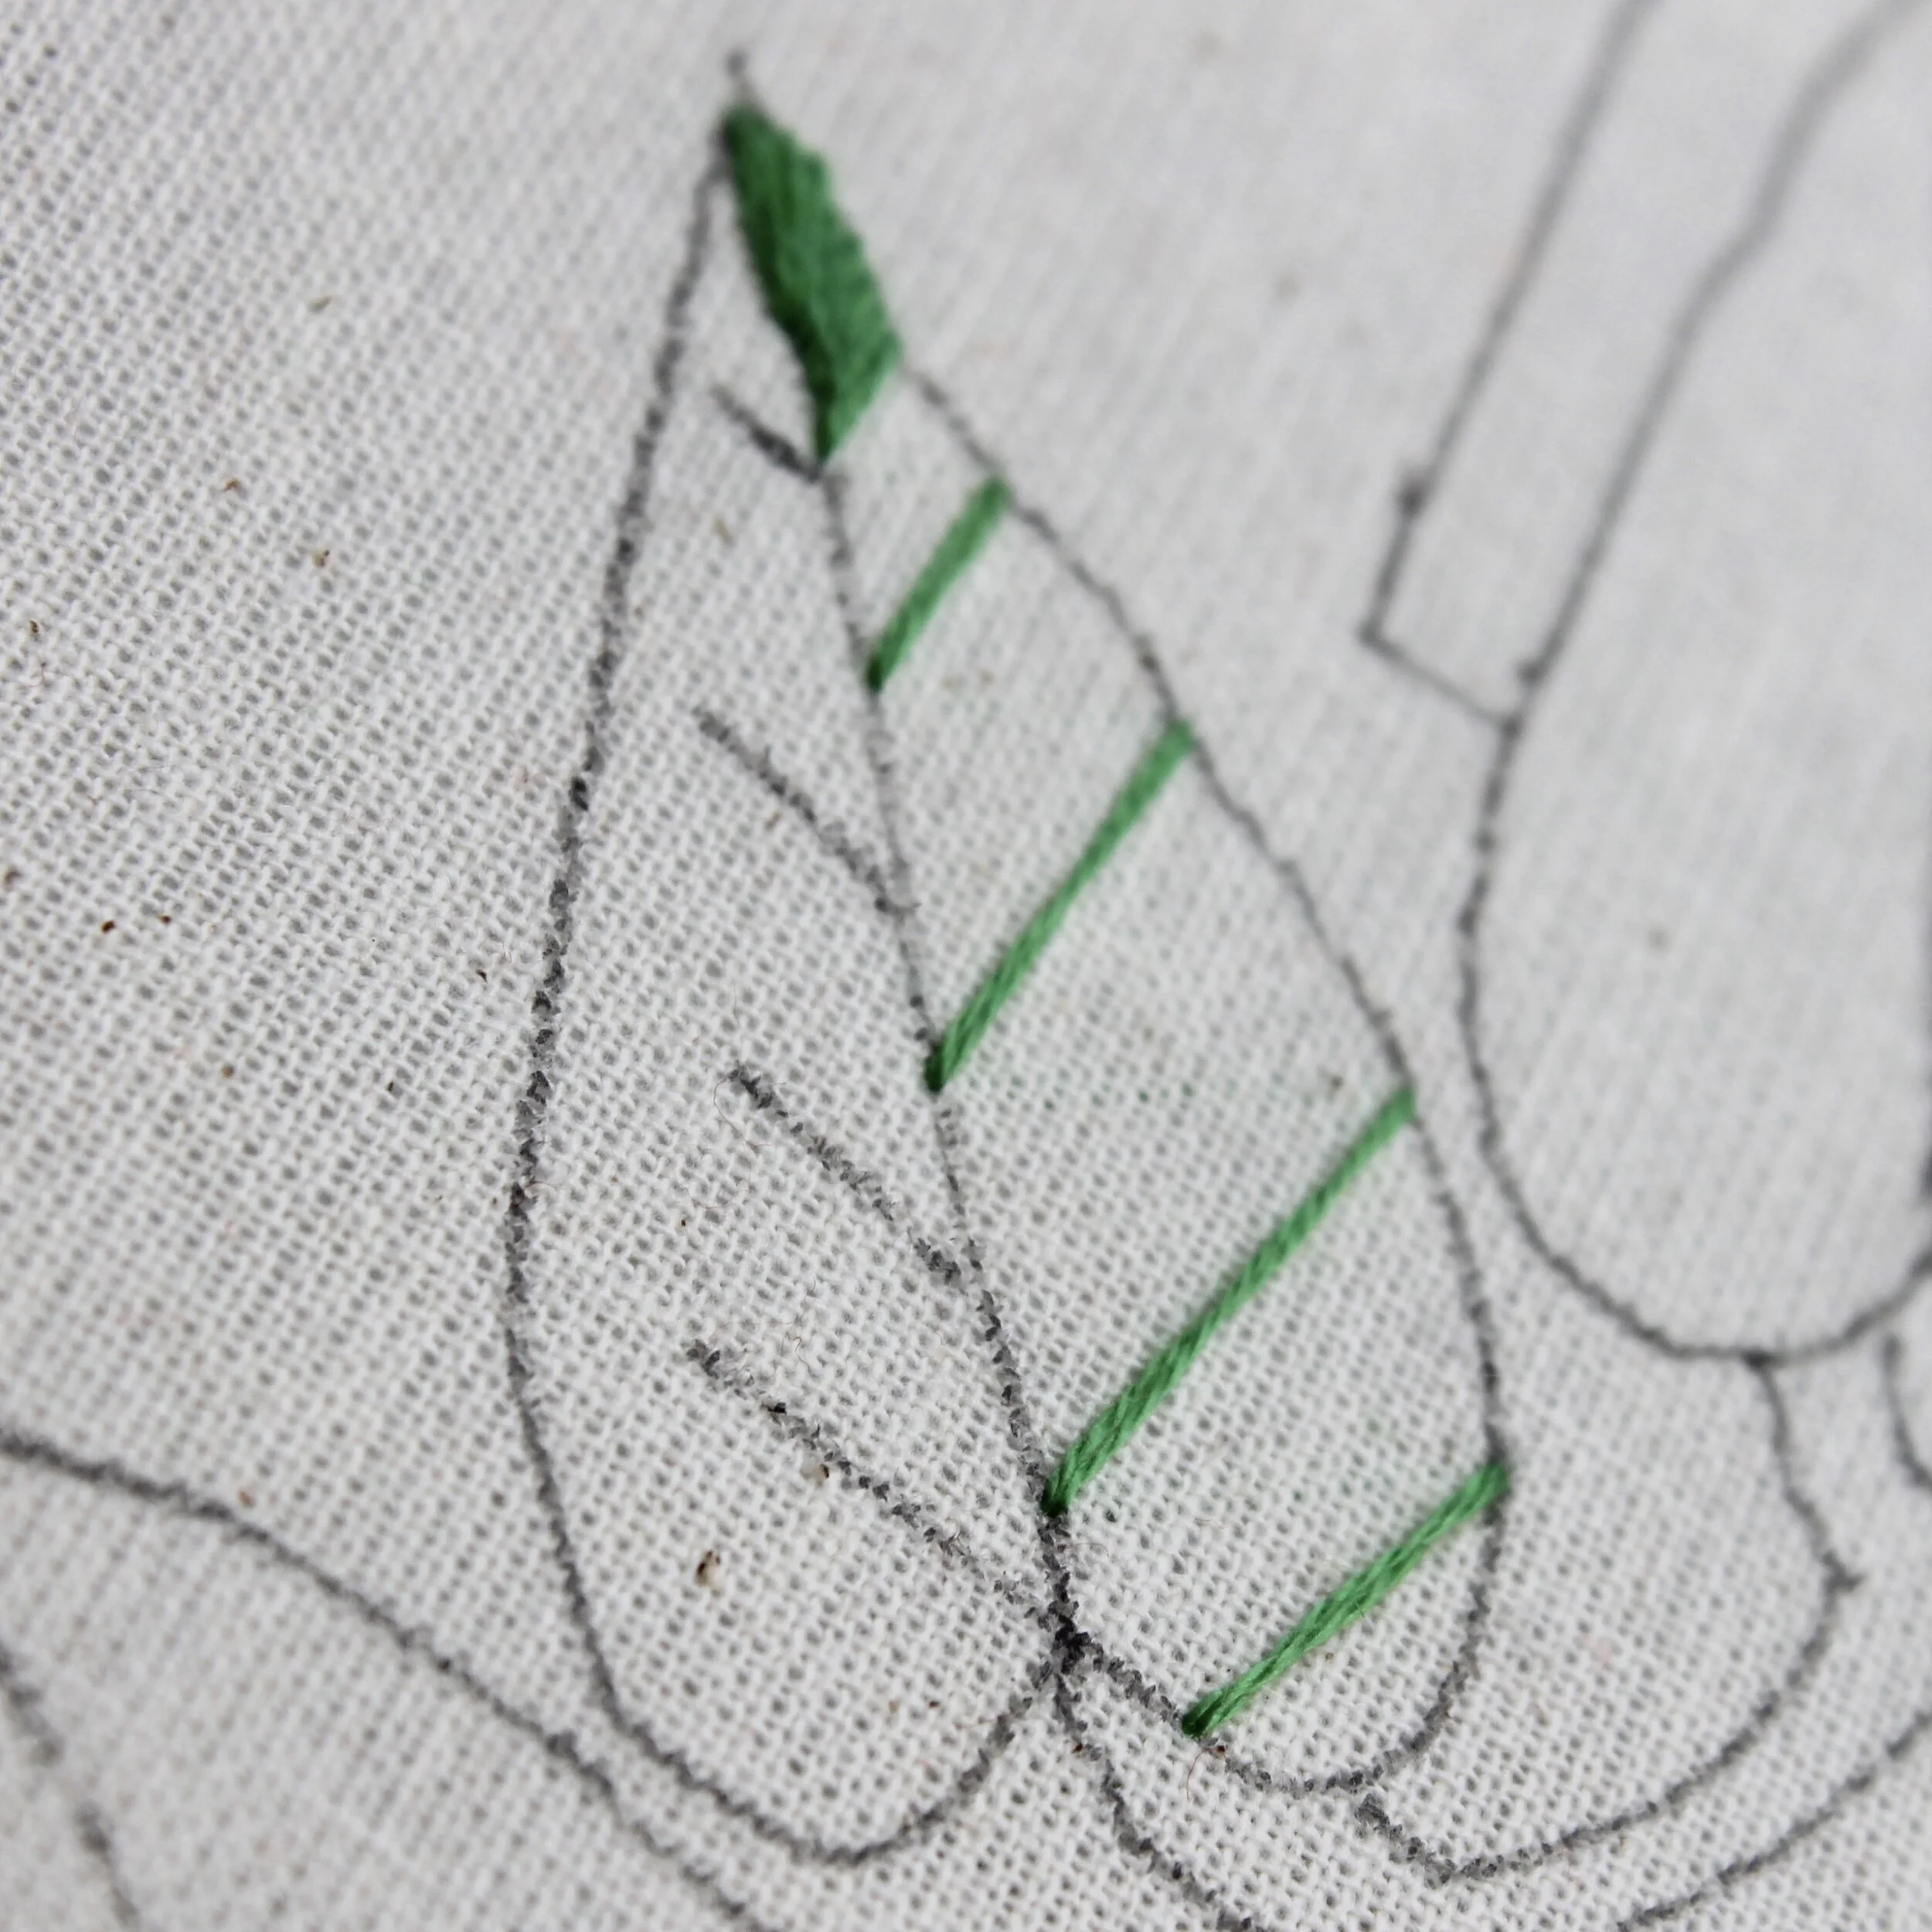
Split stitch can be used in different ways in the same piece. In this tree blossom embroidery there are some parts stitched using one strand and split stitch, other parts use two-stranded split stitch and other parts has lines of split stitch next to each other to create a thicker branch.

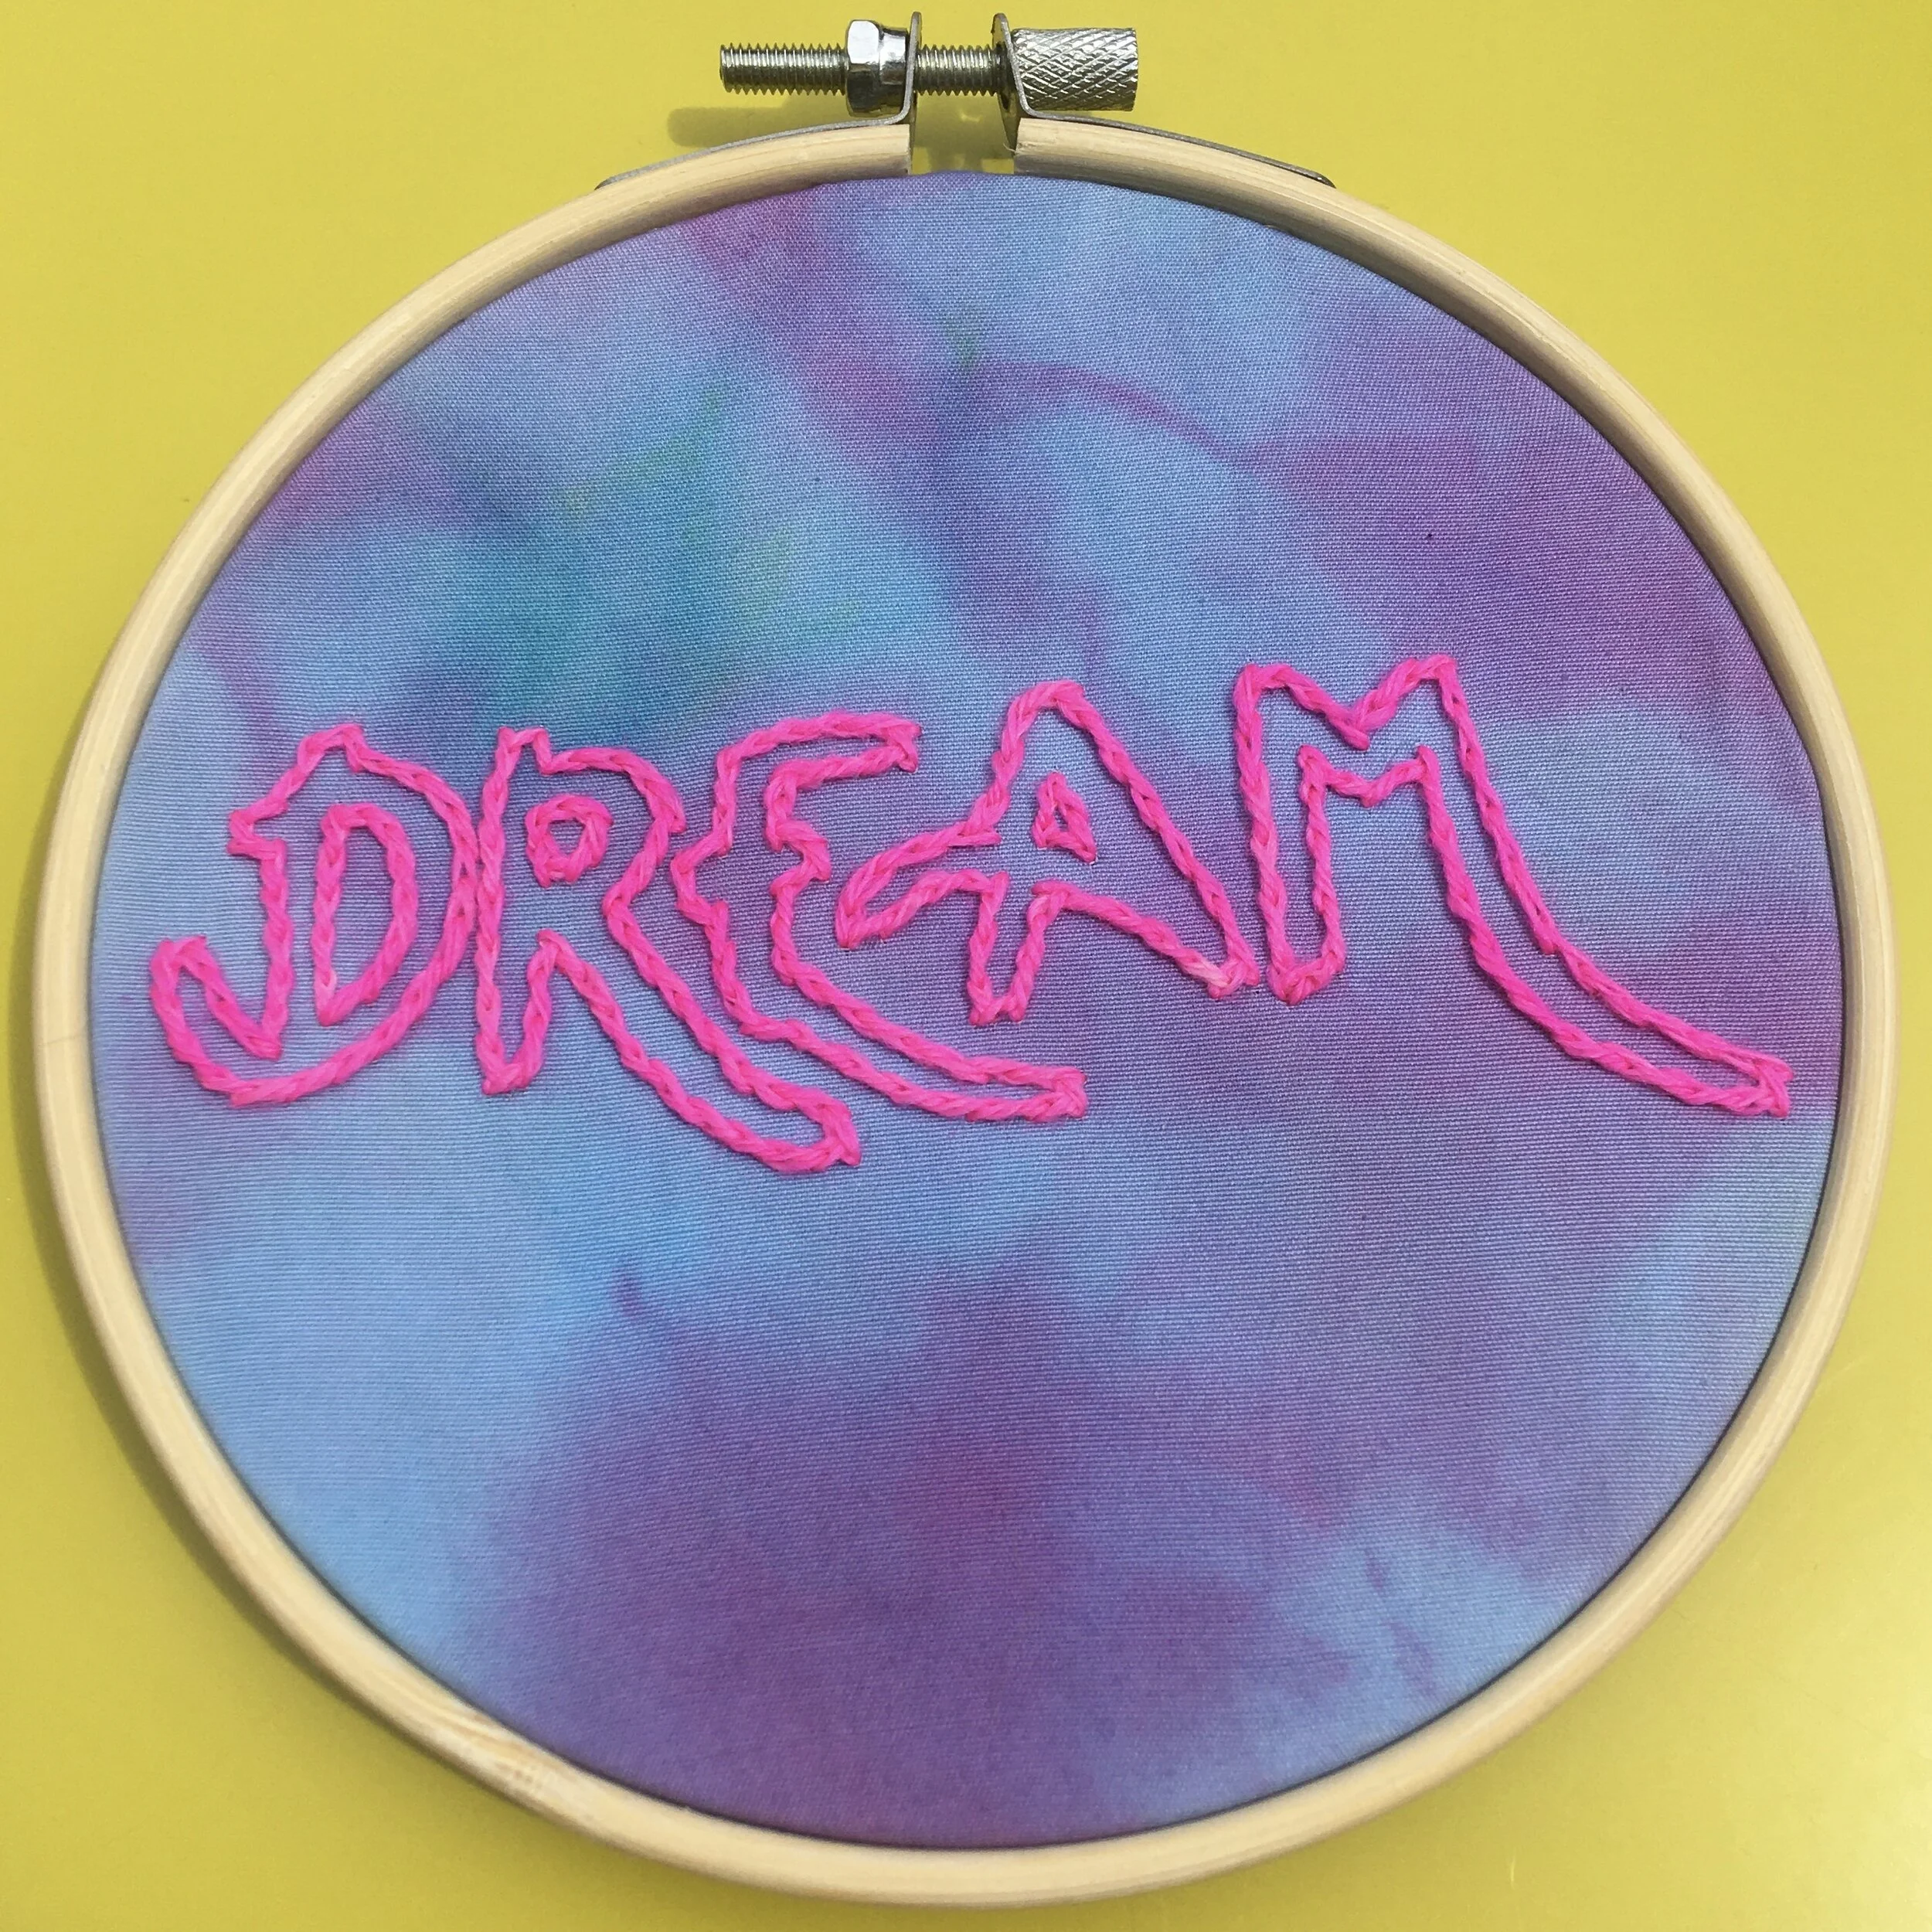
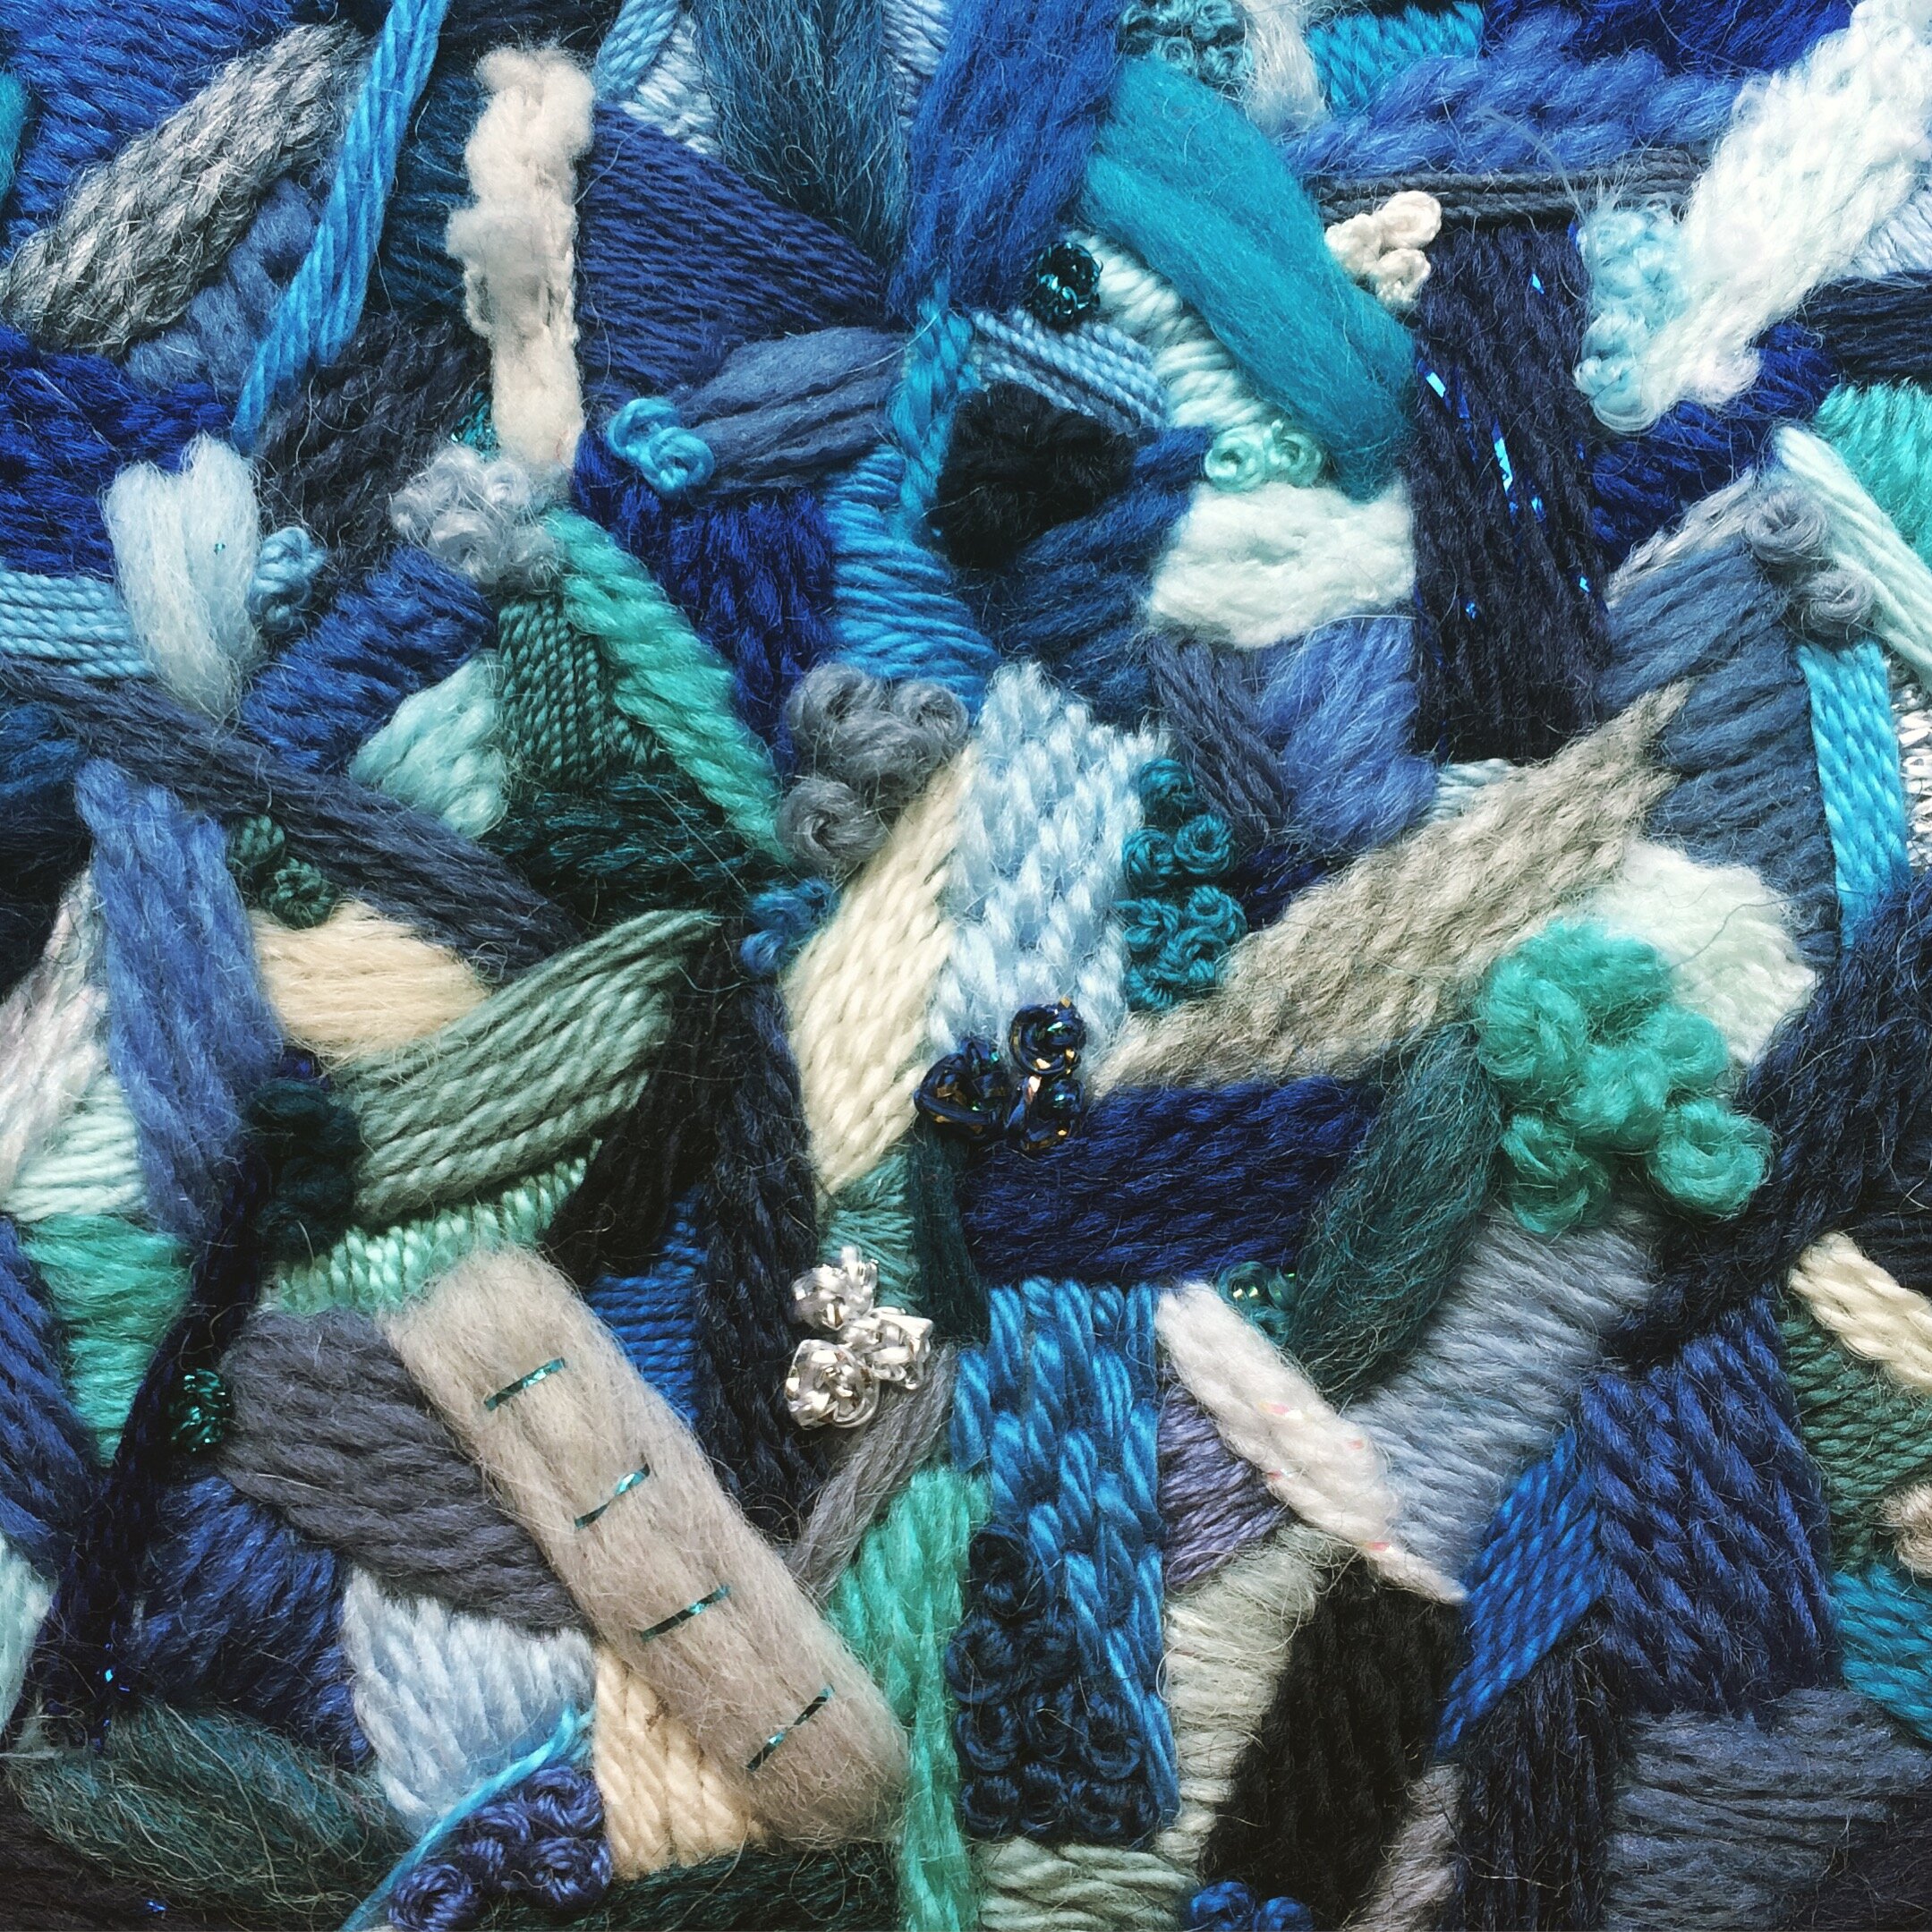
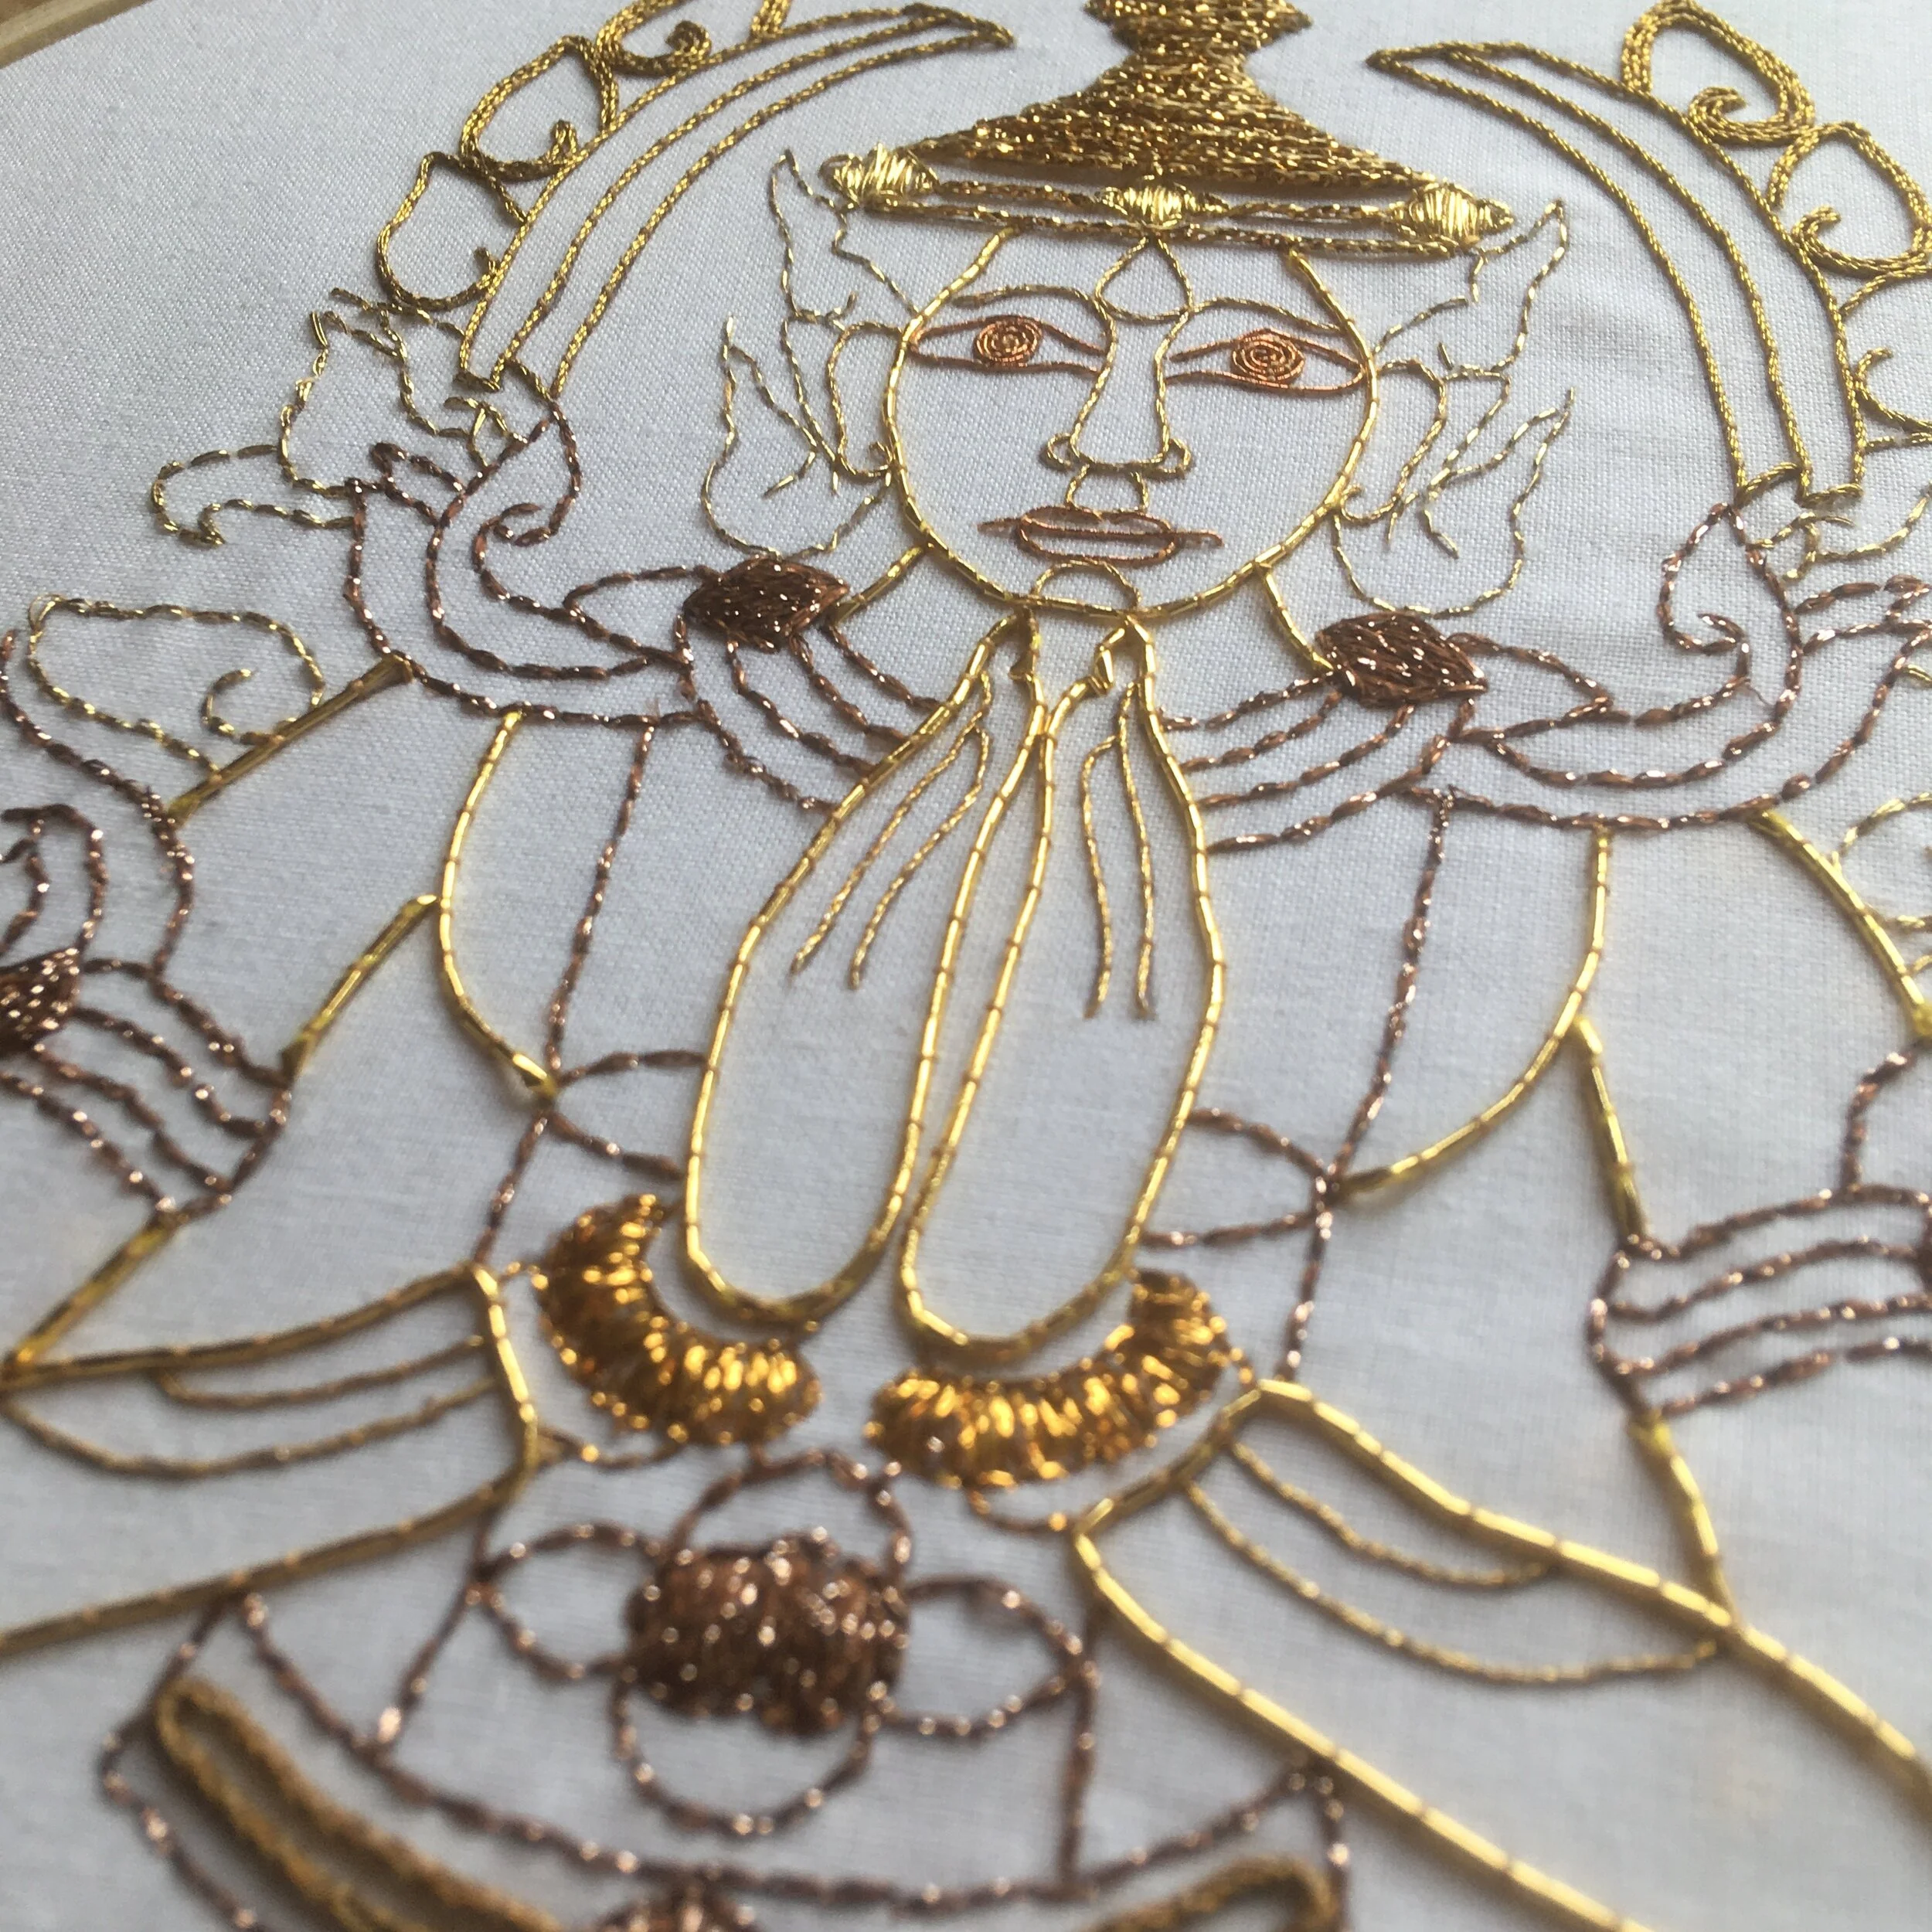
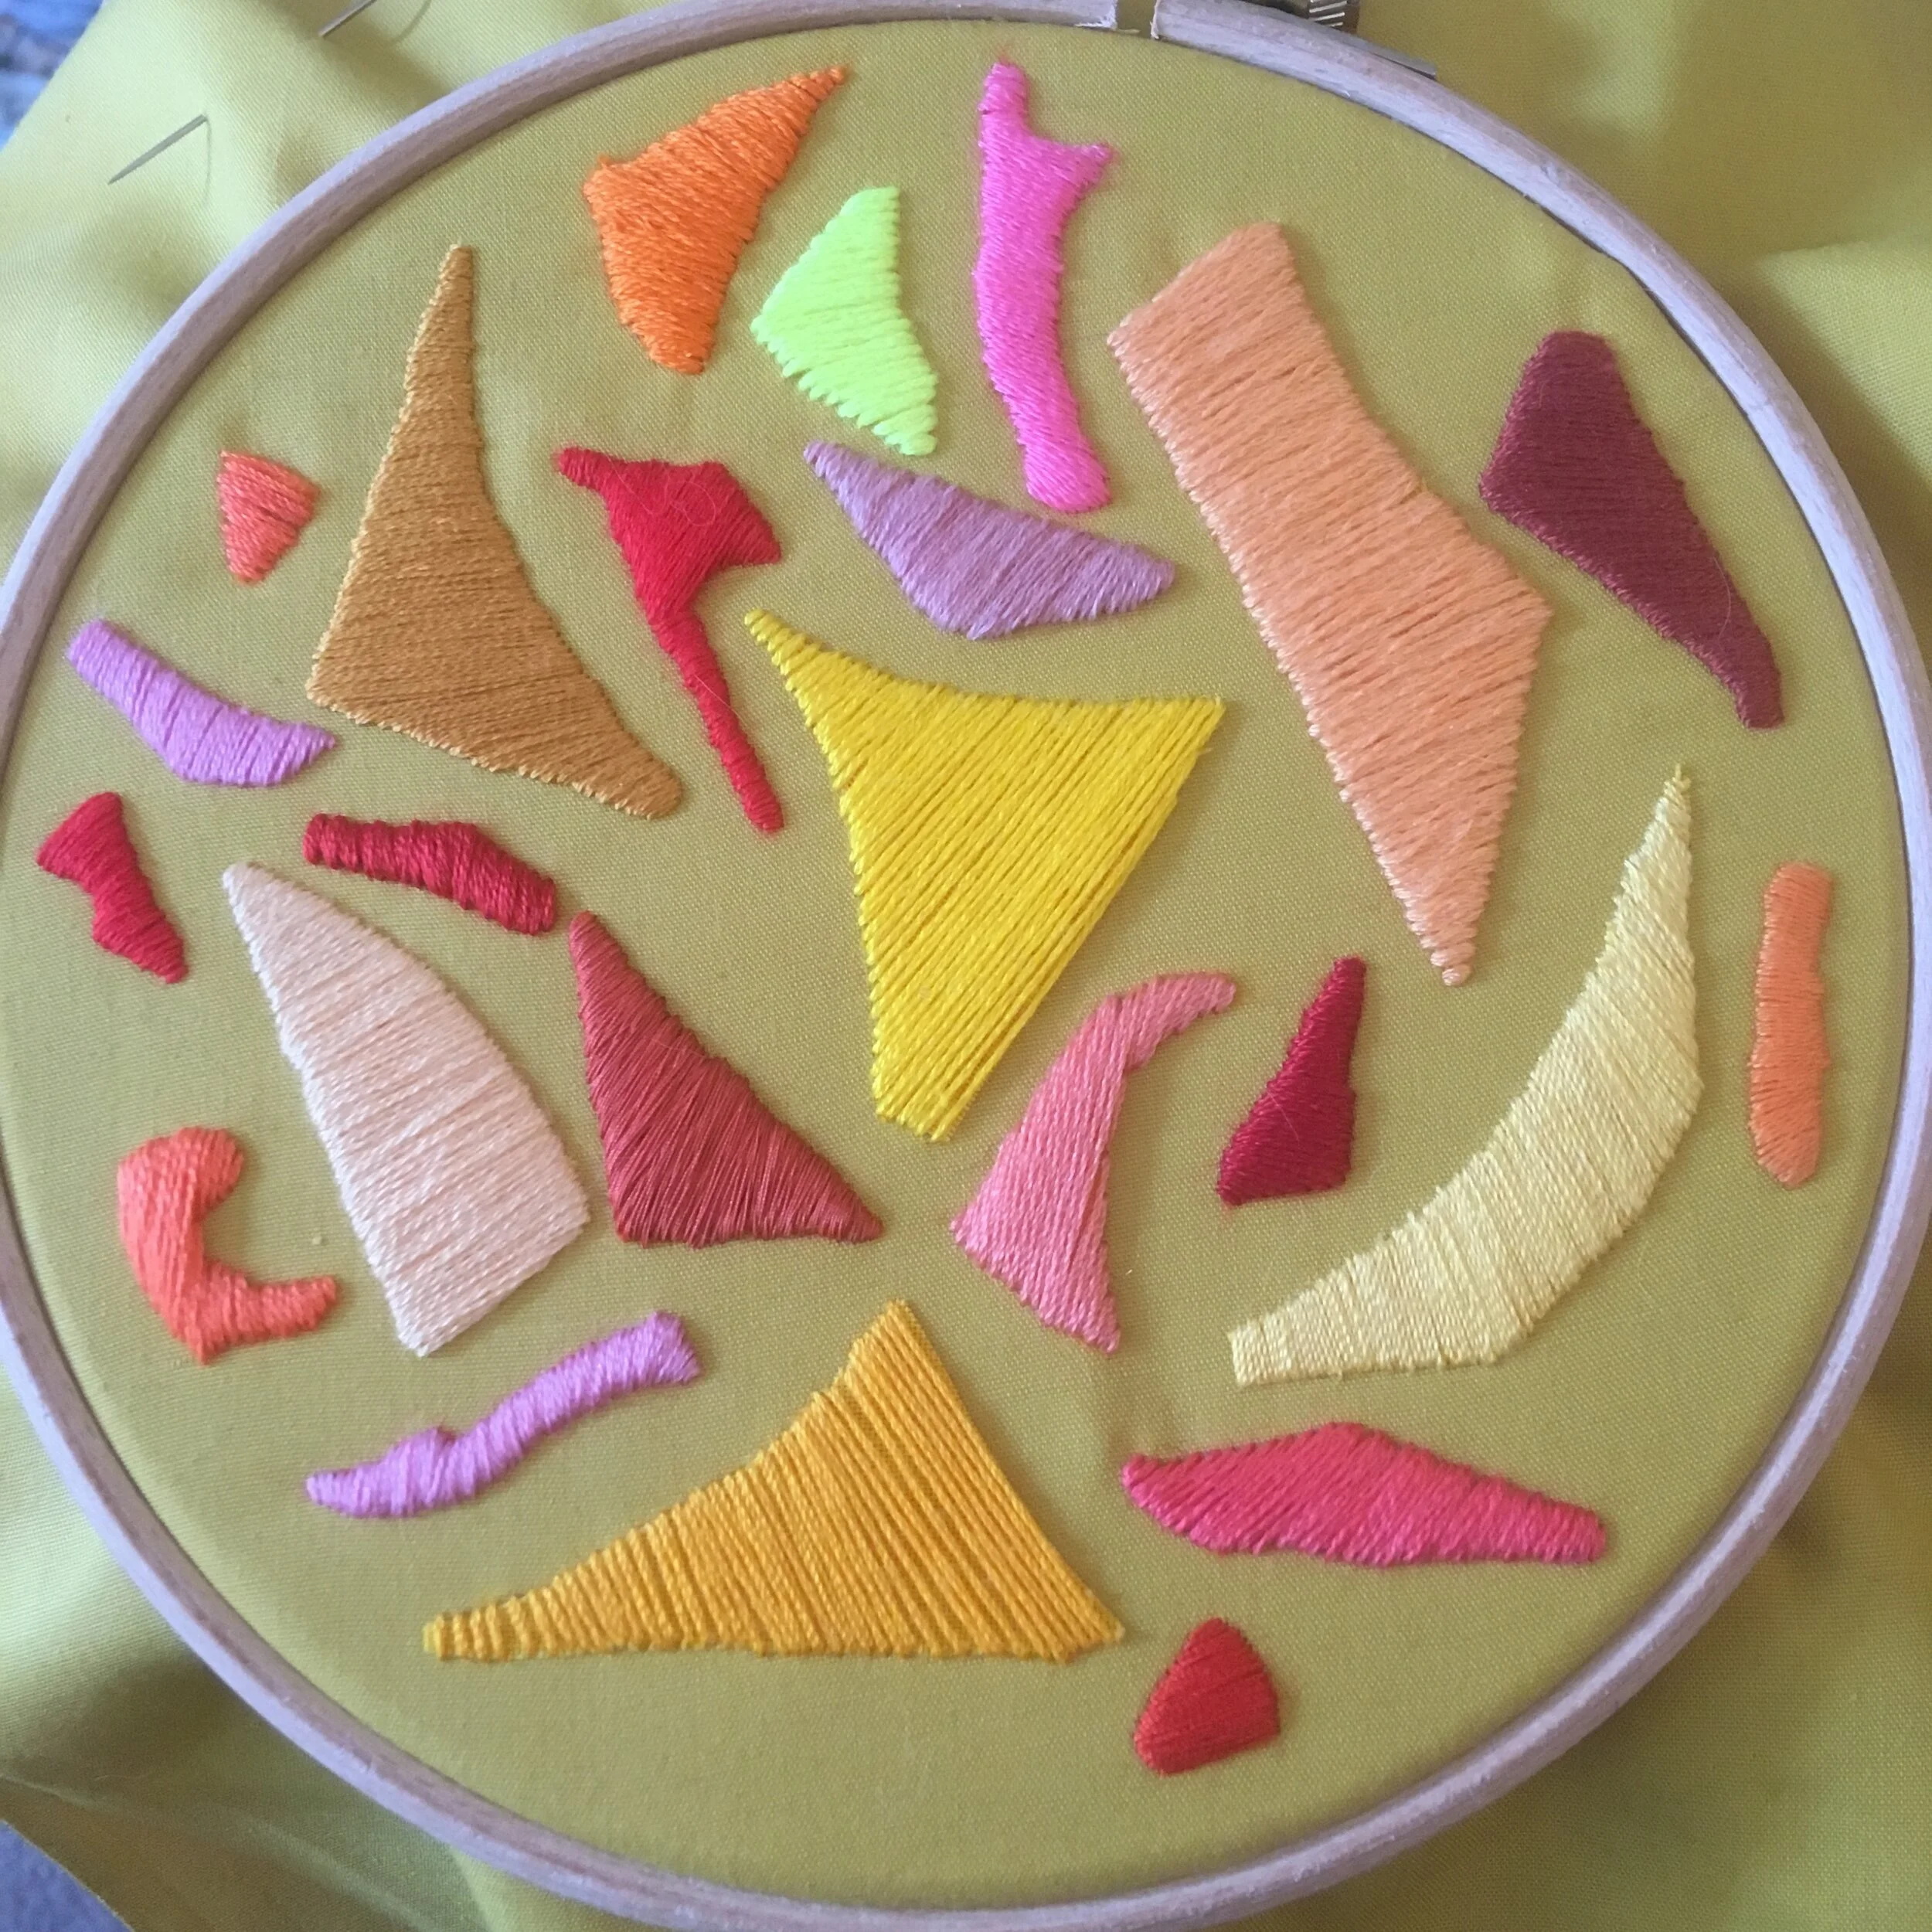
Split stitch can works well with single strands of thicker thread to create a plaited effect as shown in this word art embroidery.

Want to try this stitch? It’s a stitch I recommend in my elephant ear plant kit, spring blossom kit, snowdrop kit and crocus kit.

Sign up to my email newsletter to get a monthly free embroidery pattern and a round up of Stitch Showcase blogs.

A picture of split stitch of different thicknesses used to create branches
A picture of the word 'dream' stitched in bright pink yarn on a blue and purple dyed fabric background
In stitch showcase 1 Tags Stitch Showcase, Line Stitch
Comment
A picture of seed stitches in black thread of different thicknesses on white fabric. Overlaid is a blue square with white text saying - stitch showcase, seed stitch, www.embellishedelephant.co.uk

Stitch Showcase: Seed Stitch

October 21, 2020

Seed stitch is basically a running stitch but stitched randomly rather than in a line and is a great decorative stitch especially when you want to fill a space but still see the backing fabric.

  • Bring the needle up from the back of the fabric (A)

  • Take it back down a few millimetres along (B)

  • Repeat this at different angles (eg C-D) and with different spacing between the stitches.

  • The stitches can be of the same length or differing lengths.

  • Seed stitch can also be layered up with the ‘seeds’ overlapping and this works particularly well when using different threads that overlap.

An illustration showing how to create seed stitches. The illustration is in shades of blue and grey on a white background

The light blue section of this sampler shows how seed stitches can be layered over each other and how different thicknesses of thread and stitch length can also add variation. It’s also really effective when used to emphasise colours in the fabric. Seed stitches were added intuitively to this hand dyed piece of fabric to highlight areas of colour.

Want to try this stitch? It’s a stitch I suggest using in my heart stitch sampler kit and floral sampler kit.

Sign up to my email newsletter to get a monthly free embroidery pattern and a round up of Stitch Showcase blogs.

A picture showing layered seed stitches an isolated seed stitches
A picture showing hand dyed pink fabric with seed stitches in shades of yellow, blue and yellow picking out patches of dye in these colours
In stitch showcase 1 Tags Stitch Showcase, Isolated Stitch
Comment
An image of chain stitch used to create a basket effect in light brown thread. Overlaid is a blue square with white text saying - stitch showcase, chain stitch, www.embellishedelephant.co.uk

Stitch Showcase: Chain Stitch

October 14, 2020

Chain stitch is one of my favourite embroidery stitches as it can add some wonderful texture to a piece of work. It can be stitched in a single row or closer together to create a basket effect. A single chain stitch on its own is know as a lazy daisy stitch.

  • Bring the needle up through the fabric (A) then back down as close as possible to the original hole (B)

  • Gently pull the thread until there is a small loop - don't pull fully tight

  • Push the needle up through the fabric where the stitch should end (C) when pushing the needle back up make sure it goes through the centre of the loop

  • Gently pull the needle all the way through so that the loop ends up the same length as the stitch and lies flat

  • To create the next stitch push the needle back down as close as possible to the spot it came up (D), this should be inside the stitch just created

  • Repeat until the chain is the desired length

  • At the end of the chain, secure the final chain by stitching the last stitch over the end of the loop rather than inside it (E & F)

An illustration of the steps required to create chain stitch. The illustration is in blue and grey on a white background.

Chain stitch can be used as a filling stitch and looks great when several rows are stitched together, each row in the opposite direction.

It can also be stitched as a single chain to create an outline such as in this free kit from Mollie Makes designed by Zeena Shah. In this example, I also filled the chain stitches with a straight stitch in a contrasting colour to fill the centre of the chains.

Want to try this stitch? It’s a stitch I suggest using in my flamingo flower kit.

Enjoyed this blog post? I share embroidery tips and a free embroidery pattern in my monthly newsletter. Sign up here to receive the newsletter on the 1st of each the month.

A picture of an autumnal abstract embroidery showing elements stitched in chain stitch
A picture of a floral embroidery in a heart shape border stitched in chain stitch
In stitch showcase 1 Tags Stitch Showcase, Filling Stitch, Line Stitch
Comment
A picture of an embroidery of a tree branch with pink blossoms created from french knots. Overlaid is a blue square with white text saying - stitch showcase, french knot, www.embellishedelephant.co.uk

Stitch Showcase: French Knot

October 7, 2020

I think French knots are my all time favourite embroidery stitch. I know that some people can’t stand them but a little practice goes a long way with this one if this is one you haven’t tried before or don’t like I would recommend practicing on a scrap piece of fabric until you are comfortable with the motion of this stitch.

  • Push the needle up through the fabric in the place you want your knot to approximately sit (A)

  • Wrap the thread around the needle (the number of wraps affects the size of the knot) I tend to use three wraps

  • Take the tip of the needle back through the fabric as close to the original hole as possible (B). If the same hole is used then the knot can be pulled all the way through to the back of the fabric

  • Use your thumb over the thread wraps and gently pull the thread through, being careful of tangles.

An illustration of how to do french knot embroidery stitch. The illustration is in blue and grey on a white background.

Commonly French knots are used in isolation or in groups as in the blossom embroidery in the header picture, but can also be used to fill areas, such as in this negative space word art. (You need to REALLY love French knots if you are going to attempt a piece like this.)

They can also be used effectively as a counter point to more linear stitches such as in this blue piece of intuitive embroidery (where they also fill small gaps between the linear stitches.)

Want to try this stitch? It’s one I suggest using in my heart stitch sampler kit, flamingo flower plant kit, floral sampler kit and spring blossom kit.

Enjoyed this blog post? I share embroidery tips and a free embroidery pattern in my monthly newsletter. Sign up here to receive the newsletter on the 1st of each the month.

A picture of an embroidery hoop with yellow fabric and the word sunshine stitched in negative space style with the outline of the letters stitched in yellow french knots
A close up image of an abstract embroidery stitched in shades of blue yarn featuring a range of stitches including french knots
In stitch showcase 1 Tags Stitch Showcase, Filling Stitch, Isolated Stitch
Comment
A picture of blue threads couched on a white background. Overlaid is a blue square with white text saying - stitch showcase, couching, www.embellishedelephant.co.uk

Stitch Showcase: Couching

September 30, 2020

Couching is when embellishments such as cord are attached to a piece of fabric using small stitches to hold it in place rather than it being sewn through the fabric. It is a technique used extensively in gold work embroidery as well as in certain types of bead work. Most commonly a single strand of matching thread is used so that the couching stitch is barely visible but contrasting thread of different thicknesses can be used to make the couching visible.

Depending on the type of item you are couching will influence how you attach it. Thick cord that can’t be pushed through the fabric will be completely surface couched. If the item can be pushed through the fabric then it is best to attach the start and end of the length with a simple knot on the back of the fabric.

  • Place the item being couched on the fabric at the start (A) and end (B) points. This may be a thread that goes through the fabric or one that stays on the the surface

  • The thread that will be couching could be the same thread or a different thread to the one being couched

  • Bring the needle with the couching thread up through the fabric right next to the item (C). it works best if it is slightly underneath and you bring the needle through at a slight angle

  • Take the thread over the top of the item being couched and push the needle back down as close to the item as possible (D). Again a slight angle works best

  • Add as many couching stitches as is needed to keep the item being couched secure. These can be close together or evenly spaced apart.

An illustration of how to do couching embroidery stitch. The illustration is in blue and grey on a white background.

With this goldwork piece each hand is one strand of gold cord, the start and end of the cord is pushed through the fabric at the fingertips and each hand is then couched in place. The cord was of a thickness that it could be pushed through the fabric.

The couching stitches can also be made very close together so that the item being couched is completely covered. In the middle picture, on the right hand side of the sampler, thick yarn has been couched to the surface with the ends of the thread loose as this was too thick to be pushed through the fabric. On the left hand side cord has been completely covered by couching stitches.

Couching is also a technique used to attach strings of sequins or beads to fabric and is a much quicker method of embellishing than stitching on individual beads!

Enjoyed this blog post? I share embroidery tips and a free embroidery pattern in my monthly newsletter. Sign up here to receive the newsletter on the 1st of each the month.

A picture of a buddha figure stitched using couched goldwork techniques
A picture of beads and sequins in various shades of blue couched to fabric
In stitch showcase 1 Tags Stitch Showcase, Couching Stitch
Comment
A picture of a sea-scape stitched in satin stich in blues and yellows. Overlaid is a blue square with with text saying - stitch showcase, satin stitch, www.embellishedelephant.co.uk

Stitch Showcase: Satin Stitch

September 23, 2020

Satin stitch is commonly used to fill in large spaces and there are contemporary embroidery artists such as Sarah K Benning and Salt Stitches who use it extensively in their work. The stitch is created by laying lengths of thread as close as possible on the surface of the fabric.

  • Bring the needle up through the fabric at the appropriate starting point (A)

  • Take it down through the fabric at the end point (B)

  • Bring the needle back up right next to the first point you brought it through (C).

  • Take it down through the fabric next to the end of the first stitch (D)

  • The gap between each stitch will depend on the thickness of the thread being used

  • Each stitch should start from the same side each time. This should mean that the back of the work work looks similar to the front (just not as neat)

  • It may seem like a waste of thread to have such long stitches on the back of the work, but it does help to maintain the tension over such a large area.

  • If you are short of thread or are working a smaller area you could bring the needle up right next to the point it went down (on the same side of the area) rather than go back to the other side but beware this may cause fabric wrinkles.

An illustration of how to stitch satin stitch on a white background with blue and grey images.

Satin stitch can be made using a range of numbers of threads, this is a sampler I made exploring this, the yellow shape at the bottom is stitched with all 6 strands at once while the pale yellow on the right hand side is stitched with just one strand.

One of the most difficult things with covering a large area with satin stitch is to keep the stitches all at the same angle. You can draw guidelines to follow, but I like to create guidelines with stitches, these smaller areas can then be filled in bit by bit and it’s easier to maintain the direction of the stitches.

Want to try this stitch? It’s one I recommend using in my snowdrop kit and my floral sampler kit.

Enjoyed this blog post? I share embroidery tips and a free embroidery pattern in my monthly newsletter. Sign up here to receive the newsletter on the 1st of each the month.

A picture of abstract shapes of satin stitch in shades of yellow, purple and pinks on a mustard fabric background.
A picture of satin stitch covering a leaf showing thread and pen guidelines
In stitch showcase 1 Tags Stitch Showcase, Filling Stitch
Comment
A picture of hearts stitched in concentric shapes in differing shades of pinks on kraft card. Overlaid is a blue square with white text saying - stitch showcase, backstitch, www.embellishedelephant.co.uk

Stitch Showcase: Backstitch

September 16, 2020

As with running stitch, backstitch is another basic stitch in both hand embroidery and sewing. It is the perfect stitch to use to hand sew fabric together if you are making an item from your embroidered fabric. For embroidery it is great for adding simple details as it can be worked in a straight line or curve.

  • To create the stitch bring the needle up from the back of the fabric (A)

  • Take it back down a few millimetres along (B)

  • Bring the needle up again a few millimetres further along from the first stitch (C)

  • To make the second stitch join onto the first taking the needle down in the same place you completed the first stitch (B)

  • Bring the needle up at (D) and take it down through the fabric at (C)

  • Repeat for the length required.

An illustration of how to stitch backstitch. The illustration is in blue on a white background

Backstitches can be short or long, and can be stitched in straight lines, curves or patterns but backstitch look best when the stitches are of an even length. It is commonly used to outline a section of embroidery, the gold outline of the monogrammed needle minder below is stitched in backstitch. It is great for stitching on paper as it only uses three holes per two stitches as shown in the header picture.

Want to try this stitch? It is one I suggest using in my floral sampler kit.

Enjoyed this blog post? I share embroidery tips and a free embroidery pattern in my monthly newsletter. Sign up here to receive the newsletter on the 1st of each the month.

IMG_5349.JPG
A picture of an embroidered needle minder holding and embroidery needle on the edge of a hoop. The needle minder is stitched on purple fabric with a purple S and pink flowers
In stitch showcase 1 Tags Stitch Showcase, Line Stitch
Comment
A picture of some fabric appliqued onto a quilt surrounded by rows of running stitches. Overlaid is a blue square with white text saying - stitch showcase, running stitch, www.embellishedelephant.co.uk

Stitch Showcase: Running Stitch

September 9, 2020

This is one of the most basic embroidery stitches but is so useful, not just in hand embroidery but in sewing and mending as well. It is the perfect stitch to use to gather fabric together, such as when you are finishing the back of an embroidery hoop.

  • Bring the needle up from the back of the fabric (A)

  • Take it back down a few millimetres along (B)

  • Bring the needle up again a few millimetres further along (C) and complete the stitch (D)

  • Either bring the needle fully up and push it fully down creating one stitch at a time

  • Or weave the needle through the fabric a few times and pull the thread through to create several stitches at once.

An illustration of running stitch on a white background with blue details.

Running stitches can be tiny so that they are barely visible, which is great for attaching embellishments. This stitch looks best as a decorative stitch when there is an even gap between each stitch and each stitch is of an even length, but you can vary both the gap and the length.

Normally running stitches are used in isolation, but can be stitched next to each other or alongside other stitches such as backstitch they can create interesting textures.

It’s also a great stitch to use with quilting as you can see in the header picture where the circles of running stitches are staggered.

Want to try this stitch? It is one I suggest using in my floral sampler kit and the embellished bauble kit (that will be back at Christmas).

Sign up to my email newsletter to get a monthly free embroidery pattern and a round up of Stitch Showcase blogs.

In stitch showcase 1 Tags Stitch Showcase, Line Stitch
Comment
A picture of flowers stitched in shades of pink, purple and yellow using straight stitches. Overlaid is a blue square with white text saying - stitch showcase, straight stitch, www.embellishedelephant.co.uk

Stitch showcase: Straight stitch

September 2, 2020

If you’ve ever knitted you’ll know that there are really only two stitches, knit and purl, and that all the stitch patterns used in knitting are just combinations of knit and purl.

I see the straight stitch as the embroidery version of knit and purl. It’s just a single stitch of any length and in any direction. So it really is the building block for the majority of other embroidery stitches - running stitch, backstitch, seed stitch, satin stitch and cross stitch to name just a few.

  • Creating a straight stitch is easy, bring the needle up through the fabric at the point the stitch will start

  • Push it back through the fabric at the point at which you want the stitch to end.

An illustration of how to create straight stitch in blue and white

The image in the header shows one way of using straight stitches - to create a flower. But a fun way to use straight stitches is when stitching on paper. This is a card I made for my niece’s birthday using long straight stitches at random angles and overlapping.

Want to try this stitch? It’s one I suggest using in my floral sampler kit.

Sign up to my email newsletter to get a monthly free embroidery pattern and a round up of Stitch Showcase blogs.

IMG_5511.JPG
In stitch showcase 1 Tags Stitch Showcase, Isolated Stitch, Line Stitch
Comment

Introducing Stitch Showcase

September 1, 2020

Welcome to a series of blog posts called Stitch Showcase started in September 2020. The aim of these blog posts is to provide tutorials on a wide range of different embroidery stitches giving you additional support and guidance in more detail than we can cover in the instruction booklets for our kits. For the more experienced crafters we’re also showcasing some ideas for different ways to use these stitches.

You can head here to browse all the posts in this series.

I hope these are useful in your stitching explorations.

I share embroidery tips and a free embroidery pattern in my monthly newsletter. Sign up here to receive the newsletter on the 1st of each the month.

In stitch showcase 1 Tags Stitch Showcase
← Newer Posts

Tags

  • About me
  • Artists/Designers
  • Basics
  • Christmas
  • colour
  • Couching Stitch
  • Fabric
  • Filling Stitch
  • Finishing
  • Hoops
  • Isolated Stitch
  • Line Stitch
  • London
  • My Makes
  • Needles
  • Stitch Showcase
  • Texture Stitch
  • Thread
  • Transfer
  • Travel

Latest Posts

Featured
Jun 1, 2025
What is stranded embroidery thread?
Jun 1, 2025
Jun 1, 2025
May 1, 2025
How to manage your backlog of craft projects
May 1, 2025
May 1, 2025
Apr 1, 2025
What to do if you don't like what you've stitched
Apr 1, 2025
Apr 1, 2025
Feb 15, 2025
How to decide which embroidery stitch to use
Feb 15, 2025
Feb 15, 2025
Feb 1, 2025
Focus on stitches for flowers
Feb 1, 2025
Feb 1, 2025
Jan 1, 2025
Focus on stitches for leaves
Jan 1, 2025
Jan 1, 2025
Nov 1, 2024
Stitch Showcase: Six-pointed star stitch
Nov 1, 2024
Nov 1, 2024
Oct 1, 2024
Focus on transferring or tracing patterns
Oct 1, 2024
Oct 1, 2024
Sep 1, 2024
Focus on hoops
Sep 1, 2024
Sep 1, 2024
Aug 1, 2024
A focus on needles
Aug 1, 2024
Aug 1, 2024

Home — Shop — Stockists — Wholesale — Portfolio — Contact — Reviews — Policies — FAQs