• Home
  • Shop
  • Stitch Showcase
  • Embroidery tips
  • Freebies
  • About
  • Contact
Menu

Embellished Elephant

  • Home
  • Shop
  • Stitch Showcase
  • Embroidery tips
  • Freebies
  • About
  • Contact
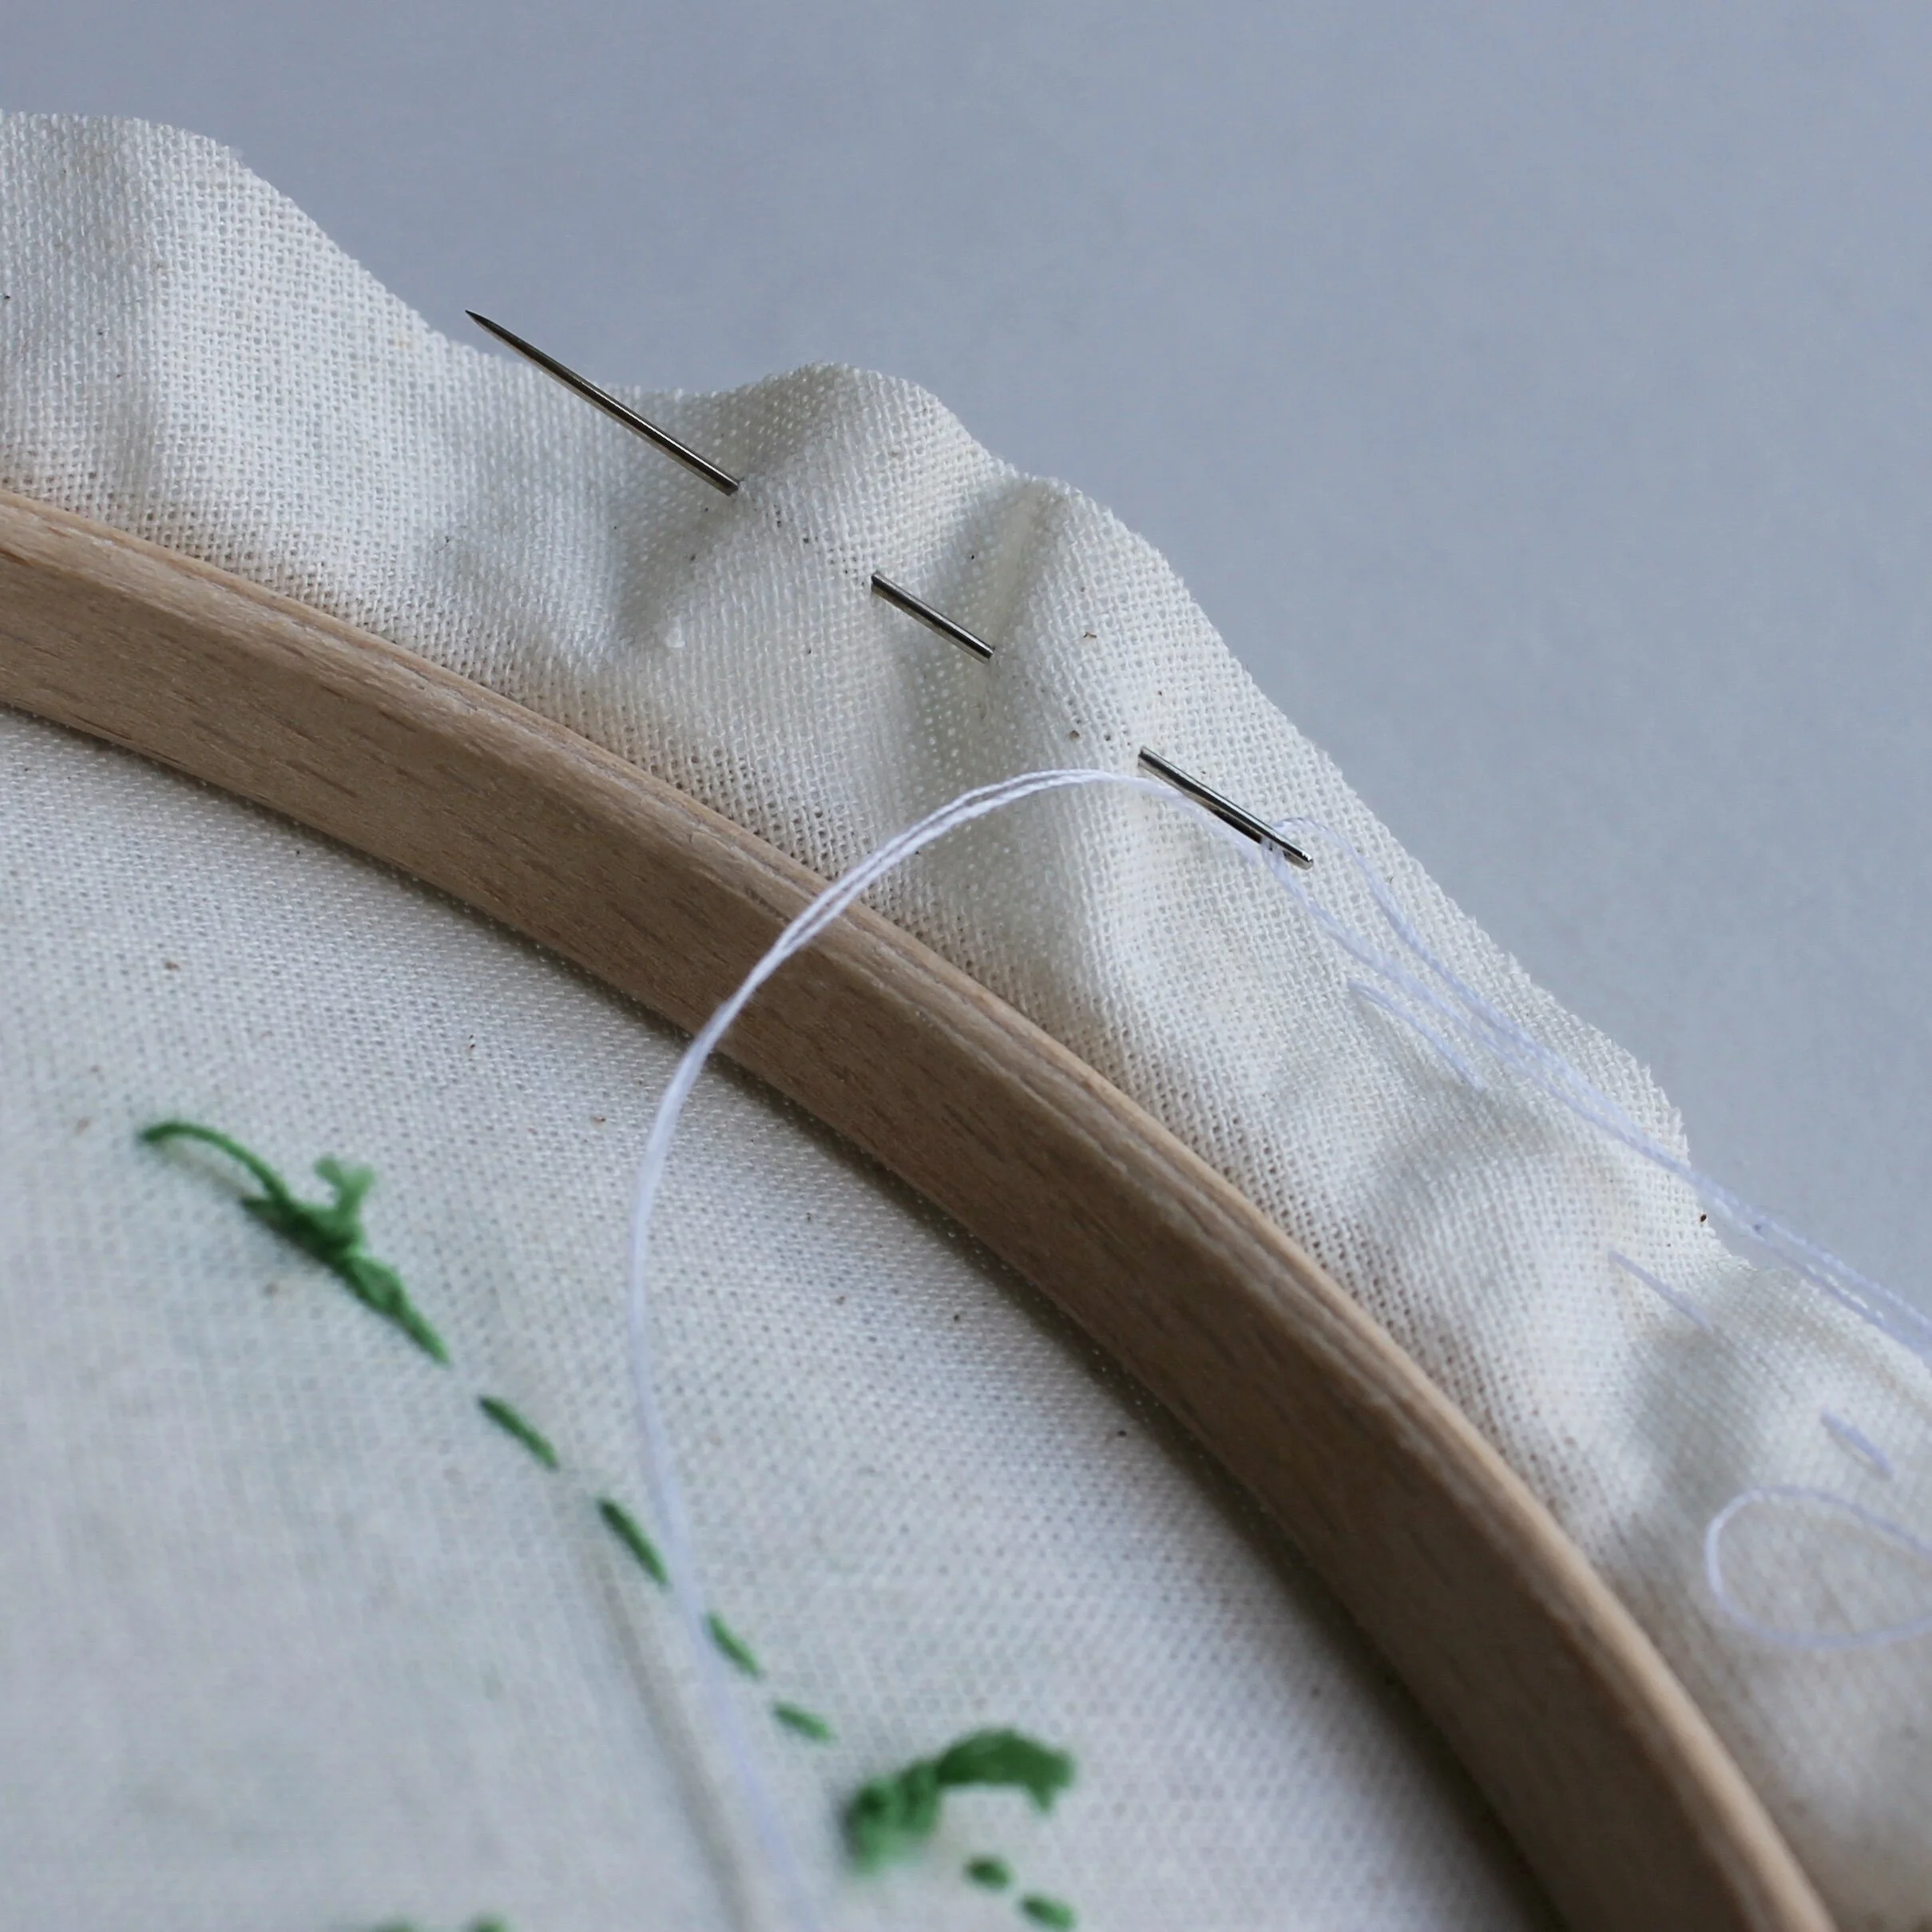
A picture of the back of an embroidery hoop where the fabric has been glued to the hoop. Overlaid is a blue square with white text saying - hand embroidery, four ways to finish the back of a hoop, www.embellishedelephant.co.uk

4 ways to finish the back of embroidery hoops

December 12, 2020

You’ve stitched your piece and you want to proudly hang it in a hoop on the wall. But for it to lie flat on the wall you need to finish off the back of the hoop.

There are several different ways to do this:
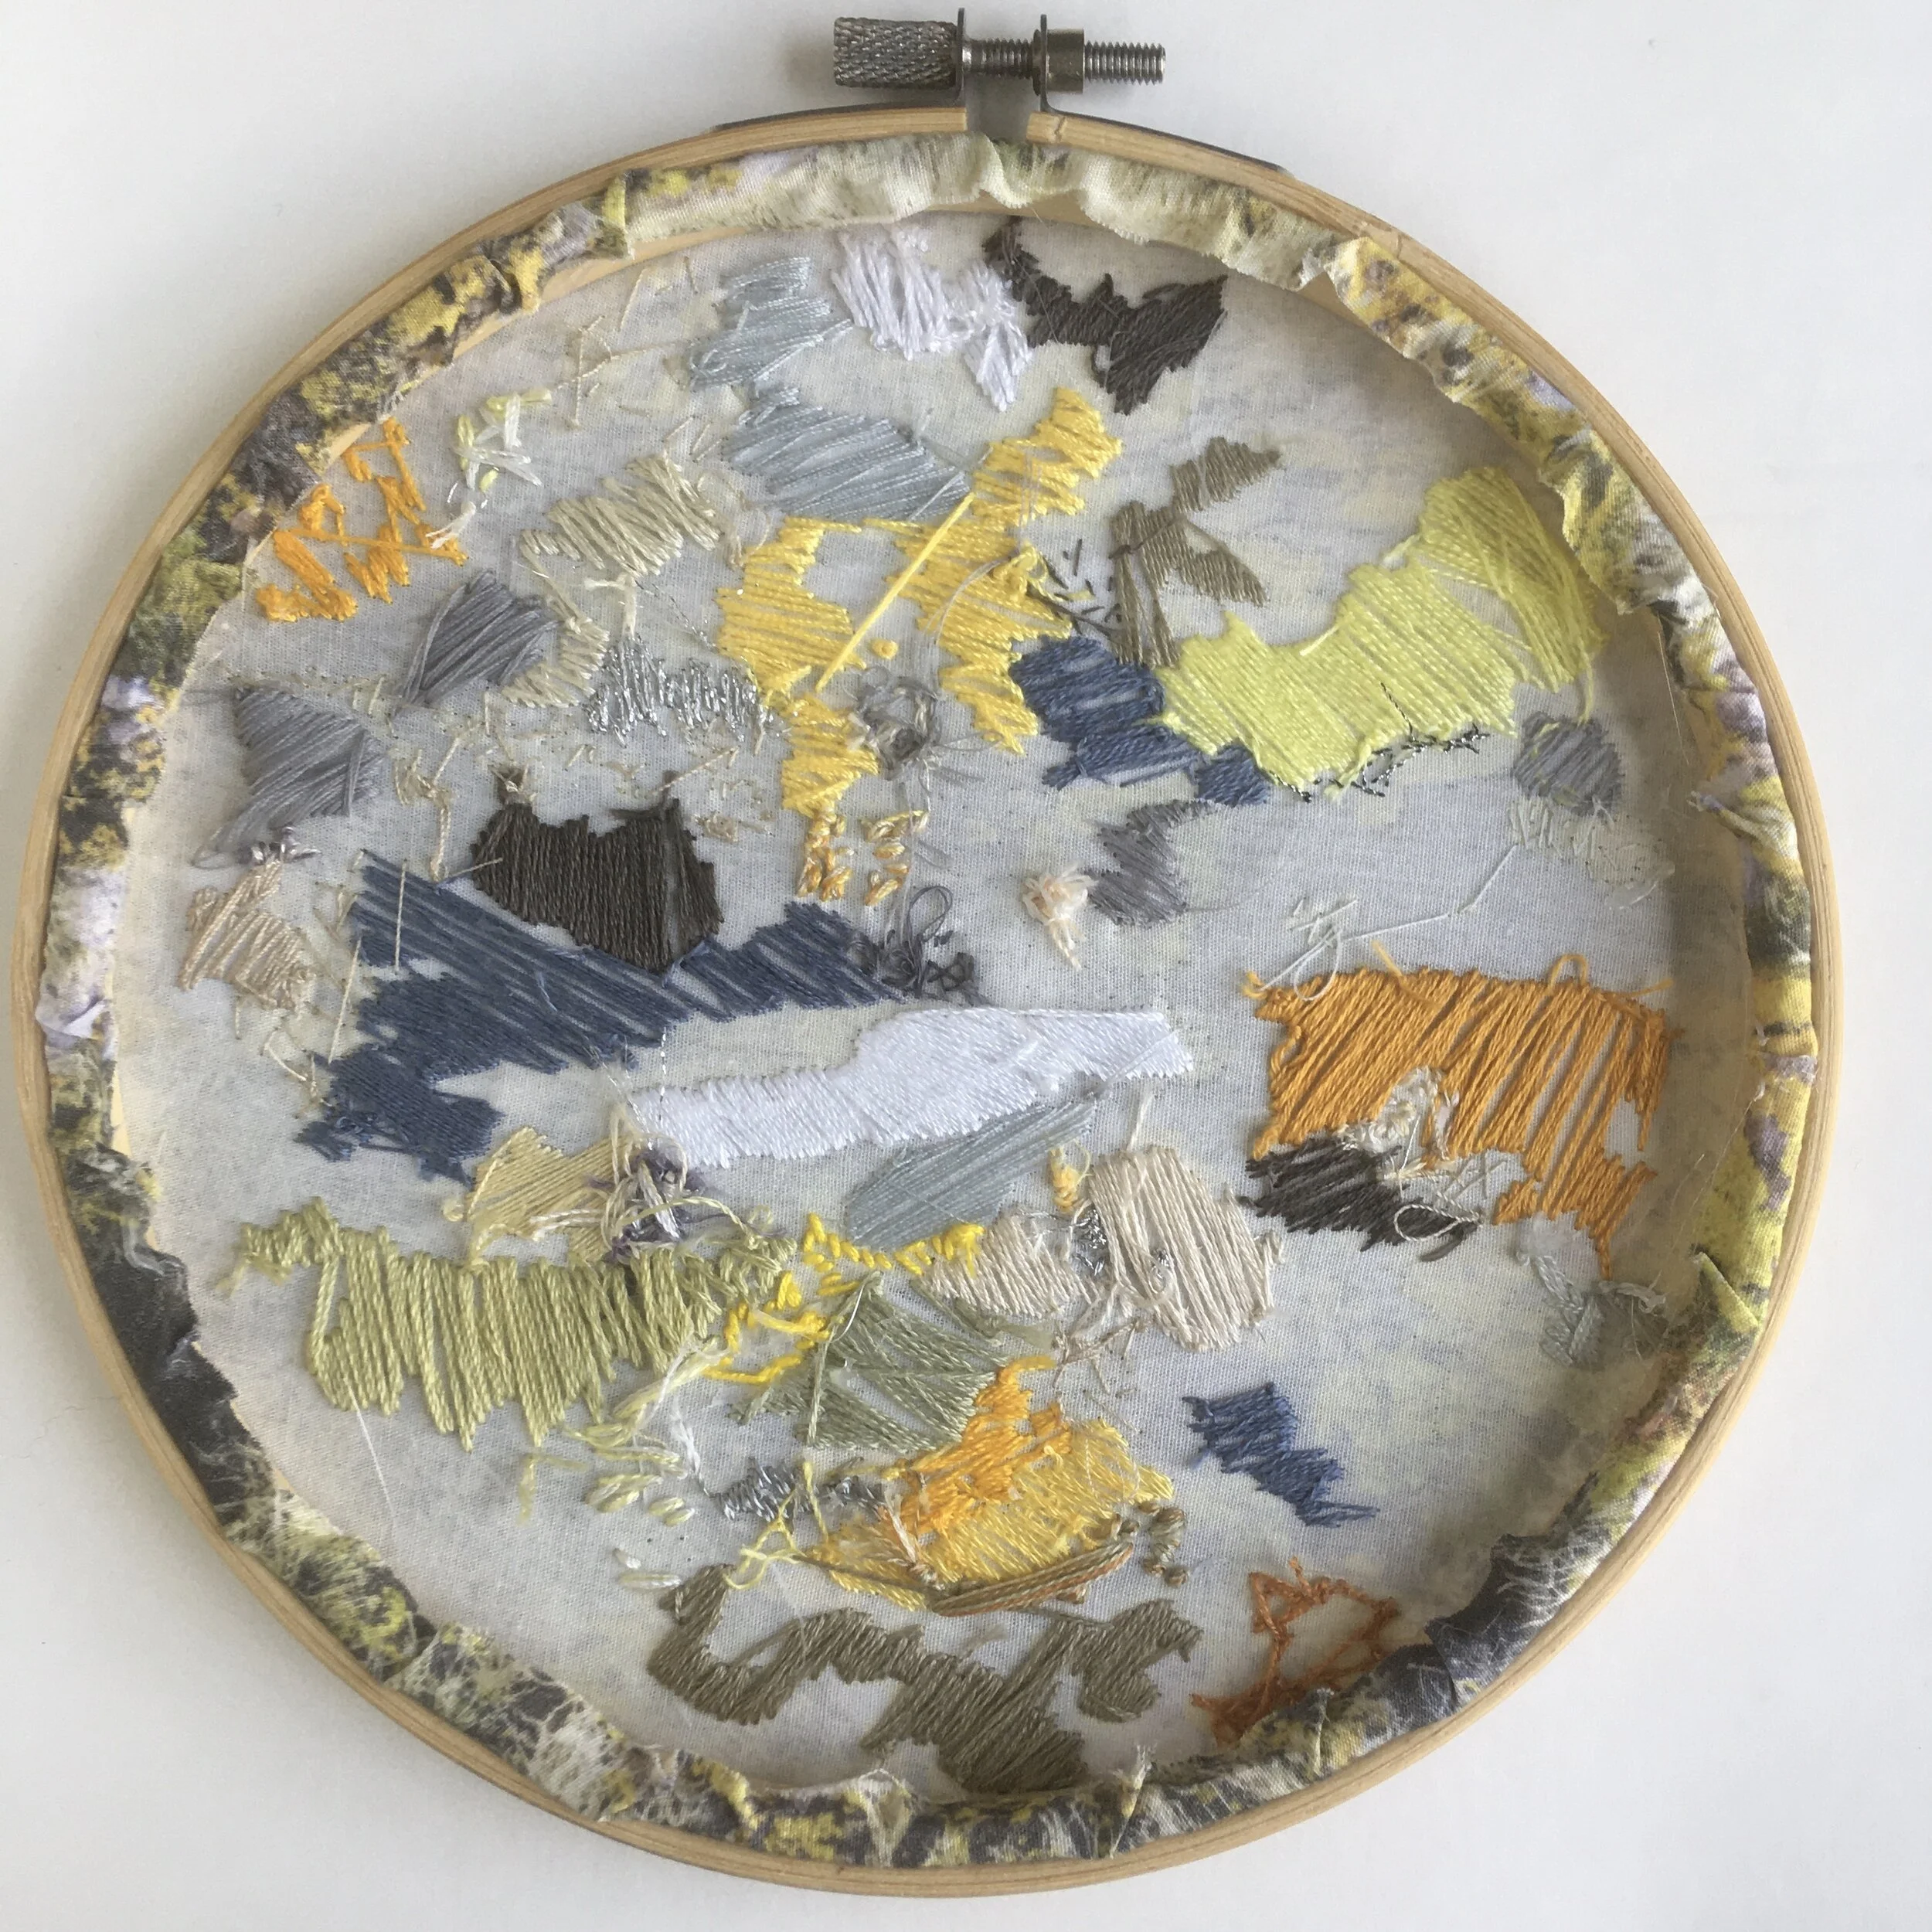
A picture of an embroidery hoop with fabric glued to the hoop to finish the back of the hoop

1. Glue

This is great if you know you don’t want to use the hoop for another purpose at a later date and perfect if you’ve not got enough fabric to gather. Just get your glue gun out and work round the hoop section by section
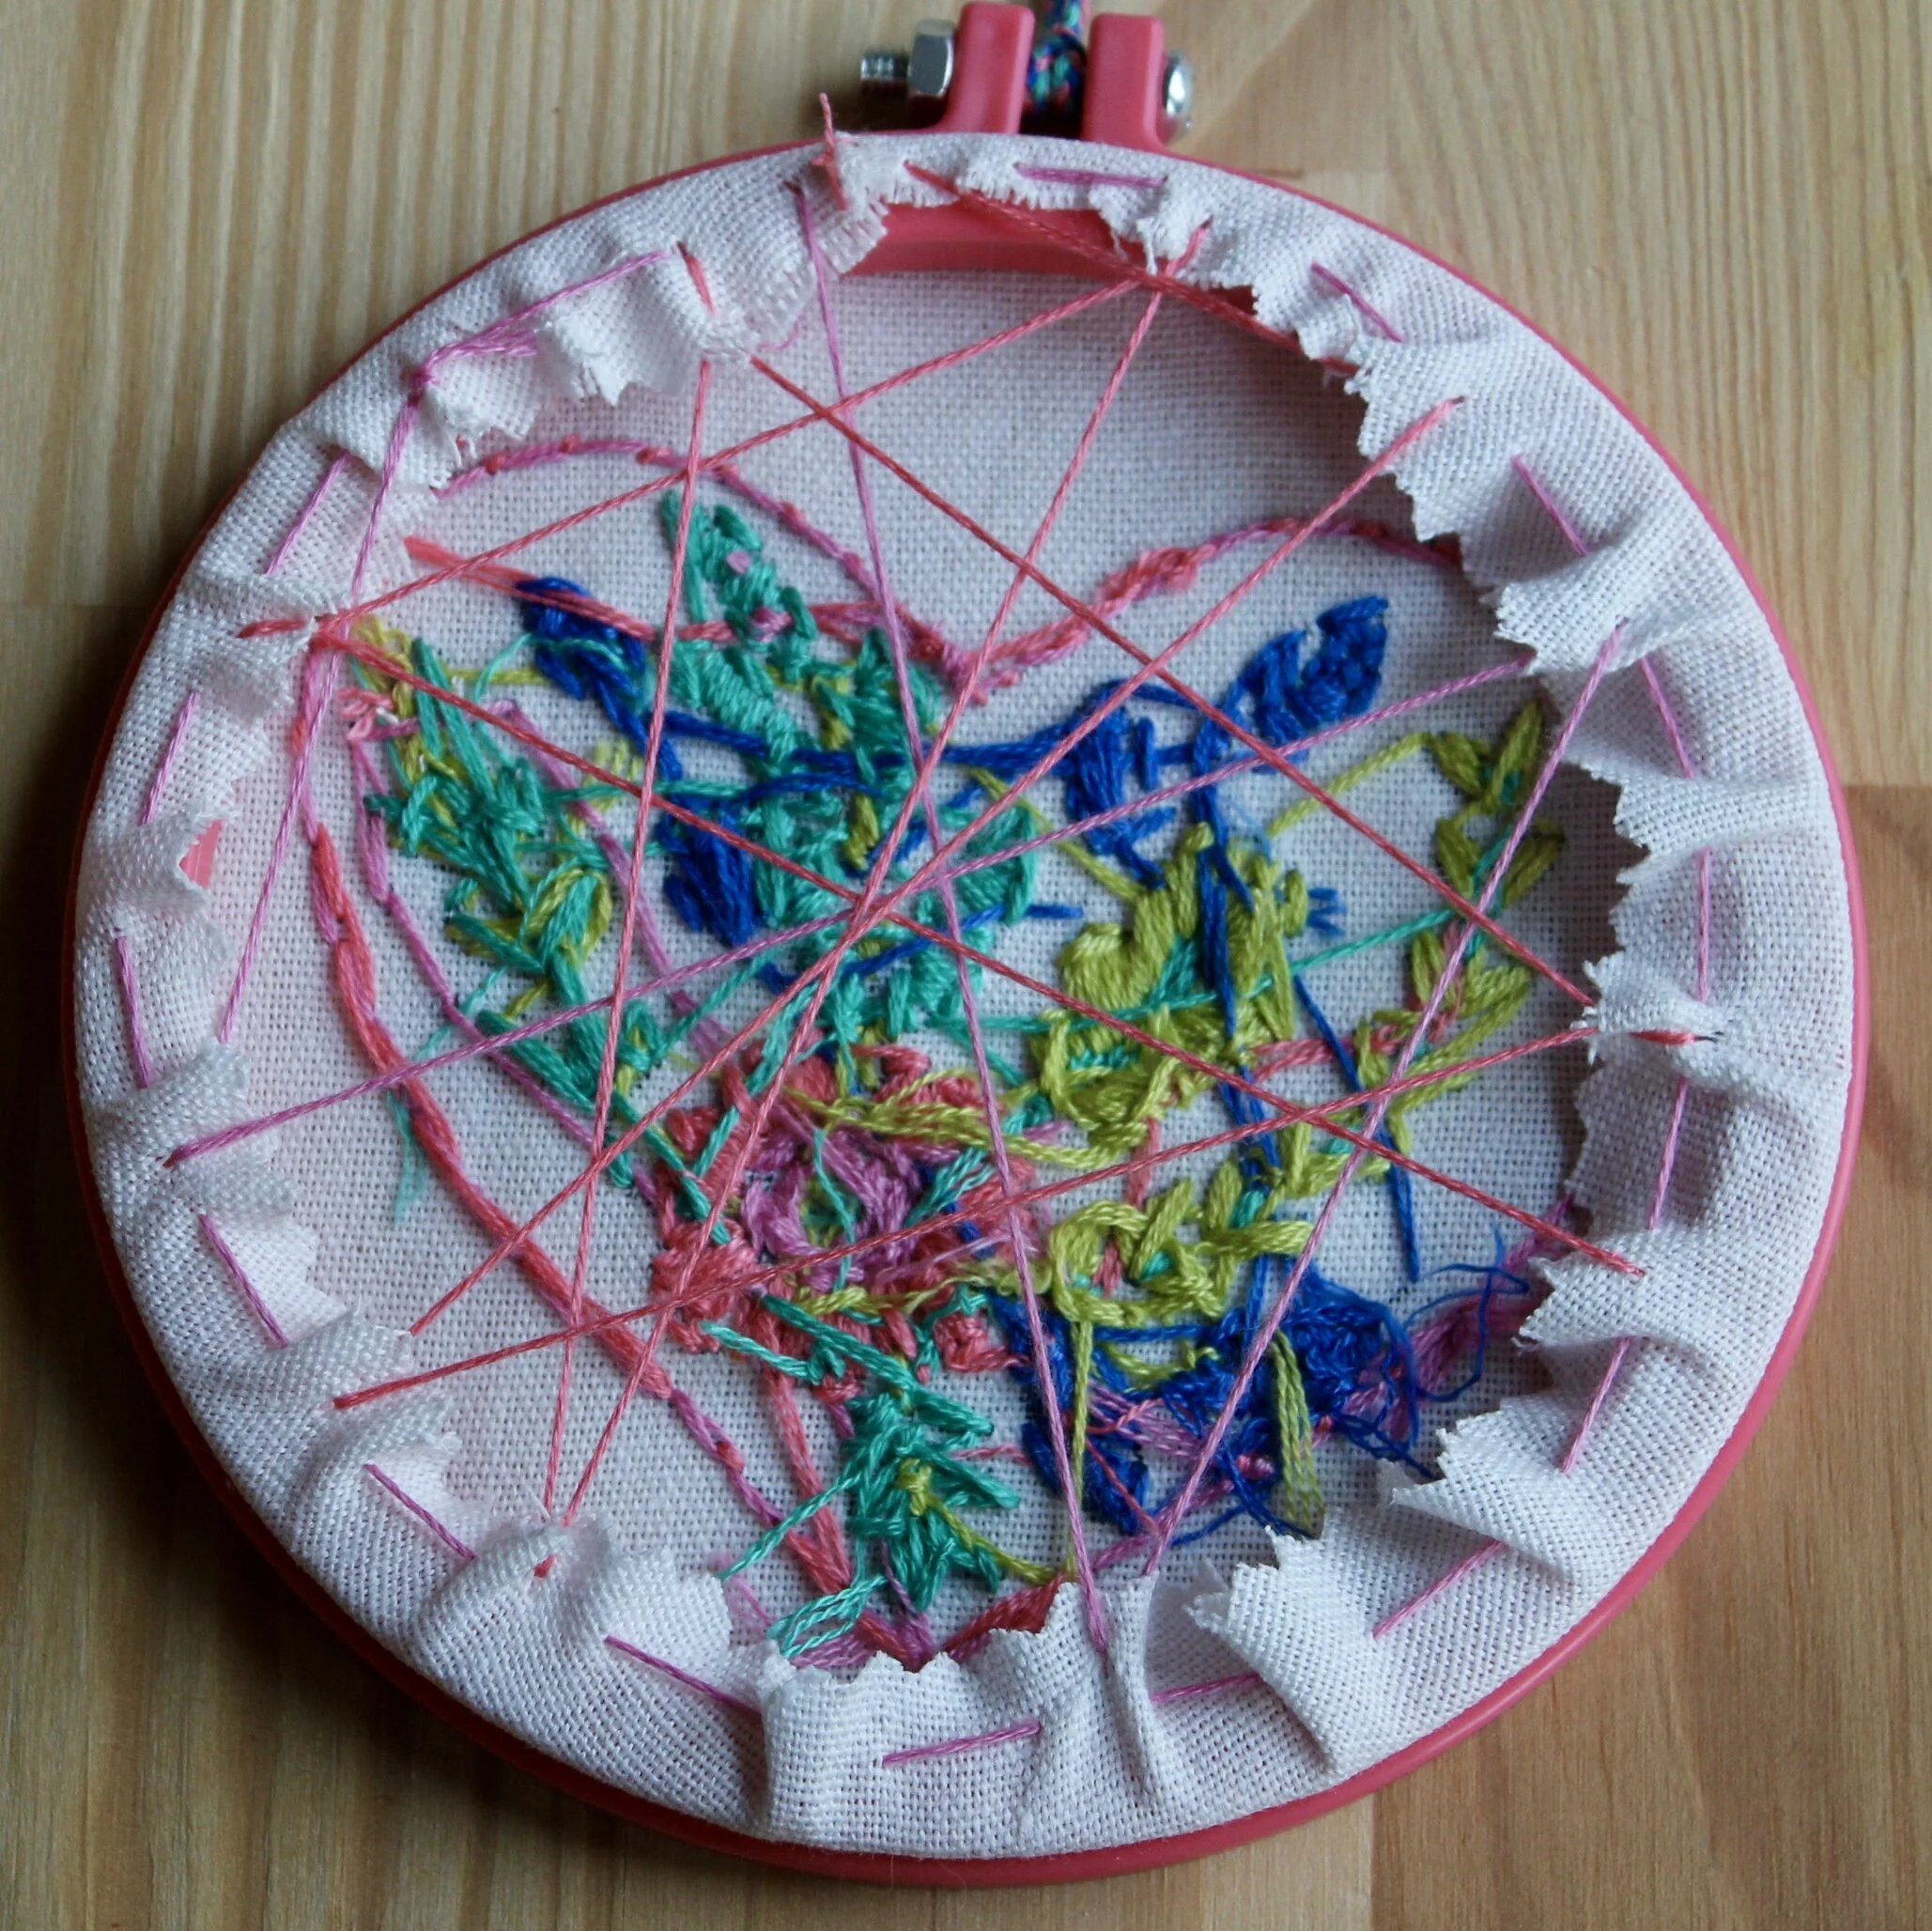
A picture showing an embroidery hoop by finished by gathering fabric using running stitches

2. Gathering

The easiest non-permanent way to finish a hoop by stitching around the edge of the fabric at the back of the hoop and gently pulling the threads to tighten the edges. Just use a large running stitch round the edge of the fabric and gently pul until the fabric has gathered. You can get an even flatter finish if you criss-cross the threads at tension across the back of the hoop as well.
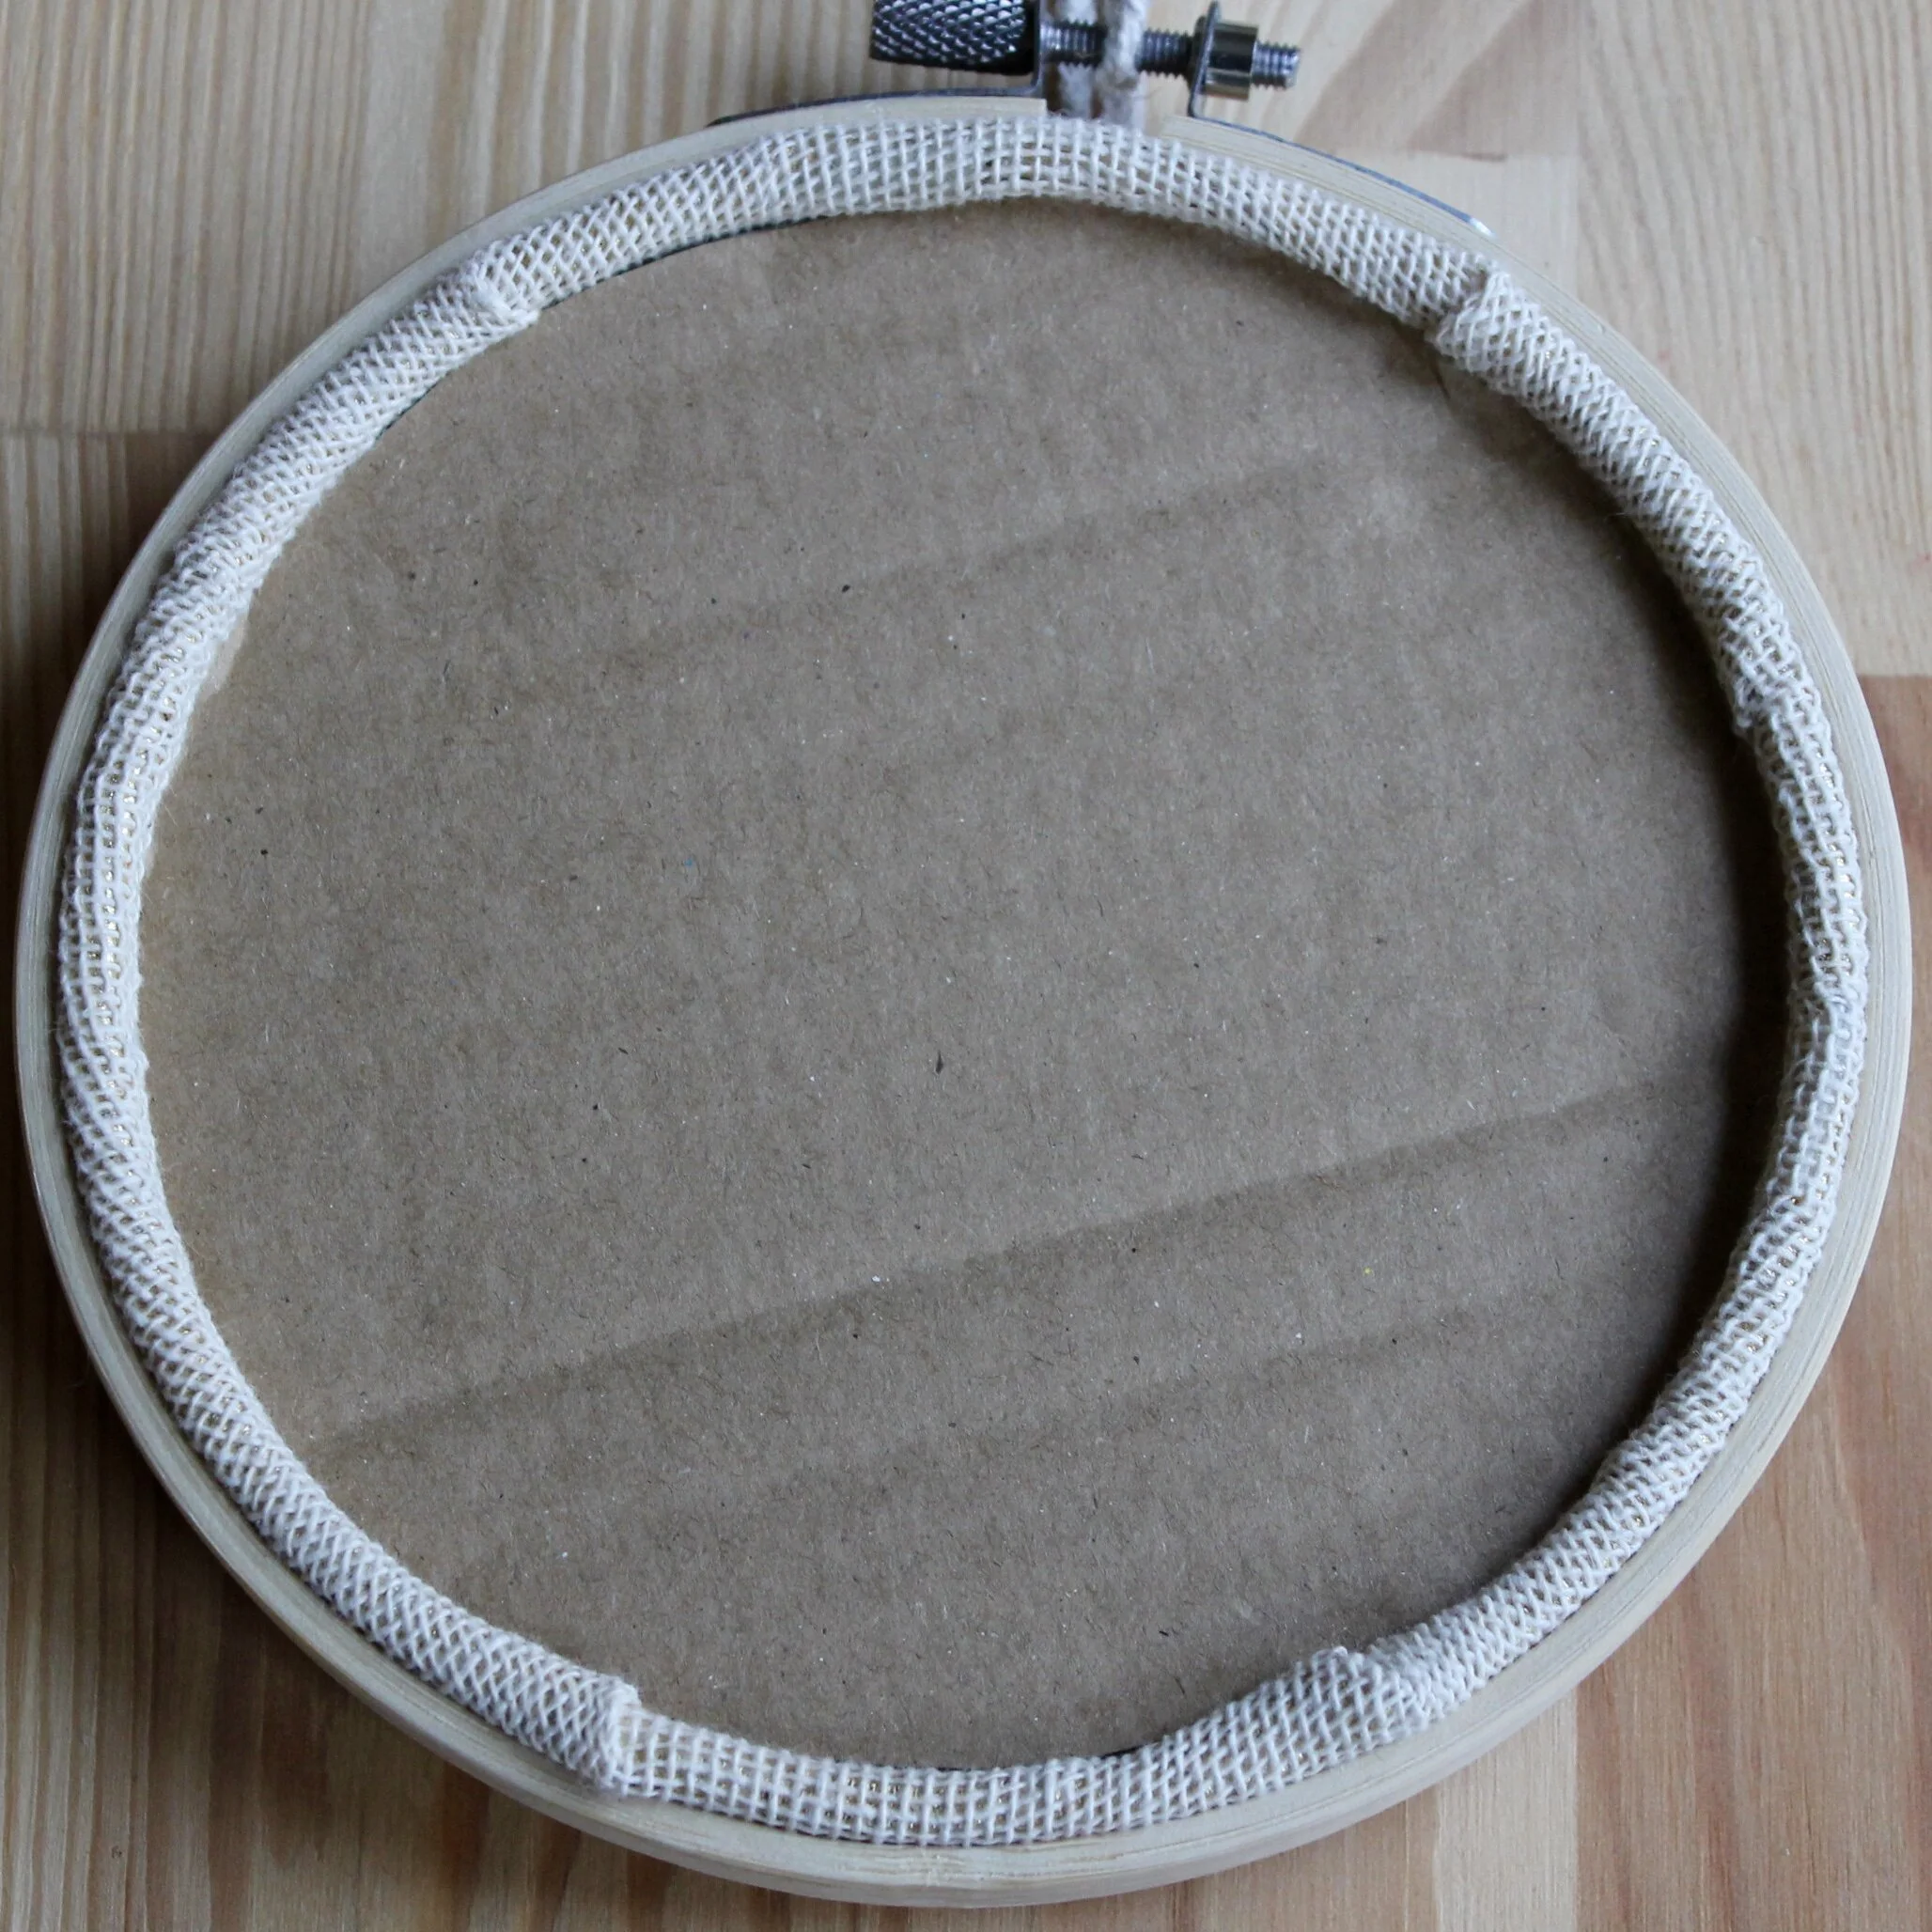
A picture of an embroidery hoop finished using a cardboard circle

3. Cardboard

This is my current favourite as it is so simple, works best if you’ve already gathered the lose fabric although you can sometimes get away with not having done this. Just draw round the inner hoop on a bit of cardboard and cut it out inside the line, trimming by a small amount if the card board still doesn’t fit
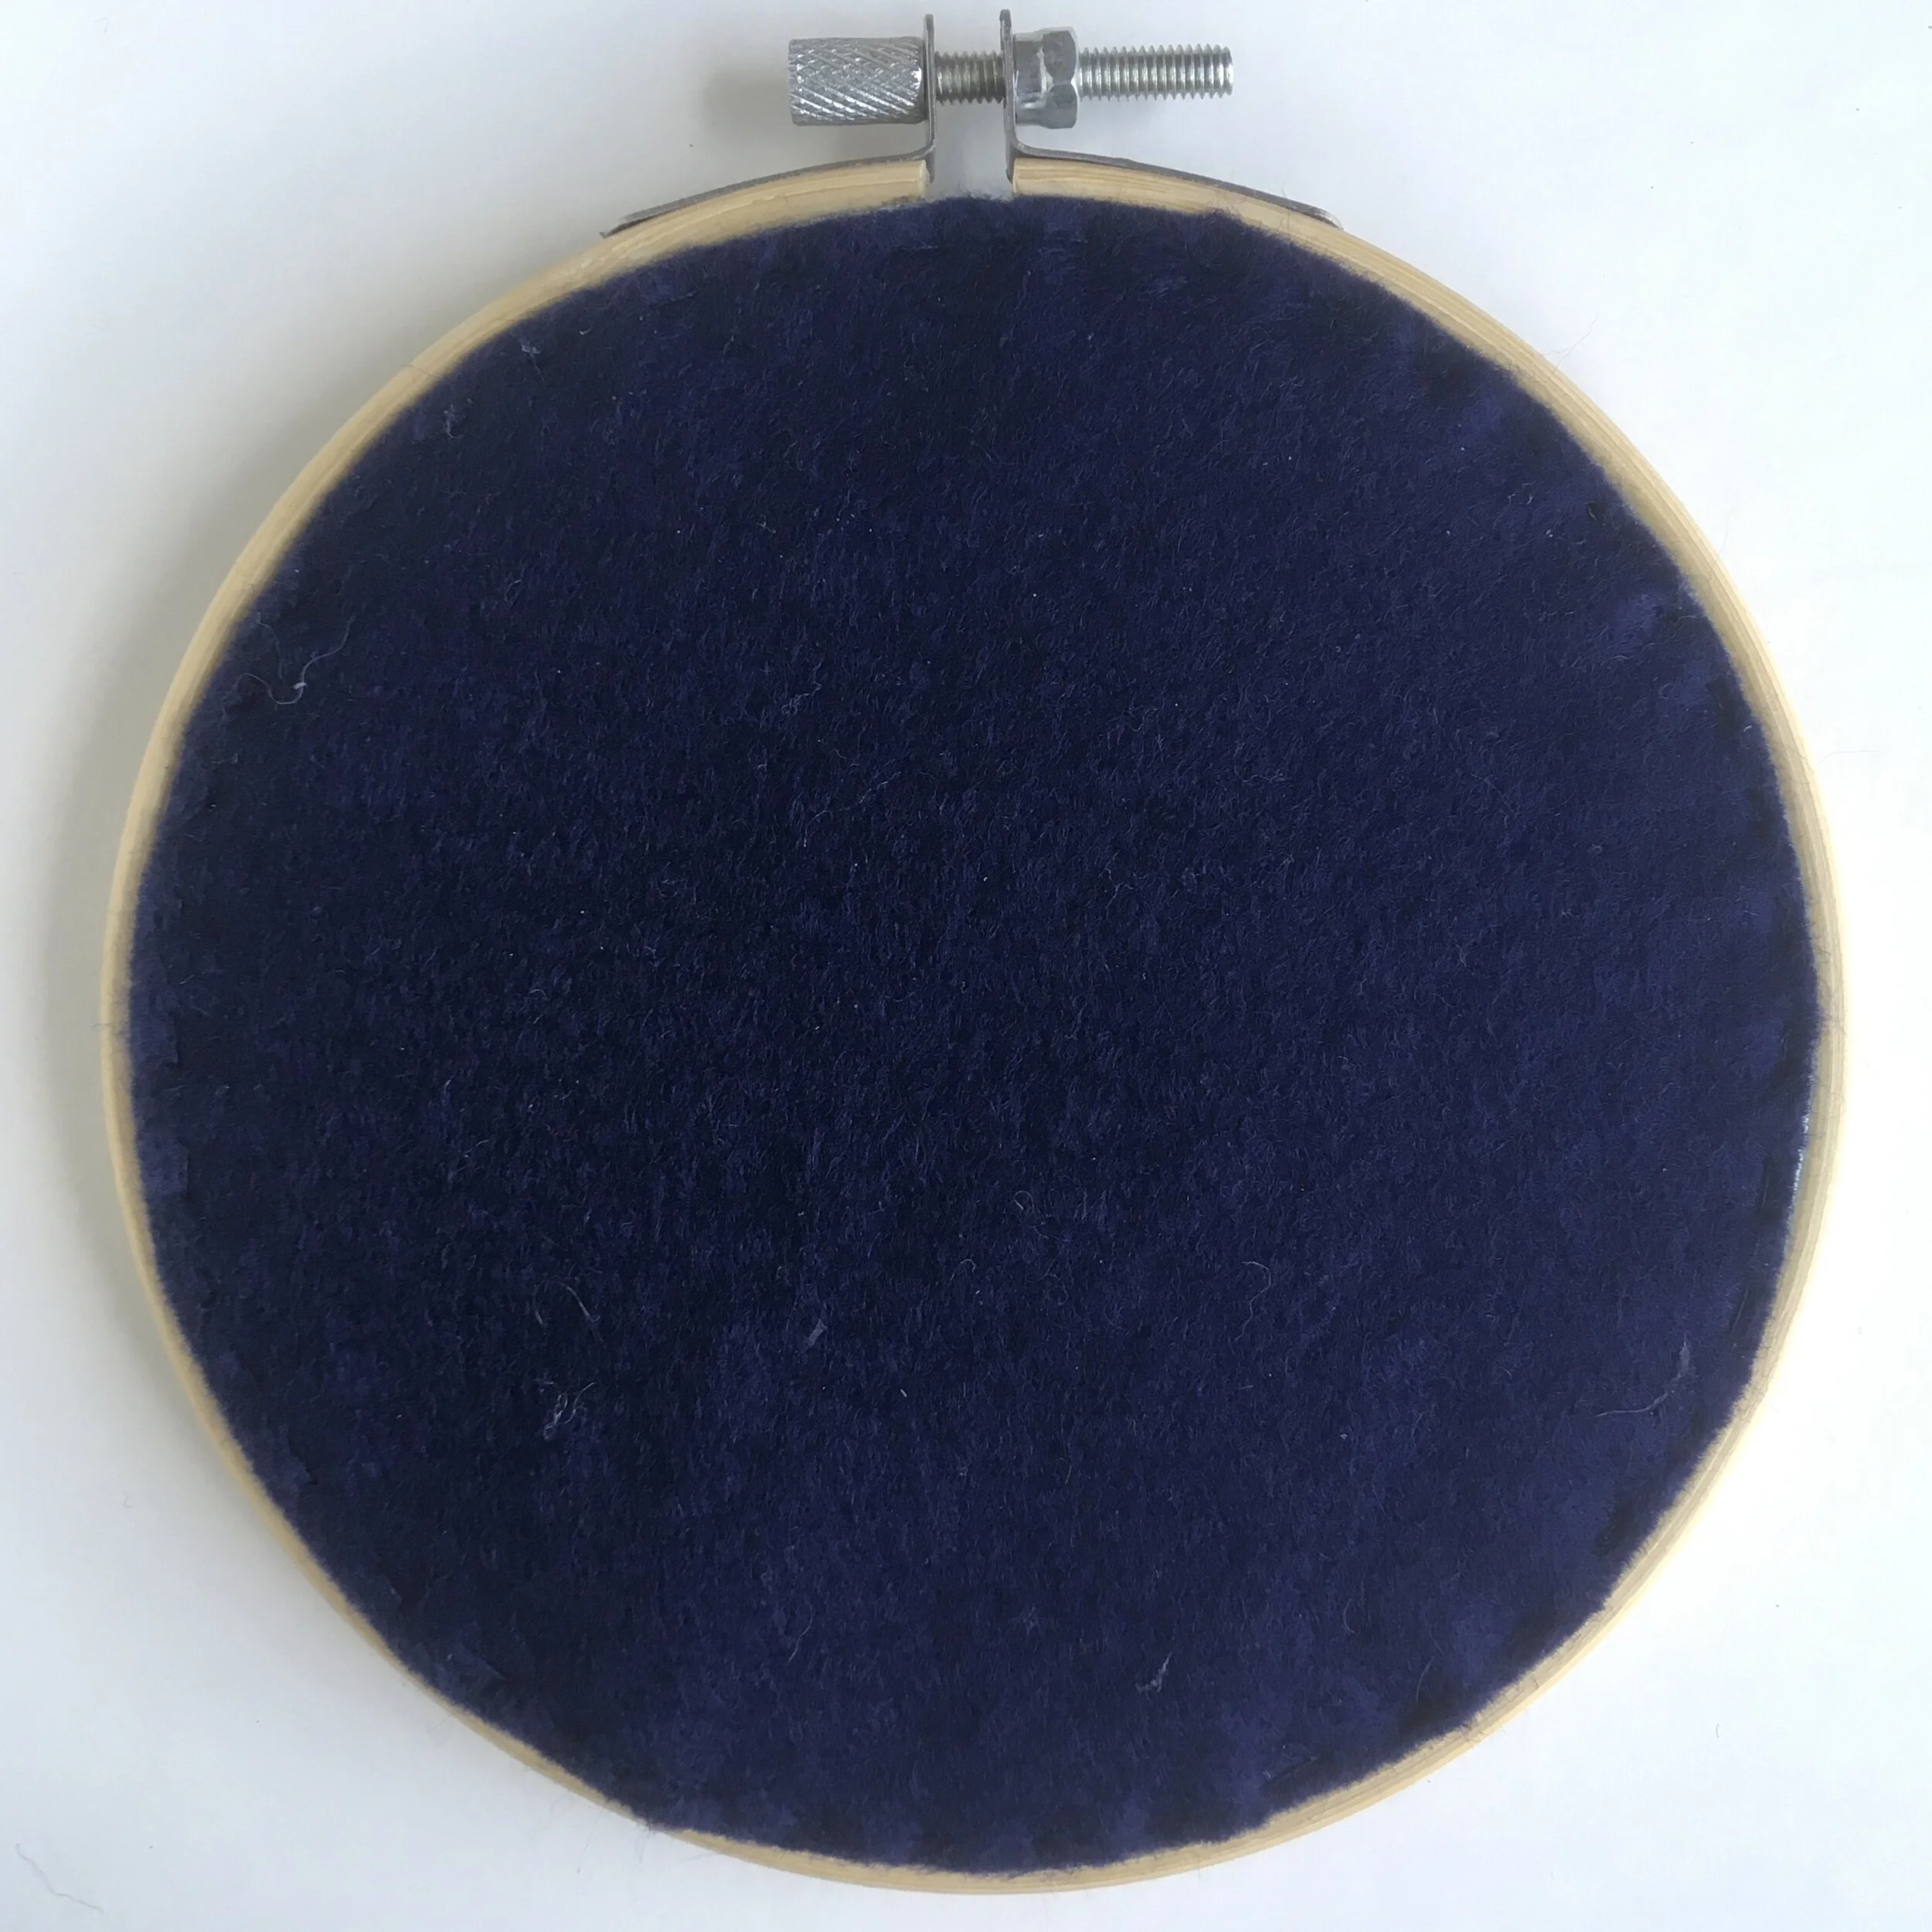
A picture of the back of an embroidery hoop finished off by stitching fabric over the back of the hoop

4. Felt

This gives the most professional finish again you need to gather the fabric first before carefully stitching the felt on to the fabric. Draw round the inner hoop on the felt and then attach with either running stitch or blanket stitch

Enjoyed this blog post? I share embroidery tips and a free embroidery pattern in my monthly newsletter. Sign up here to receive the newsletter on the 1st of each the month.
In tips 2 Tags Hoops, Finishing, Basics
Comment
A picture of brick stitch in three different blue threads. Overlaid is a blue square with white text saying - stitch showcase, brick stitch, www.embellishedelephant.co.uk

Stitch Showcase: Brick Stitch

December 9, 2020

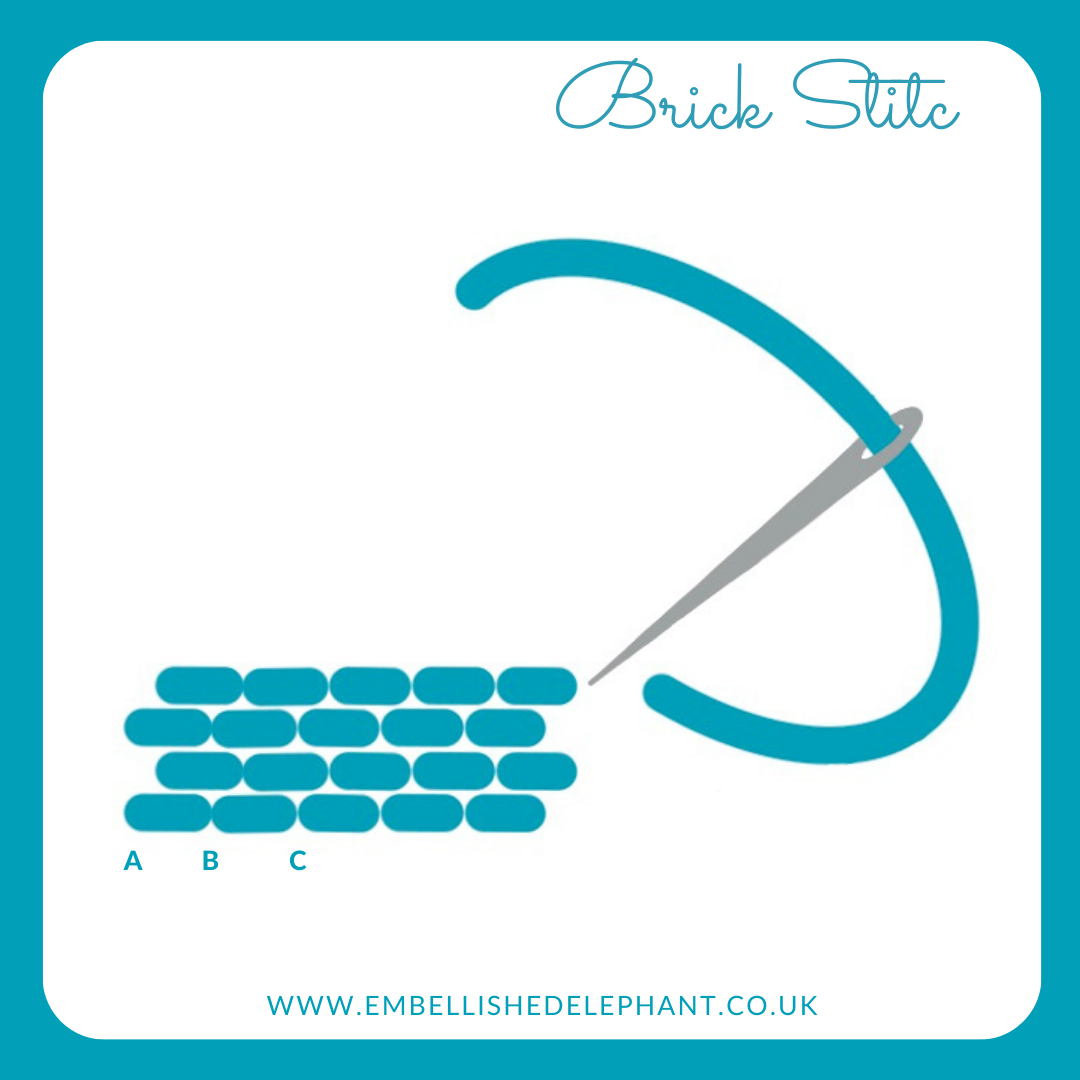
Brick stitch is simply rows of back stitch next to each other and staggered, like bricks in the wall.

  • Start by creating a row of backstitch (see here for a tutorial on backstitch)

  • To create the next row, start the stitch about half way along the first (B)

  • Complete the stitch, making sure the length of the stitch is consistent with the previous row (A)

  • Create the next stitch again about halfway along the row above (C) and complete the stitch (B)

An illustration showing how to create brick stitch. The illustration is in blue on a white background.

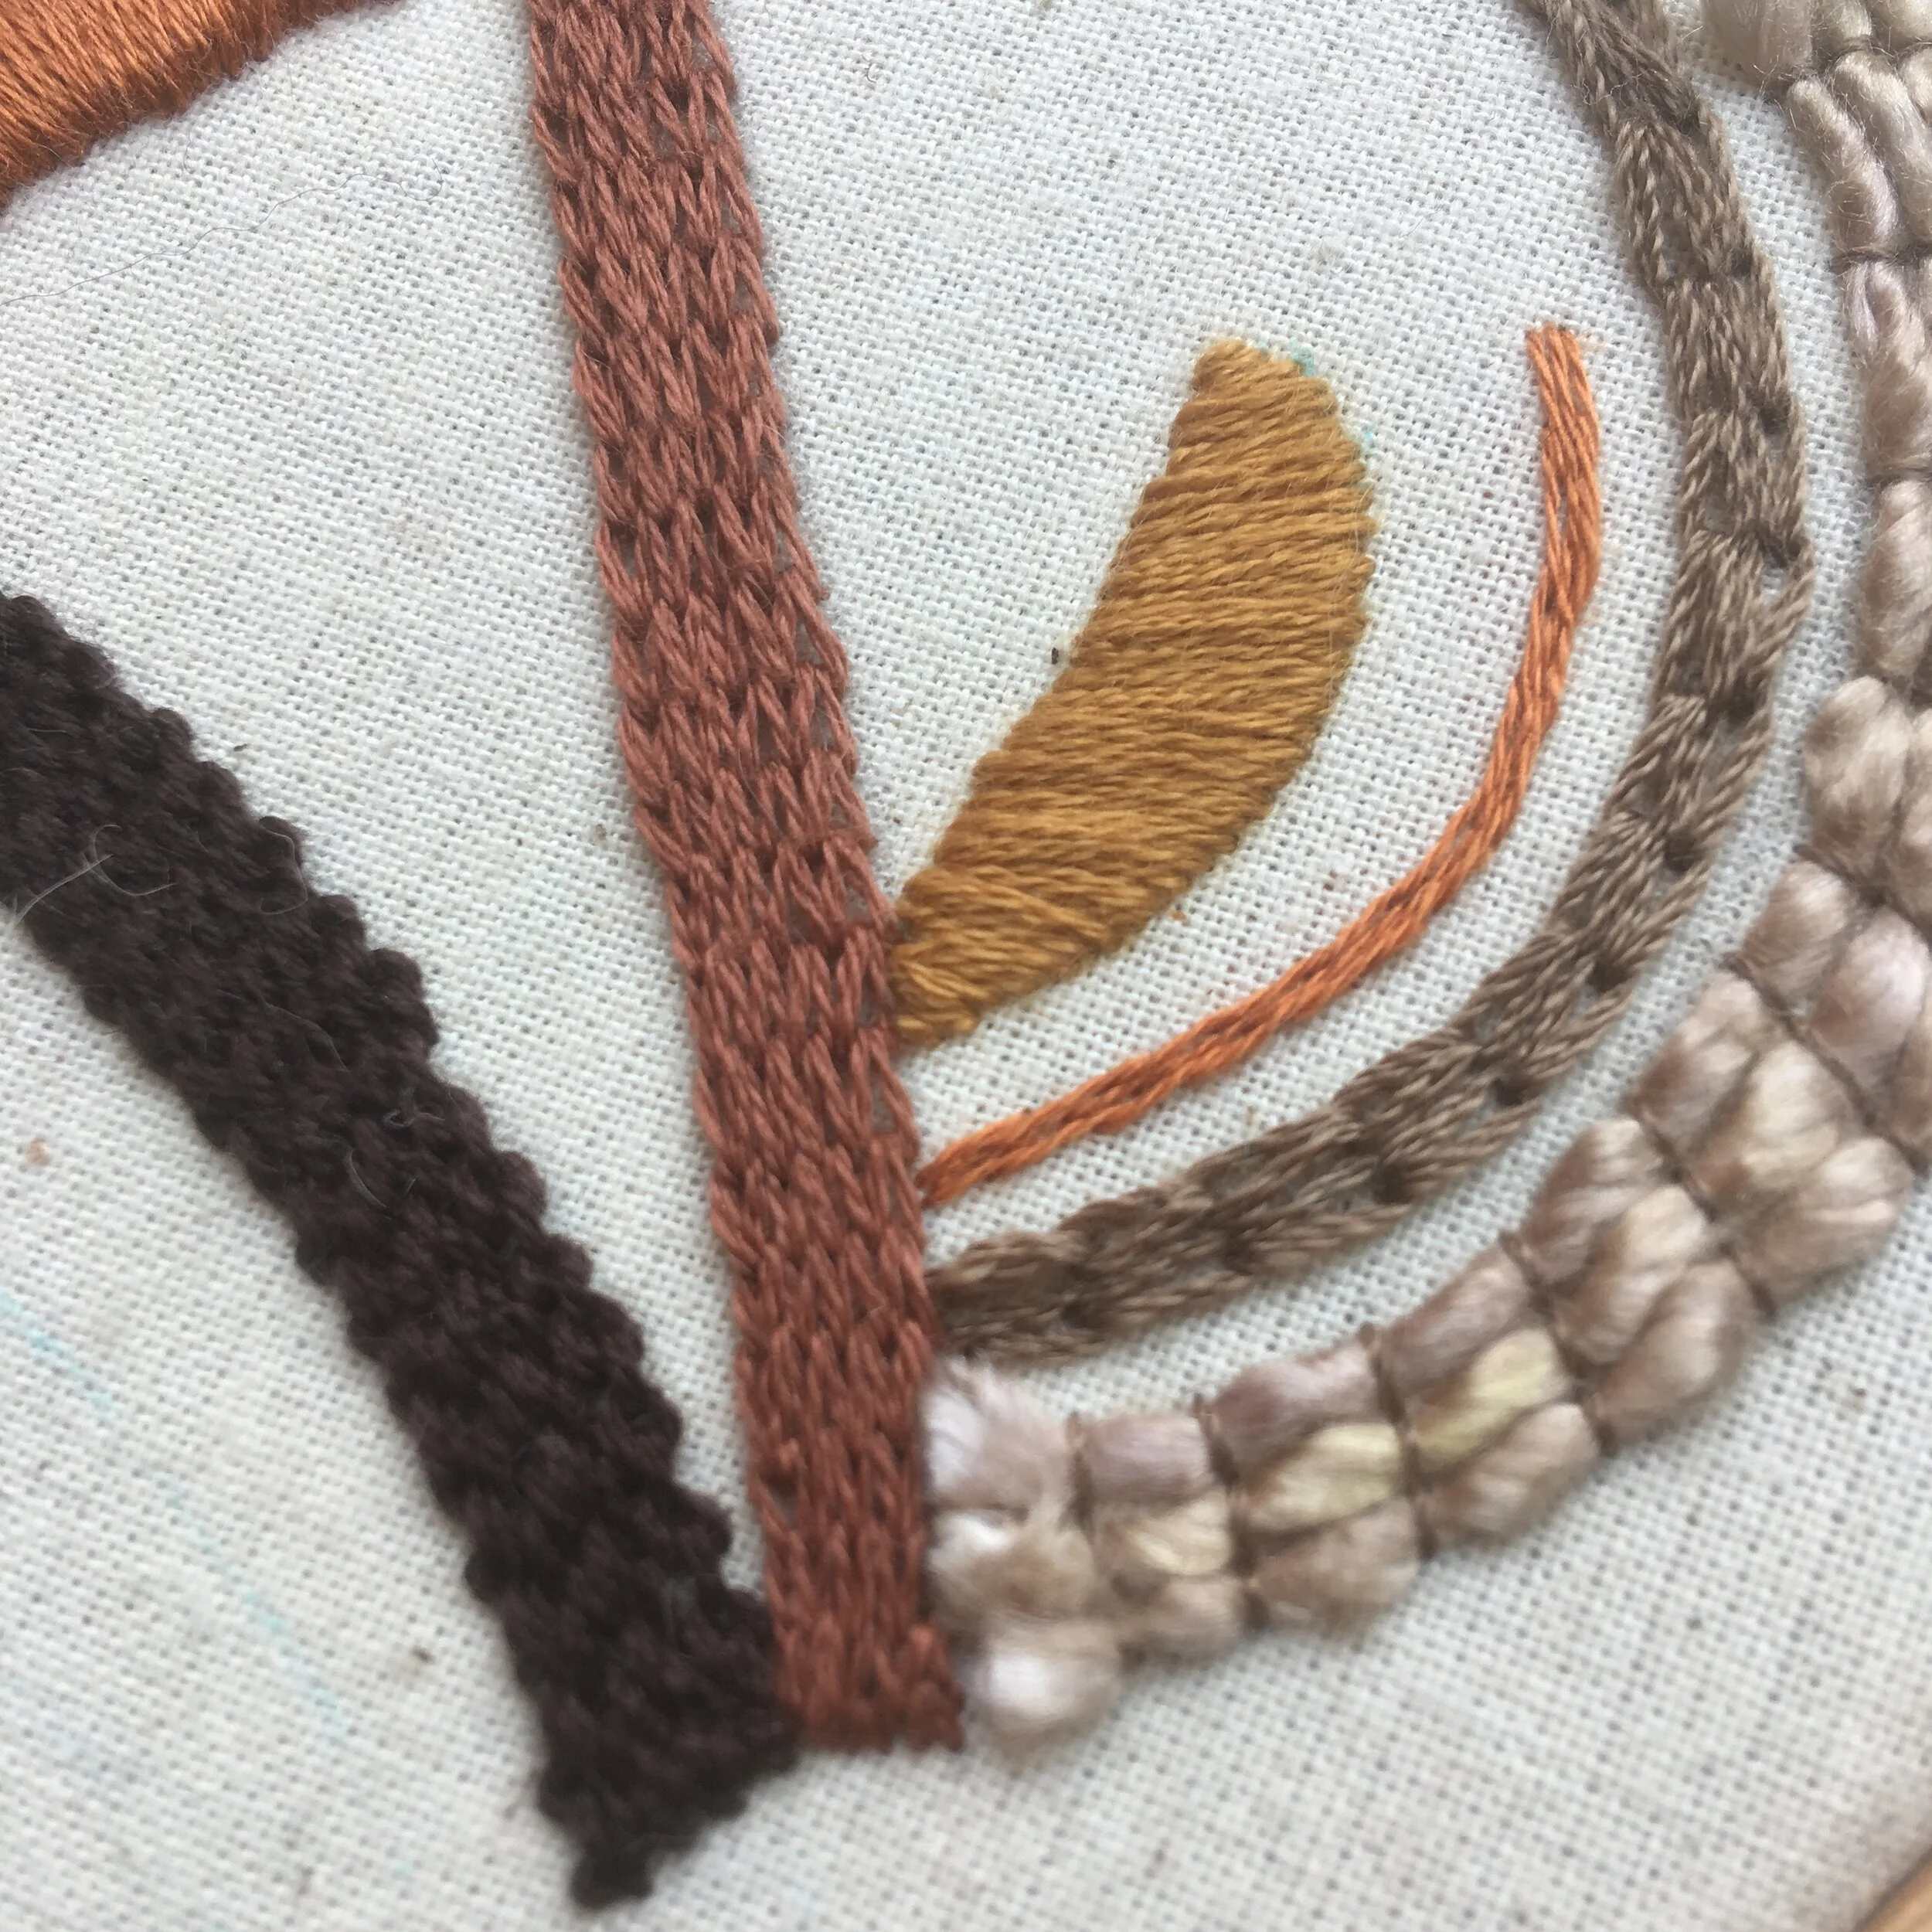
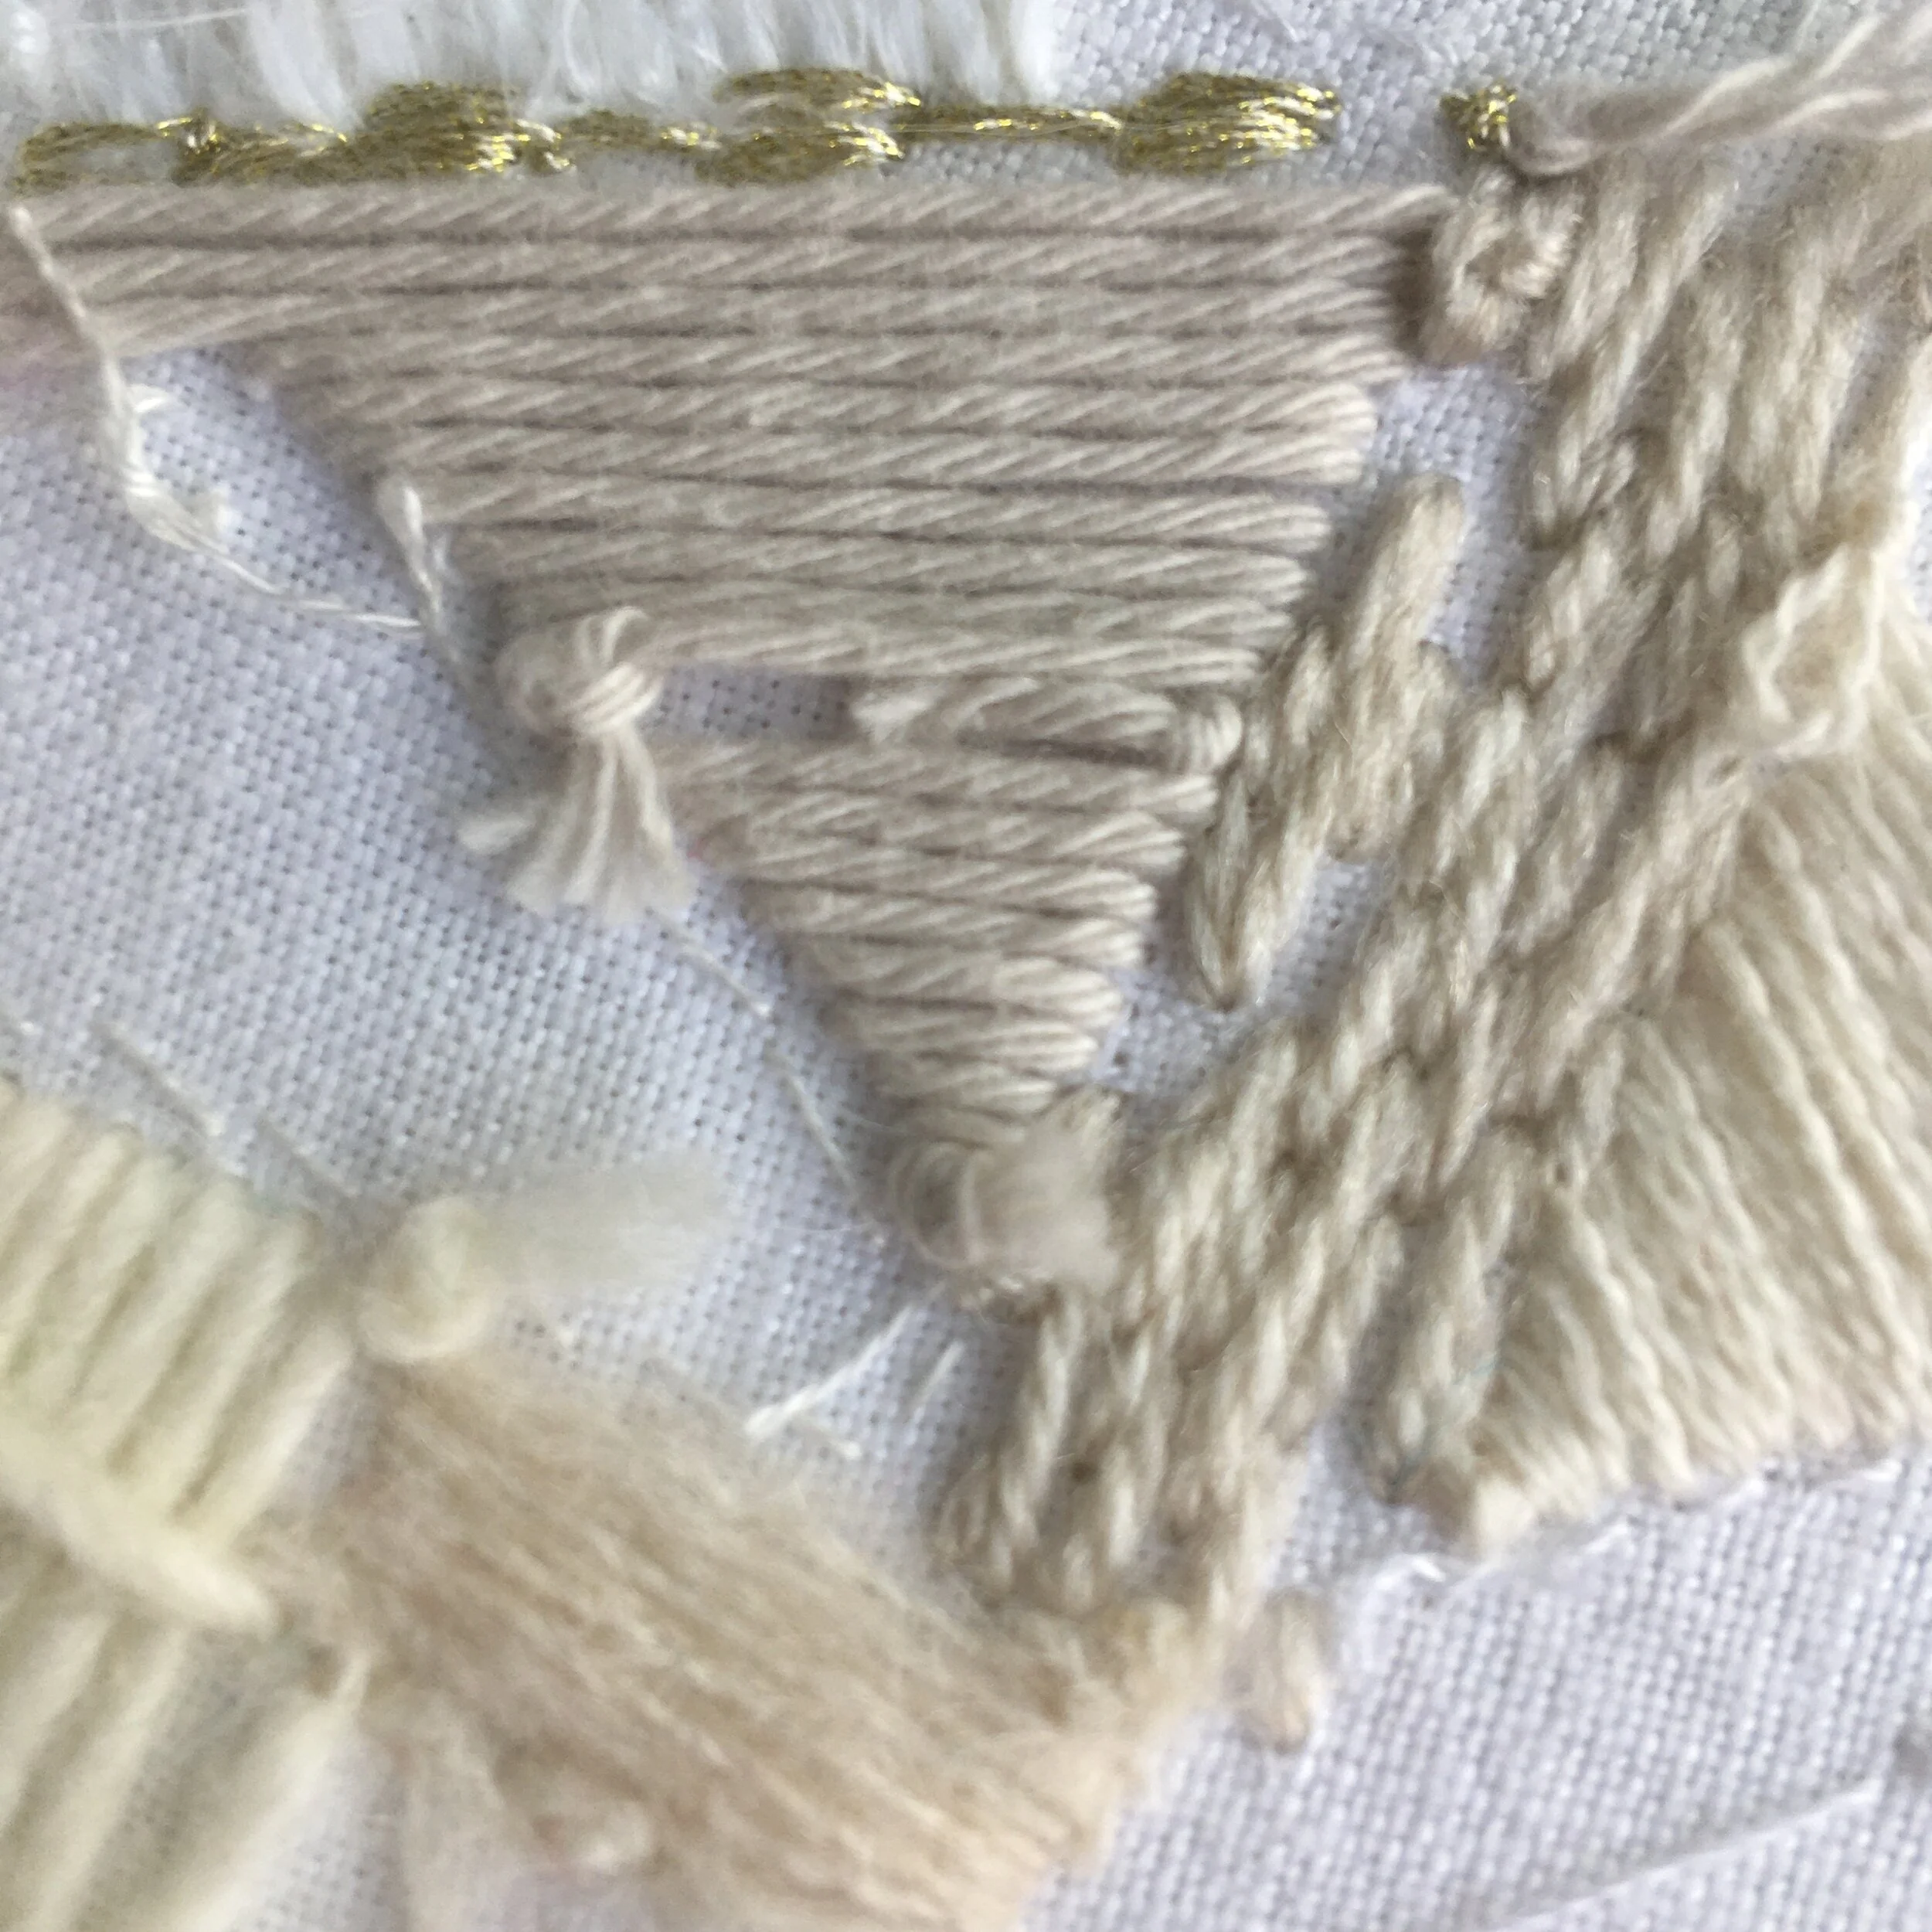
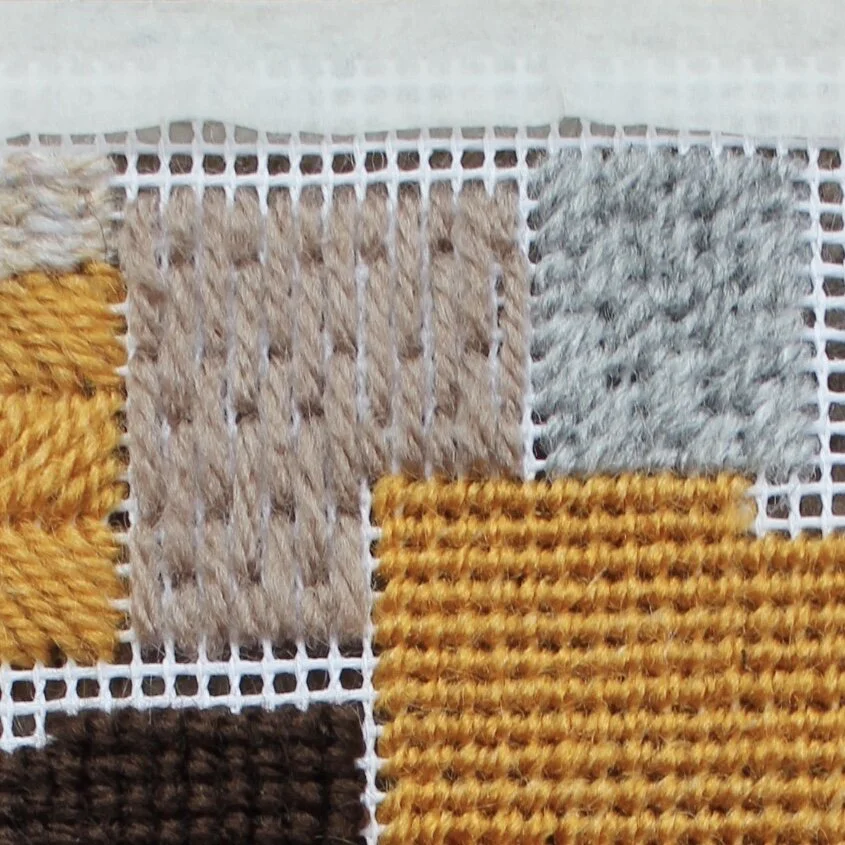
This canvas work sampler shows tow different examples of brick stitches, the light brown shows a block of bricks using longer stitches. Whilst the grey section the bricks are stitched in a diagonal direction.

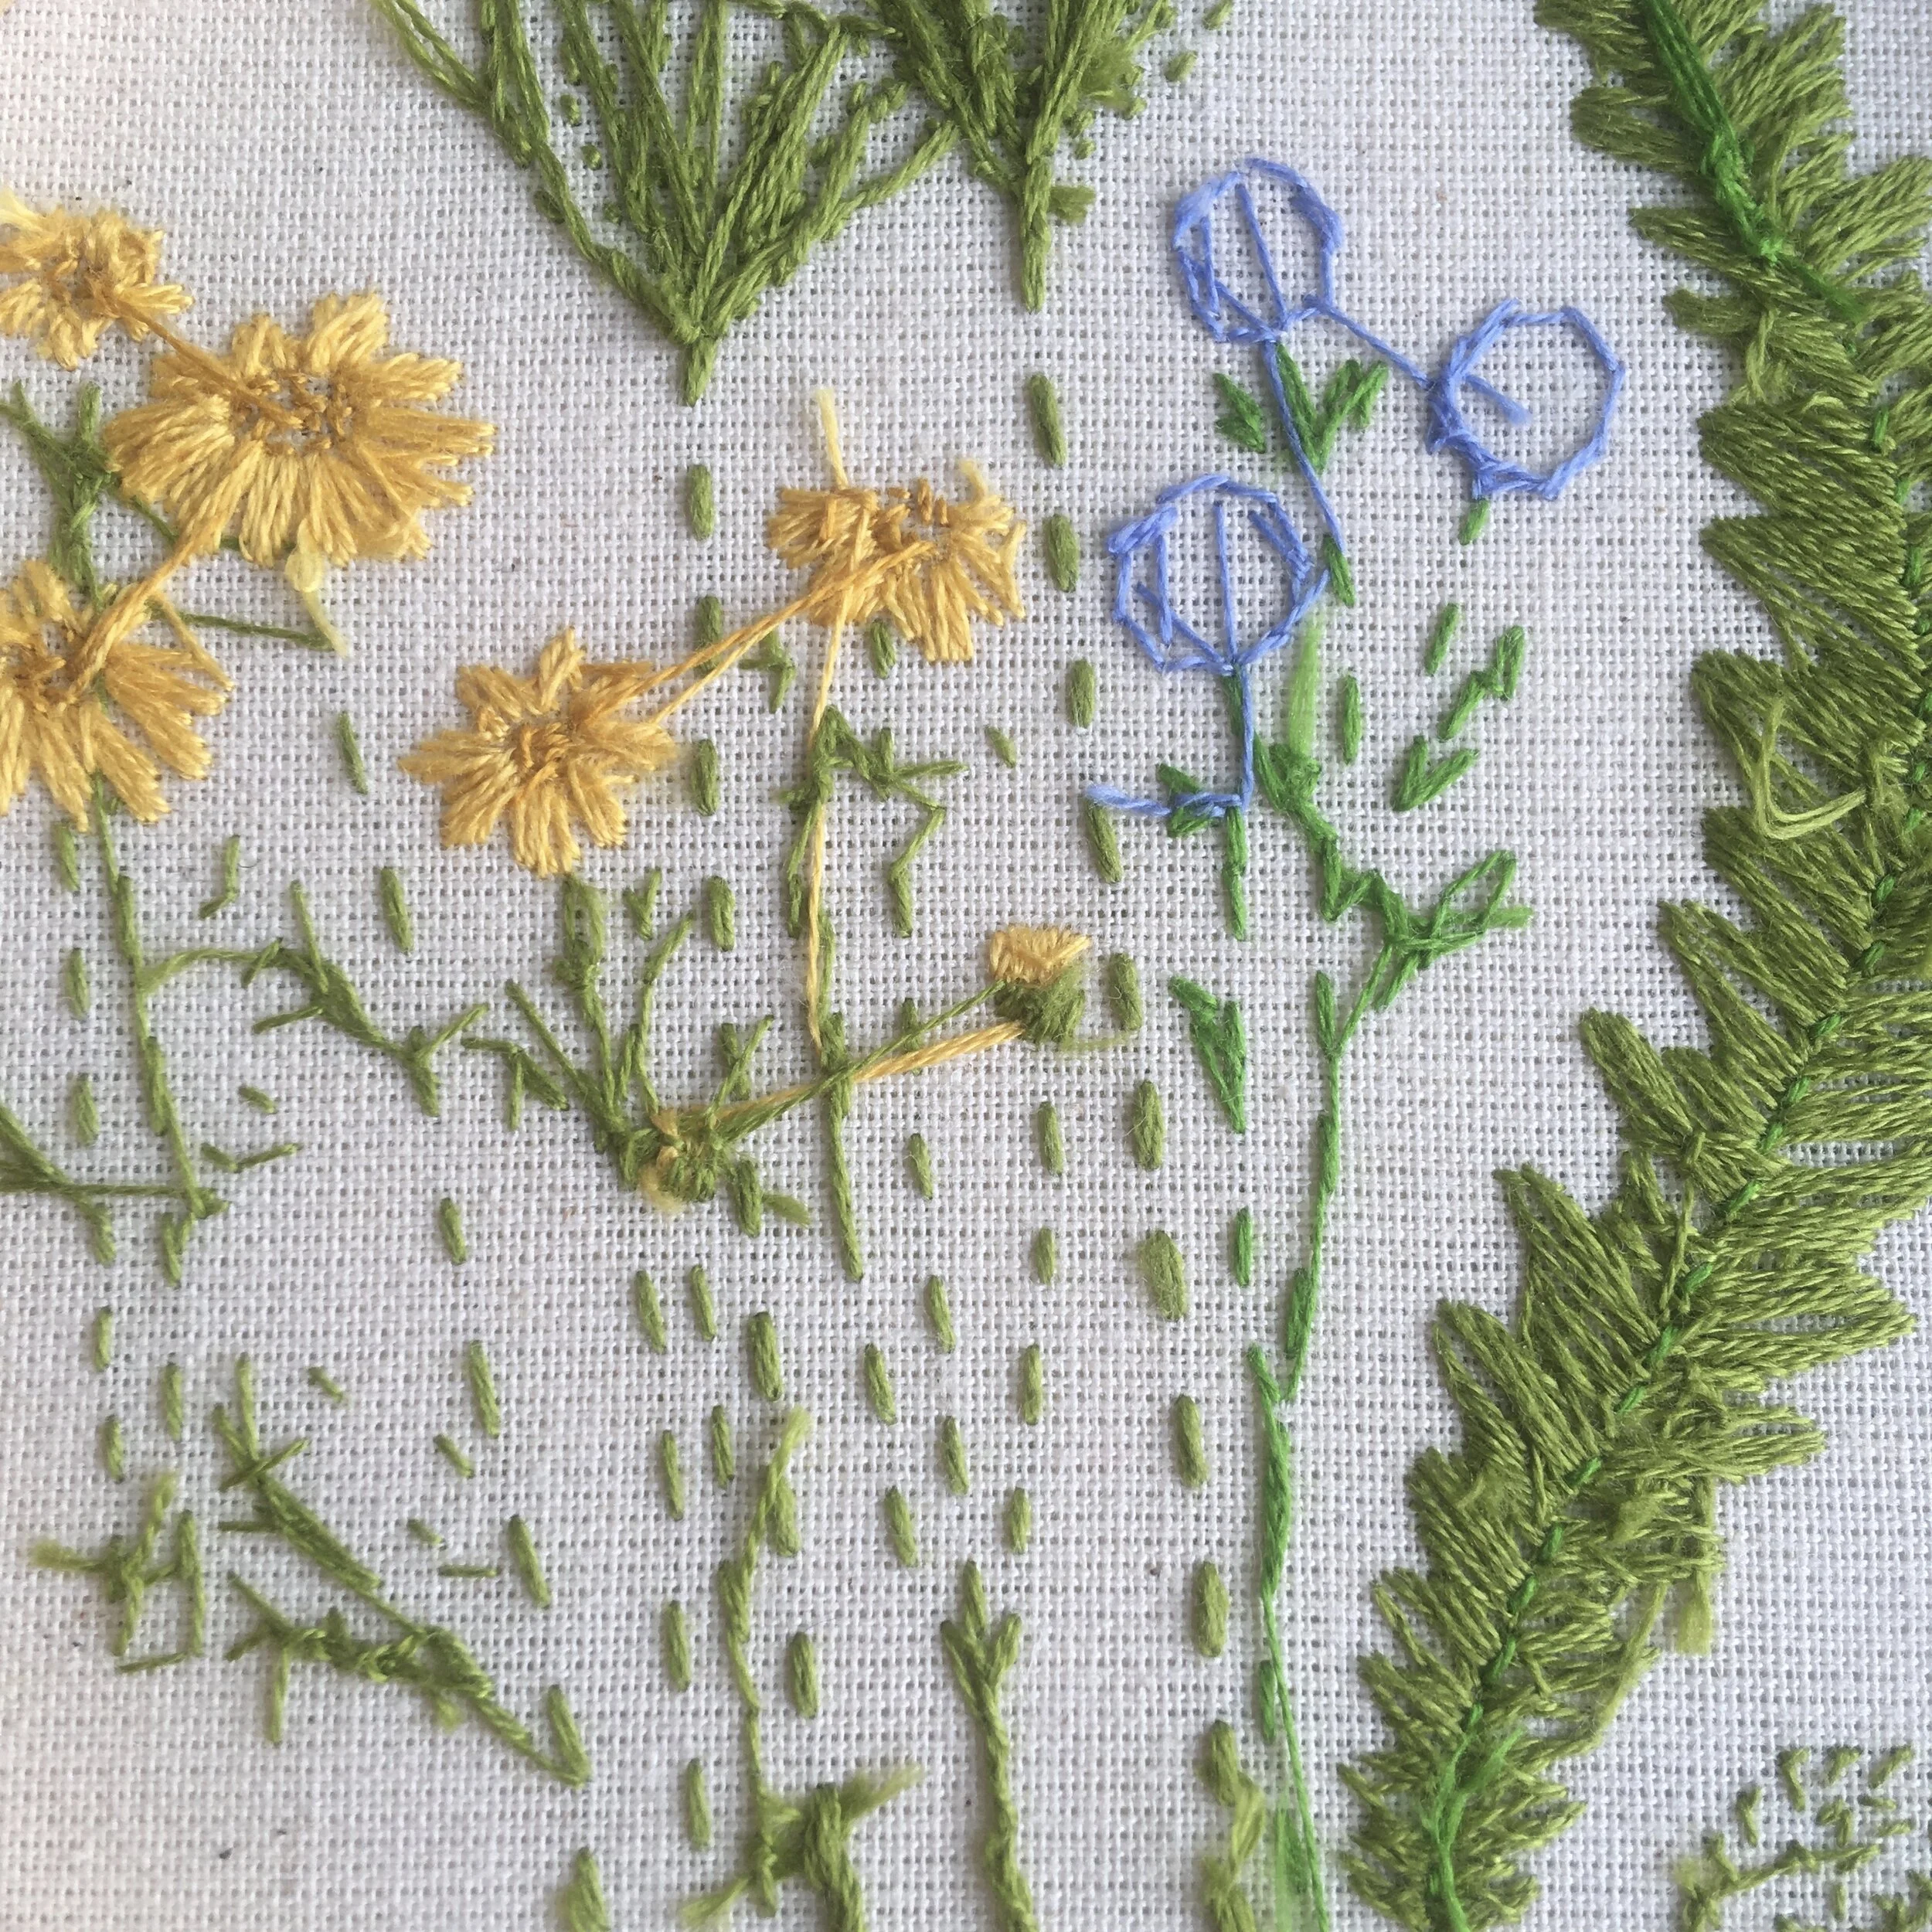
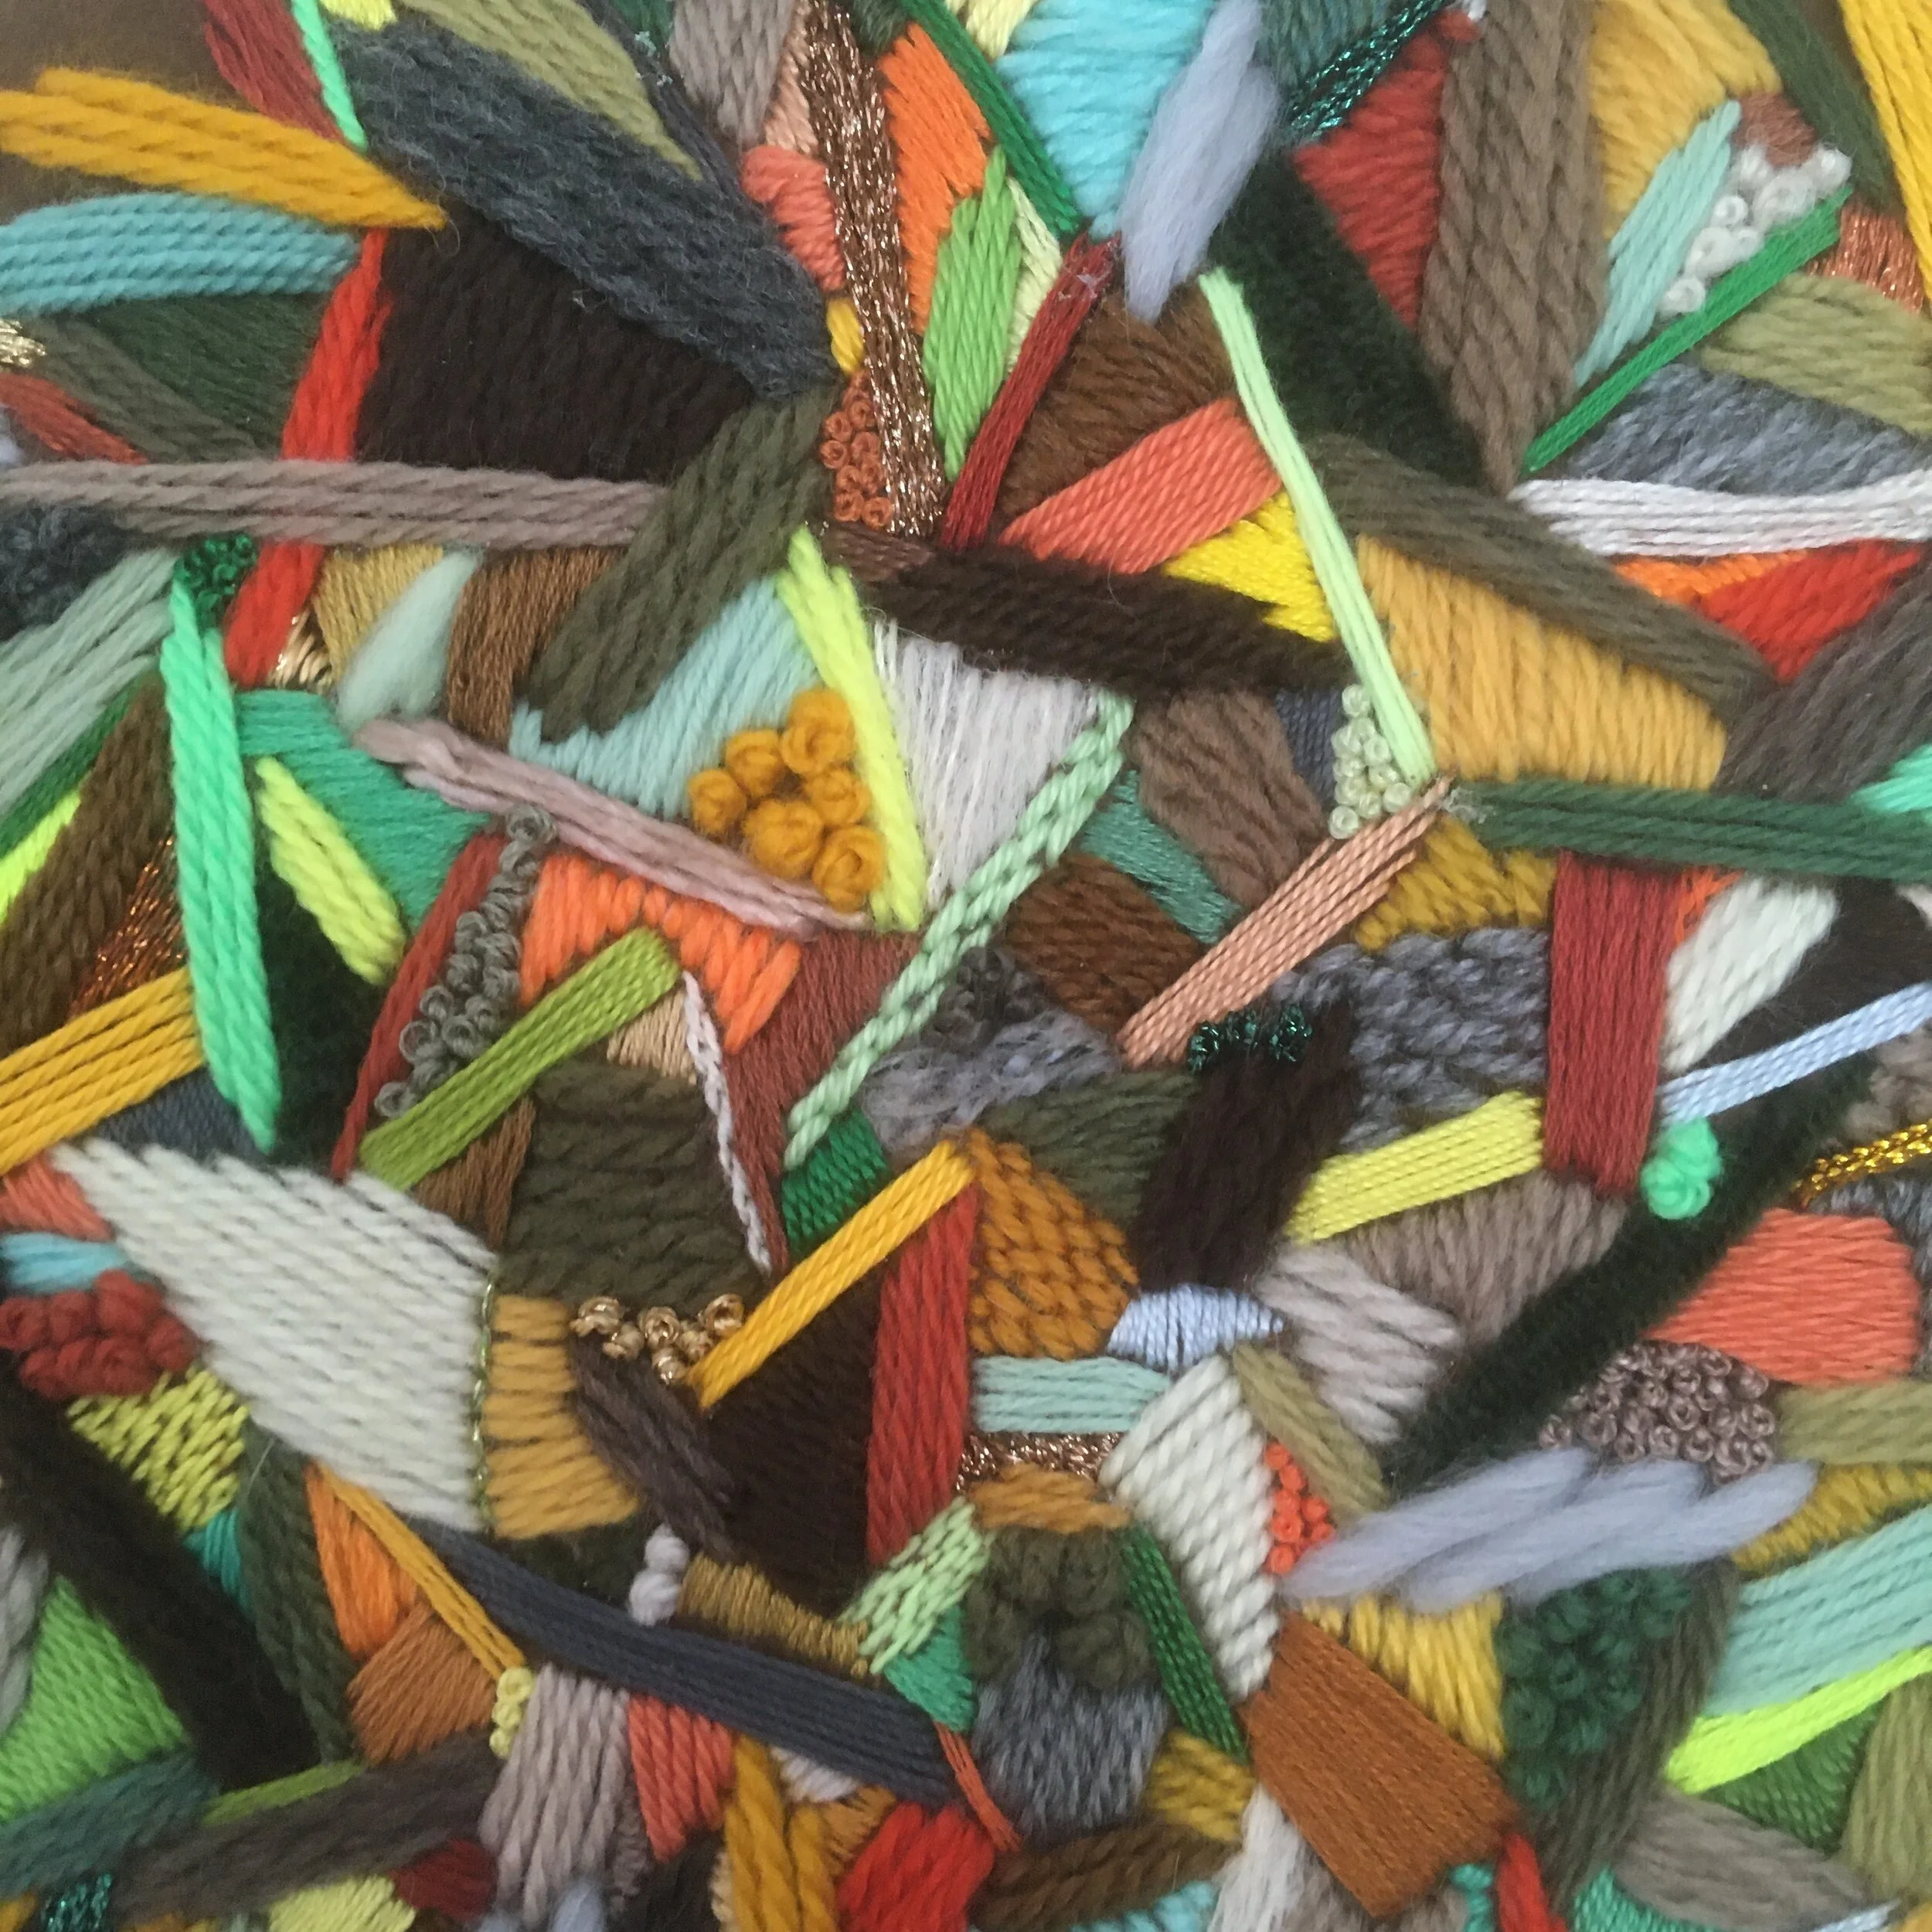
The close up of one of my intuitive embroidery pieces shows two further examples of brick stitch. Can you spot them? A light green section in the centre of the photo shows three long, thin rows, whilst just below this there is a mustard coloured triangular section where brick stitch is used more as a filling stitch.

Want to try this stitch? It’s one I suggest as part of my monstera kit.

A picture of a canvas work stitch sampler showing different canvas work stitches in shades of brown and yellow yarn
A close up image of a modern embroidery in autumnal tones using a range of embroidery stitches

Enjoyed this blog post? I share embroidery tips and a free embroidery pattern in my monthly newsletter. Sign up here to receive the newsletter on the 1st of each the month.
In stitch showcase 1 Tags Stitch Showcase, Line Stitch, Filling Stitch
Comment
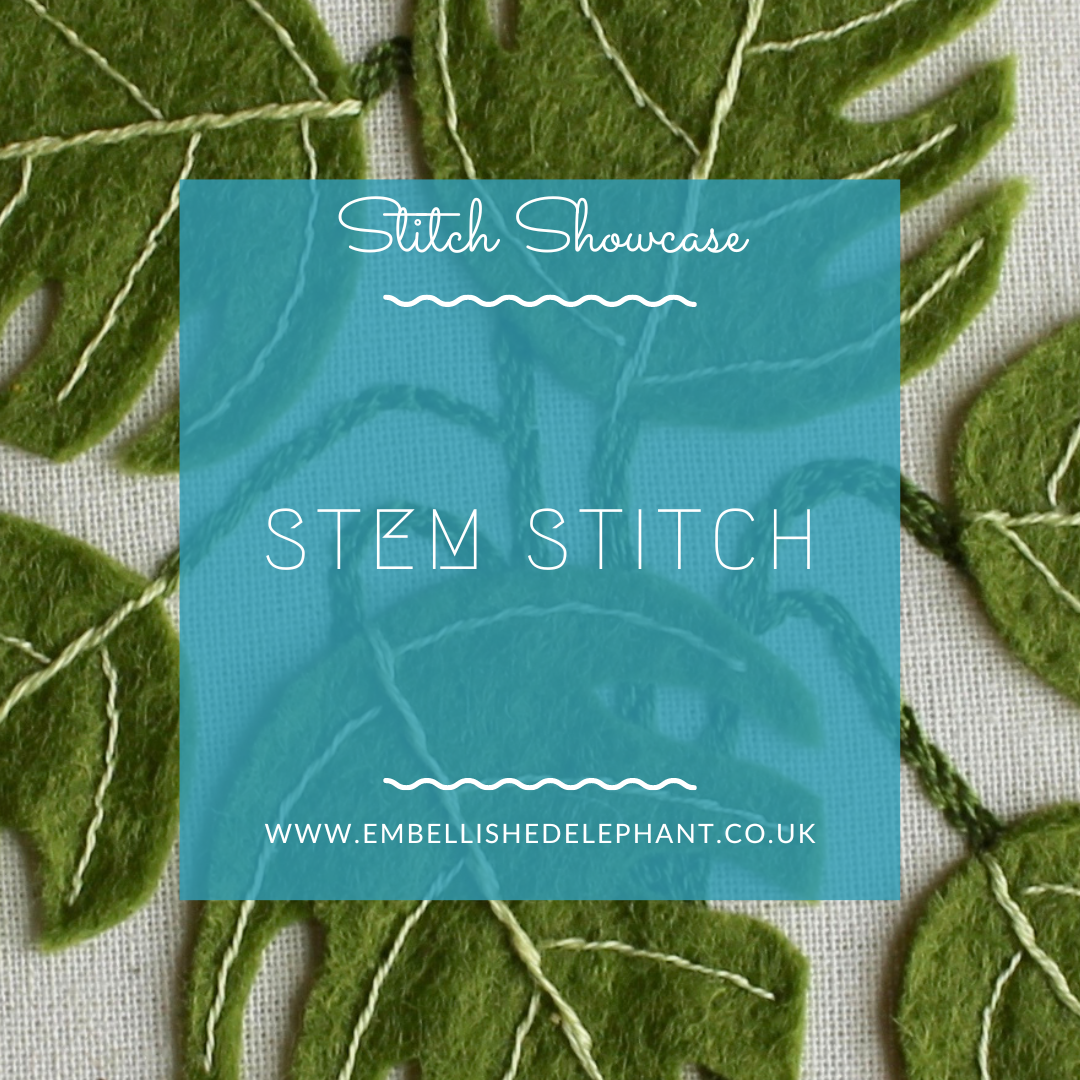
An image of green felt monstera leaves on a calico background. Each leaf is embroidered in light green thread with stem stitch. Overlaid is a blue square with white text saying - stitch showcase, stem stitch, www.embellishedelephant.co.uk

Stitch Showcase: Stem Stitch

December 2, 2020

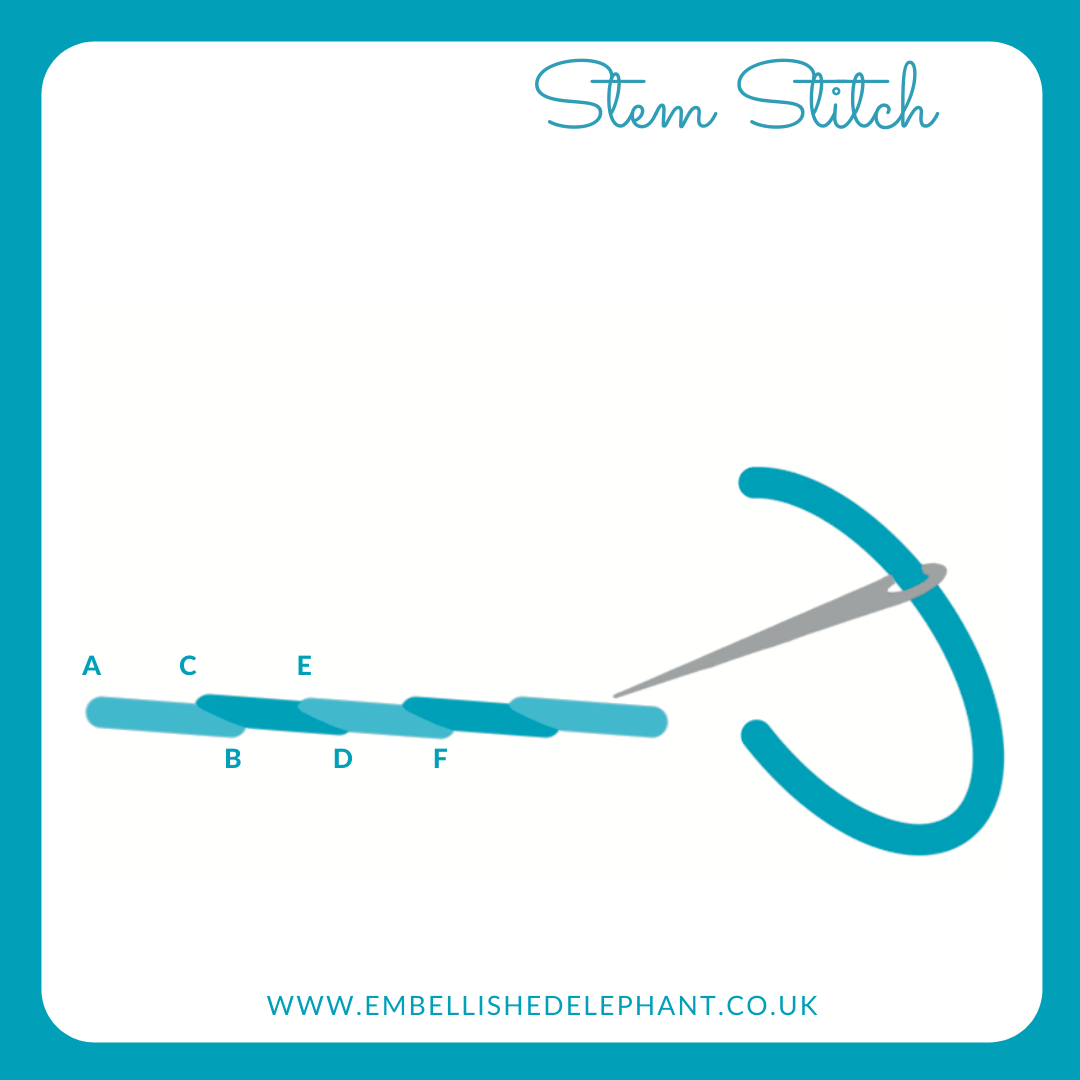
For a long time I didn’t really bother with stem stitch, I preferred using plain old backstitch or occasionally split stitch but I gave it another go recently and it’s grown on me, but I have to admit I only really use it when stitching plants! This is basically a back stitch but with the point at which we start the next stitch in the sequence altered.

  • Bring the needle up through the fabric

  • Take the needle down through fabric about 5mm along, but don't pull the thread completely through - leave a small loop.

  • Bring the needle back up equal distance from each end of the stitch and in line with each hole. Gently pull through the loop until the stitch lies flat on the felt.

  • Create another stitch a few millimetres along so that the total stitch length from start to finish is the same as your first stitch. Again create a loop and push the needle back through in between and in line with the previous holes

  • It is important that each time you bring the needle back up you keep the loop of thread on the same side of the needle to create the wrapped effect of stem stitch.

An illustration of how to create stem stitch in embroidery. The illustration is in shades of blue and grey on a white background.

The leaves in the header picture show that varying the number of threads for different parts of leaf stems gives strong centre vein but the rest of the leaf has a more delicate look.

Want to try this stitch? It’s a stitch I suggest using in my monstera kit, flamingo flower kit, floral sampler and sunflower sampler.

Enjoyed this blog post? I share embroidery tips and a free embroidery pattern in my monthly newsletter. Sign up here to receive the newsletter on the 1st of each the month.
In stitch showcase 1 Tags Stitch Showcase, Line Stitch
Comment
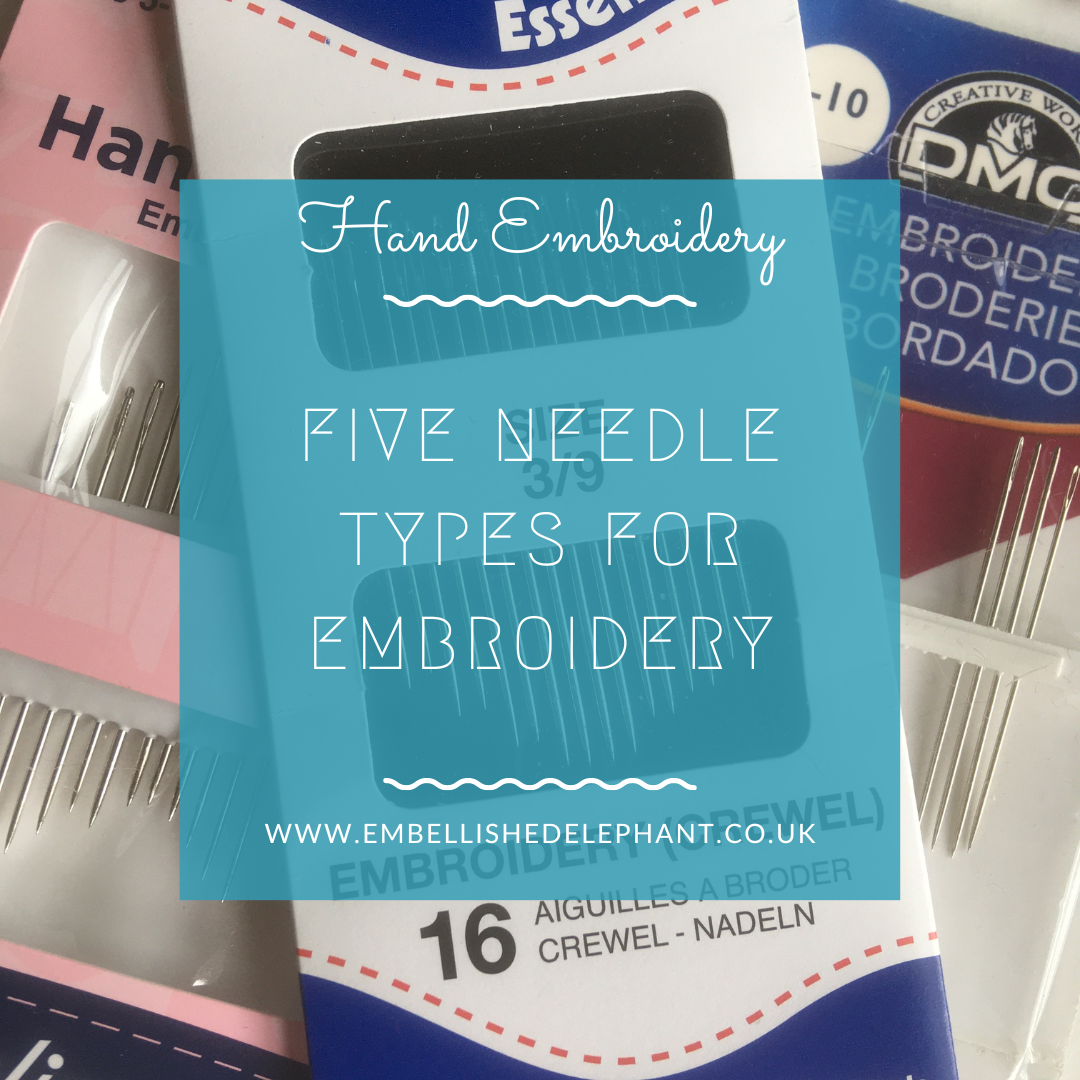
A picture of packets of embroidery needles. Overlaid is a blue square with white text saying - hand embroidery, five needle types for embroidery, www.embellishedelephant.co.uk

Five needle types you need to know about for hand embroidery

November 28, 2020

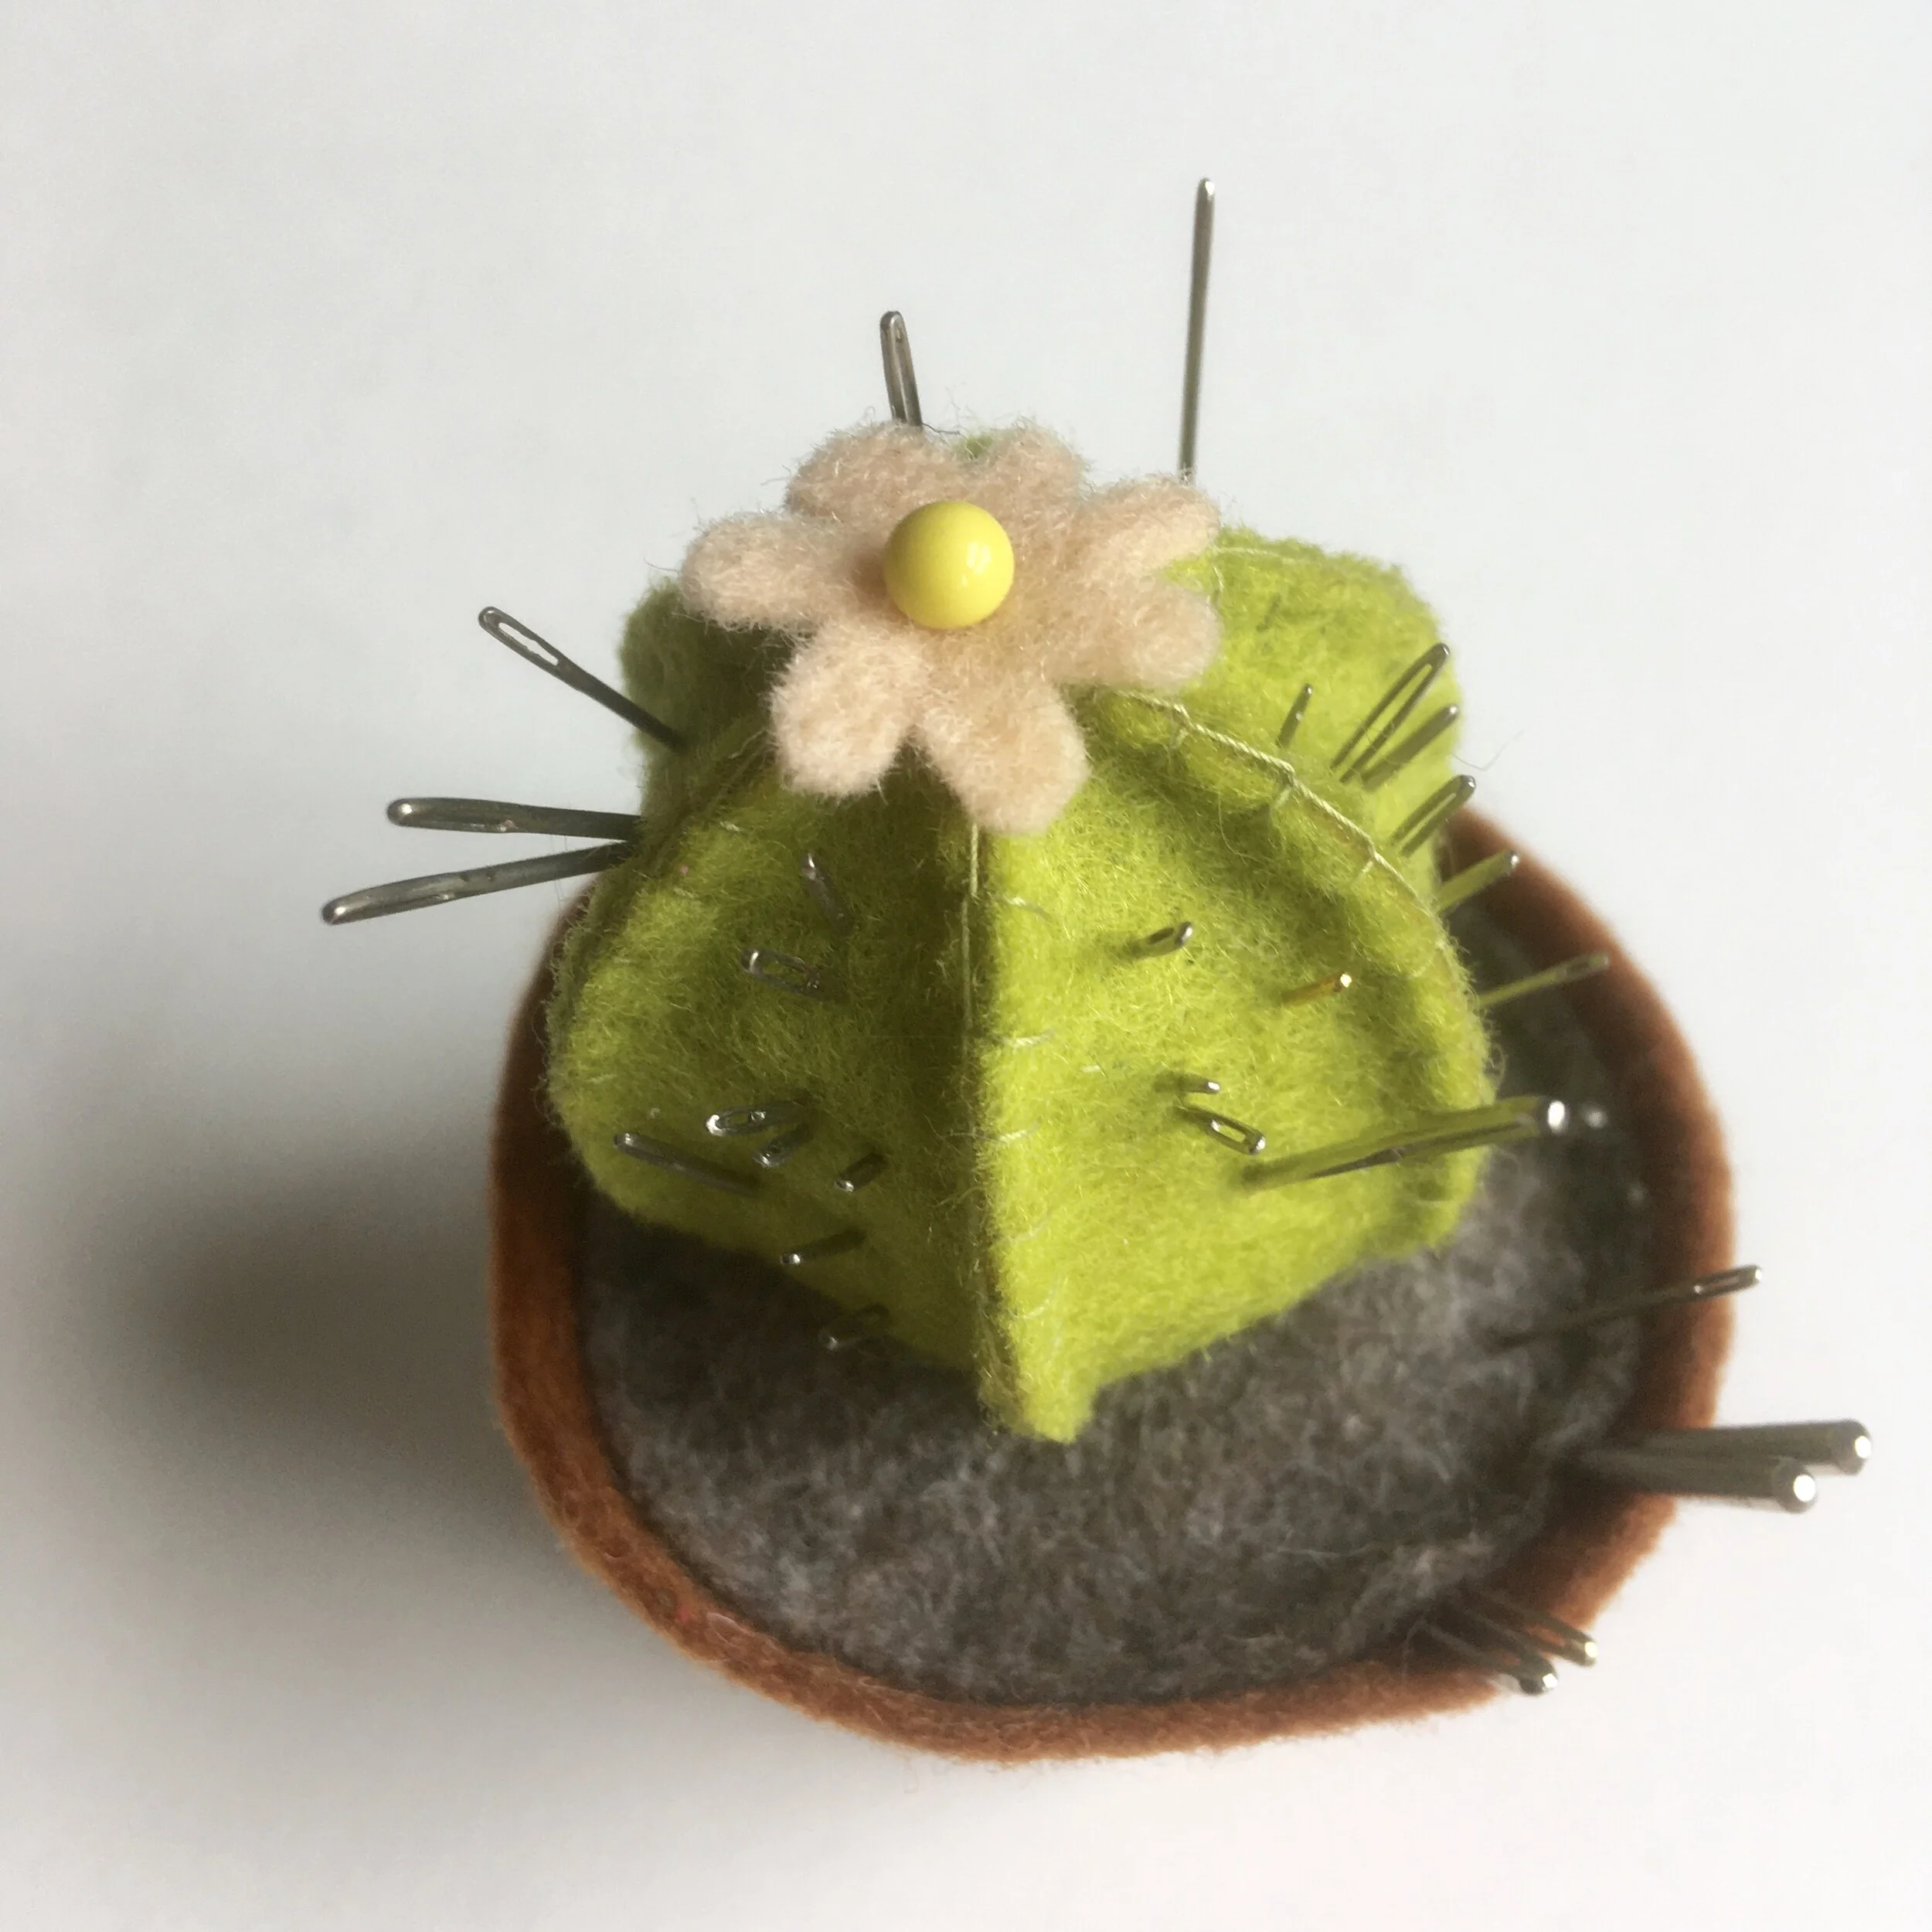
My favourite pin cushion isn’t a pin cushion but a ‘needle’ cushion. I’ve accumulated many needles over the years and in this pin cushion I can sort them into their different types (I also love that they look like the spines on a cactus).

A picture of a pin cushion in the shape of a cactus in a pot made from green and brown felt.

I find that most of the time it doesn’t matter what type of needle I use (as long as it has a decent point, a big enough eye and isn’t too thick) but it’s well worth being able to tell the different types of needles apart.

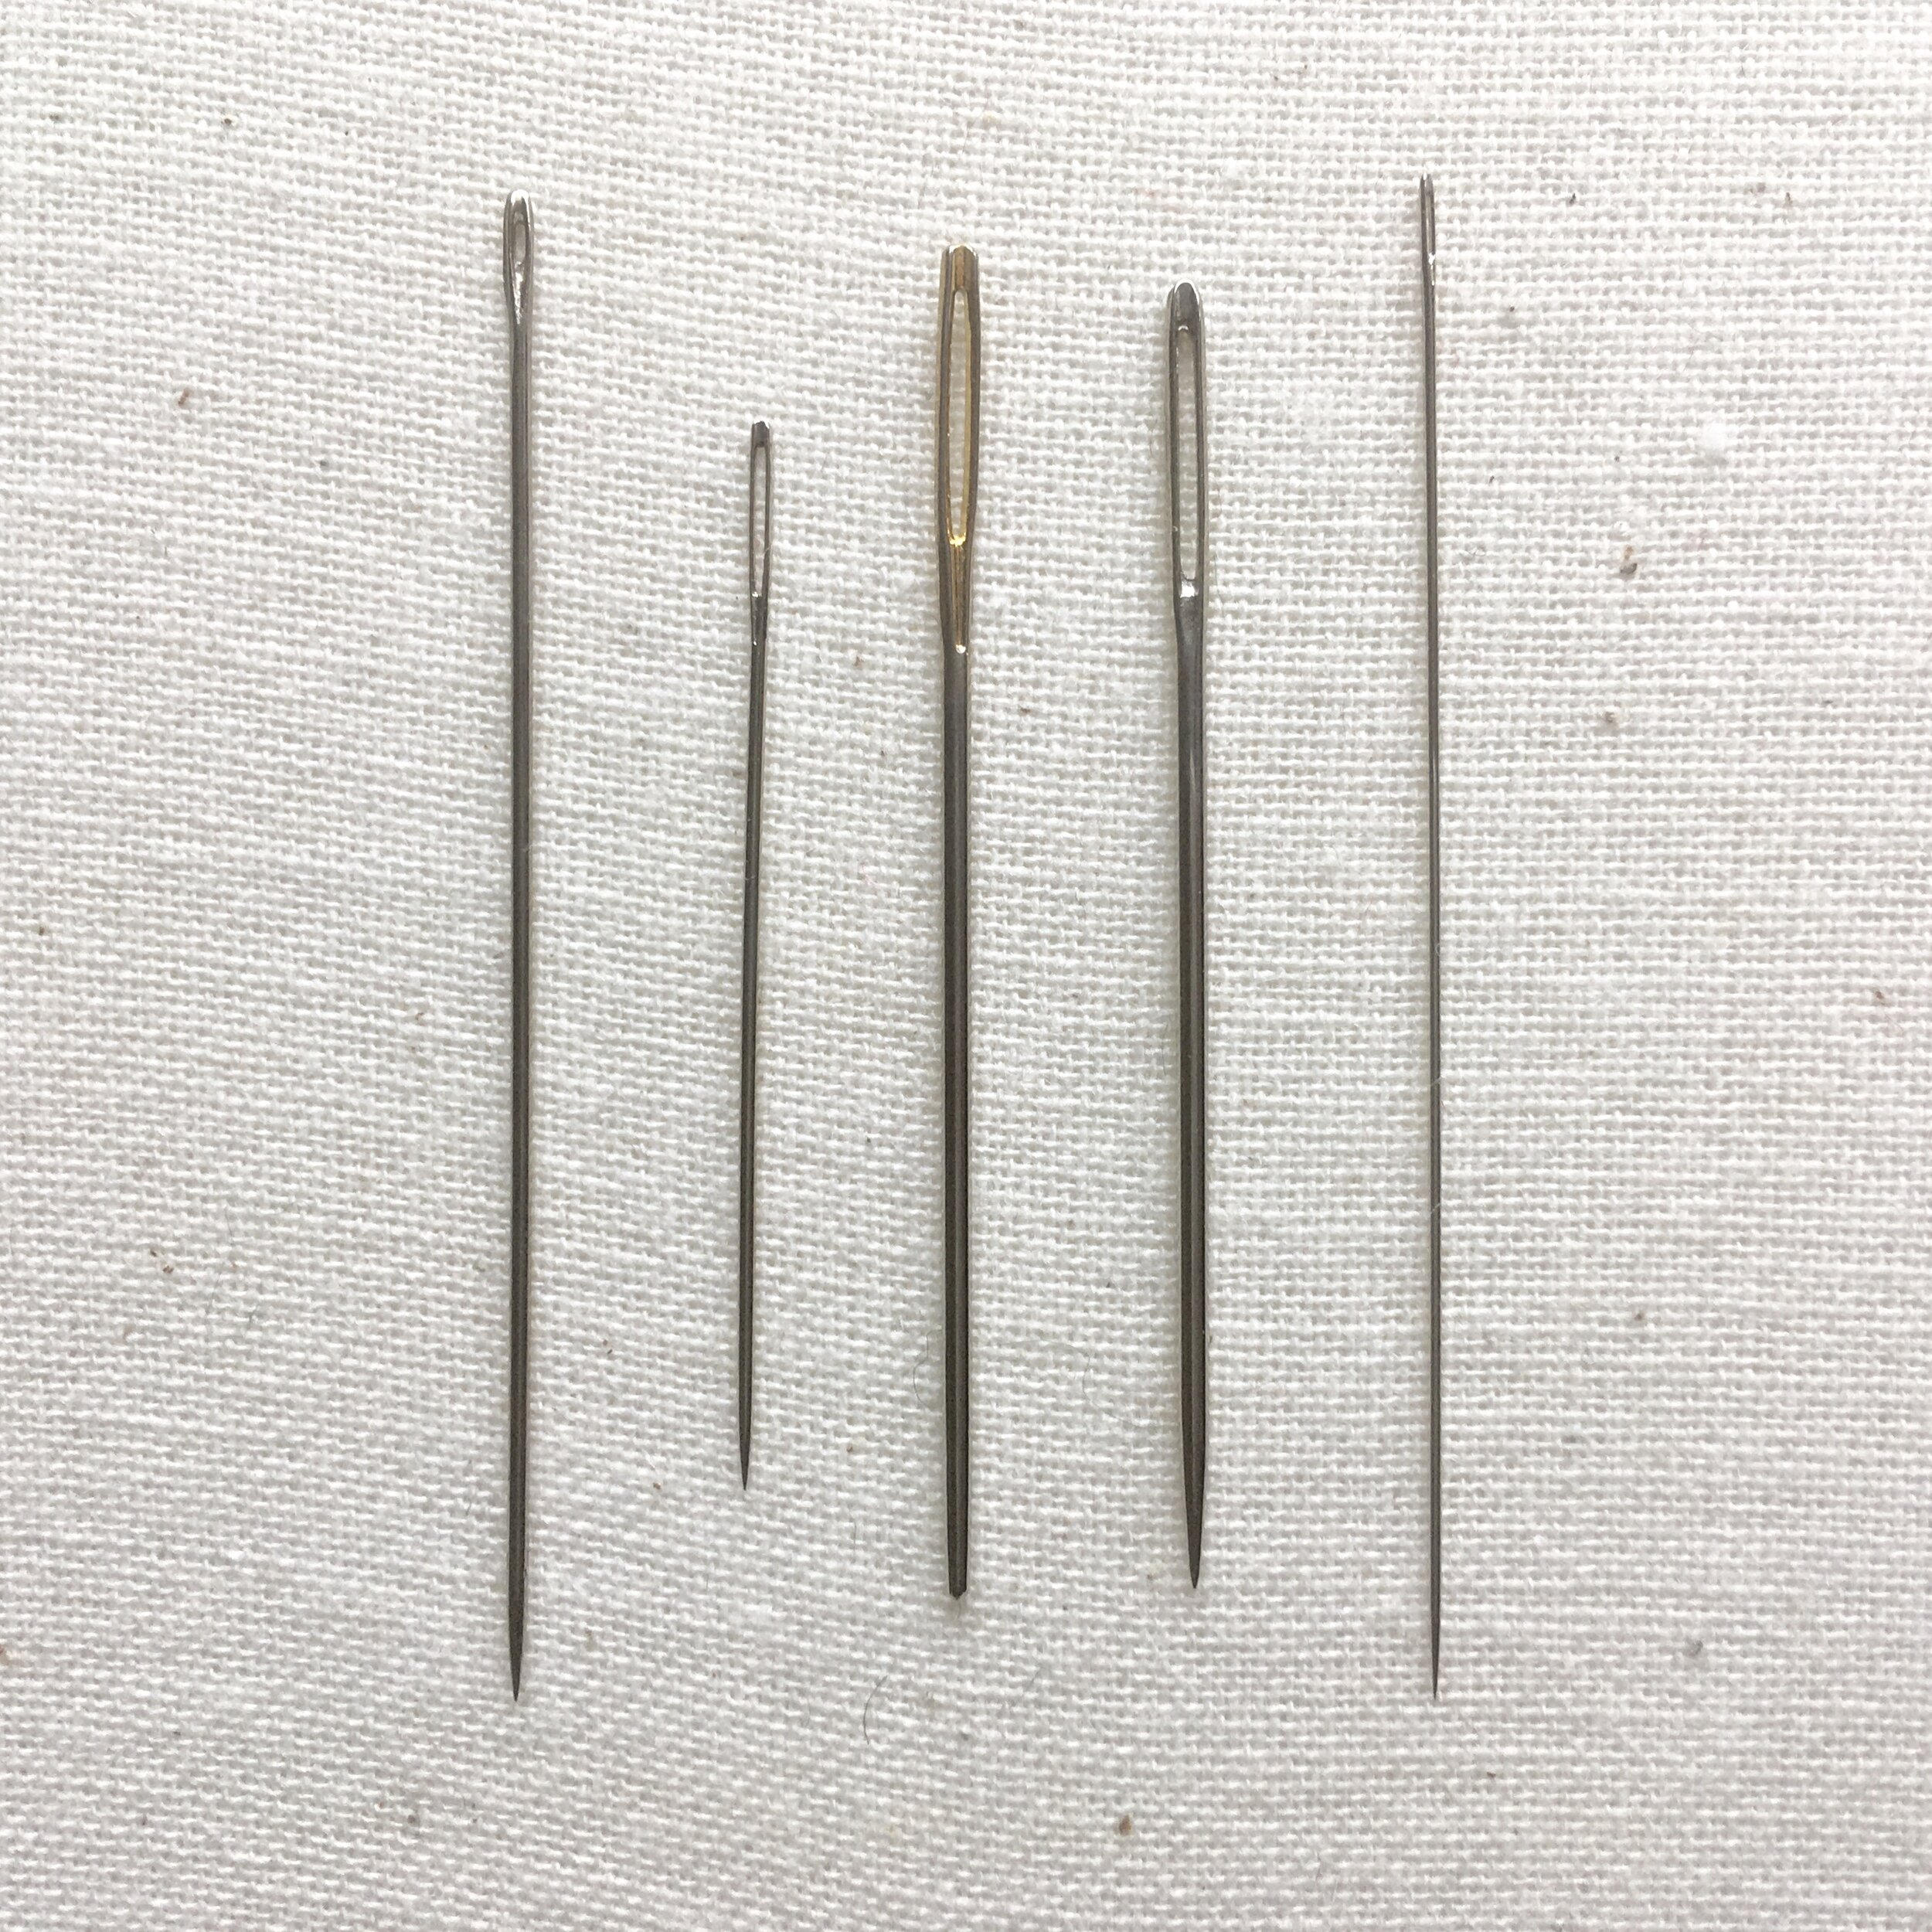
Here are the five different types of needles I use for hand embroidery (shown from left to right in the picture below):

  • Sharps - are used for general hand sewing, they have a small eye as generally only one strand of sewing thread is used at a time

  • Crewel - this is the needle to use for hand embroidery it has a slightly longer eye than a sharps needle to allow threading of multiple strands of thread

  • Tapestry - has a large eye & blunt end to pass thick tapestry yarn through canvas without splitting it, thinner versions are also used for cross stitch

  • Chenille - is a cross between a sharps needle and a tapestry needle in that there is a large eye and a sharp point, it’s great for stitching with yarn on fabric (rather than canvas)

  • Beading - the thinnest needle so that it can fit through the smallest seed bead hole it is long and thin and can be very difficult to thread, it’s also really flexible.

A picture of 5 types of hand embroidery needles laid flat on calico fabric

Each of these comes in different lengths or thicknesses and if you want to read more about different needle types, diameter, lengths and what those numbers mean in terms of sizes then John James have a great needle guide.

Enjoyed this blog post? I share embroidery tips and a free embroidery pattern in my monthly newsletter. Sign up here to receive the newsletter on the 1st of each the month.
In tips 2 Tags Needles, Basics
Comment
An image of blue thread woven tightly in a grid. Overlaid is a blue square with white text saying - stitch showcase, needle weaving, www.embellishedelephant.co.uk

Stitch Showcase: Needle Weaving

November 25, 2020

If you’ve ever woven with a loom then needle weaving is a version of this just on a much smaller scale. It’s also the same technique you’ll use if you need to darn a sock or jumper.

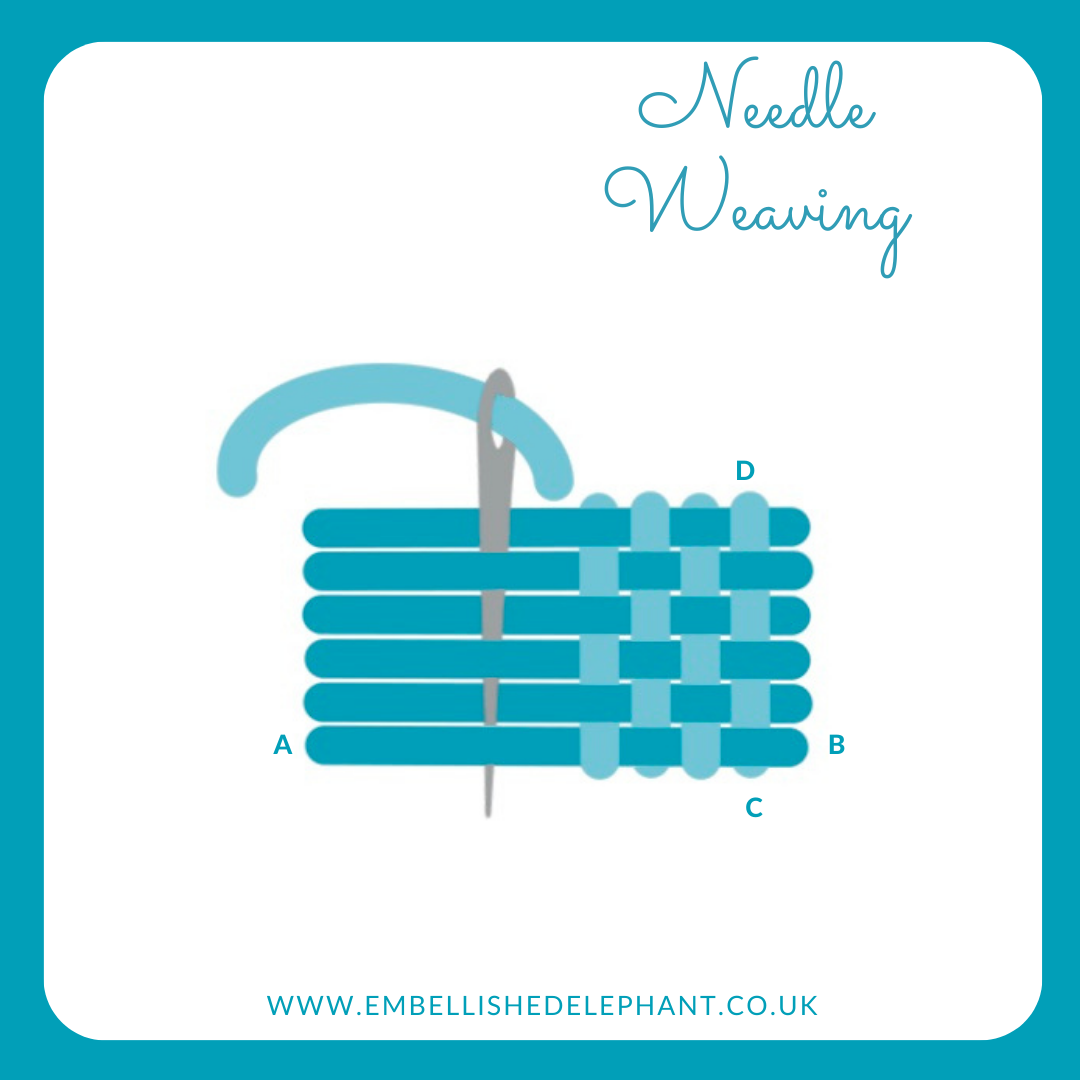
  • To start you need to create the warp threads, these should be long, parallel stitches in one direction (A to B).

  • The steps for satin stitch here can be used for creating the warp threads

  • The warp threads don’t have to be laid tightly together, but if they are spaced, make sure the spacing is even

  • The weaving can be done in the same thread or a different one, the weft thread is passed over and under the warp threads (C to D)

  • On the next row it is passed under and over ie the opposite way.

  • Different textures can be created by passing over or under different numbers of threads or using the same pattern on multiple rows.

An illustration of how to create needle weaving embroidery stitch. The illustration is in shades of blue and grey on a white background.

Normally all the weaving is done above the surface, but I’ve found that I maintain tension better and don’t get a pulling effect if I anchor the end of each row with a tiny stitch through the fabric.

The blue sampler shown in the header picture uses two different thicknesses of thread with the weft thread the thicker one, this creates a much tighter weave and didn’t need to anchor at the end of each row because of this.

Want to try this stitch? It’s one I suggest using in my elephant ear plant kit.

Enjoyed this blog post? I share embroidery tips and a free embroidery pattern in my monthly newsletter. Sign up here to receive the newsletter on the 1st of each the month.
In stitch showcase 1 Tags Stitch Showcase, Filling Stitch
Comment
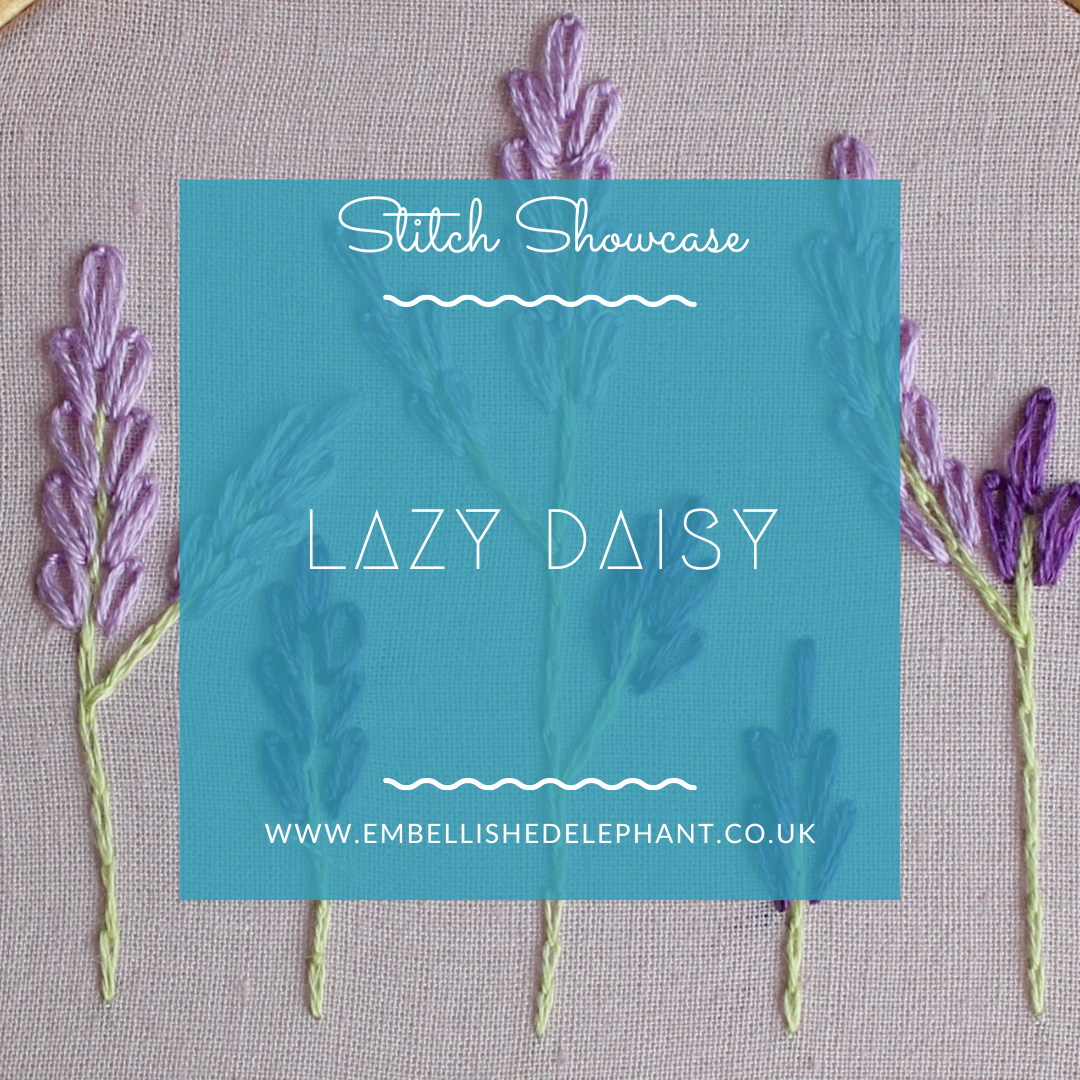
An image of embroidered lavender in shades of purple and light green on a light purple background. Overlaid is a blue square with white text saying - stitch showcase, lazy daisy, www.embellishedelephant.co.uk

Stitch Showcase: Lazy Daisy Stitch

November 18, 2020

Lazy daisy stitch is also known as a single chain stitch, and that’s all this stitch is - one chain stitch. It’s great to use to create the petals of flowers.

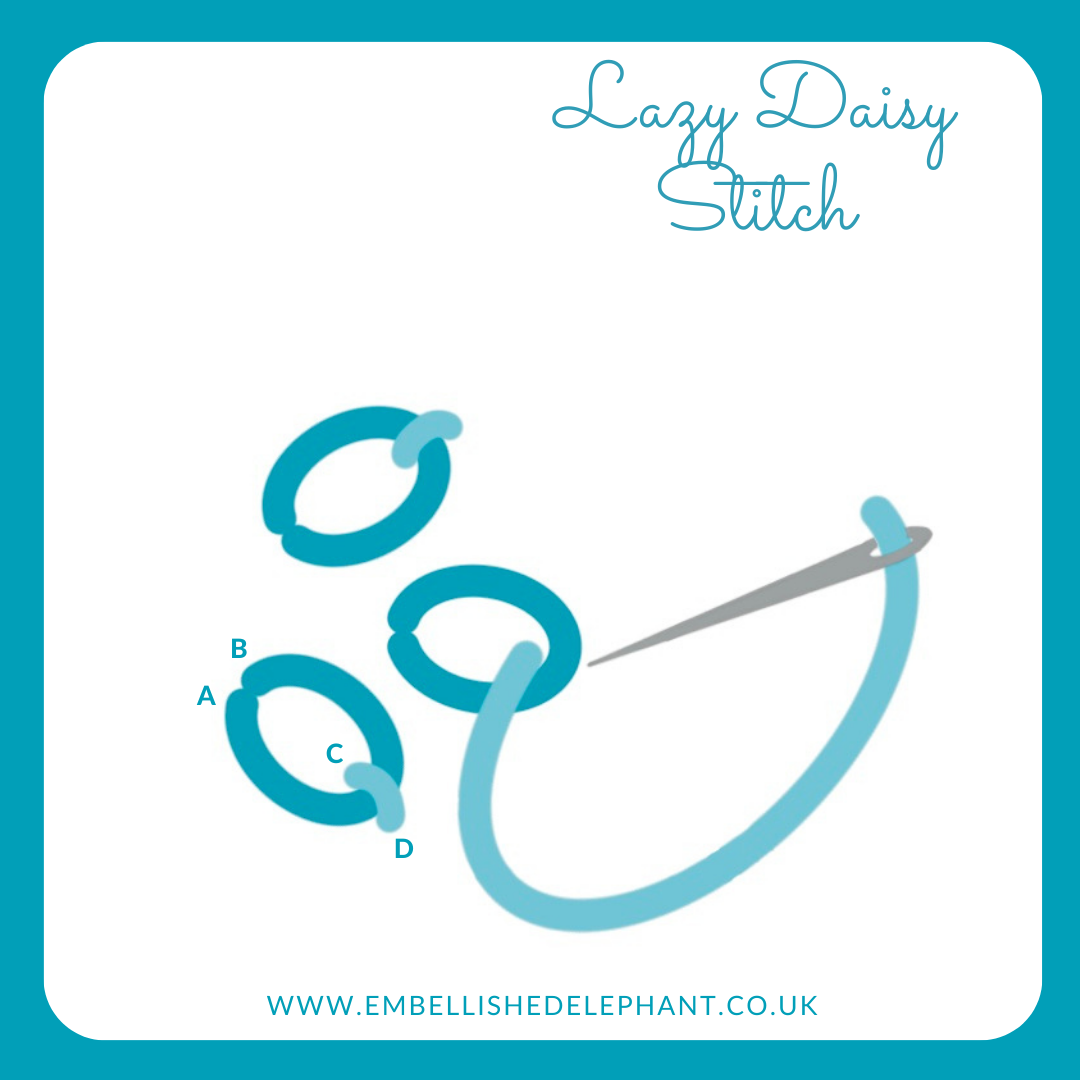
  • Bring the needle up through the fabric at the point where you want your stitch to start (A)

  • Take it back down as close as possible to the original hole (B)

  • Gently pull the thread through until you have a small loop - don't pull fully tight at this point

  • Push the needle up through the fabric at the point where you want the stitch to end, 5mm is a good length (C)

  • Create a tiny straight stitch over the loop so it can’t come loose (D).

An illustration of how to create lazy daisy embroidery stitch. The illustration is in shades of blue and grey on a white background.

Lazy daisy stitches can be worked randomly, but commonly they are placed in a circle to form a flower.

Want to try this stitch? It is one I recommend using in my lavender embroidery kit.

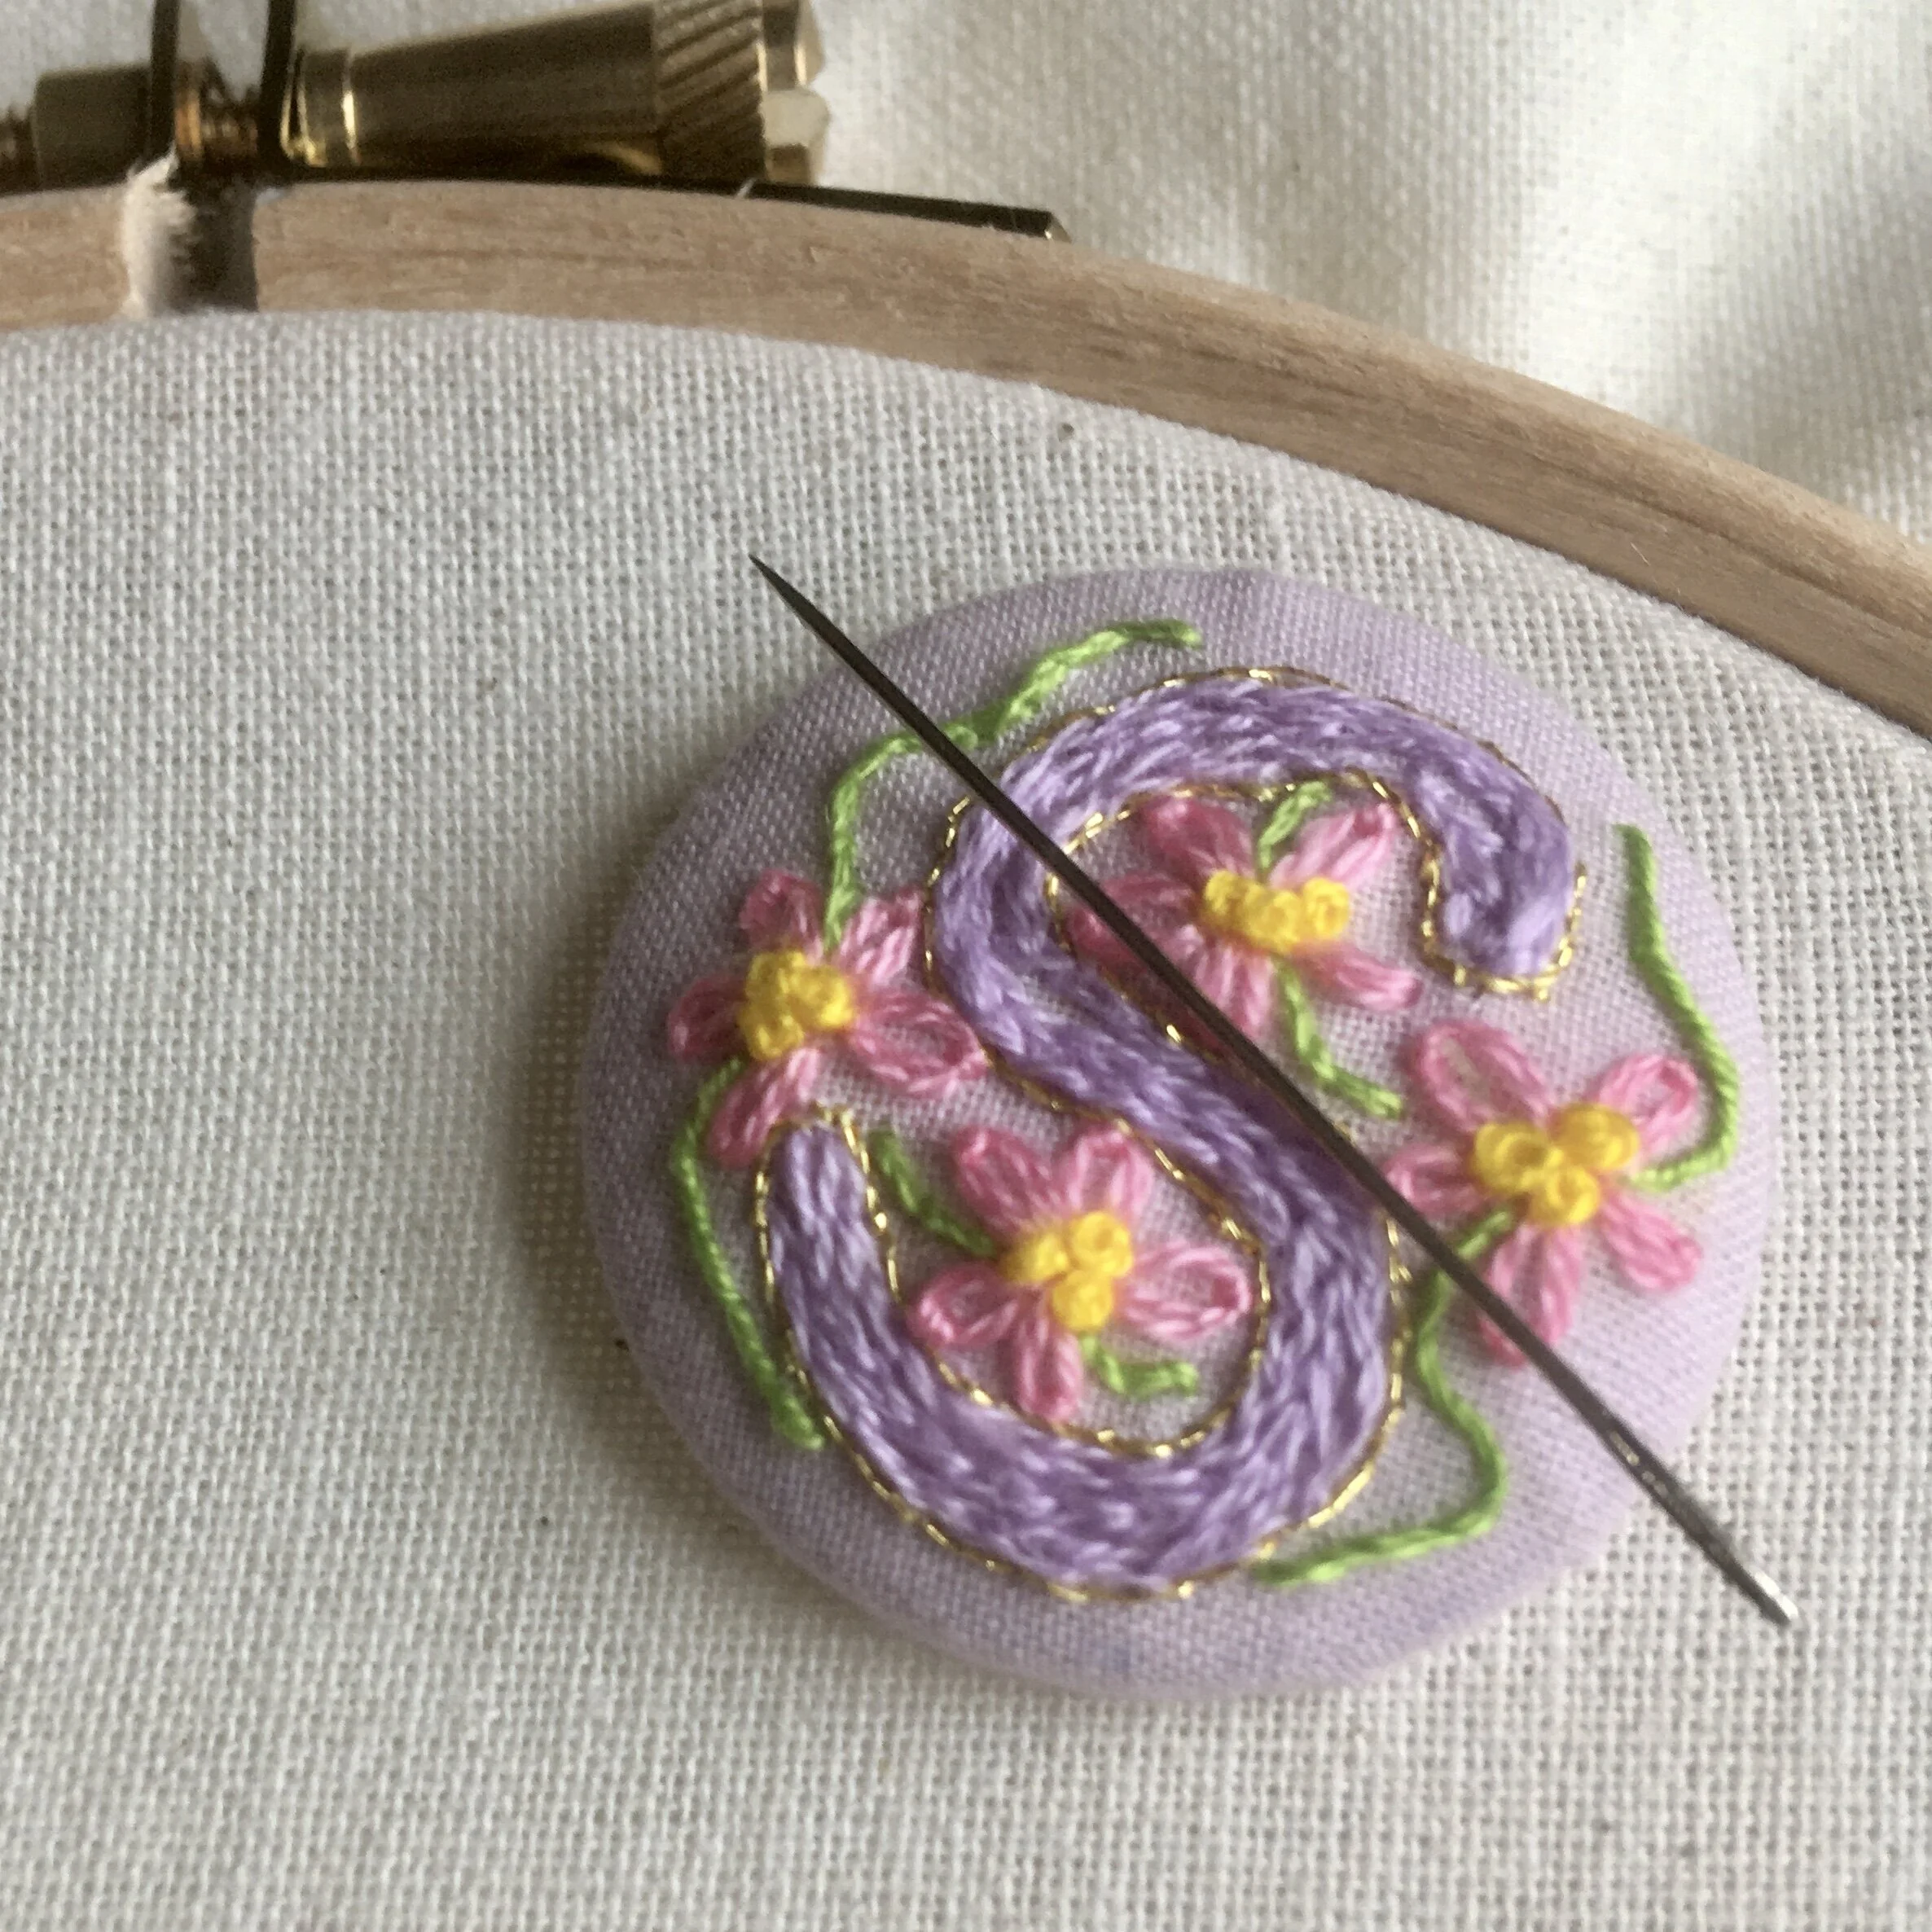
An image of an embroidered needle minder with the letter S surrounded by pink flowers made from lazy daisy stitch.

Enjoyed this blog post? I share embroidery tips and a free embroidery pattern in my monthly newsletter. Sign up here to receive the newsletter on the 1st of each the month.
In stitch showcase 1 Tags Stitch Showcase, Isolated Stitch
Comment
A picture of the back of an embroidery hoop  showing the edge of the fabric. Overlaid is a blue square with white text saying - hand embroidery, how to gather fabric at the back of a hoop, www.embellishedelephant.co.uk

How to gather the fabric at the back of an embroidery hoop

November 14, 2020

Once you’ve finished your embroidery and want to put it on display the easiest way to do this is to display it in the hoop you stitched it in. 

Many of the different techniques to finish off the back of an embroidery hoop for display require the fabric to be gathered first so that none of the excess fabric peaks out and so it also lies flat on the wall. 

  • Before you start you may need to straighten up the embroidery in the hoop and make sure the screw fixture is at the top of the hoop as this is how you will hang it on the wall. Don’t forget once you have straightened it up to re-screw the fabric as tight as possible.

  • Trim any excess fabric, but don’t trim too close to the hoop - you need some fabric to be able to overlap to the inner hoop for all methods about 1.5-2cm is perfect (it doesn’t need to be trimmed in a perfect circle but just make sure you get as close as you can). 

  • Take a long length of normal sewing thread - long enough to go round the circumference of the hoop twice (to give some nice long ends to pull on to gather).  

  • Tie a BIG knot in one end - it doesn’t have to be neat as it will get the chop later - but you do need to make sure that it won’t pop through the weave of the fabric as you sew

  • Stitch around the fabric in a running stitch - each stitch should be reasonably long (around 1cm). Your stitches should be about 5mm from the edge of the fabric but don’t worry if it isn’t even from the edge all the way round.  

A picture showing how running stitch can be used to gather the fabric at the back of the embroidery thread
  • Once you’ve stitched all the way round and get back to the starting point, gently pull on the knot end slightly whilst holding the other end so you have two tails.

  • Then pull on one of the tails while holding the other to gather the fabric. Once it is gathered maintain the tension and tie the two tails together. It is tricky to maintain the tension so do a single knot first and then pull to tighten before doing the second (double) knot. Don’t pull too hard otherwise you risk breaking the thread.

  • You can either leave it like this or pull the fabric at the back extra tight by stitching across the back from opposite side to opposite side.

A picture showing additional stitches to gather fabric at the back of an embroidery hoop

Enjoyed this blog post? I share embroidery tips and a free embroidery pattern in my monthly newsletter. Sign up here to receive the newsletter on the 1st of each the month.
In tips 2 Tags Fabric, Hoops, Basics
Comment
An image of some green fabric leaves stitched with yellow stripes created using whipped backstitch. Overlaid is a blue square with white text saying - stitch showcase, whipped backstitch, www.embellishedelephant.co.uk

Stitch Showcase: Whipped Backstitch

November 11, 2020

Whipped backstitch is a stitch that I’ve used for a lot of projects, it’s great for creating a line of stitching where you don’t want to see the individual stitches for example, plant stems or lettering.

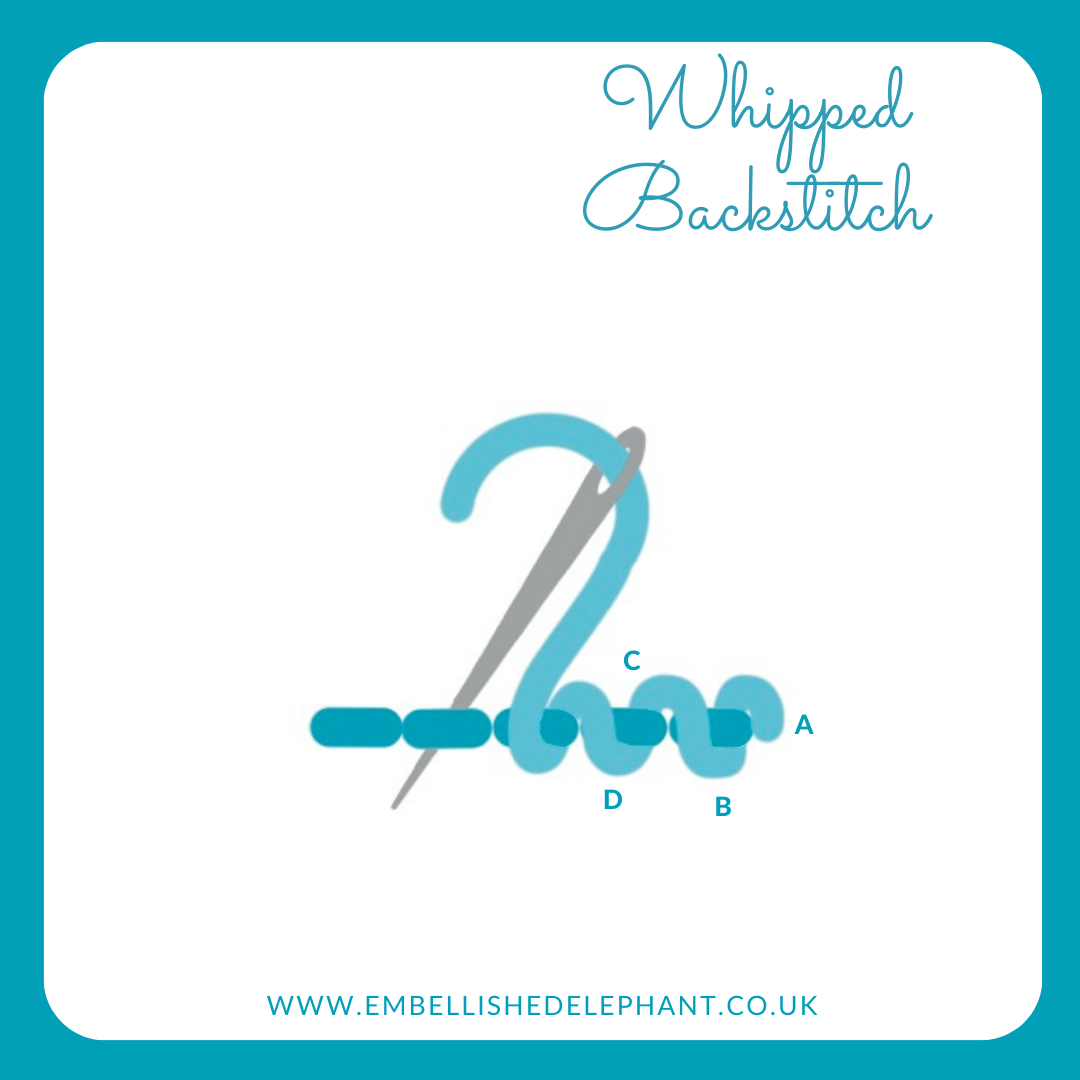
  • Backstitch is the foundation and then floss is wrapped around each of these stitches to create a cord effect

  • Start by backstitching the complete length of the line you want to embroider (see here for how to create a backstitch line)

  • To wrap the backstitch, bring the needle up at the end of the backstitch length (A)

  • Pass the needle under the first backstitch from right to left (B)

  • Repeat on the next backstitch again passing from right to left (C to D)

  • Continue until the floss is wrapped around all the backstitches

  • To finish push the needle back down through the fabric.

An illustration showing how to create whipped backstitch. The illustration is in shades of blue and grey on a white background

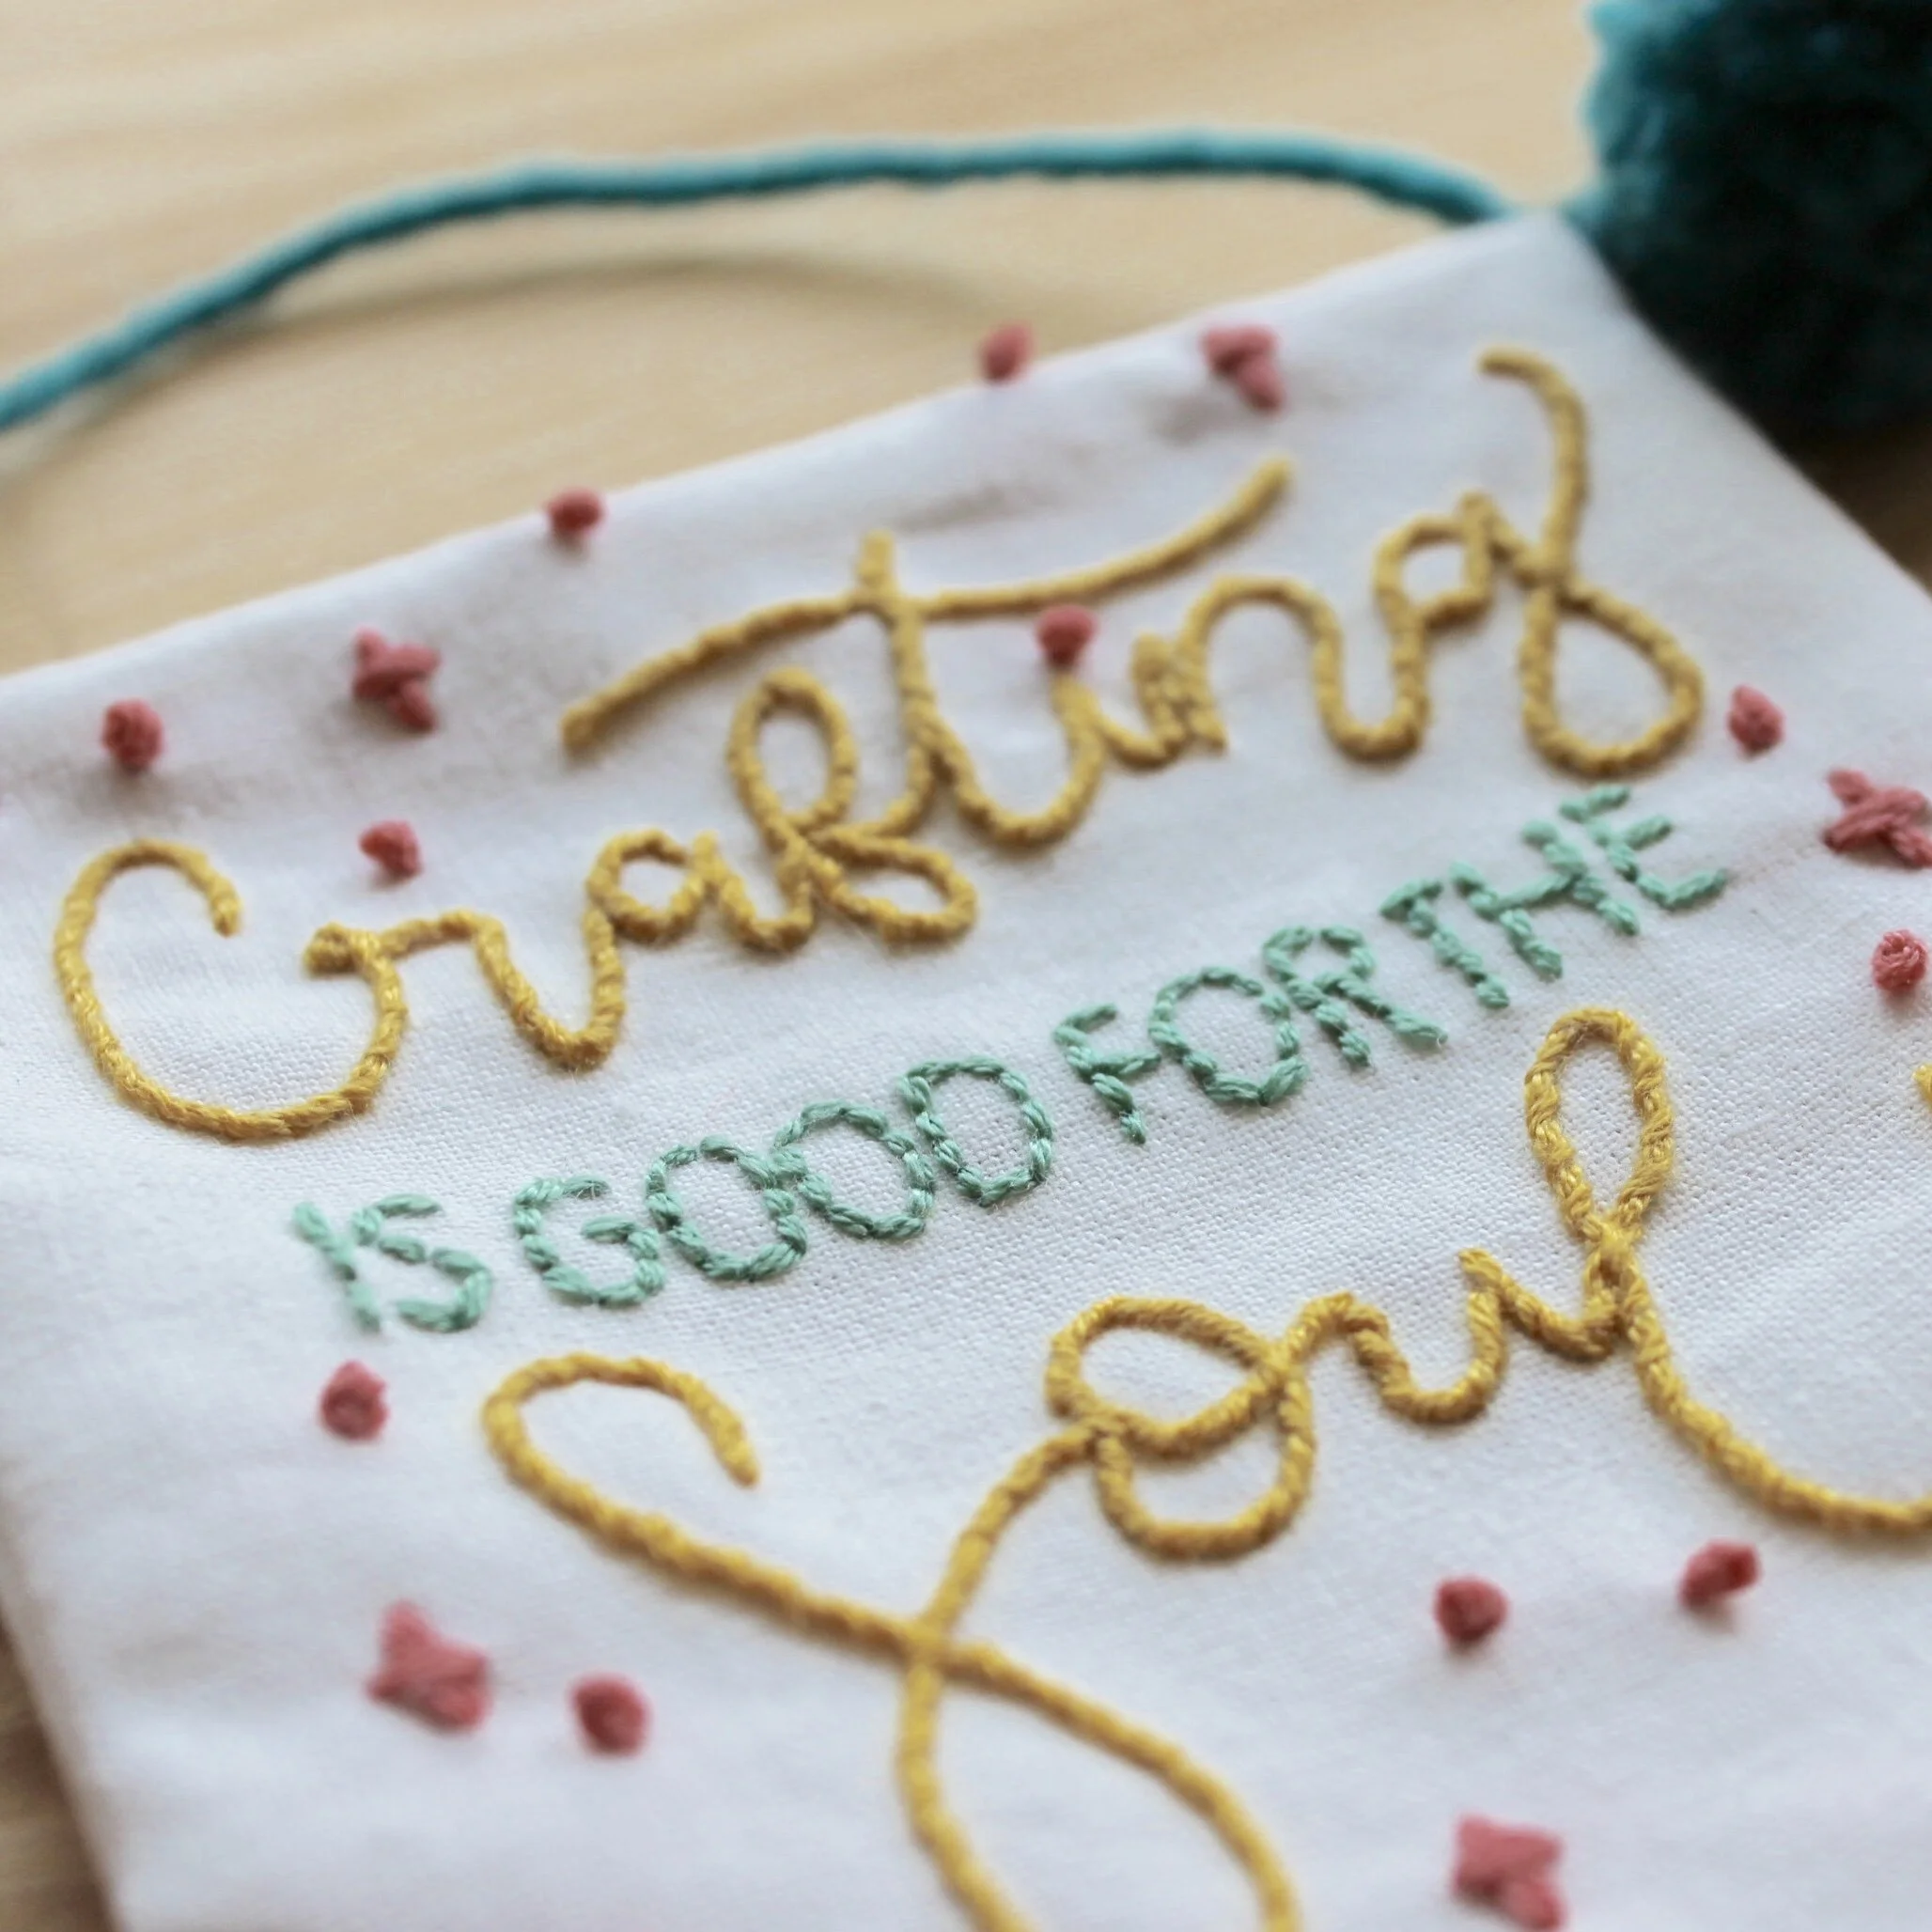
You can vary the number of strands used for the foundation and the wrapping part of the stitch. This in progress shot shows the foundation backstitch with one strand and the wrapping thread is all 6 strands. In this banner the script writing is done in whipped backstitch and you can’t see the stitches just beautiful raised texture writing.

Want to try this stitch? It’s one I suggest using in my elephant ear plant kit.

An image of whipped backstitch being created using one strand of backstitch and multiple strands to whip with
An image of an embroidered banner saying 'crafting is good for the soul' the words crafting and soul are stitched in yellow whipped backstitch

Enjoyed this blog post? I share embroidery tips and a free embroidery pattern in my monthly newsletter. Sign up here to receive the newsletter on the 1st of each the month.
In stitch showcase 1 Tags Stitch Showcase, Line Stitch
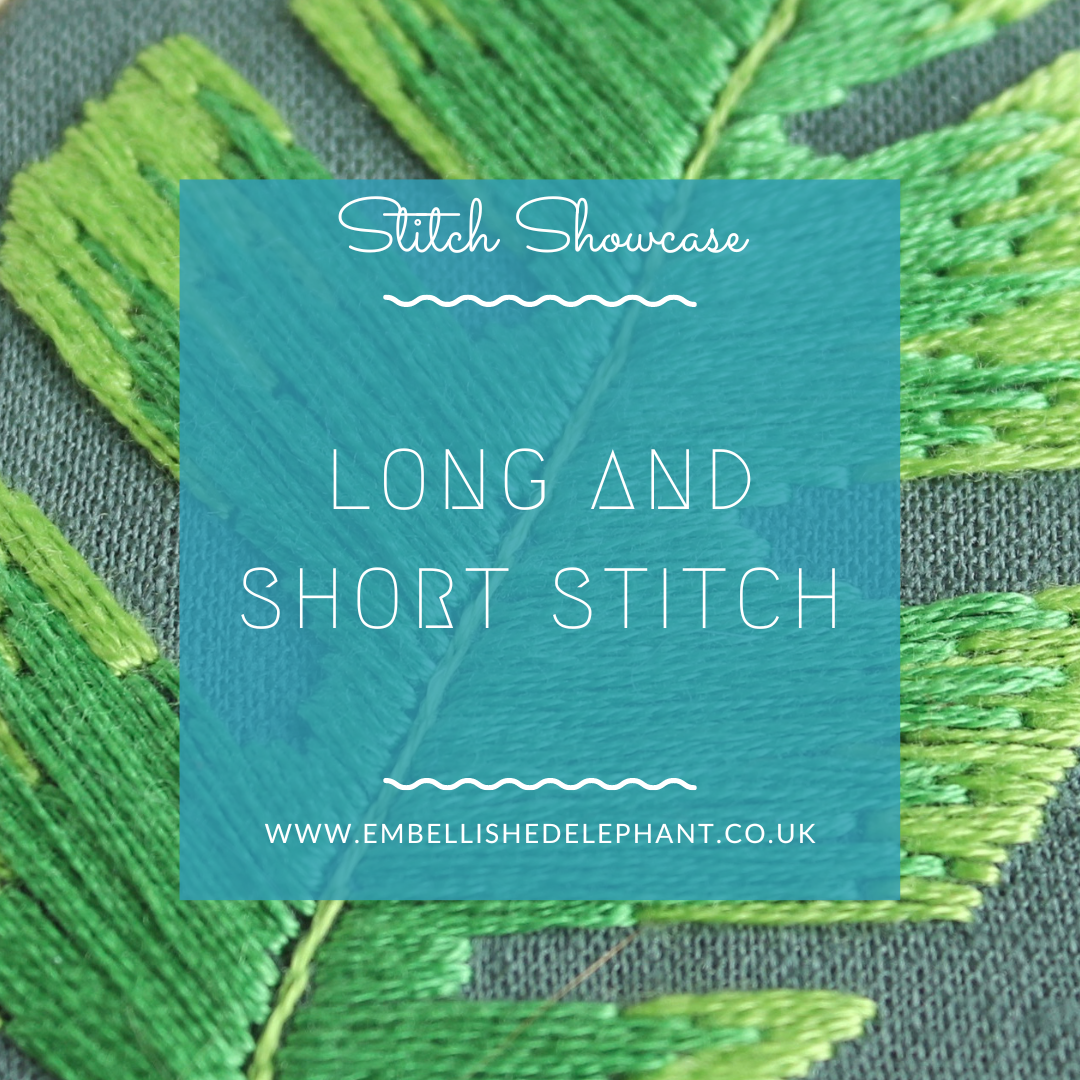
An image of a monstera leaf stitched in long and short stitch with two different shades of green. Overlaid is a blue square with white text saying - stitch showcase, long and short stitch, www.embellishedelephant.co.uk

Stitch Showcase: Long and Short Stitch

November 4, 2020

Long and short stitch is a great way to fill large areas if satin stitch isn’t suitable or you want a more textured look. It is a variation on satin stitch, where the area is covered using one long stitch, but instead of covering the whole area with one stitch you are breaking that one stitch up into several sections of random lengths. It is the different lengths that add the texture.

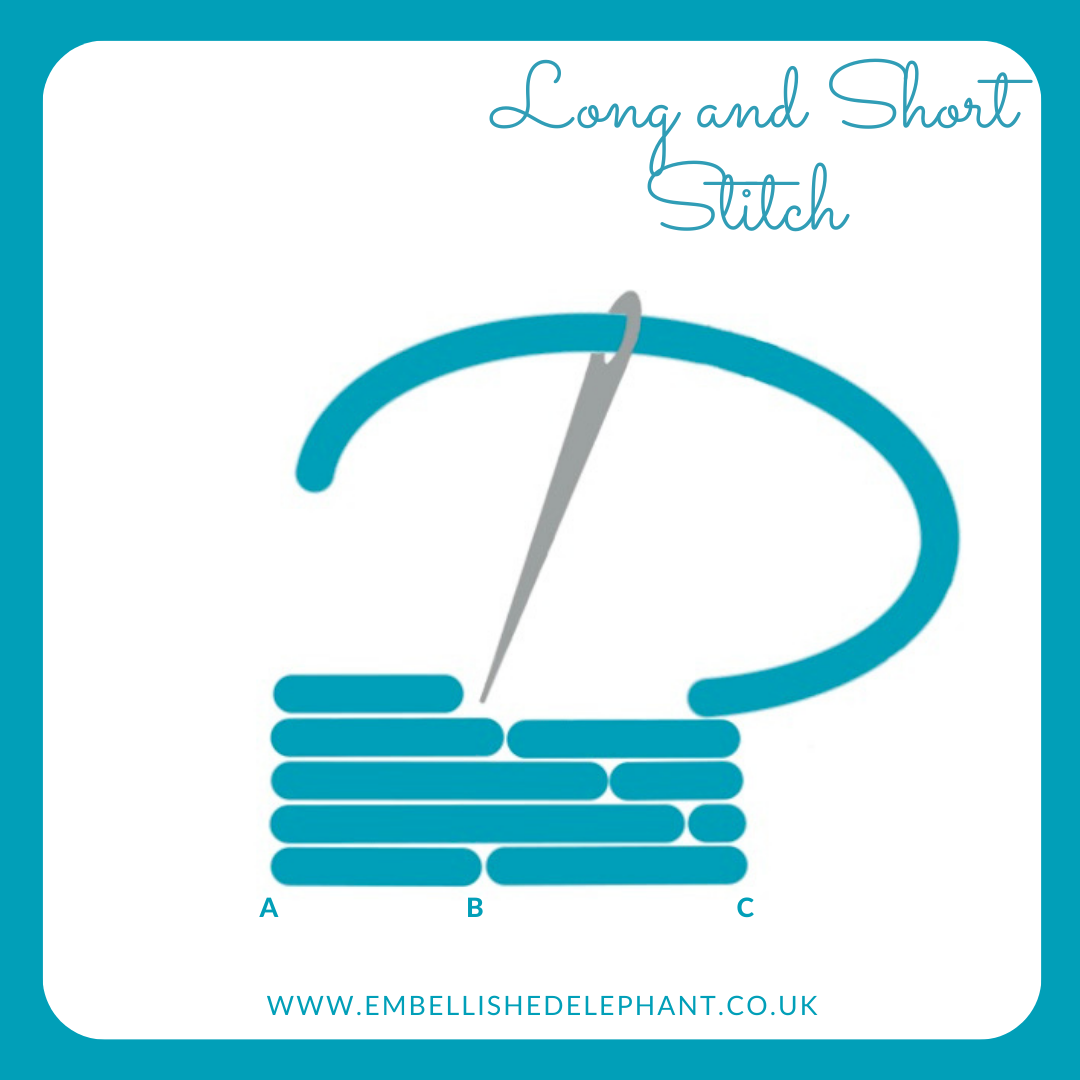
  • Starting at one edge make stitches of varying lengths (A to B).The aim is to make sure that stitches next to each other don't start and finish in line.

  • Once one side of the area has been stitched then move on to fill the next section (C to B)

  • It is easiest to work long and short stitch in sections. Try to divide the area to be filled into two or three sections. The header picture is stitched in two sections, the light green and the dark green

  • If stitching in three sections then stitch the outer and inner edges first before filling in the middle.

An illustration of how to create long and short stitch. The illustration is in blue and grey on a white background.

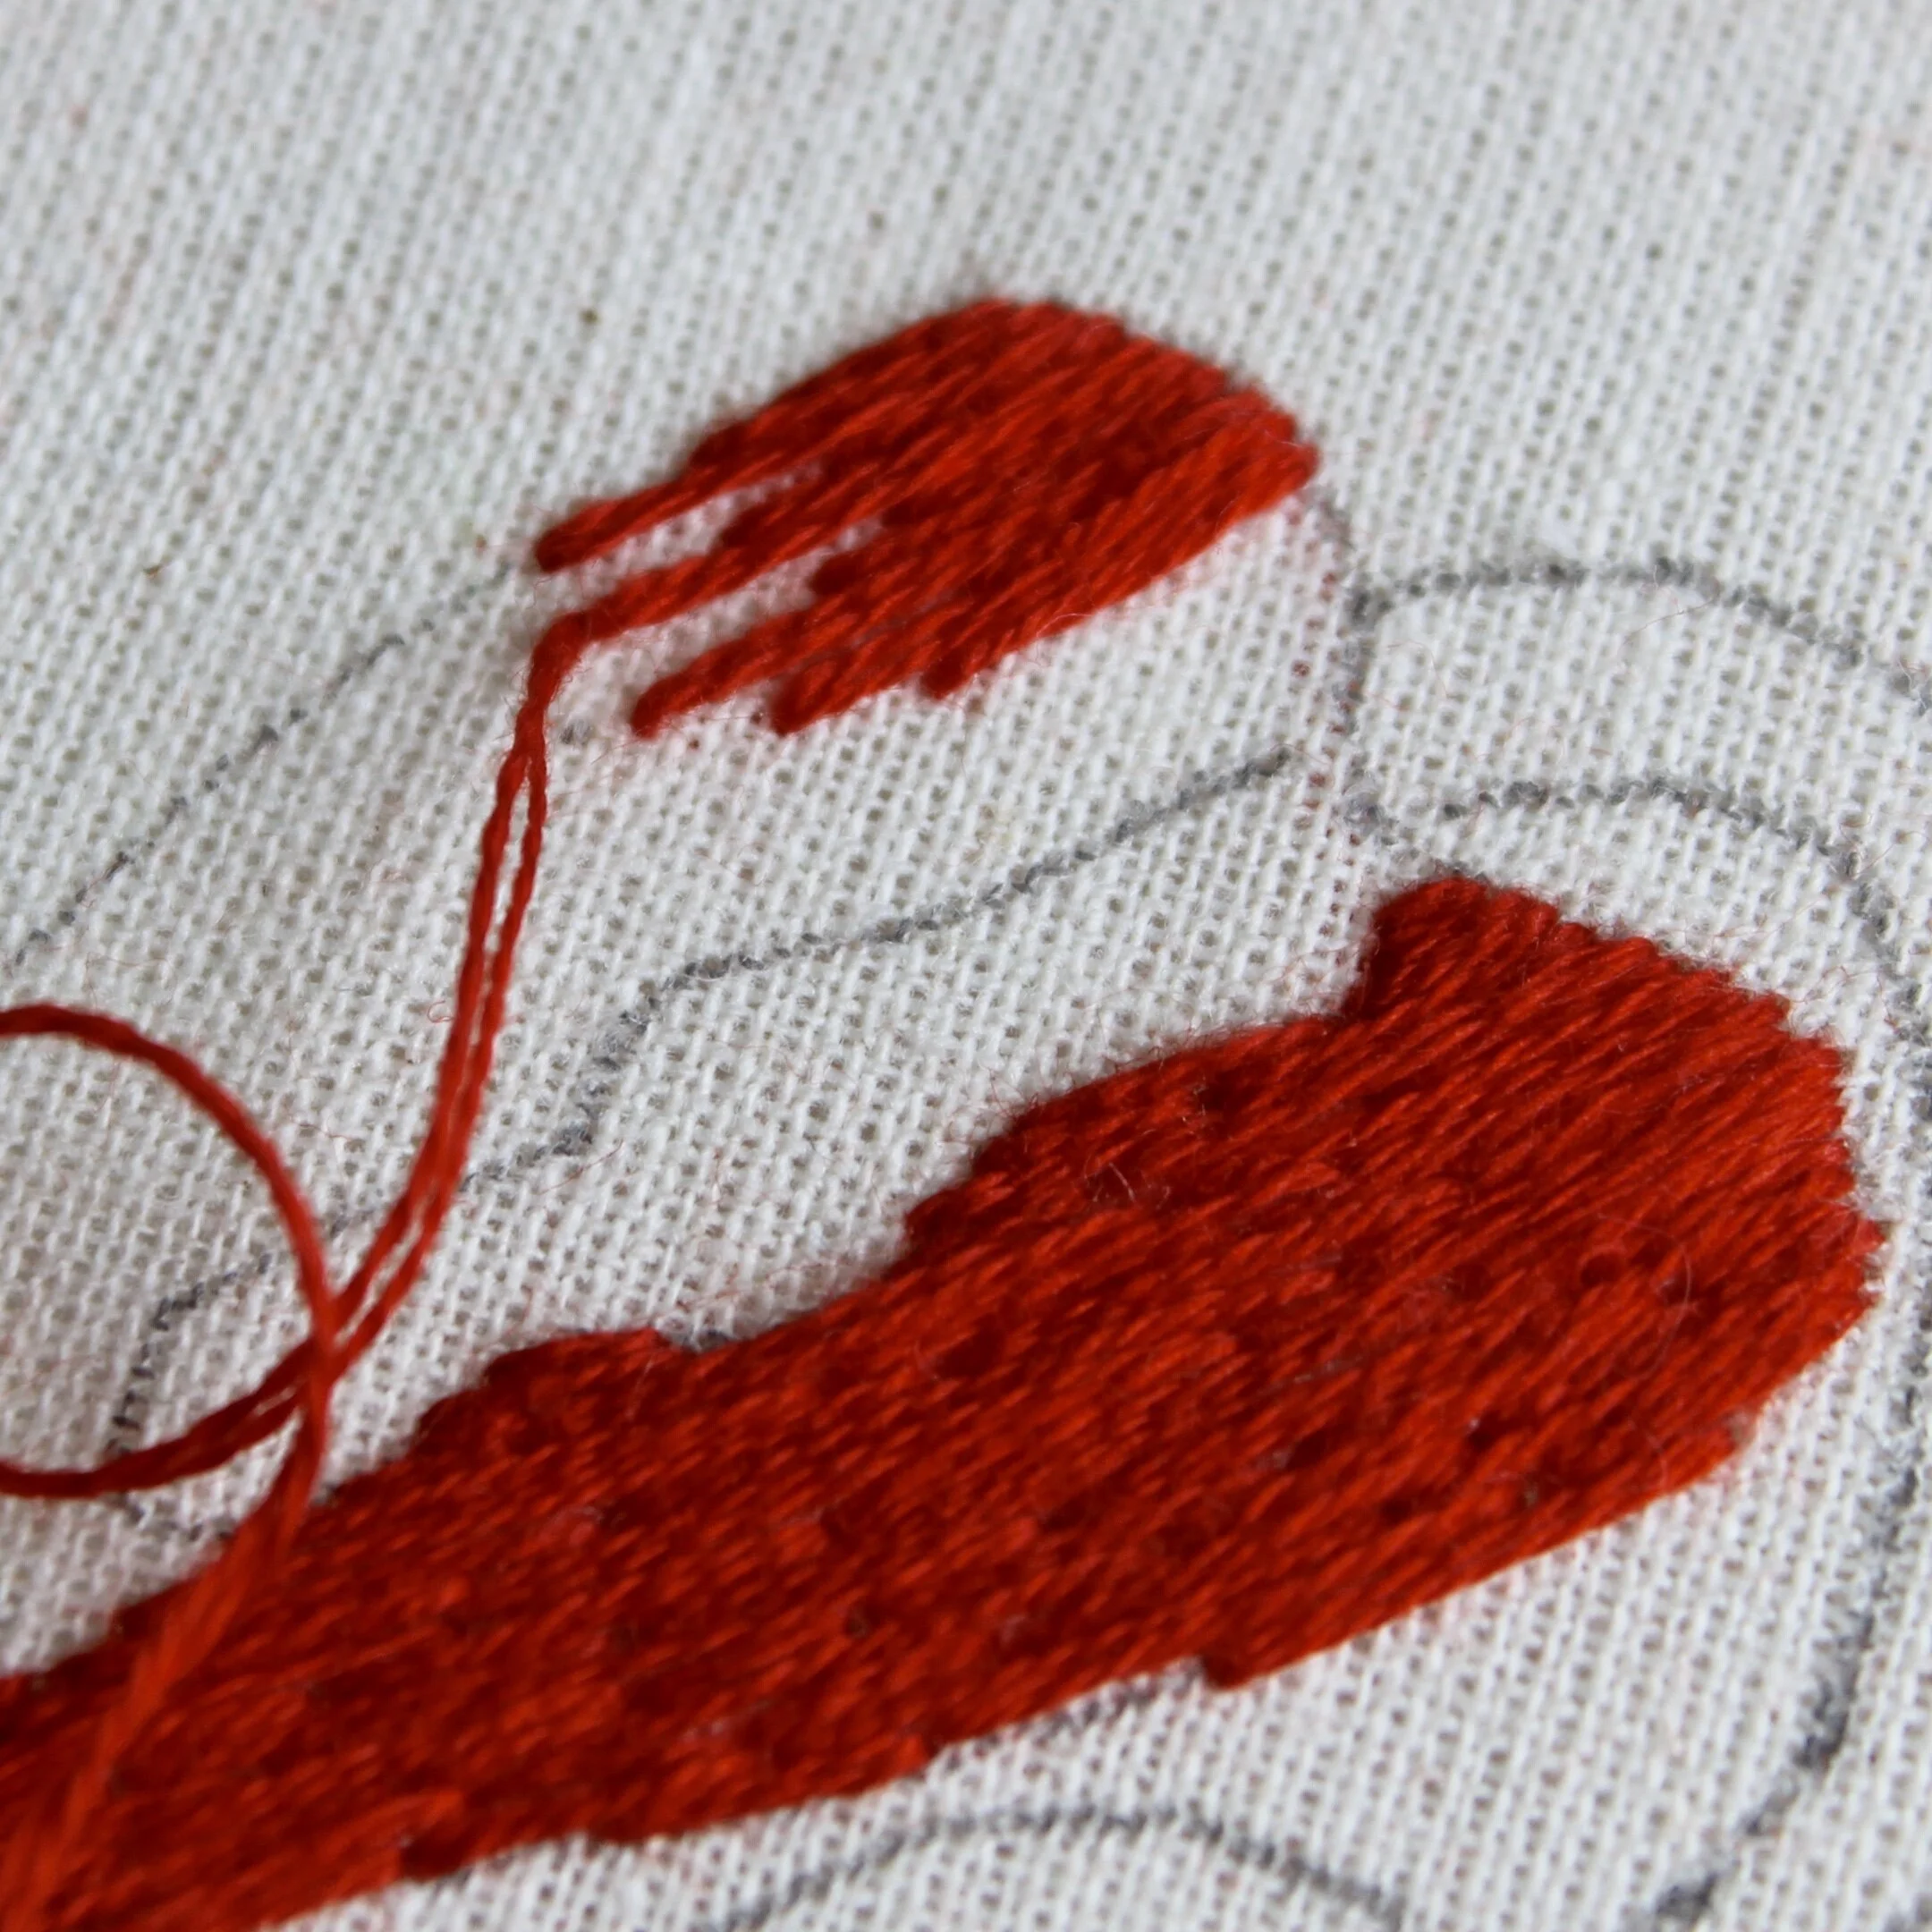
The picture below shows long and short stitch in progress and shows the texture that can be created when using one solid colour.

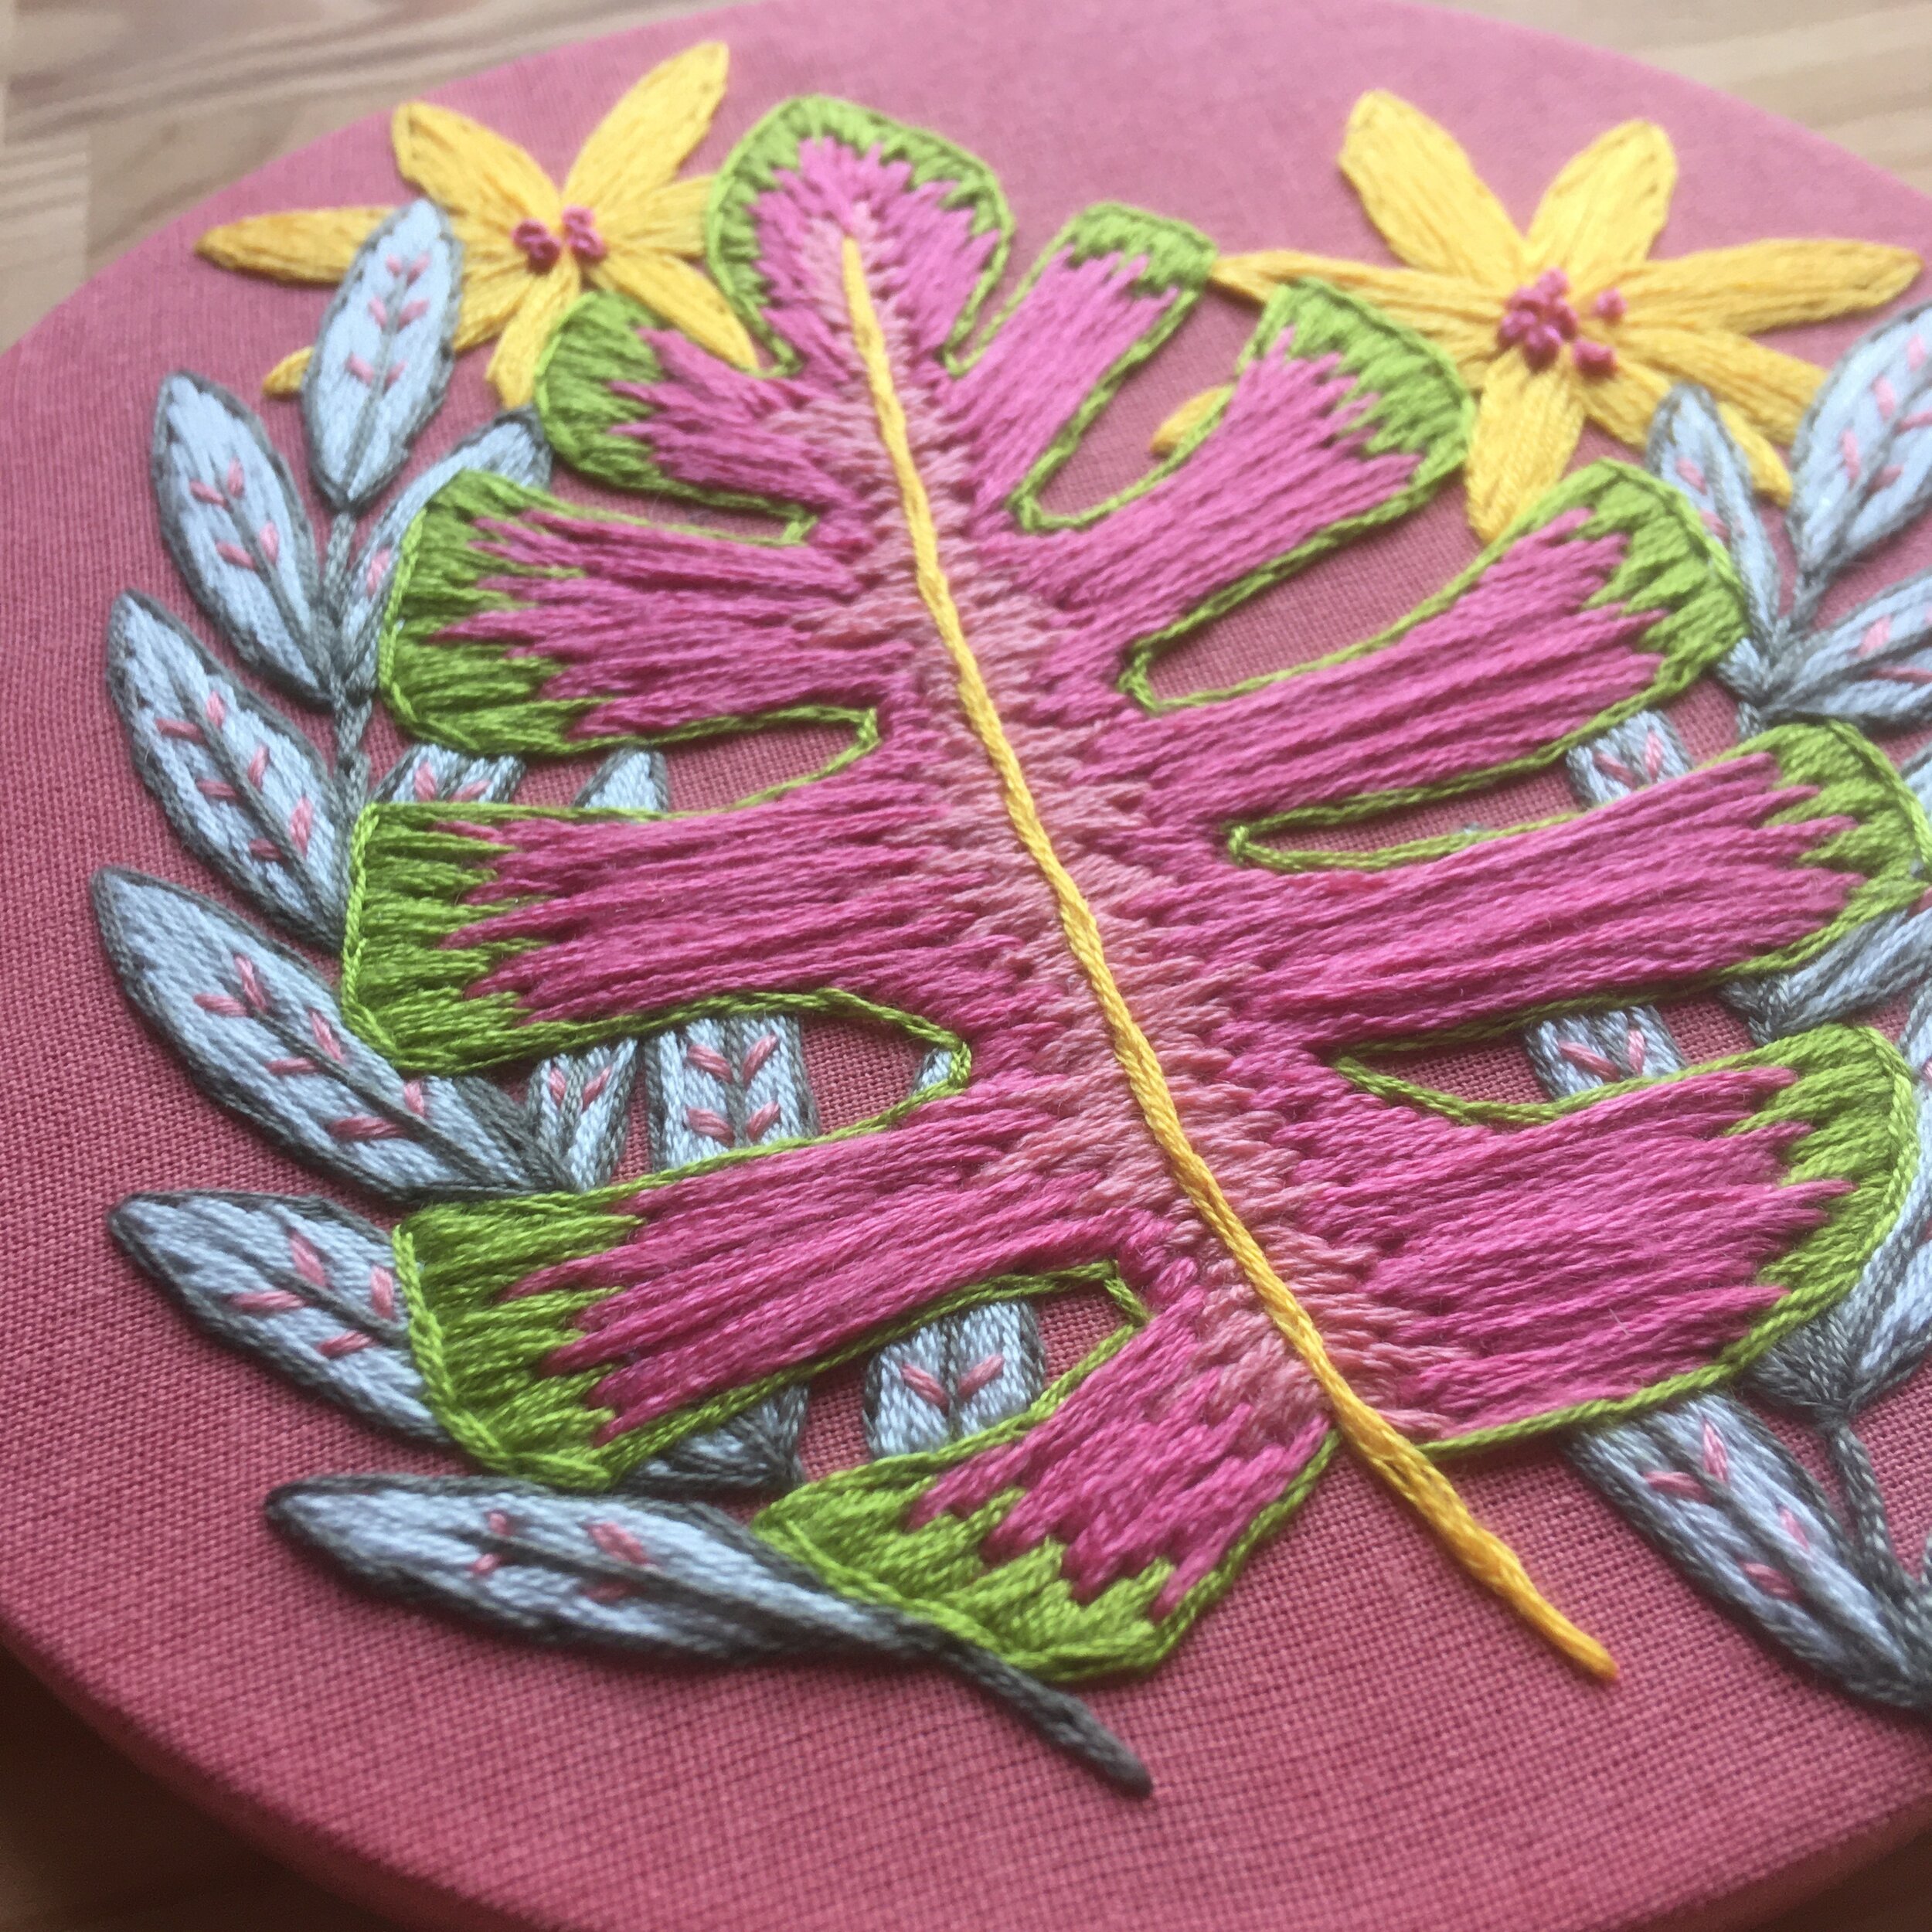
Lucy Freeman uses a lot of long and short stitch in her colourful botanical embroideries. This is a piece I stitched from one of her kits. It is stitched with all 6 strands of embroidery floss using long and short stitch. The green outer edge and light pink inner edge are stitched first before the central bright pink.

Want to try this stitch? It is one that I recommend using in my crocus embroidery kit.

An image of a flower being stitched using long and short stitch. Red thread on calico gives a textured look to the stitching
An image of a pink and green monstera leaf on pink fabric. The monstera leaf is stitched using long and short stitch with green to the edge of the leaves, light pink at the centre and dark pink inbetween

Enjoyed this blog post? I share embroidery tips and a free embroidery pattern in my monthly newsletter. Sign up here to receive the newsletter on the 1st of each the month.
In stitch showcase 1 Tags Stitch Showcase, Filling Stitch
Comment
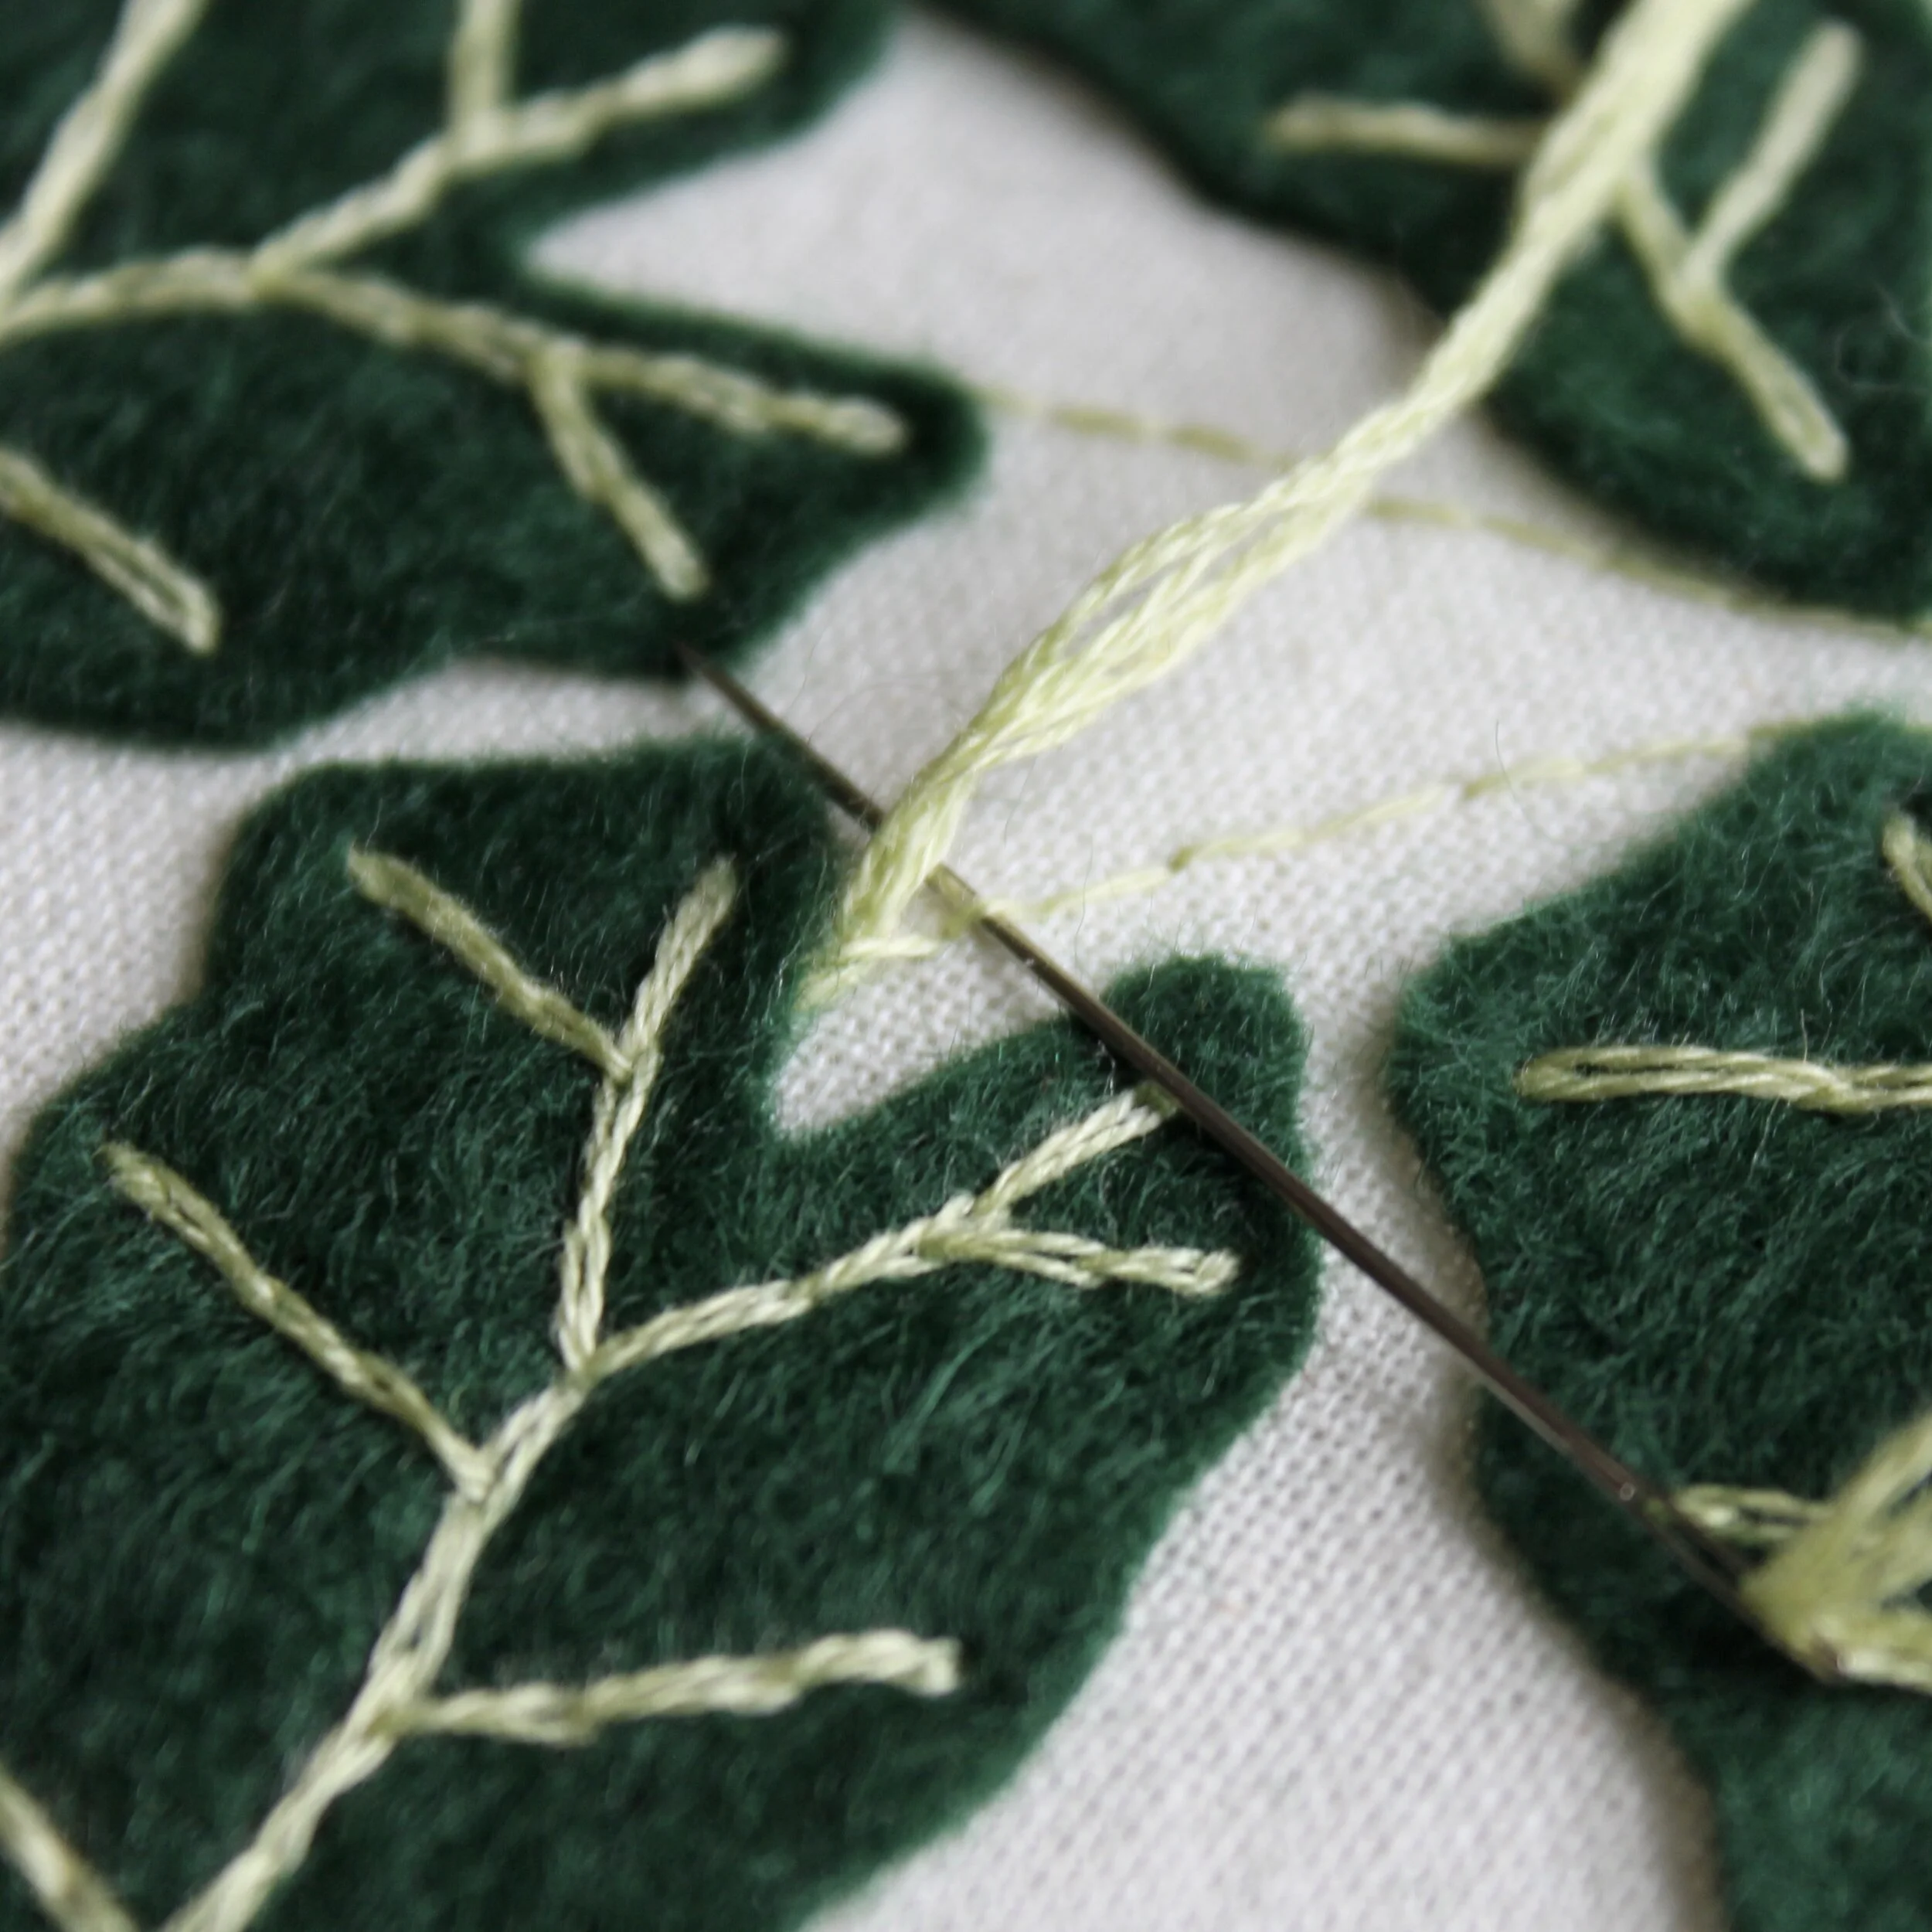
An image of split stitch in light green used on dark green felt leaves. Overlaid is a blue square with white text saying - stitch showcase, split stitch, www.embellishedelephant.co.uk

Stitch Showcase: Split Stitch

October 28, 2020

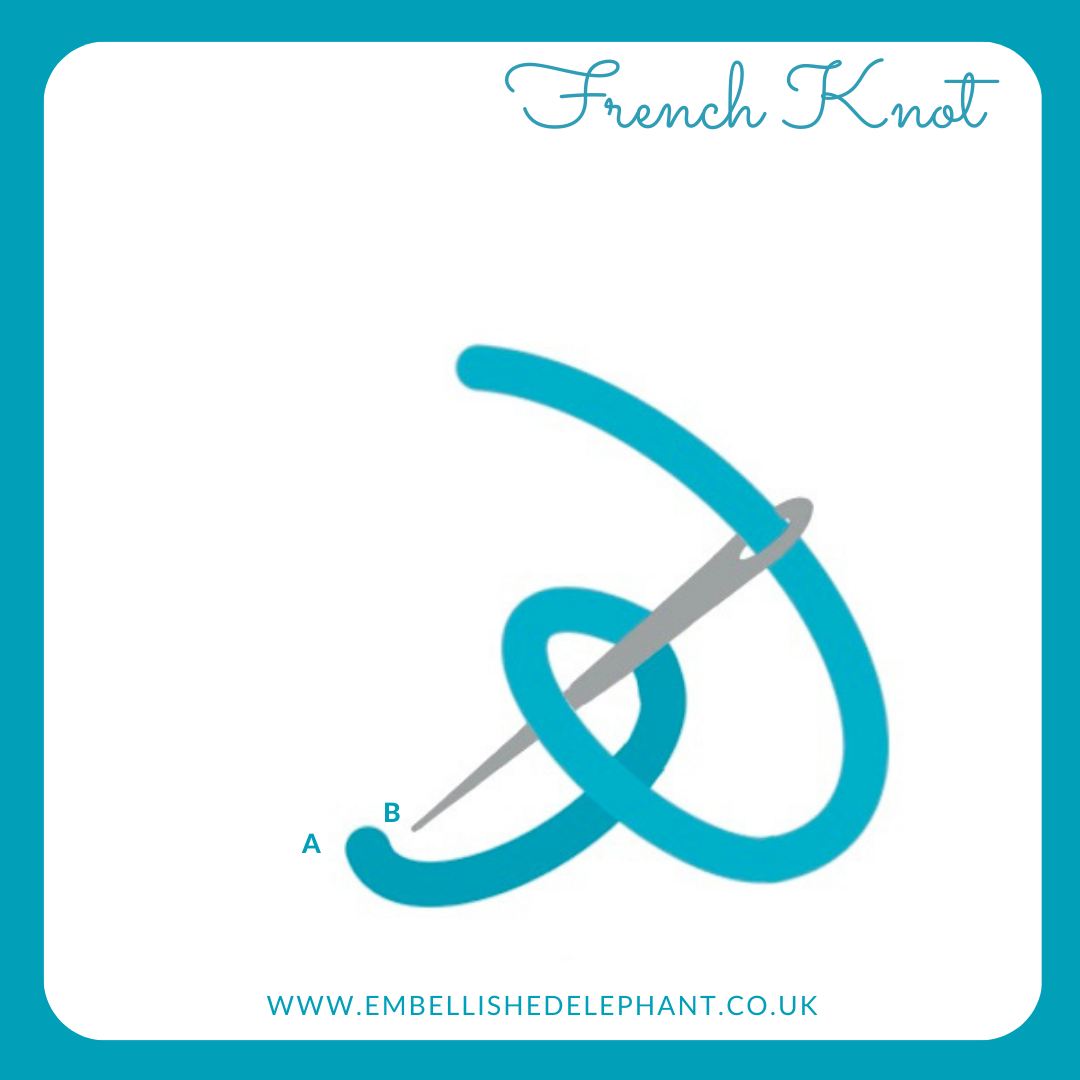
When I first encounter split stitch I wasn’t a big fan but as I’ve used it in more projects it’s one I now love. At its basic level it is a backstitch with a bit of variation in where you bring up the needle to start each stitch. It’s a great stitch for any botanical based embroidery, so if you are a plant lover then this is one to practice.

  • Create a stitch as if you were starting running or back stitch (A to B)

  • Then bring the needle back up through the fabric about 1mm along the stitch you just made (C)

  • Carefully poke the needle through the fabric and through the thread so that you 'split' the strand/strands evenly

  • Complete the stitch (D) making it the same length overall as the first stitch.

  • This method can be a bit tricky so an alternative method that I find a bit easier is to create the first stitch, then bring the needle up through the fabric at the point where you want the next stitch to end (D). Then poke it back down through the thread to split the strand/strands into two even parts (C).

  • This stitch can be worked with just one strand of thread. If working with multiple strands it is best to have an even number otherwise there is a slightly lopsided split

French Knot, seed stitch, split stitch illustration.png

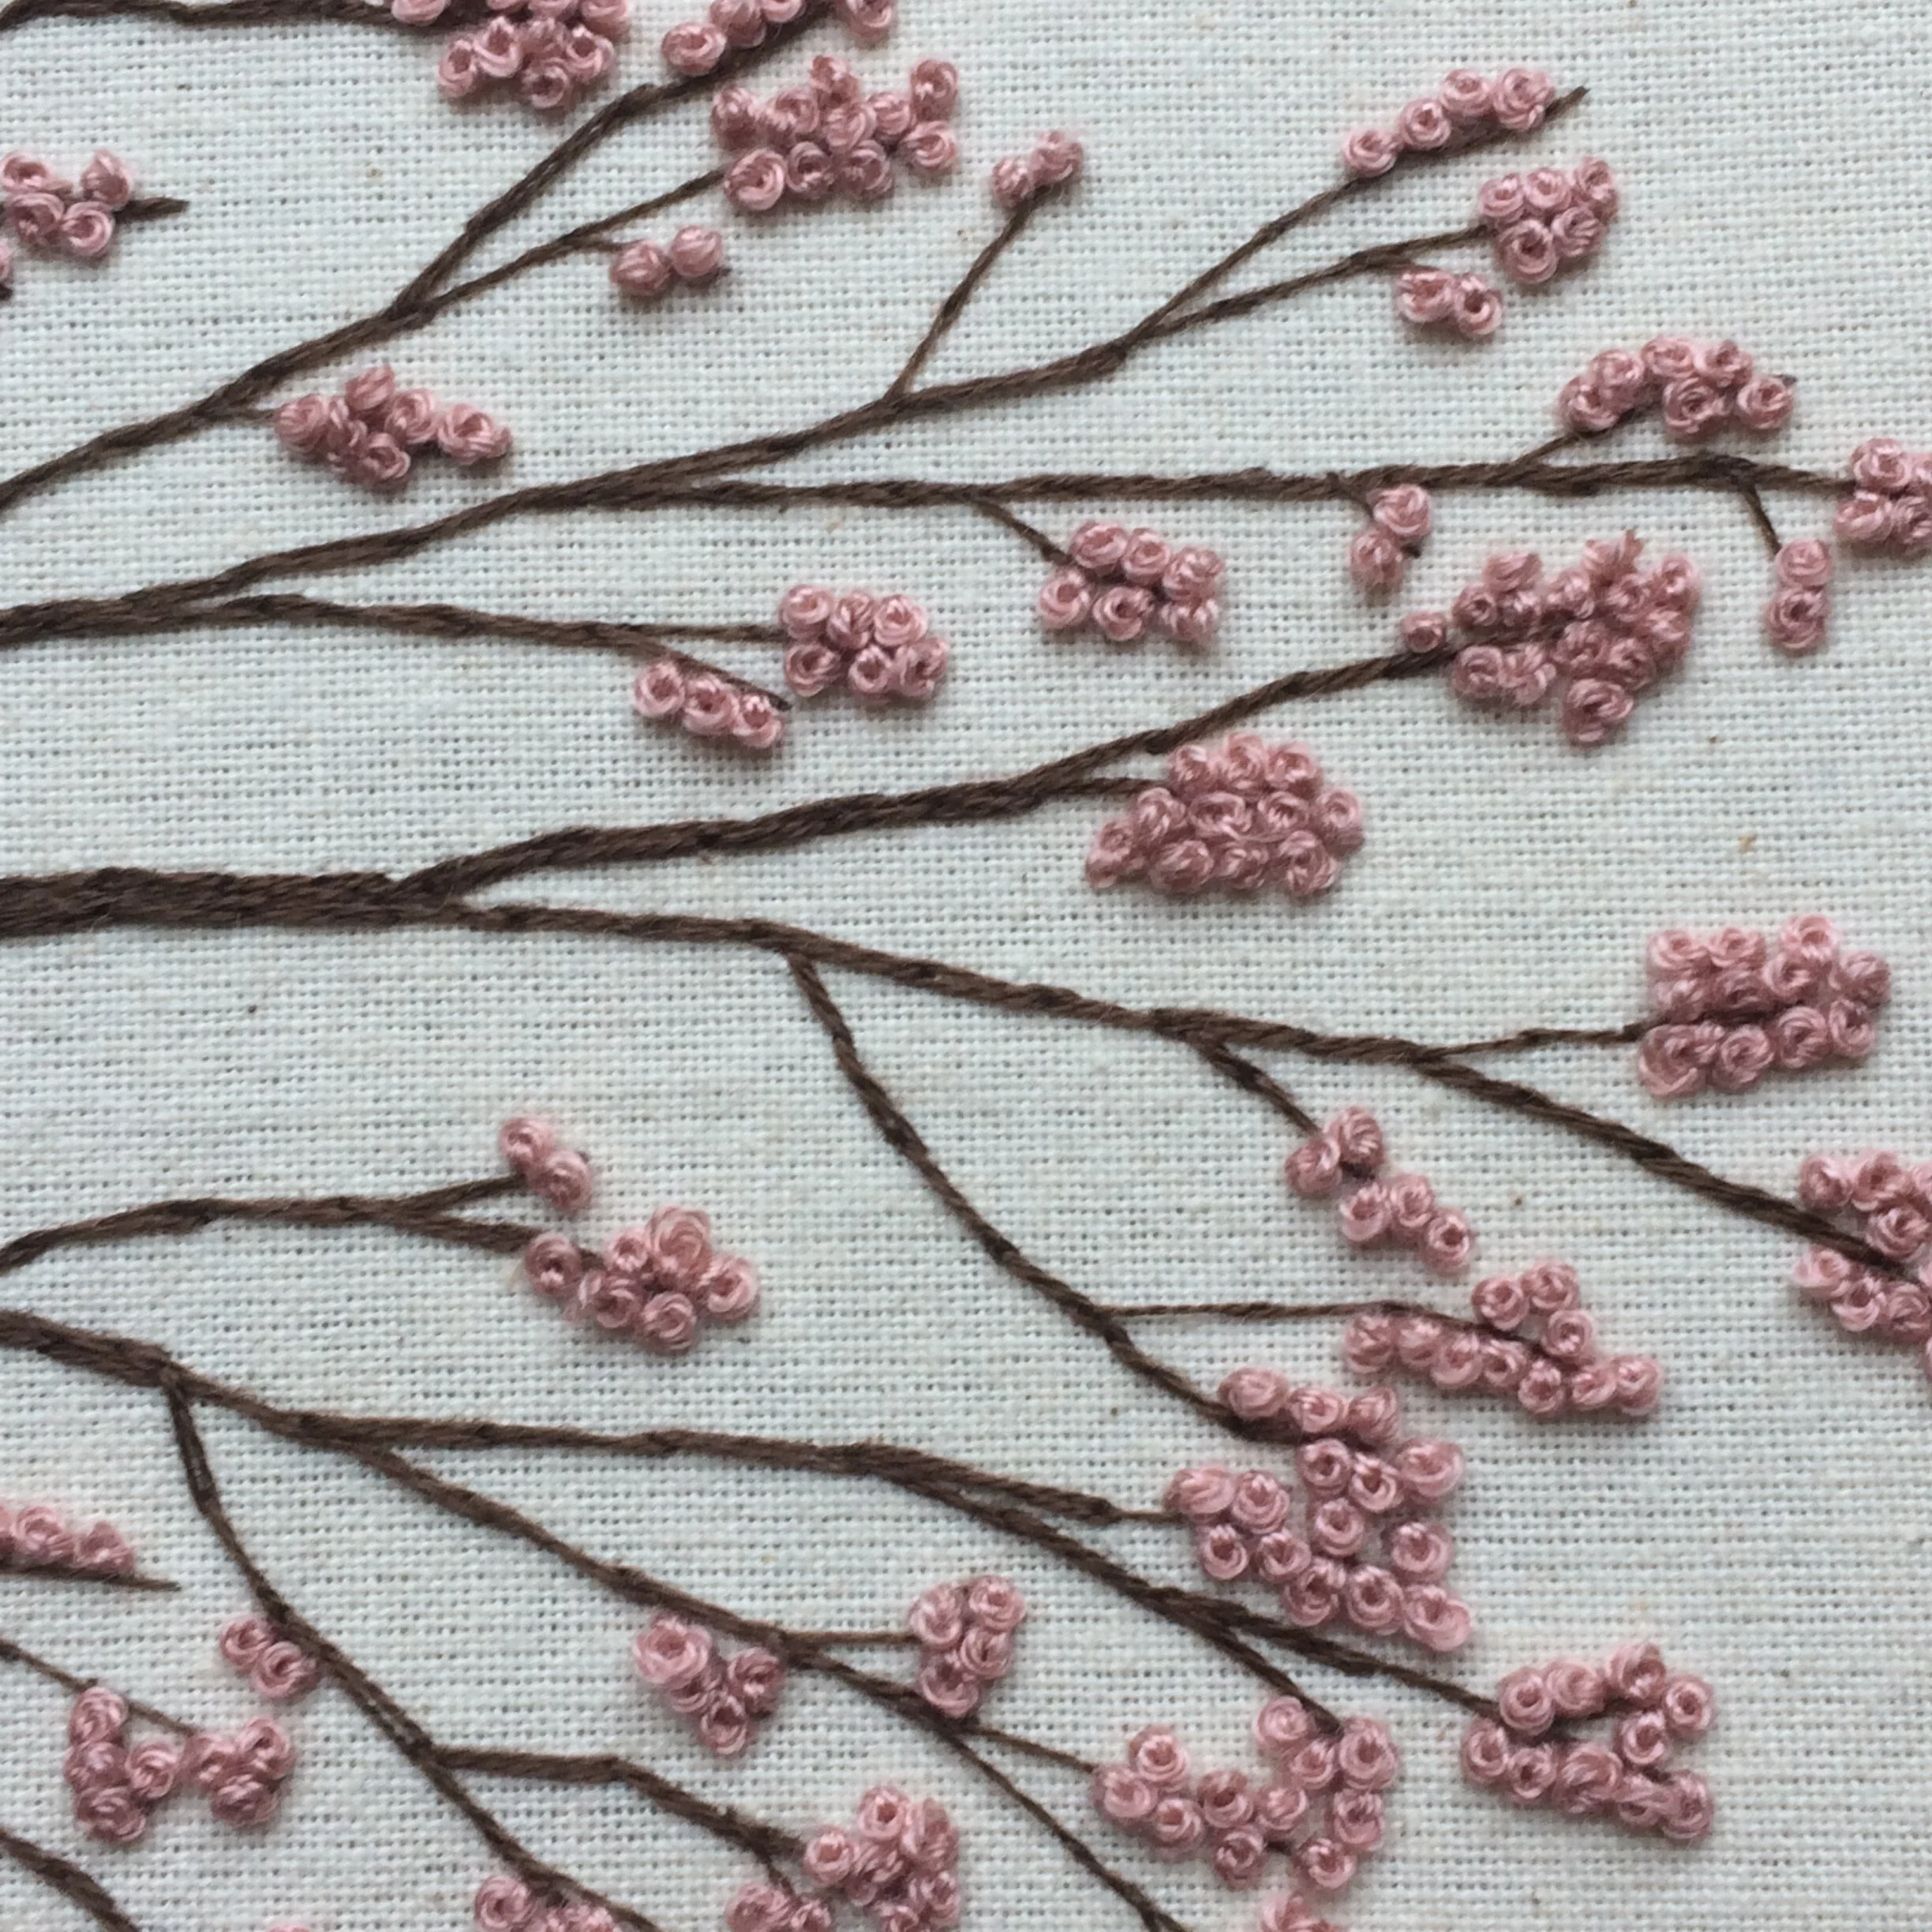
Split stitch can be used in different ways in the same piece. In this tree blossom embroidery there are some parts stitched using one strand and split stitch, other parts use two-stranded split stitch and other parts has lines of split stitch next to each other to create a thicker branch.

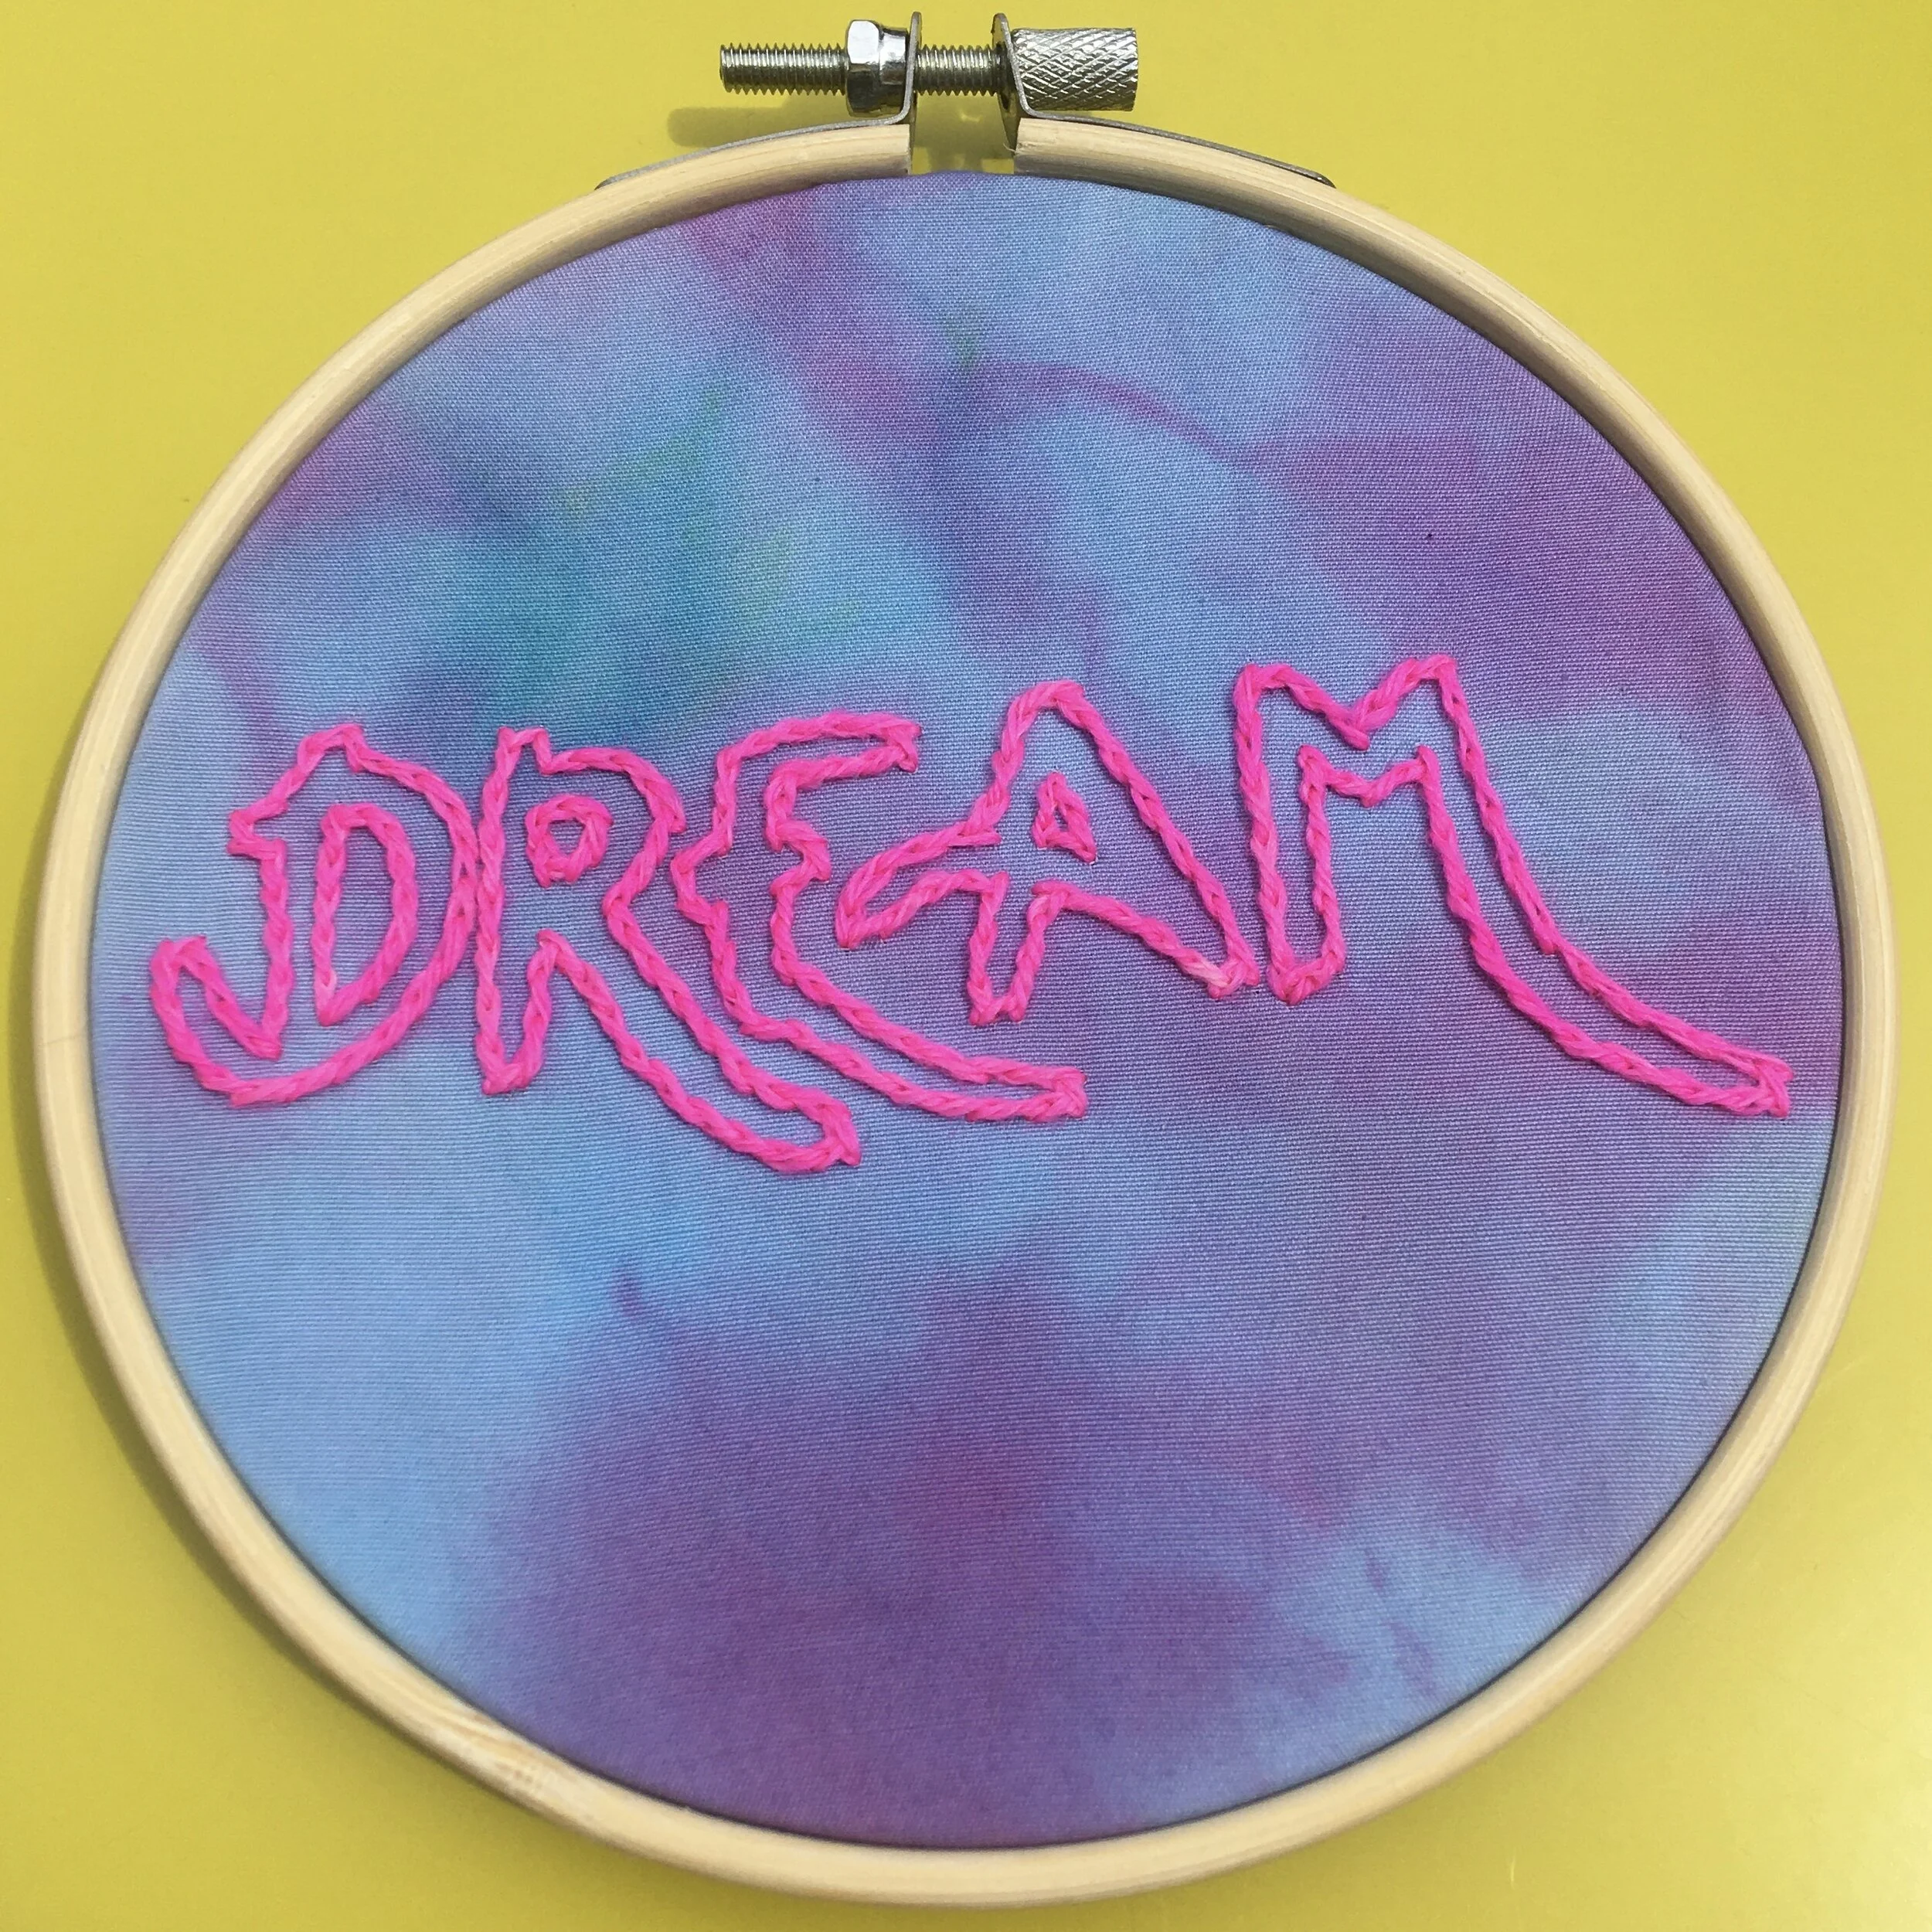
Split stitch can works well with single strands of thicker thread to create a plaited effect as shown in this word art embroidery.

Want to try this stitch? It’s a stitch I recommend in my elephant ear plant kit, spring blossom kit, snowdrop kit and crocus kit.

A picture of split stitch of different thicknesses used to create branches
A picture of the word 'dream' stitched in bright pink yarn on a blue and purple dyed fabric background

Enjoyed this blog post? I share embroidery tips and a free embroidery pattern in my monthly newsletter. Sign up here to receive the newsletter on the 1st of each the month.
In stitch showcase 1 Tags Stitch Showcase, Line Stitch
Comment
A picture of different threads in shades of blue laid on a wooden table. Overlaid is a blue square with white text saying - hand embroidery, one rule for picking the right embroidery thread, www.embellishedelephant.co.uk

One rule for picking the right thread for your embroidery project

October 24, 2020

When you are first starting out learning embroidery the default recommendation is to use six-stranded embroidery floss. This thread is great for the traditional styles of hand embroidery but don’t assume that this is the only thread you can stitch with. If you want to start experimenting more with embroidery, changing up the thread you are using is a surefire way to get a different look.

But the one rule I wan to share if you are going to experiment in this way by using different threads is …

“The type of thread you use should match the project that you are making”

‘Of course’ you may be shouting at your screen right now but let me explain a bit more.

There are so many different types and styles of embroidery - gold work, Hardanger, canvaswork and not to mention modern embroidery artist such as Elizabeth Pawle artists who work with yarns rather than floss.

Some of the more traditional styles of embroidery use particular threads for very good reasons:

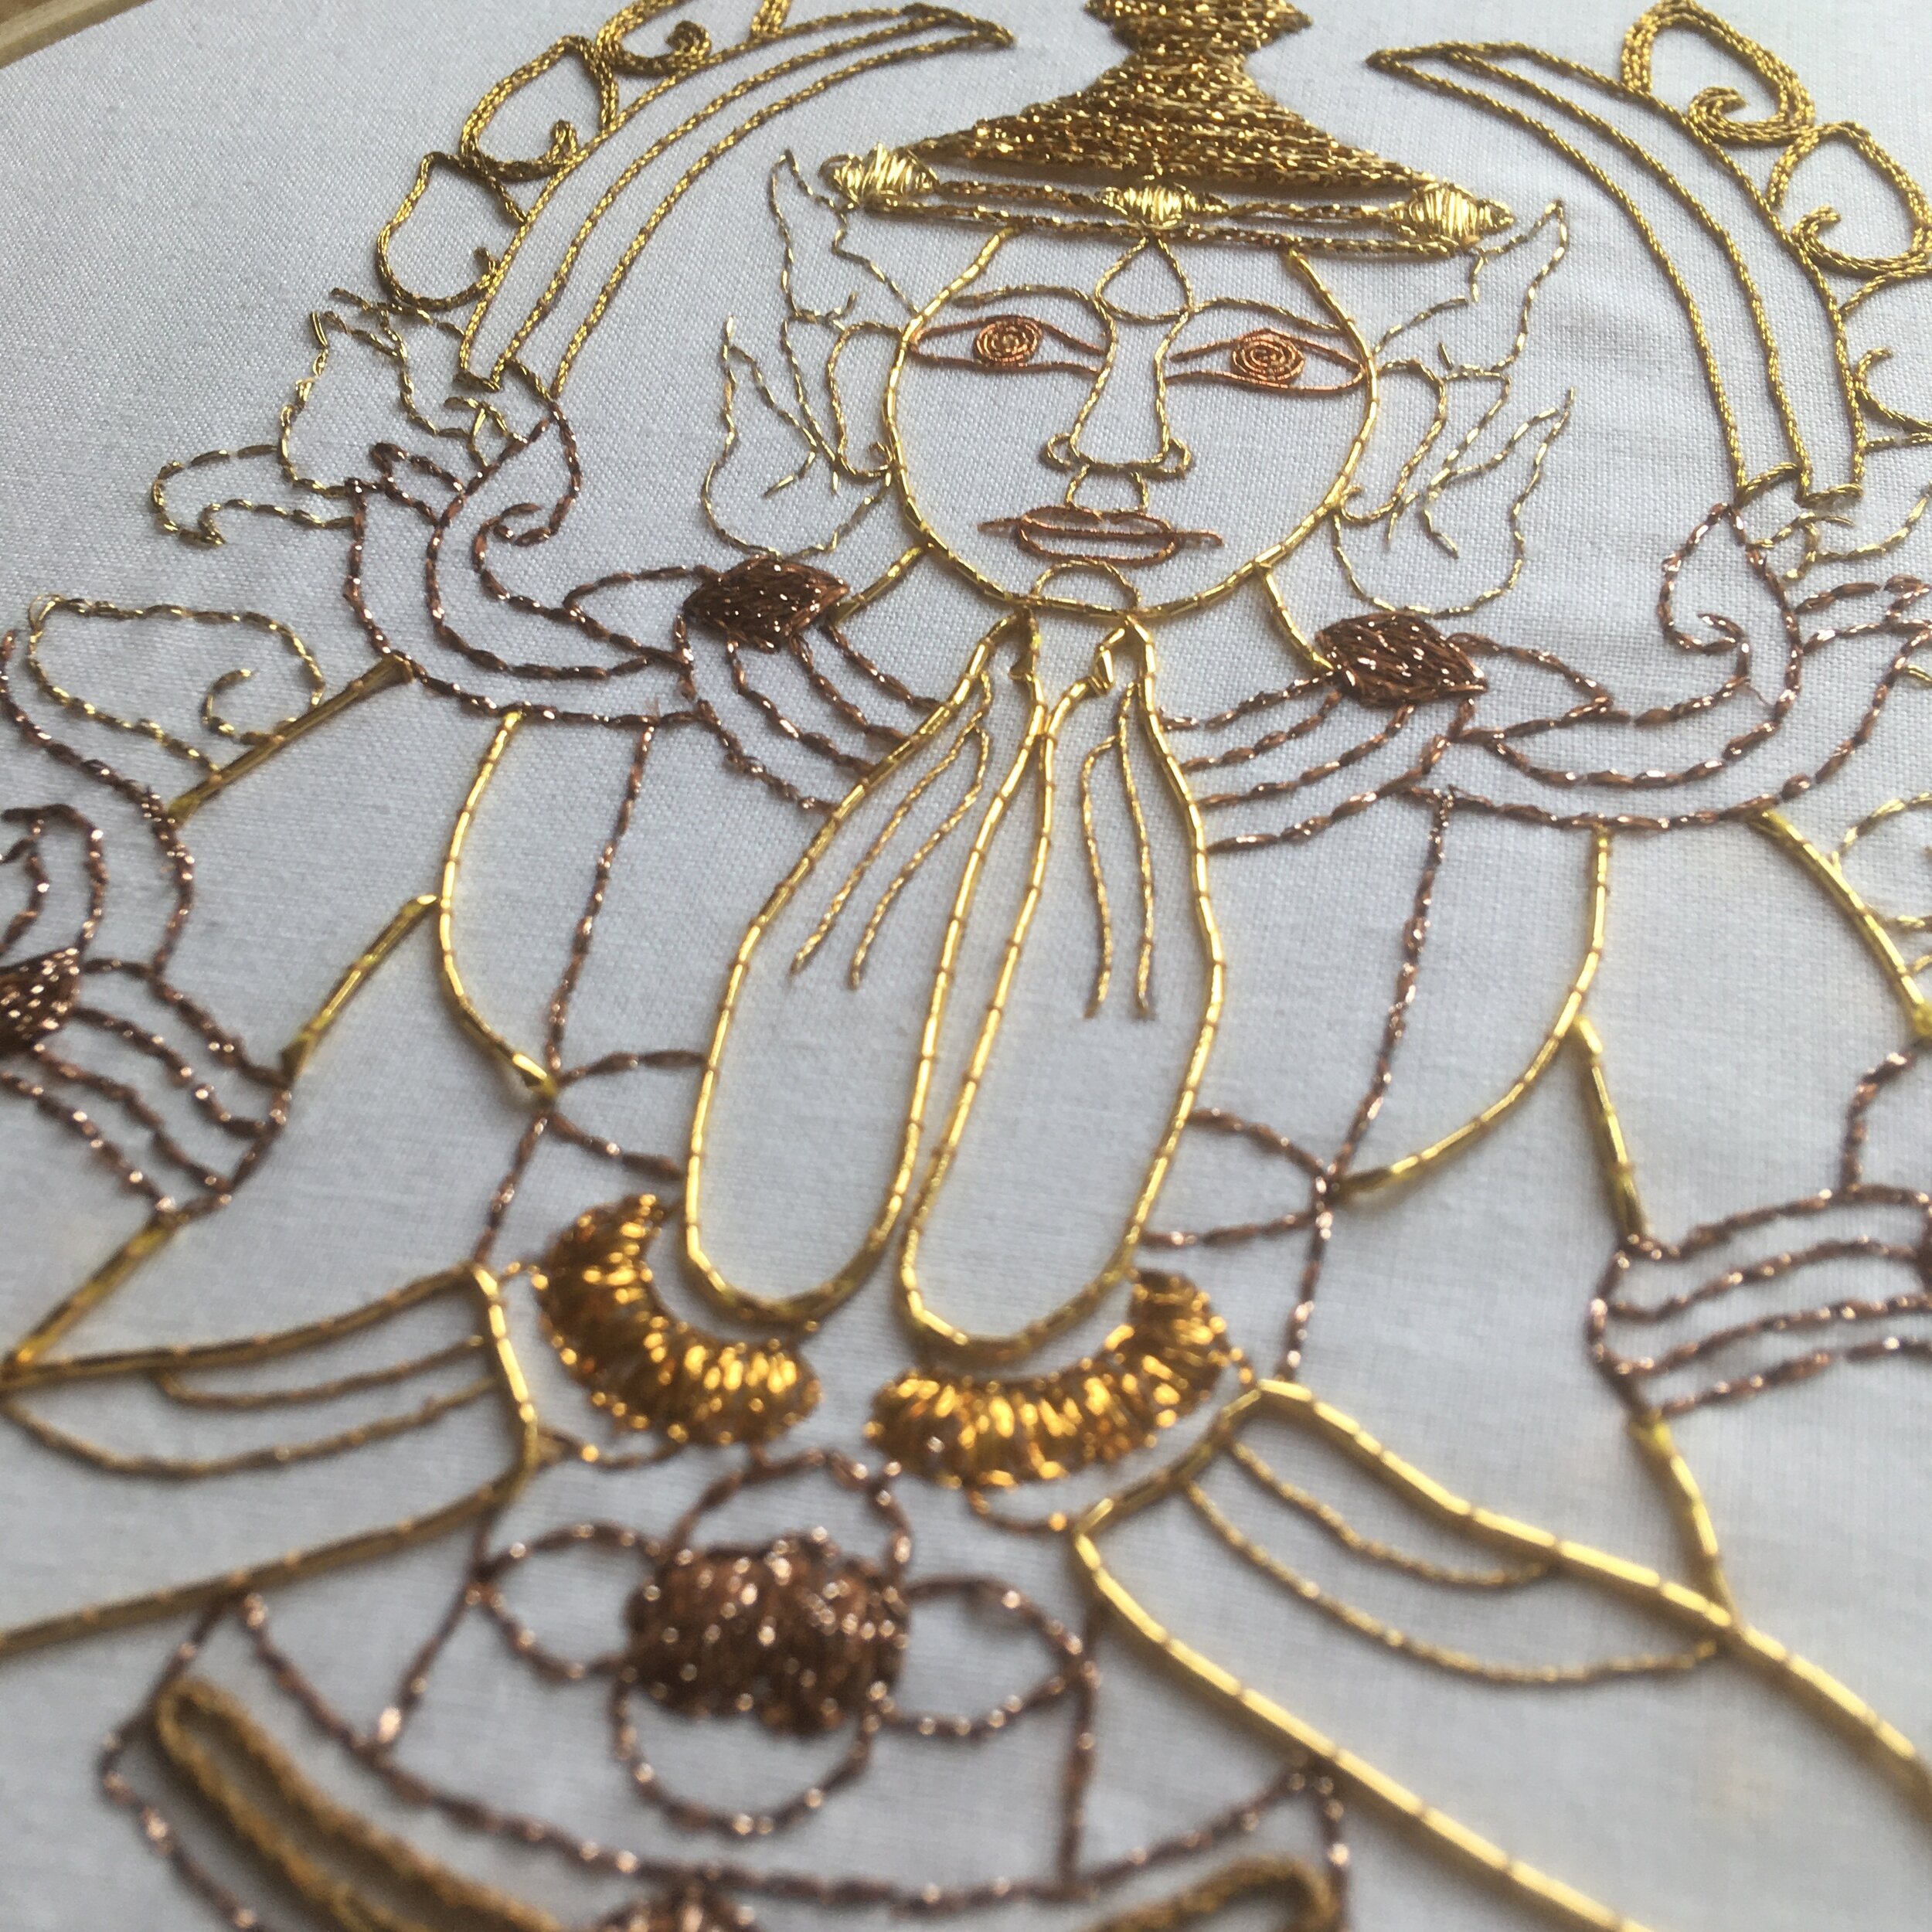
A picture of a goldwork buddha figure on white fabric

Gold work

This technique uses thicker threads so that you can see the beautiful gold detailing that this style is based on.

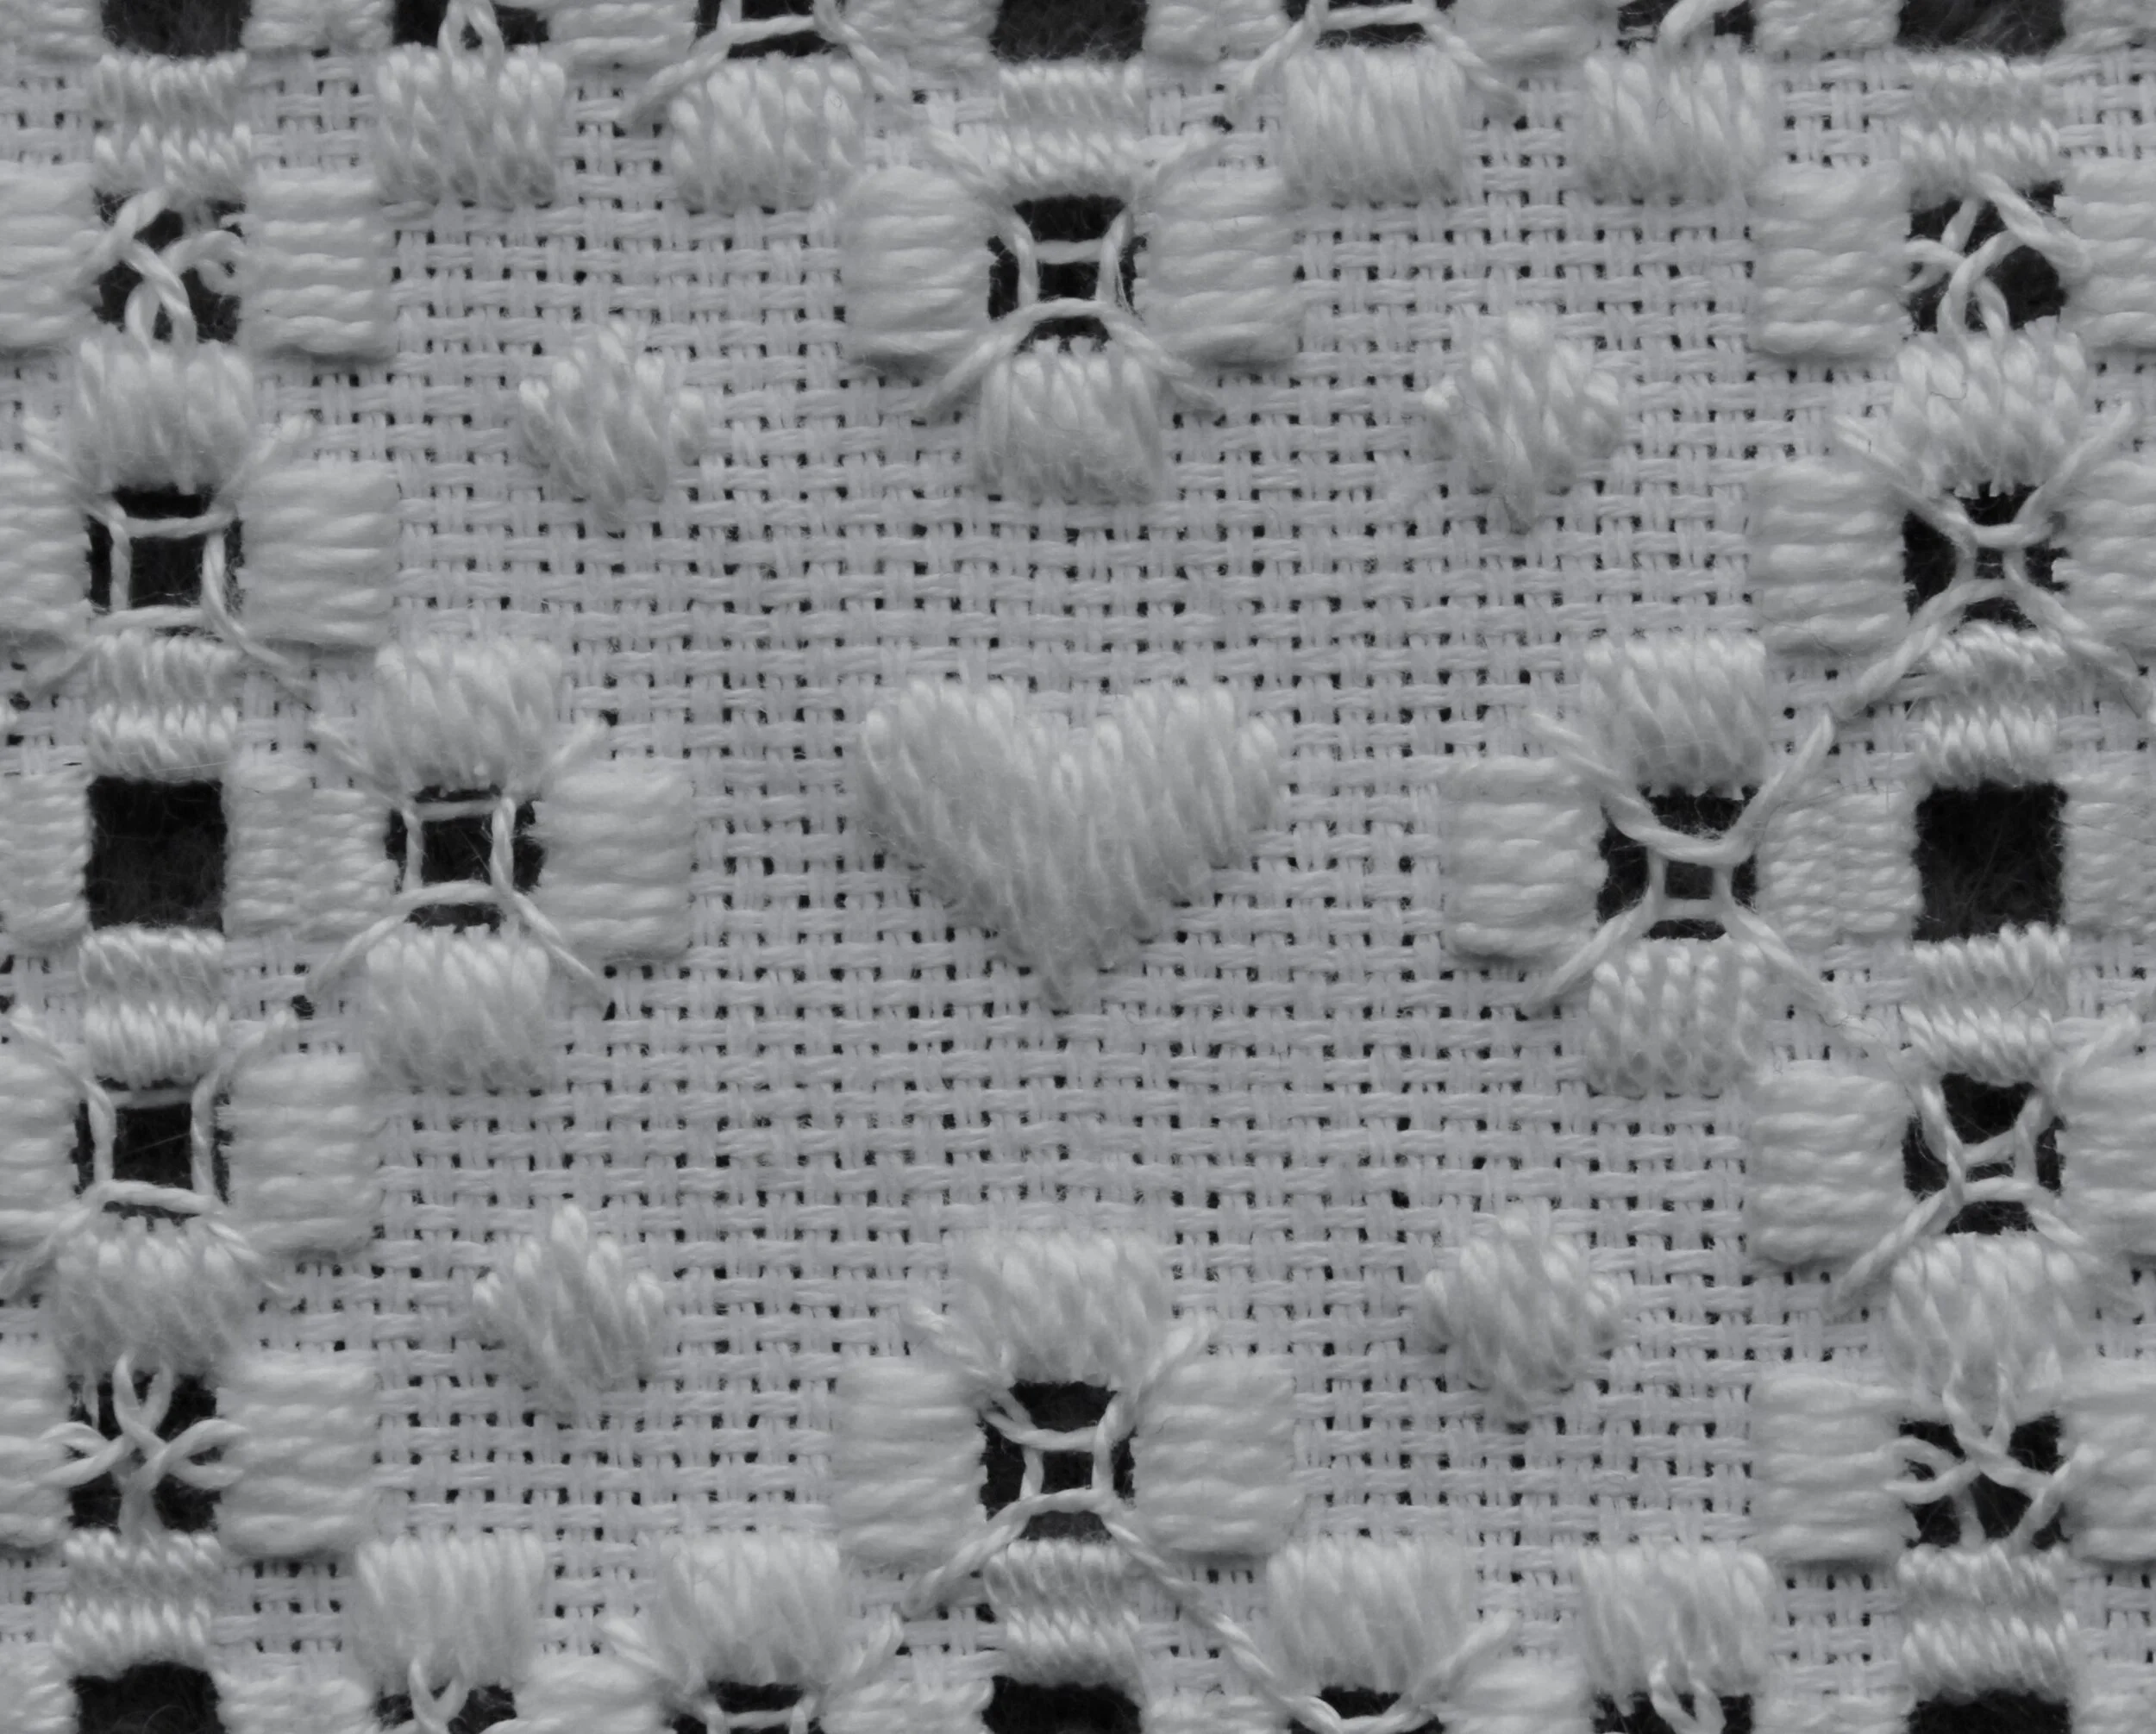
A picture of hardanger embroidery - white thread on white fabric with cut out square sections

Hardanger

Size 5 & 8 perle cotton is used for this type of embroidery because you need this thickness of thread to hold the warp and weft threads when you cut out the holes.

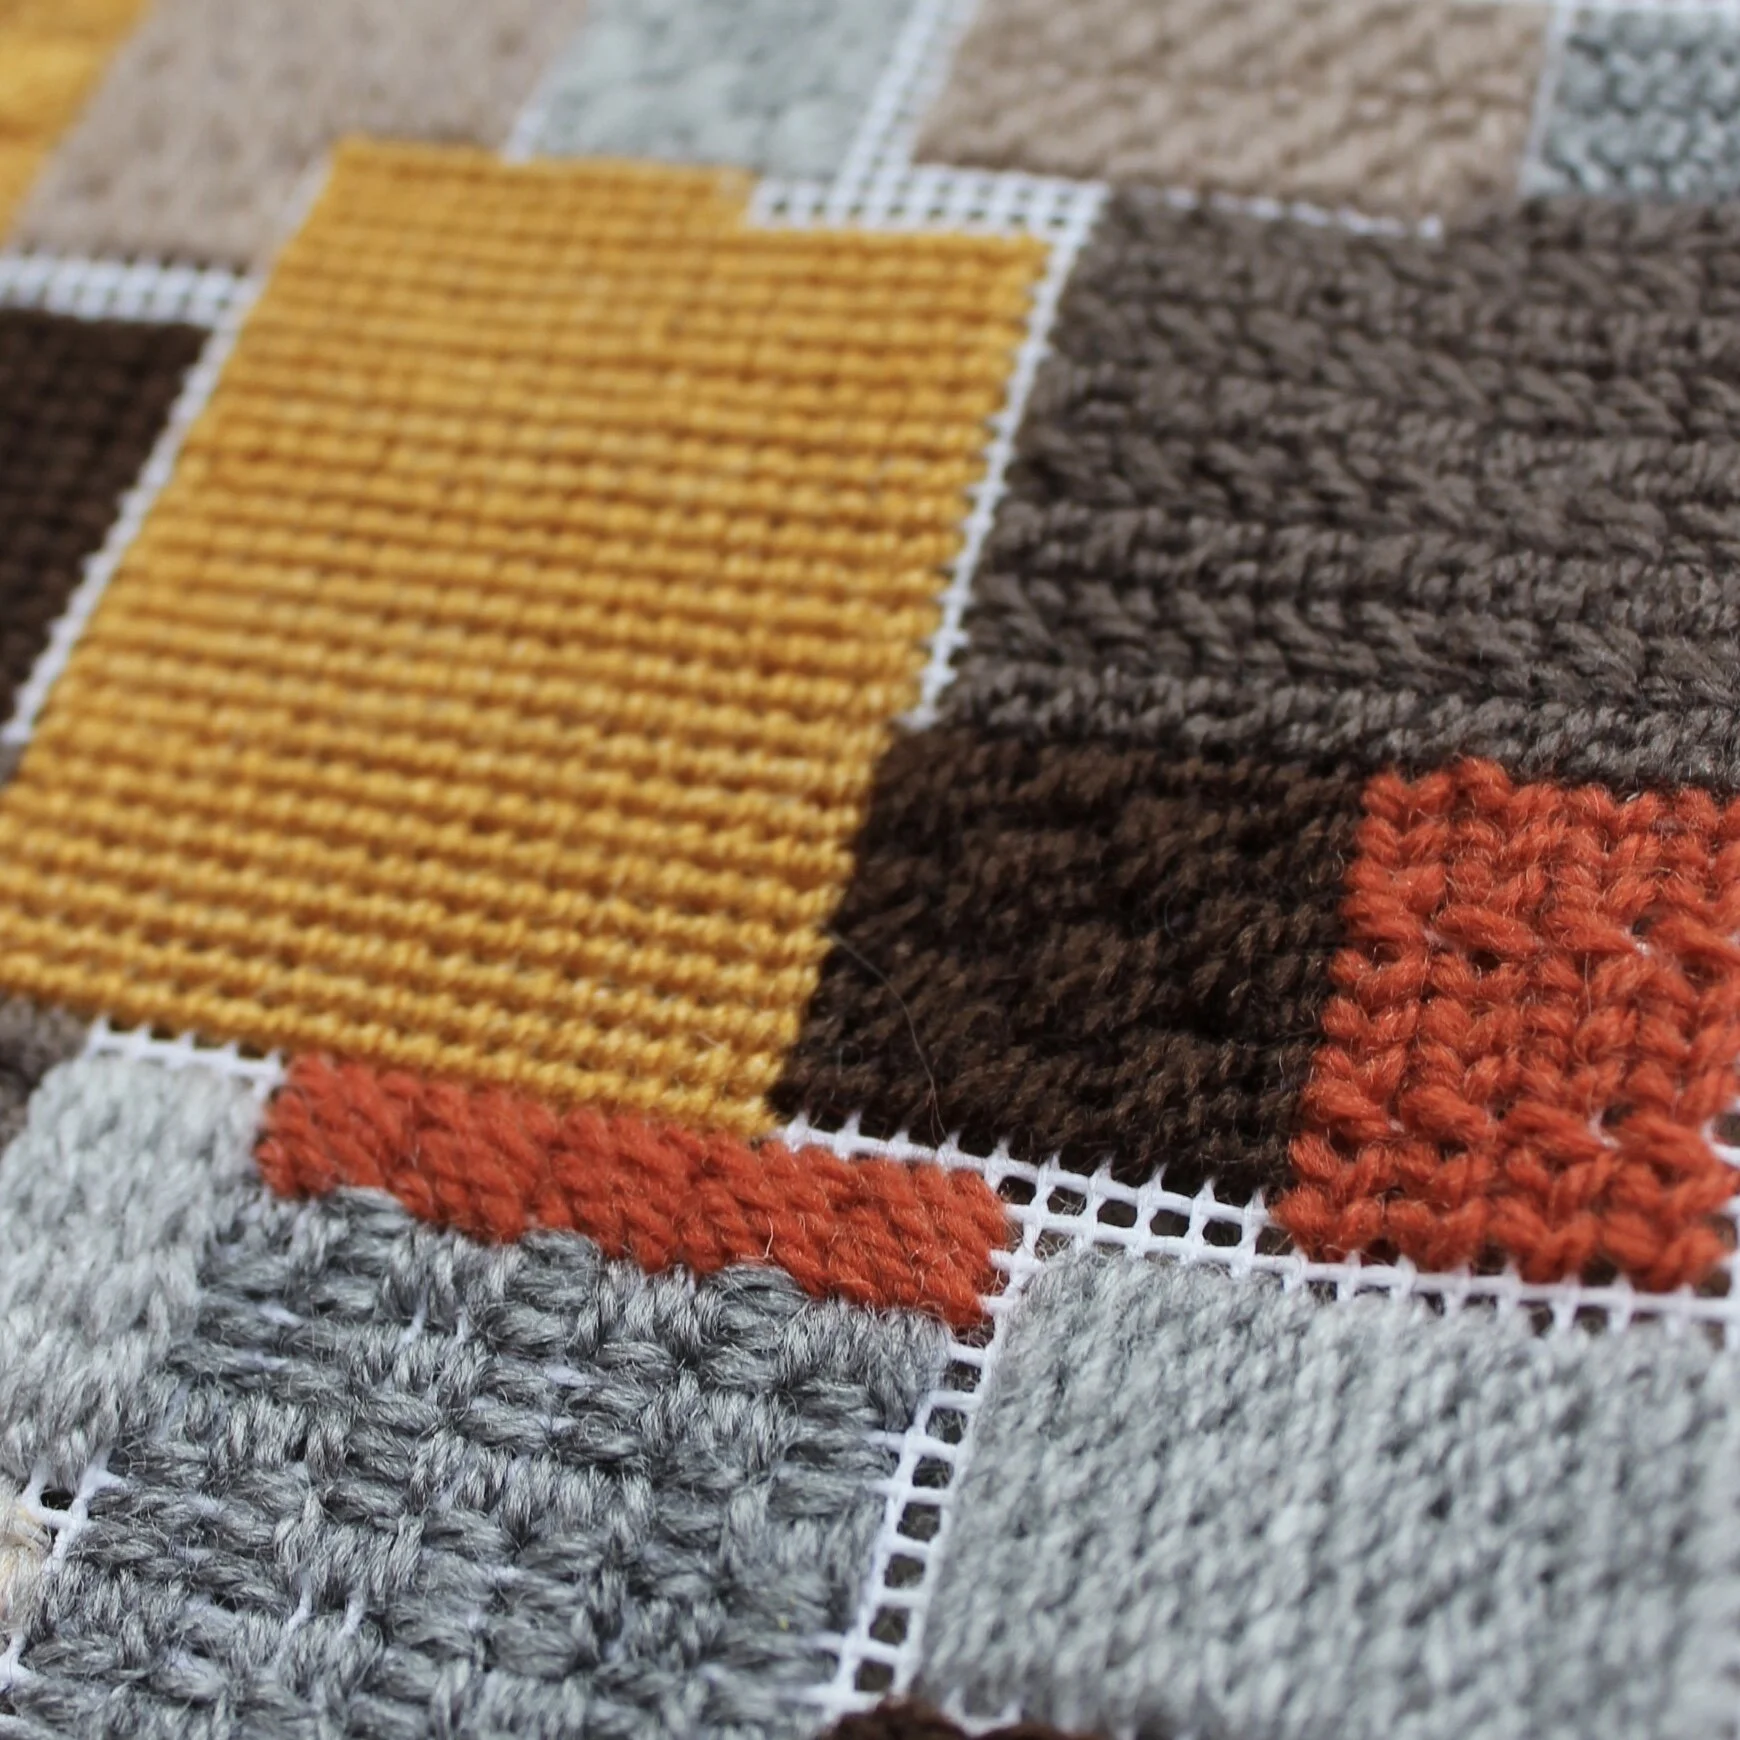
A picture of canvas work stitch sampler in shades of yellow, brown, grey and orange.

canvas work

When working on canvas then using tapestry wool is best to make sure the larger holes in the canvas are covered up appropriately.

A picture of isolated embroidery stitches in pink, purple and blue shades stitch on white canvas

Modern embroidery

I like to use yarn (I have a big stash from knitting and crocheting projects). The main reason for this is that the yarn fills up the larger space much quicker than floss would. But it also creates a different look and feel to the piece.

Enjoyed this blog post? I share embroidery tips and a free embroidery pattern in my monthly newsletter. Sign up here to receive the newsletter on the 1st of each the month.
In tips 2 Tags Thread, Basics
Comment
A picture of seed stitches in black thread of different thicknesses on white fabric. Overlaid is a blue square with white text saying - stitch showcase, seed stitch, www.embellishedelephant.co.uk

Stitch Showcase: Seed Stitch

October 21, 2020

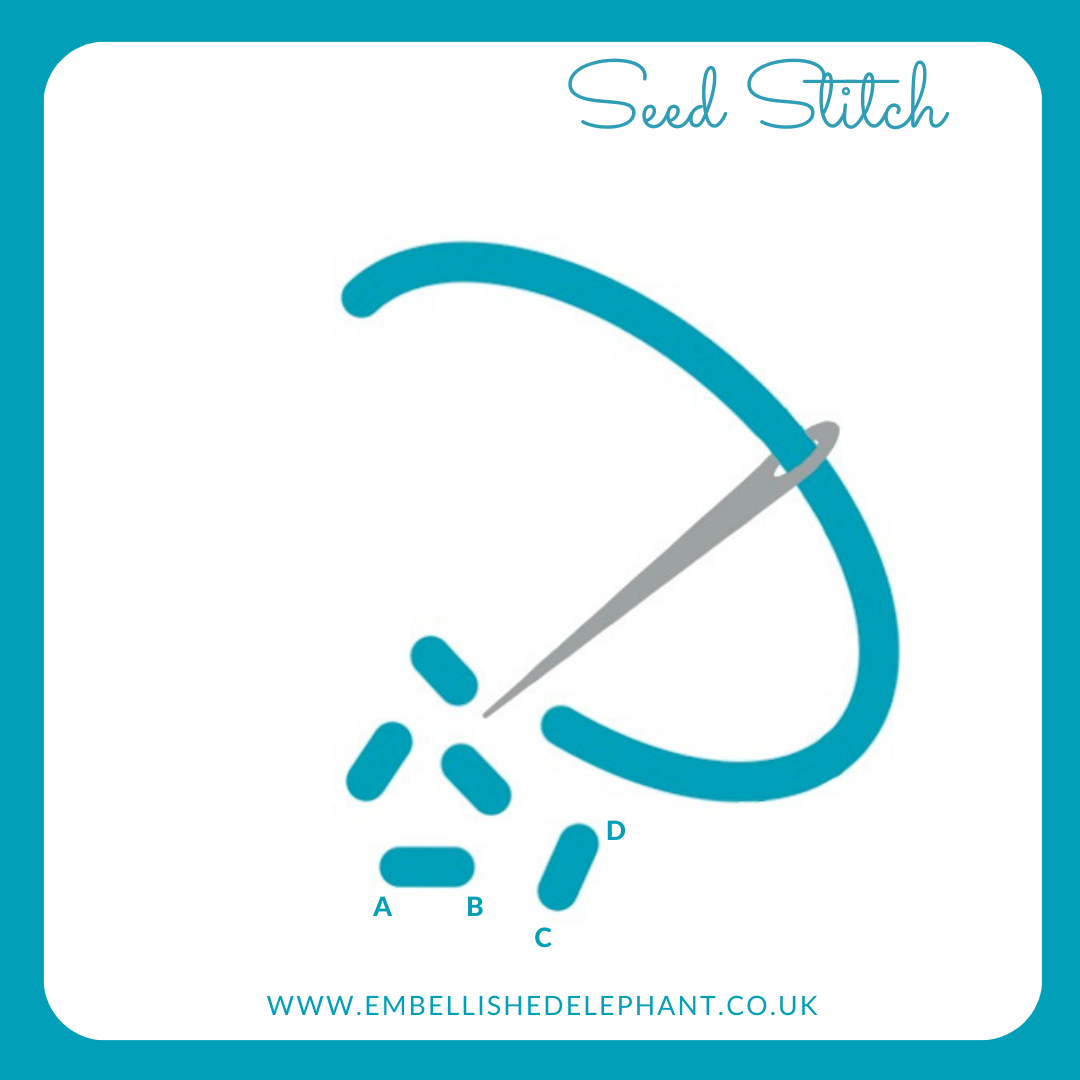
Seed stitch is basically a running stitch but stitched randomly rather than in a line and is a great decorative stitch especially when you want to fill a space but still see the backing fabric.

  • Bring the needle up from the back of the fabric (A)

  • Take it back down a few millimetres along (B)

  • Repeat this at different angles (eg C-D) and with different spacing between the stitches.

  • The stitches can be of the same length or differing lengths.

  • Seed stitch can also be layered up with the ‘seeds’ overlapping and this works particularly well when using different threads that overlap.

An illustration showing how to create seed stitches. The illustration is in shades of blue and grey on a white background

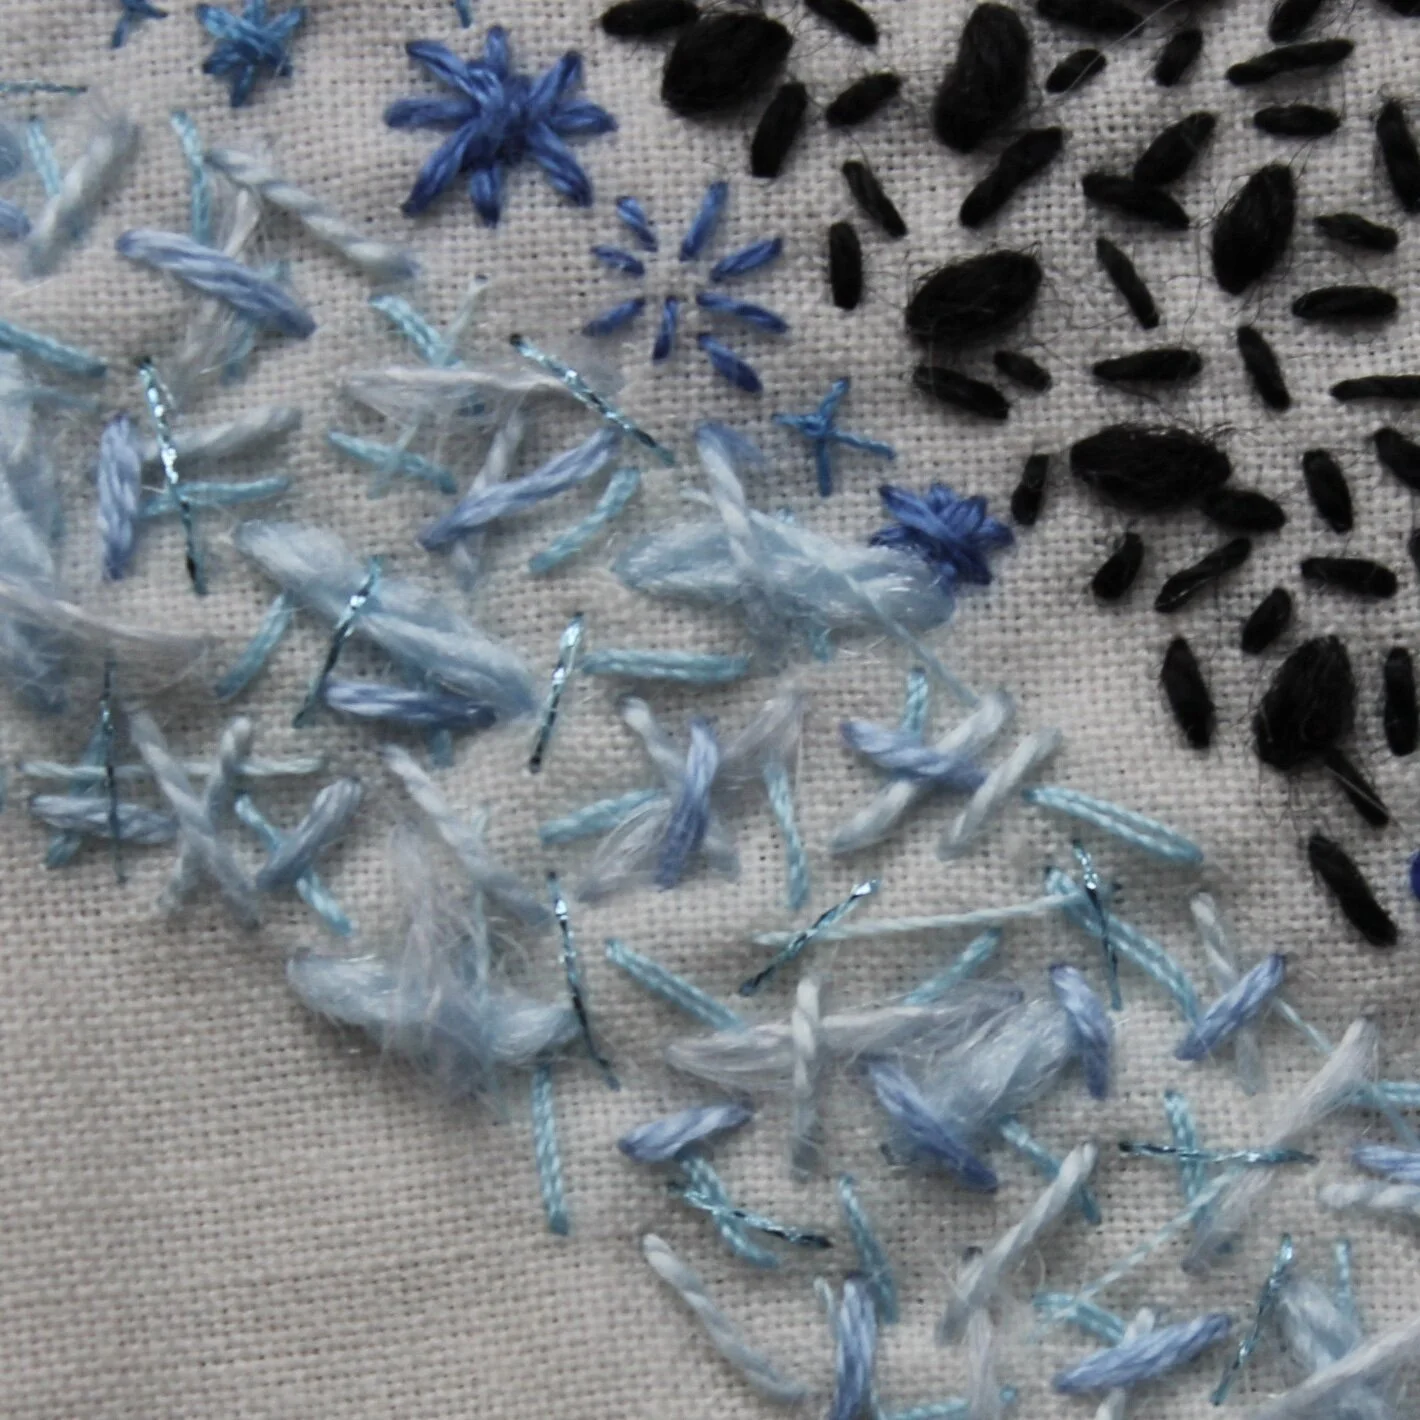
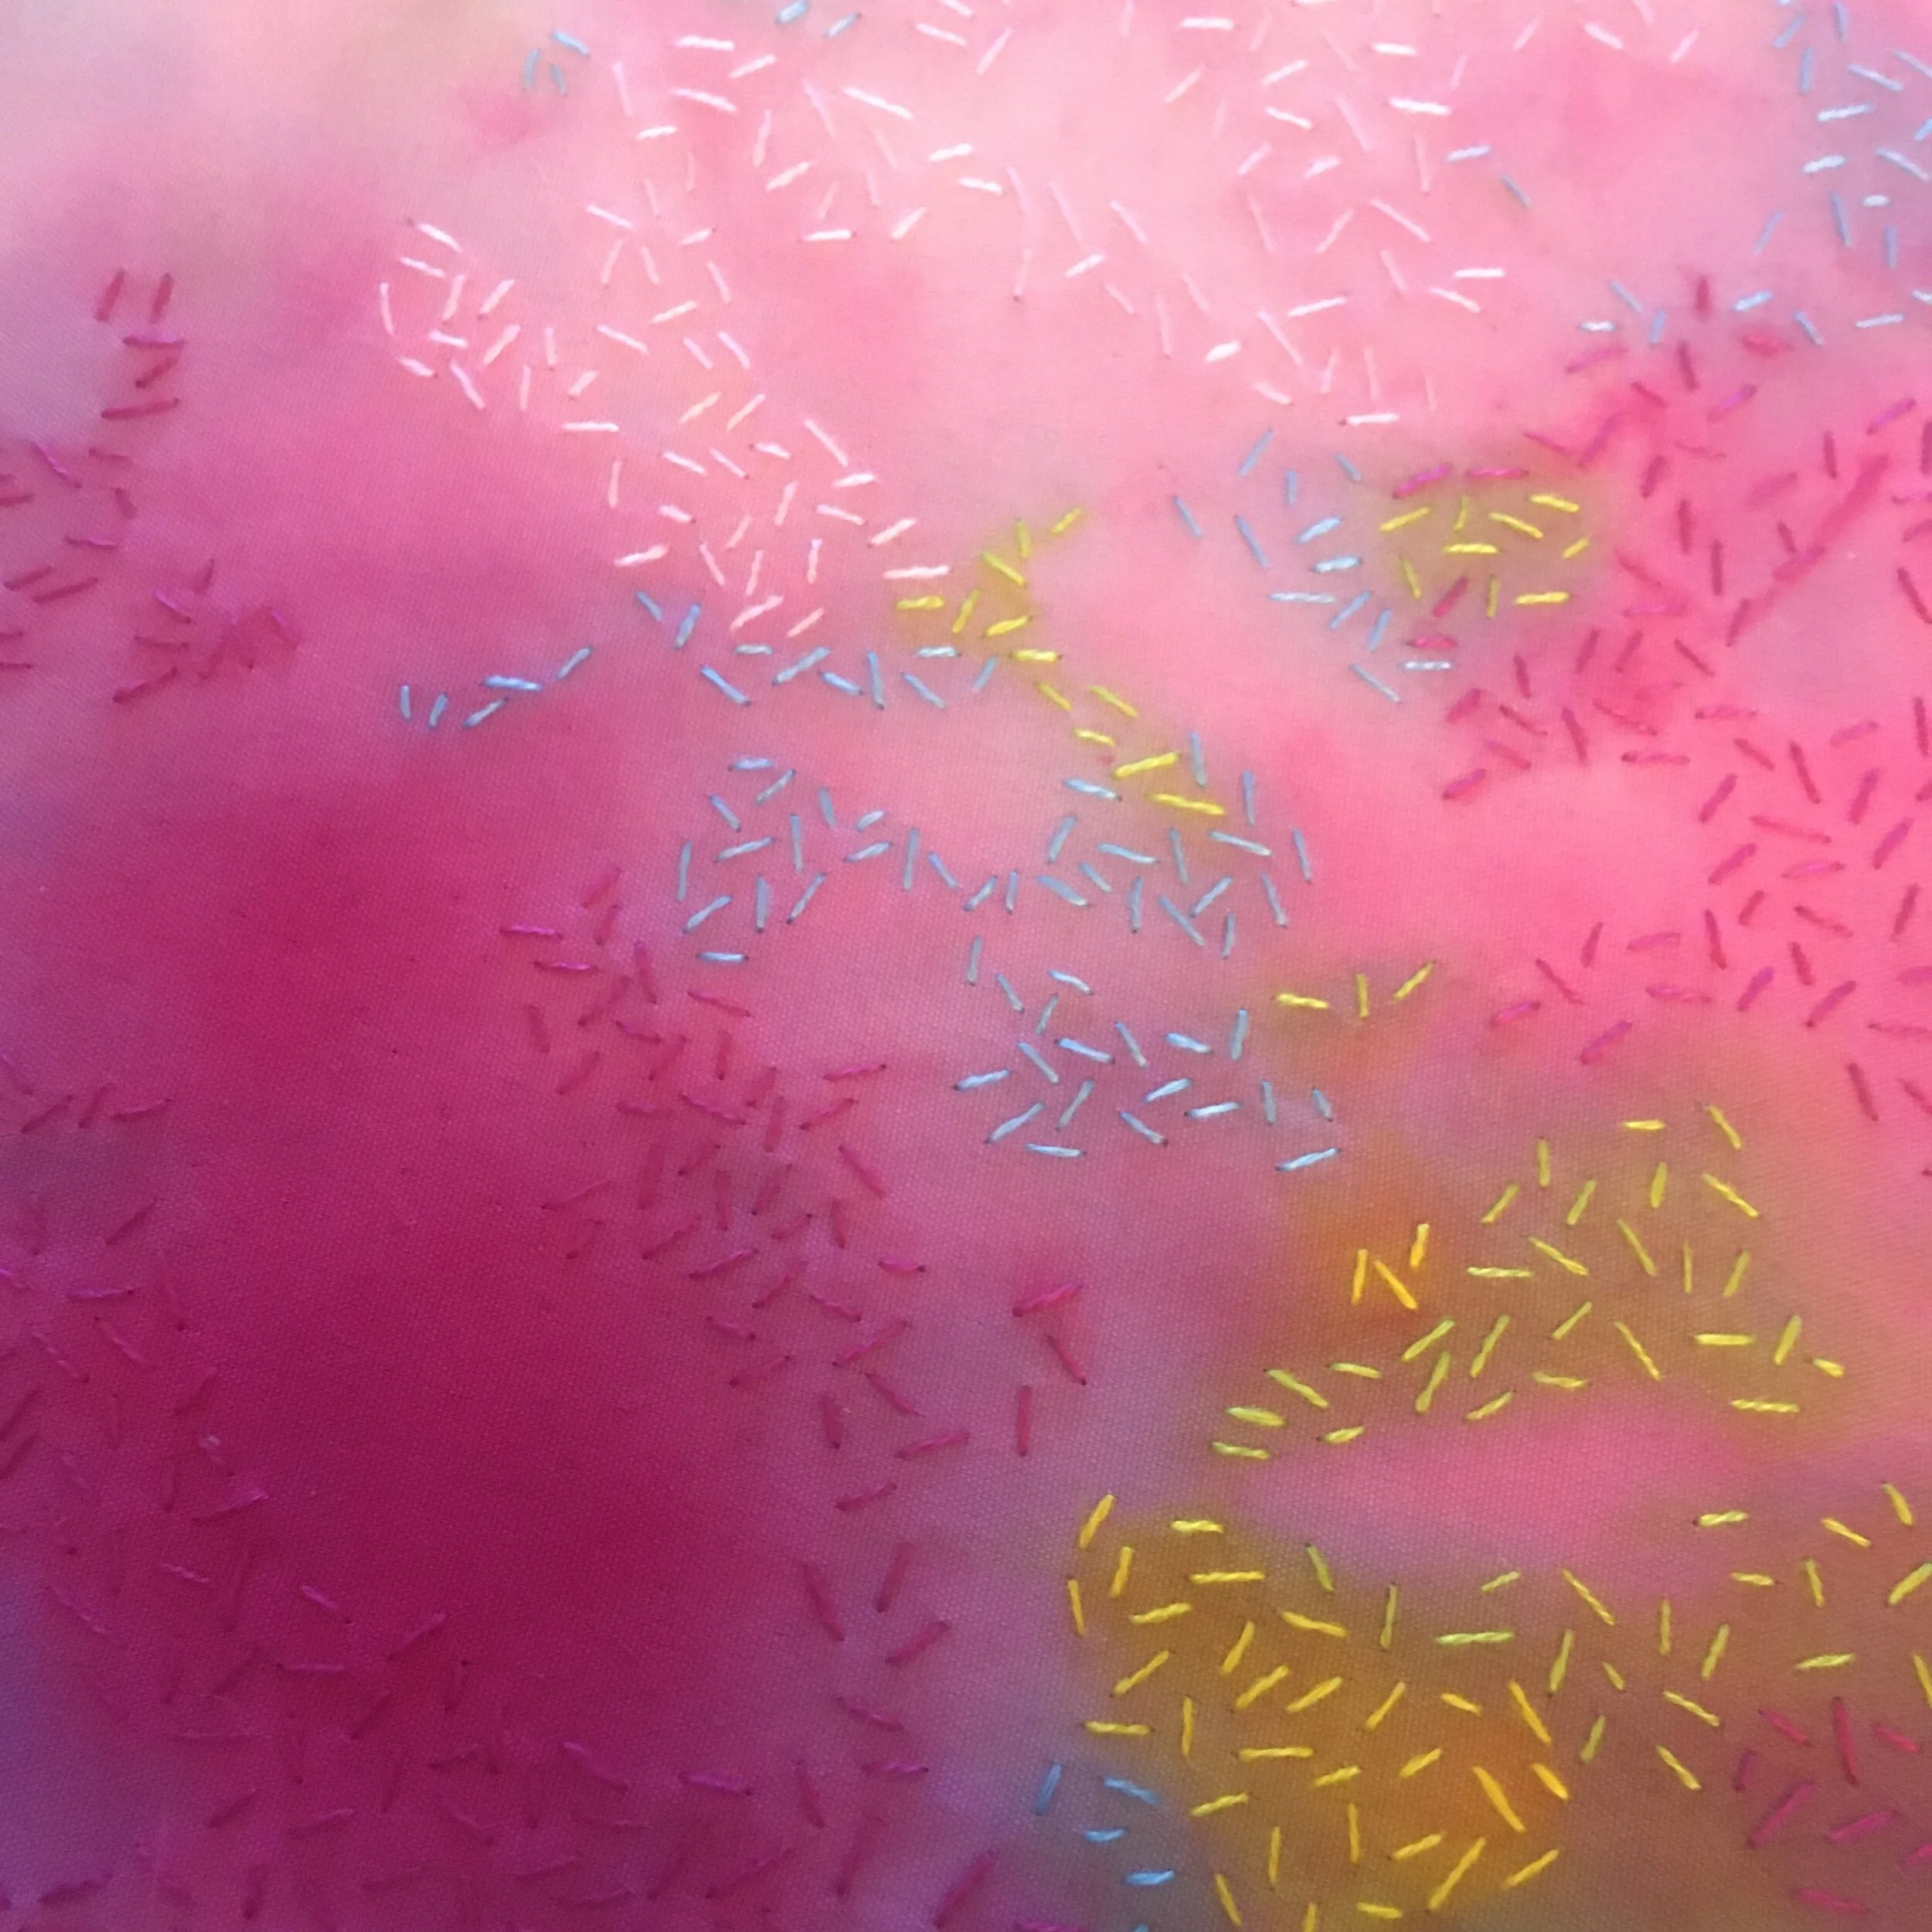
The light blue section of this sampler shows how seed stitches can be layered over each other and how different thicknesses of thread and stitch length can also add variation. It’s also really effective when used to emphasise colours in the fabric. Seed stitches were added intuitively to this hand dyed piece of fabric to highlight areas of colour.

Want to try this stitch? It’s a stitch I suggest using in my heart stitch sampler kit and floral sampler kit.

A picture showing layered seed stitches an isolated seed stitches
A picture showing hand dyed pink fabric with seed stitches in shades of yellow, blue and yellow picking out patches of dye in these colours

Enjoyed this blog post? I share embroidery tips and a free embroidery pattern in my monthly newsletter. Sign up here to receive the newsletter on the 1st of each the month.
In stitch showcase 1 Tags Stitch Showcase, Isolated Stitch
Comment
An image of chain stitch used to create a basket effect in light brown thread. Overlaid is a blue square with white text saying - stitch showcase, chain stitch, www.embellishedelephant.co.uk

Stitch Showcase: Chain Stitch

October 14, 2020

Chain stitch is one of my favourite embroidery stitches as it can add some wonderful texture to a piece of work. It can be stitched in a single row or closer together to create a basket effect. A single chain stitch on its own is know as a lazy daisy stitch.

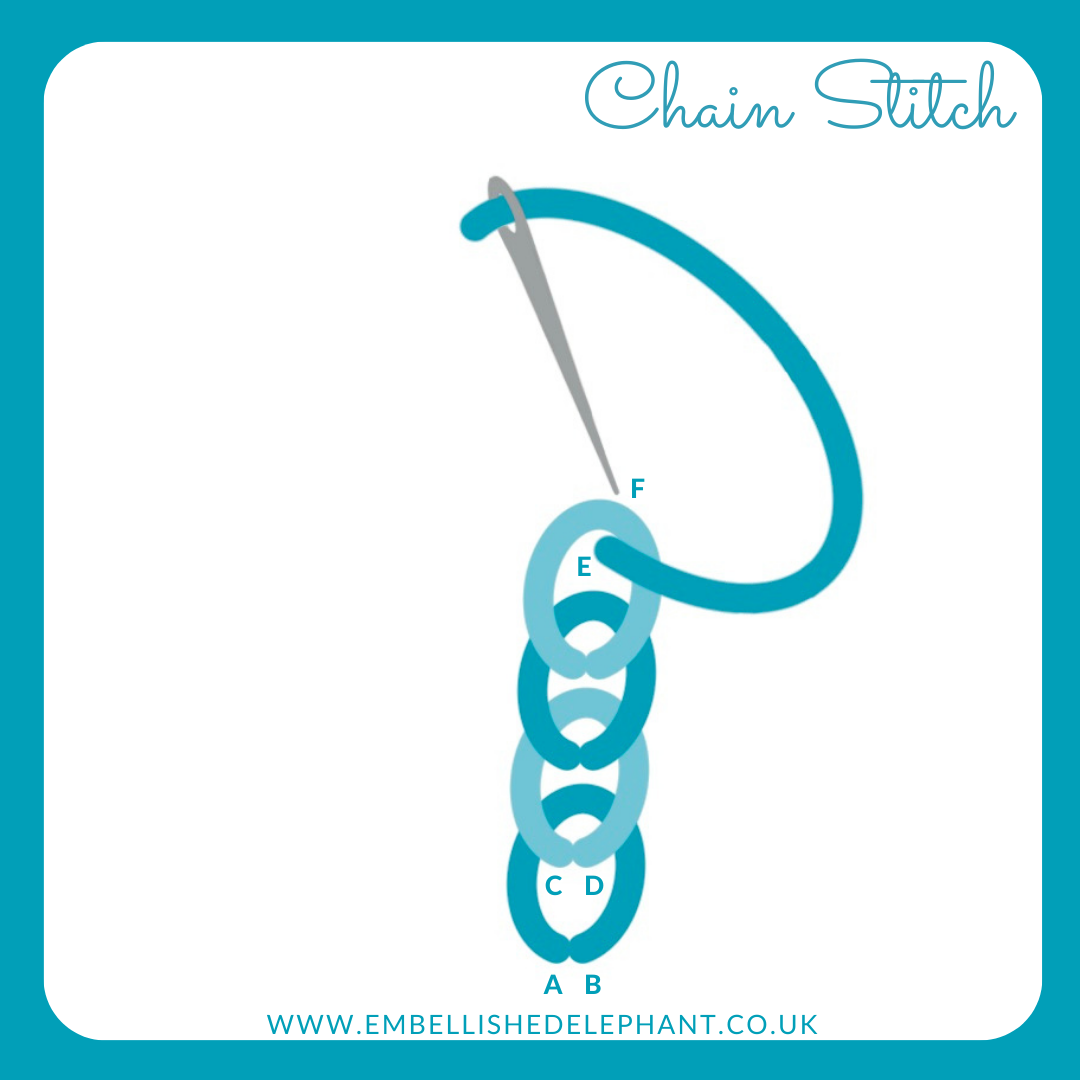
  • Bring the needle up through the fabric (A) then back down as close as possible to the original hole (B)

  • Gently pull the thread until there is a small loop - don't pull fully tight

  • Push the needle up through the fabric where the stitch should end (C) when pushing the needle back up make sure it goes through the centre of the loop

  • Gently pull the needle all the way through so that the loop ends up the same length as the stitch and lies flat

  • To create the next stitch push the needle back down as close as possible to the spot it came up (D), this should be inside the stitch just created

  • Repeat until the chain is the desired length

  • At the end of the chain, secure the final chain by stitching the last stitch over the end of the loop rather than inside it (E & F)

An illustration of the steps required to create chain stitch. The illustration is in blue and grey on a white background.

Chain stitch can be used as a filling stitch and looks great when several rows are stitched together, each row in the opposite direction.

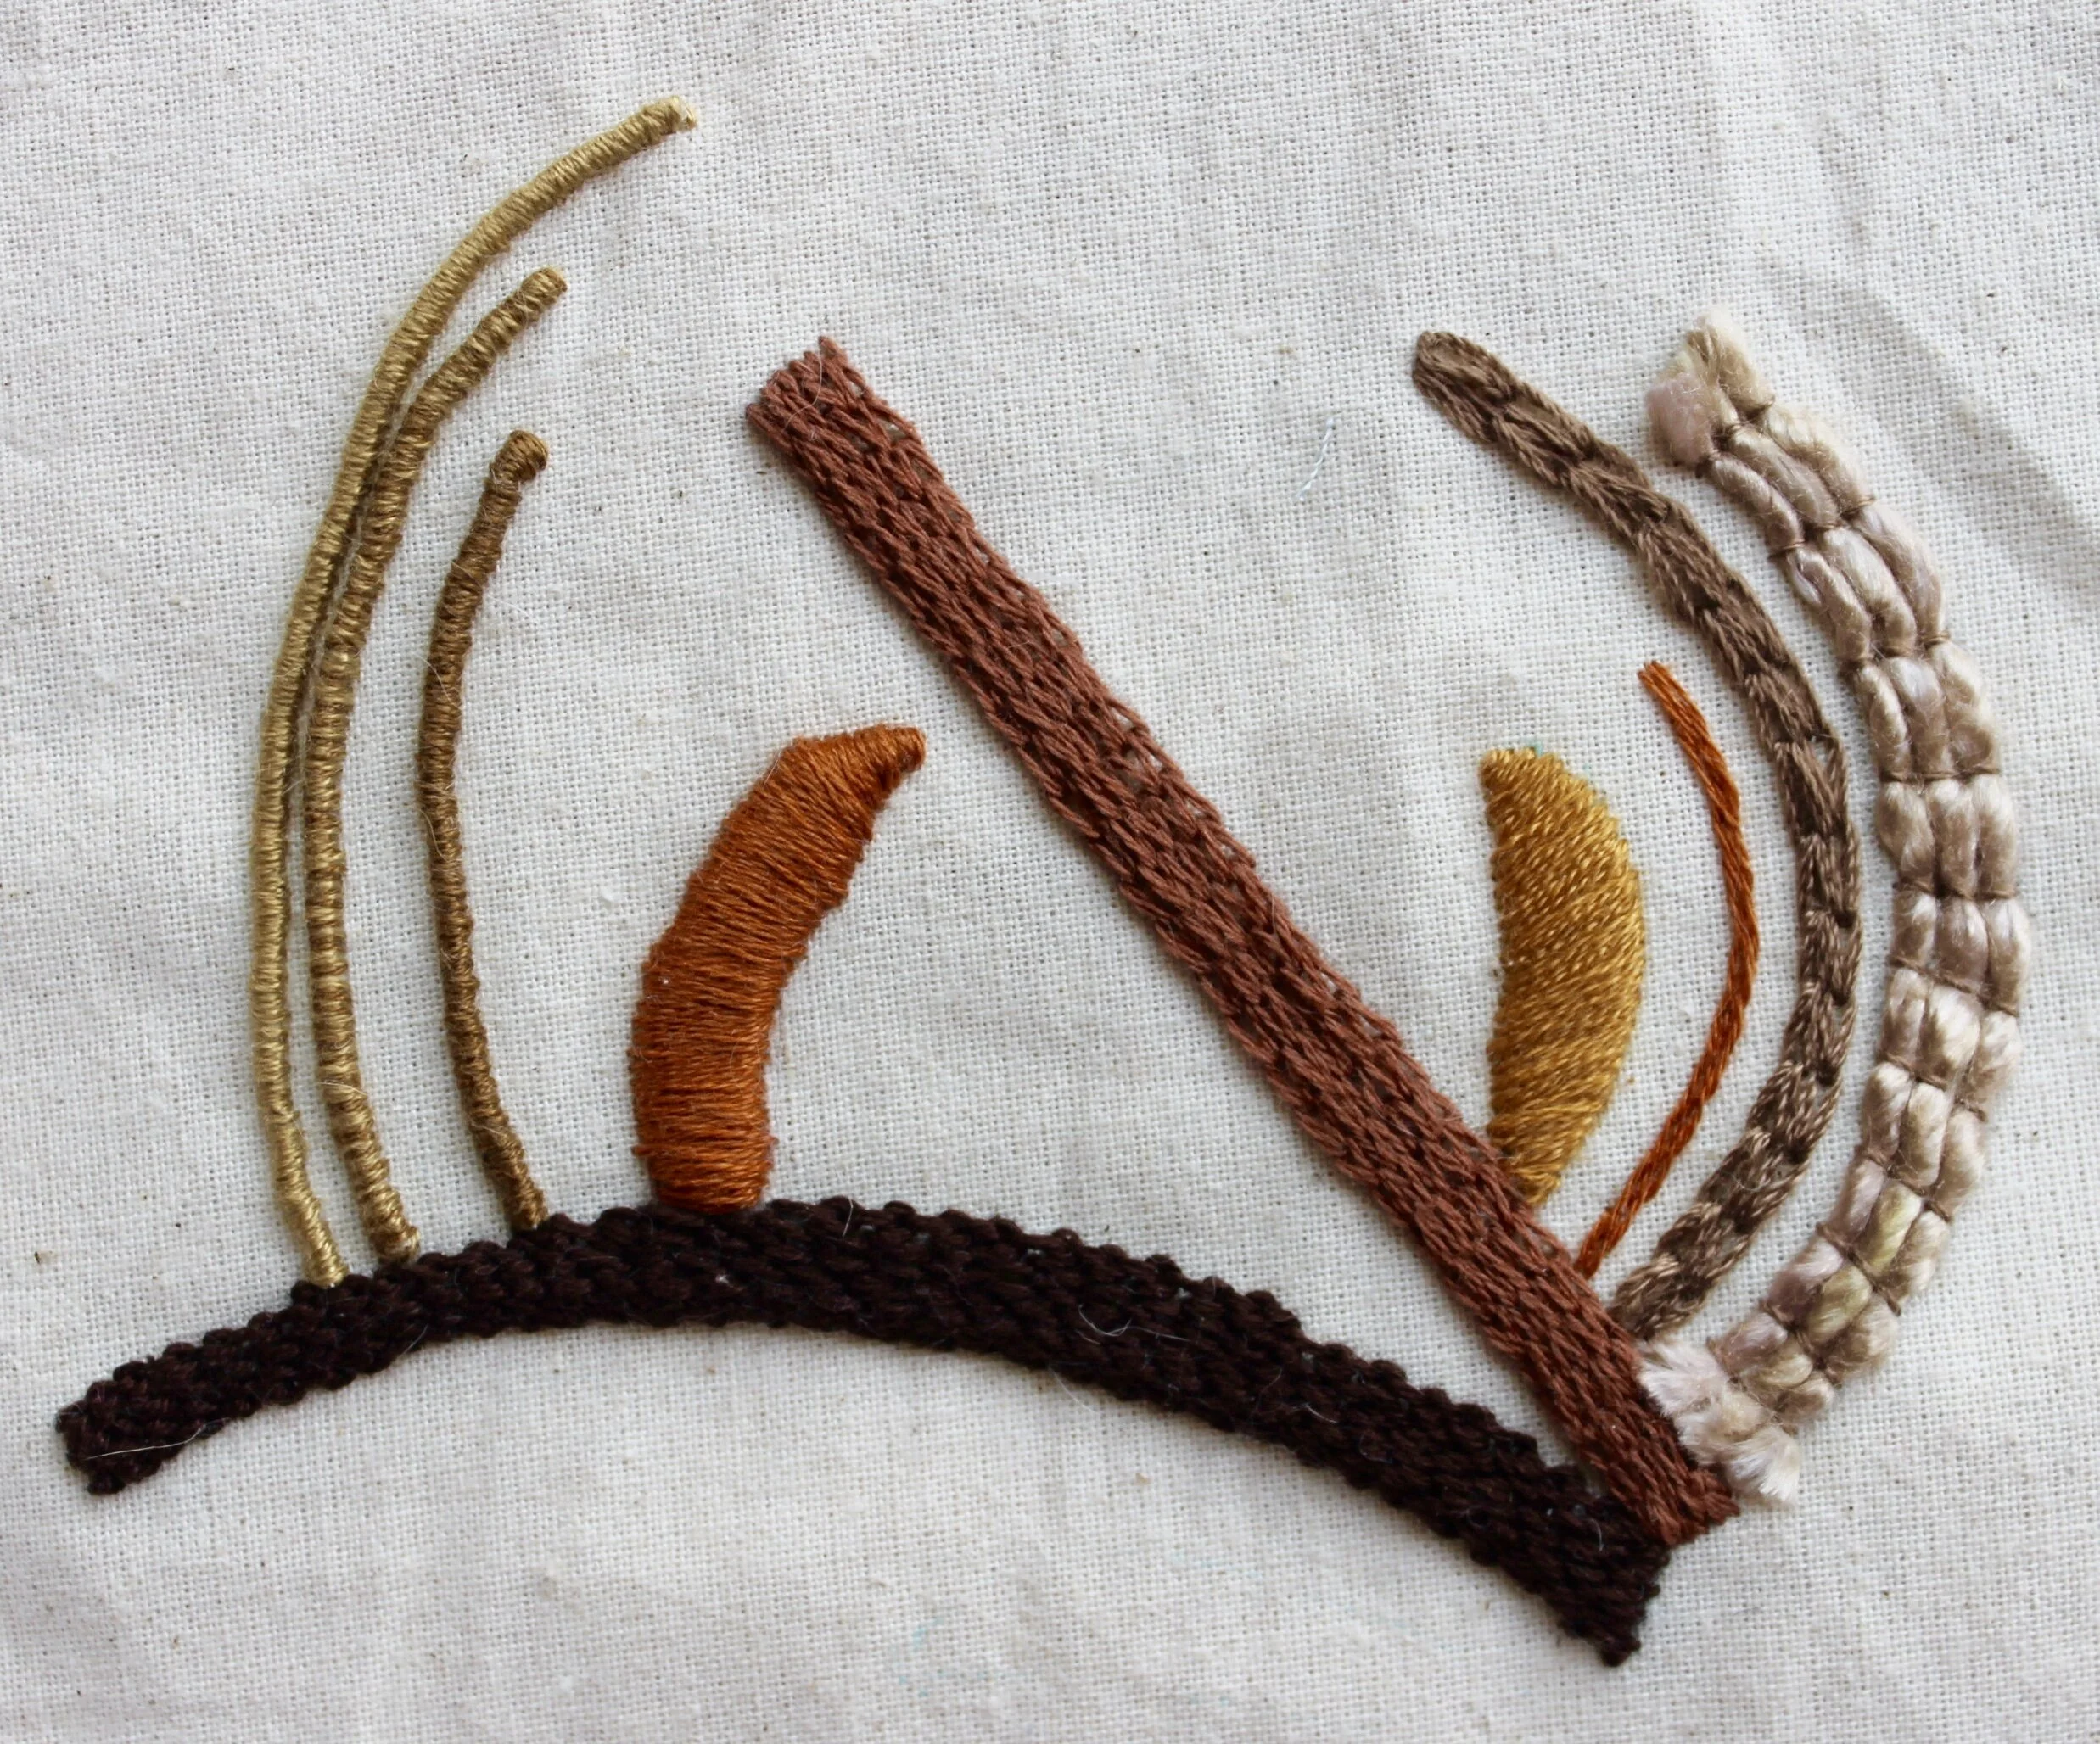
It can also be stitched as a single chain to create an outline such as in this free kit from Mollie Makes designed by Zeena Shah. In this example, I also filled the chain stitches with a straight stitch in a contrasting colour to fill the centre of the chains.

Want to try this stitch? It’s a stitch I suggest using in my flamingo flower kit.

A picture of an autumnal abstract embroidery showing elements stitched in chain stitch
A picture of a floral embroidery in a heart shape border stitched in chain stitch

Enjoyed this blog post? I share embroidery tips and a free embroidery pattern in my monthly newsletter. Sign up here to receive the newsletter on the 1st of each the month.
In stitch showcase 1 Tags Stitch Showcase, Filling Stitch, Line Stitch
Comment

To knot or not to knot when hand embroidering

October 10, 2020

In the ‘old days’ the quality of the back of the embroidery was as important as the front as it showed a lady’s skill in embroidery.

I’m a real advocate of knotting the thread when starting or finishing my embroidery. Why? Because I’m a bit lazy and I don’t always pay attention when starting off a new thread and have ended up pulling the thread completely through after one or two stitches (and roll my eyes every time I do this).

But there are certain occasions where even I will not knot:

  • when the back does need to look identical to the front such as in Hardanger

  • when the embroidery needs to lie completely flat such as for pieces that are framed

  • embroidering on clothes where a knot in the wrong place could be irritating

  • where the fabric just won’t take a knot as the holes are too big

  • when you are stitching on thin fabric and everything going on in the back of the work shows through

The photos below show the difference between a piece where knots were used and a piece where they weren’t used, but no-one is going to see these when these pieces are on display.

Do you knot or not knot?

A picture showing the back of an embroidery where knots are used to start and finish the thread
A picture of the back of an embroidery where knots are not used to secure threads

Enjoyed this blog post? I share embroidery tips and a free embroidery pattern in my monthly newsletter. Sign up here to receive the newsletter on the 1st of each the month.
In tips 2 Tags Thread, Basics
Comment
A picture of an embroidery of a tree branch with pink blossoms created from french knots. Overlaid is a blue square with white text saying - stitch showcase, french knot, www.embellishedelephant.co.uk

Stitch Showcase: French Knot

October 7, 2020

I think French knots are my all time favourite embroidery stitch. I know that some people can’t stand them but a little practice goes a long way with this one if this is one you haven’t tried before or don’t like I would recommend practicing on a scrap piece of fabric until you are comfortable with the motion of this stitch.

  • Push the needle up through the fabric in the place you want your knot to approximately sit (A)

  • Wrap the thread around the needle (the number of wraps affects the size of the knot) I tend to use three wraps

  • Take the tip of the needle back through the fabric as close to the original hole as possible (B). If the same hole is used then the knot can be pulled all the way through to the back of the fabric

  • Use your thumb over the thread wraps and gently pull the thread through, being careful of tangles.

An illustration of how to do french knot embroidery stitch. The illustration is in blue and grey on a white background.

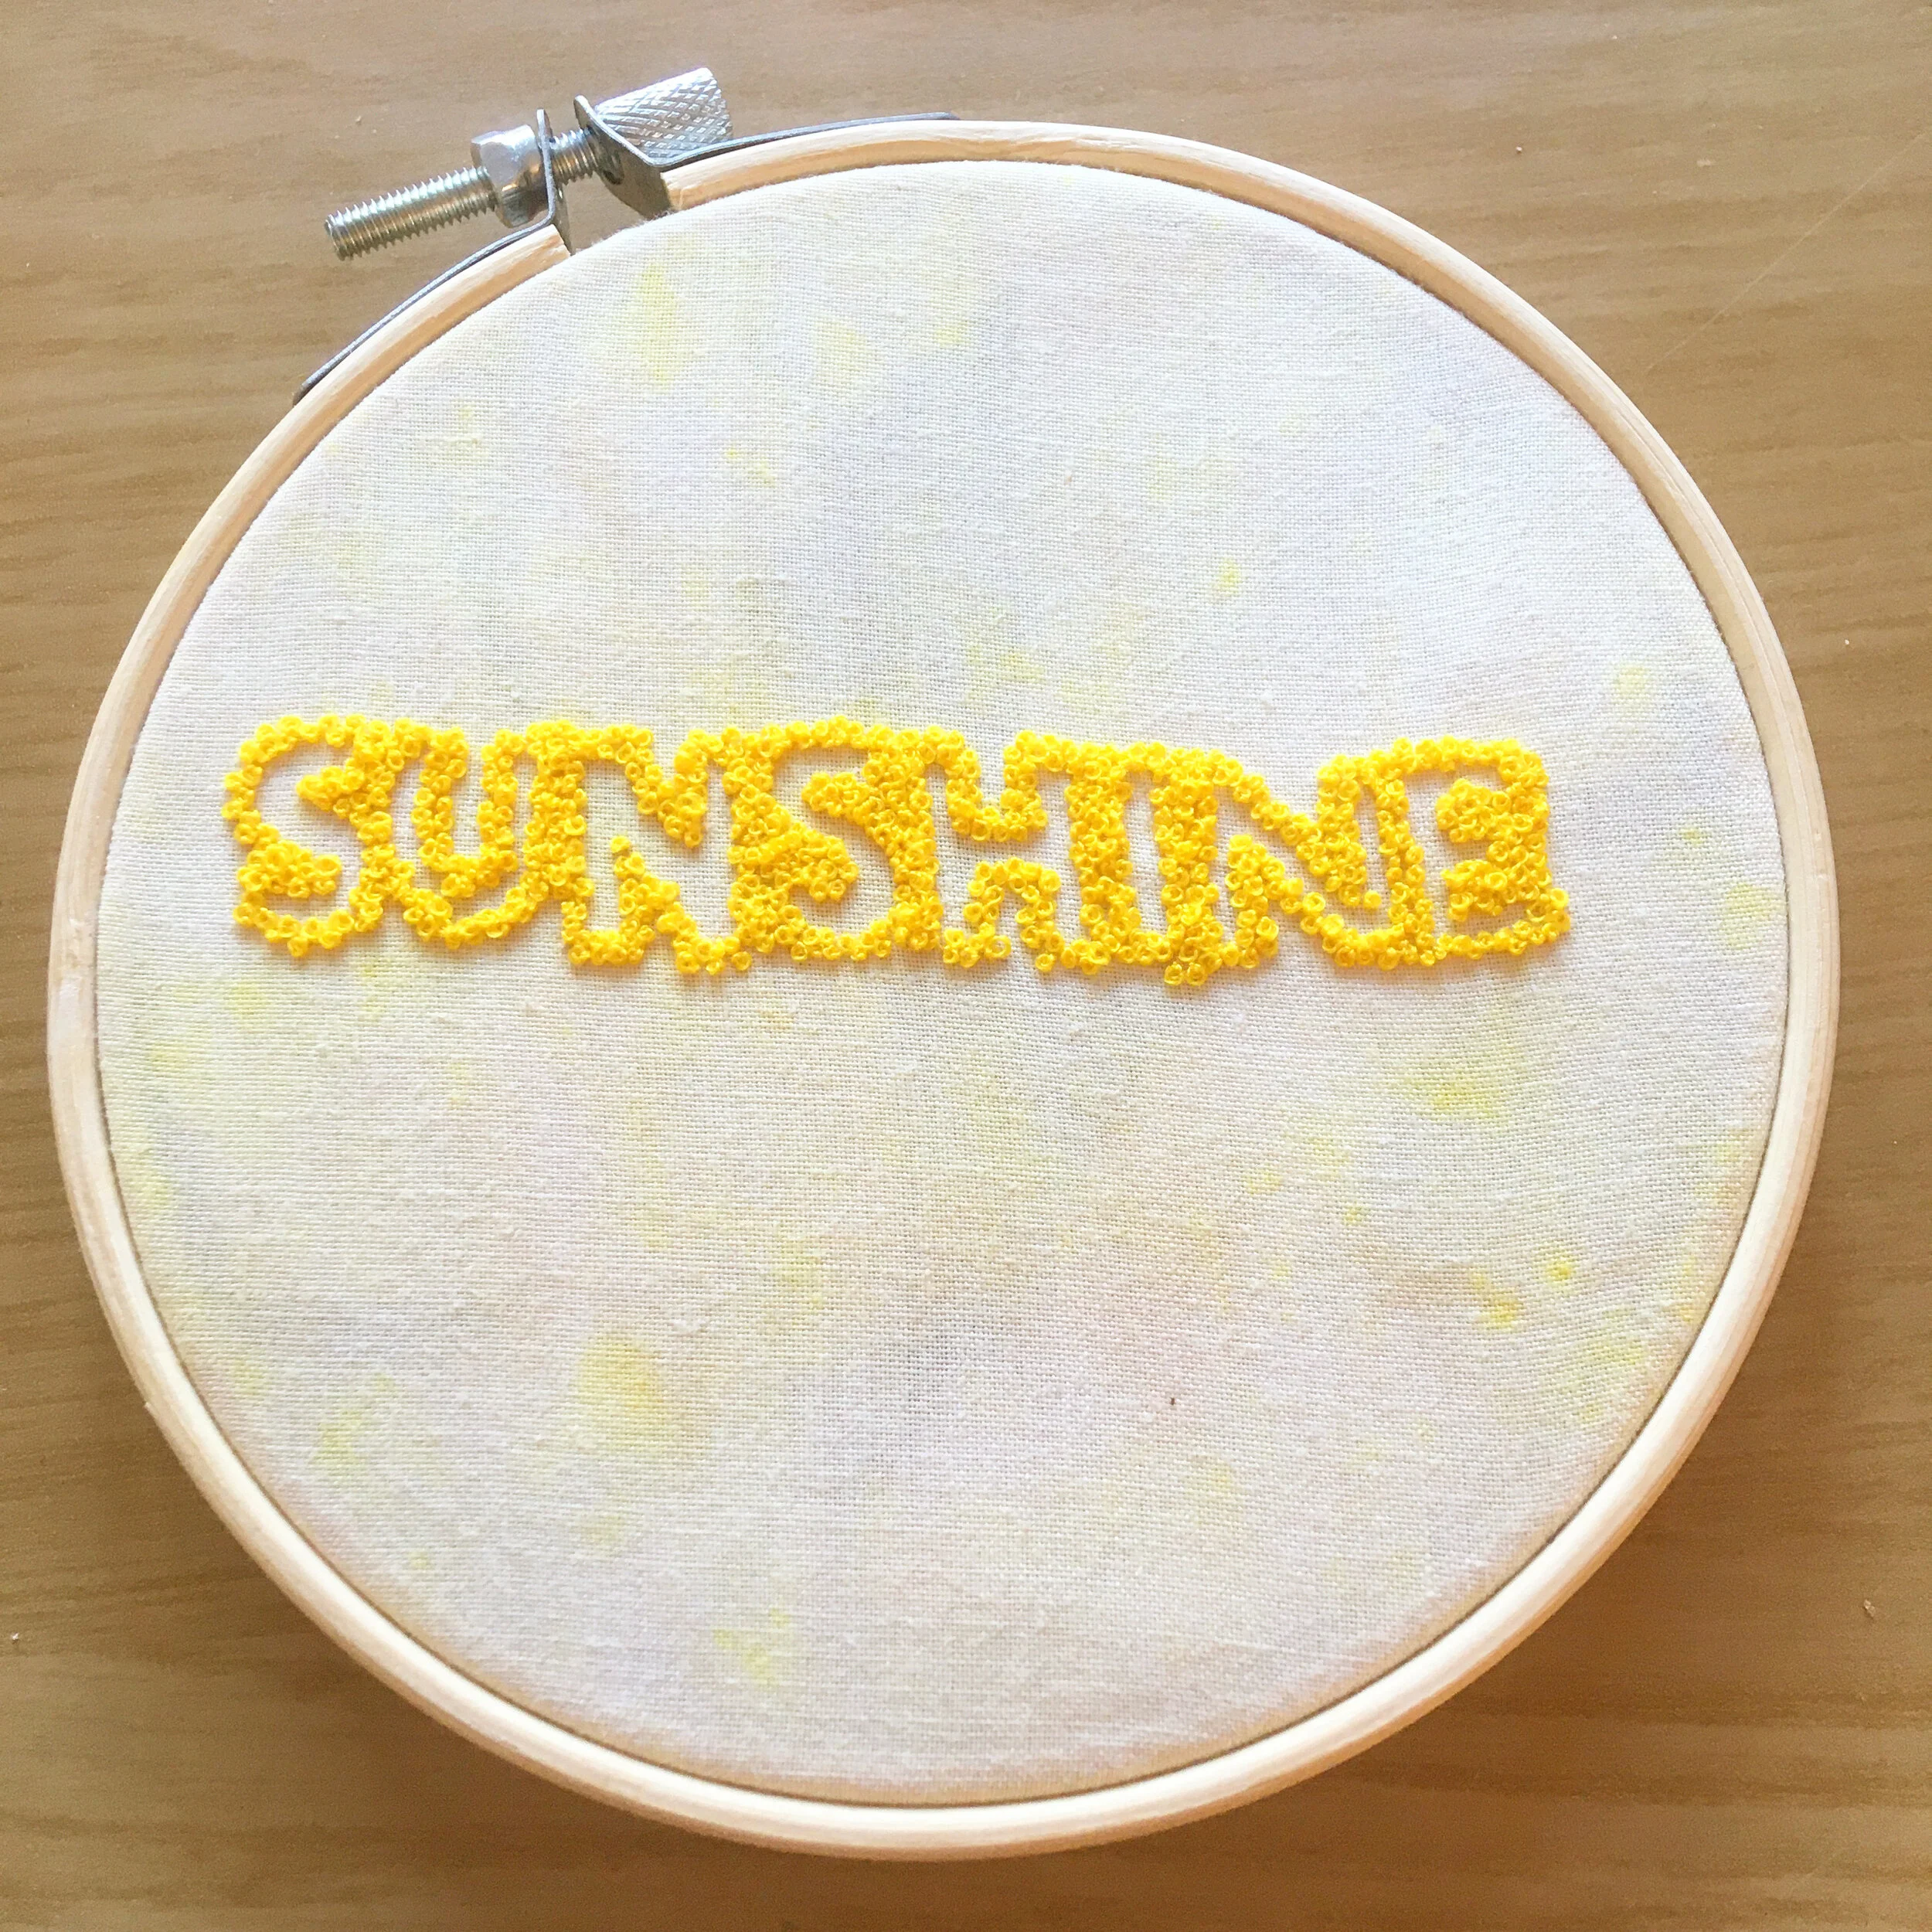
Commonly French knots are used in isolation or in groups as in the blossom embroidery in the header picture, but can also be used to fill areas, such as in this negative space word art. (You need to REALLY love French knots if you are going to attempt a piece like this.)

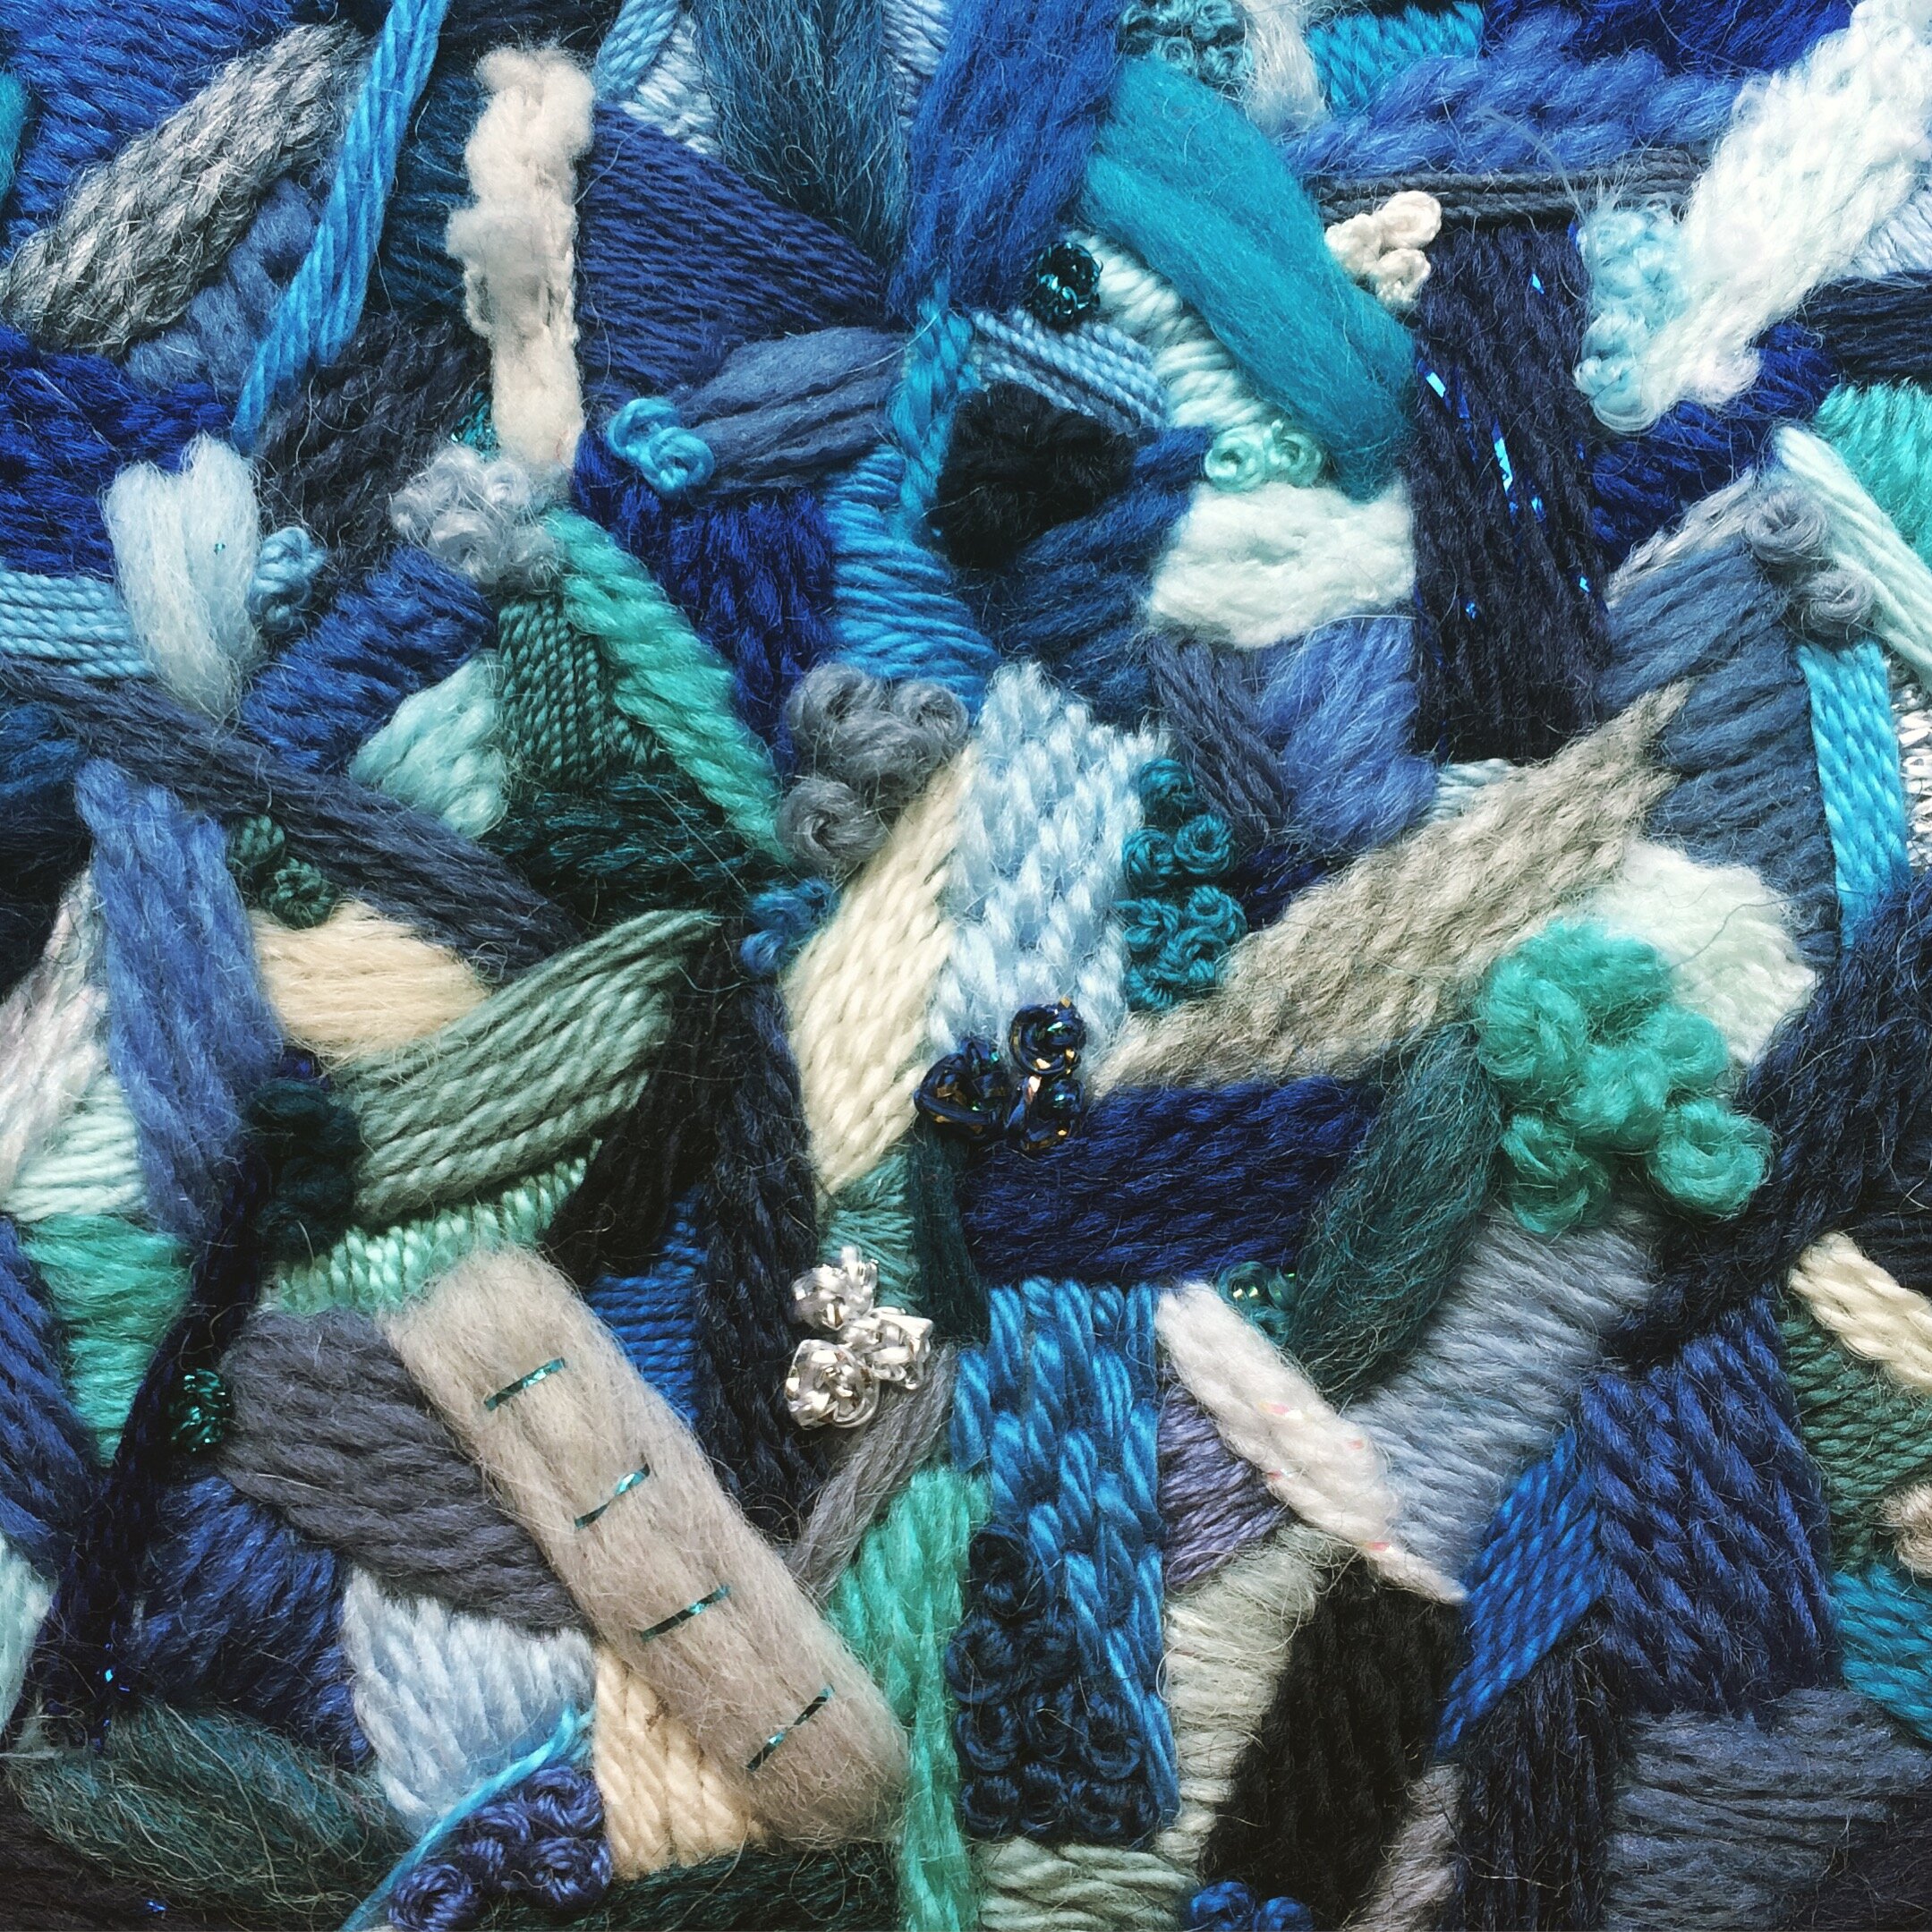
They can also be used effectively as a counter point to more linear stitches such as in this blue piece of intuitive embroidery (where they also fill small gaps between the linear stitches.)

Want to try this stitch? It’s one I suggest using in my heart stitch sampler kit, flamingo flower plant kit, floral sampler kit and spring blossom kit.

A picture of an embroidery hoop with yellow fabric and the word sunshine stitched in negative space style with the outline of the letters stitched in yellow french knots
A close up image of an abstract embroidery stitched in shades of blue yarn featuring a range of stitches including french knots

Enjoyed this blog post? I share embroidery tips and a free embroidery pattern in my monthly newsletter. Sign up here to receive the newsletter on the 1st of each the month.
In stitch showcase 1 Tags Stitch Showcase, Filling Stitch, Isolated Stitch
Comment
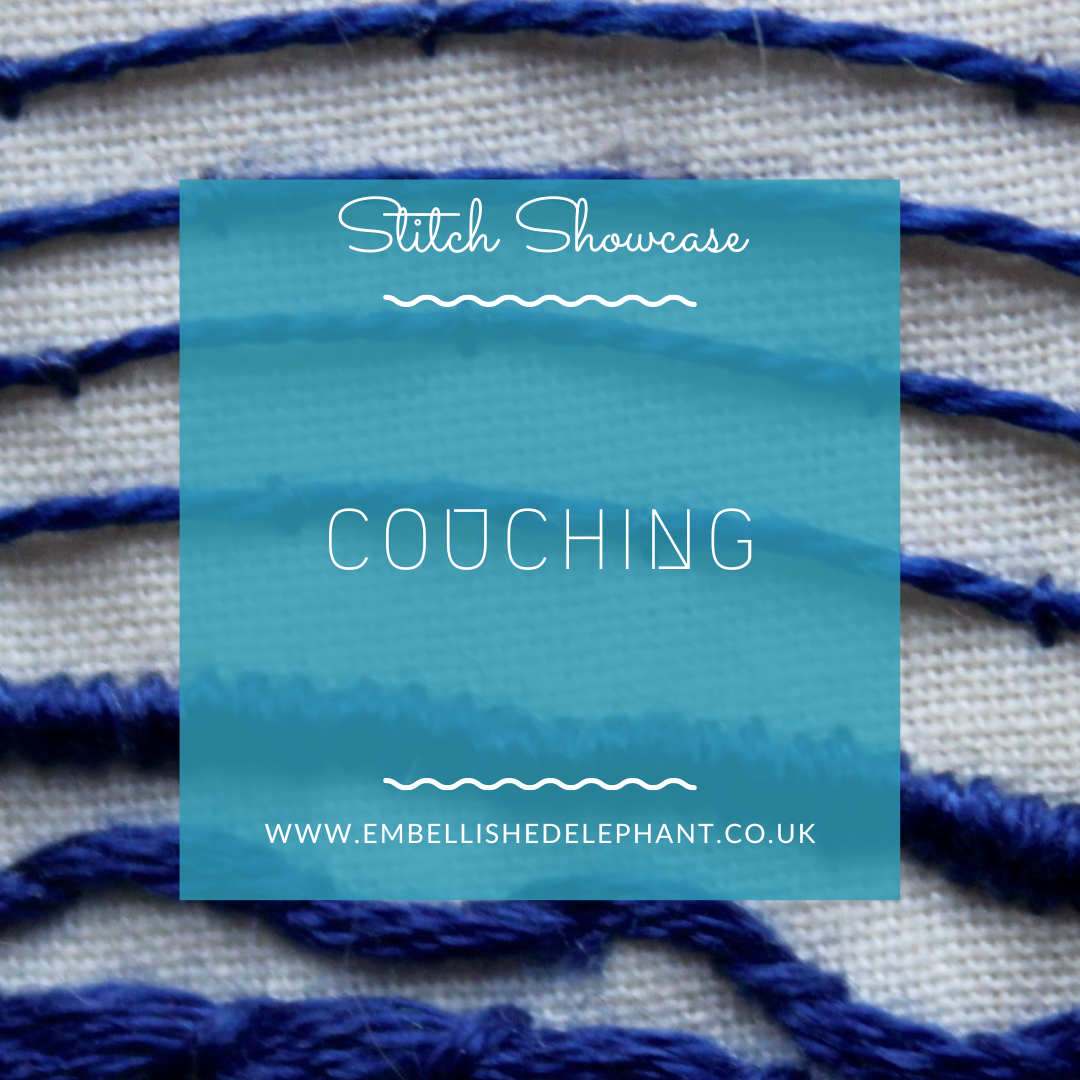
A picture of blue threads couched on a white background. Overlaid is a blue square with white text saying - stitch showcase, couching, www.embellishedelephant.co.uk

Stitch Showcase: Couching

September 30, 2020

Couching is when embellishments such as cord are attached to a piece of fabric using small stitches to hold it in place rather than it being sewn through the fabric. It is a technique used extensively in gold work embroidery as well as in certain types of bead work. Most commonly a single strand of matching thread is used so that the couching stitch is barely visible but contrasting thread of different thicknesses can be used to make the couching visible.

Depending on the type of item you are couching will influence how you attach it. Thick cord that can’t be pushed through the fabric will be completely surface couched. If the item can be pushed through the fabric then it is best to attach the start and end of the length with a simple knot on the back of the fabric.

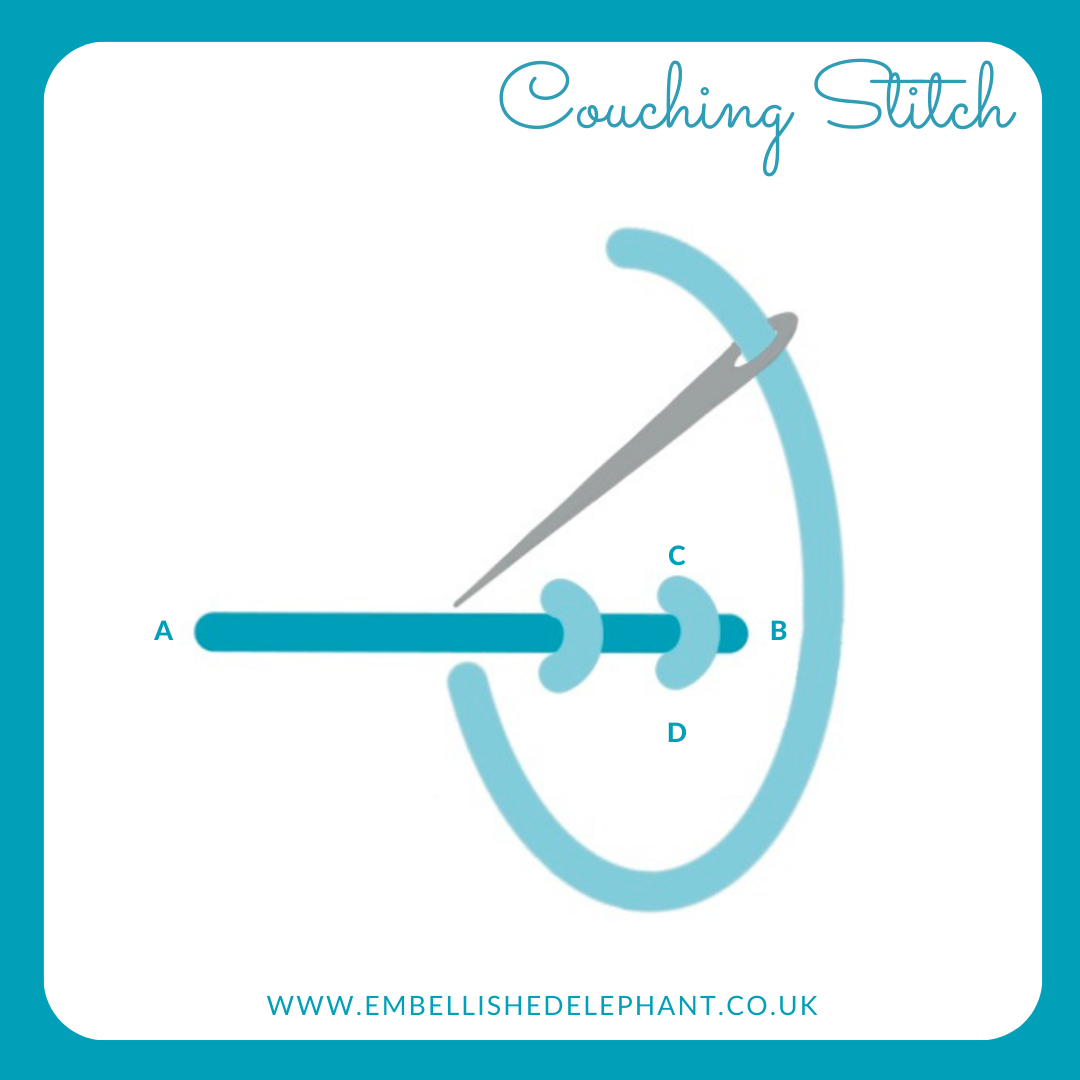
  • Place the item being couched on the fabric at the start (A) and end (B) points. This may be a thread that goes through the fabric or one that stays on the the surface

  • The thread that will be couching could be the same thread or a different thread to the one being couched

  • Bring the needle with the couching thread up through the fabric right next to the item (C). it works best if it is slightly underneath and you bring the needle through at a slight angle

  • Take the thread over the top of the item being couched and push the needle back down as close to the item as possible (D). Again a slight angle works best

  • Add as many couching stitches as is needed to keep the item being couched secure. These can be close together or evenly spaced apart.

An illustration of how to do couching embroidery stitch. The illustration is in blue and grey on a white background.

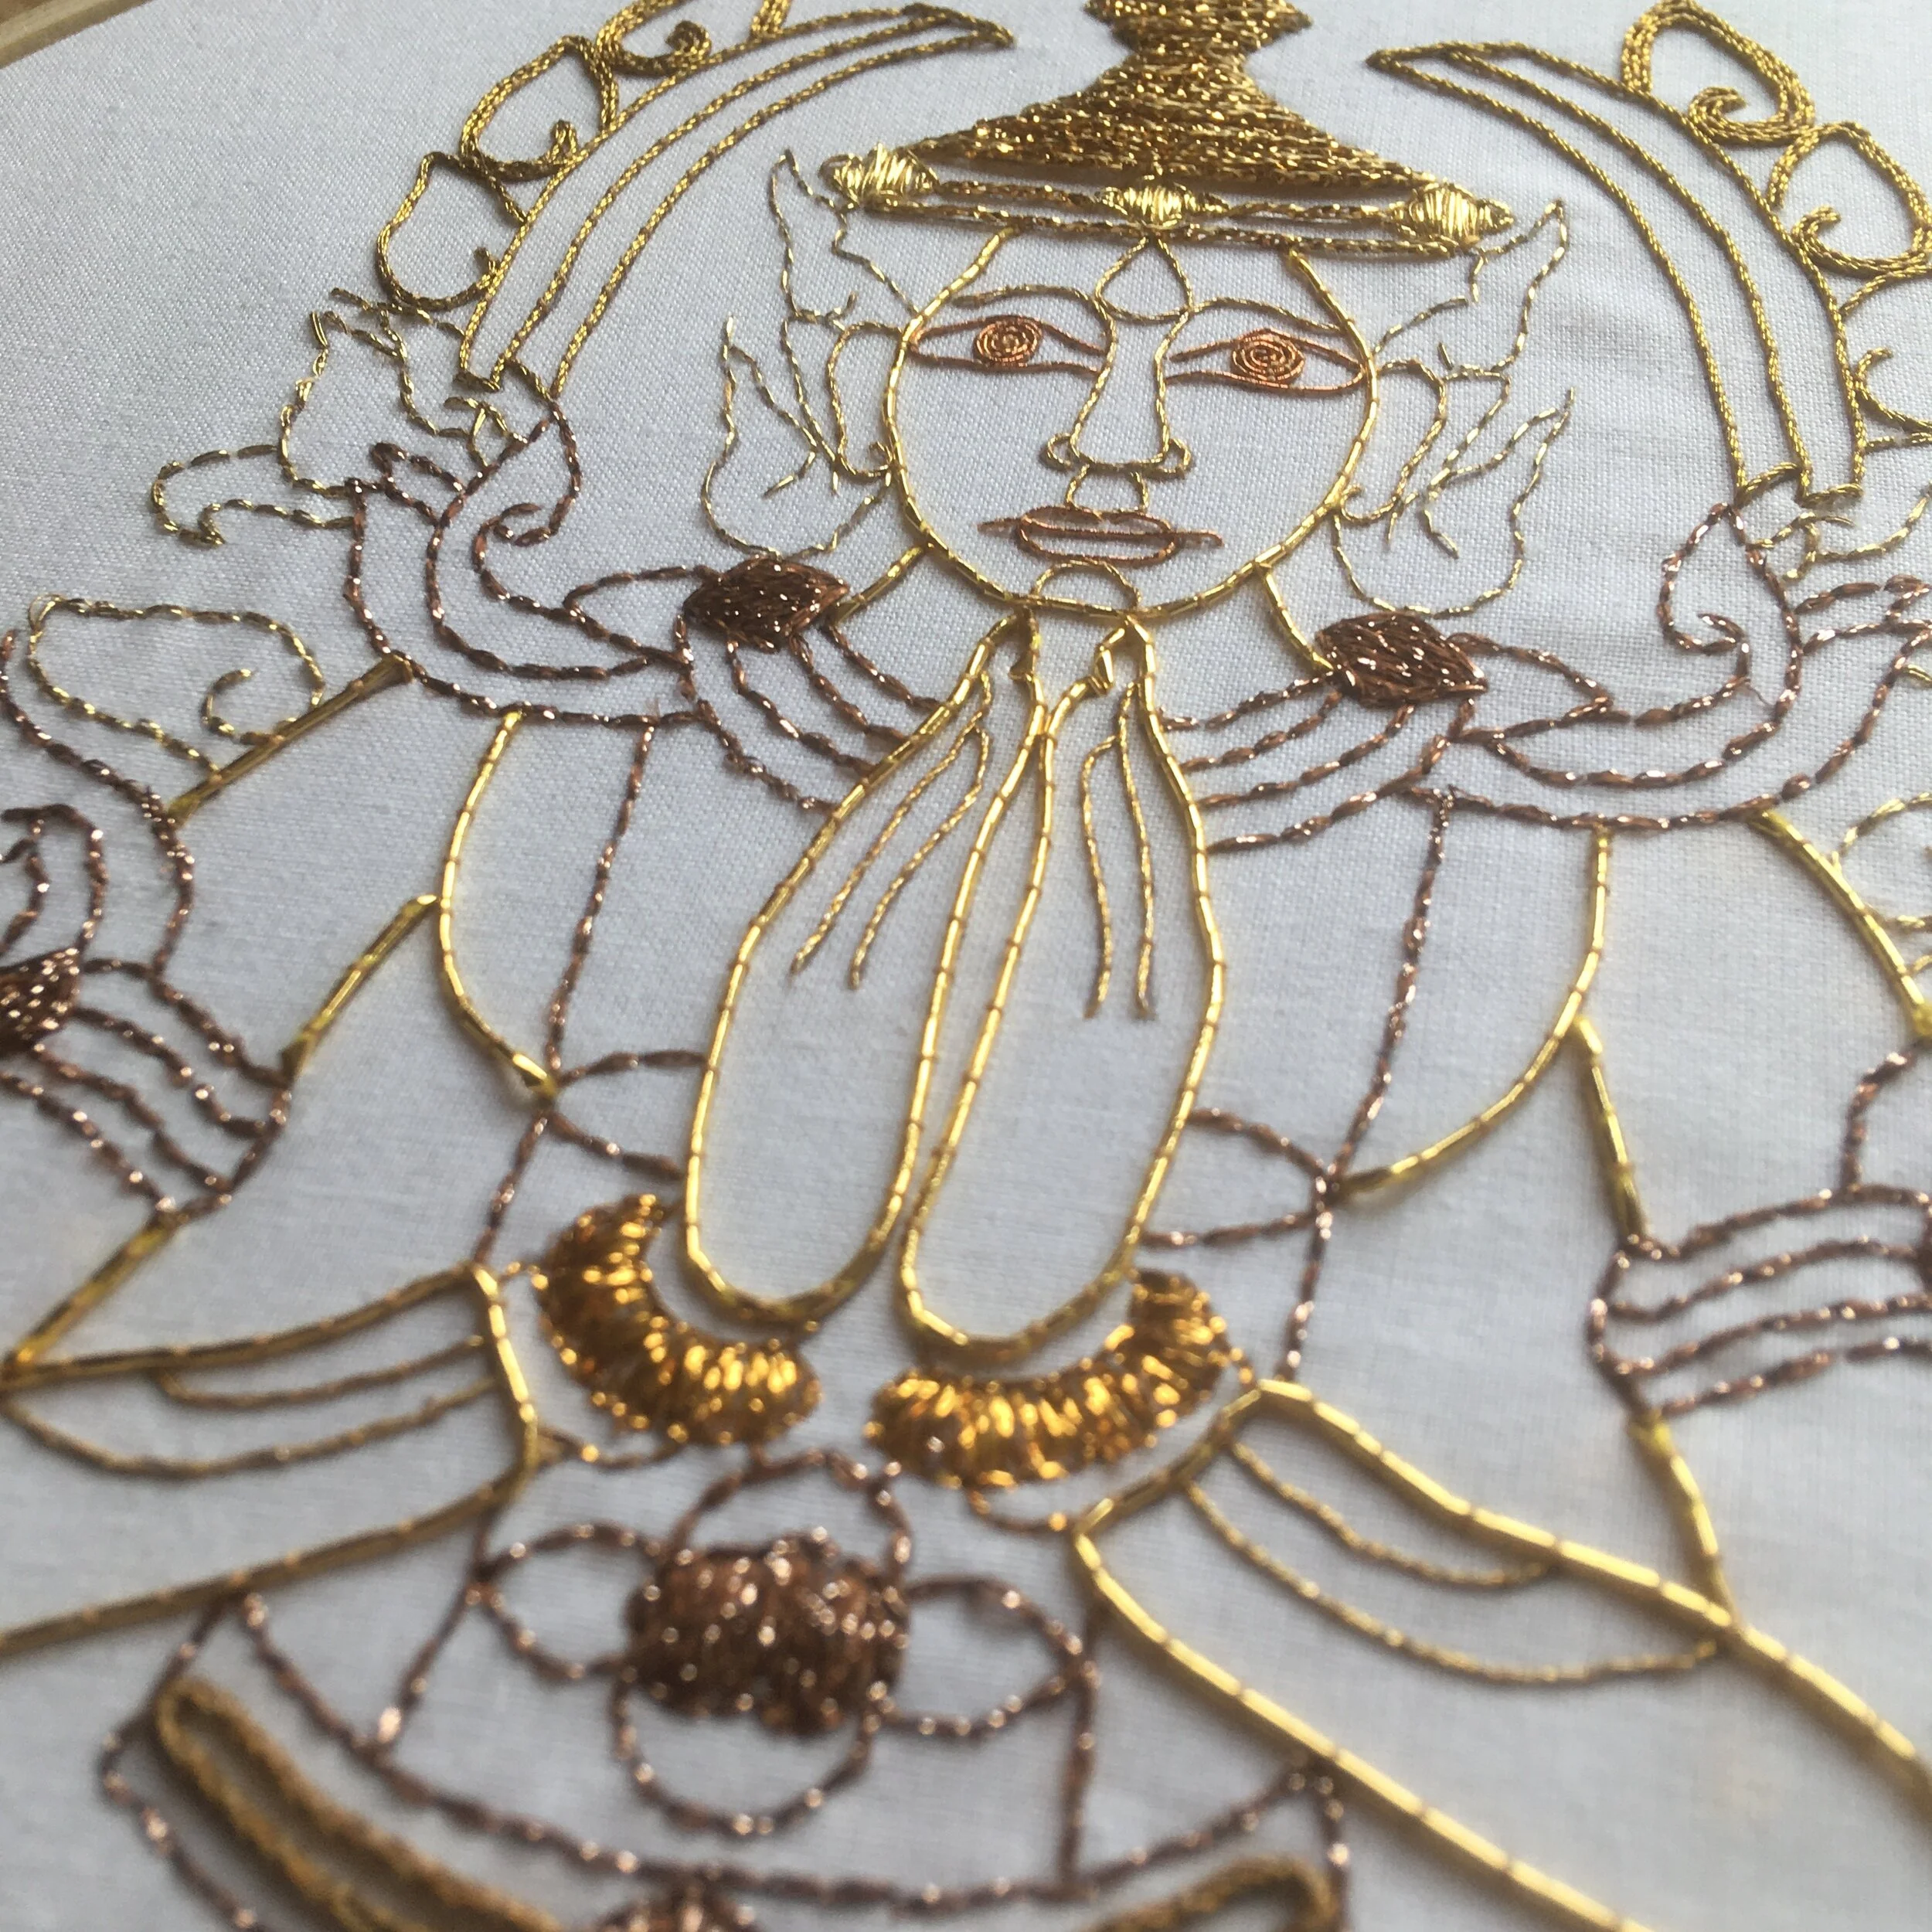
With this goldwork piece each hand is one strand of gold cord, the start and end of the cord is pushed through the fabric at the fingertips and each hand is then couched in place. The cord was of a thickness that it could be pushed through the fabric.

The couching stitches can also be made very close together so that the item being couched is completely covered. In the middle picture, on the right hand side of the sampler, thick yarn has been couched to the surface with the ends of the thread loose as this was too thick to be pushed through the fabric. On the left hand side cord has been completely covered by couching stitches.

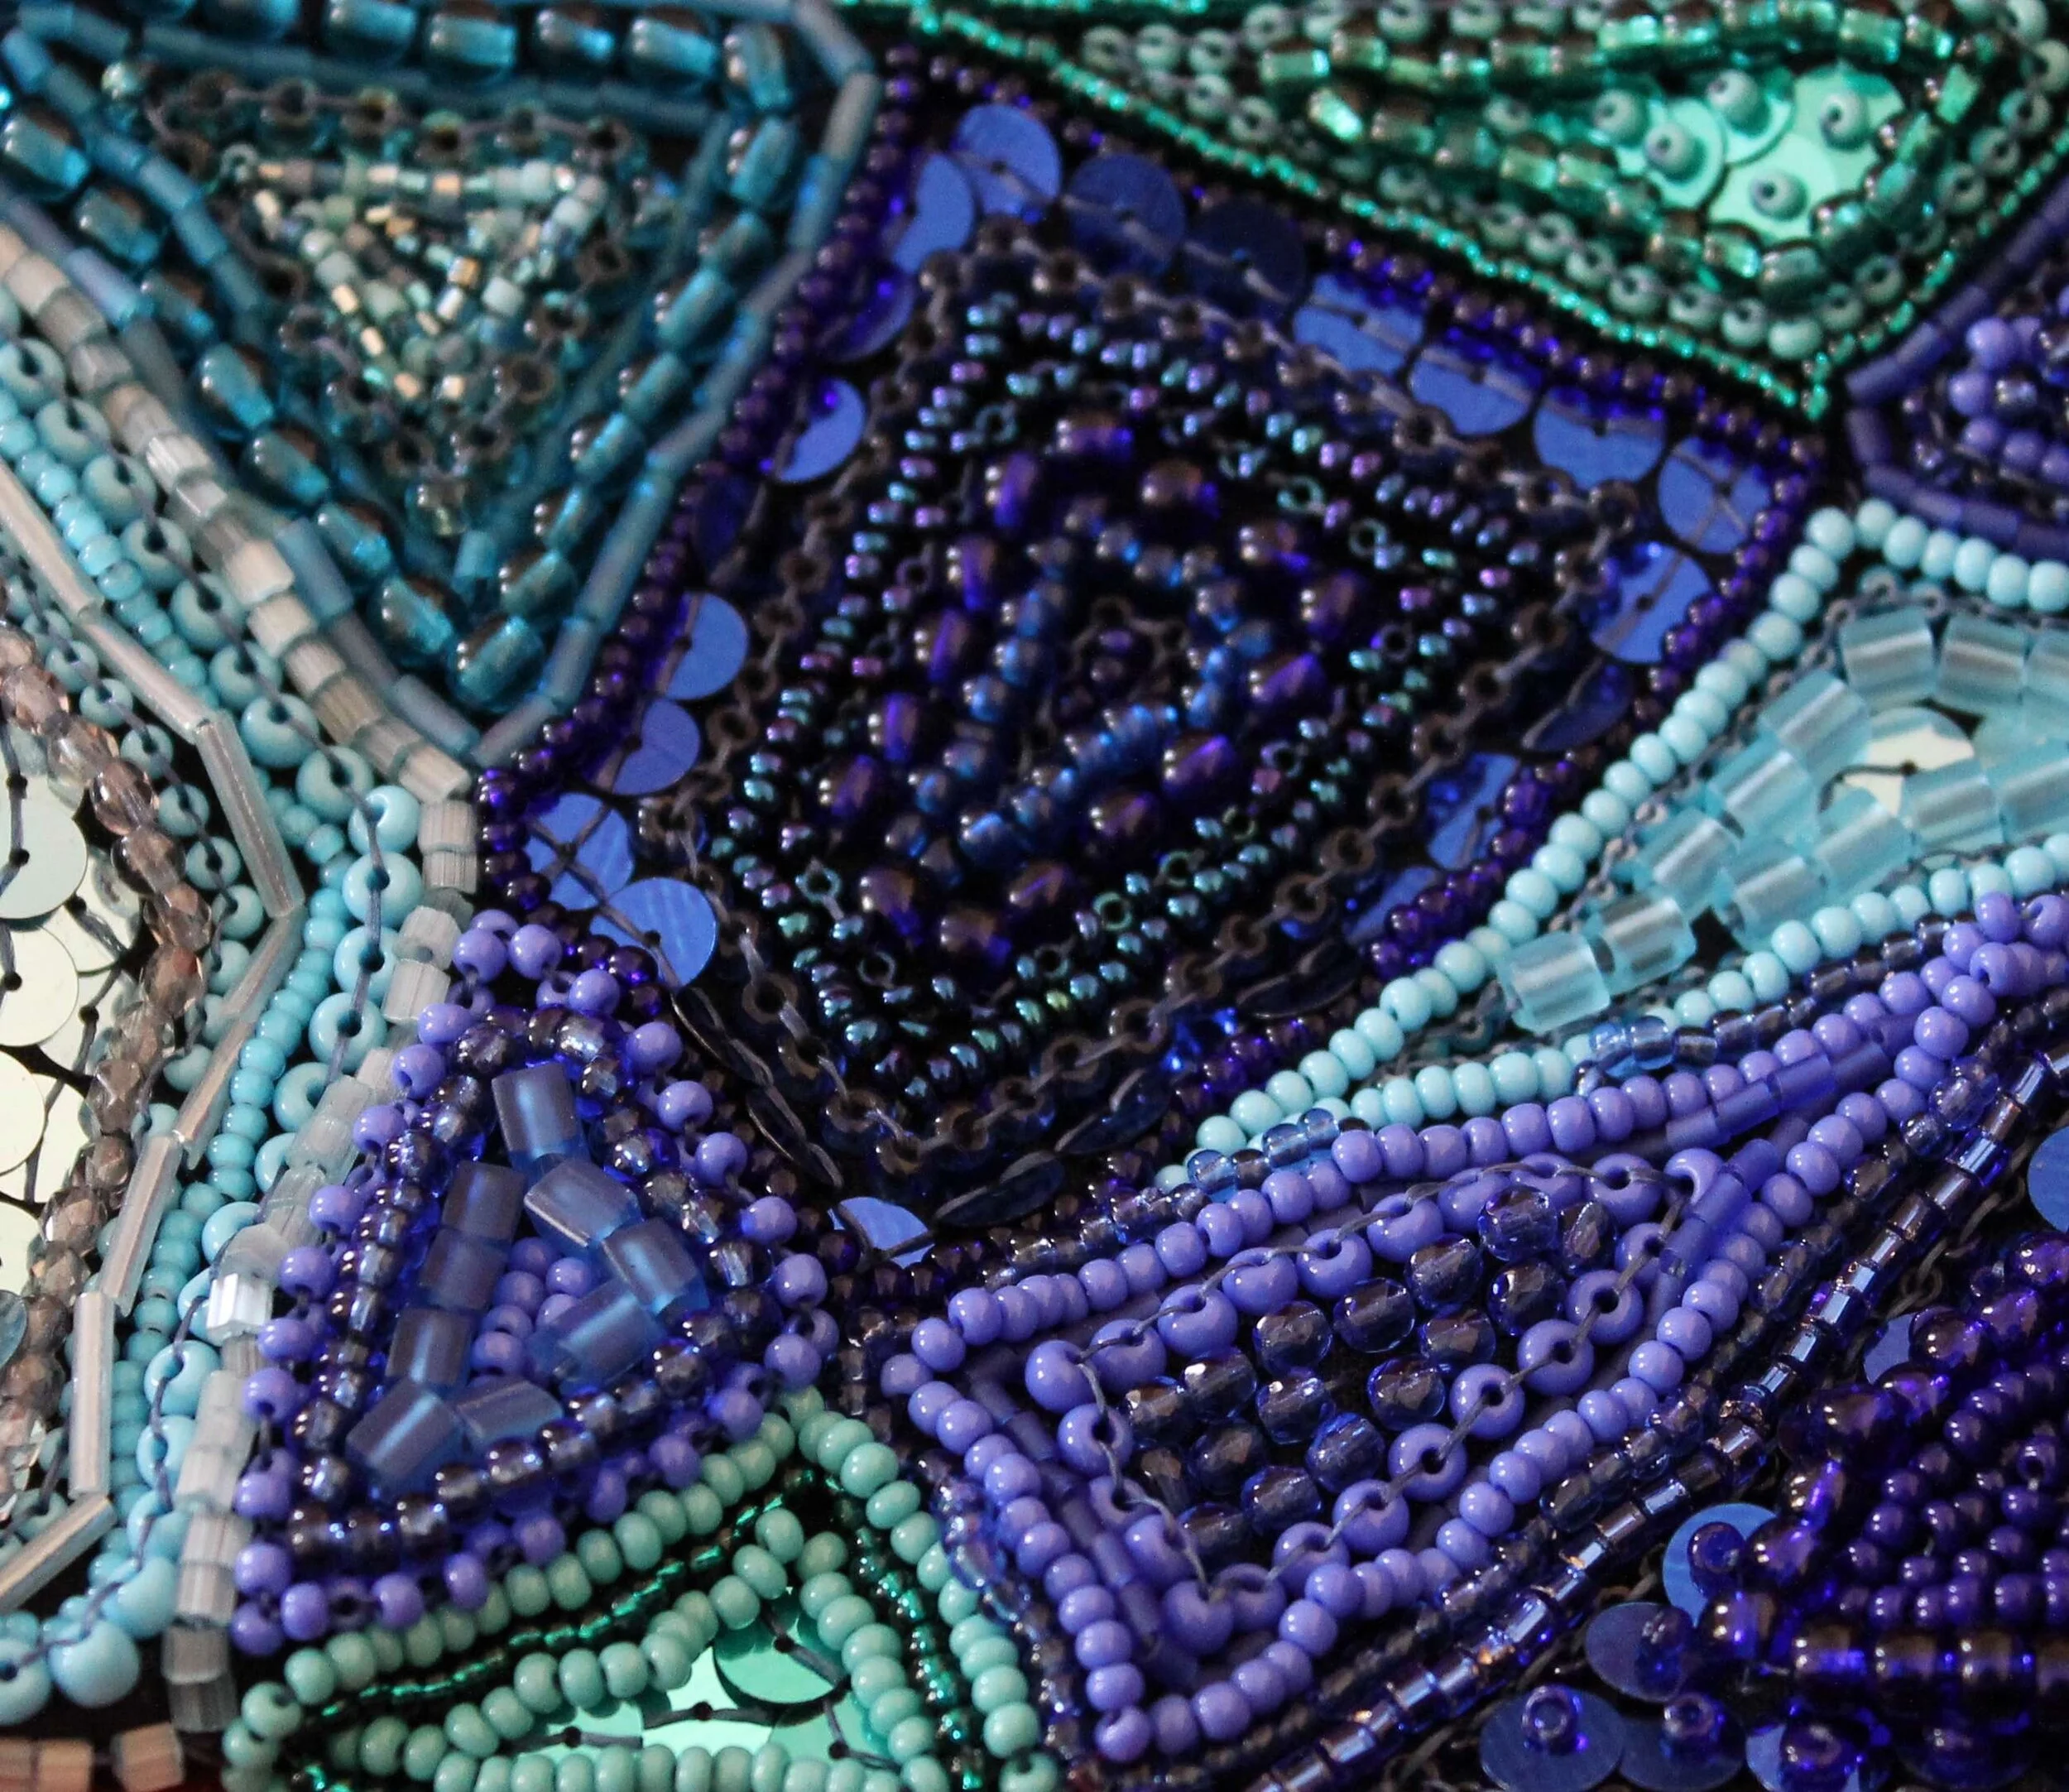
Couching is also a technique used to attach strings of sequins or beads to fabric and is a much quicker method of embellishing than stitching on individual beads!

A picture of a buddha figure stitched using couched goldwork techniques
A picture of beads and sequins in various shades of blue couched to fabric

Enjoyed this blog post? I share embroidery tips and a free embroidery pattern in my monthly newsletter. Sign up here to receive the newsletter on the 1st of each the month.
In stitch showcase 1 Tags Stitch Showcase, Couching Stitch
Comment
A picture of lots of blue thread and yarn jumbled up. Overlaid is a blue square with white text saying - hand embroidery, five tips to avoid thread tangles, www.embellishedelephant.co.uk

5 tips to avoid thread tangles in your embroidery project

September 26, 2020

It seems so simple - you just want one or two threads from the six stranded floss … and 30 seconds later you have a big old tangle that you spend 5 minutes wrestling with before you win or give up.

Thread tangles are not unique to embroidery, every thread or yarn based craft I’ve ever tried I’ve had instances of that big tangled mess.

But since I’ve been embroidering there are a few things I’ve learned about working with embroidery floss that help to avoid the tangles. Here are my 5 top tips to avoid tangles:

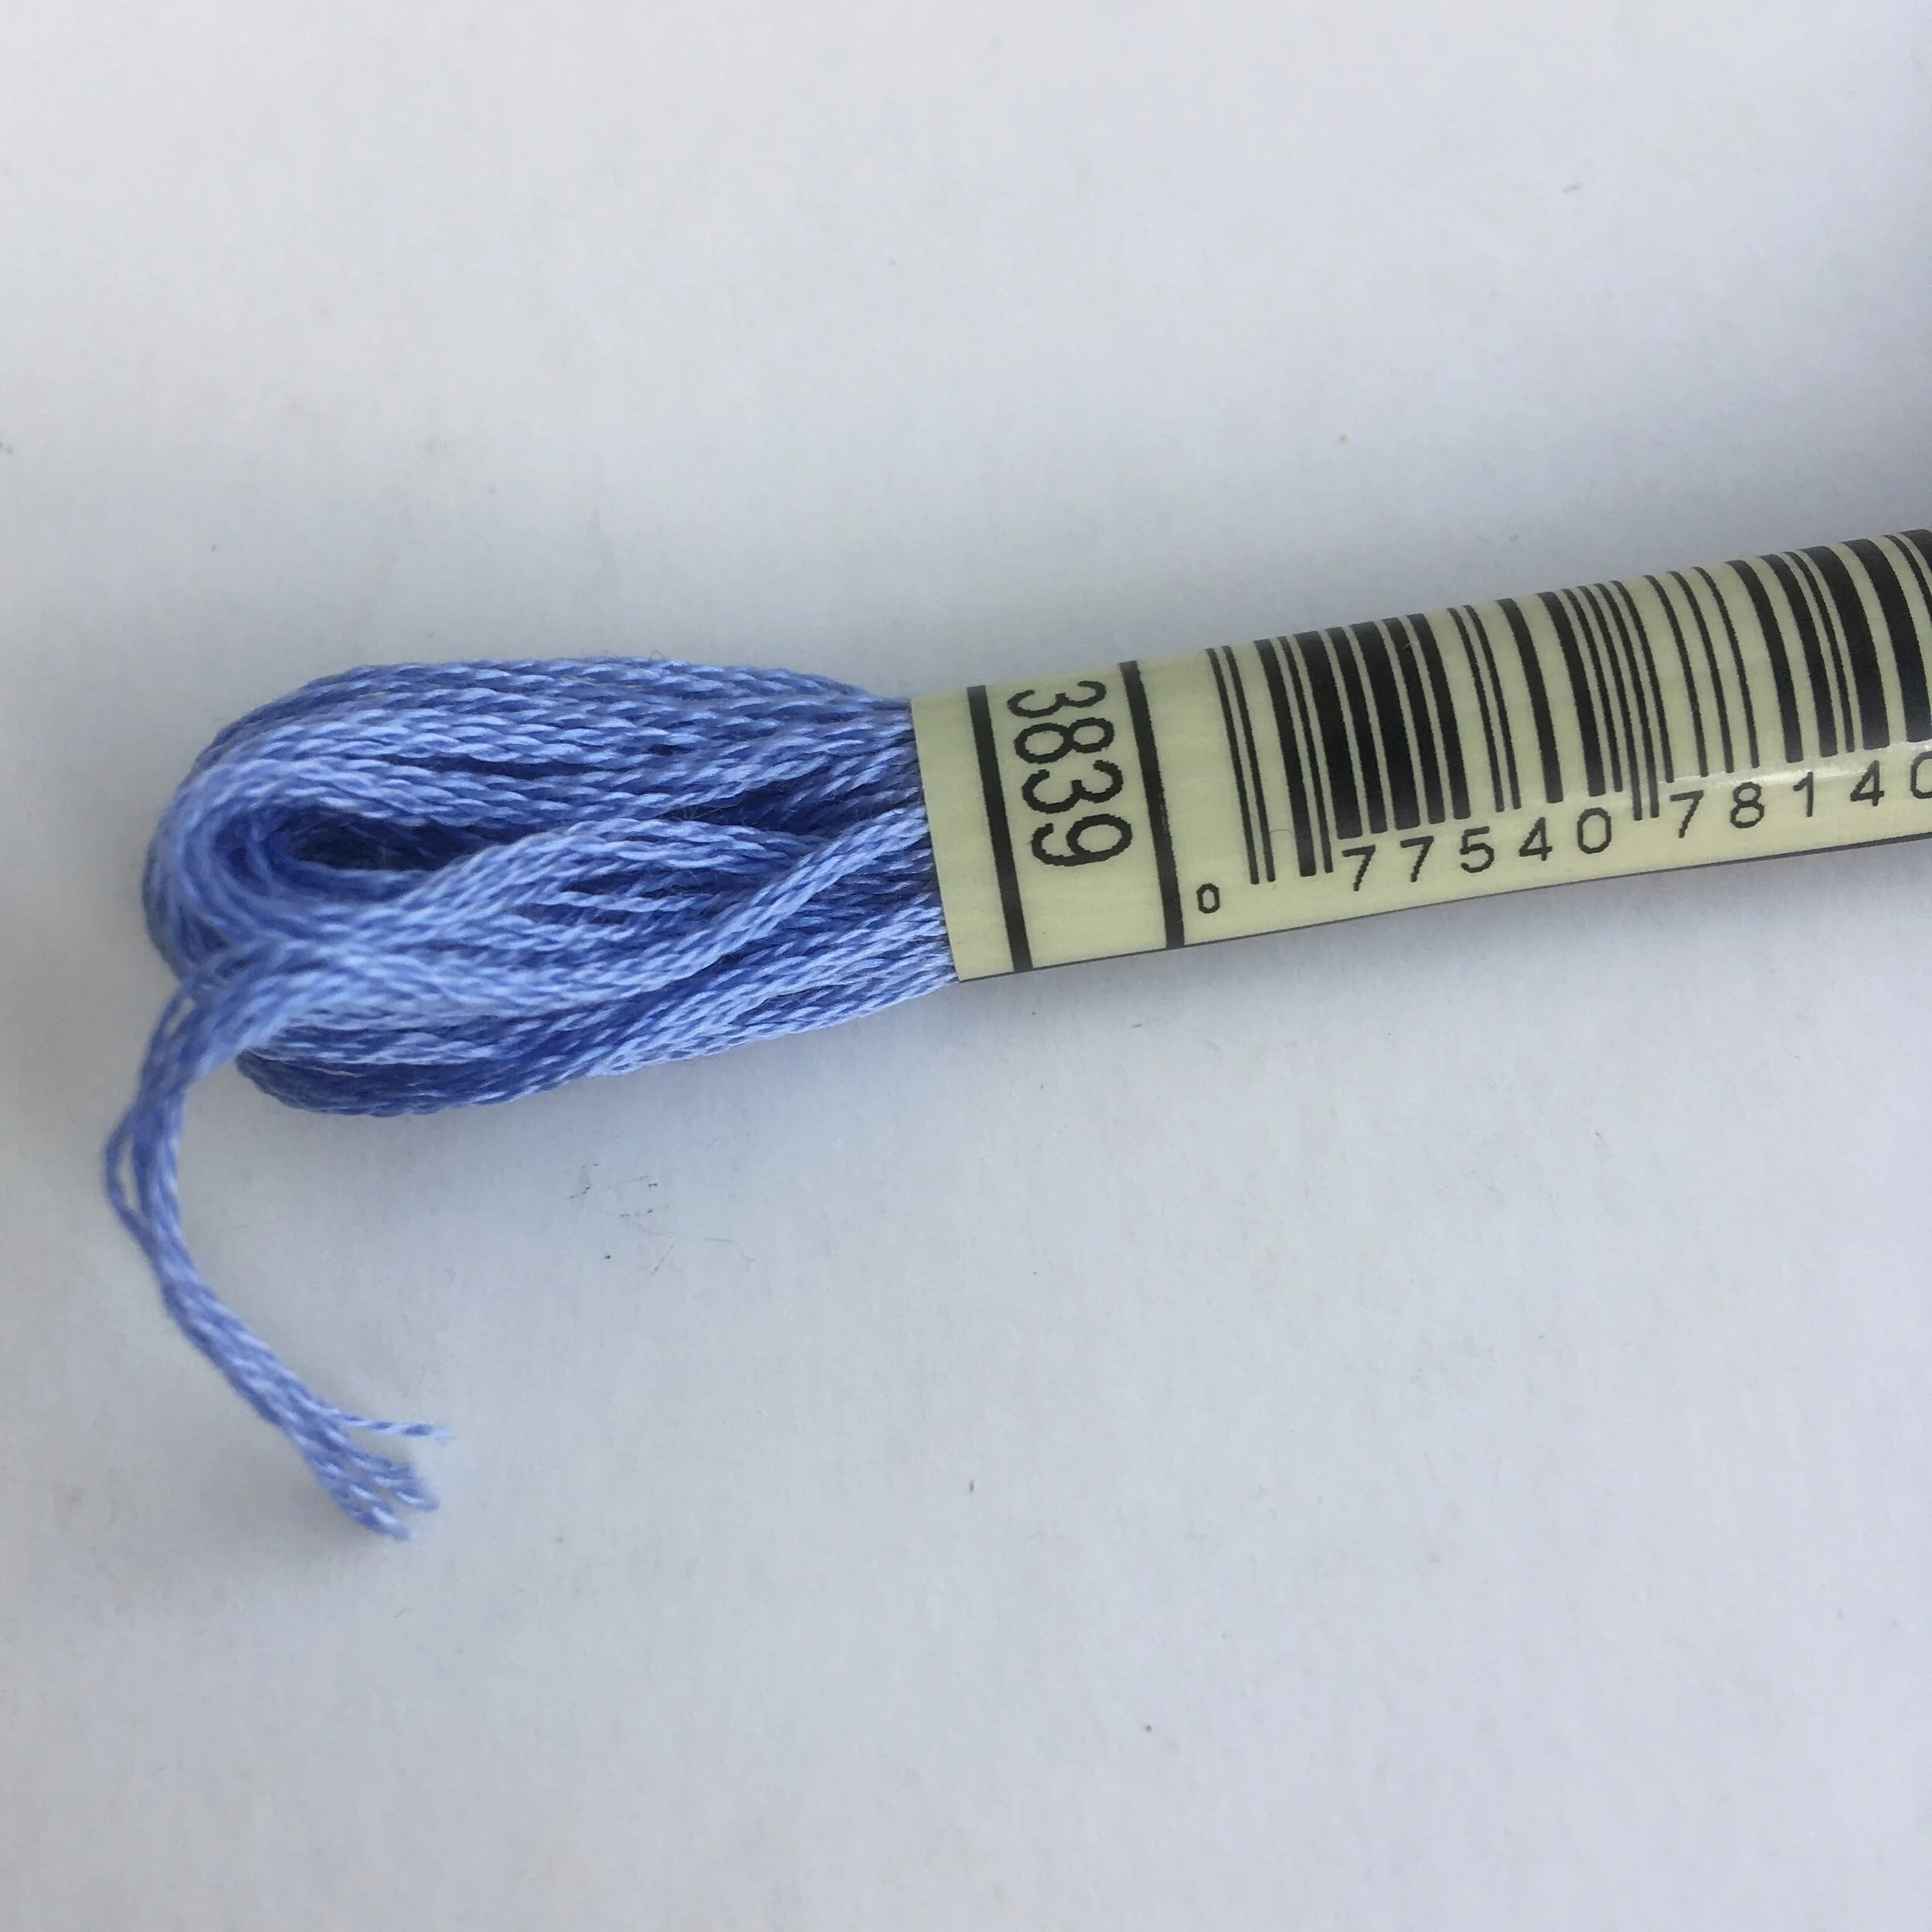
Picture of the label on a skein of blue DMC embroidery thread

1. pull the thread from the bottom of the skein (the long label end)

Most embroidery threads are manufactured and packaged in this way to prevent such tangles. It’s such a simple thing to remember to do to prevent tangles.

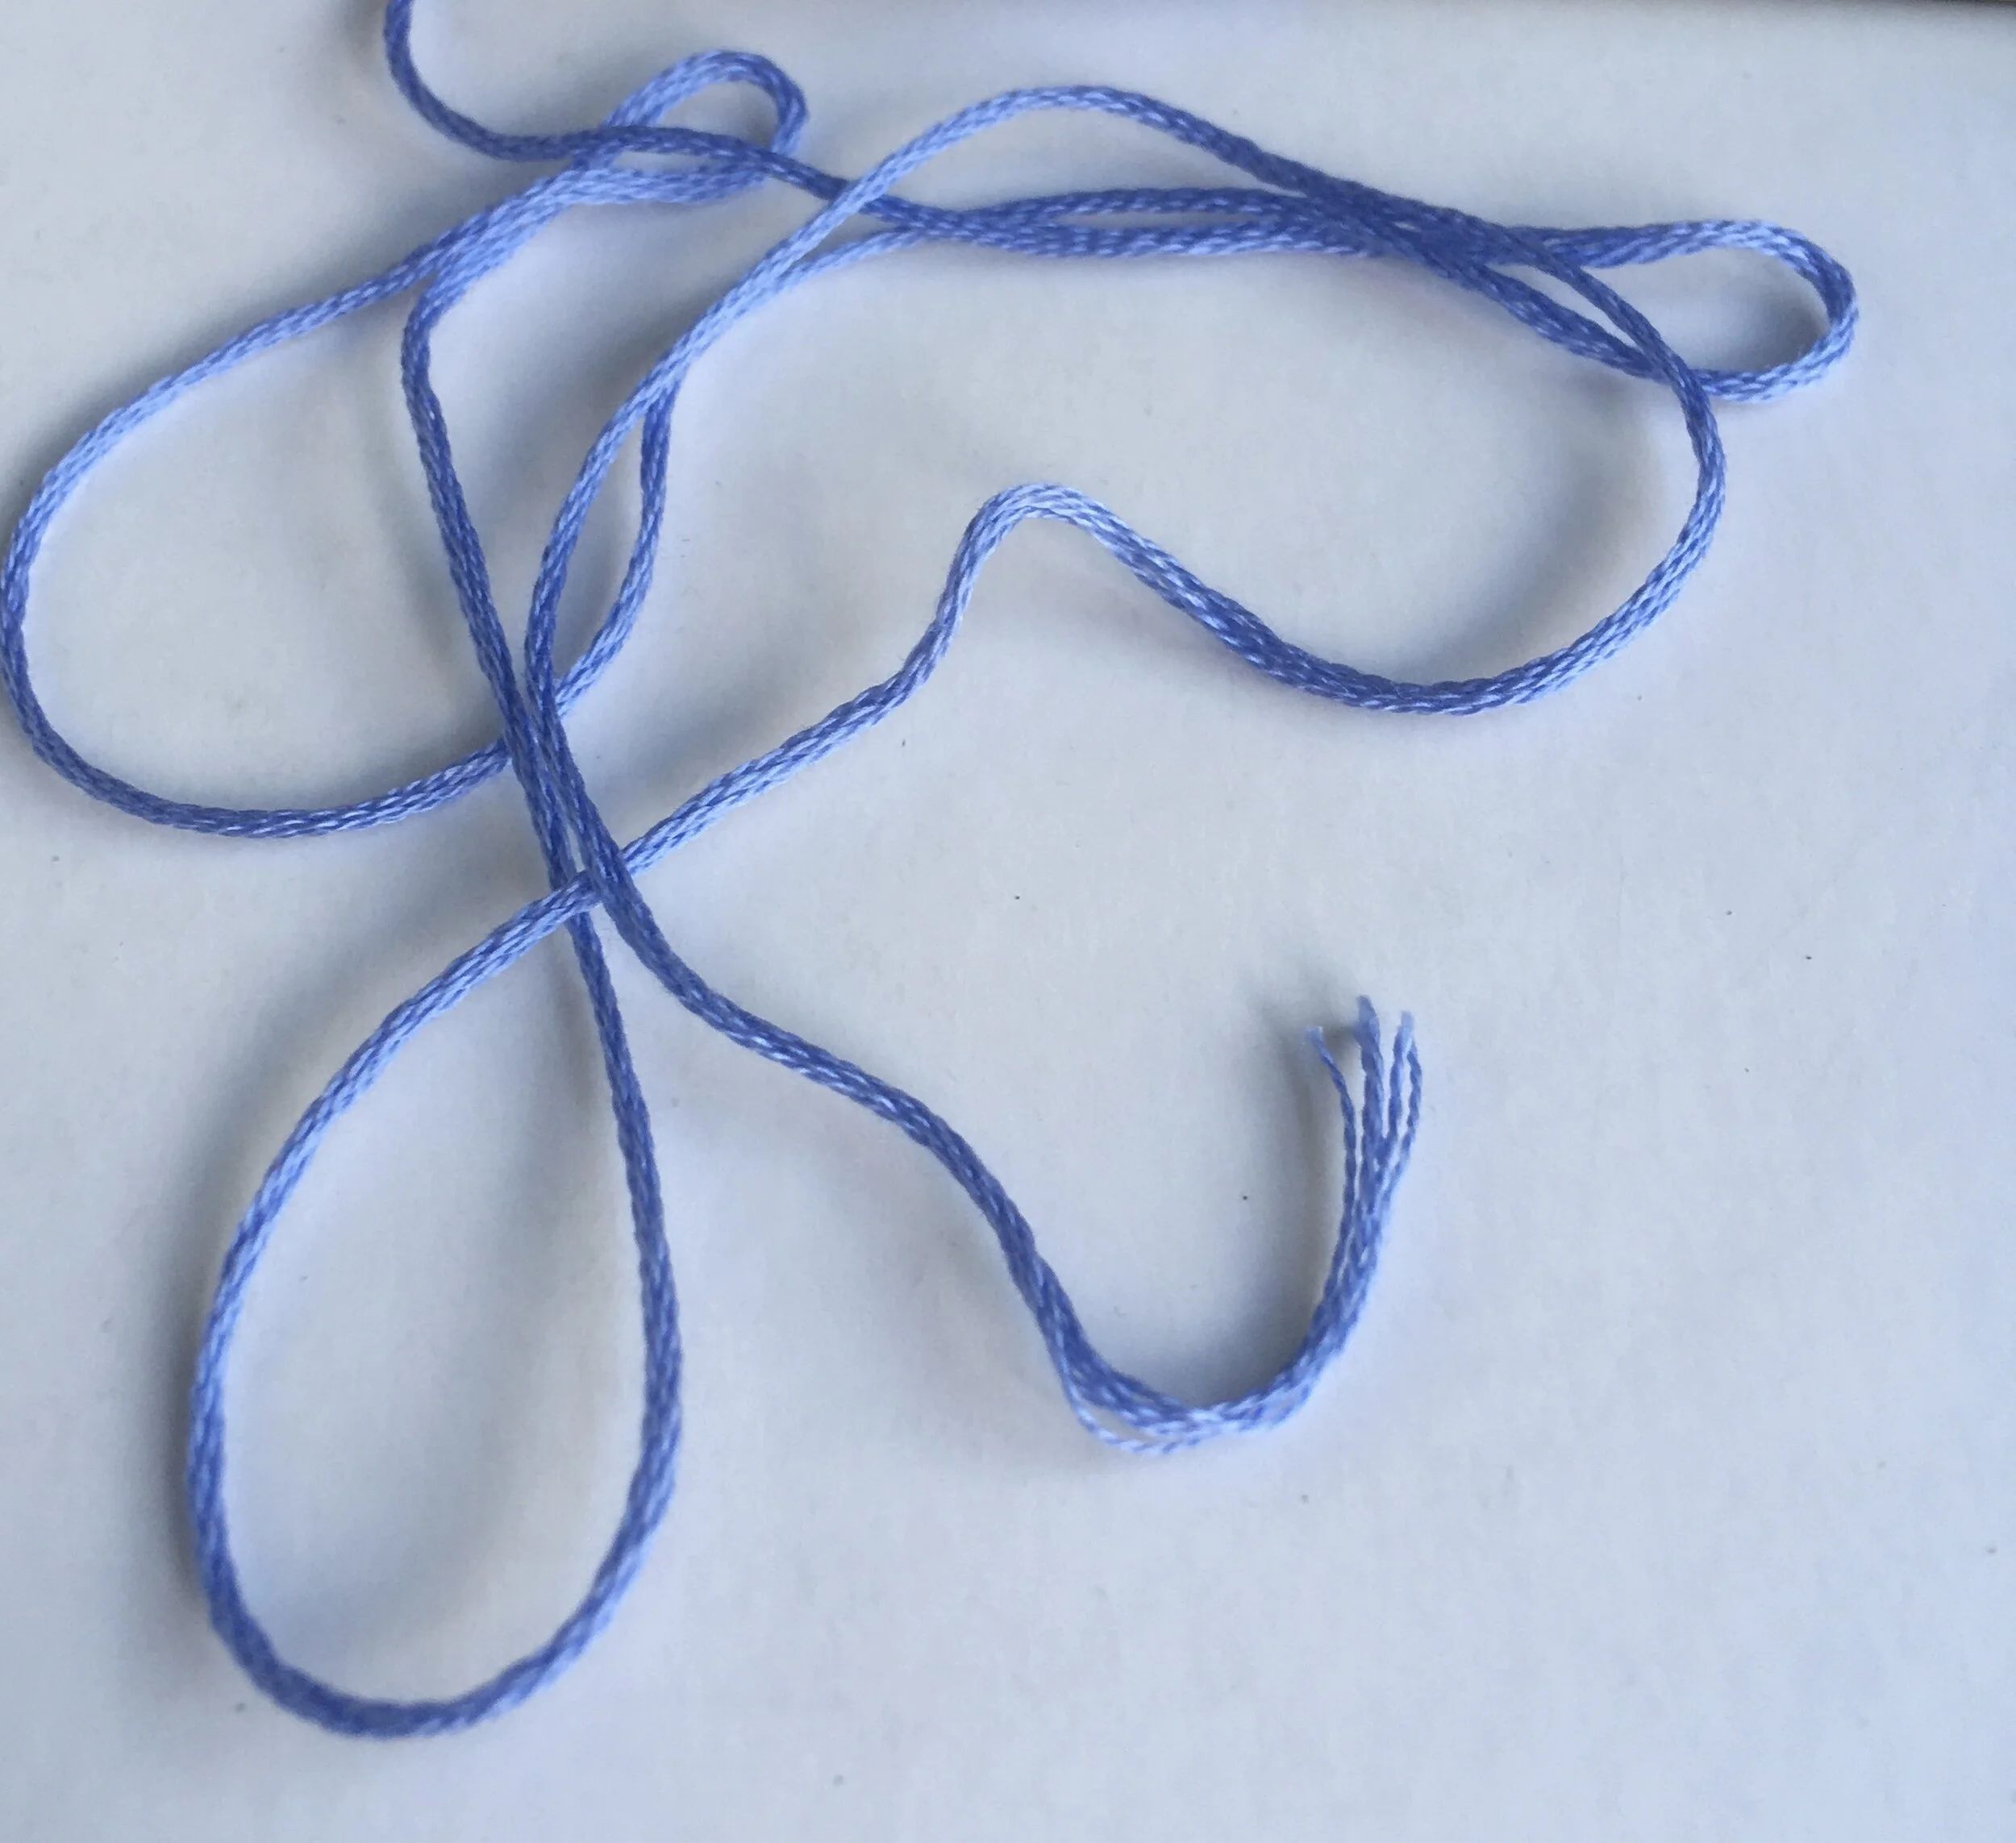
A picture of a length of blue six stranded embroidery floss

2. don’t cut the thread too long

It can be tempting to pull a really long length of thread so that you don’t run out of thread too quickly when you are in your stitching flow. I normally pull 2 full skein lengths or about the length of my fingers to my elbow.

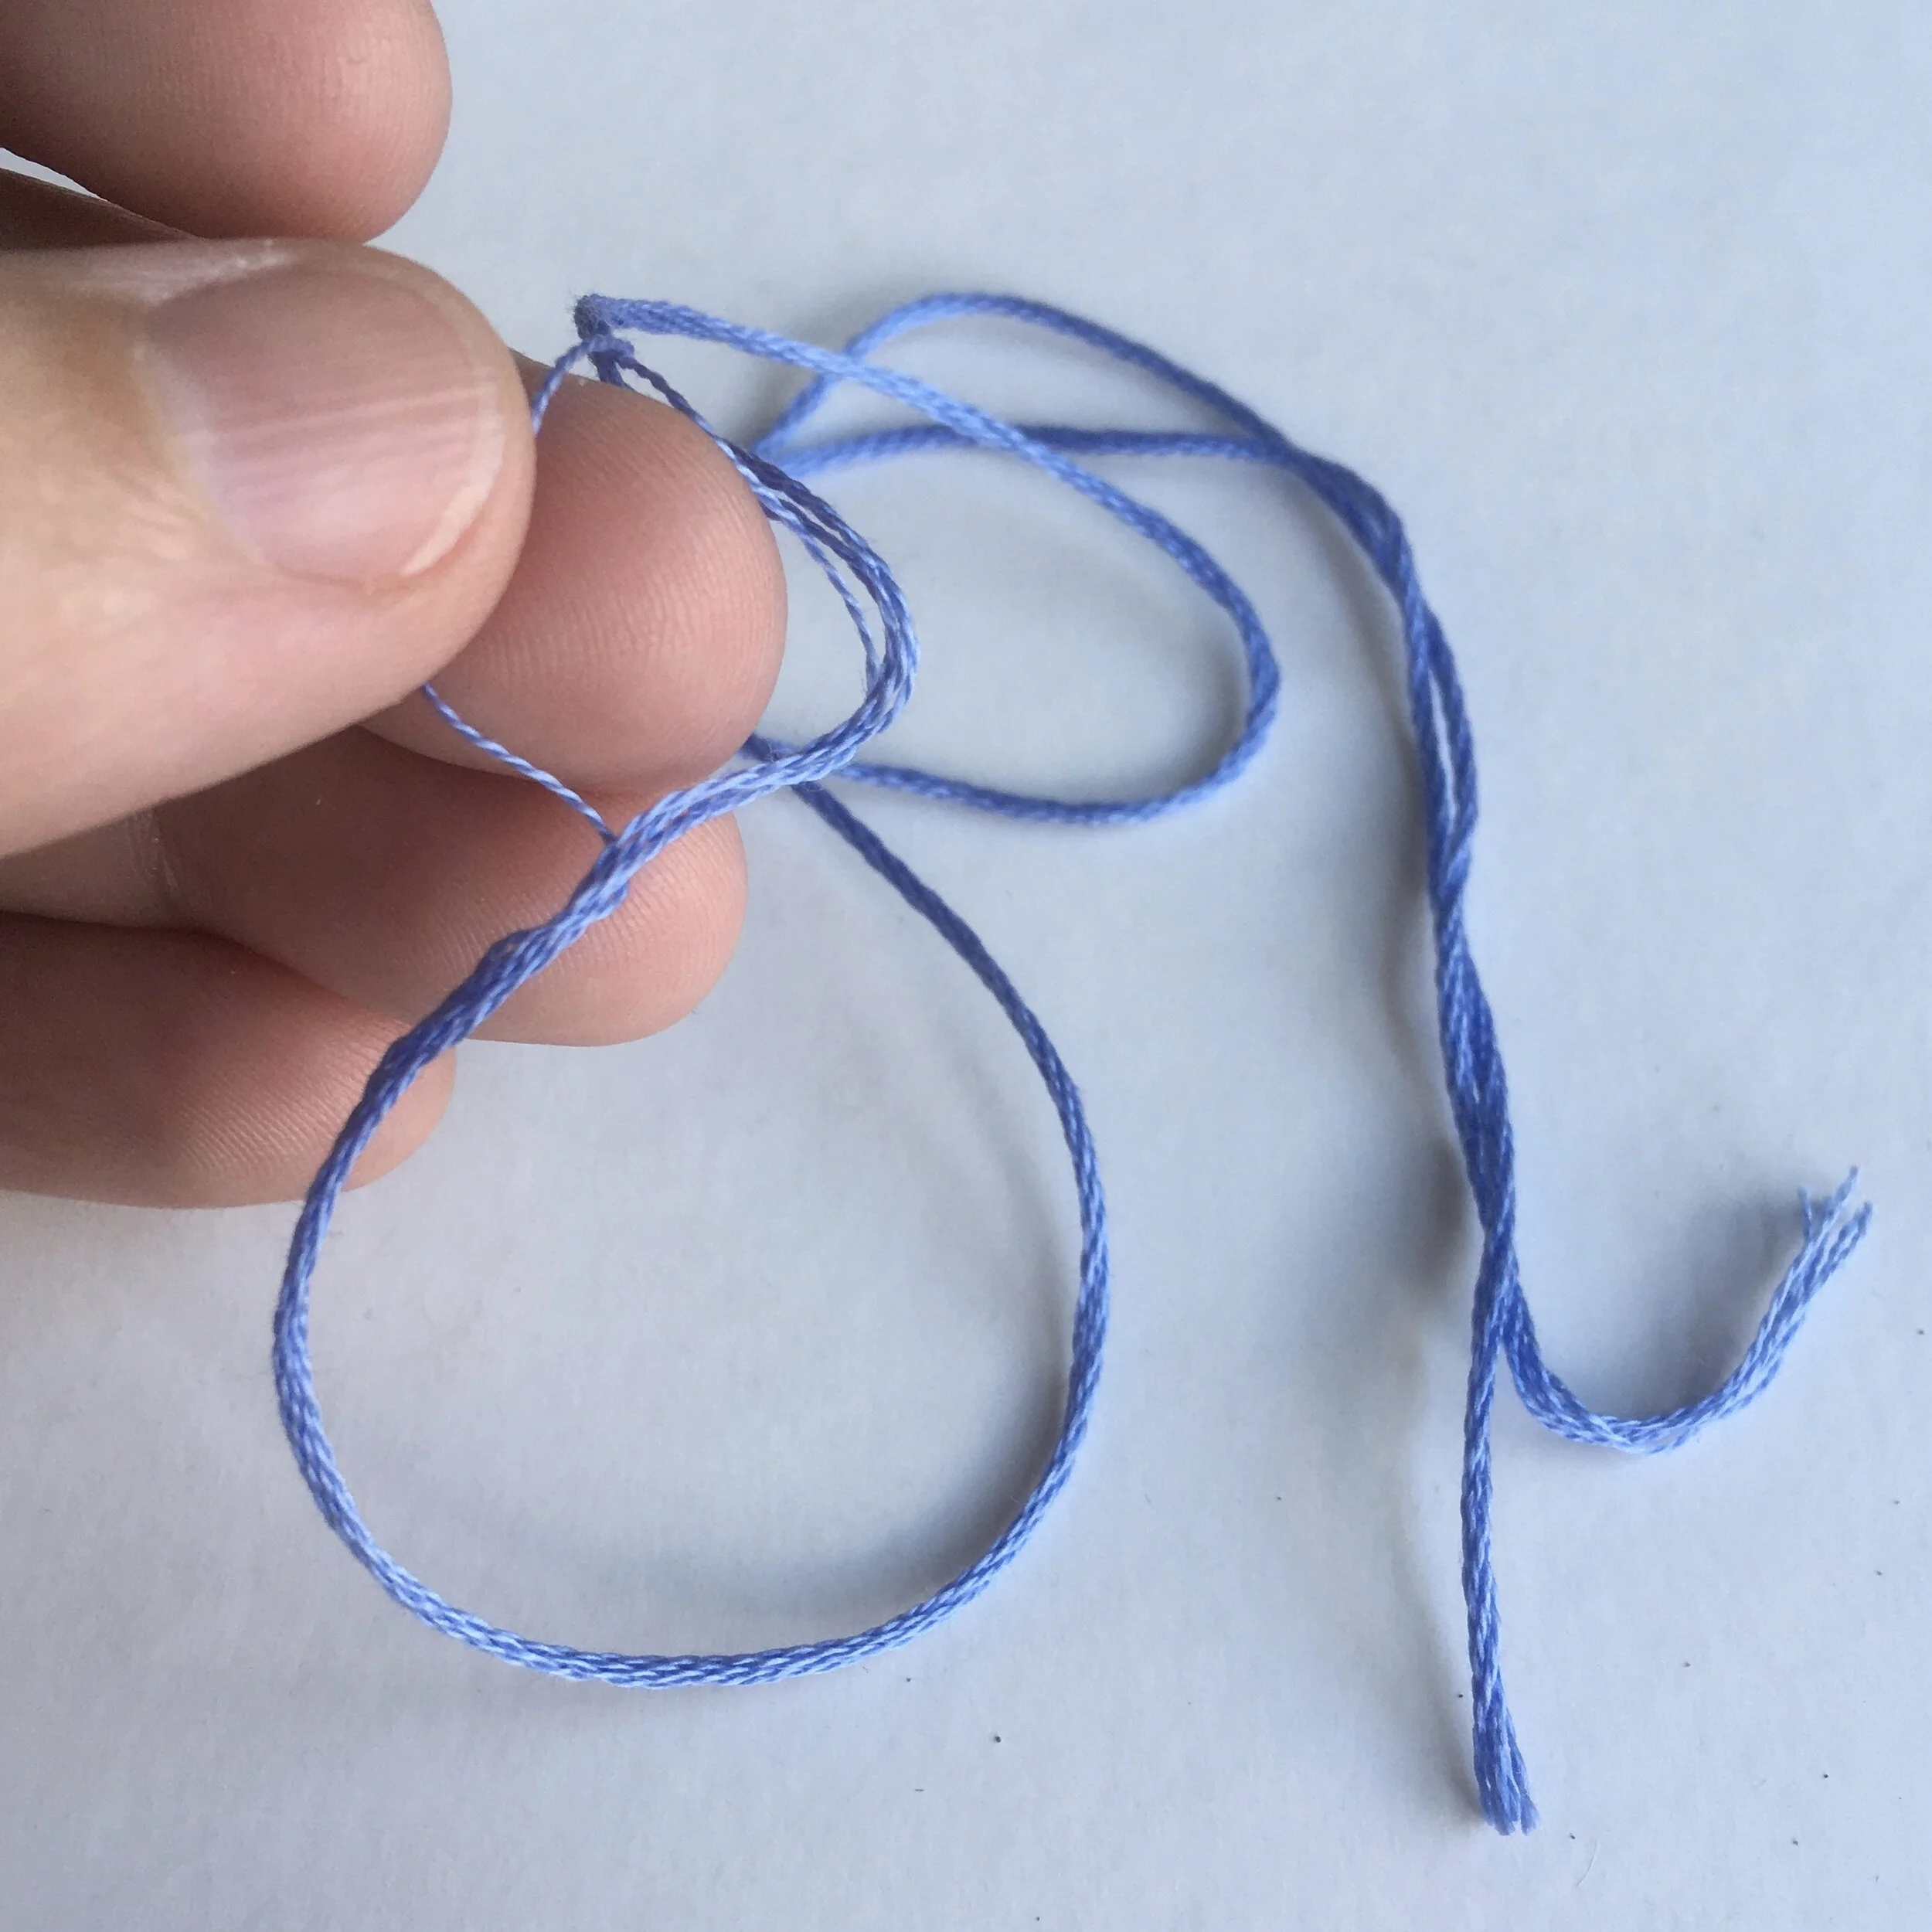
A picture showing separation of six stranded embroidery floss in the middle of the length

3. pull your strands from the middle of your cut length

Most embroidery patterns require you to use one or two strands of floss for a section of stitching. Separating strands is normally where I end up in tangles. But ever since I was given the tip to separate the strands in the middle of your cut thread and use your fingers to run the strand to the end, I’ve all but eliminated the tangles.

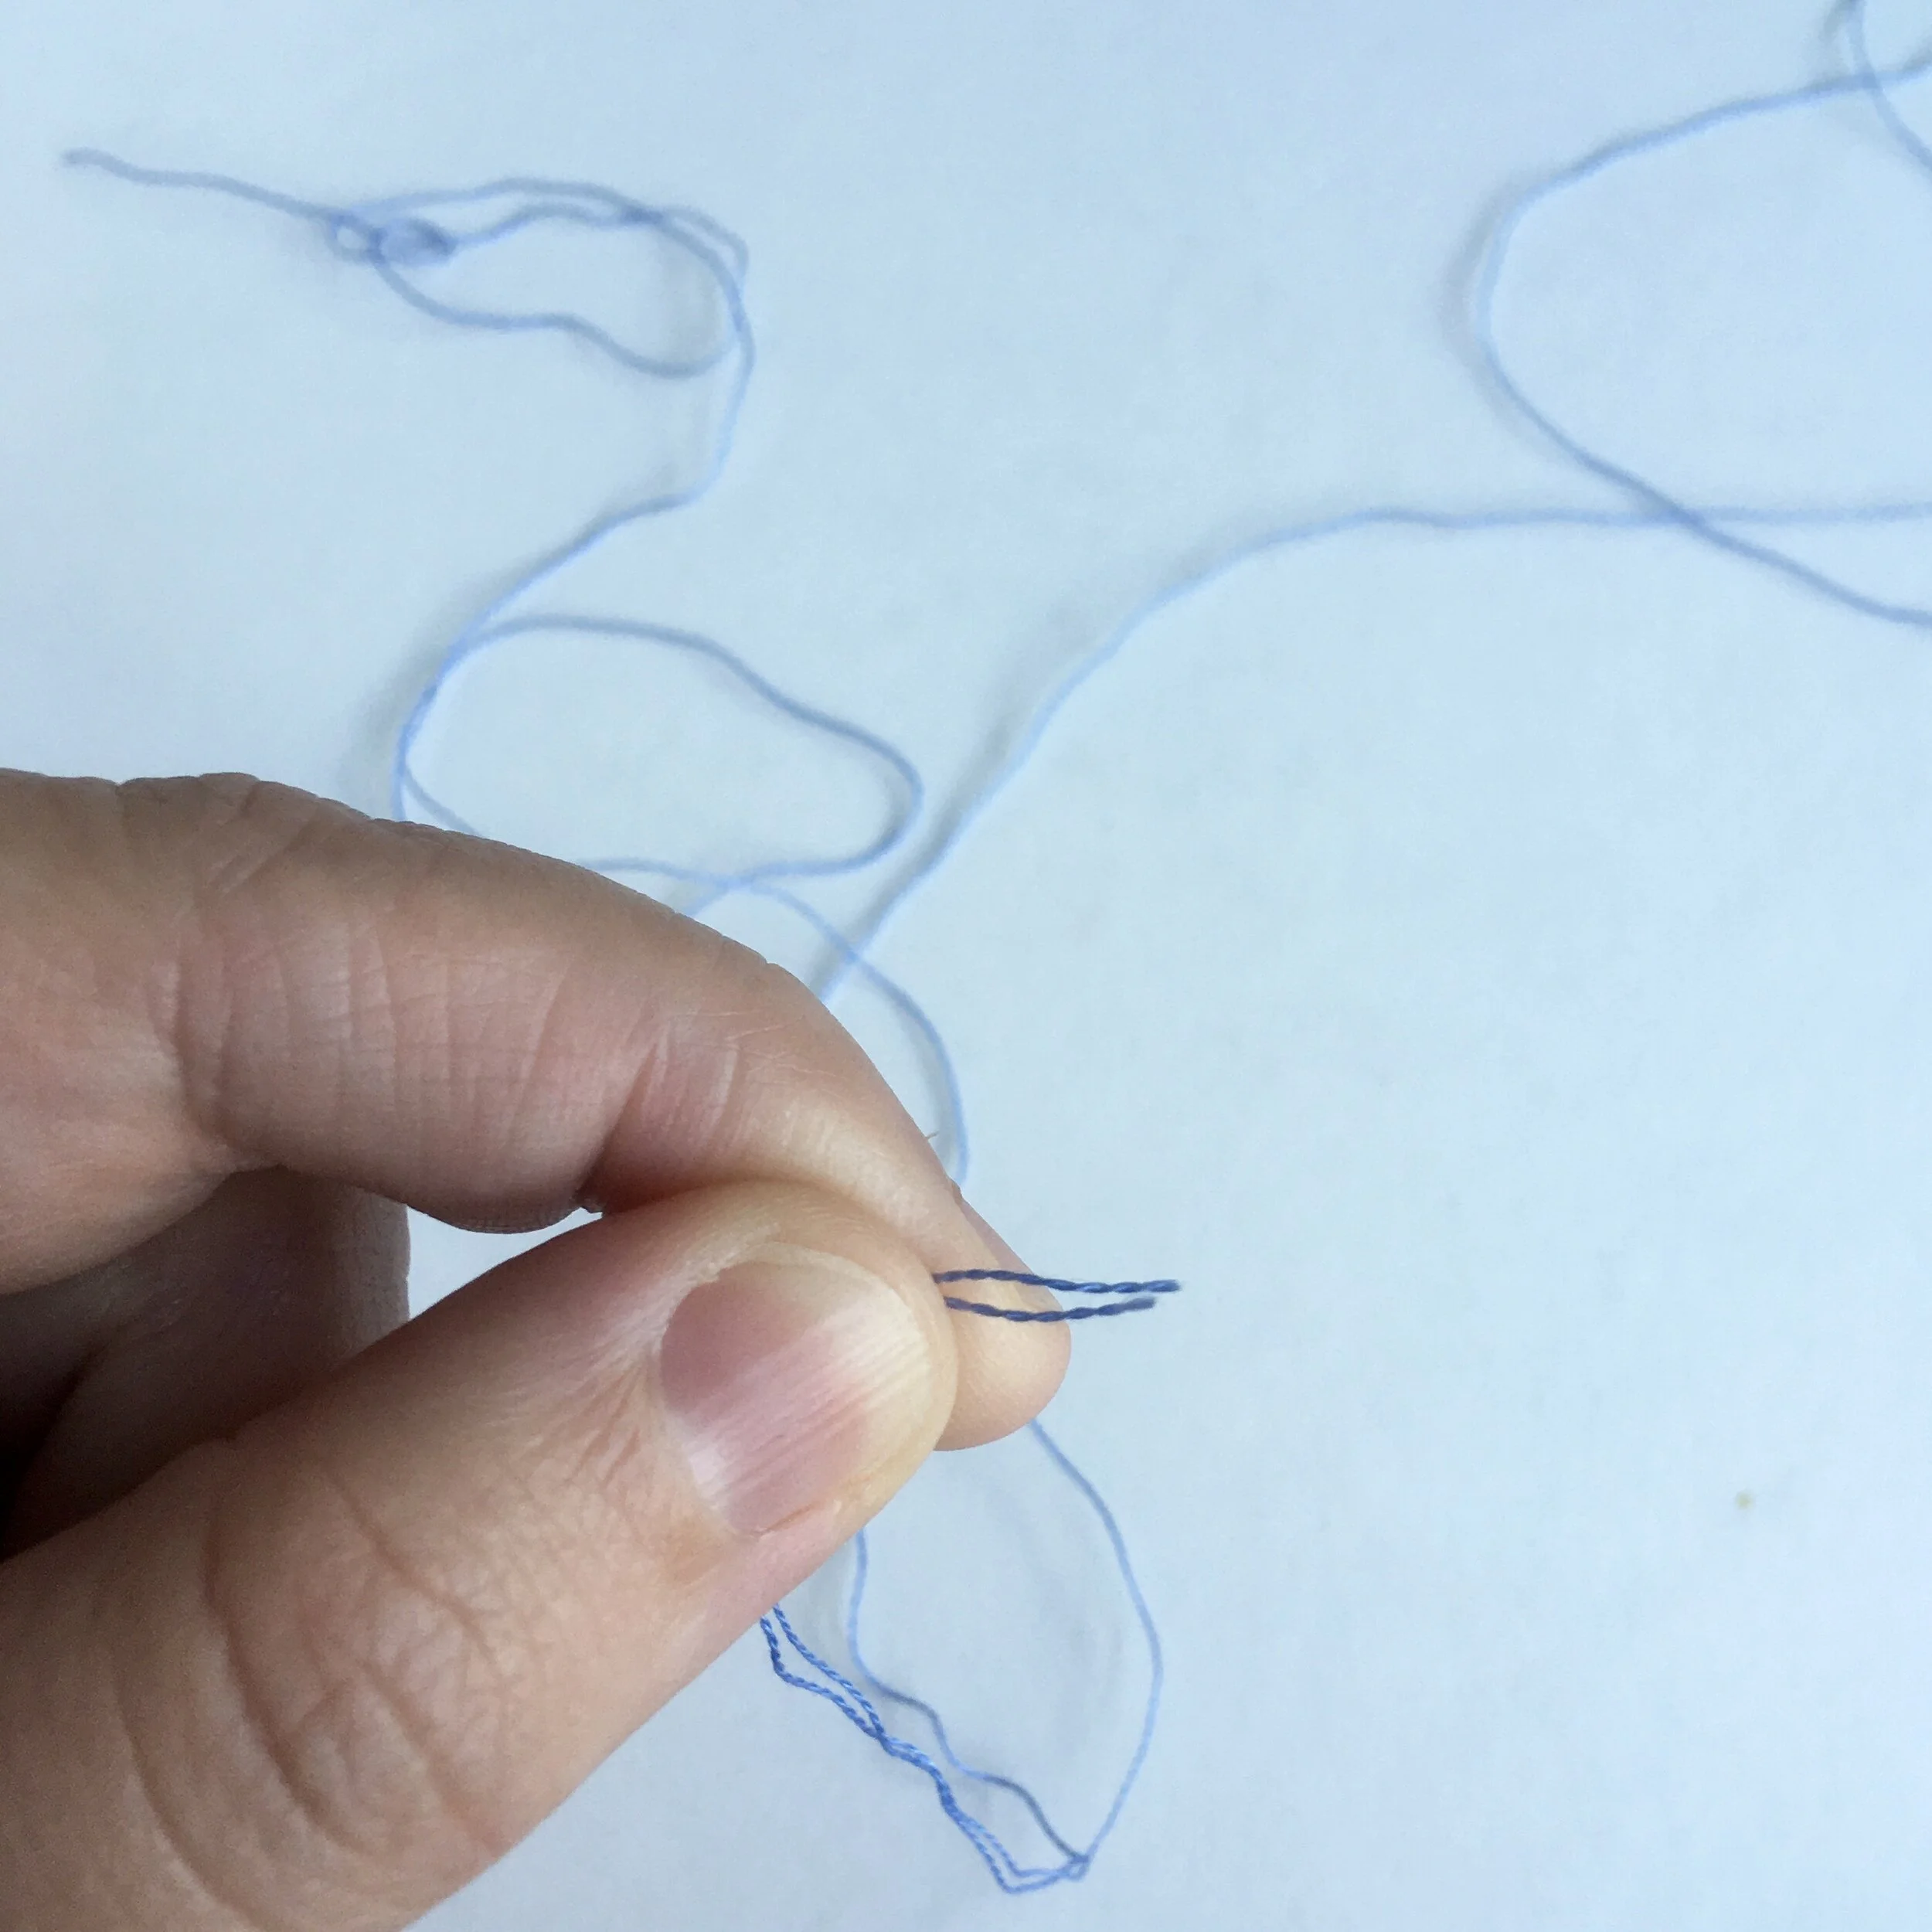
A picture showing two separate lengths of embroidery floss being brought together

4. pull each strand out separately

When threads are manufactured they are twisted to create each strand and each strand is twisted together to make the six stranded floss. So if you need two strands pull out two strands of one rather than two strands together, this just releases the twisting from the manufacturing process. Then just bring them back together and smooth them out.

IMG_5816.jpg

5. keep an eye on twists

Each time you pull the thread through the fabric it twists slightly and twists twist upon themselves to create tangles. If you do find your thread twisting, periodically just let the needle and thread dangle and it will untwist itself.

And one final bonus tip (that I’ve not yet cracked!) periodically keep an eye on the back of your work to prevent knots and tangles while you are stitching. I’d love to hear from you if you have any other tips to help avoid the tangles just add a comment below.

Enjoyed this blog post? I share embroidery tips and a free embroidery pattern in my monthly newsletter. Sign up here to receive the newsletter on the 1st of each the month.
In tips 2 Tags Thread, Basics
Comment
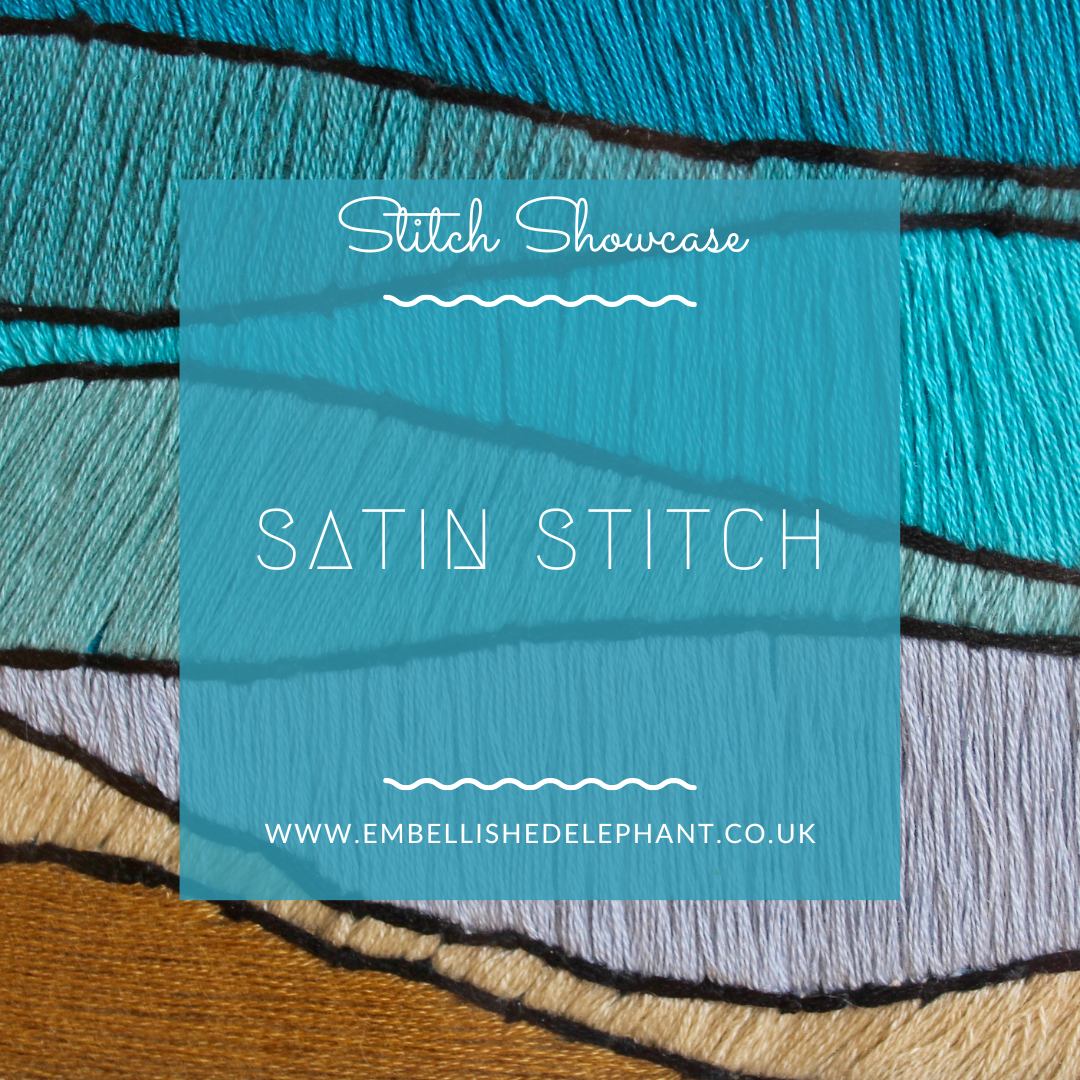
A picture of a sea-scape stitched in satin stich in blues and yellows. Overlaid is a blue square with with text saying - stitch showcase, satin stitch, www.embellishedelephant.co.uk

Stitch Showcase: Satin Stitch

September 23, 2020

Satin stitch is commonly used to fill in large spaces and there are contemporary embroidery artists such as Sarah K Benning and Salt Stitches who use it extensively in their work. The stitch is created by laying lengths of thread as close as possible on the surface of the fabric.

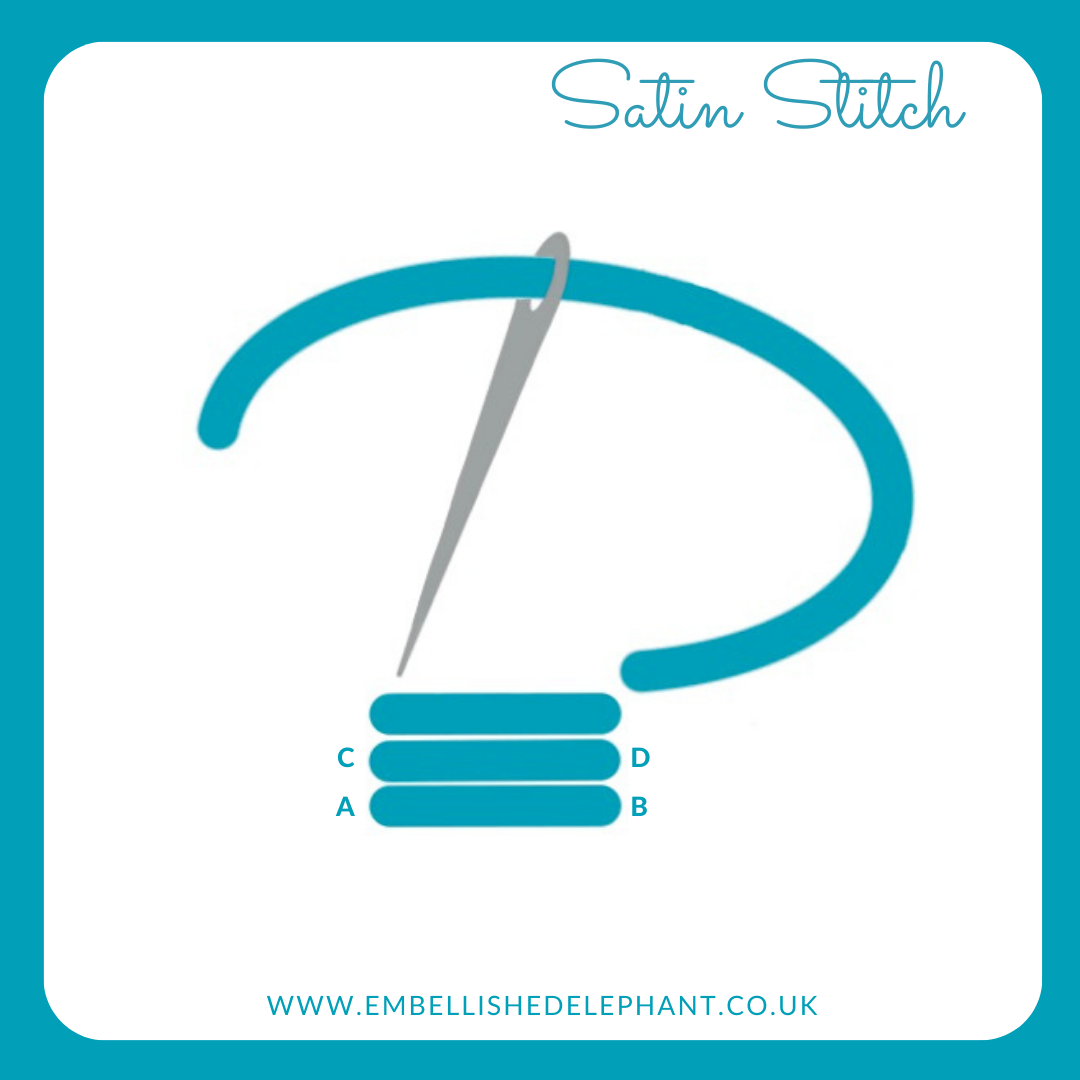
  • Bring the needle up through the fabric at the appropriate starting point (A)

  • Take it down through the fabric at the end point (B)

  • Bring the needle back up right next to the first point you brought it through (C).

  • Take it down through the fabric next to the end of the first stitch (D)

  • The gap between each stitch will depend on the thickness of the thread being used

  • Each stitch should start from the same side each time. This should mean that the back of the work work looks similar to the front (just not as neat)

  • It may seem like a waste of thread to have such long stitches on the back of the work, but it does help to maintain the tension over such a large area.

  • If you are short of thread or are working a smaller area you could bring the needle up right next to the point it went down (on the same side of the area) rather than go back to the other side but beware this may cause fabric wrinkles.

An illustration of how to stitch satin stitch on a white background with blue and grey images.

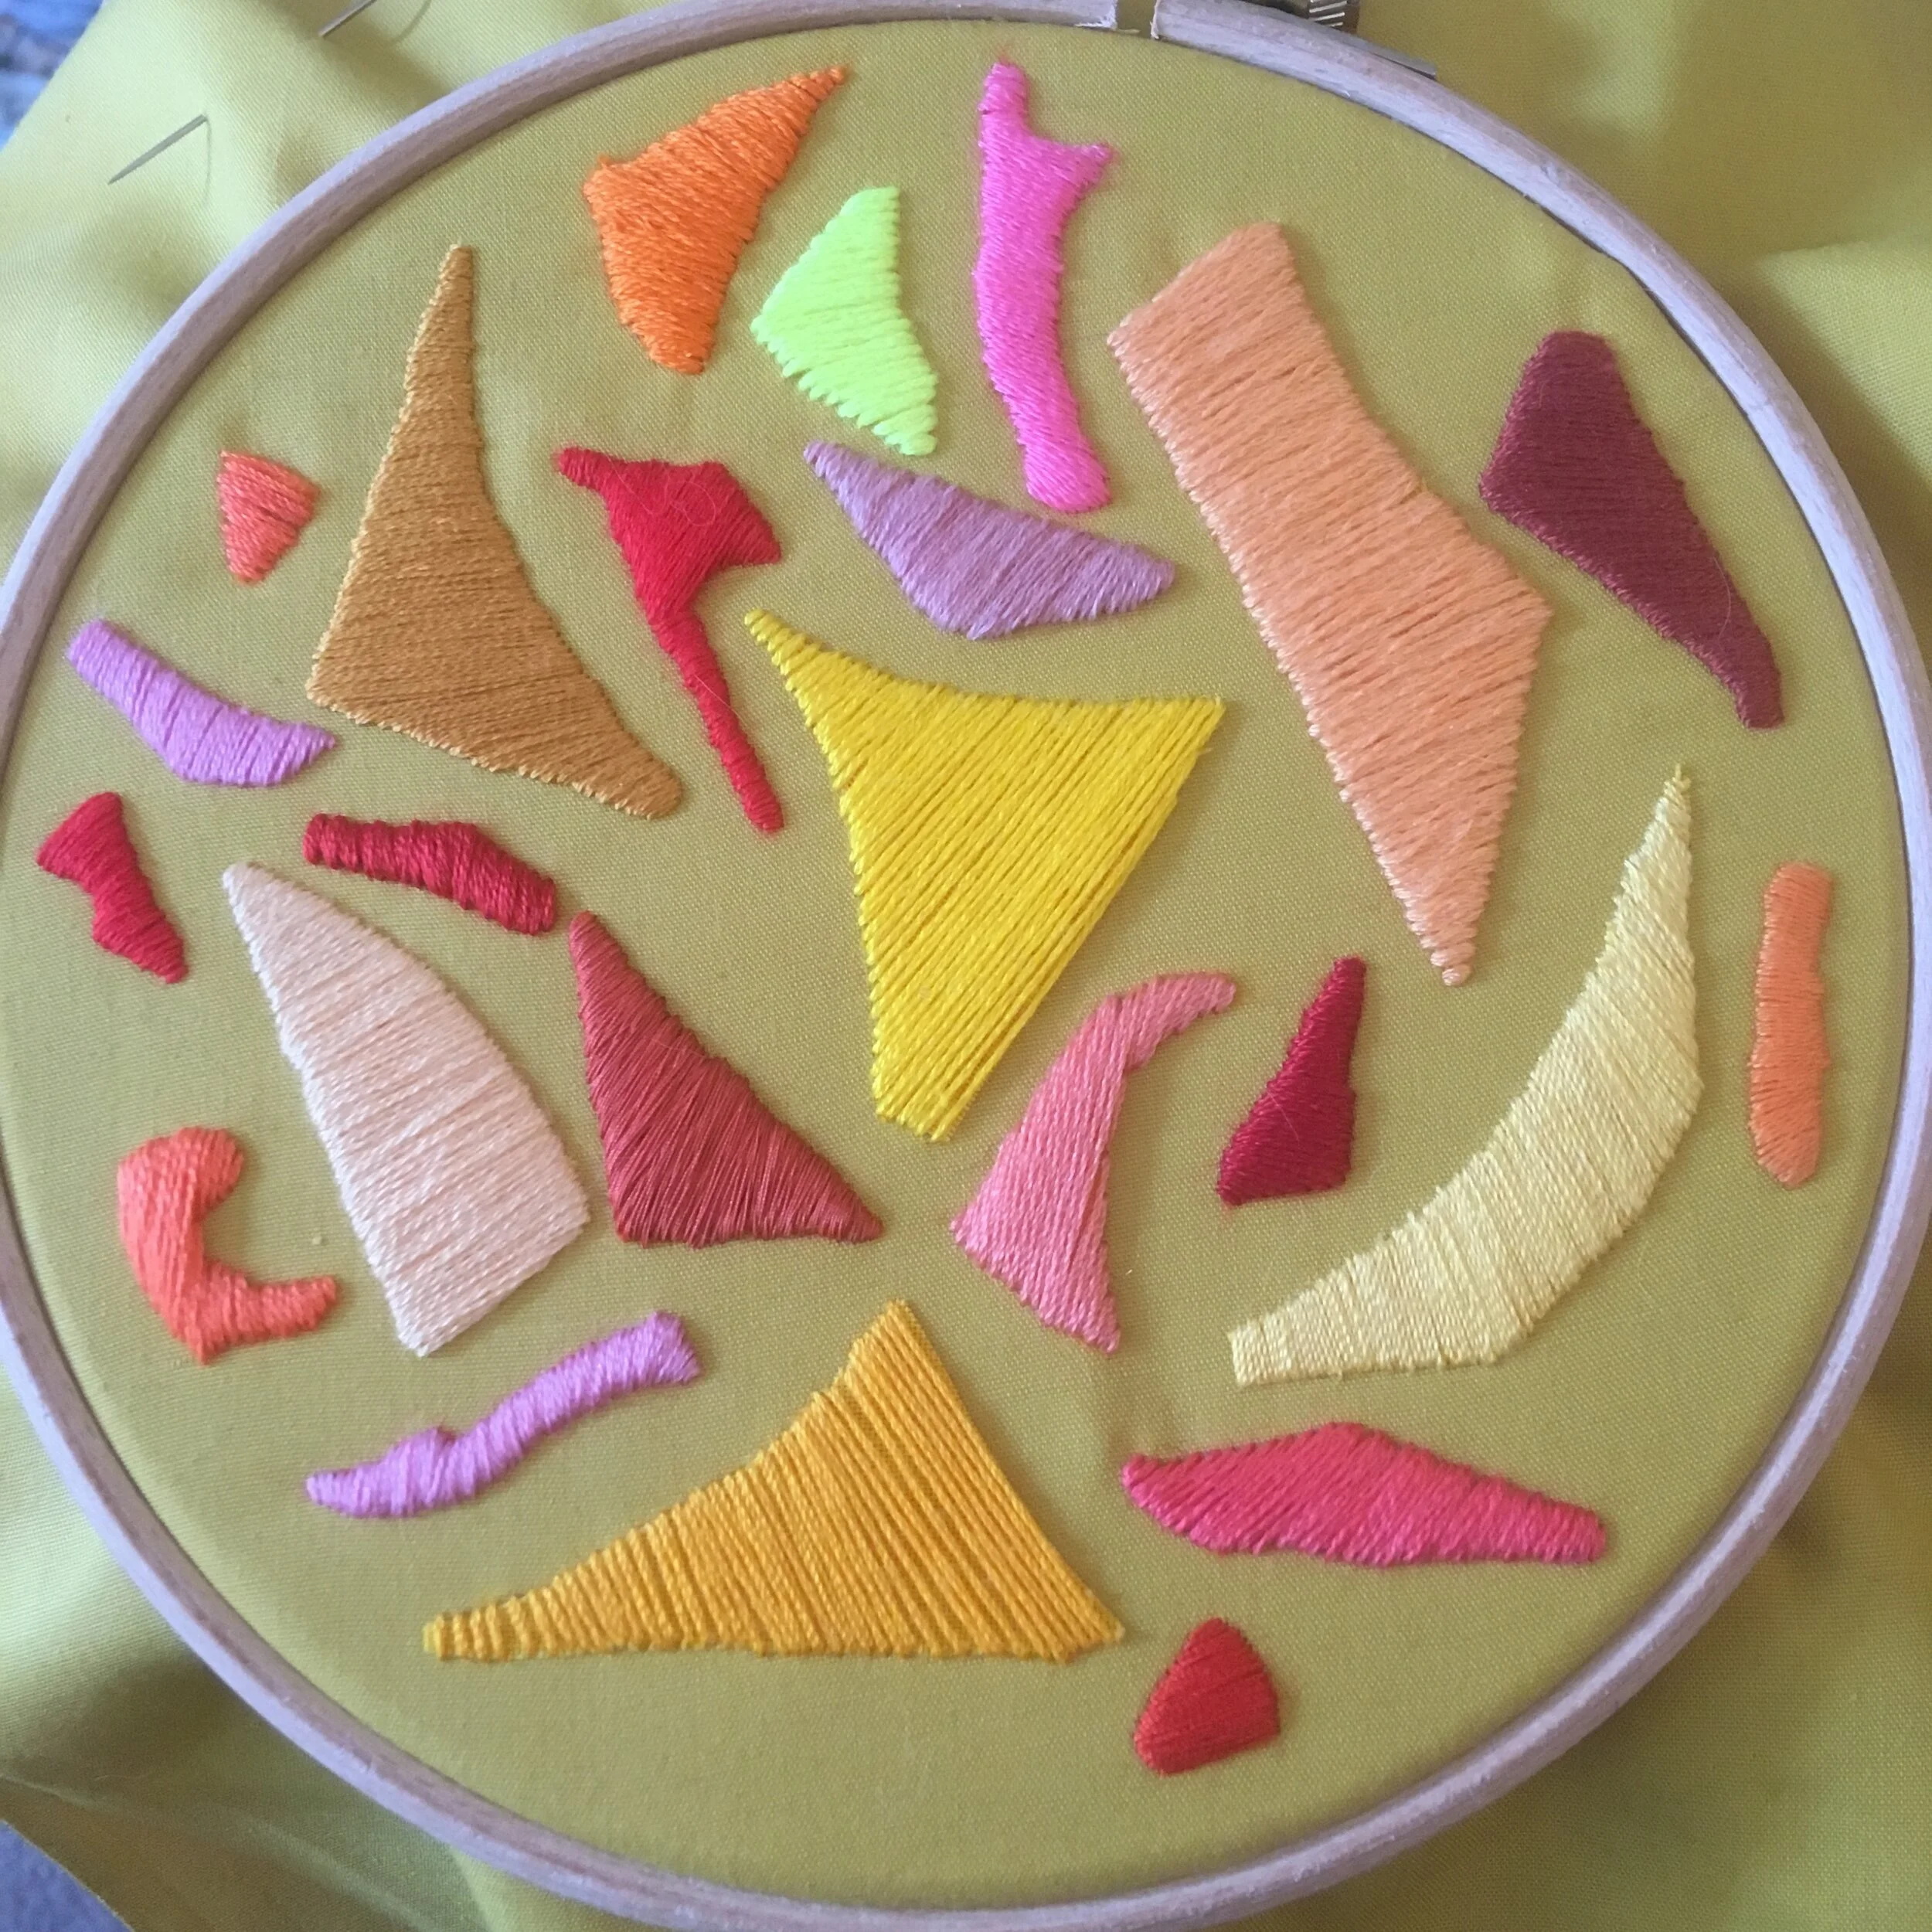
Satin stitch can be made using a range of numbers of threads, this is a sampler I made exploring this, the yellow shape at the bottom is stitched with all 6 strands at once while the pale yellow on the right hand side is stitched with just one strand.

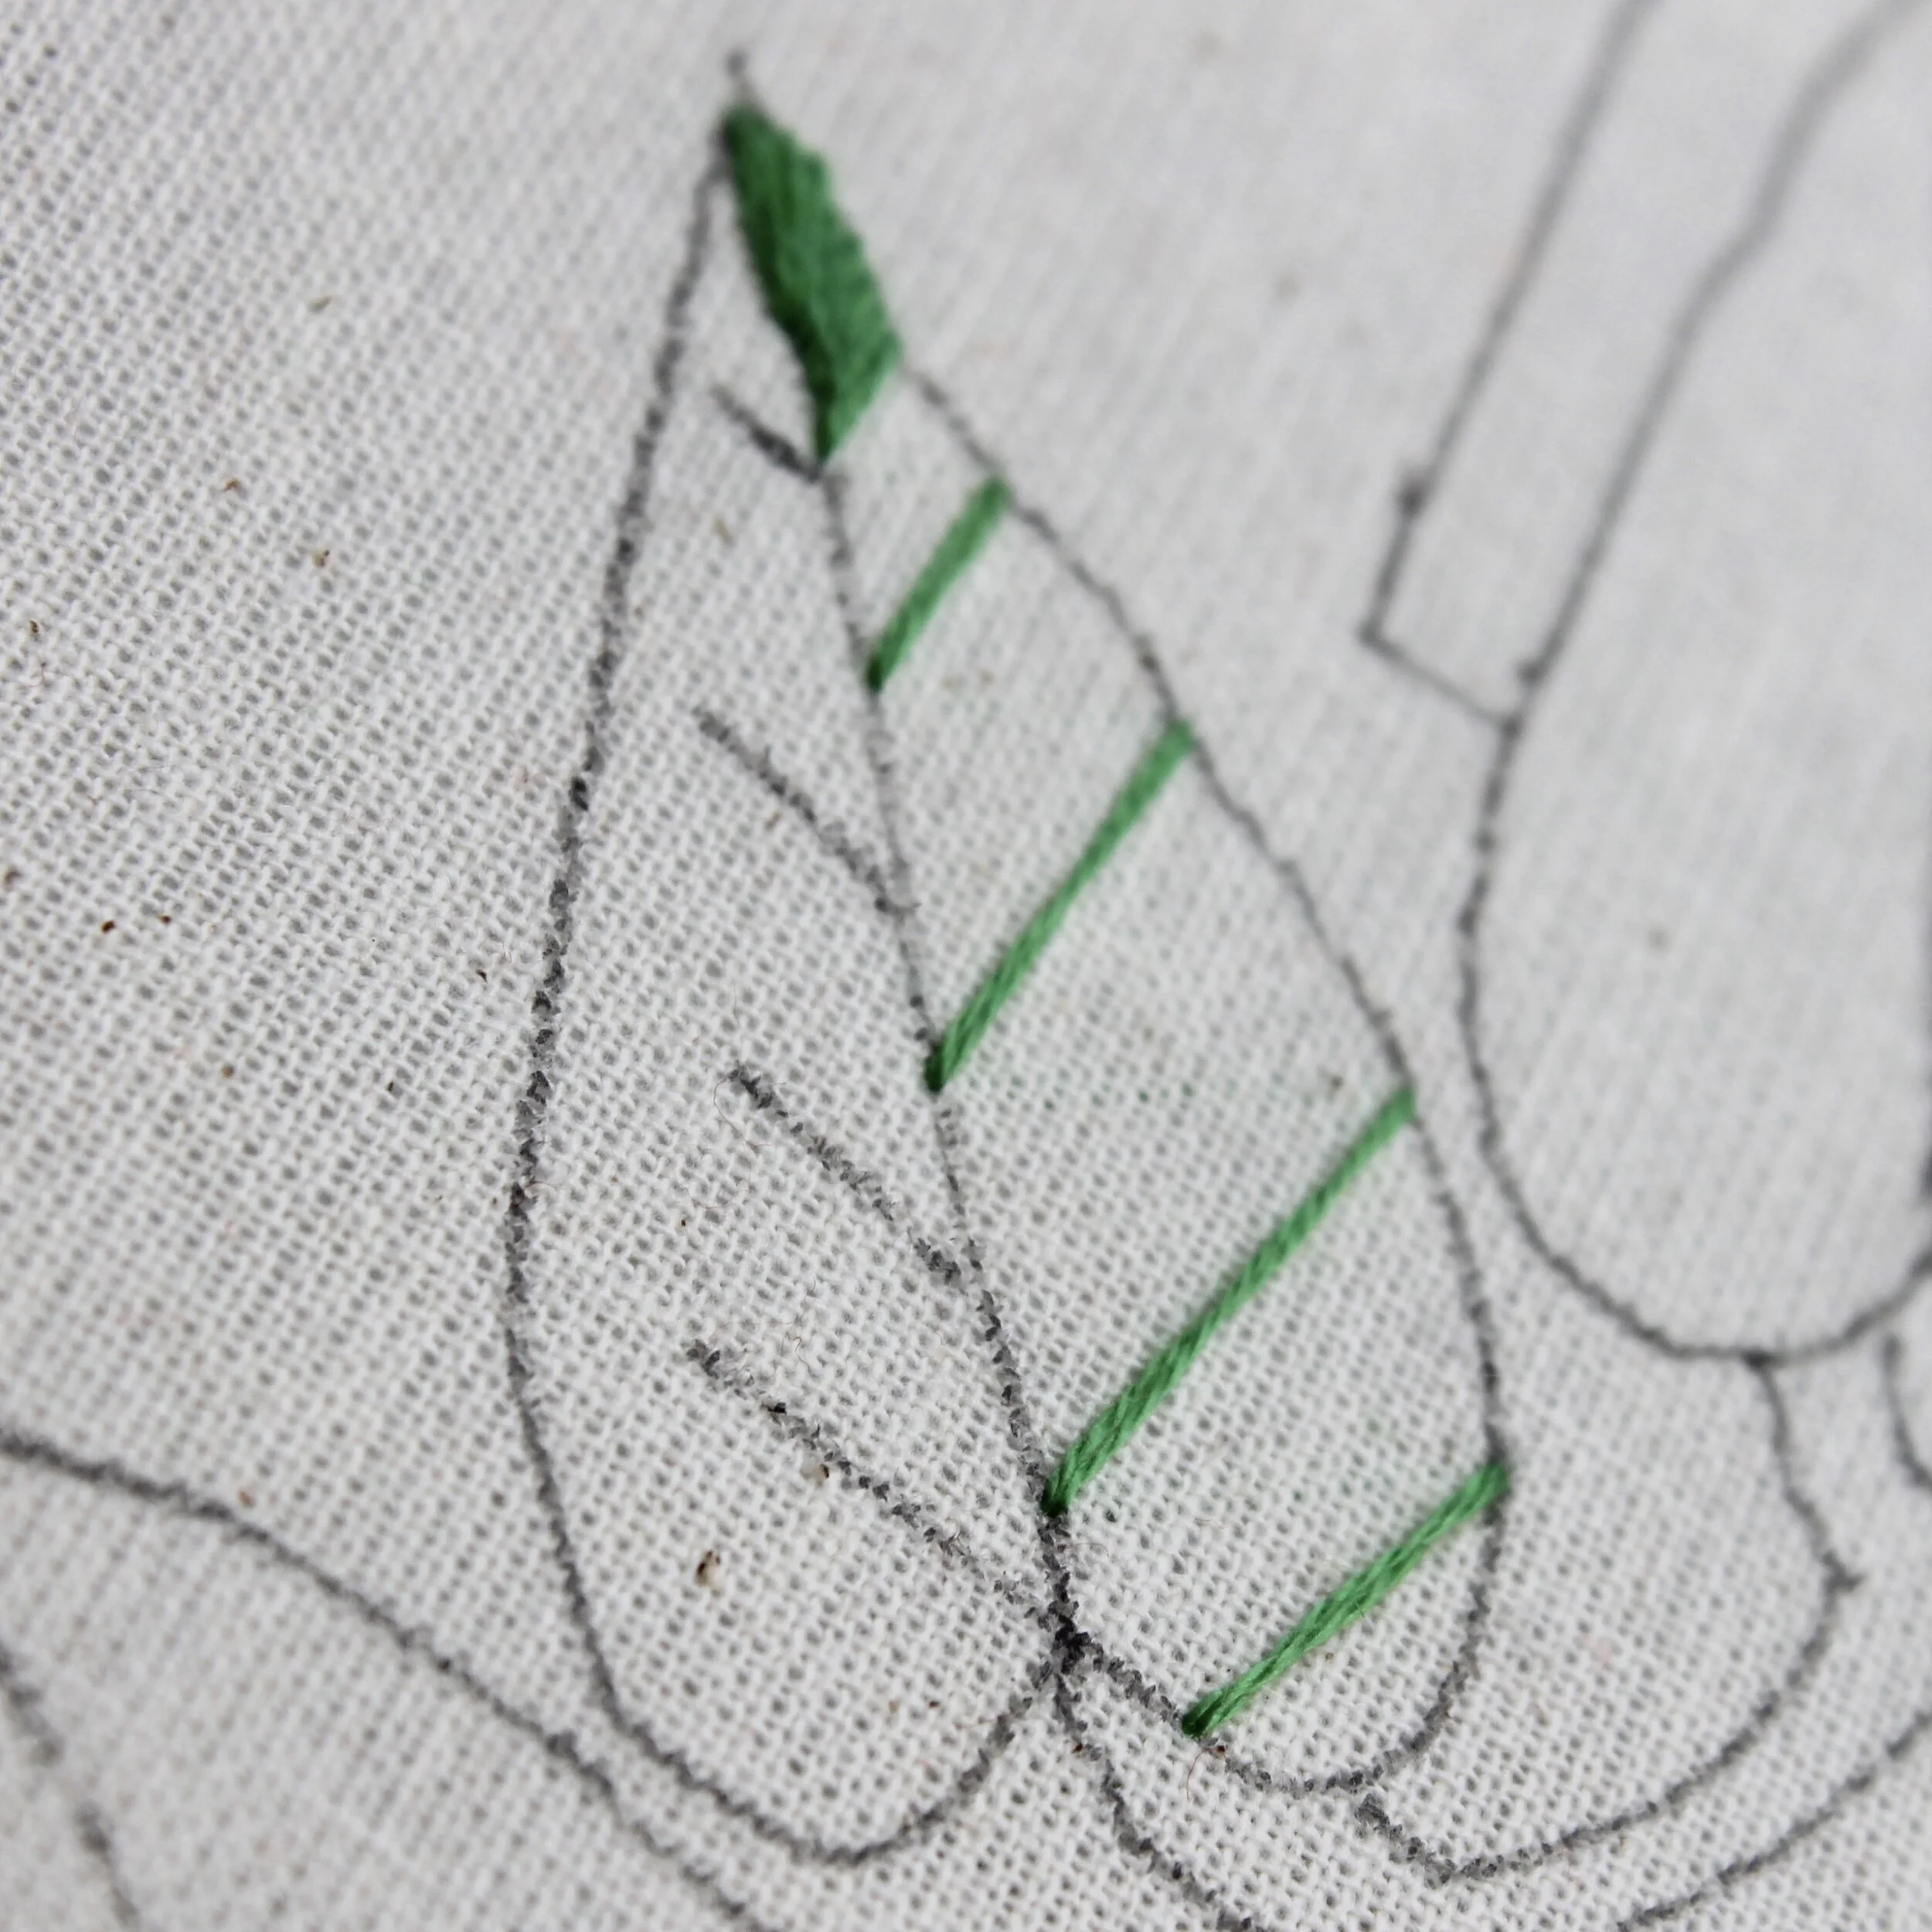
One of the most difficult things with covering a large area with satin stitch is to keep the stitches all at the same angle. You can draw guidelines to follow, but I like to create guidelines with stitches, these smaller areas can then be filled in bit by bit and it’s easier to maintain the direction of the stitches.

Want to try this stitch? It’s one I recommend using in my snowdrop kit and my floral sampler kit.

A picture of abstract shapes of satin stitch in shades of yellow, purple and pinks on a mustard fabric background.
A picture of satin stitch covering a leaf showing thread and pen guidelines

Enjoyed this blog post? I share embroidery tips and a free embroidery pattern in my monthly newsletter. Sign up here to receive the newsletter on the 1st of each the month.
In stitch showcase 1 Tags Stitch Showcase, Filling Stitch
Comment
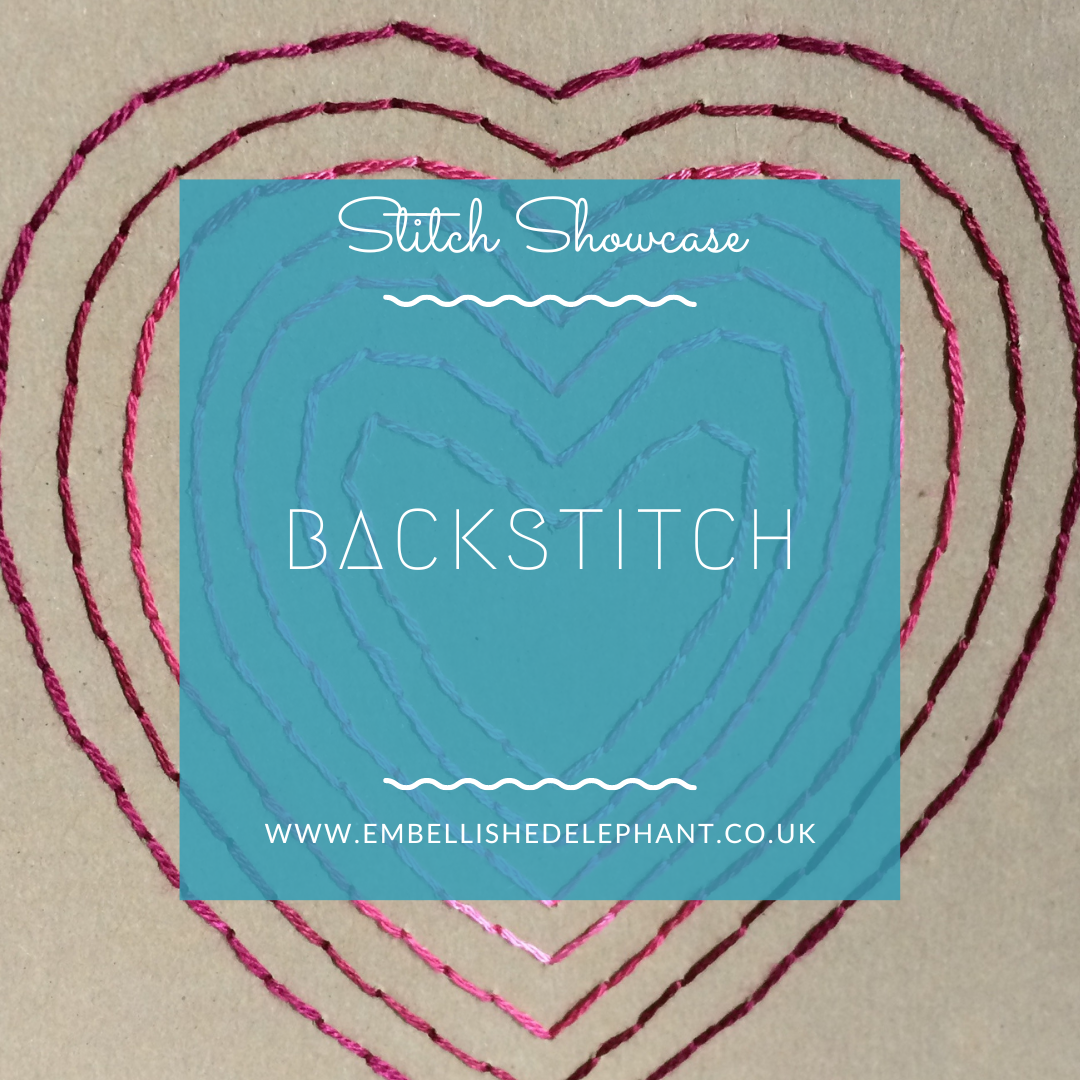
A picture of hearts stitched in concentric shapes in differing shades of pinks on kraft card. Overlaid is a blue square with white text saying - stitch showcase, backstitch, www.embellishedelephant.co.uk

Stitch Showcase: Backstitch

September 16, 2020

As with running stitch, backstitch is another basic stitch in both hand embroidery and sewing. It is the perfect stitch to use to hand sew fabric together if you are making an item from your embroidered fabric. For embroidery it is great for adding simple details as it can be worked in a straight line or curve.

  • To create the stitch bring the needle up from the back of the fabric (A)

  • Take it back down a few millimetres along (B)

  • Bring the needle up again a few millimetres further along from the first stitch (C)

  • To make the second stitch join onto the first taking the needle down in the same place you completed the first stitch (B)

  • Bring the needle up at (D) and take it down through the fabric at (C)

  • Repeat for the length required.

An illustration of how to stitch backstitch. The illustration is in blue on a white background

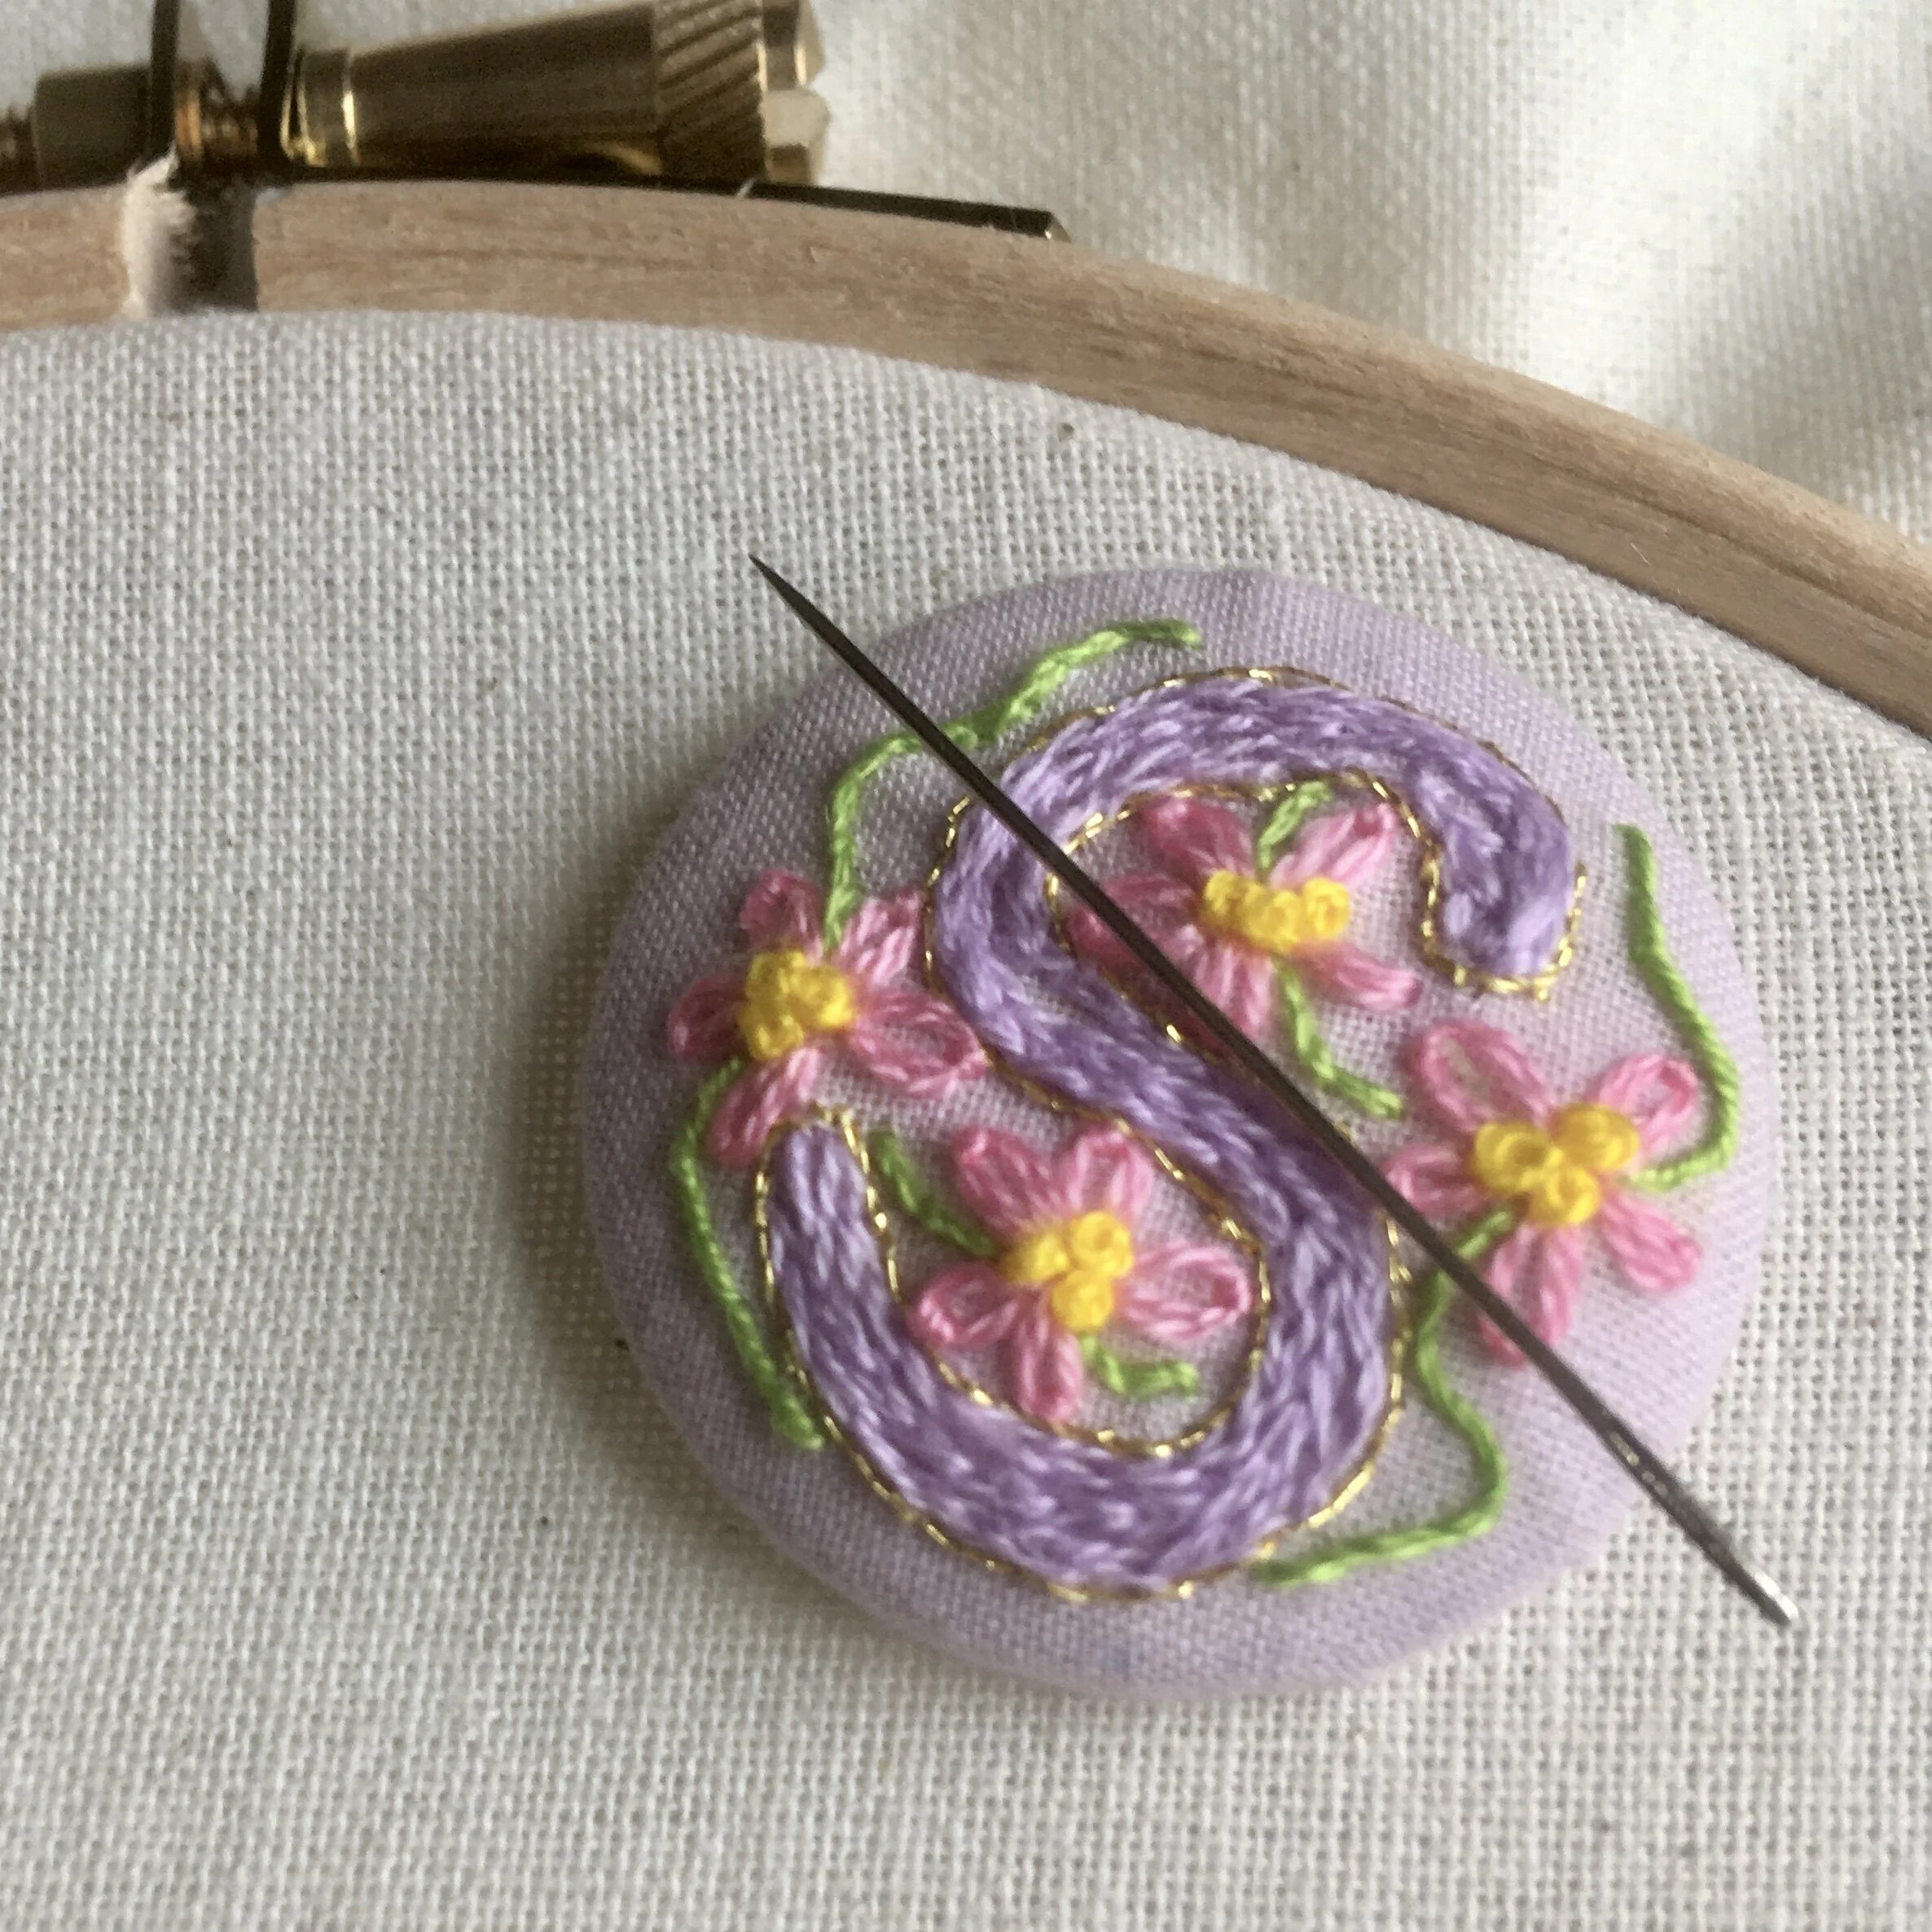
Backstitches can be short or long, and can be stitched in straight lines, curves or patterns but backstitch look best when the stitches are of an even length. It is commonly used to outline a section of embroidery, the gold outline of the monogrammed needle minder below is stitched in backstitch. It is great for stitching on paper as it only uses three holes per two stitches as shown in the header picture.

Want to try this stitch? It is one I suggest using in my floral sampler kit.

IMG_5349.JPG
A picture of an embroidered needle minder holding and embroidery needle on the edge of a hoop. The needle minder is stitched on purple fabric with a purple S and pink flowers

Enjoyed this blog post? I share embroidery tips and a free embroidery pattern in my monthly newsletter. Sign up here to receive the newsletter on the 1st of each the month.
In stitch showcase 1 Tags Stitch Showcase, Line Stitch
Comment
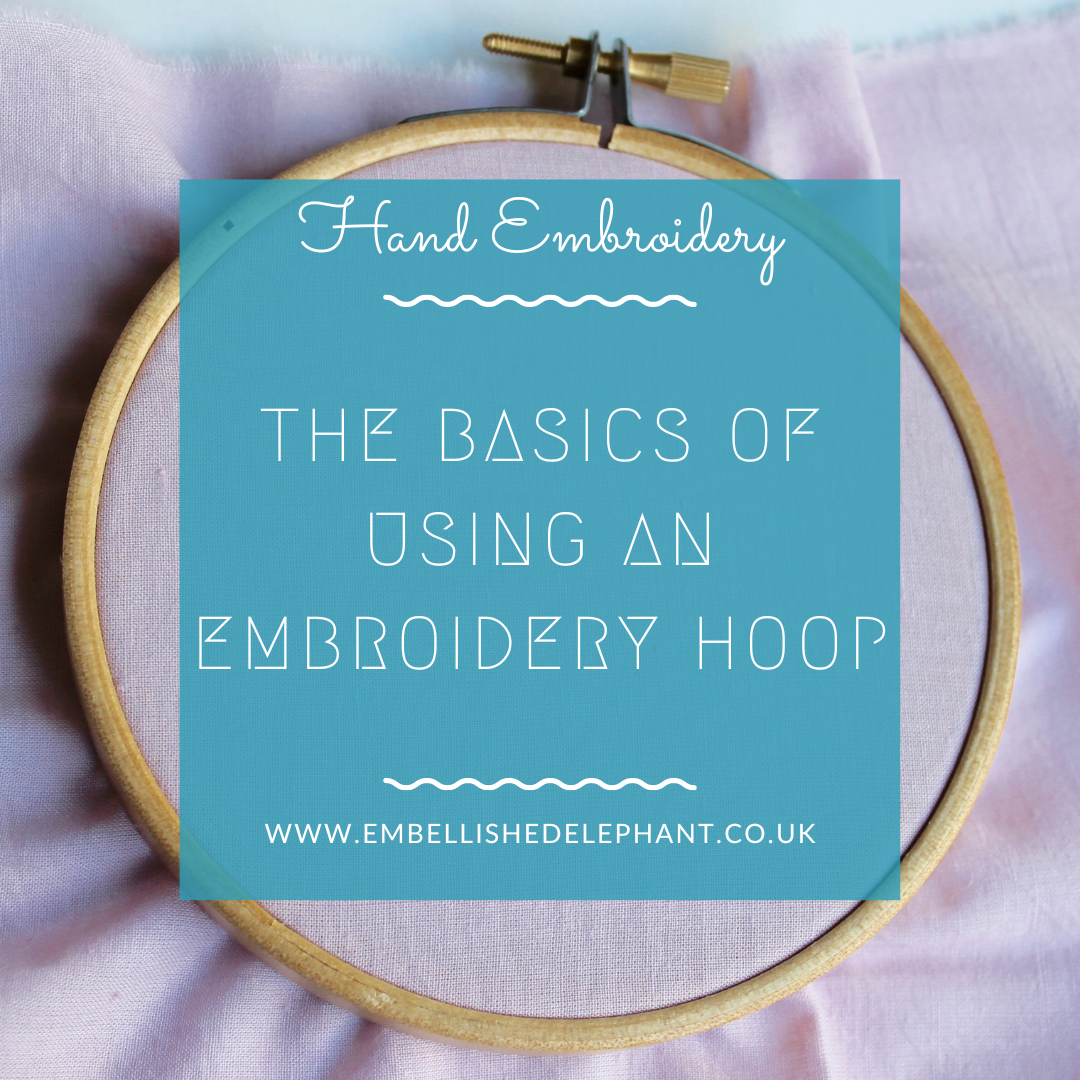
A picture of some pink fabric in a wooden embroidery hoop. Overlaid is a blue square with white text saying - hand embroidery, the basics of using an embroidery hoop, www.embellishedelephant.co.uk

The basics of using an embroidery hoop

September 12, 2020

An embroidery hoop is vital to creating a great finished look for your embroidery project.

It’s important to stretch the fabric taut to keep the stitches you make even, if the fabric is too lose then you will often unwittingly pull the stitches marginally too tight meaning the fabric can’t lie flat due to the uneven tension when you remove it from the hoop.

There are a few different types of embroidery hoop, but the most common is the wooden hoop with a screw fixture.

Ideally the size of the hoop should be big enough to display the whole area you are going to stitch but this isn’t vital unless you are working with beads or other embellishments.

  • To get started loosen the screw slightly (you don’t need to unscrew it all the way) until the inner hoop separates from the outer hoop.

  • Lie the inner hoop down and place the ironed fabric over the inner hoop so that it is central.

  • Place the outer hoop over the inner hoop and gently press down, you may need to unscrew the outer hoop a little further if you have any difficulty in pushing the outer hoop down.

  • The tighten the screw as tight as you can so that the fabric is like the skin of a drum, you can pull each side of the fabric to make sure it is as taut as possible.

Enjoyed this blog post? I share embroidery tips and a free embroidery pattern in my monthly newsletter. Sign up here to receive the newsletter on the 1st of each the month.
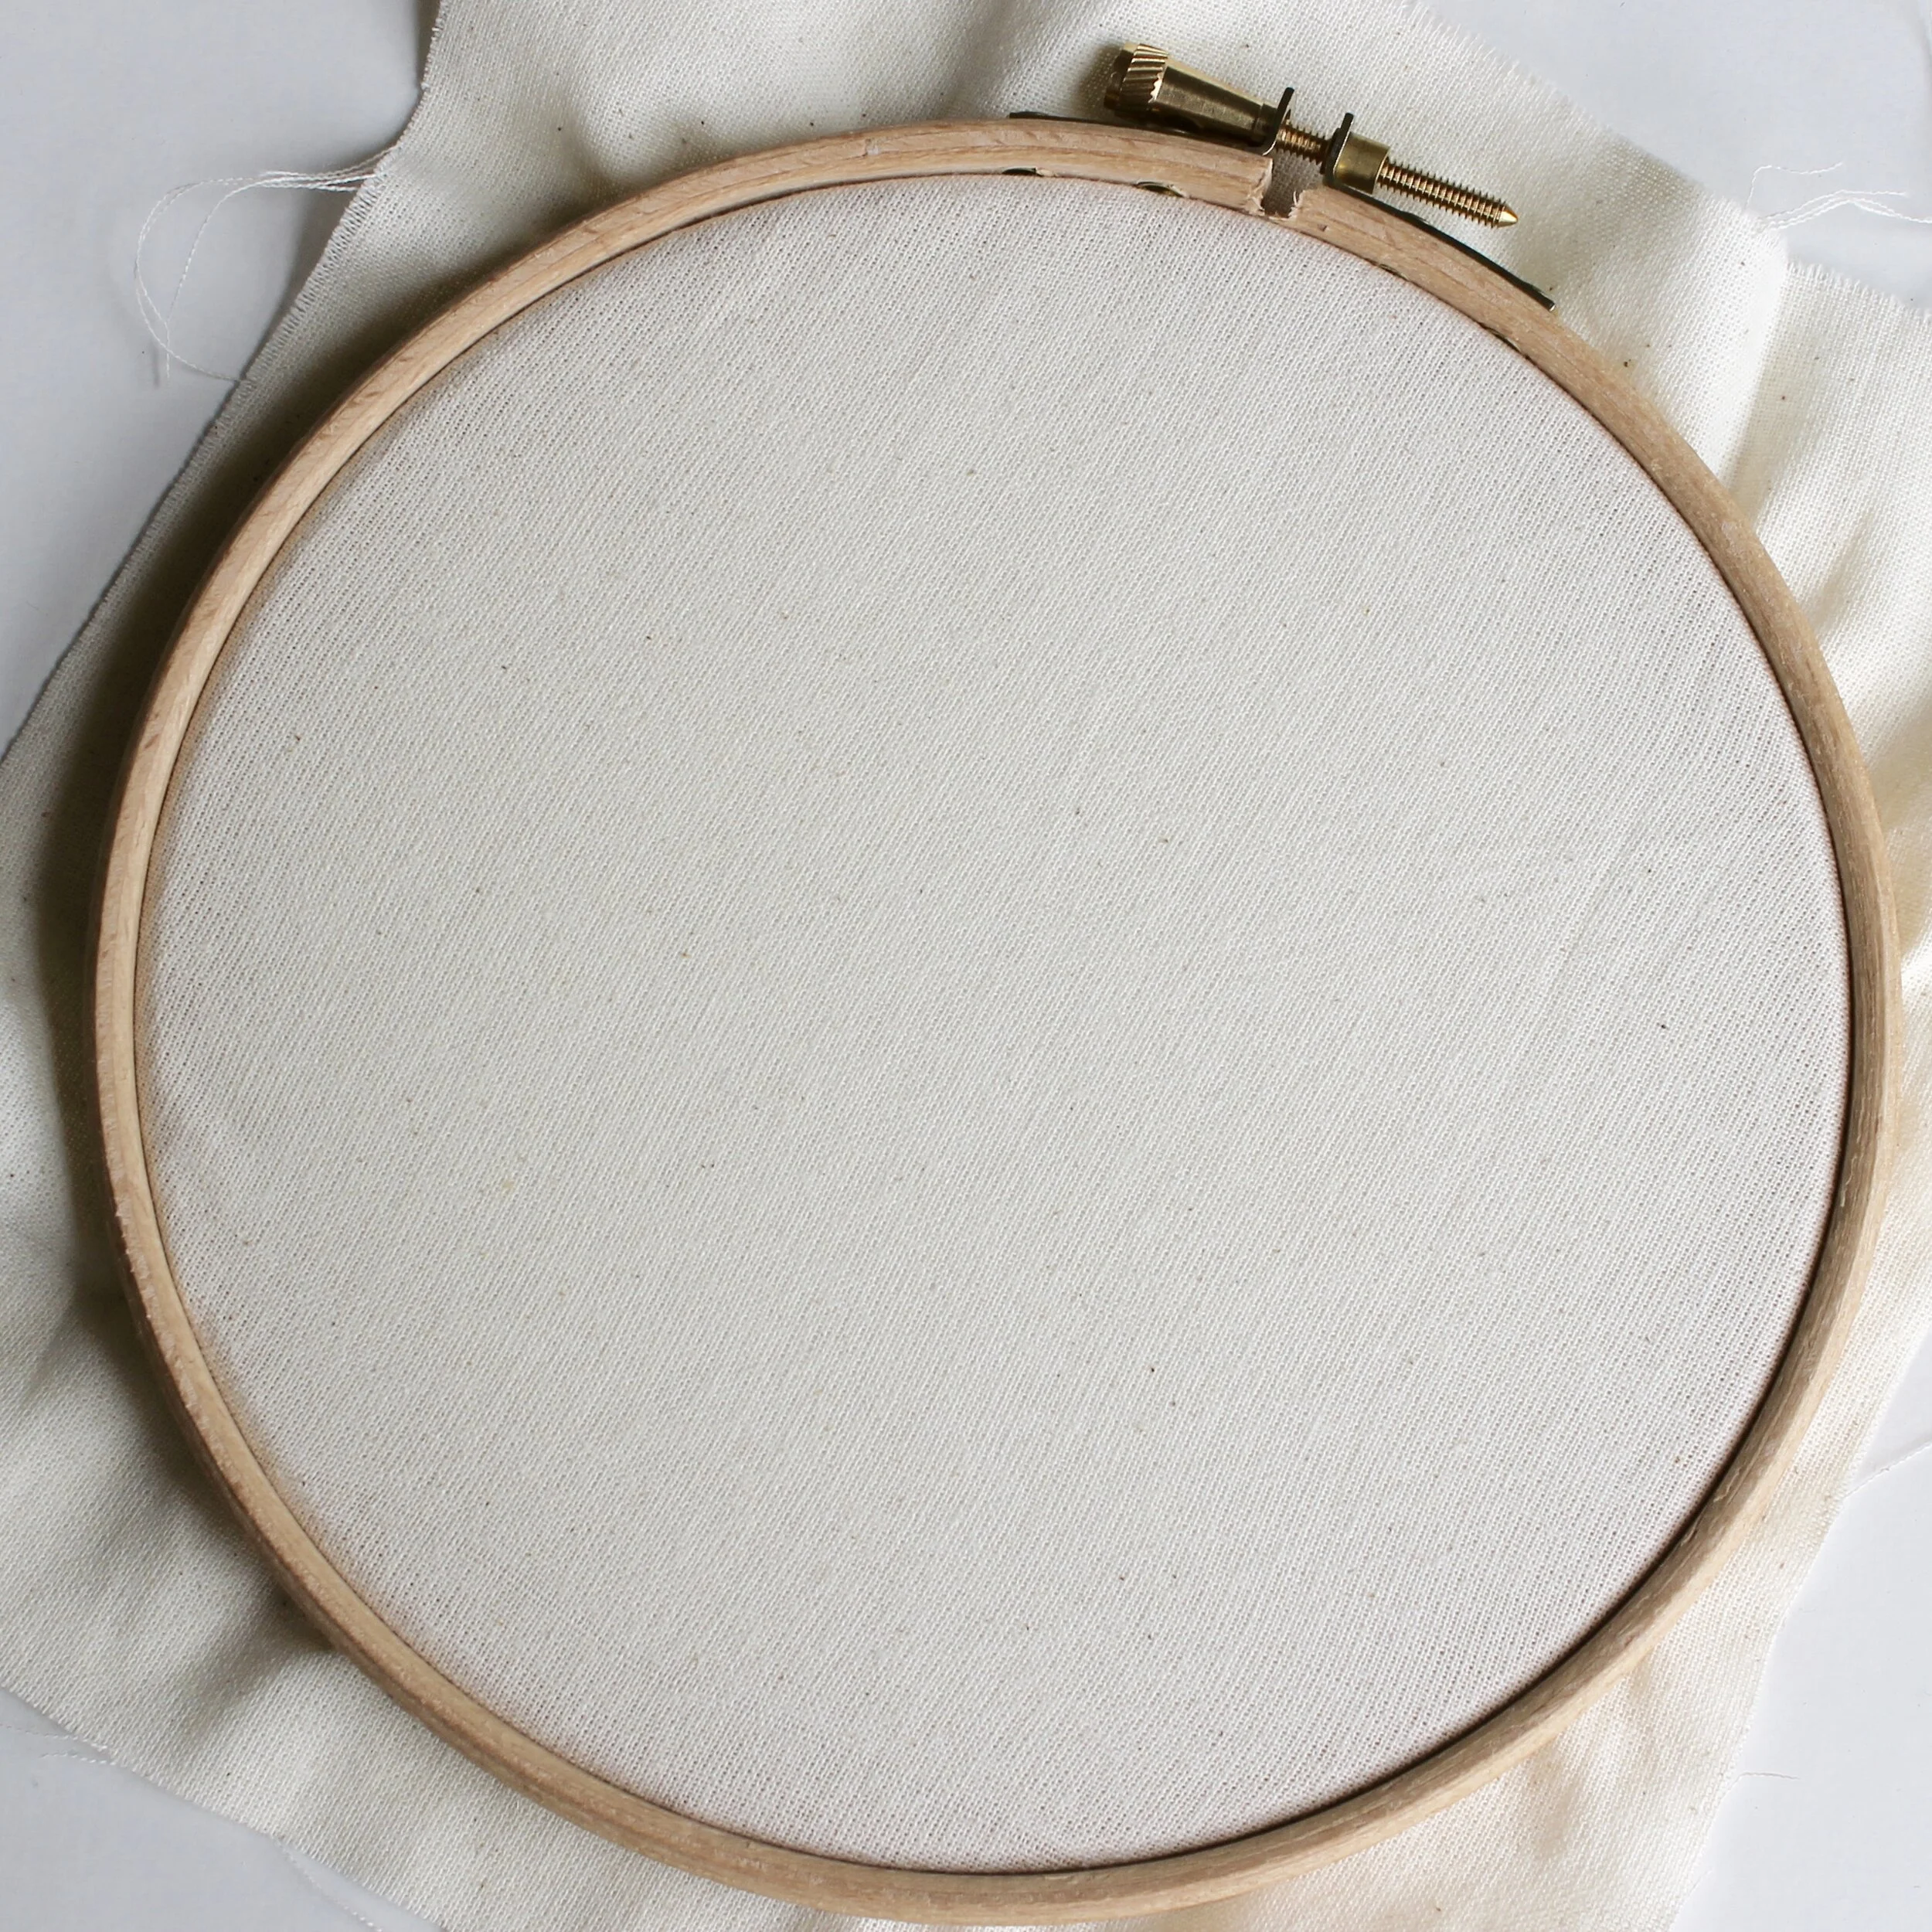
a picture of some calico fabric in a wooden embroidery hoop
In tips 2 Tags Hoops, Basics
Comment
← Newer Posts Older Posts →
No results found

Tags

  • Artists/Designers
  • Basics
  • Christmas
  • colour
  • Couching Stitch
  • Fabric
  • Filling Stitch
  • Finishing
  • Hoops
  • Isolated Stitch
  • Line Stitch
  • London
  • My Makes
  • Needles
  • Raised Stitch
  • Stitch Showcase
  • Texture Stitch
  • Thread
  • Transfer
  • Travel

Latest Posts

Featured
how to make an embroidered eye pillow or sachet
August 1, 2026
How to make an embroidered eye pillow or sachet
August 1, 2026
Read more →
August 1, 2026
focus_on_embroidery_knots
June 1, 2026
Focus on knots
June 1, 2026
Read more →
June 1, 2026
focus_on_stranded_floss
May 1, 2026
Focus on stranded floss
May 1, 2026
Read more →
May 1, 2026
focus_on_raised_stitches
April 1, 2026
Focus on raised stitches
April 1, 2026
Read more →
April 1, 2026
thread tangles.png
February 15, 2026
Tips for unpicking thread tangles
February 15, 2026
Read more →
February 15, 2026
additional_elements.png
February 1, 2026
How to add elements to a basic embroidery pattern
February 1, 2026
Read more →
February 1, 2026
using yarn.png
December 1, 2025
Using yarn in embroidery
December 1, 2025
Read more →
December 1, 2025
how long is a piece of thread
November 15, 2025
How long is a piece of thread?
November 15, 2025
Read more →
November 15, 2025
vintage books.png
November 1, 2025
What can you learn from vintage embroidery books
November 1, 2025
Read more →
November 1, 2025
understanding embroidery needle sizes
October 15, 2025
Understanding embroidery needle sizes
October 15, 2025
Read more →
October 15, 2025

Home — Shop — Stockists — Wholesale — Portfolio — Contact — Reviews — Policies — FAQs