• Home
  • Shop
  • Stitch Showcase
  • Embroidery tips
  • Freebies
  • About
  • Contact
Menu

Embellished Elephant

  • Home
  • Shop
  • Stitch Showcase
  • Embroidery tips
  • Freebies
  • About
  • Contact
A picture of some white drawn thread embroidery. Overlaid is a blue square with white text saying - hand embroidery, what is perle (pearl) thread?, www.embellishedelephant.co.uk

What is perle (pearl) thread?

September 7, 2022

The most common embroidery thread that you can buy in shops is six stranded embroidery floss. But you may also come across a type of thread called pearl or perle.

Pearl (or perle) thread is not stranded thread which means that you can’t separate out the strands to stitch with. You need to use the thread as it comes. It is therefore a much thicker thread and whilst you can use it for embroidery there are few things to bear in mind.

  • You’ll need a needle with a larger eye

  • Fewer stitches are needed to fill an area

  • It has a different texture and sheen to stranded floss

  • It’s great to couch with as it has a thicker texture

  • You need to use it for some styles of embroidery such as Hardanger or drawn thread embroidery (pictured above)

Enjoyed this blog post? I share embroidery tips and a free embroidery pattern in my monthly newsletter. Sign up here to receive the newsletter on the 1st of each the month.

In tips 3 Tags Thread
Comment
An image of a stack of embroidery floss wound onto bobbins, the floss is all different shades of pink. Overlaid is a blue square with white text saying - hand embroidery, which brand of embroidery thread should I use? www.embellishedelephant.co.uk

Which brand of embroidery thread should I use?

August 24, 2022

Like a lot of products, whether it is toothpaste, a phone or a car we have a habit of becoming loyal to one brand. It may be the first one we use, recommended by a friend, the influence of advertising or simply a tried and trusted favourite.

There are several different brands of stranded embroidery floss available as well as thread that is unbranded. The brand that seems most common in haberdasheries and craft shops I’ve visited is DMC, but Anchor is also available. Other brands that offer stranded embroidery floss include Maderia, Paintbox Crafts, Rico, Trimmits and Duchess/Trebla

What to look out for in the floss you use:

  • Range of colours - as different brands have different looks to their thread, it is a good idea to pick all the threads for a project from the same brand

  • Composition - is it 100% cotton or mixed with other fibres such as acrylic, different thread compositions have different sheens and strength

  • Texture - some threads are ‘fluffier’ than others ie you can see the fibres sticking out from the main thread

  • Colour fastness - if you stitch items that will be washed then this is an important consideration

  • Cost - tends to indicate quality, although there are plenty of cheap poundshop threads that I’ve loved stitching with

DMC is the most widely available and the most popular for a reason. It comes in a wide range of colours and have a smooth texture that gives a lovely sheen to the finished stitching.

However, I also like stitching with Duchess/Trebla which has more cotton texture and a more matt look. It suits my style of embroidery.

Over the years my stash of floss is a real mish-mash. It is made up of floss I’ve specifically purchased for a project, left over floss that came in a kit I bought or spur of the moment impulse pound shop purchase.

In other words, most of the time it doesn’t matter what brand of floss you stitch with, just pick one that best fits your needs and your budget.

Enjoyed this blog post? I share embroidery tips and a free embroidery pattern in my monthly newsletter. Sign up here to receive the newsletter on the 1st of each the month.

In tips 3 Tags Thread
Comment
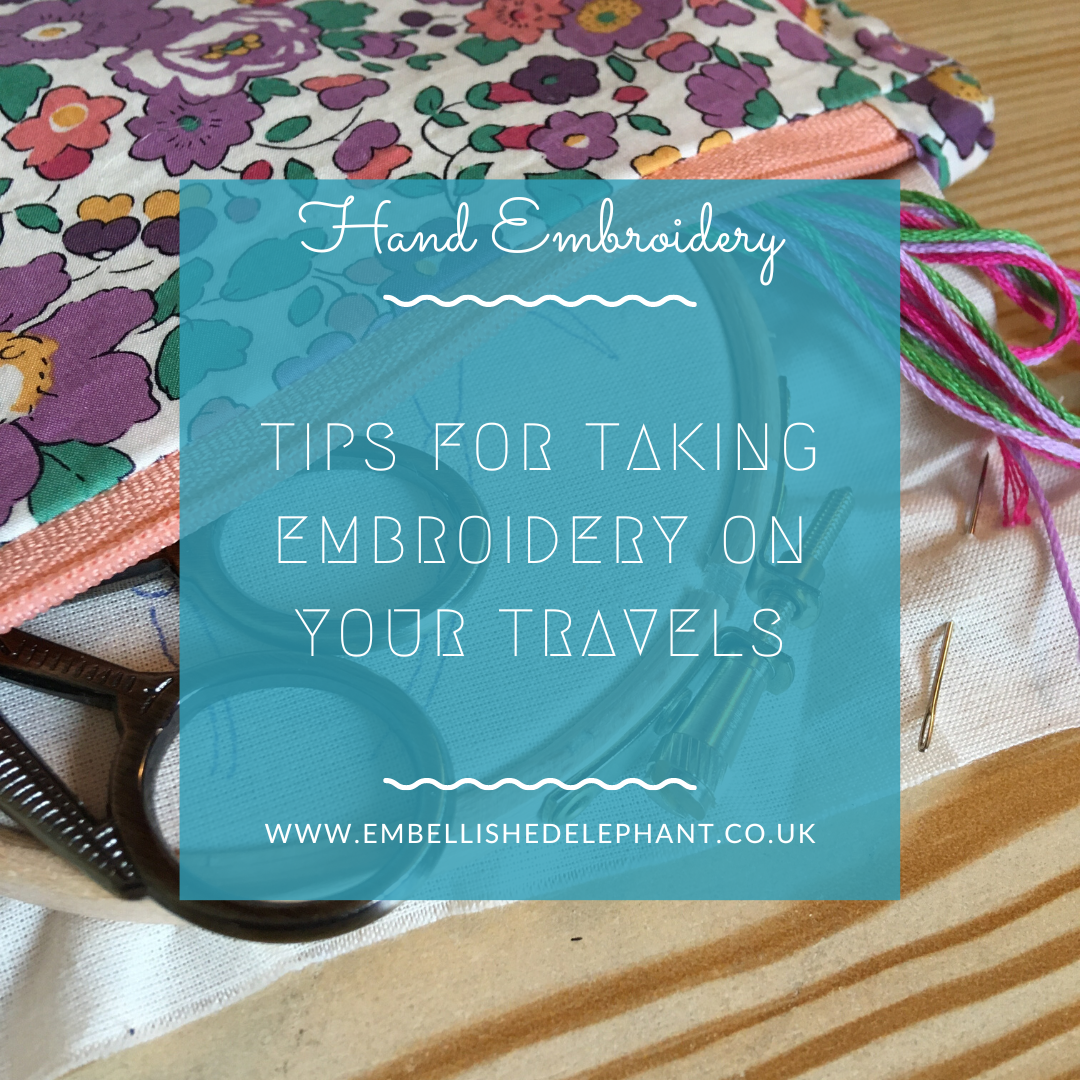
A picture of a zippered pouch with embroidery supplies coming out of the opening. Overlaid is a blue square with white text saying - hand embroidery, tips for taking embroidery on your travels, www.embellishedelephant.co.uk

Tips for taking embroidery on your travels

August 10, 2022

I take an embroidery project whenever I head away, especially if I have a train or plane journey.

Knowing how many supplies to pack can be difficult, especially on longer trips as I don’t want to finish off the project a few days into the trip and then have nothing to do for the rest of the holiday. But I also don’t want to take so much that I end up not touching half of it. Here are my tips on what to pack:

1. Have a project pouch.

I have a pouch which is around A5 size and fits up to a 5 inch embroidery hoop as well as sufficient thread fabric and tools.

2. Pick your hoops carefully

Hoops are the bulkiest item so I suggest picking projects that use the same size hoop when travelling. Extra fabric for additional projects can be folded flat. But if you are only taking one hoop make sure it is a good one - learn from my mistake.

3. Select projects with the same colour palette

This will minimise the number of different threads that you need to pack but also make sure that you have another project to go onto if you finish the first.

4. Take just the thread you need

You might not need to take full skeins of thread. Some patterns may only need a tiny amount of one colour. I take cut lengths about 1m long each but I’m quite experienced at estimating the amount of floss needed. Cut lengths are also helpful if you can’t access your scissors or they are confiscated at the airport!

5. Slim down your tools

I have a needle case where I store all my needles, but I don’t take that on holiday, I have a slimmed down version (a gorgeous felt owl needle case from the Winter 2021 craftpod) where I pack a few different needles, a pin and a pair of scissors. I’ll also take a needle minder as stitching on the move increases your chance of loosing your needle.

6. Check any restrictions

If you are travelling by plane then there you also need to consider any airline restrictions regarding scissors. Most scissors under 6 inches should be fine, but I always travel with a pair I’m prepared to part with. Alternatively there are thread cutters such as this available but the last time I travelled with this my bag was searched and it it caused more confusion than a pair of scissors.

Enjoyed this blog post? I share embroidery tips and a free embroidery pattern in my monthly newsletter. Sign up here to receive the newsletter on the 1st of each the month.

In tips 3
Comment
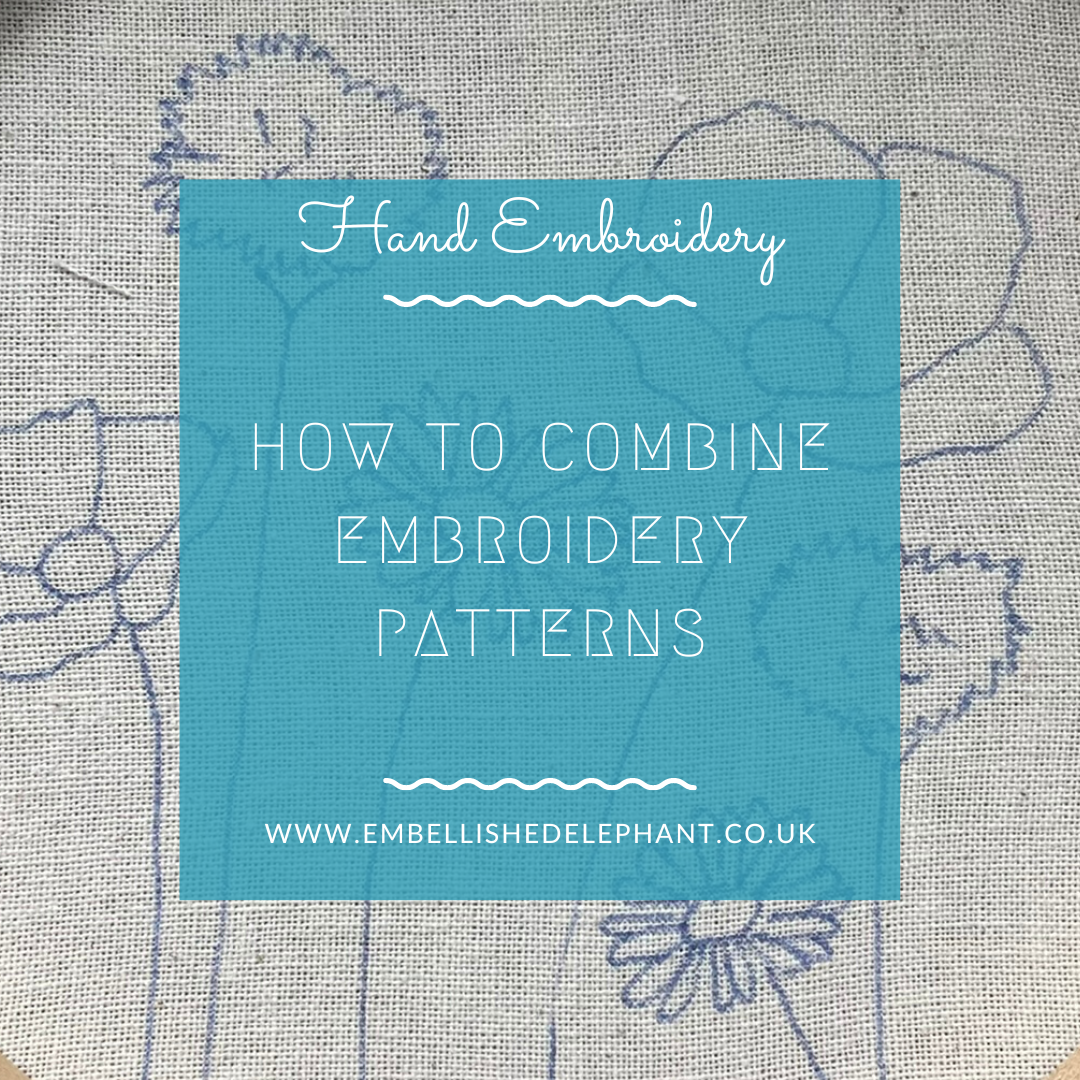
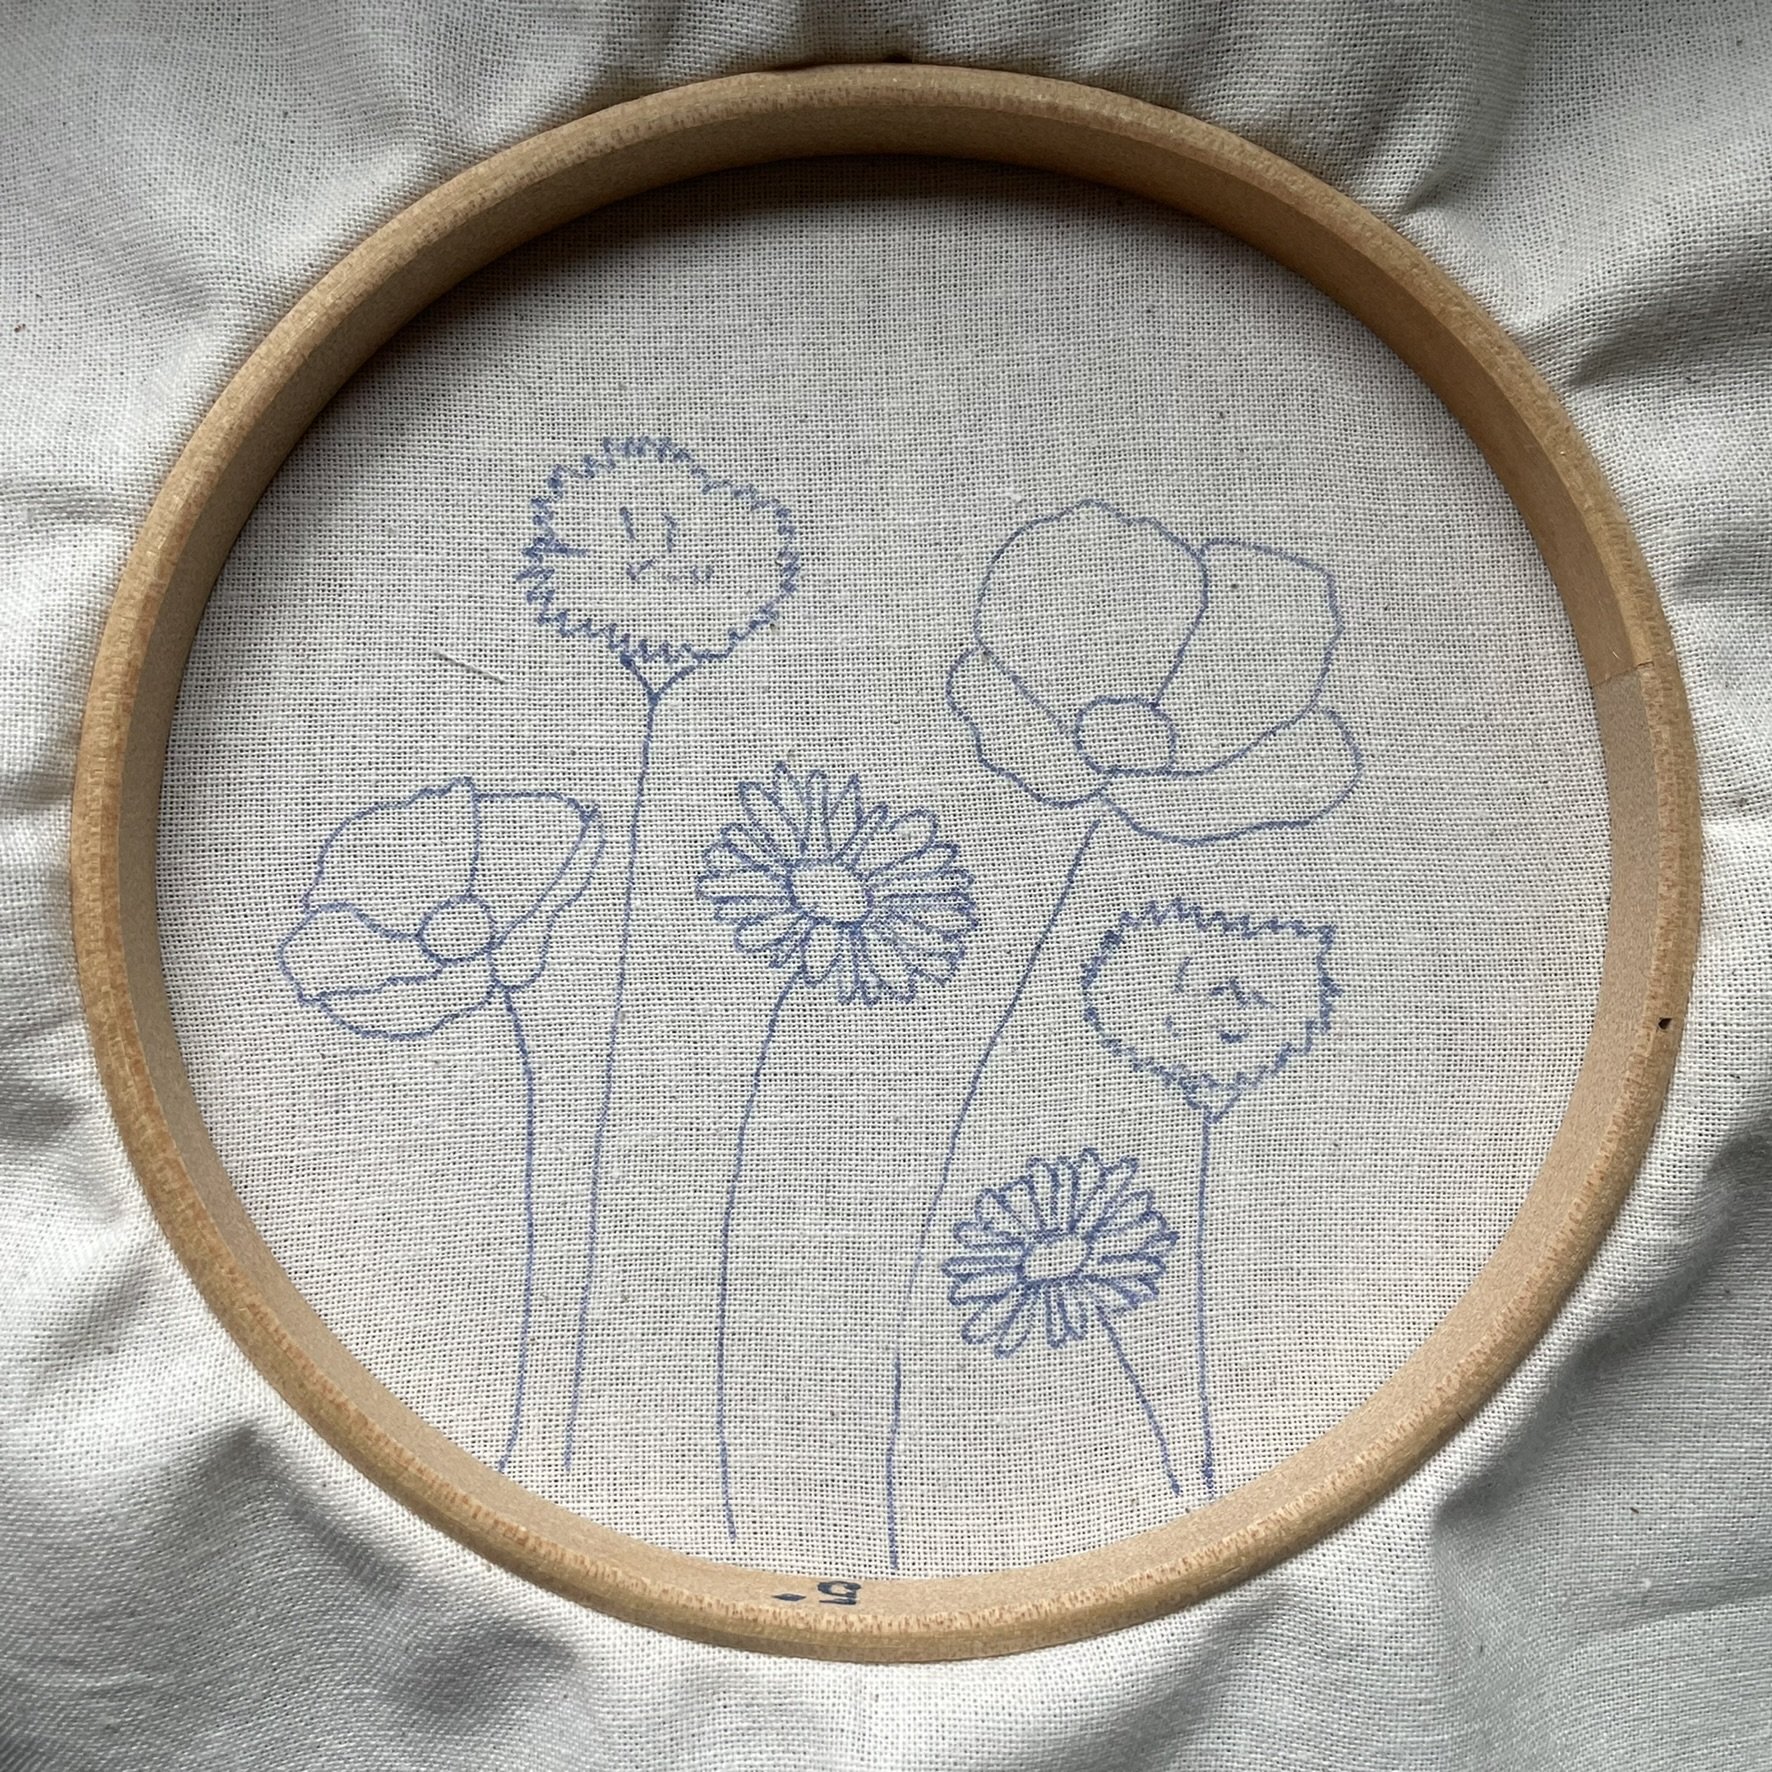
An image of flowers drawn onto calico fabric in blue pen. Overlaid is a blue square with white writing saying - hand embroidery, how  to combine embroidery patterns, www.embellishedelephant.co.uk

How to combine embroidery patterns

July 27, 2022

When I design patterns I focus on one type of flower at a time. But in a garden or in the wild, flowers don't grow in isolation, they nestle next to each other.

In this blog post I’ll outline how you can take the elements of different patterns to make your own unique embroidery.

Inspired by this photo snapped during Summer 2020 in Peckham Rye Park, London I combined my cornflower, poppy and daisies patterns.

The approach I suggest is to trace each element onto the fabric in turn to build up your design.

1. Download patterns

Start by downloading the patterns you want to use. I recommend working with the digital versions of patterns to allow you to re-size the different flowers.

If you’ve not used or transferred from a digital pattern before then this blog post guides you through how do to this.

2. Trace the first element

Pick the first flower to trace. I recommend picking the largest flower or the one you want to feature. I started with the poppy. You can either trace one of this first flower or several.

3. Add the next layers

When adding the next layers of flowers consider the following when creating your composition and tracing the elements:

  • Size - varying the size can help make one flower stand out more

  • Height - you can place all the flowers in a neat row of the same height, but I like to vary the height

  • Spacing - I have left a gap between each flower but you can decide to overlap the flowers to make a denser composition

  • Colour - consider where you place flowers of different colours, in my design I wanted a scattered natural look so I’ve mixed up the flowers and colours accordingly.

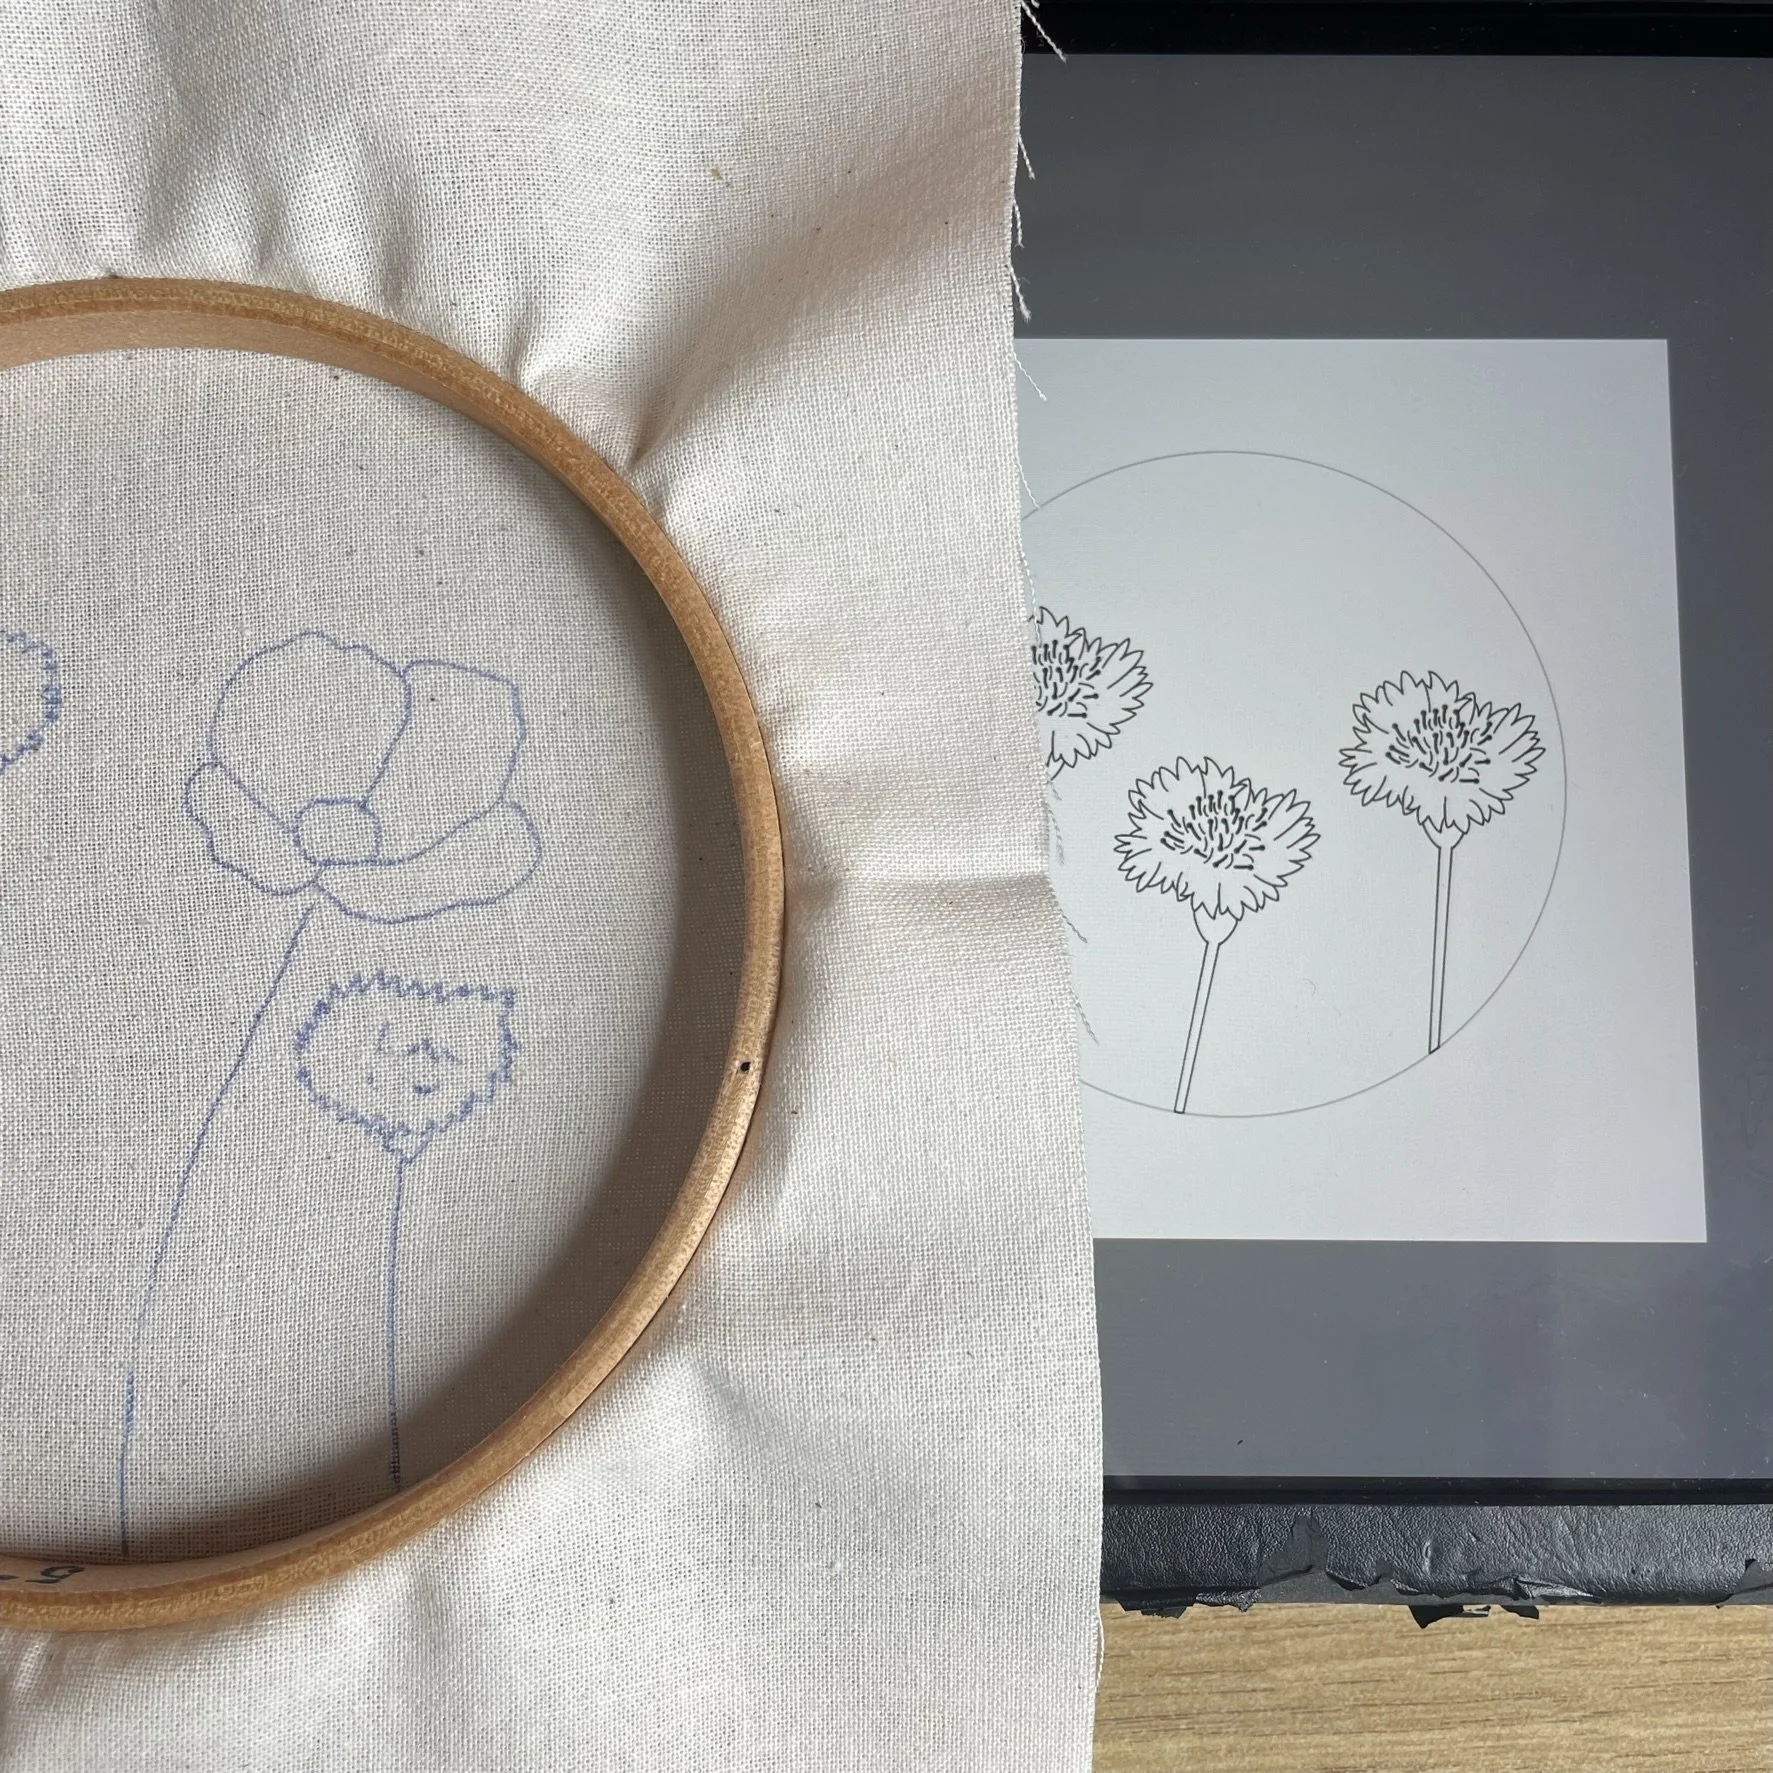
A picture of a tablet with a cornflower embroidery pattern on the screen. On top of the tablet to the left is an embroidery hoop with poppies and cornflowers drawn on calico fabric in blue pen
Final traced pattern using poppies, cornflower and daisy pattern. Drawn on calico fabric with blue pen.

Enjoyed this blog post? I share embroidery tips and a free embroidery pattern in my monthly newsletter. Sign up here to receive the newsletter on the 1st of each the month.

In tips 3 Tags Transfer
Comment
A picture of a flat lay of some pink craft materials on a white background. Overlaid is a blue square with white text saying, hand embroidery, activities when you are short on time but want to do something embroidery related,

Activities when you are short on time but want to do something embroidery related

July 13, 2022

Hand embroidery takes time. Although it is a portable craft and can easily be picked up and put down, sometimes just the thought of how much time and embroidery might take puts you off starting or carrying on a project.

Inspired by this blog post by Seamwork, here are some quick ideas to do something embroidery related aside from actually stitching:


1.Browse any existing kits or patterns or unfinished projects

Try putting them in an order that you want to tackle them in starting with the ones that bring you joy or you know won’t take much time to finish off.

2. Search out some new patterns

Even if you have a stack of patterns that you are really keen to make, there’s no harm in seeing what else is out there. Try searching Pinterest for patterns in a particular theme or browse somewhere like DMC which has a library of free patterns.

3. Browse social media to discover new embroidery artists

Instagram is great of visual media such as embroidery. Browse using hashtags and if you don’t want to follow lots of new people save your favourite post so you can come back to it later for inspiration

4. Sign up to some embroidery related email lists

Increasingly embroidery artists are also connecting with people via email lists. Sign up to some mailing lists to get some regular doses of inspiration to your inbox. You can always set up a rule or a separate inbox if you don’t want to have them all going into your main inbox.

5. Create your own designs

You don’t have to be able to draw very well, you could just jot in your note book ‘snowdrop design’ or save a photo that inspires you. If you are a doodler then sketch out an idea either in a note book. Procreate app has really helped me when I have the urge to design a pattern.

6. Pick a colour palette

Browse your stash of threads and pick out some colours you want to work with. This is particularly great for creating abstract pieces. Alternatively find a photo with colours that you love and use a colour picker such as this one to generate a colour palette for you.

7. Browse a stitch directory

I have some stitches that I always use and don’t tend to venture outside of these. Browsing a stitch directory such as my stitch showcase series may give you ideas of stitches you want to try.

8. Look through embroidery books or magazines

If you have some of these on your shelf then going back to them may give you some ideas. If you don’t have any at hand, try investigating if your local library offers magazines for free via an app. Mollie Magazine and Love Embroidery are offered by my local library. I also love browsing non-embroidery magazines - Frankie and The Simple Things also give me inspiration.

9. Organise your thread stash

I store my floss on bobbins. I find winding skeins onto bobbins is a nice relaxing activity and helps keep my stash in check. It also reminds me of some of the thread colours I have and want to work with.

10. Tidy up your craft area

I have a table next to the sofa where I pop projects that I’m working on. But often the projects start piling up or other non-craft items get added to the pile so periodically I tidy up this area and it often inspires me to want to get stitching.

11. Cut and iron fabric for stitching on

I have an old curtain that I’m slowly cutting up and using for embroidery projects. Getting this out and cutting a section of fabric is a barrier to me starting a project, but if I cut several pieces of fabric in one go I always have a pile of fabric I can pick up and start stitching on (20x20cm works well for 4, 5 and 6 inch embroidery hoops).

12. Transfer patterns onto fabric

You need to transfer the pattern before you start stitching. I will often transfer two or three patterns at a time so I have a pile of projects I could work on.

Enjoyed this blog post? I share embroidery tips and a free embroidery pattern in my monthly newsletter. Sign up here to receive the newsletter on the 1st of each the month.

In tips 3
Comment
A picture of a plastic thread box with lots of different green embroidery threads wound onto bobbins. Overlaid is a blue square with white text that says - hand embroidery, how to pick a colour palette for embroidery, www.embellishedelephant.co.uk

How to pick a colour palette for embroidery

June 29, 2022

With my kits I pick the colour palette for you. When I do this I aim to pick colours that come mostly from the threads that I stock, this helps reduce the amount of different colours I need to hold to fulfil kit orders. Where I can’t find the right shade (it’s always the green that isn’t quite right!) I look to my wider thread stash and thread cards to pick the perfect colour.

With my free patterns, I provide the design and leave the stitch and colour choices to you. I do this for two reasons firstly, I want you to feel like you can make those creative choices for yourself. I know this isn’t how everyone likes to work but the option is there for you to try. Secondly, if you do want a little more support and guidance and to benefit from my stitch and colour expertise then I offer this detail in the paid for version of the pattern.

Here are a few tips to pick a colour palette for your embroidery:

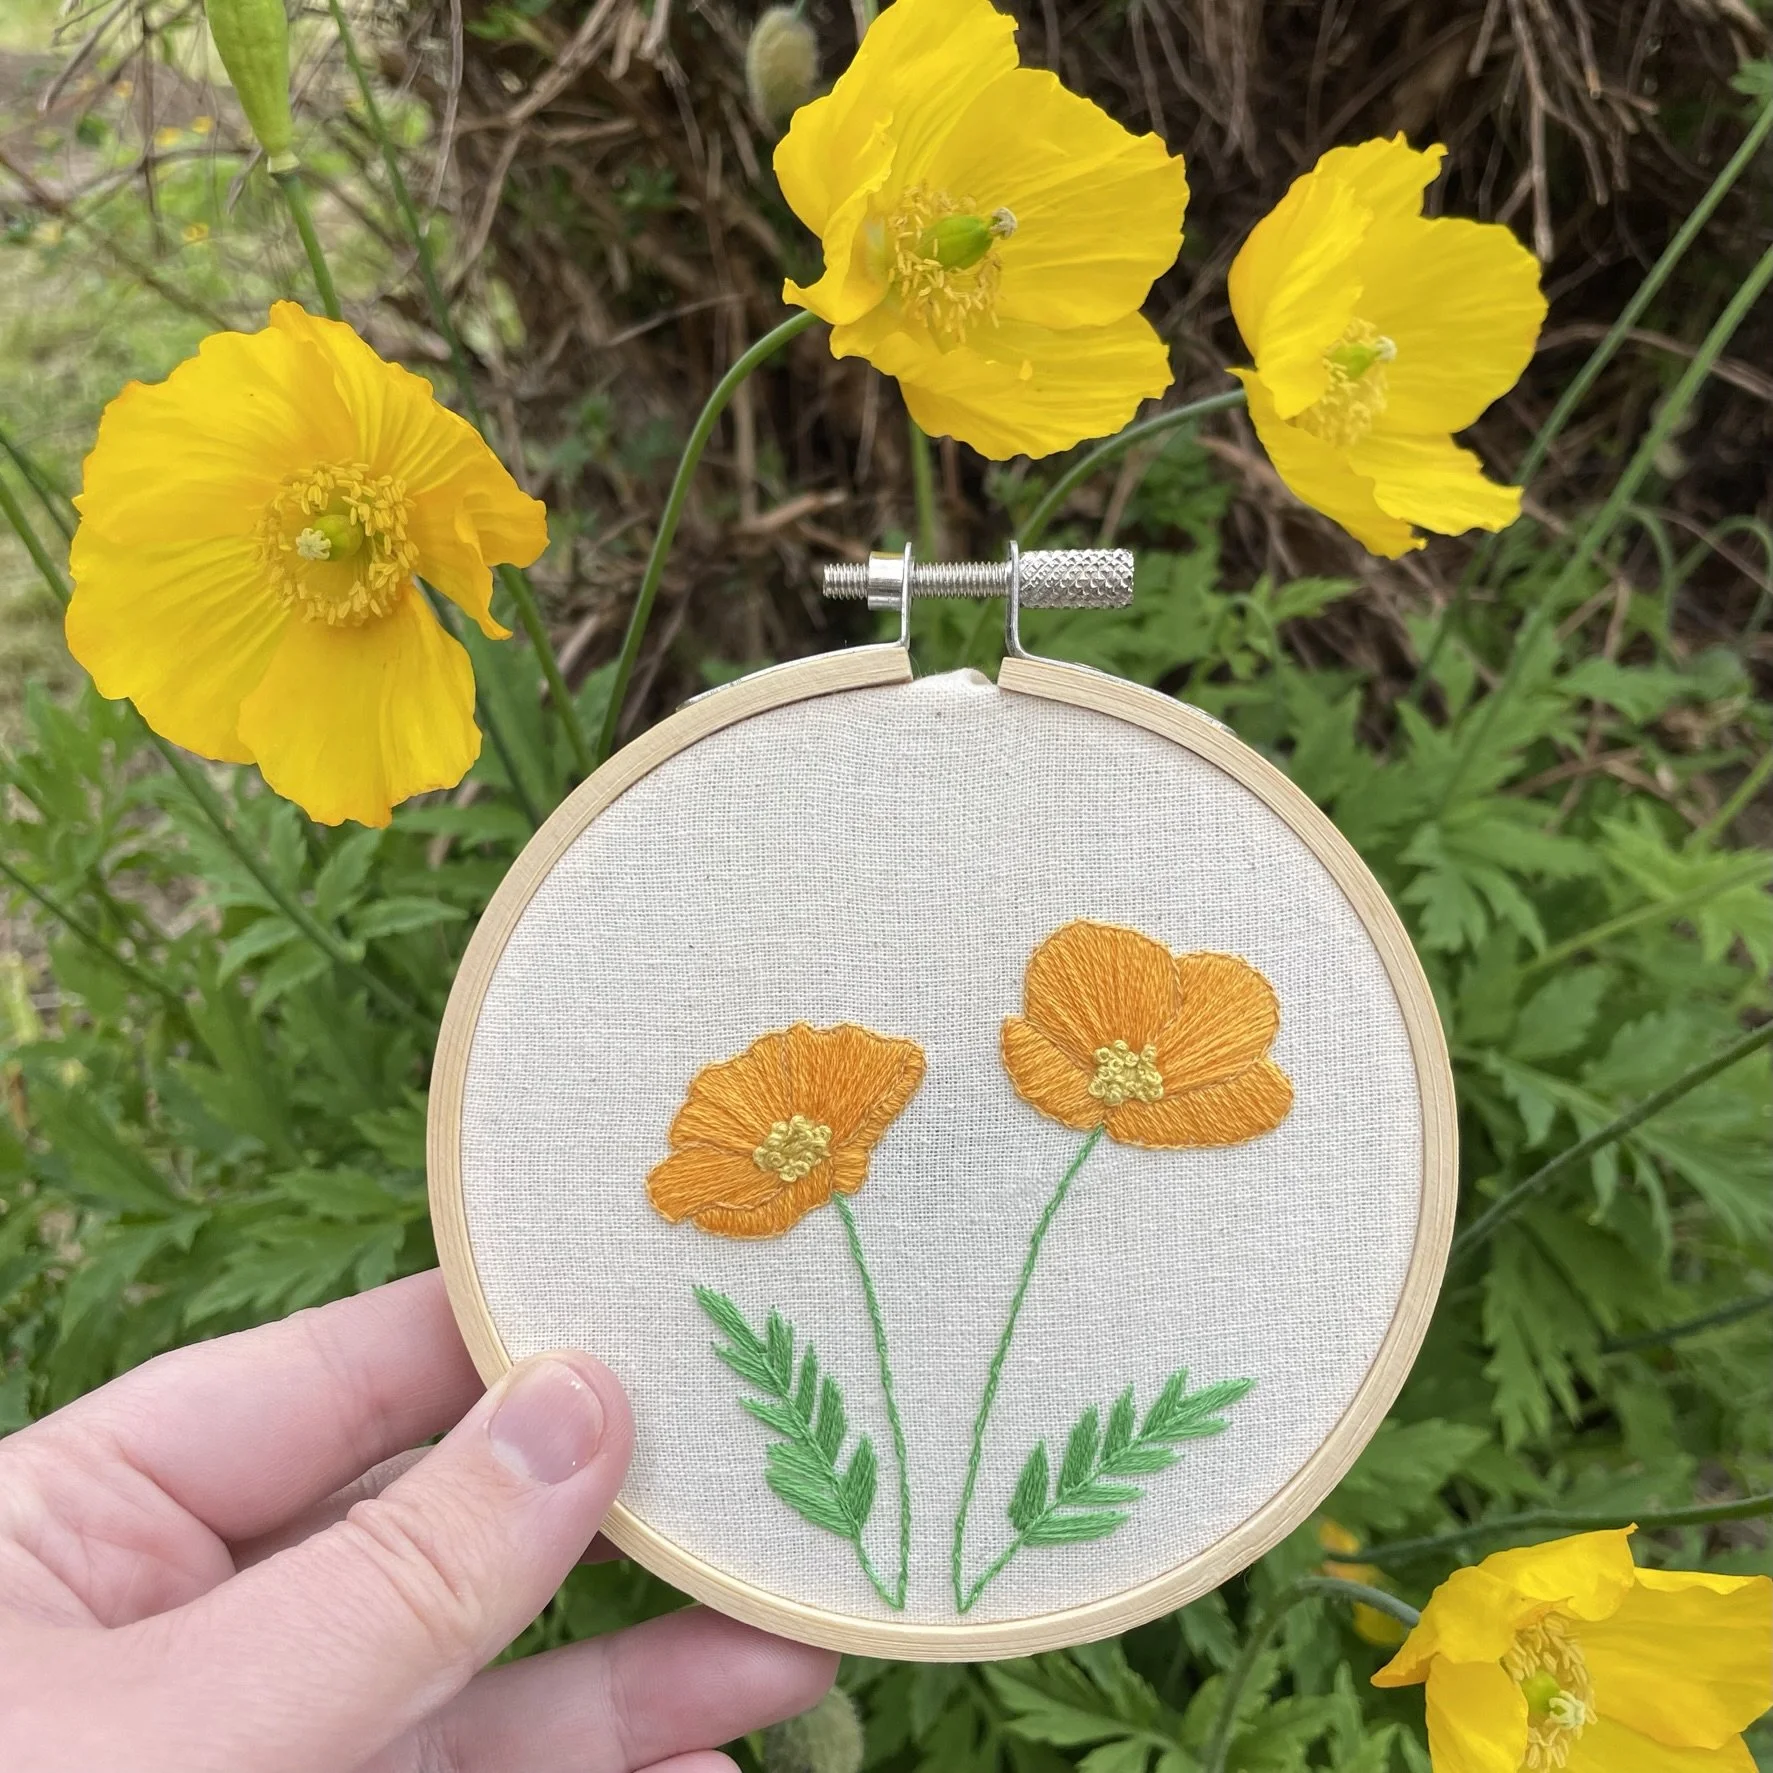
A picture of a Welsh poppy embroidery in an embroidery hoop held in from of three yellow Welsh poppies.

1. Start from real life

When I’m designing patterns I use photos to guide me on form and colour choices. Quite often flora come in different colour variations and I pick the colour that I love the most (or have the best thread match for). In the case of these Welsh poppies I went for a slightly more orange colour as that is a variation I had come across and I preferred it to the yellow.

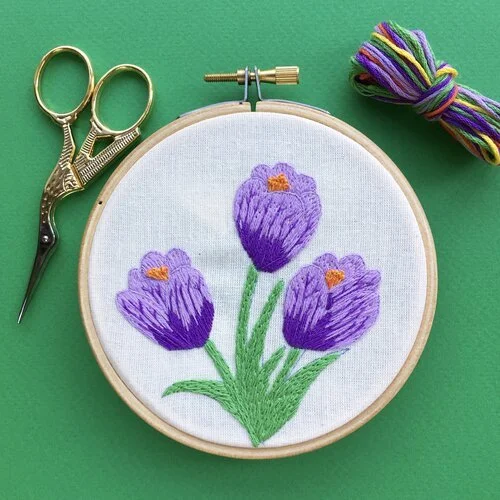
A picture of an embroidery of three variegated purple crocuses. There is a green background and to the left of the hoop is a pair of stork scissors and to the right a bundle of colourful threads

2. Look at how you can combine colours

When I originally stitched the crocus pattern I stitched in solid purple and knew it didn’t look right so I experimented with adding a darker purple which helped to define the individual petals better. I also combined one thread of yellow with one of orange for the centre of the crocus as neither colour on their own was quite right.

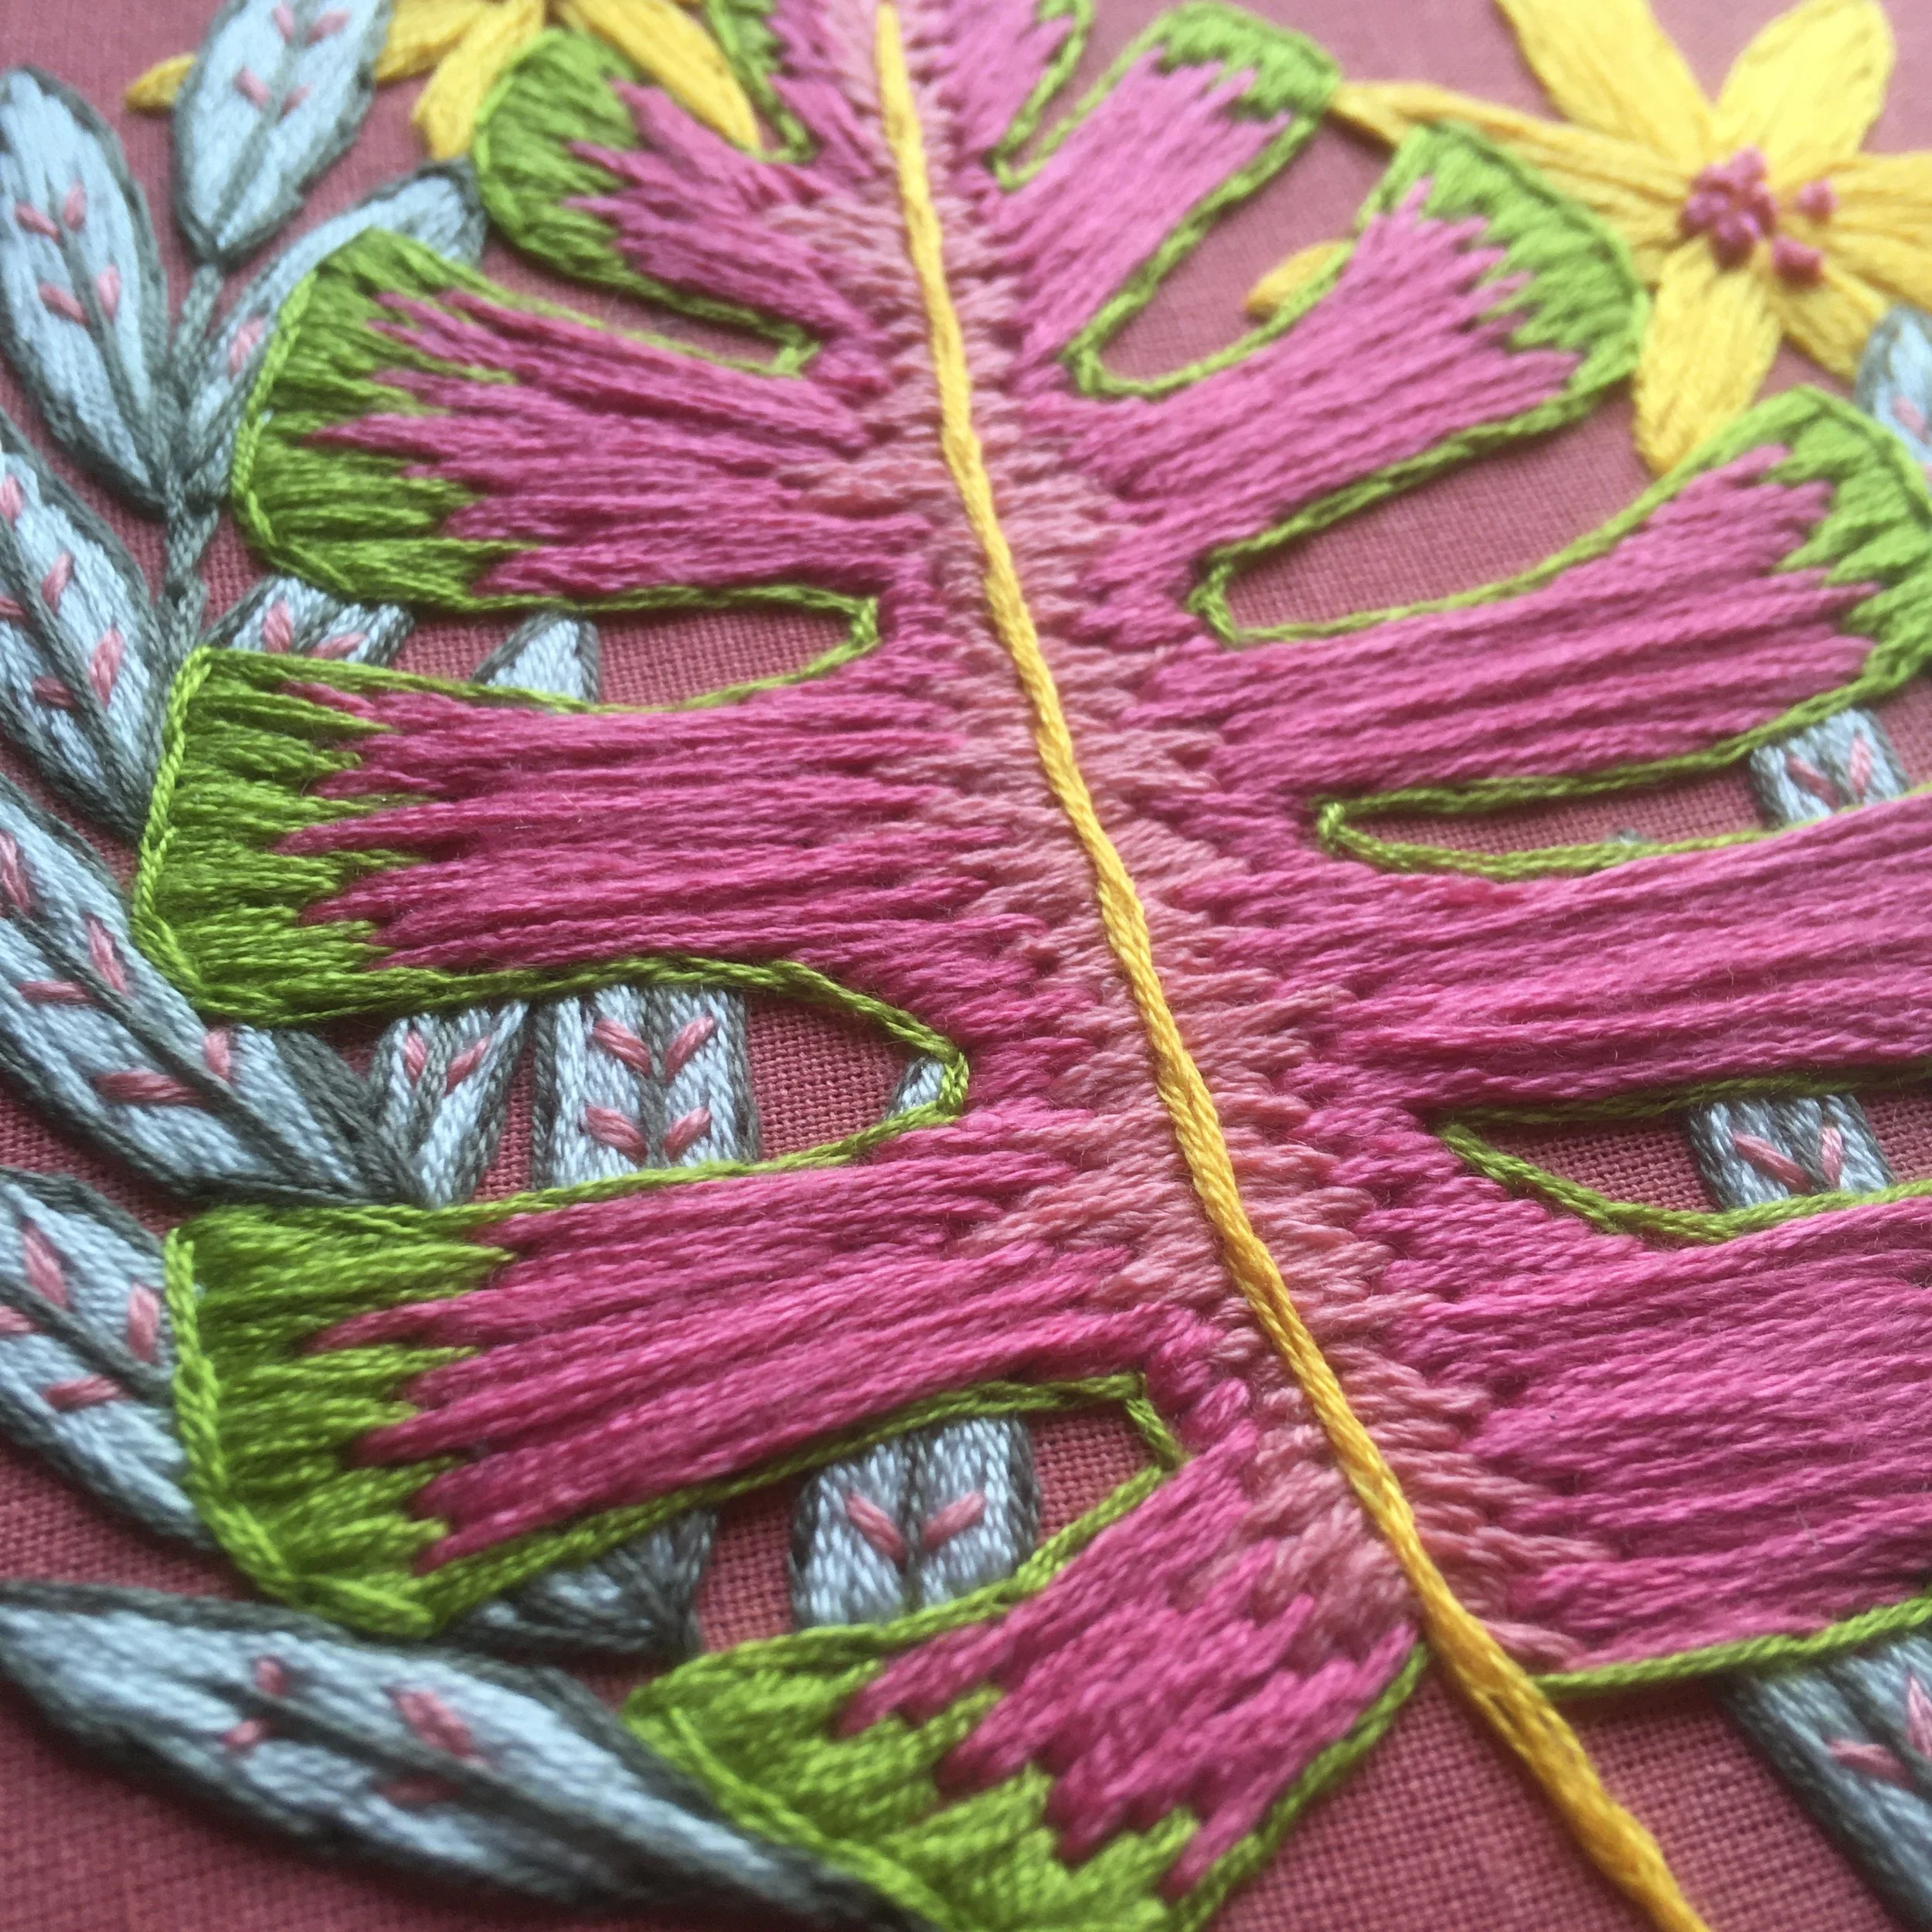
A close up picture of an abstract embroidery featuring a monstera leaf. The leaf has a yellow stem, pink inner sections and light green leaf tips

3. Go abstract

You don’t have to use real life colours when picking your colour palettes. A great example of this is this piece I stitched from a kit by Lucy Freeman.

This is obviously a monstera leaf but the traditional greens have been replaced with pinks and greys.

Enjoyed this blog post? I share embroidery tips and a free embroidery pattern in my monthly newsletter. Sign up here to receive the newsletter on the 1st of each the month.

In tips 3 Tags colour
Comment
photo of embroidery hoops on a yellow background. Overlayed with a blue square with the text - Hand Embroidery, how to deal with unfinished projects, www.embellishedelephant.co.uk

How to deal with un-finished projects

June 15, 2022

I’m going through a phase where I’m not really wanting to stitch any of the embroidery projects that I’ve got waiting to be started or that are in an un-finished state.

If you are a regular crafter, creative, writer, DIYer etc you've probably also got some projects lying around in various states of completion. Sometimes we start off a project with enthusiasm that dips or disappears for a range of different reasons - it's totally normal but what can you do about it?

1. How many projects do you have on the go or want to start?

At one point I had so many projects on the go (or thought I did) that just the idea of working through any of them was overwhelming. What helped me was to get them altogether, take a look at them and pick a few that I really wanted to make. I knew I would come back to the others when I was ready. That helped manage the pressure that I had to finish all of them straight away.

2. Is there something about the project that is putting you off?

I’ve got a gorgeous metalwork embroidery kit that I started with gusto, but has been sitting un-touched for months. I found it again when tidying up and looked at it and saw there was an area that I just wasn’t happy with. Unpicking that area has rejuvenated the feelings for the project and I’m now back stitching it again and enjoying learning the metalwork techniques.

3. Is the project too difficult?

Sometimes we pick projects that are a little above our skill level. There was a gorgeous baby dress I wanted to knit for my niece which had a lace patterned neckline. I could follow the pattern, but for the life of me I couldn’t get the lace pattern to end up with the right number of stitches at the end of the row. I attempted the pattern 8 times before going and researching how to knit lace patterns. The next time I tried, I used stitch markers to mark every repeat and bingo I got to the end of the row with the right number of stitches.

4. Can’t find the time?

Sometimes projects get abandoned simply because there aren’t enough hours in the day to fit in everything. Personally I find having a craft project on the go helps me feel calm and relaxed. Finding some time each week to work on a project is therefore a priority for me. Even if it is only 10 minute a week, I find this helps keep the project going and feel like it hasn’t stagnated.

5. A better project comes along

I’m finisher at heart, I like to see projects through to the end but I do also get my attention distracted when a shiny new project comes along. I find that getting that shiny new project done and out of the way helps me to get back to my original project. Understanding a bit about yourself and how you like to work will help you understand how to deal with your pile of unfinished projects

6. Abandon it

Ultimately, it if is too difficult, you don’t like it or you don’t have time there is no shame in just abandoning it. It could be leaving it in the un-finished objects pile for now or forever. Or it could be something more drastic like breaking it down to it’s component parts and using those for something else. I’ve even heard of people giving away half finished projects to others to finish.

Enjoyed this blog post? I share embroidery tips and a free embroidery pattern in my monthly newsletter. Sign up here to receive the newsletter on the 1st of each the month.

In tips 3
Comment
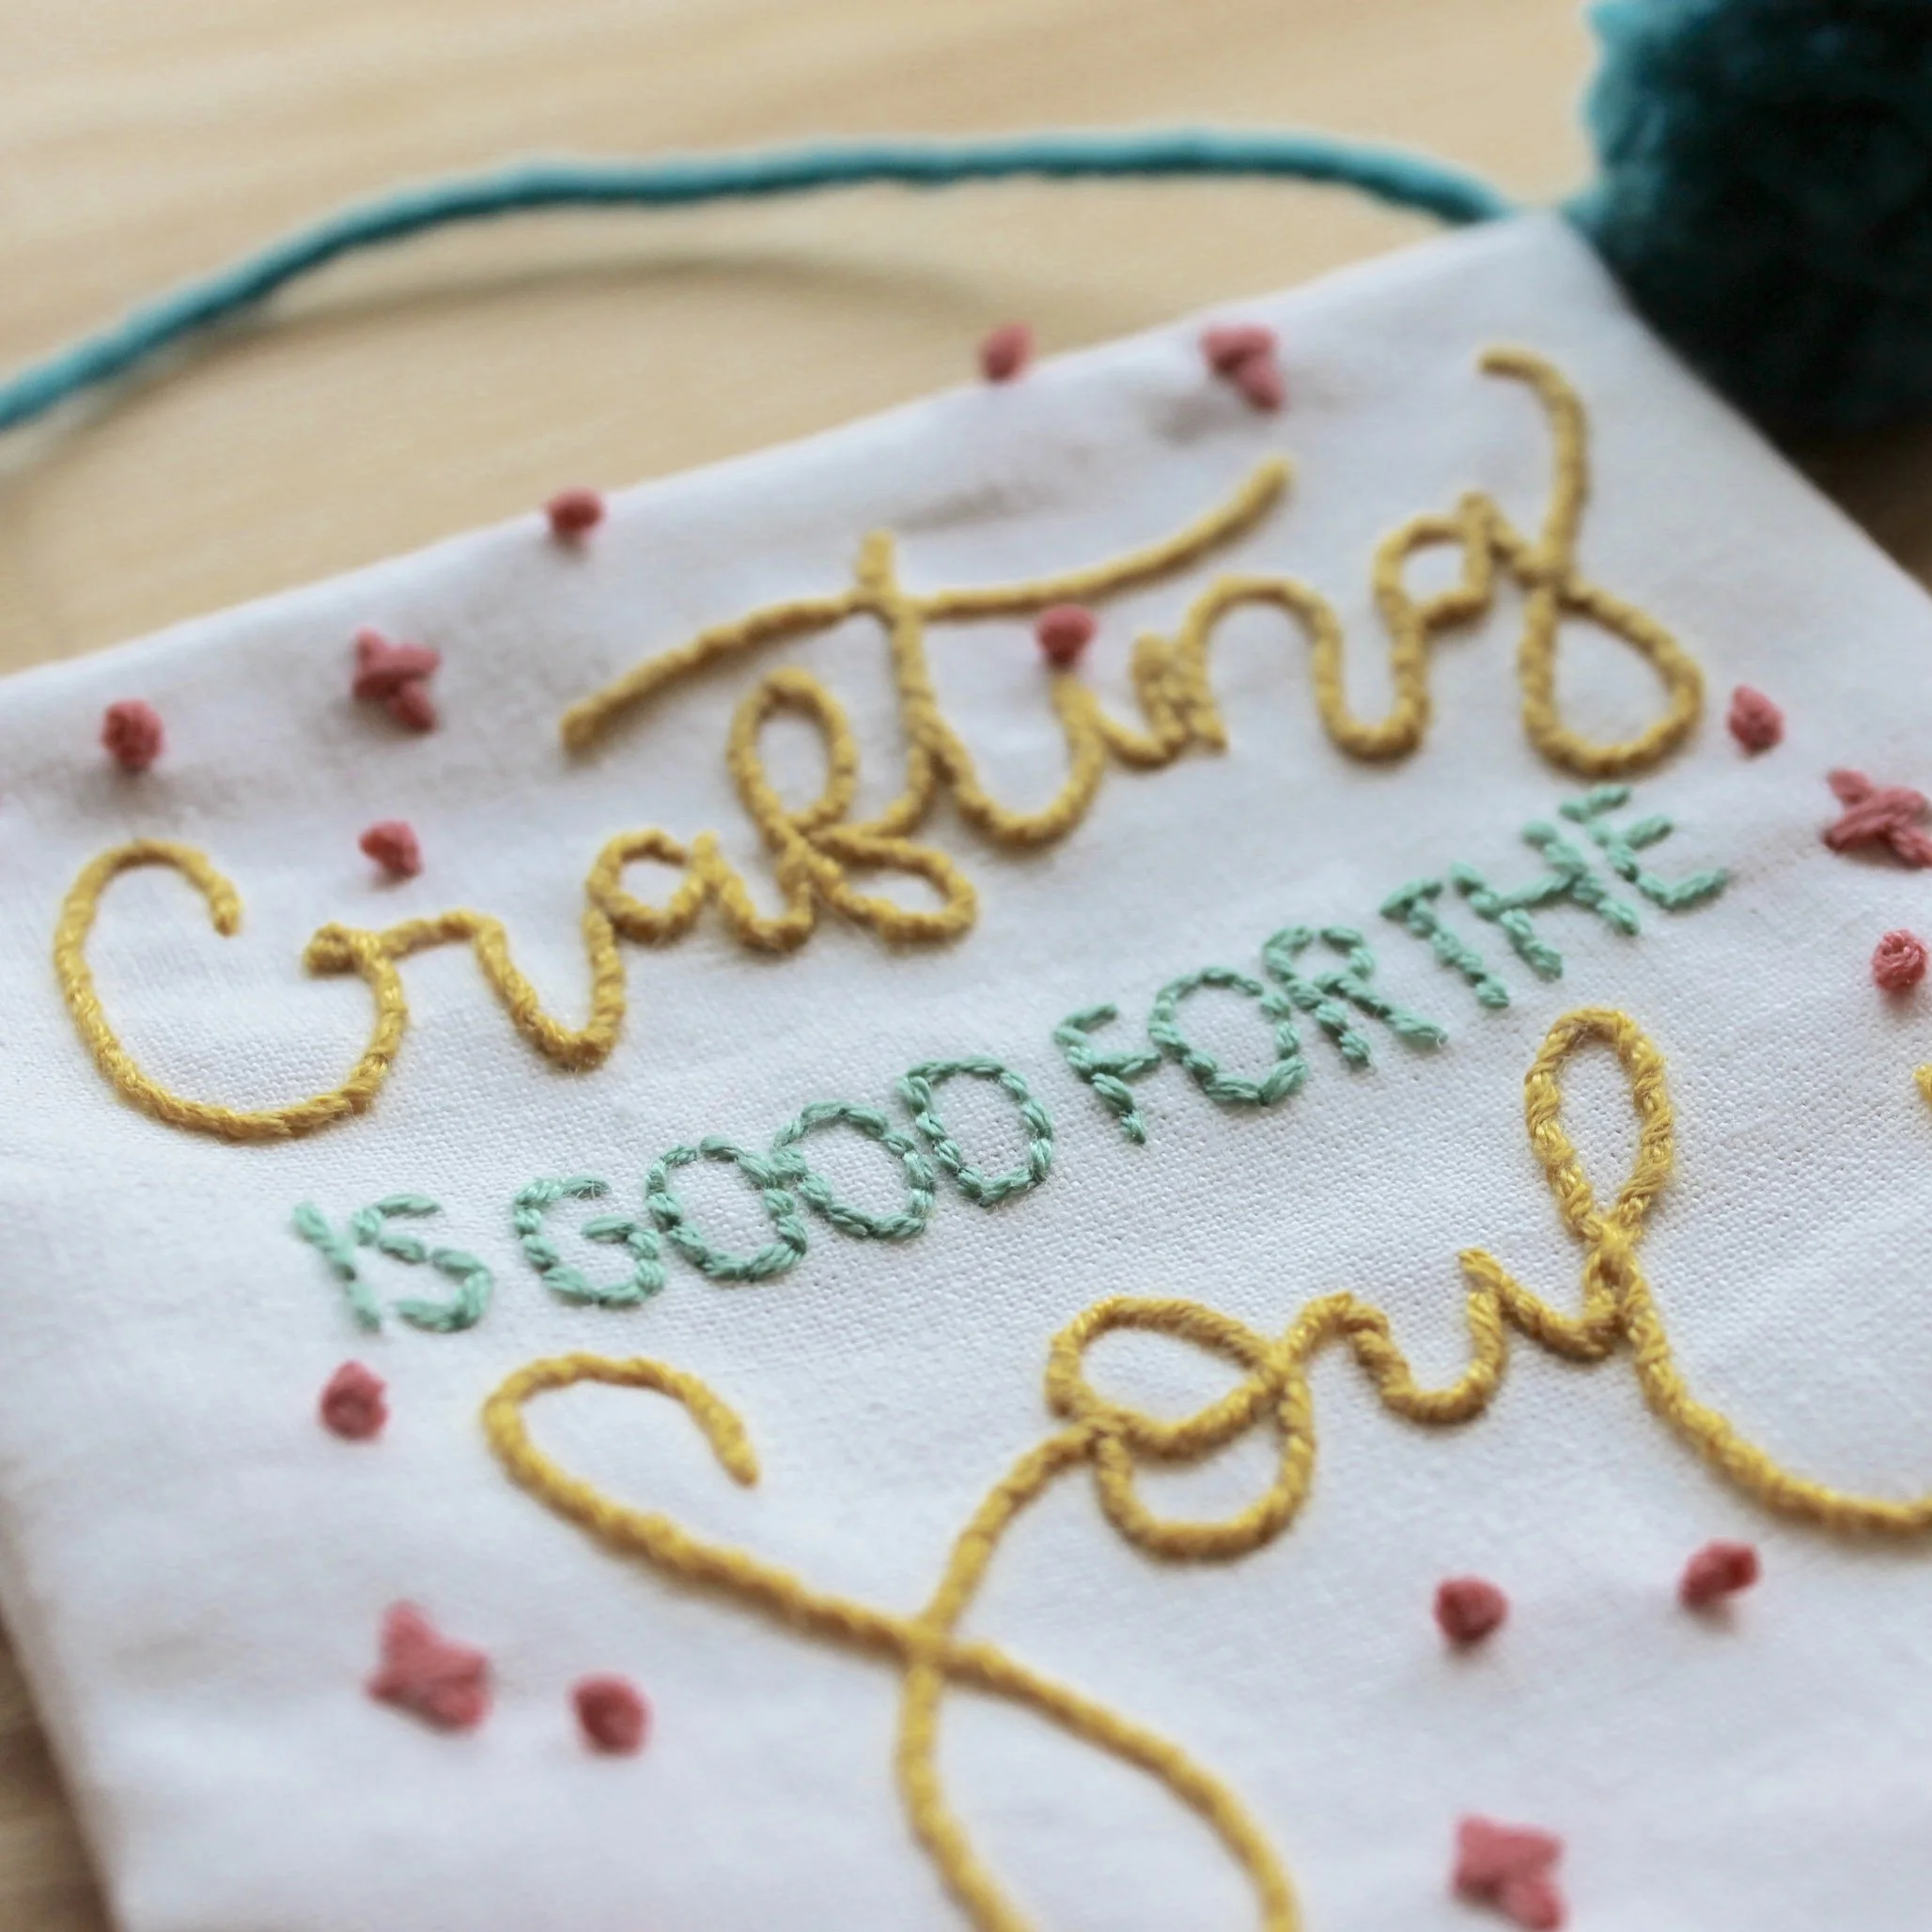
A picture of a banner with the words crafting is good for the soul embroidered in gold and green thread. Overlaid is a blue square with white text saying - hand embroidery, five stitches that are great for embroidering words

Five stitches that are great for embroidering words

May 25, 2022

Adding a quote, message, name or date to a piece of embroidery can add a different dimension and meaning.

Here are some stitches that I recommend using if you want to add text to your project:

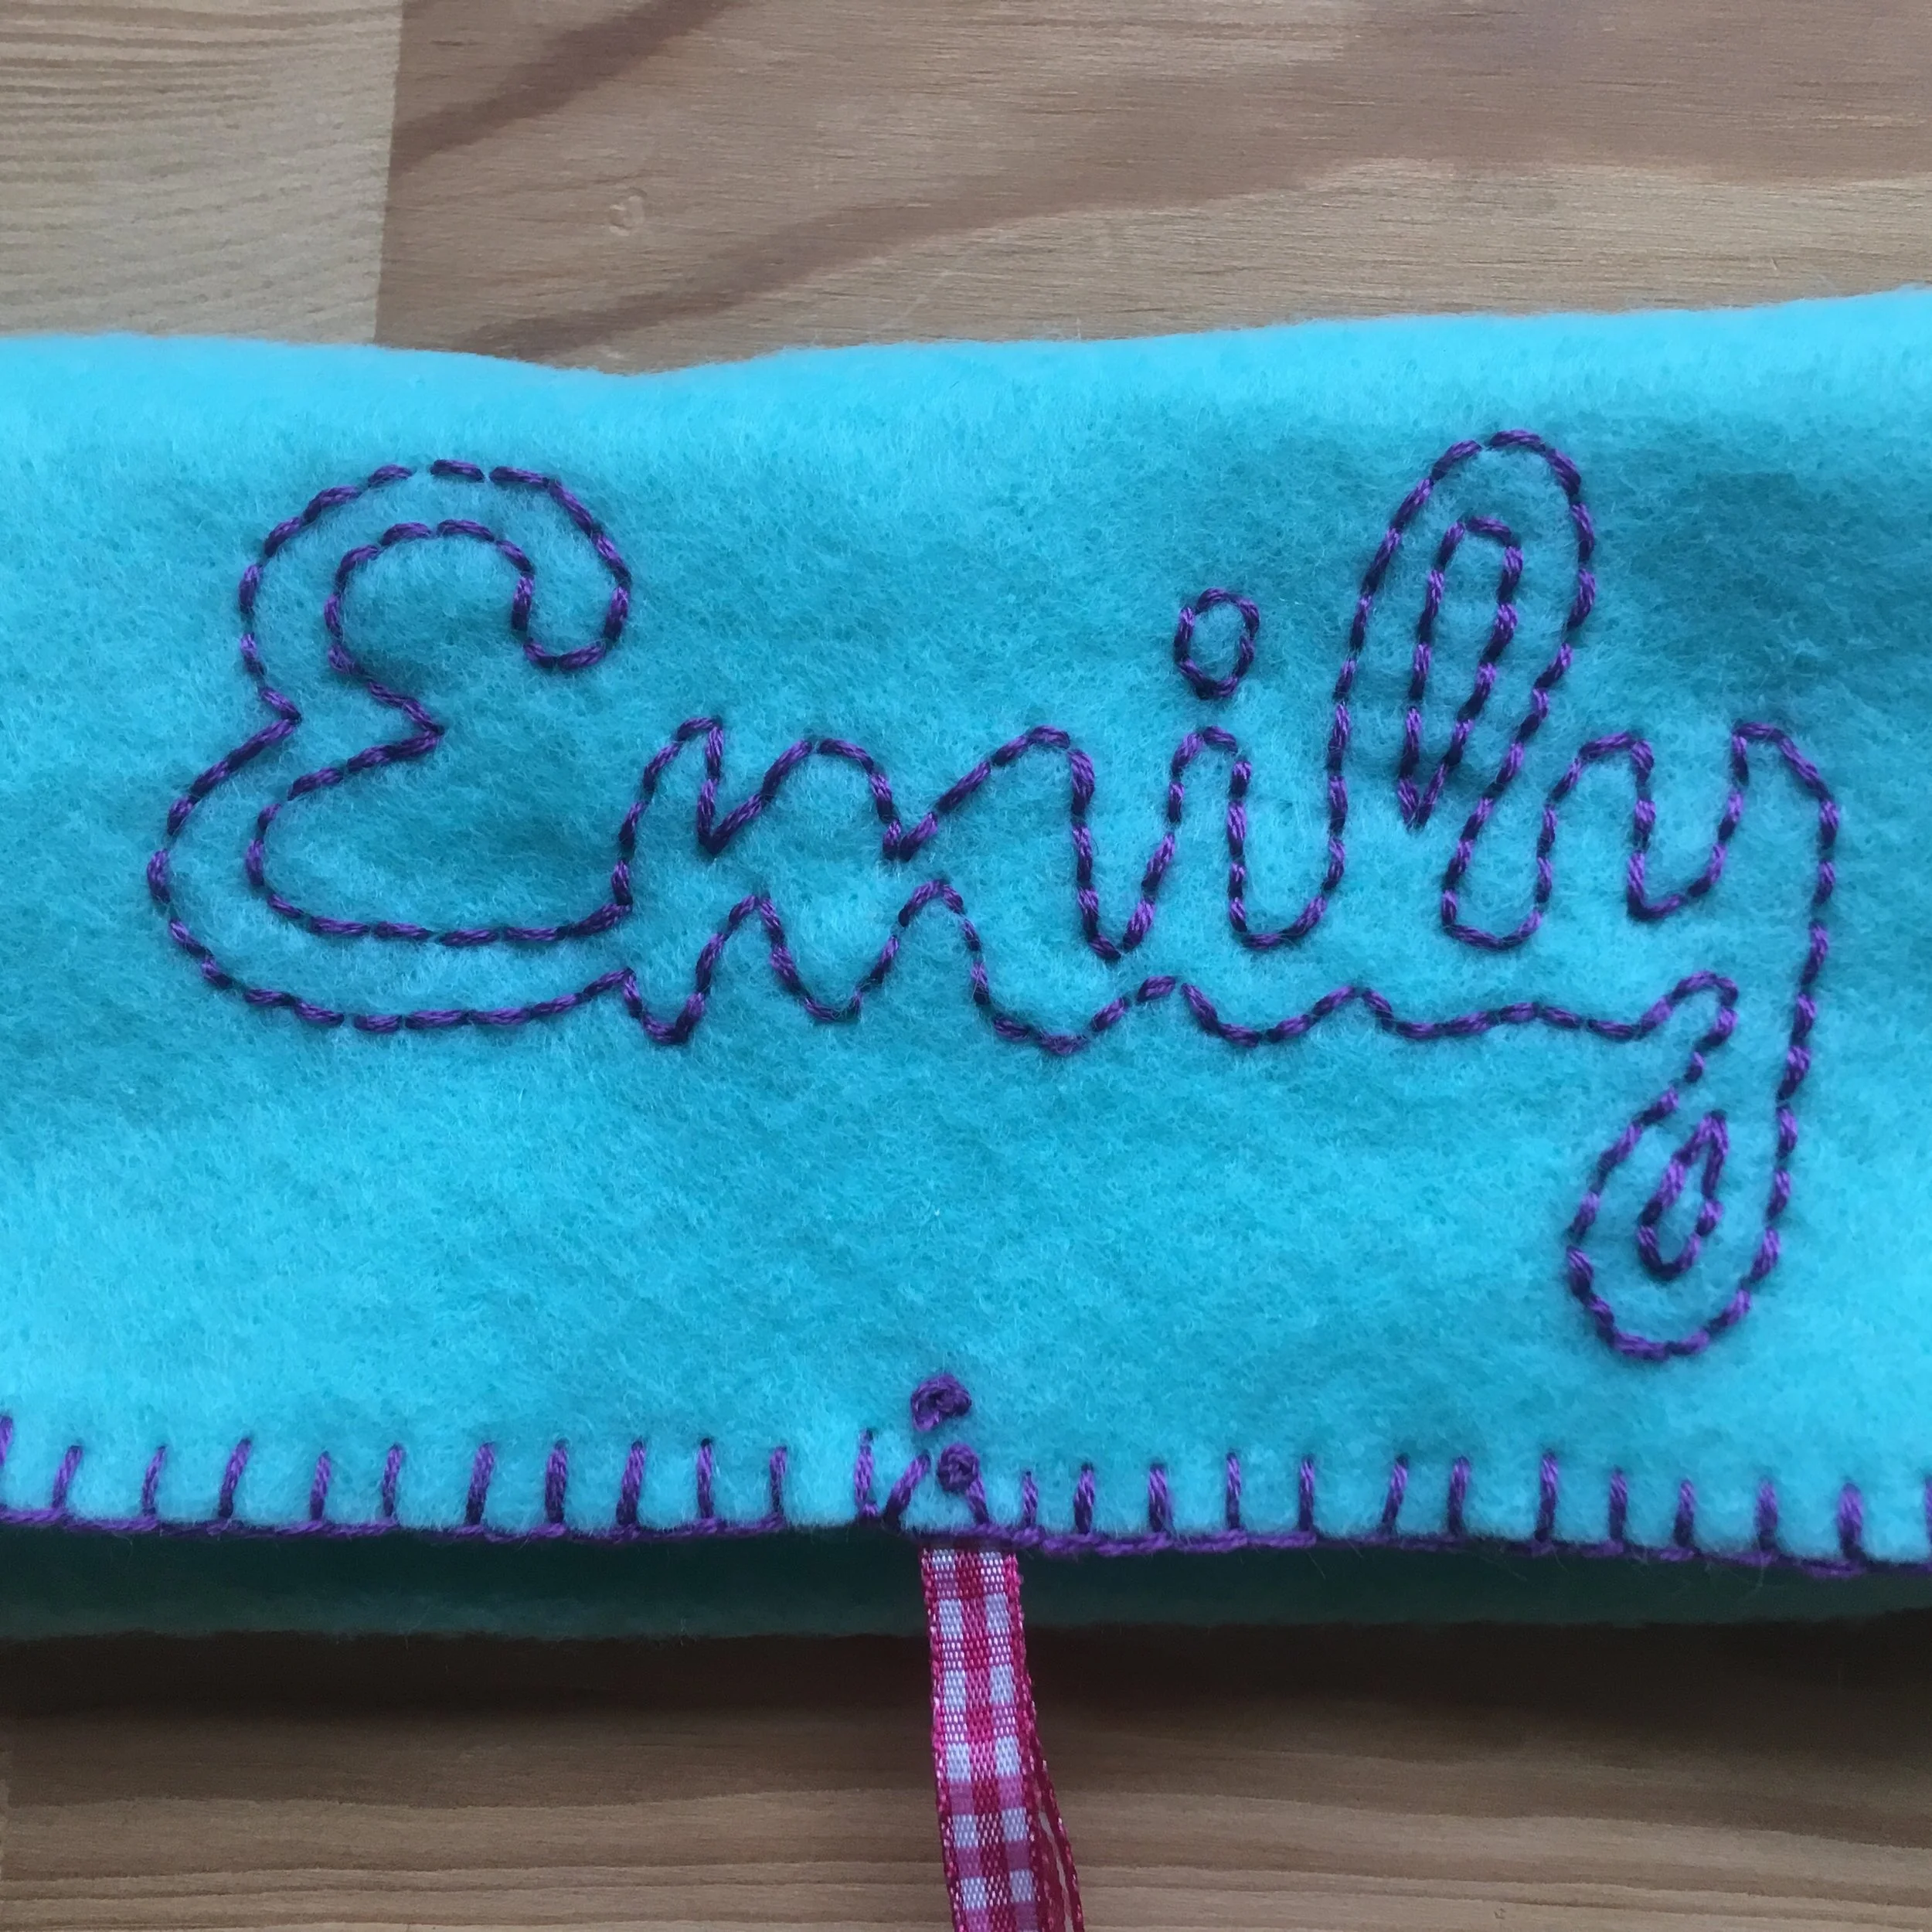
A picture of a sewing wrap in turquoise felt. The top has the word Emily embroidered on it.

Backstitch

This is a universal stitch that can be used for so many purposes. In this example, a simple back stitch was used to create the outline to the letters of the name.

A picture of an embroidered banner of white fabric with gold, green and pink stitches. On the banner is stitched the words crafting is good for the soul

Whipped backstitch

This is rapidly becoming my favourite stitch. The wrapping round the backstitch foundation layer gives a smooth, rope like line of embroidery perfect for lettering.

The green text is stitched in backstitch and you can see the difference that whipping around backstitch really makes.

This banner was a free gift from a Mollie Makes magazine and shows how great this stitch is when adding text.

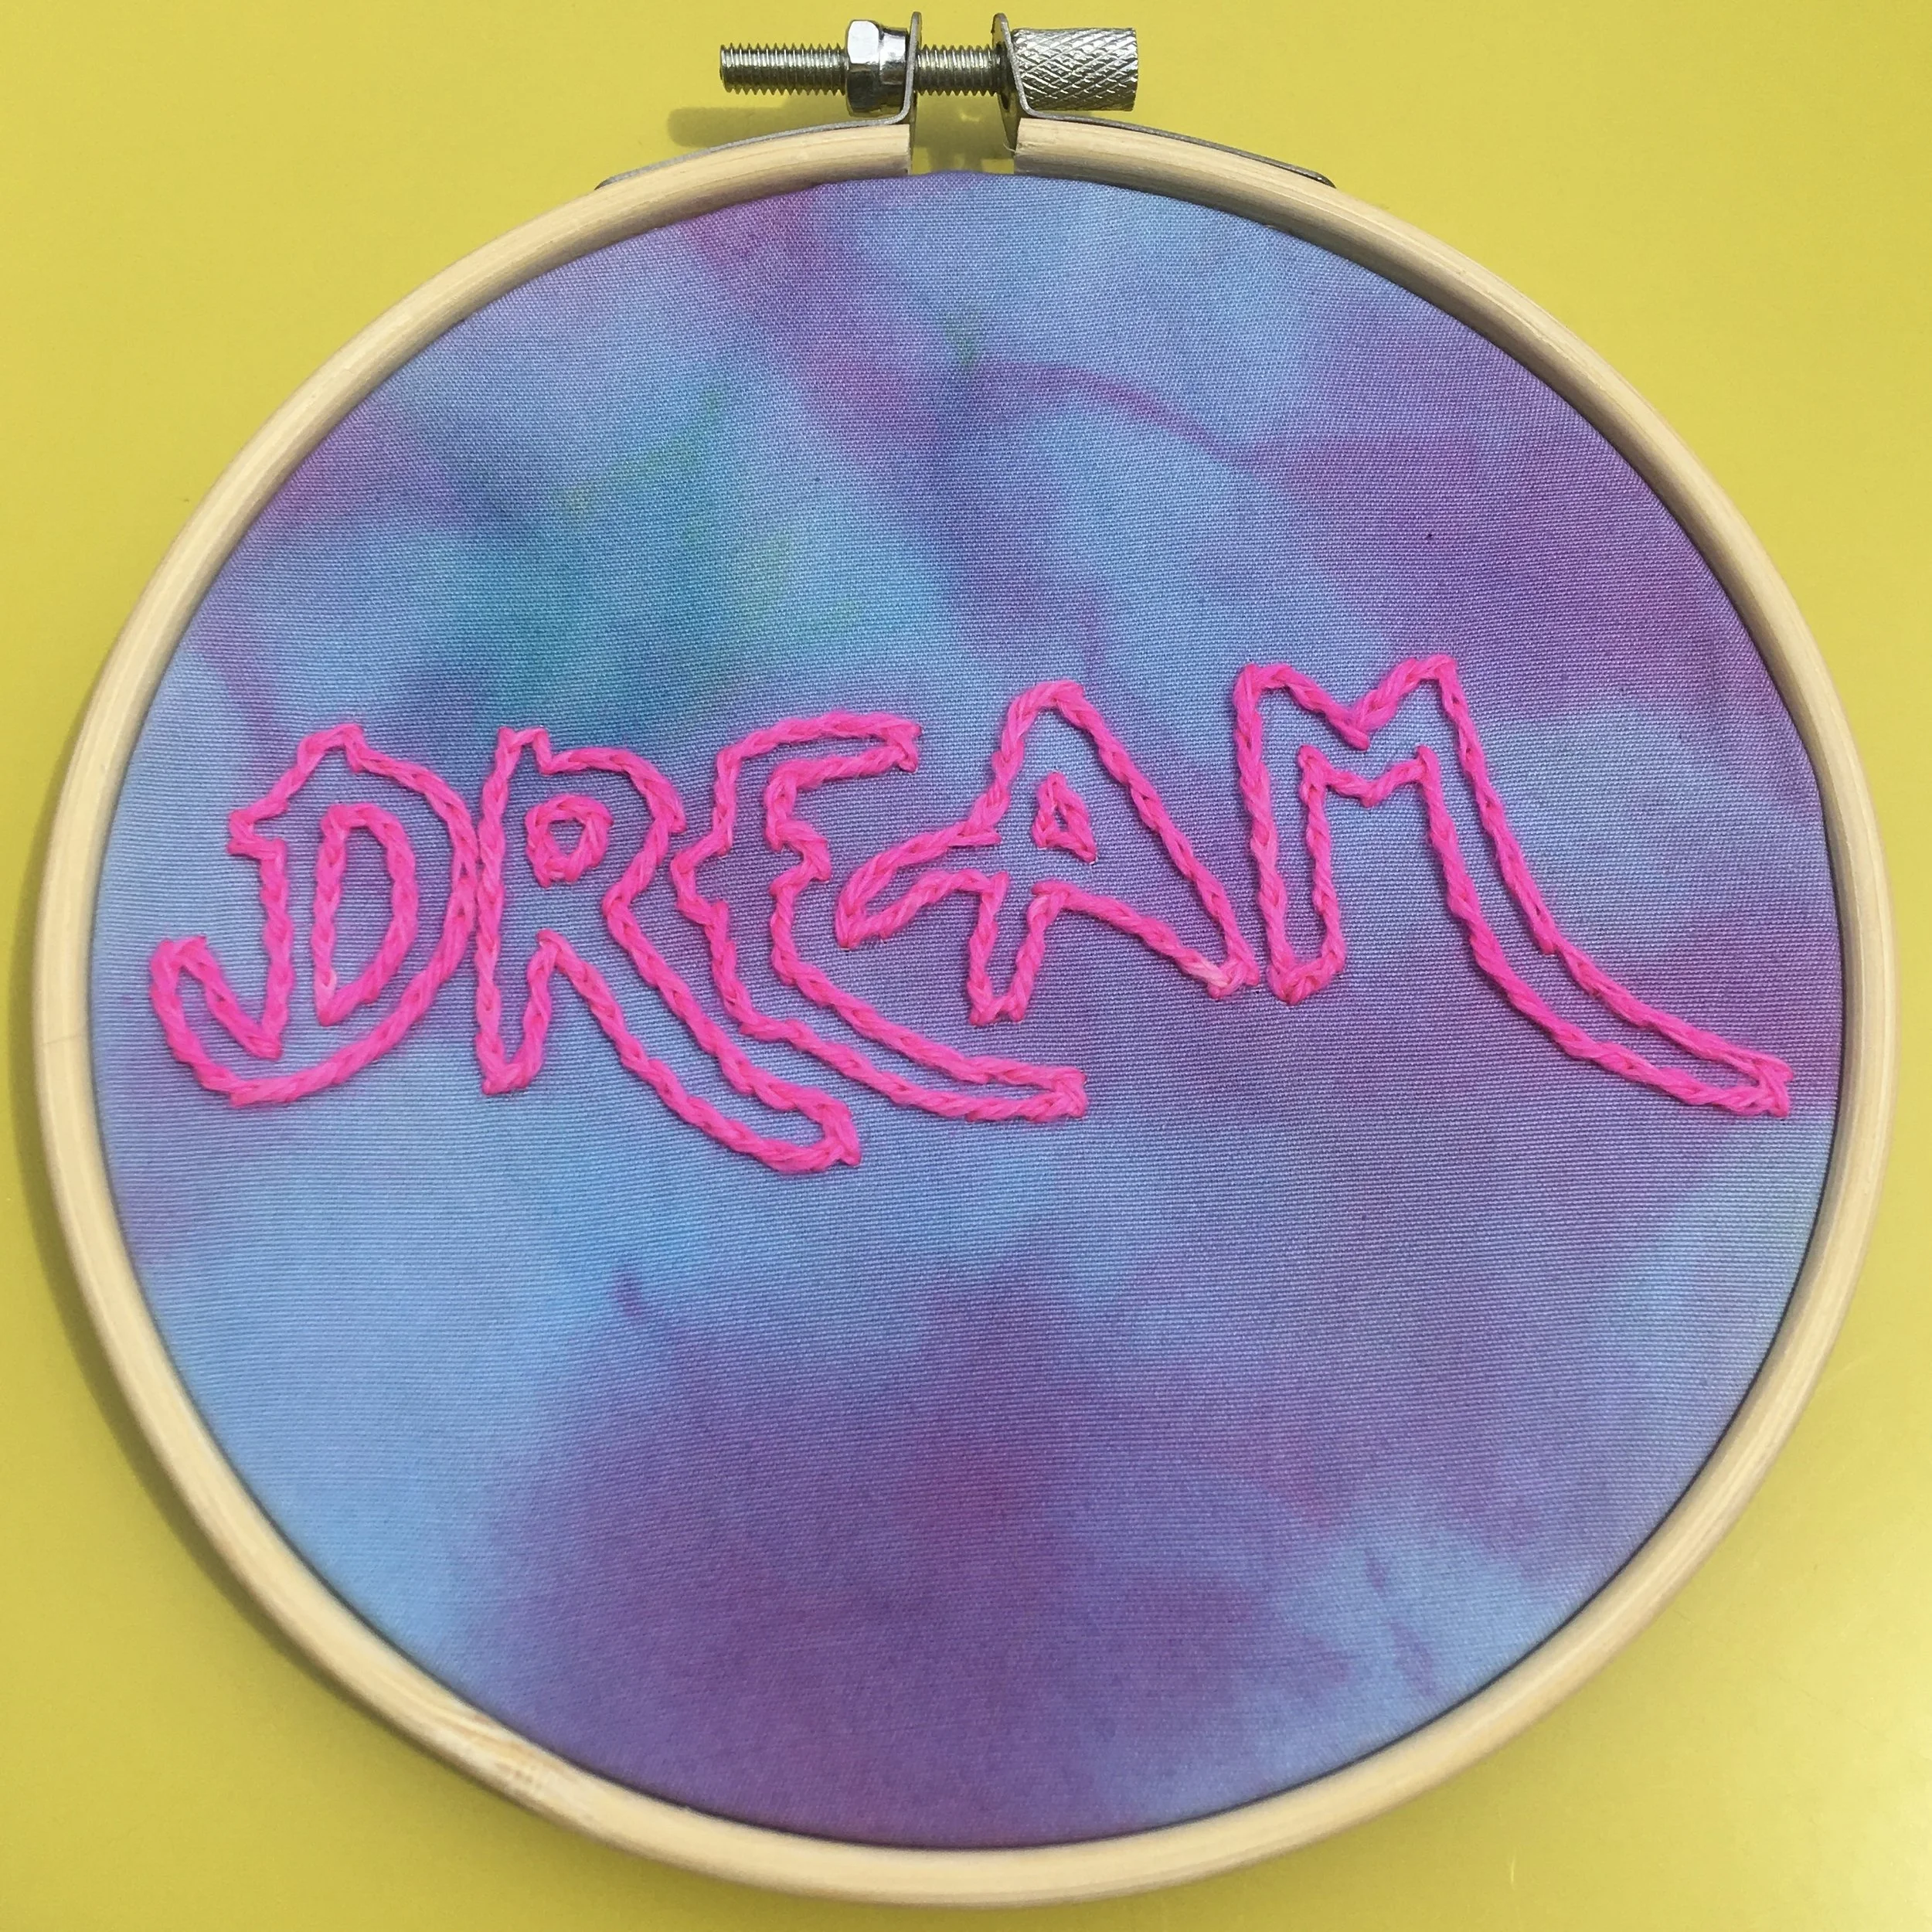
A picture of an embroidery hoop on a yellow background. The fabric in the hoop is hand dyed in a marbelled effect with shades of blue and purple. Stitched on the fabric is the word dream in neon pink

Split Stitch

In this example, split stitch was used to outline the words. Using yarn rather than embroidery floss, this stitch created a plaited look to the stitching.

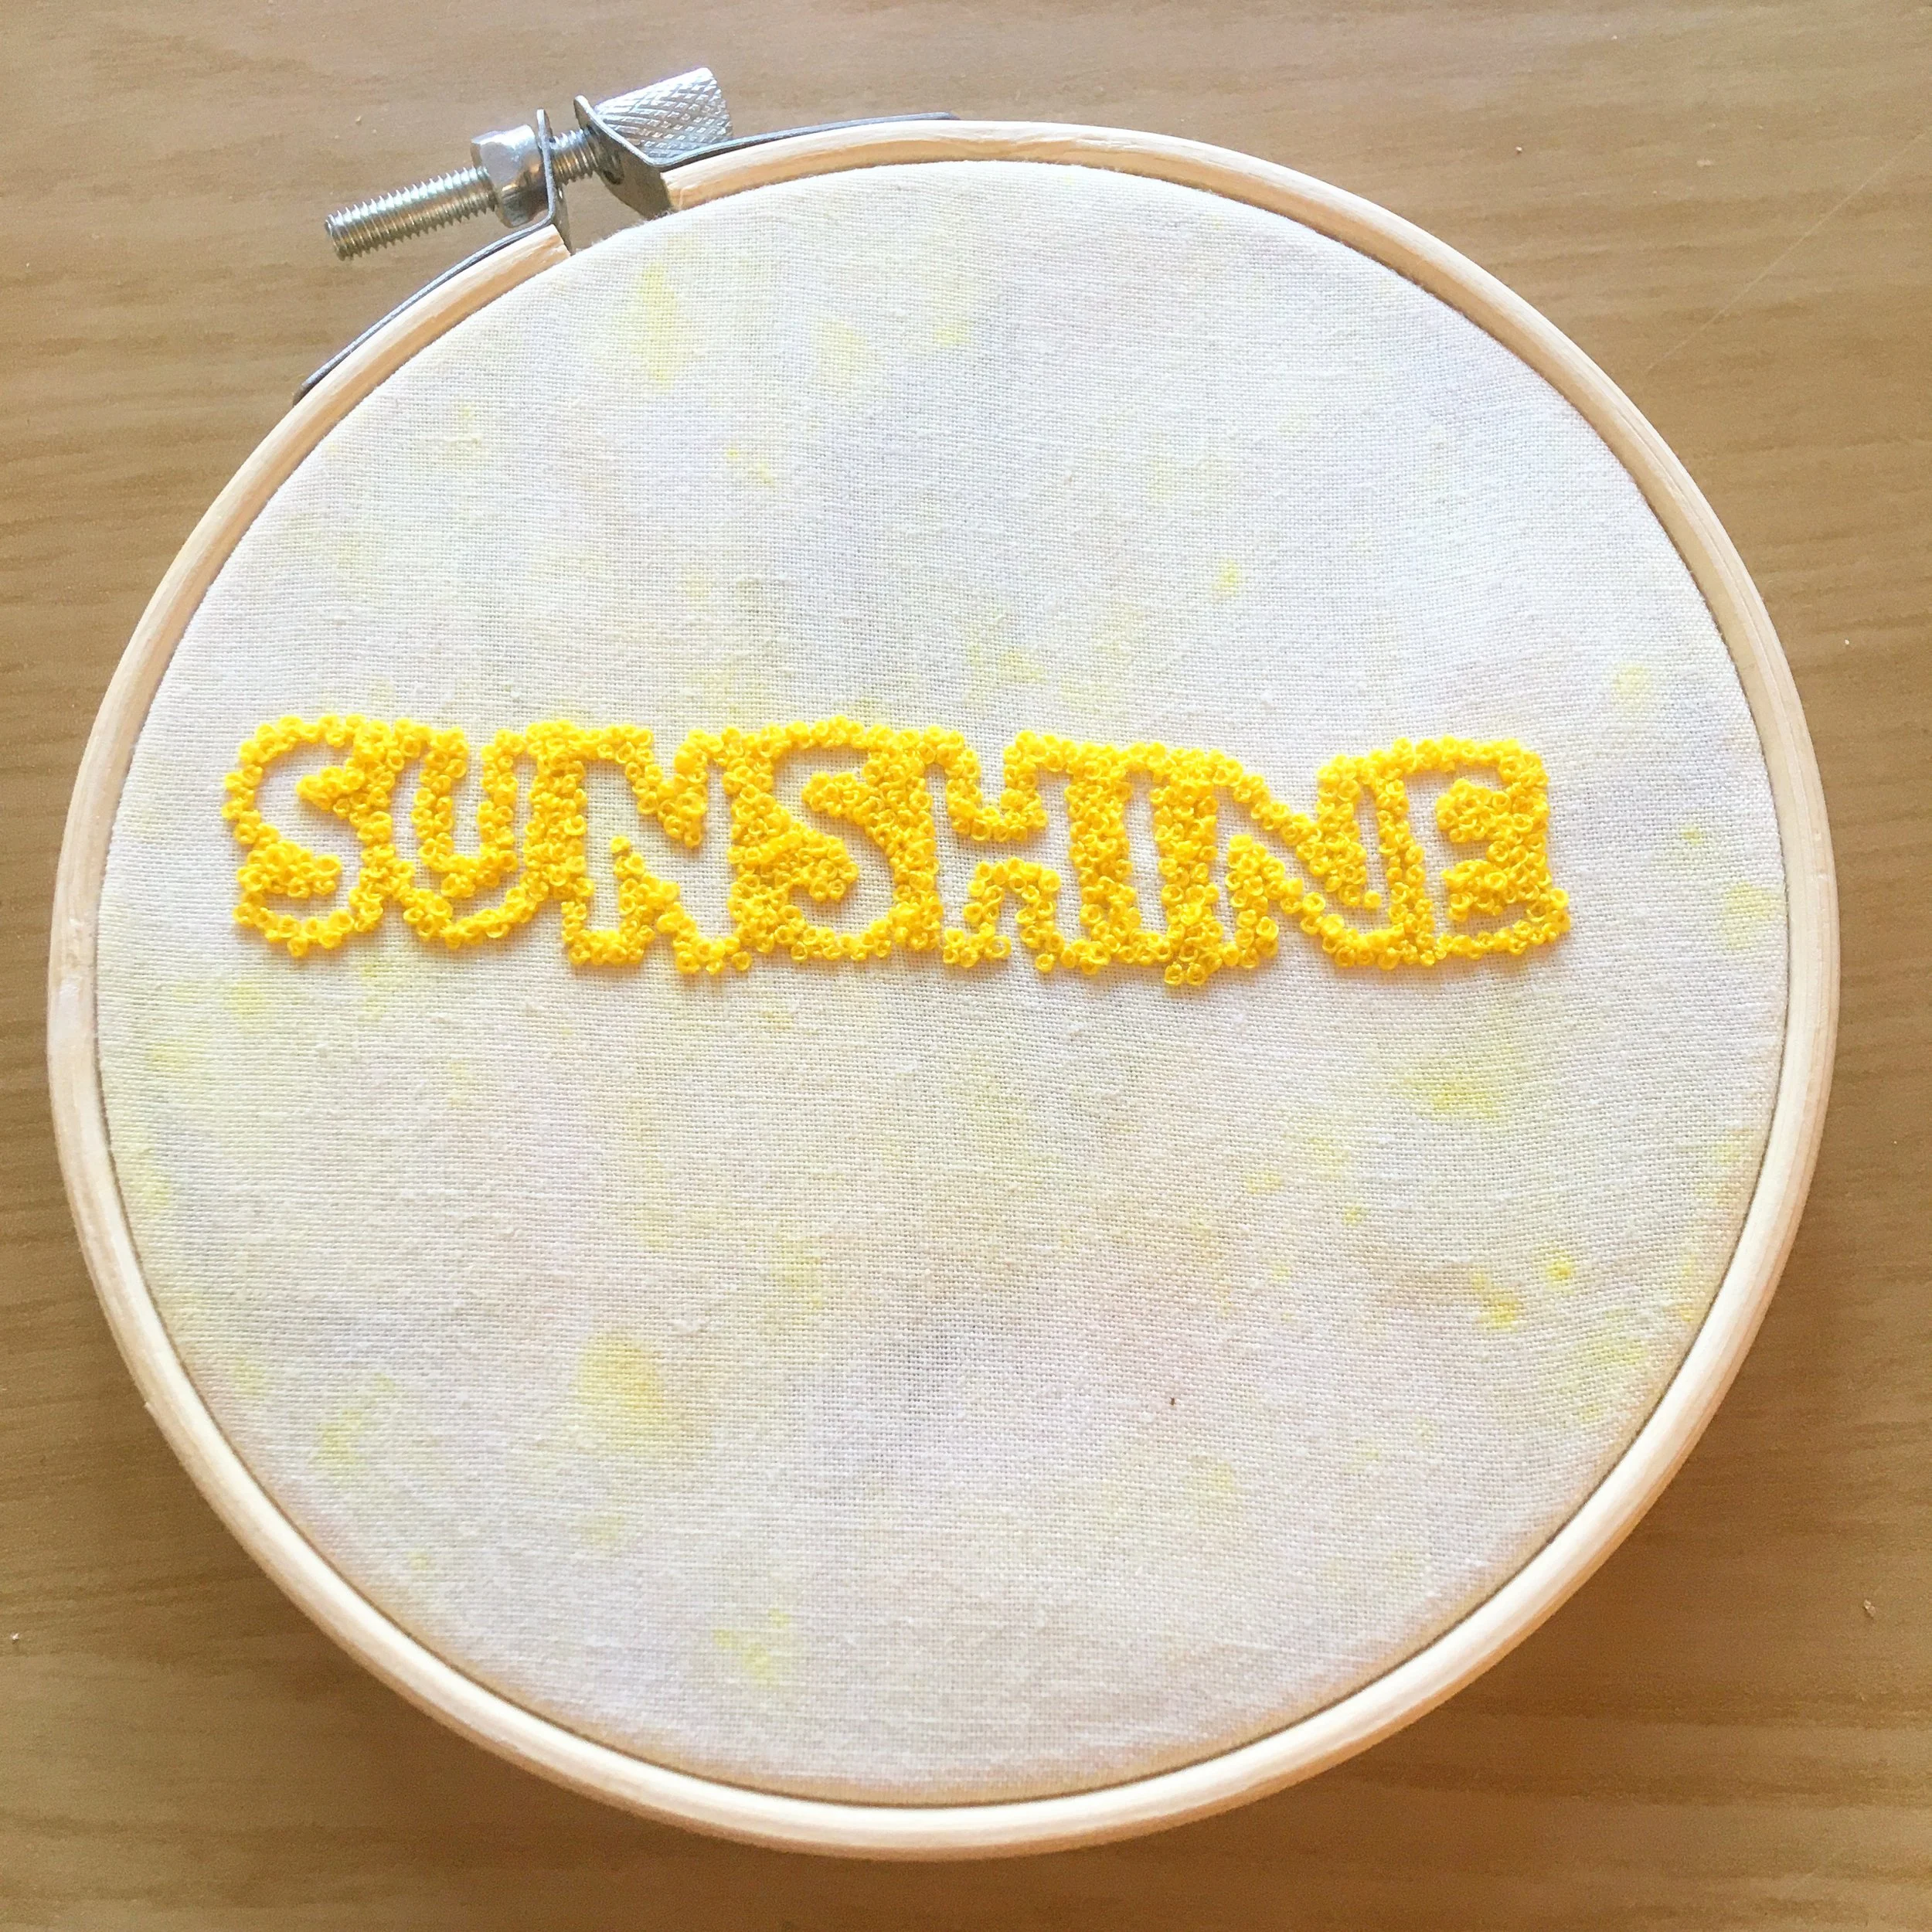
On a wooden table is an embroidery hoop. The hoop has yellow fabric in in dyed by tumeric and onion. On the fabric is stitched the word sunshine, but the stitches form the outline in a negative space approach

French Knots

Words can also be created on an embroidery using the negative space approach. In this case, the letters were created by using French knots outlines. This stitch could also be used to fill in lettering.

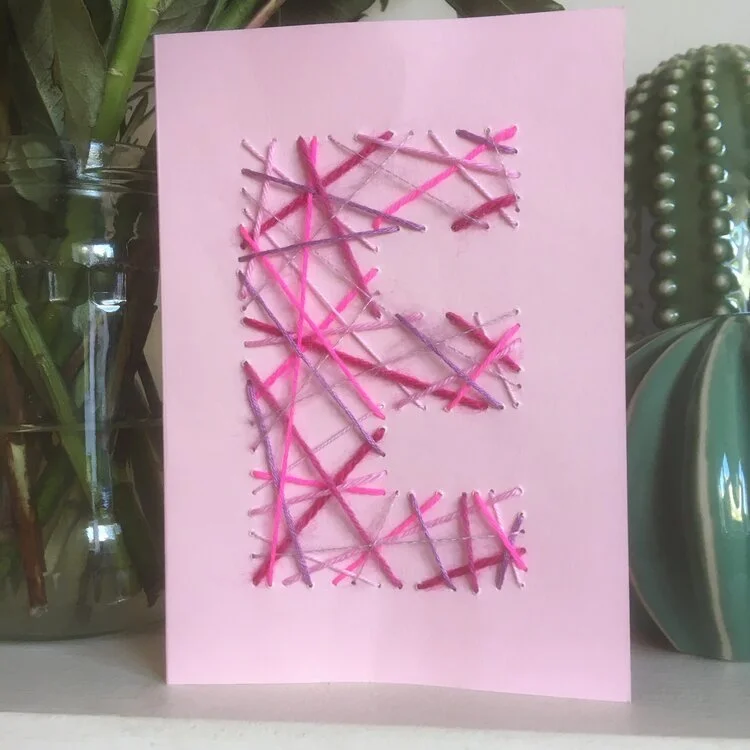
A picture of a pink greetings card. On it is the letter E covered in diagonal embroidery stitches.

Straight Stitch

This is a great way to fill in lettering without having to cover every millimetre of the word in stitches. Just cover the letter with stitches at different angles using different threads (or all the same thread).

Enjoyed this blog post? I share embroidery tips and a free embroidery pattern in my monthly newsletter. Sign up here to receive the newsletter on the 1st of each the month.

In tips 3 Tags Line Stitch
Comment
The background is blue, pink and purple embroidery on canvas. Overlayed is a blue square with the text hand embroidery, how to stitch on canvas, www.embellishedelephant.co.uk

How to stitch on canvas

May 18, 2022

Displaying a finished piece of embroidery in a hoop is the default as it is a simple way to finish it off and put it on display. This does mean that they are not viewed as pieces of artwork in the same way that a painting in a rectangular frame might be.

Finishing in a hoop also restricts the size and form of the work. So I’ve been experimenting with stitching on pre-stretched canvases. You can buy these quite cheaply in shops such as B&M and Flying Tiger.

Here are some of my thoughts of how you translate embroidery to canvas.

Wide wooden frame

Canvases are stretched over a wooden frame that is about 1 inch wide. This restricts the area for stitching and although you can get creative with the angle of your needle when stitching in the areas above the frame, this border needs to be taken into account in the design.

Large warp and weft

The canvases I’ve bought have wide warp and weft threads. This means that it can be hard to stitch really delicate designs as you normally stitch in the tiny hole that is the intersection between warp and weft threads. However, canvas is also a fairly even weave fabric meaning that modern designs with geometric shapes work well.

Using thicker threads

Canvas is a thick fabric which can be hard on the fingers. But it also means it can hold the weight of thicker threads such as yarn.

I found that using chenille needles rather than crewel needles worked best when stitching on canvas as the thicker needles gave better grip and the larger eye accommodated thicker thread.

Pre-stretched

As the canvas is pre-stretched it means that if it becomes loose it can’t easily be re-stretched to make the fabric taut (which is needed for great looking embroidery). Canvas can become loose if it is heavily worked so choosing a design with fewer stitches will help prevent the canvas going loose.

Changing the fabric

You can take the canvas off and use the frame to stretch other fabrics. I’ve experimented with replacing the canvas with a very open weave linen stretching the new fabric over the frame and holding it in place with drawing pins while I stitched. Once the piece was finished I re-stretched the fabric and attached it securely using a staple gun. I worked in this way as I don’t have a roll frame embroidery stand.

Enjoyed this blog post? I share embroidery tips and a free embroidery pattern in my monthly newsletter. Sign up here to receive the newsletter on the 1st of each the month.

In tips 3 Tags Fabric
Comment
A background of hardanger embroidery with a blue square graphic on top saying hand embroidery, the traits you need to be an embroiderer, www.embellishedelephant.co.uk

The traits you need to be an embroiderer

May 4, 2022

I’m a firm believer that anyone can make gorgeous embroidery, but there are some traits that really help when picking up a needle to start an embroidery project. Here’s three and why they are important:

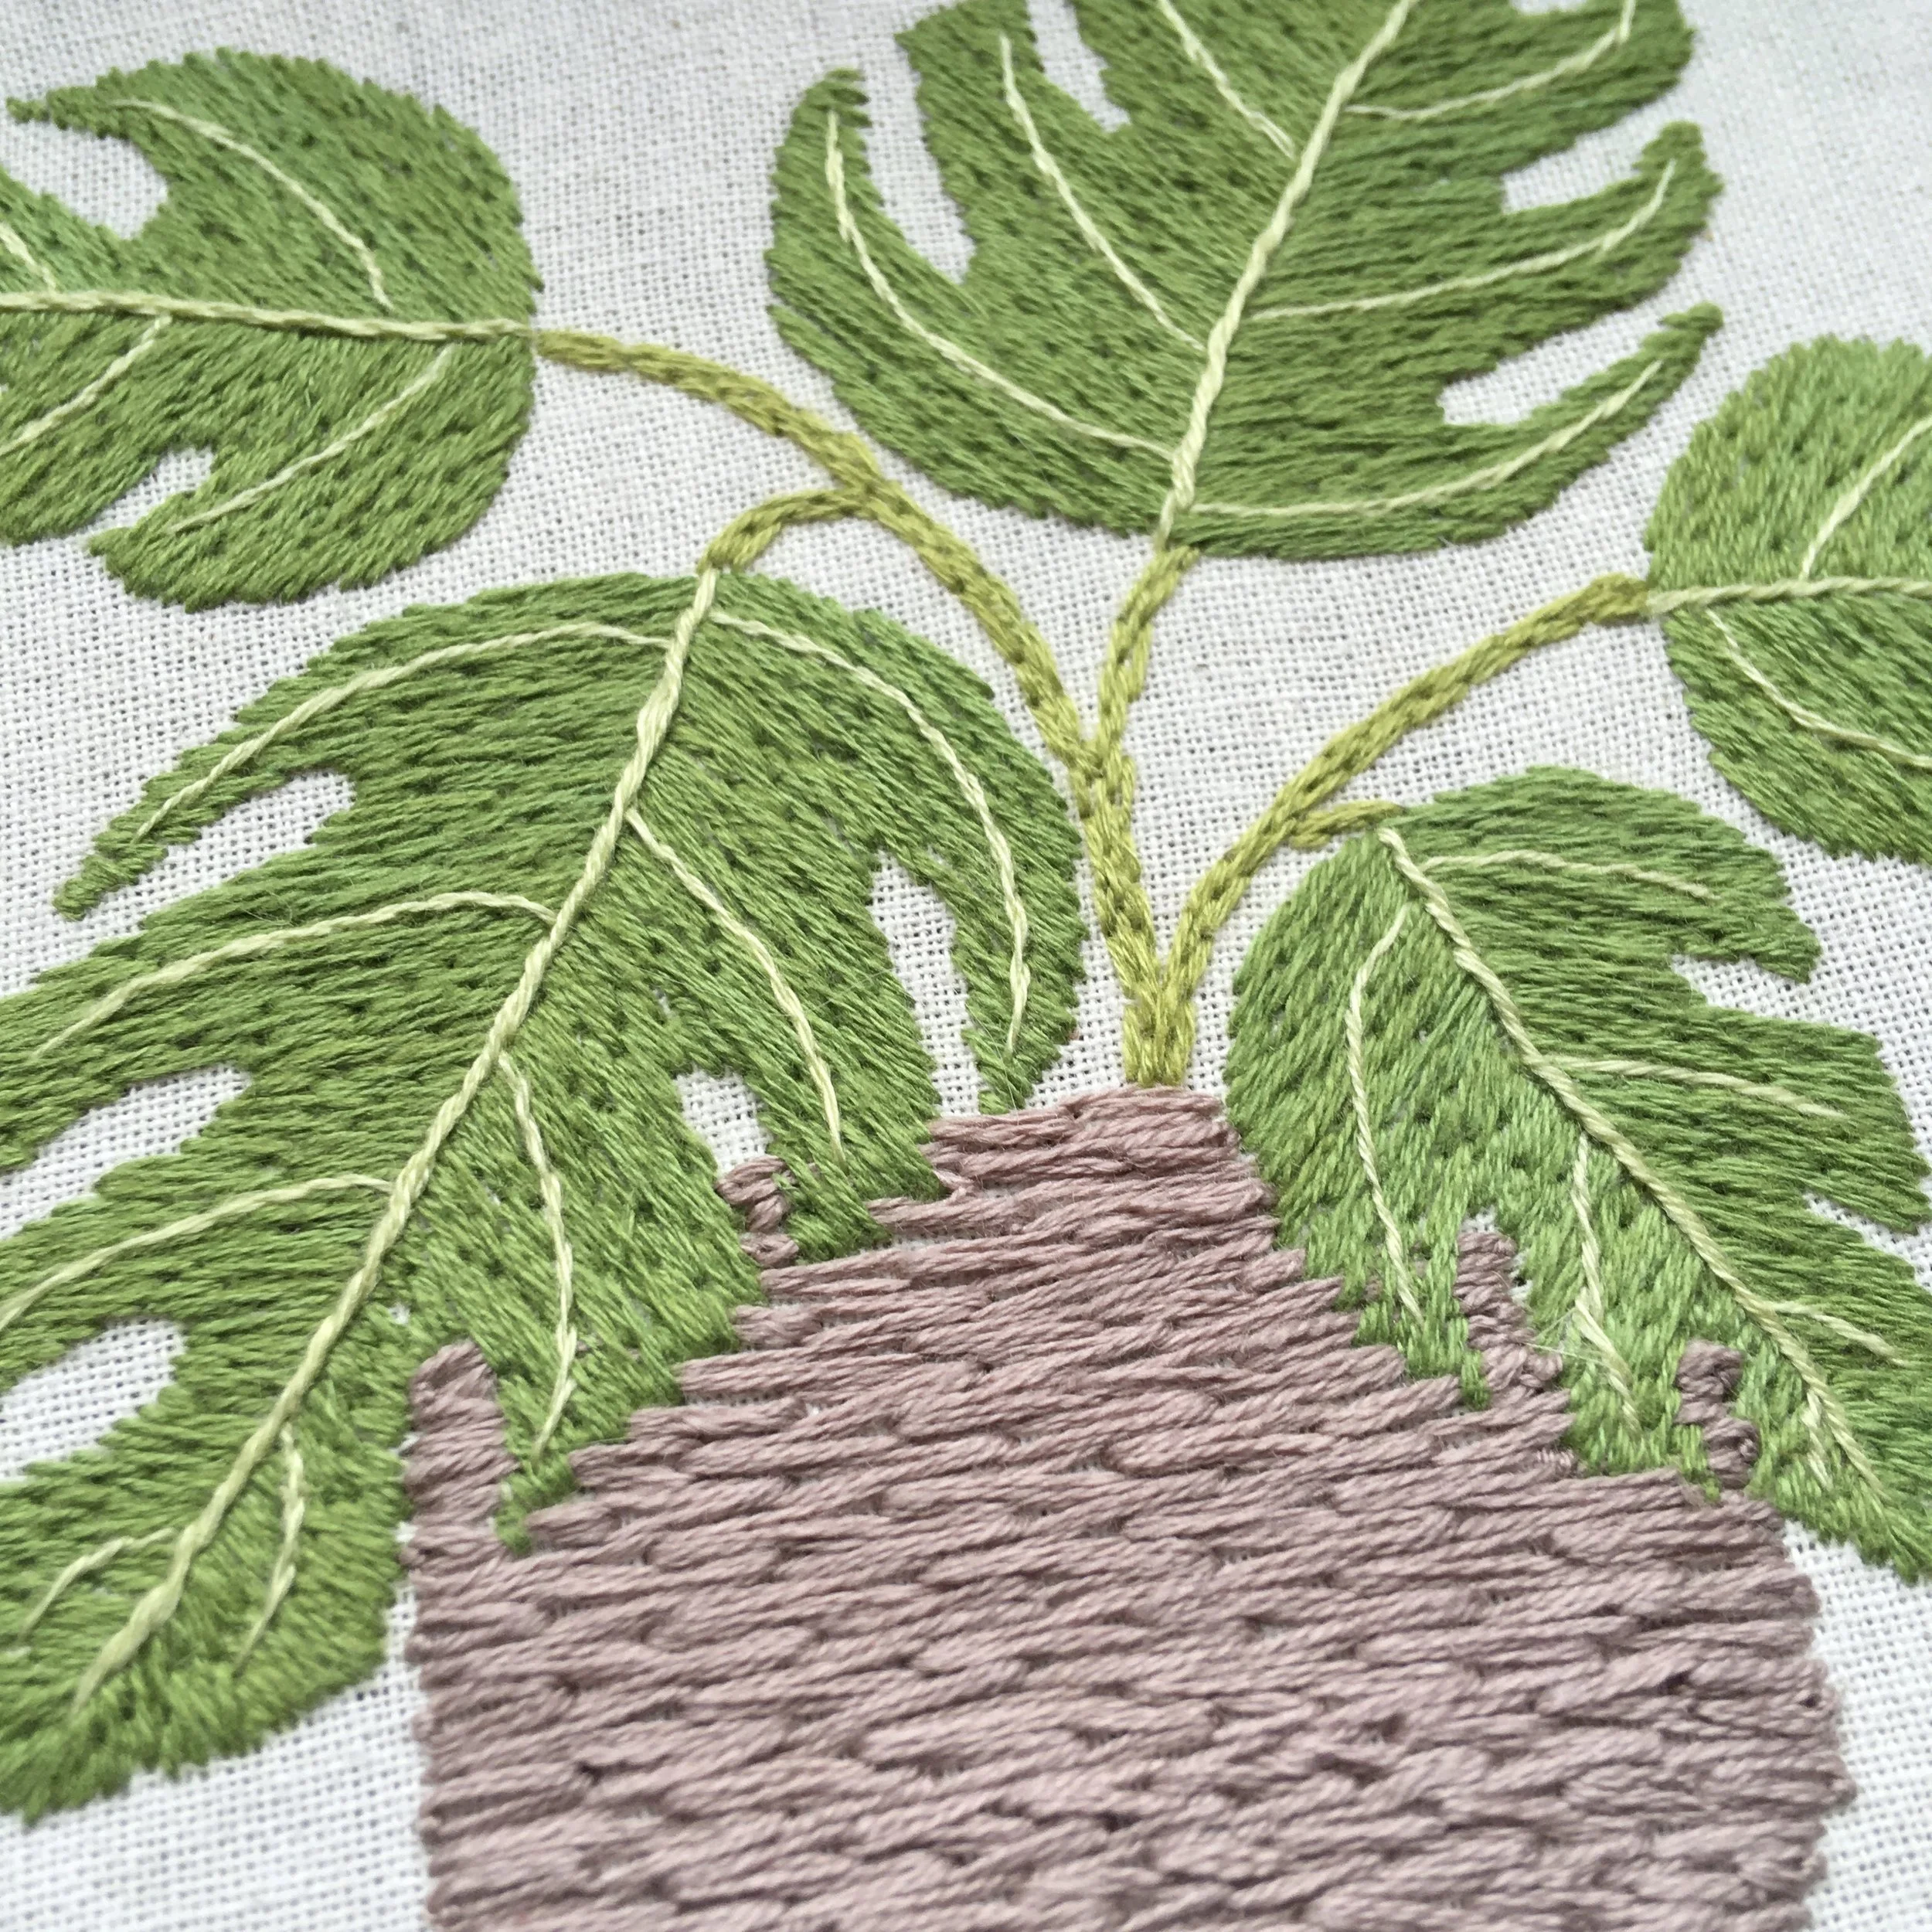
A close up image of an embroidered monstera plant in a basket

Patience

Embroidery can take a long time to complete.

I don’t often time how long it takes me to stitch a piece from start to finish as one of the joys of embroidery is you can pick it up and put it down at will. But for this piece I only stitched it in blocks of time (zoom calls and train journeys!) so I know this took 12 hours to finish.

You need to be patient and know that for many fully stitched designs such as this, you are not going to be able to finish it in an afternoon.

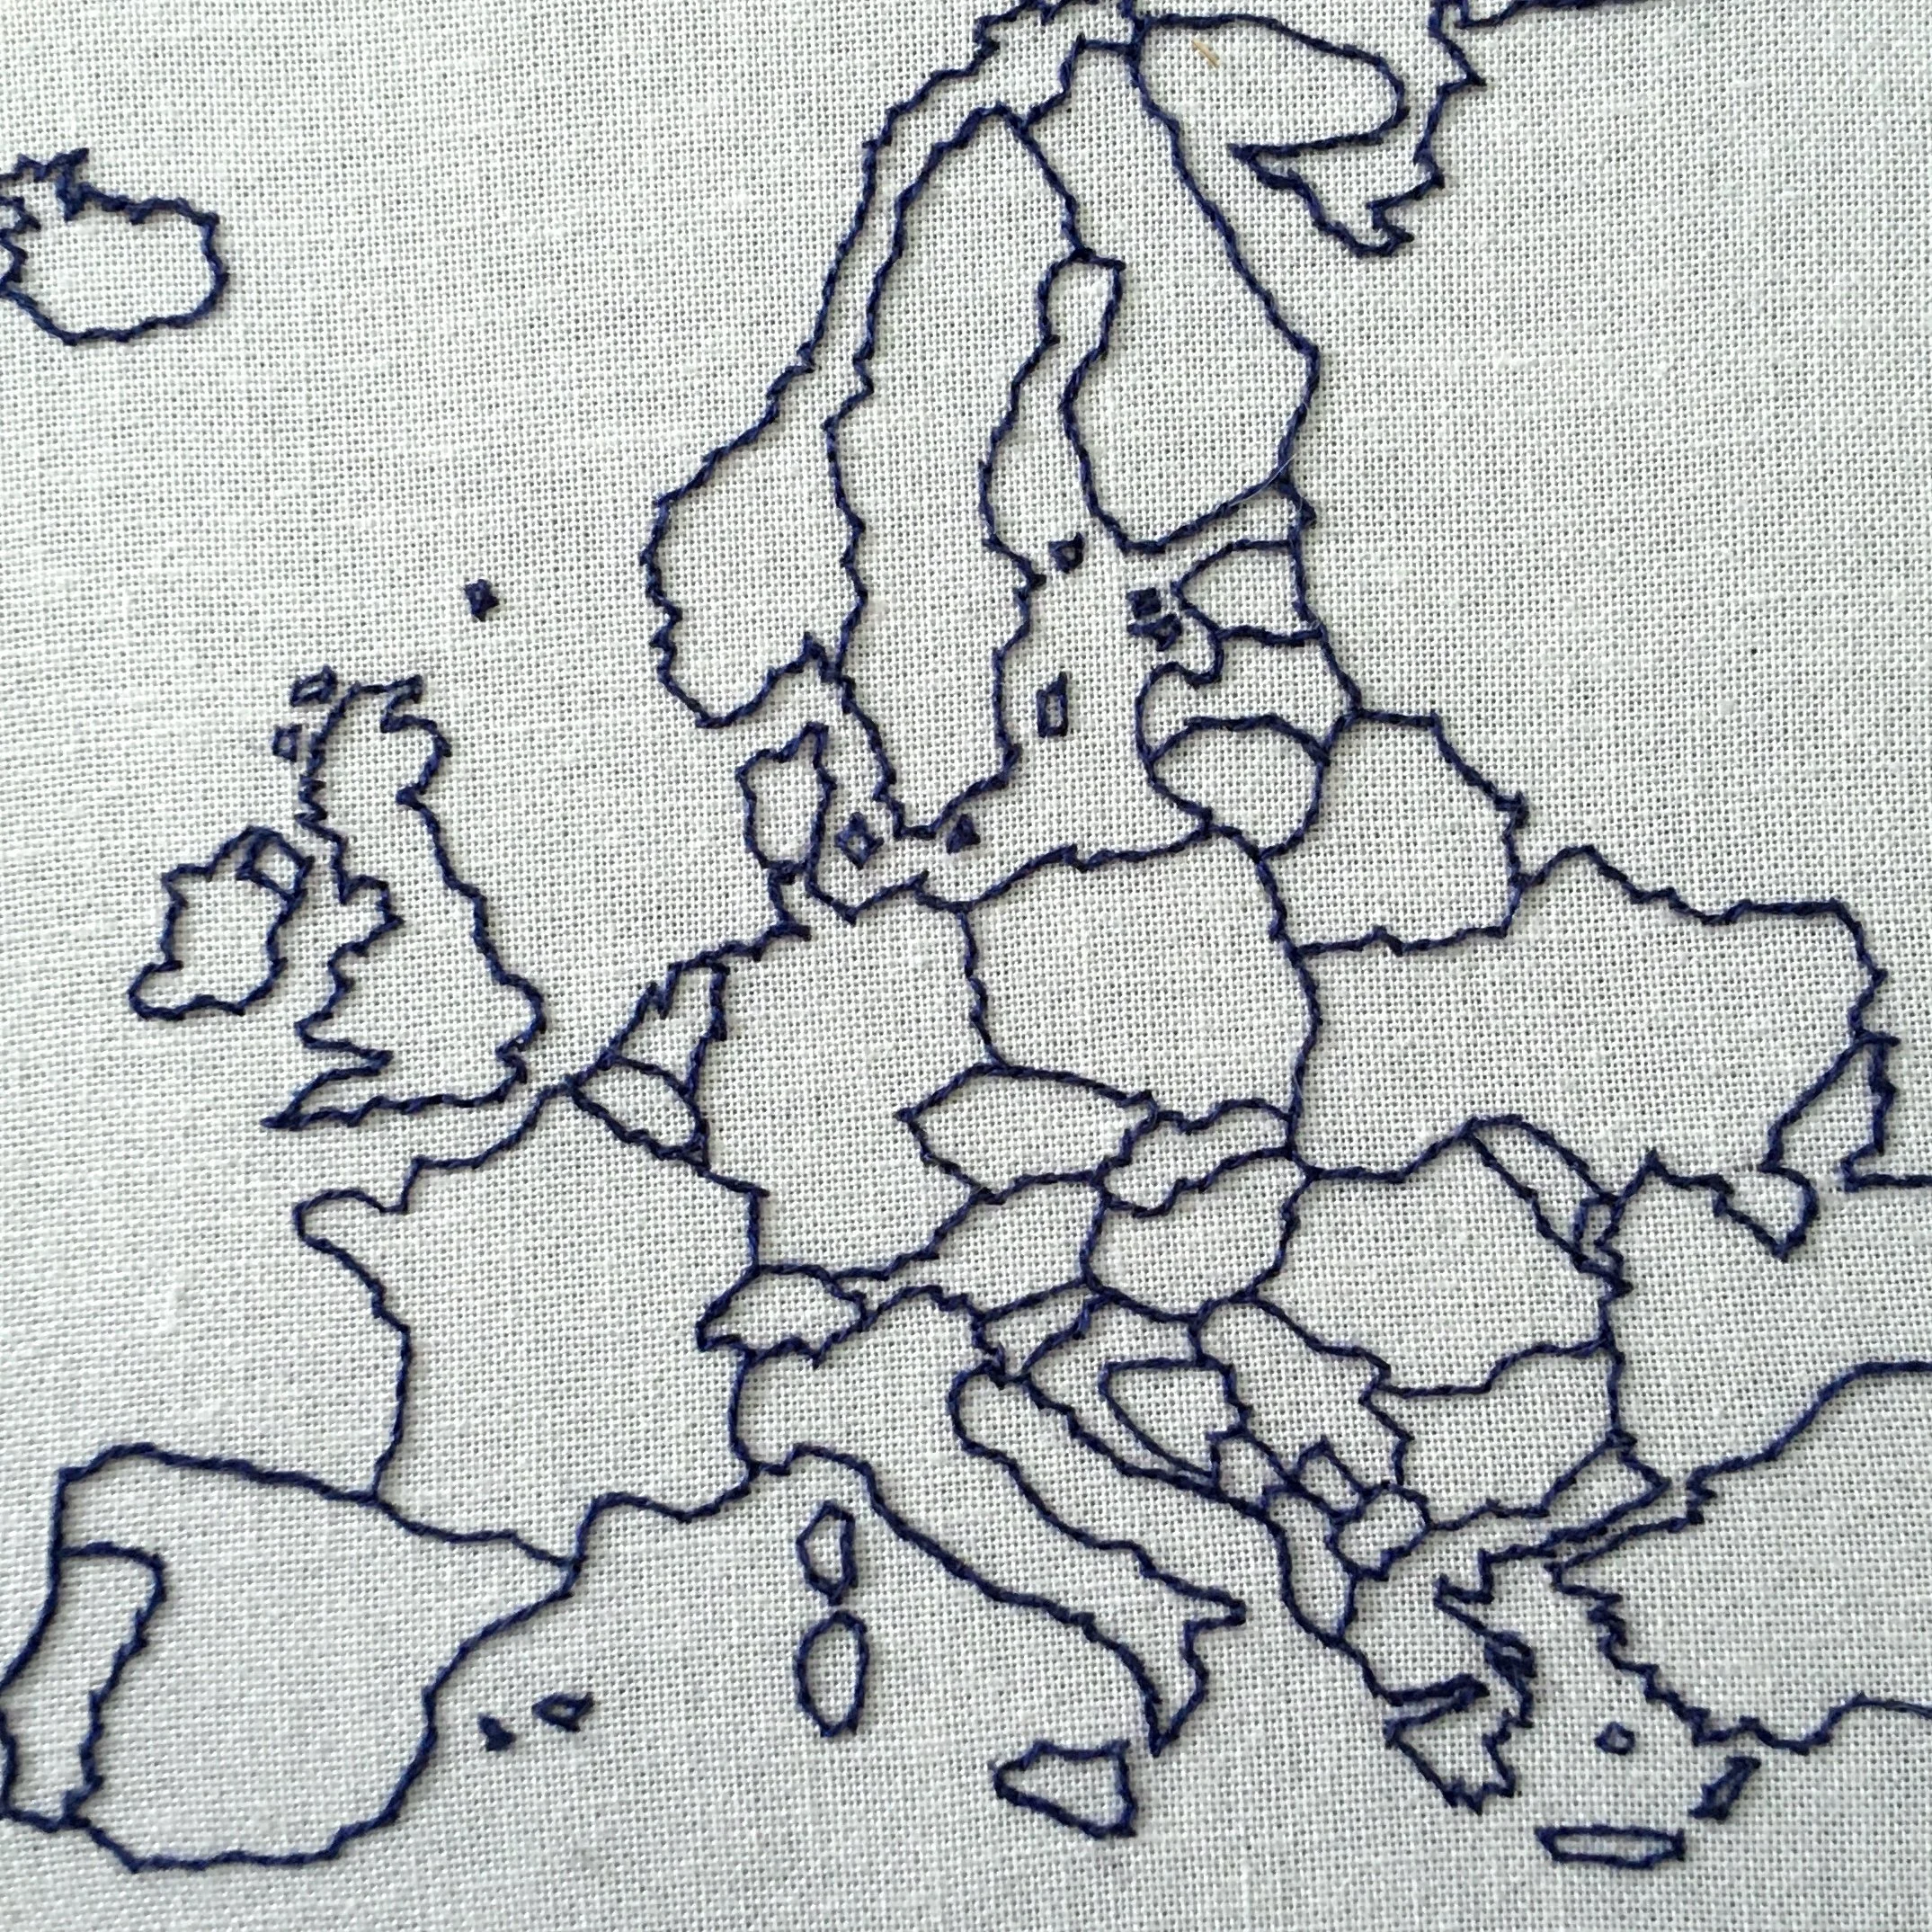
A map of Europe on fabric with embroidered outlines of each country

Perseverance

Especially if you are stitching a new design or experimenting with a new stitch, it won’t always go right first time.

It can be disheartening to see an area that you have spend an hour or two stitching doesn’t look quite right. But more often than not, making a decision to cut it out and re-stitch is the right one.

With this map of Europe I originally wanted to fill in each country with a different colour, but after completing a couple it just didn’t look right so I cut out all that stitching and started outlining instead. It looks so much better!

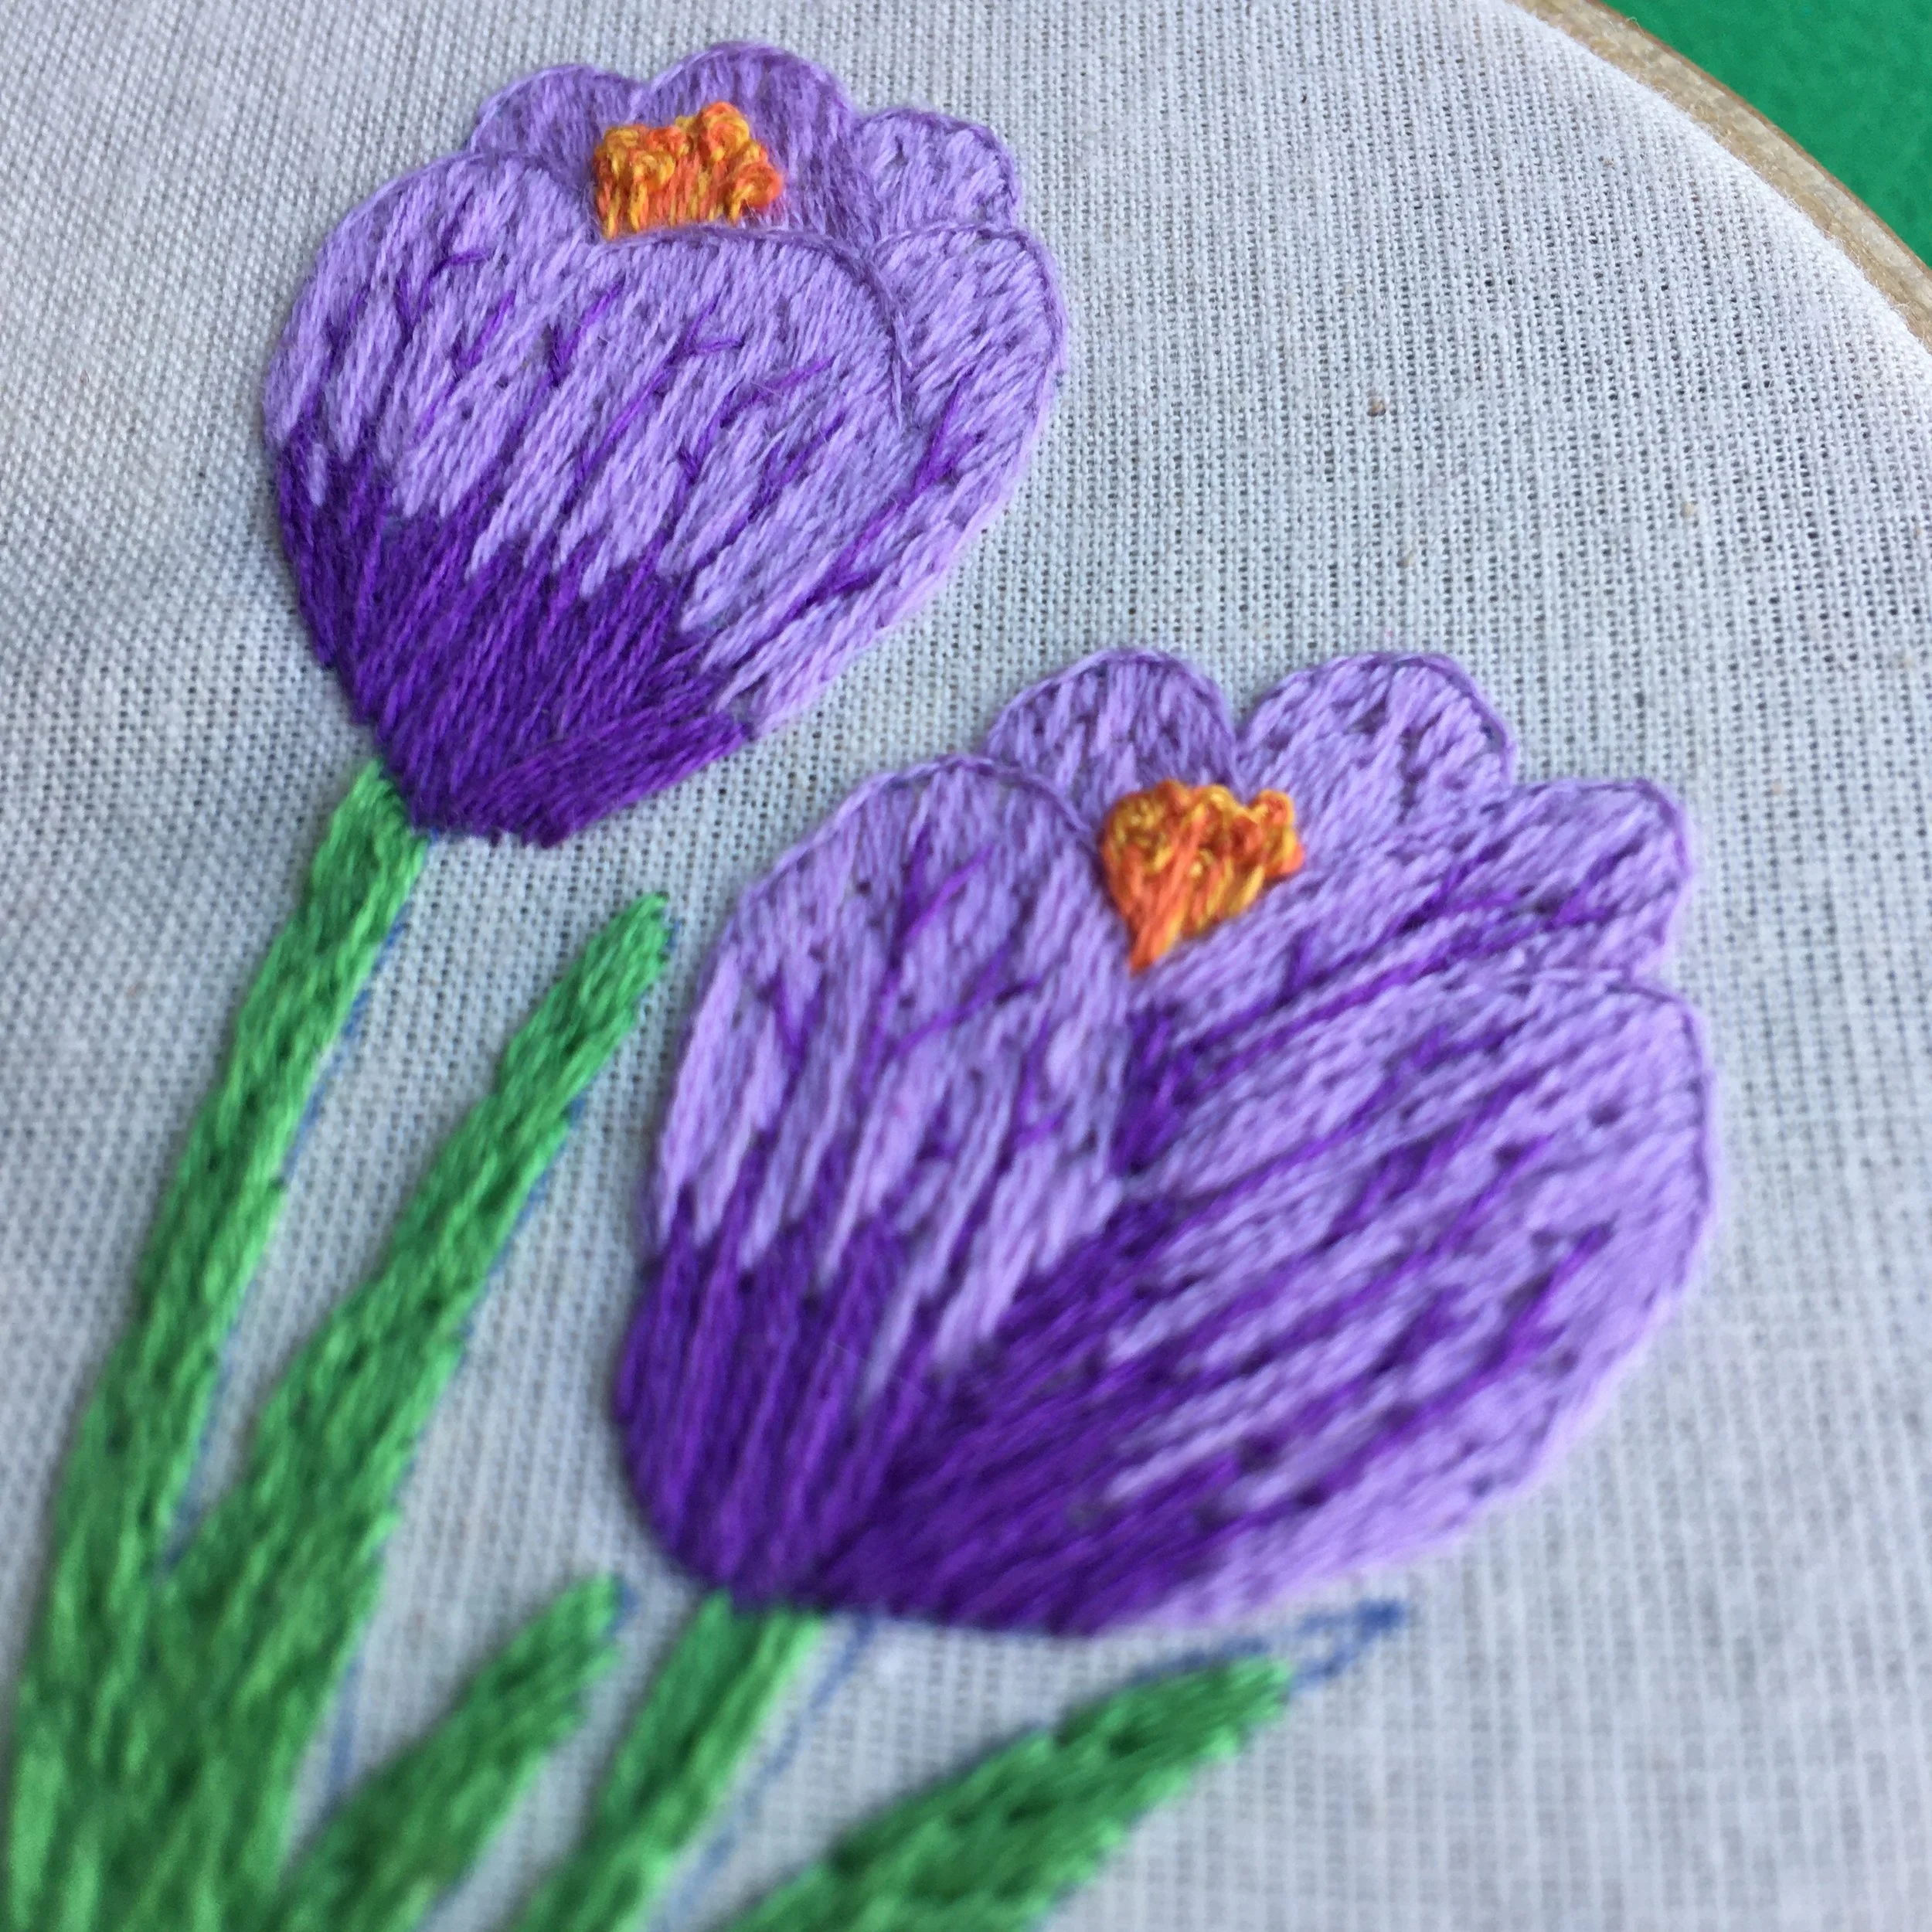
a close up image of some embroidered purple crocus

An eye for detail

I was originally going to say ‘attention to detail’ because you do need to pay attention to the smallest things. The fraction of a millimetre difference in where you place your needle for a stitch can make the difference between good and great looking embroidery. But it think that it’s slightly different to that - it’s about being able to look at a design or piece of stitching and notice where an added detail will make a difference.

I initially stitched the centre of this crocus using only orange thread, but it didn’t look quite right. Mixing one strand of yellow with one of orange, really made the difference.

But don’t worry if you are reading this and this doesn’t sound like you but you still want to create a great embroidery! This floral stitch sampler is the perfect project for you. Each floral motif is stitched separately meaning you can pick it up and put in down - you only need a small dose of patience to stitch each one. It come with pre-printed fabric and a guide of which stitches you can use for each motif - I’ve persevered and used my eye for detail to get this design right and ready for you to stitch.

Enjoyed this blog post? I share embroidery tips and a free embroidery pattern in my monthly newsletter. Sign up here to receive the newsletter on the 1st of each the month.

In tips 3
Comment
a picture of an embroidery stitch sampler using a variation of number of threads overlayed with a blue square and the text - hand embroidery, how many strands of embroidery floss to use, www.embellishedelephant.co.uk

How many strands of embroidery floss to use

April 20, 2022

Embroidery floss comes in skeins of six strands and patterns will often indicate how many strands to use. But what effect does varying the number of strand actually have on your embroidery?

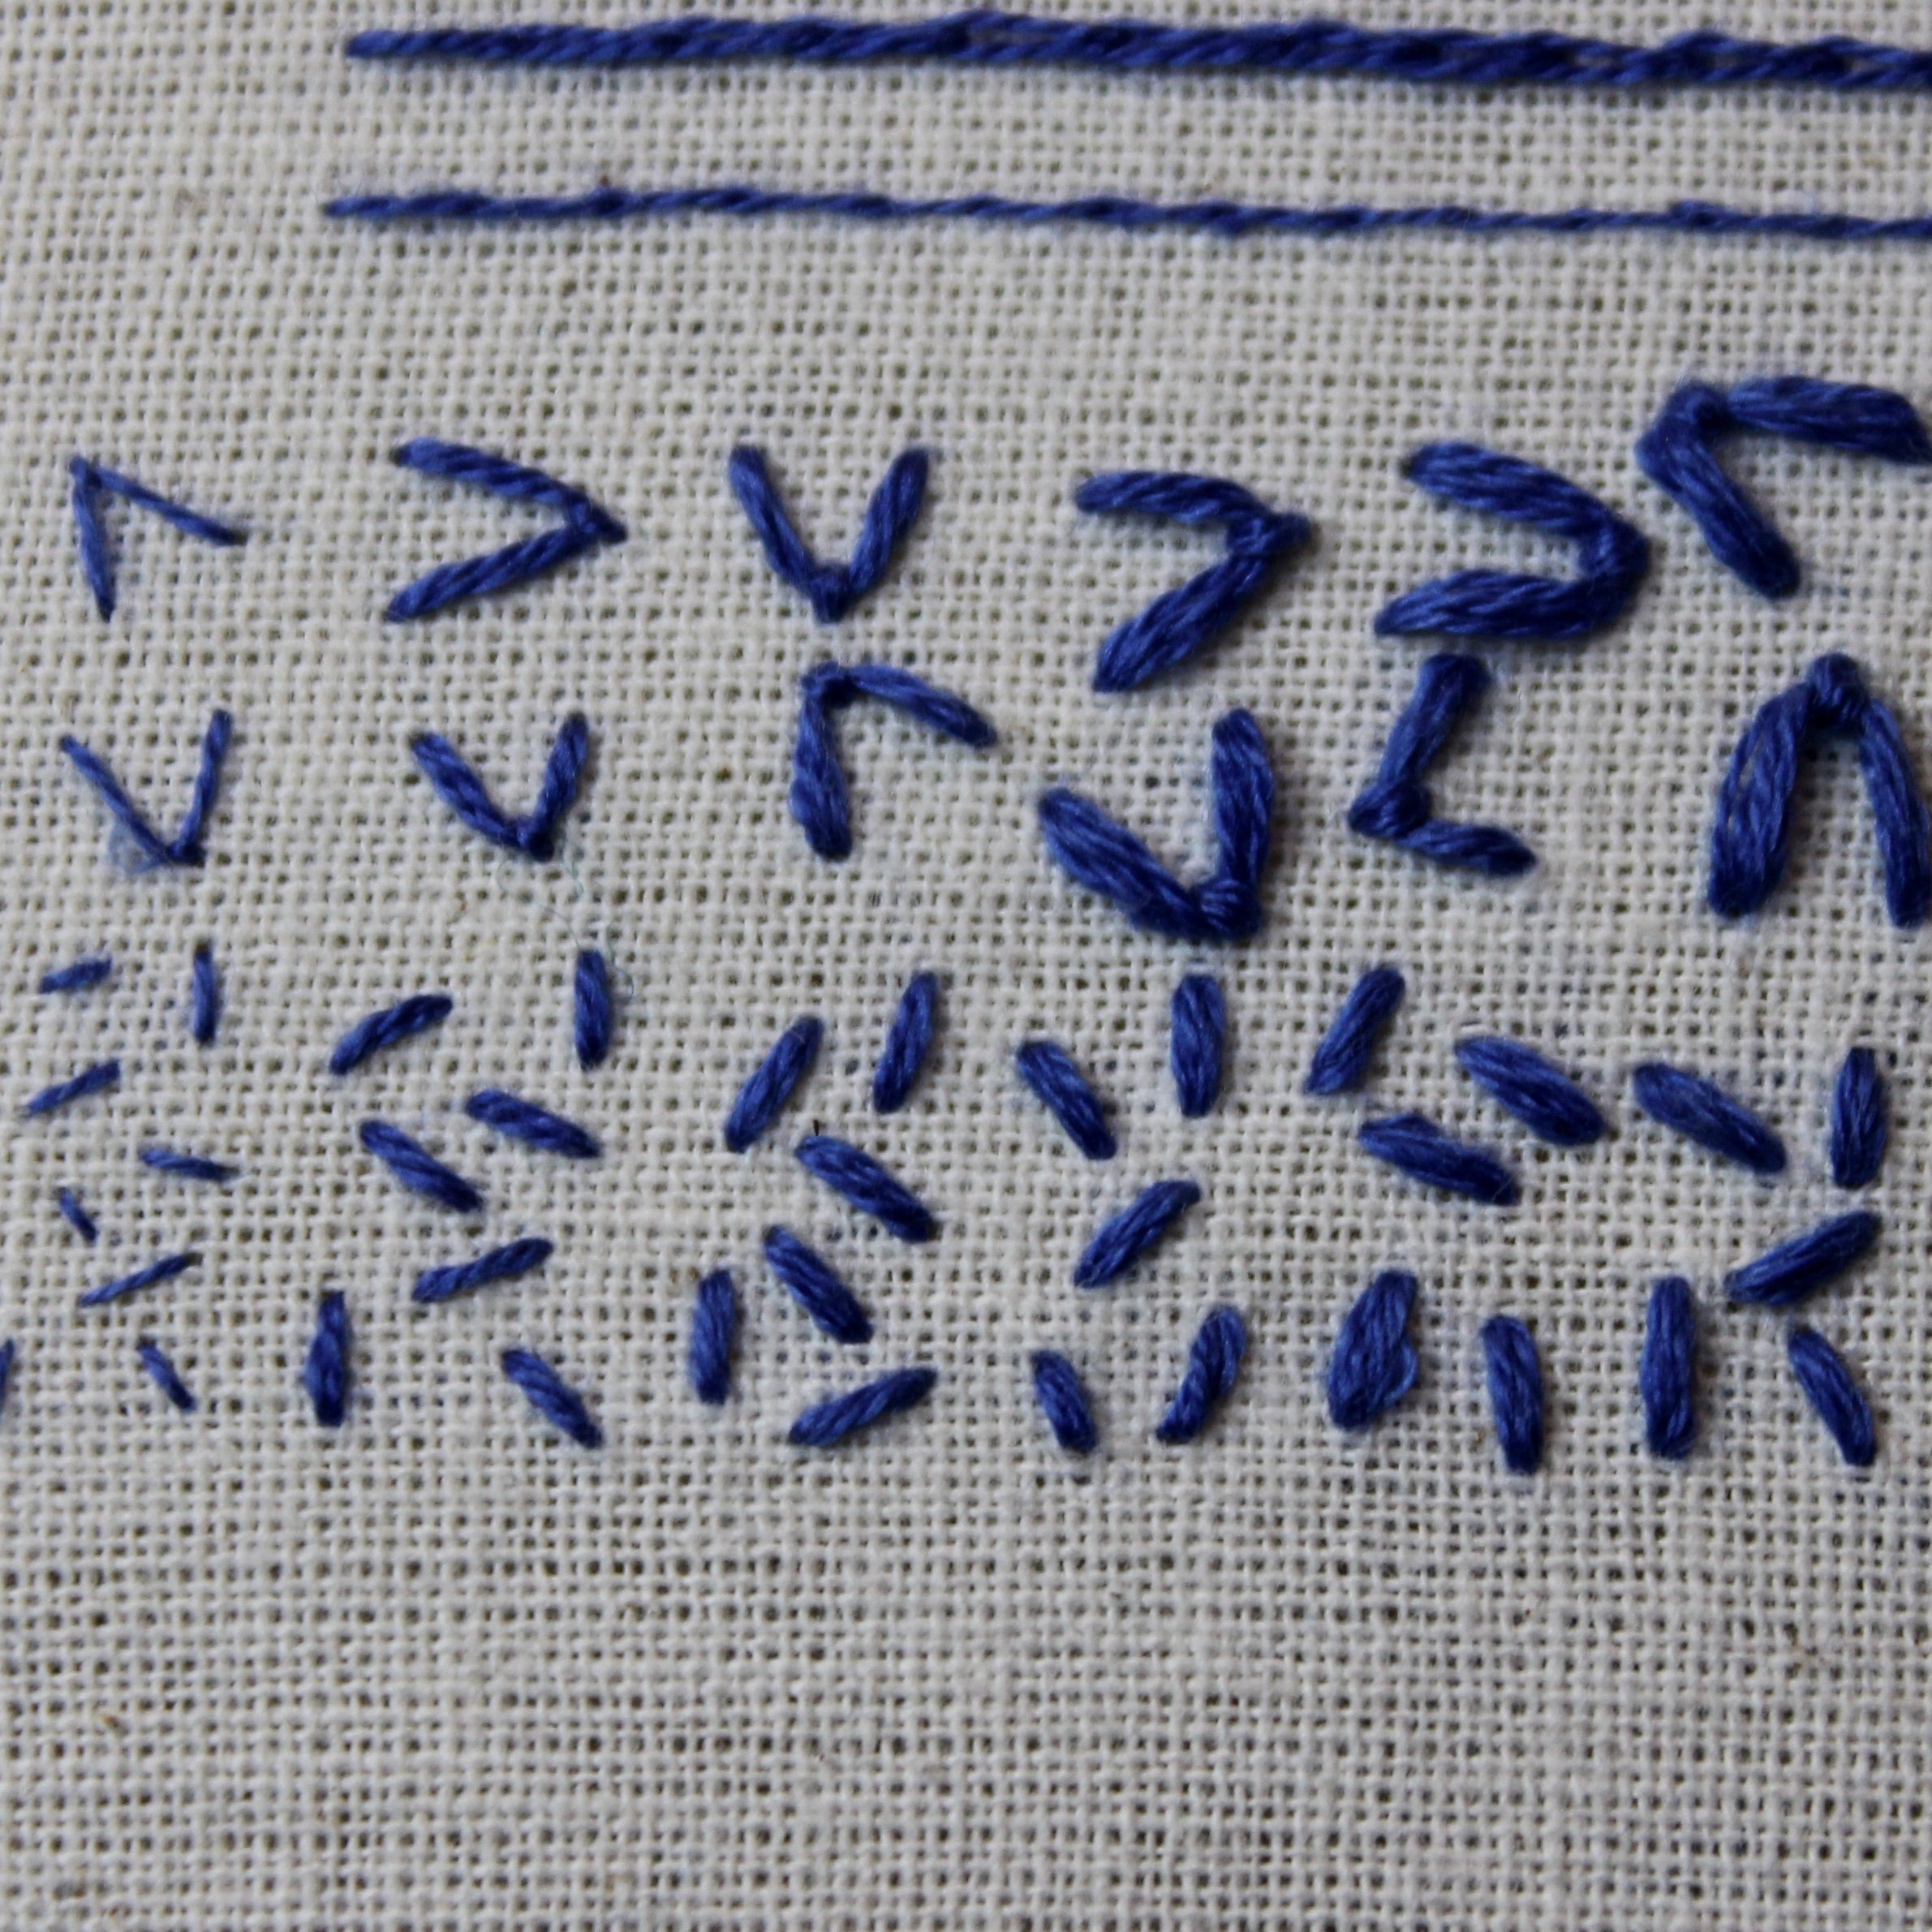
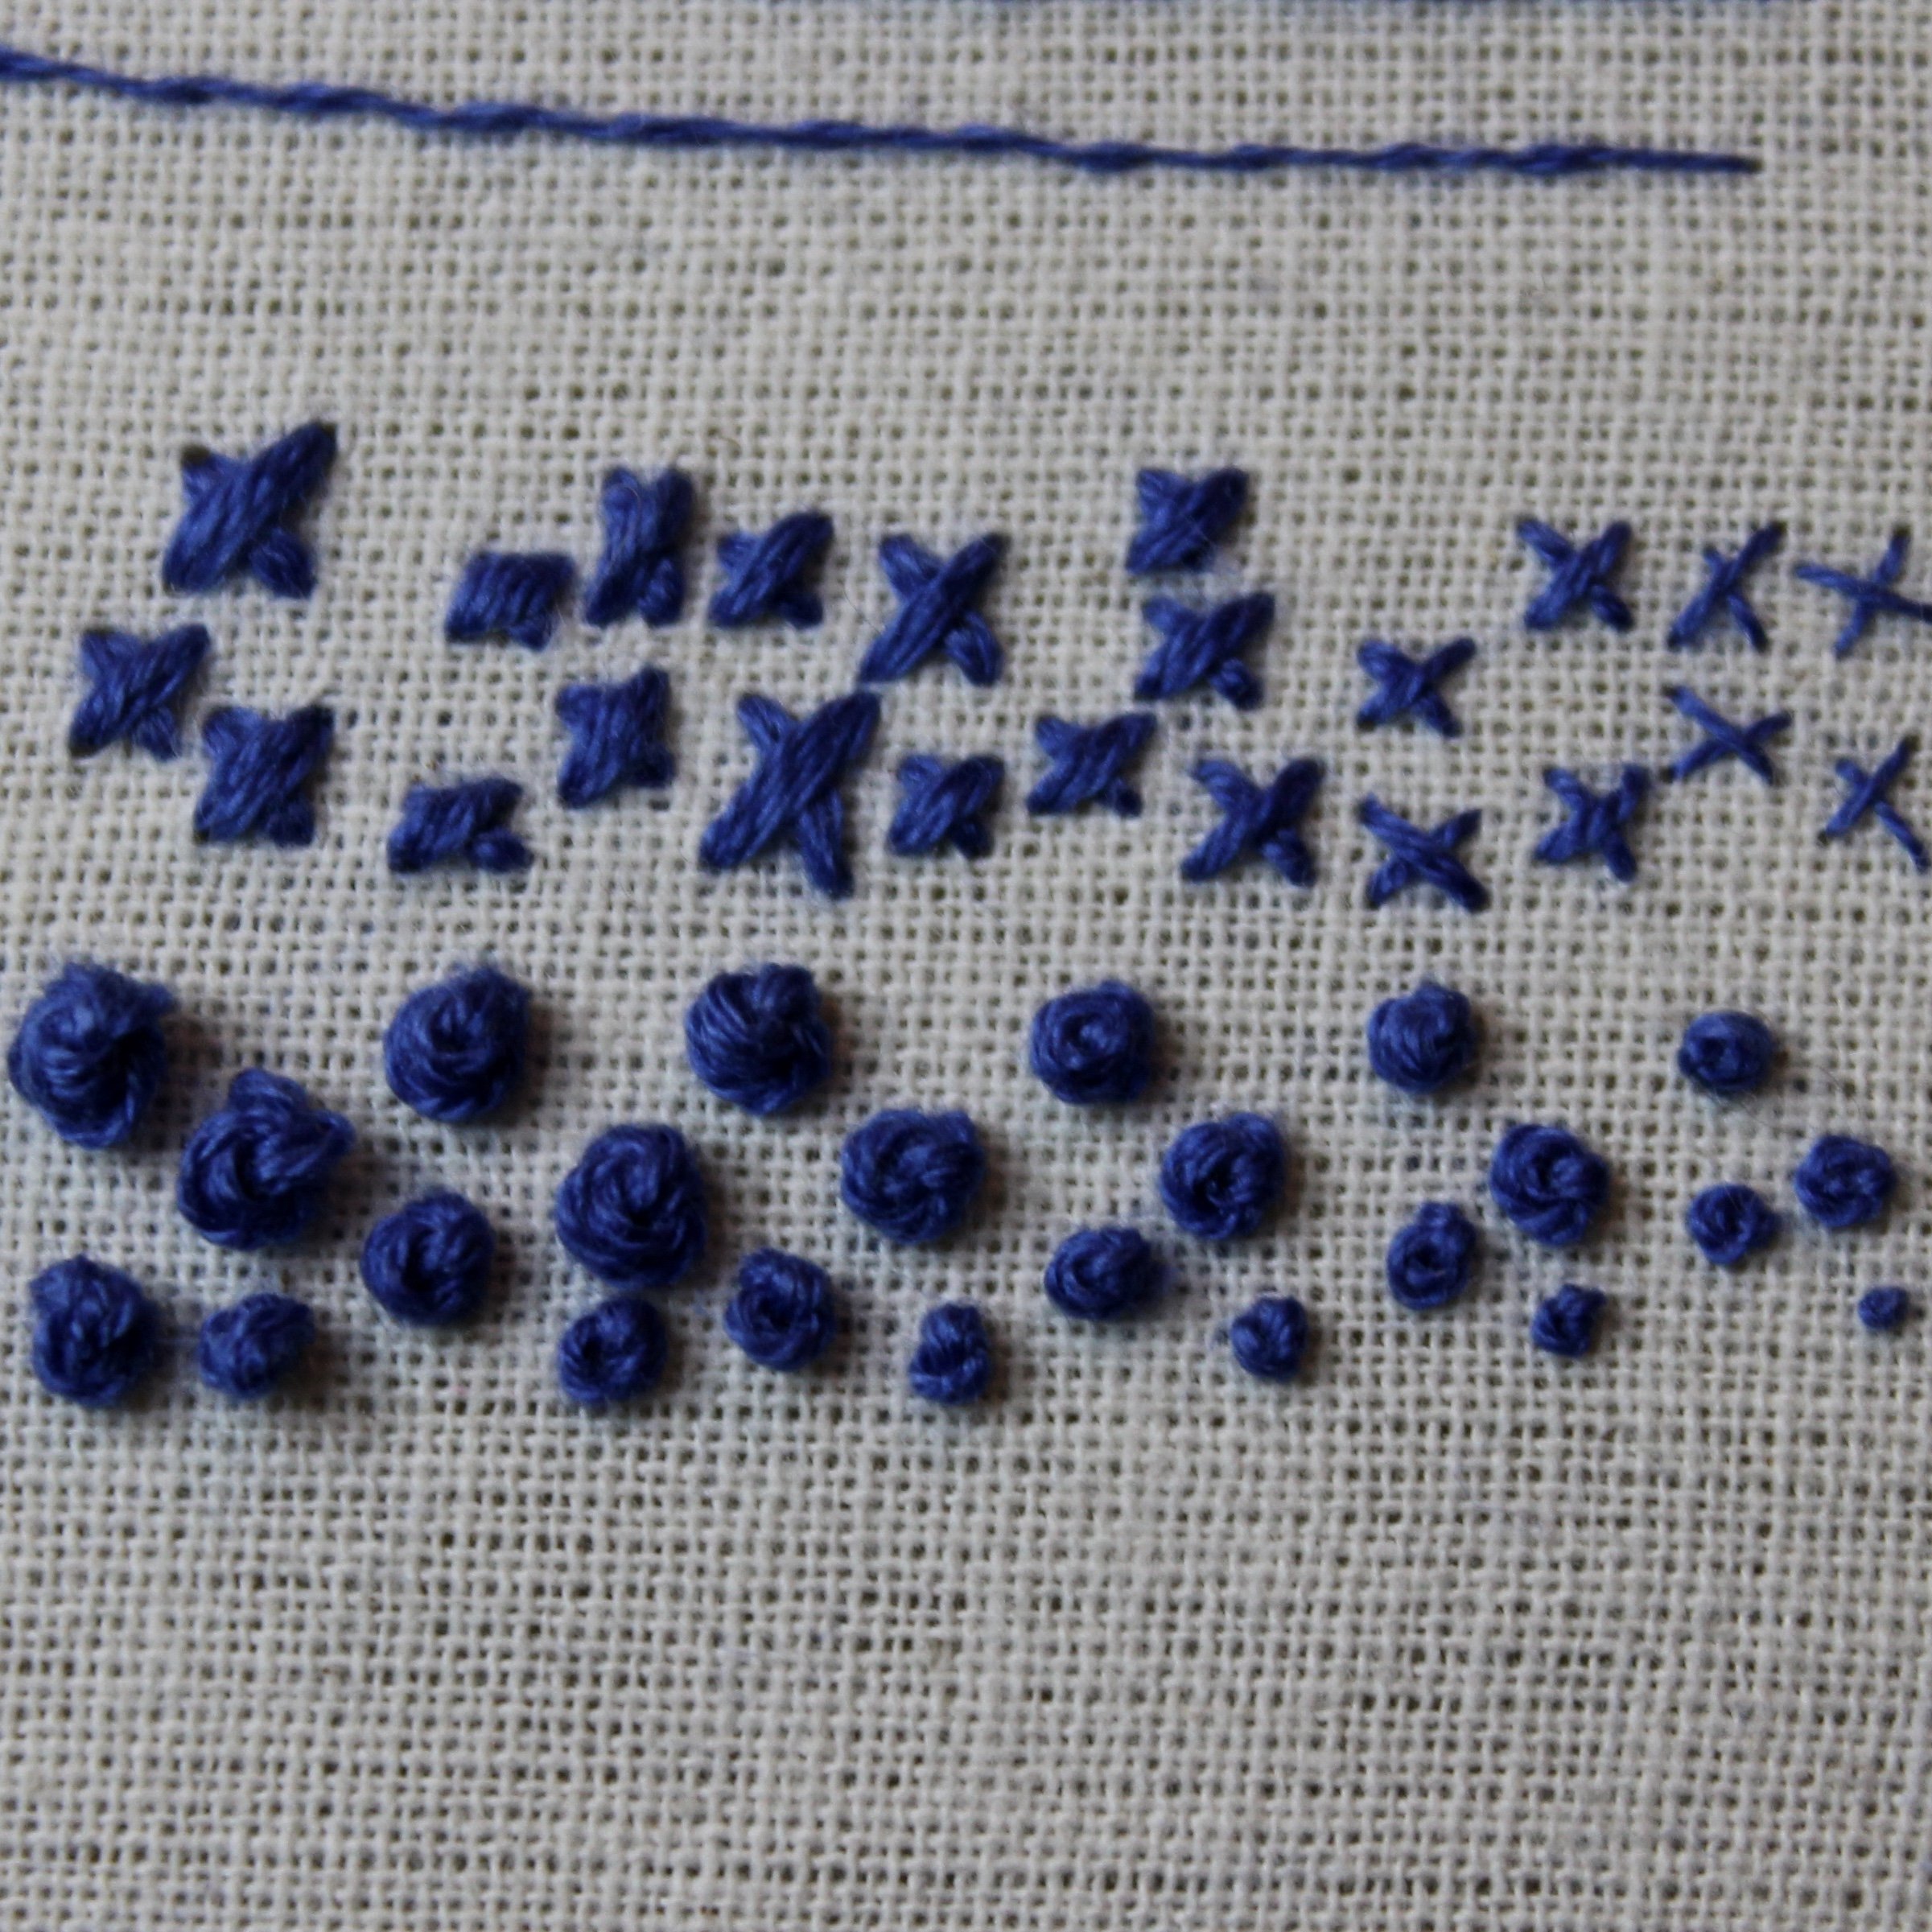
I tried stitching various embroidery stitches with different numbers of thread to demonstrate how this impacts the overall look. For many stitches they loose their definition if too many strands of floss are used. But some stitches, for example stem stitch actually look better with thicker thread.

Here are some things to bear in mind whichever stitch/thread number combination you choose.

  • One strand - Perfect for fine embroidery work and for thin outlines.

  • Two strands - I stitch most of my projects with two strands because the additional strand gives a little bit more bulk. It’s especially useful to have that extra stitch when filling areas it means fewer stitches are needed to fill the area.

  • Three strands - I sometimes use three strands when stitching plant stems as it gives extra width without the need for another row of stitches.

  • Four strands - I have to admit I rarely stitch with four or five strands, but sometimes four strands is just the right amount of bulk needed for the part of the pattern you are stitching.

  • Five strands - It seems like a very odd number to stitch with if you ask me. But if it’s right for the project then go for it!

  • Six strands - Sometimes you want maximum bulk and to retain the embroidery floss look, in which case all 6 strands can be used. A longer length of three strands can be doubled if you want to stitch with 6 strands but don’t want as much bulk at the eye of the needle.

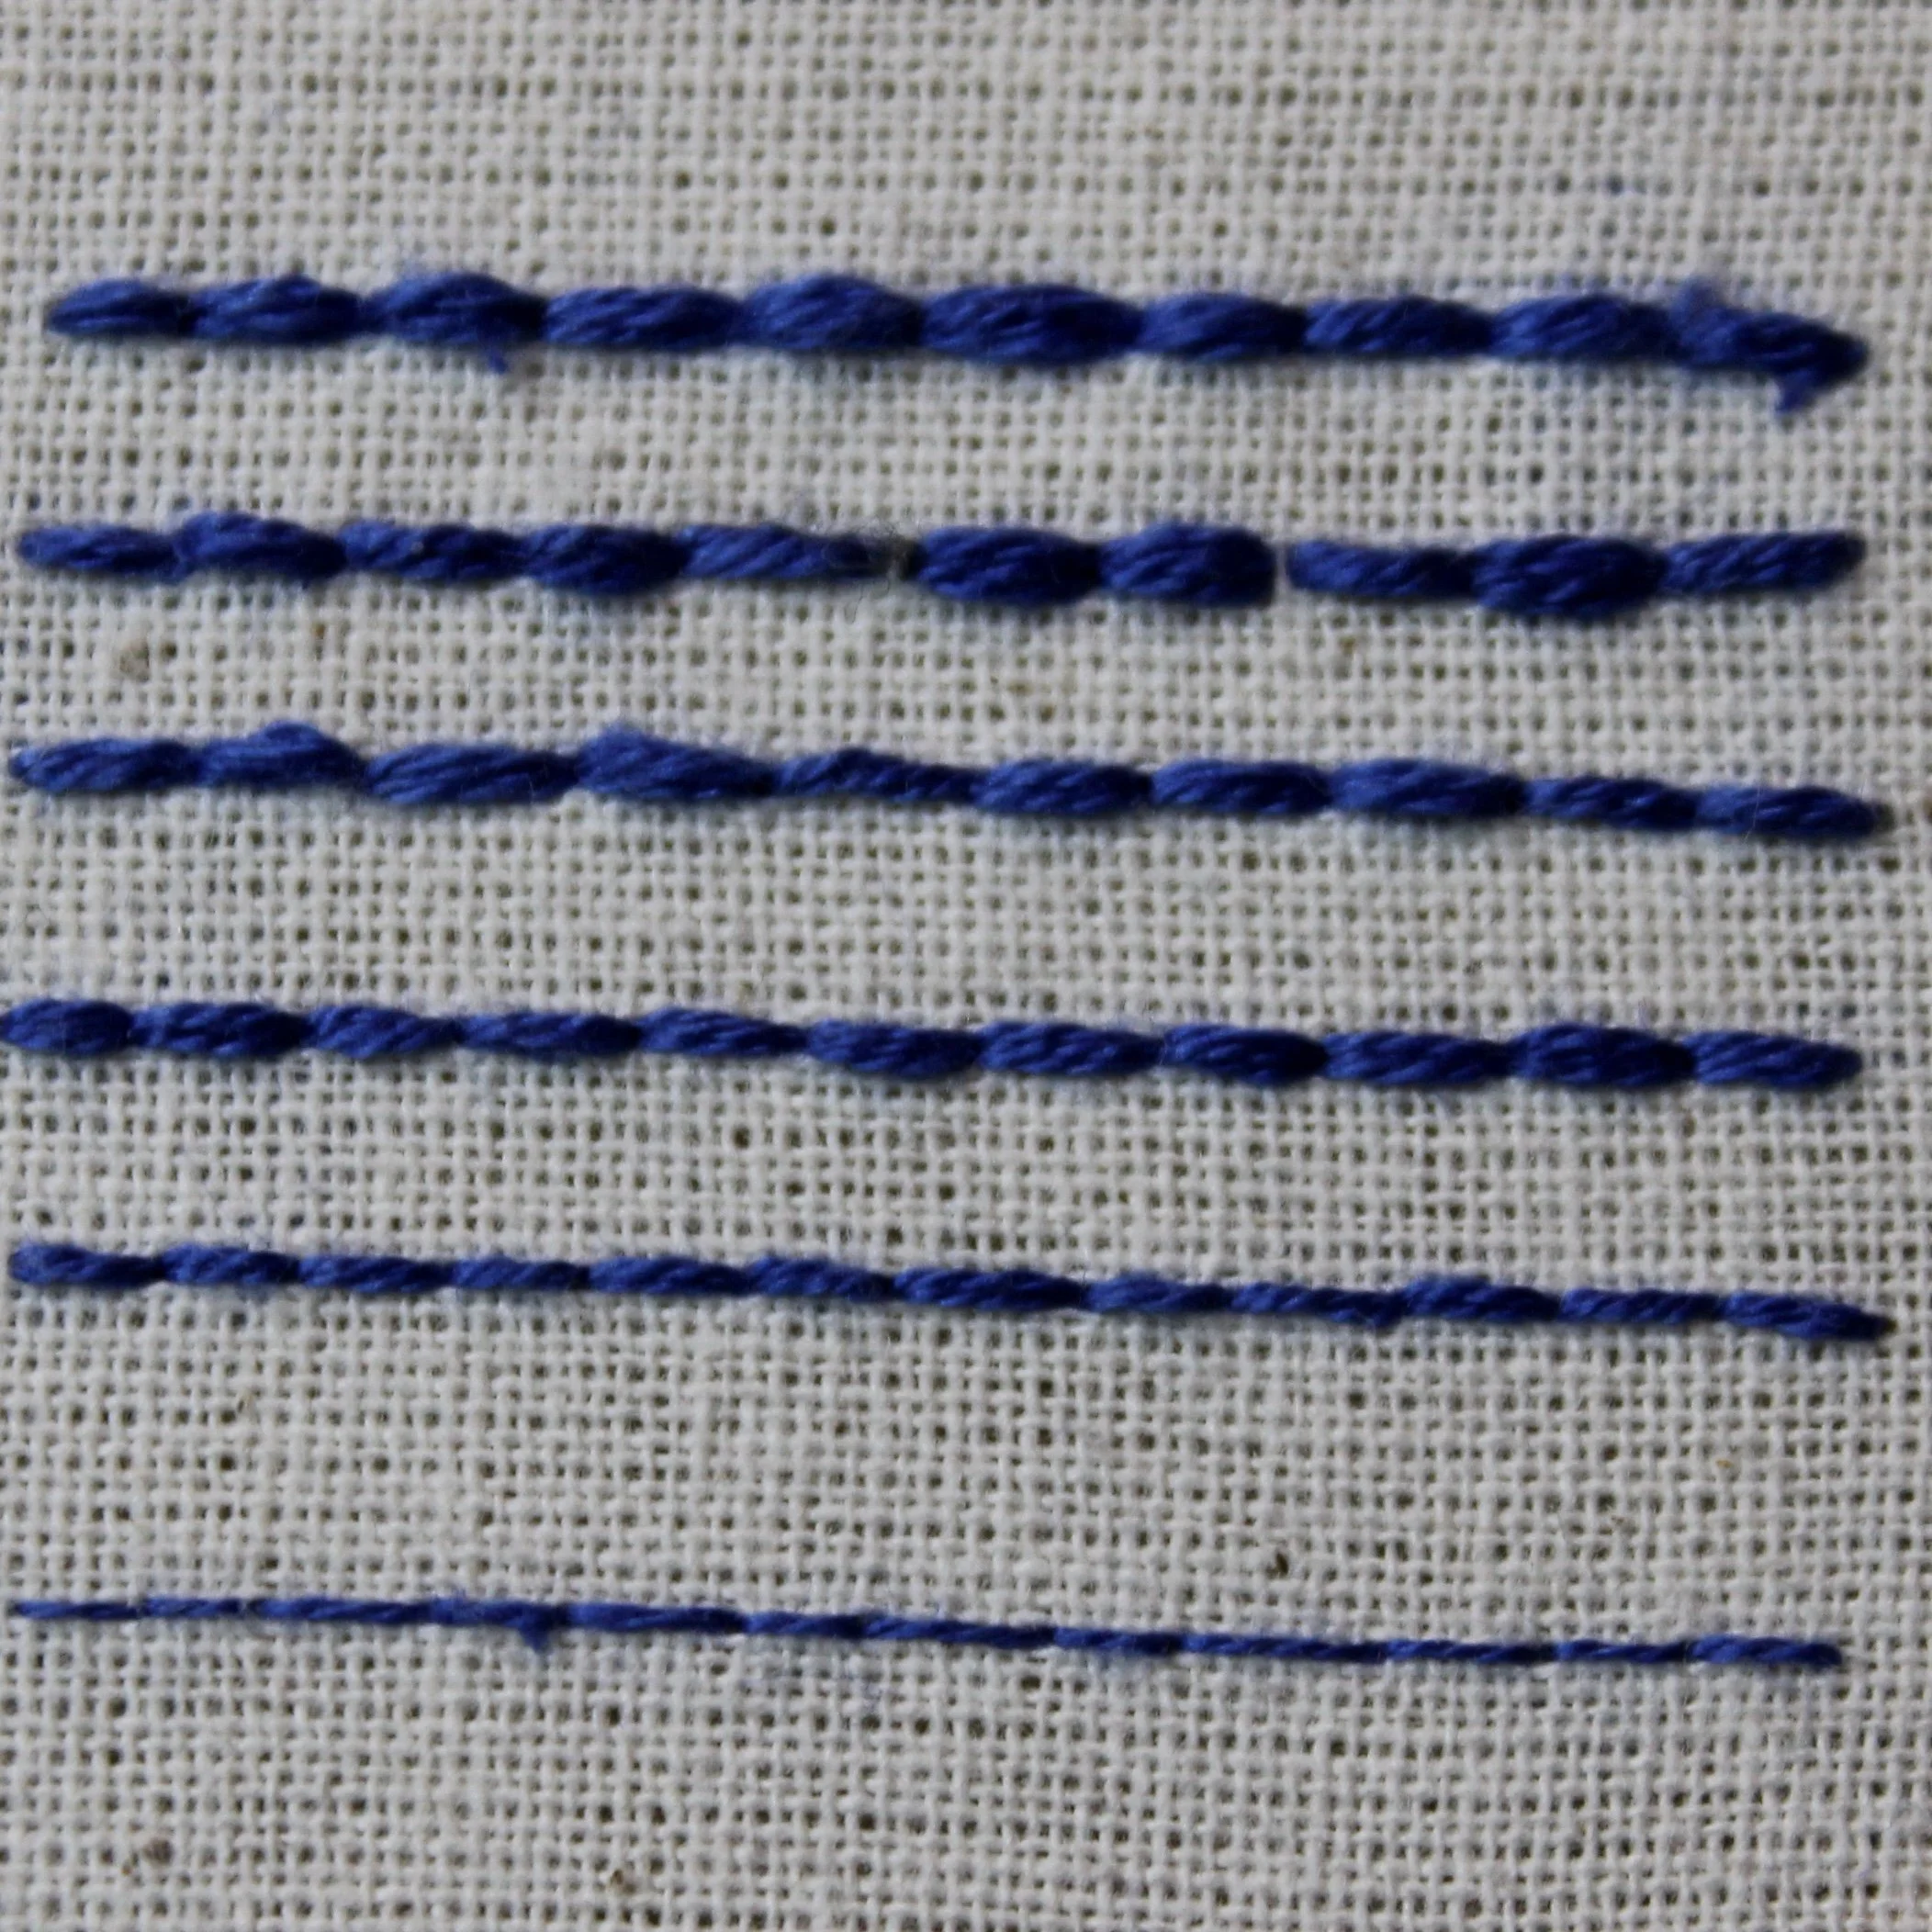
A picture showing blue thread on calico fabric. There are 6 rows of embroidery in backstitch. Each row is stitched with a different number of threads starting with 1 strand at the bottom and 6 at the top.

Backstitch

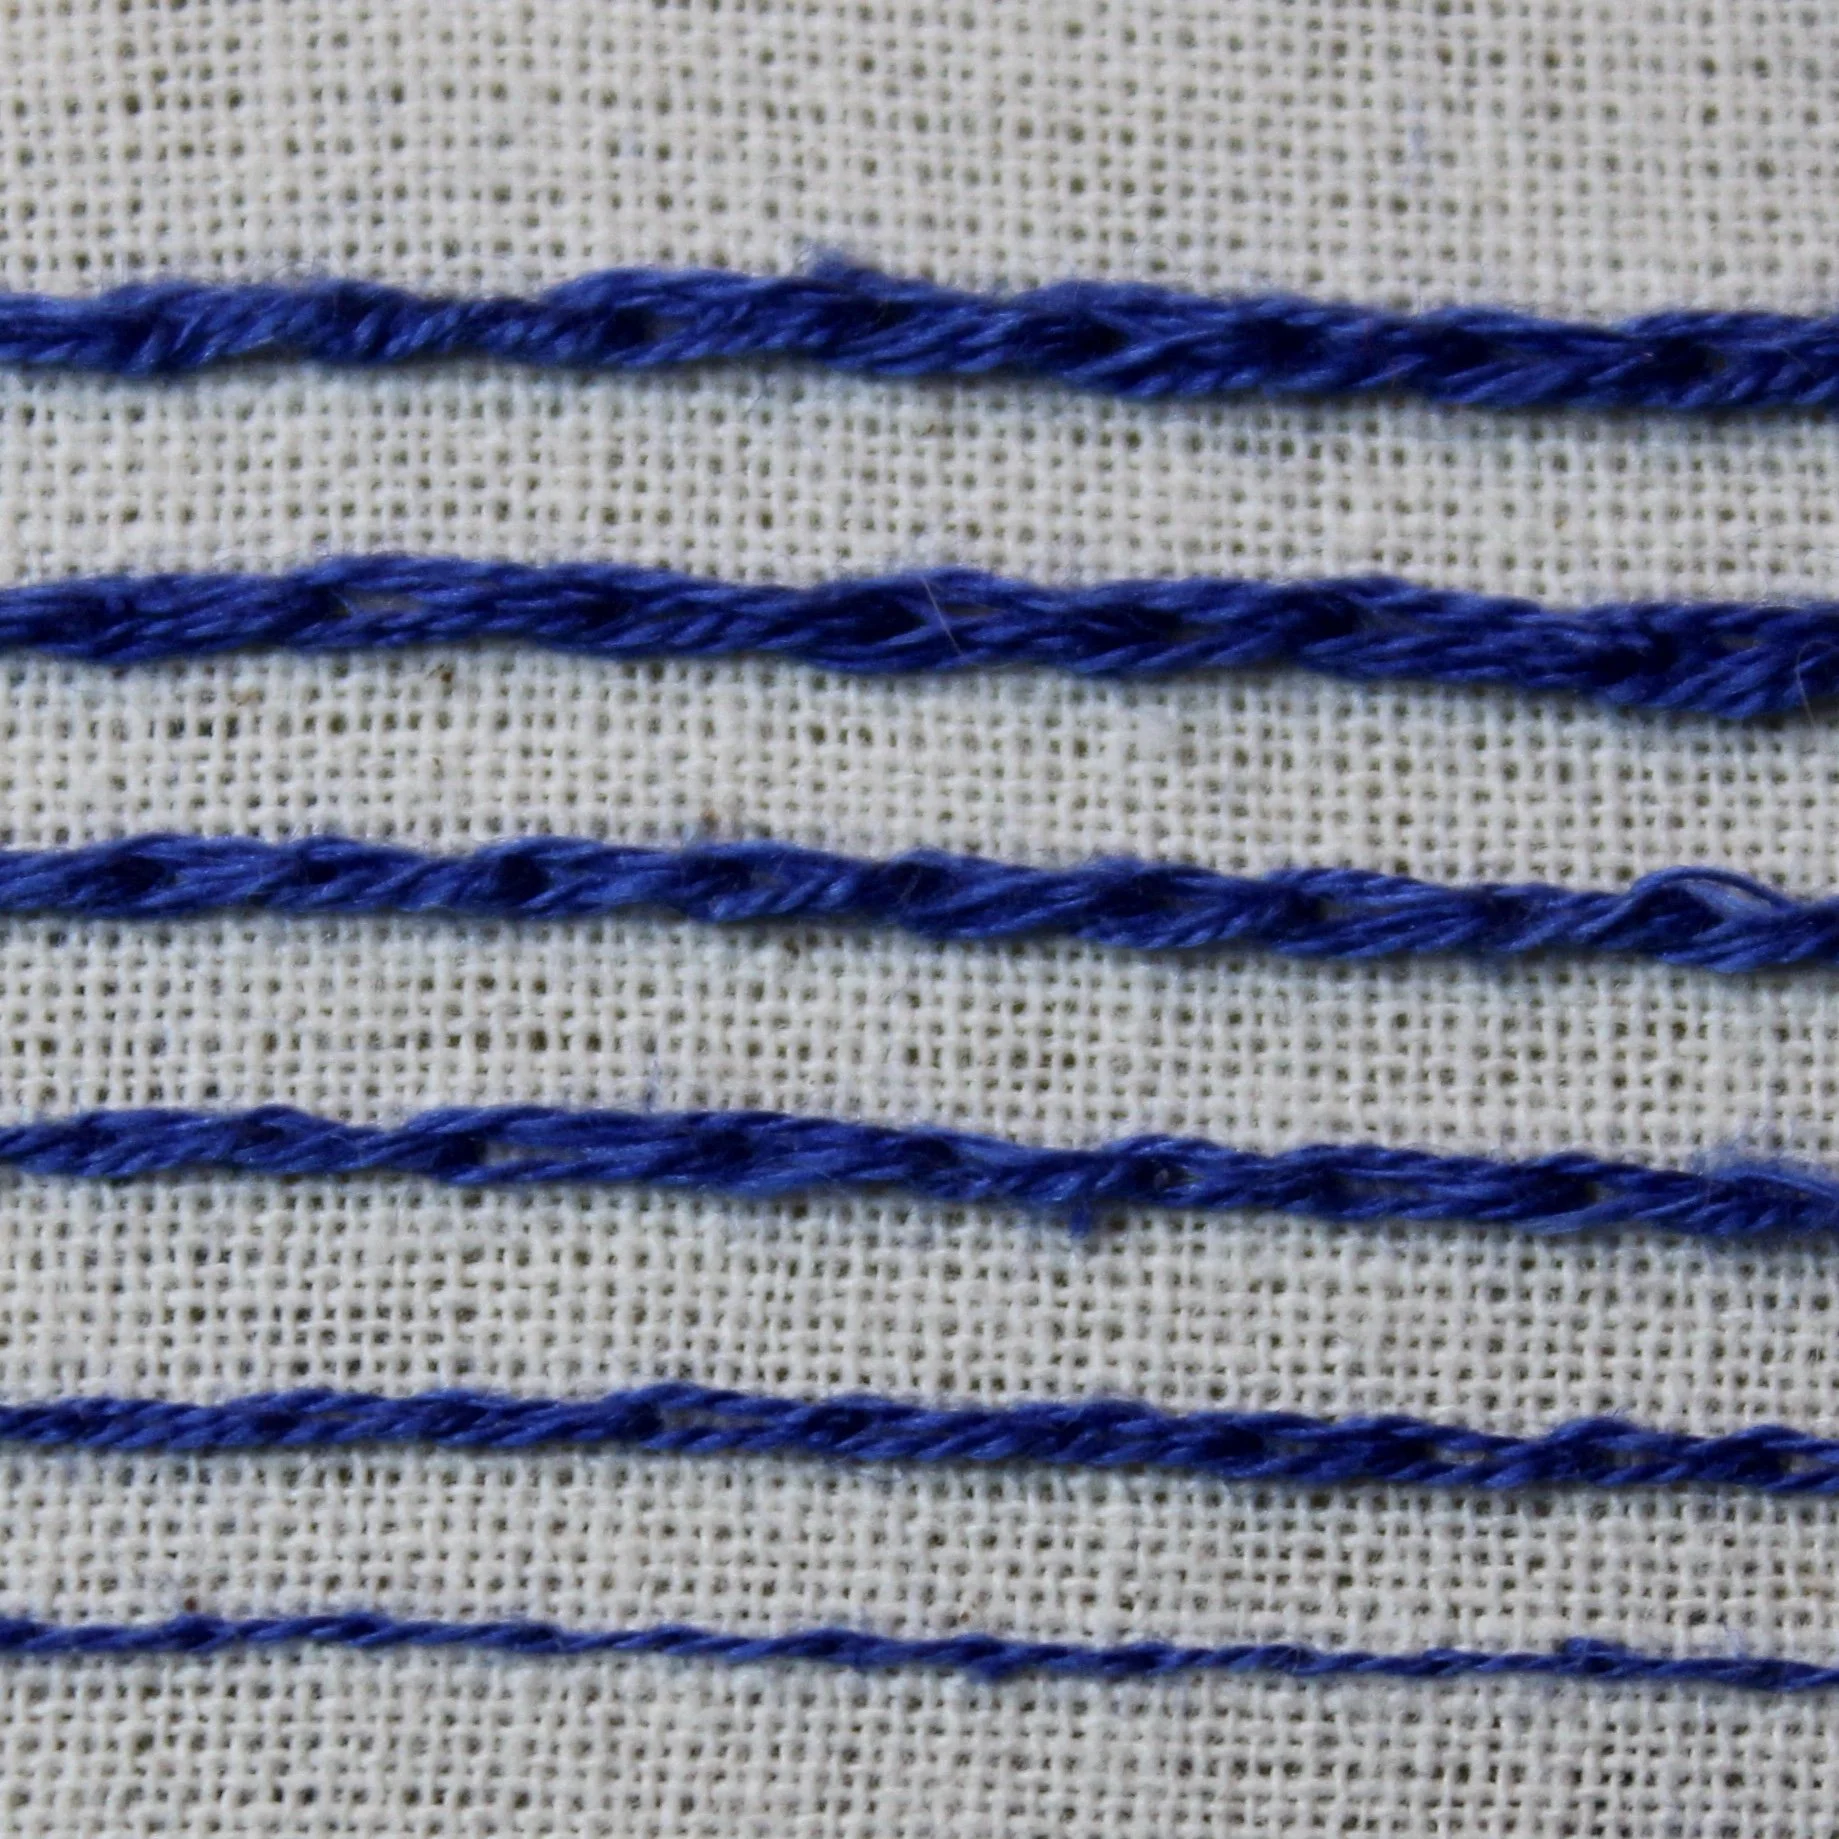
A picture showing blue thread on calico fabric. There are 6 rows of embroidery in split stitch. Each row is stitched with a different number of threads starting with 1 strand at the bottom and 6 at the top.

Split Stitch

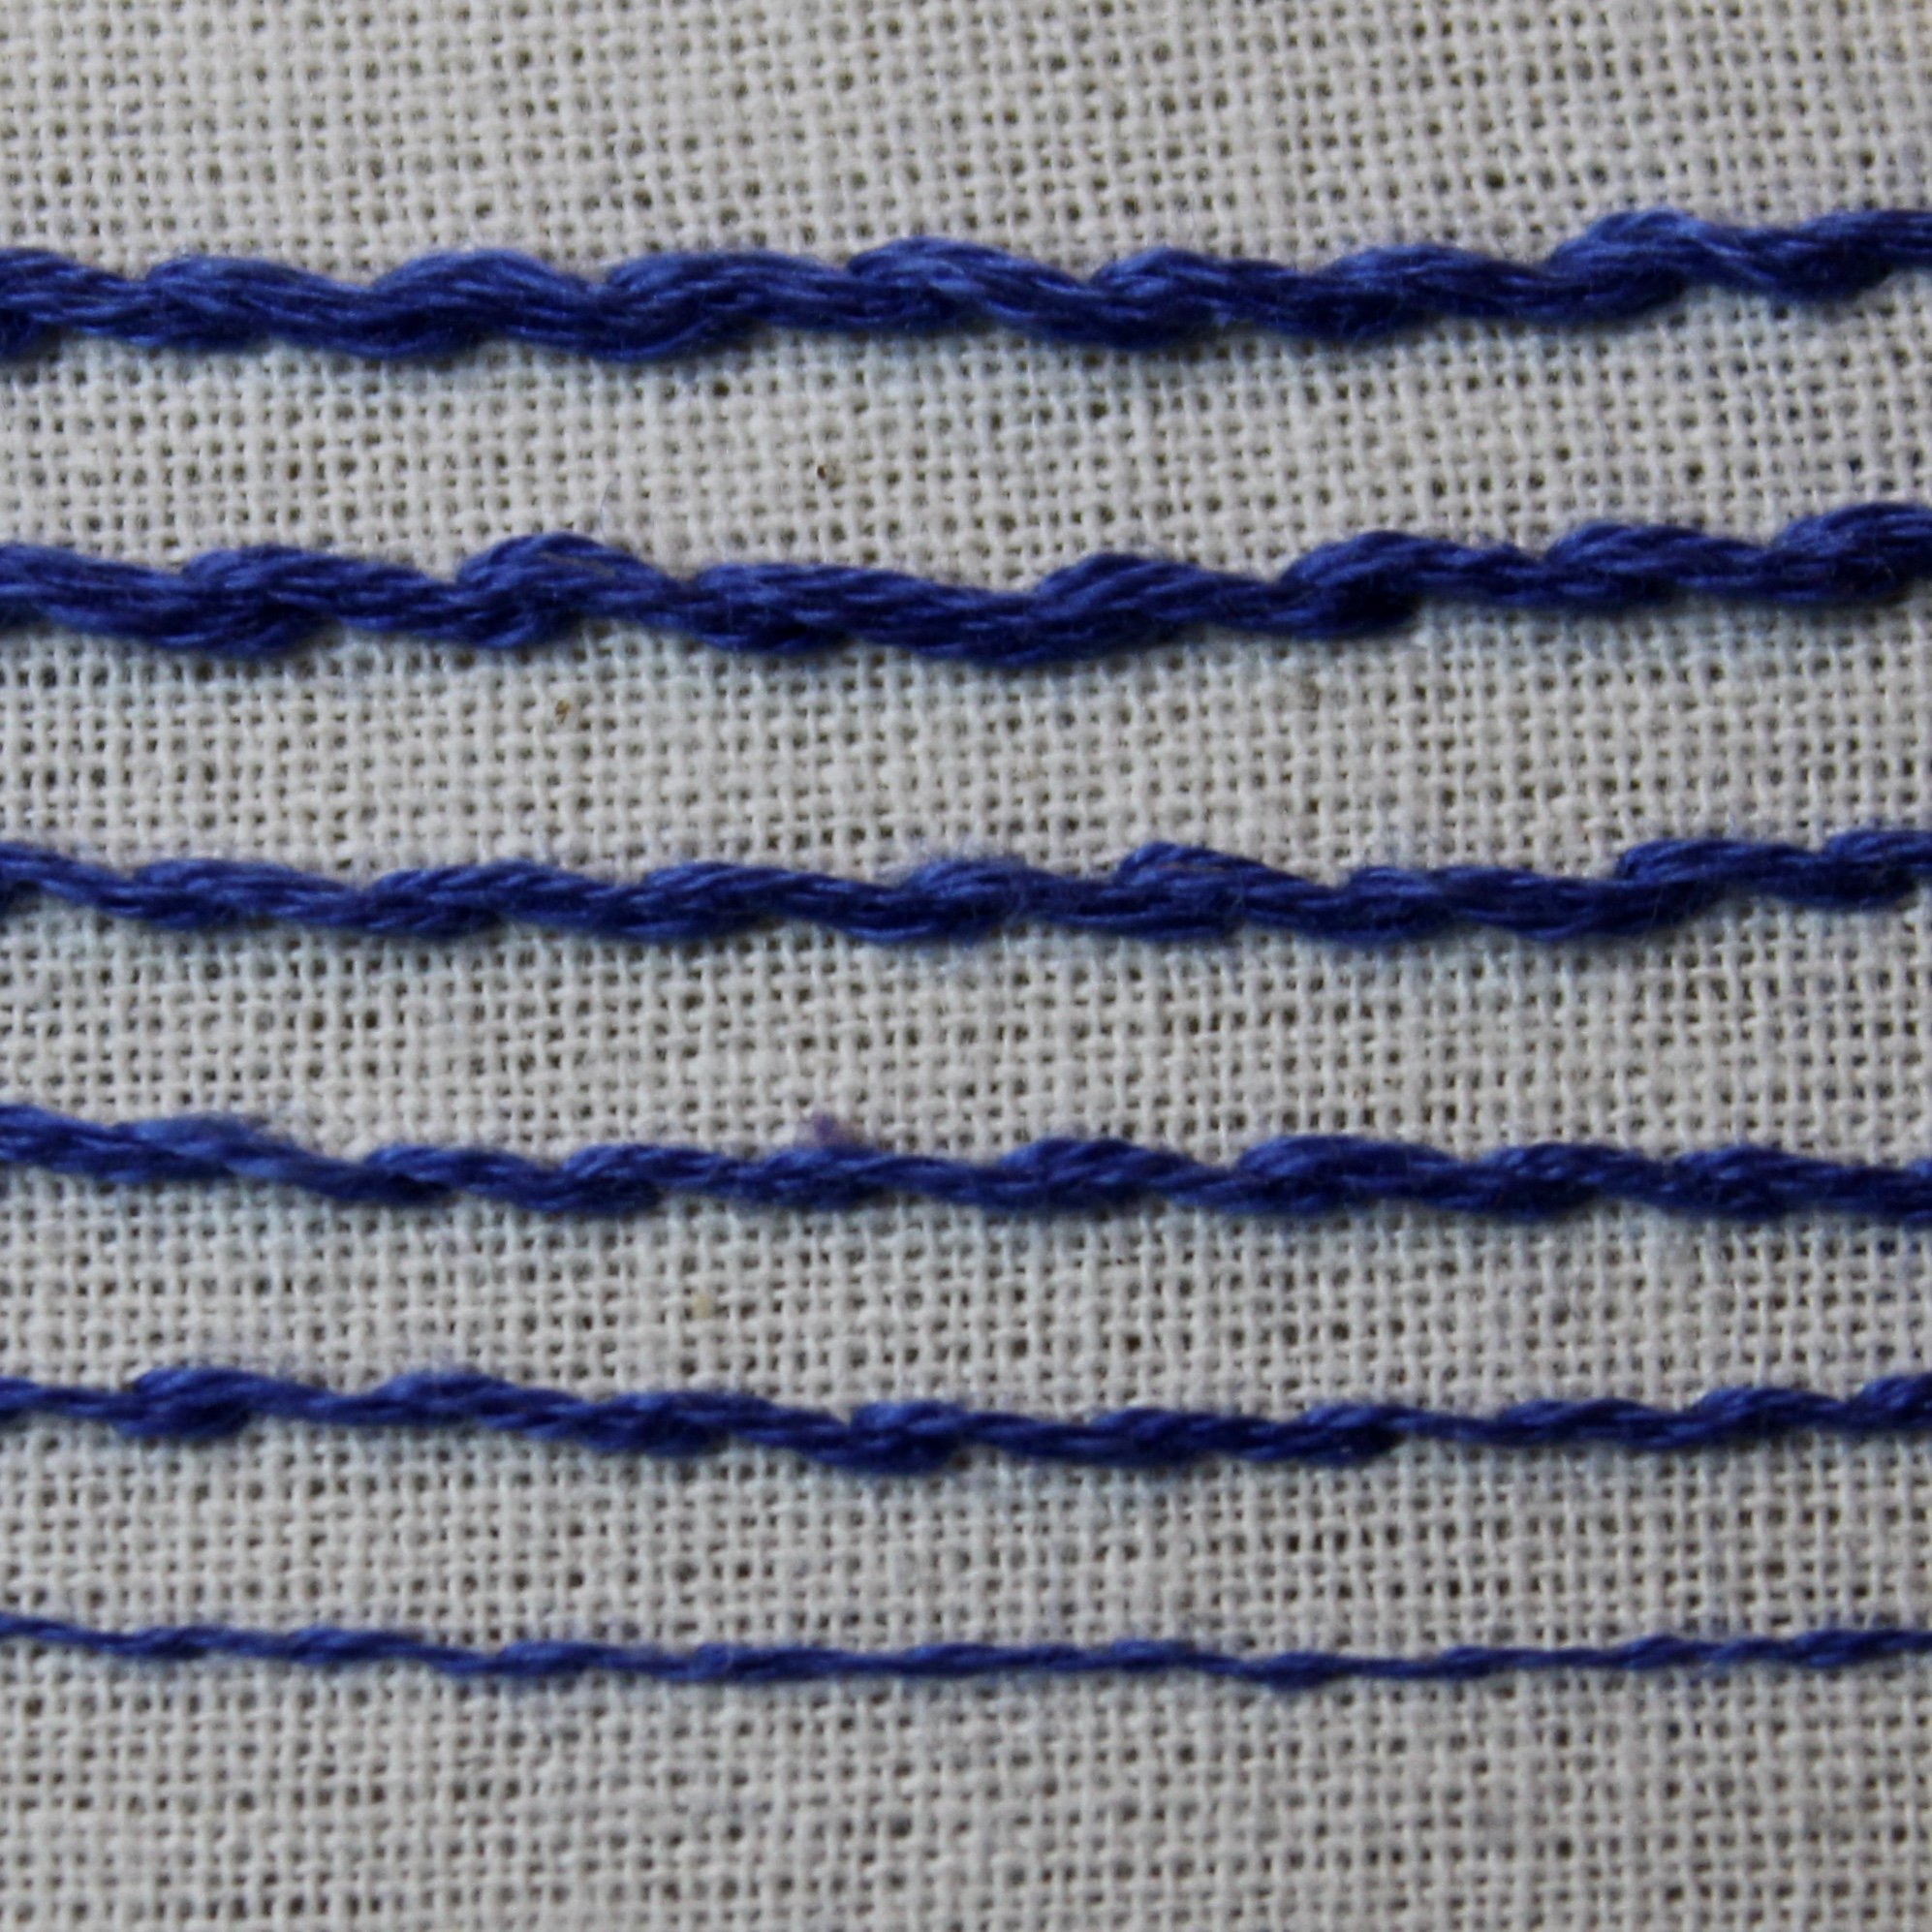
A picture showing blue thread on calico fabric. There are 6 rows of embroidery in stem stitch. Each row is stitched with a different number of threads starting with 1 strand at the bottom and 6 at the top.

Stem Stitch

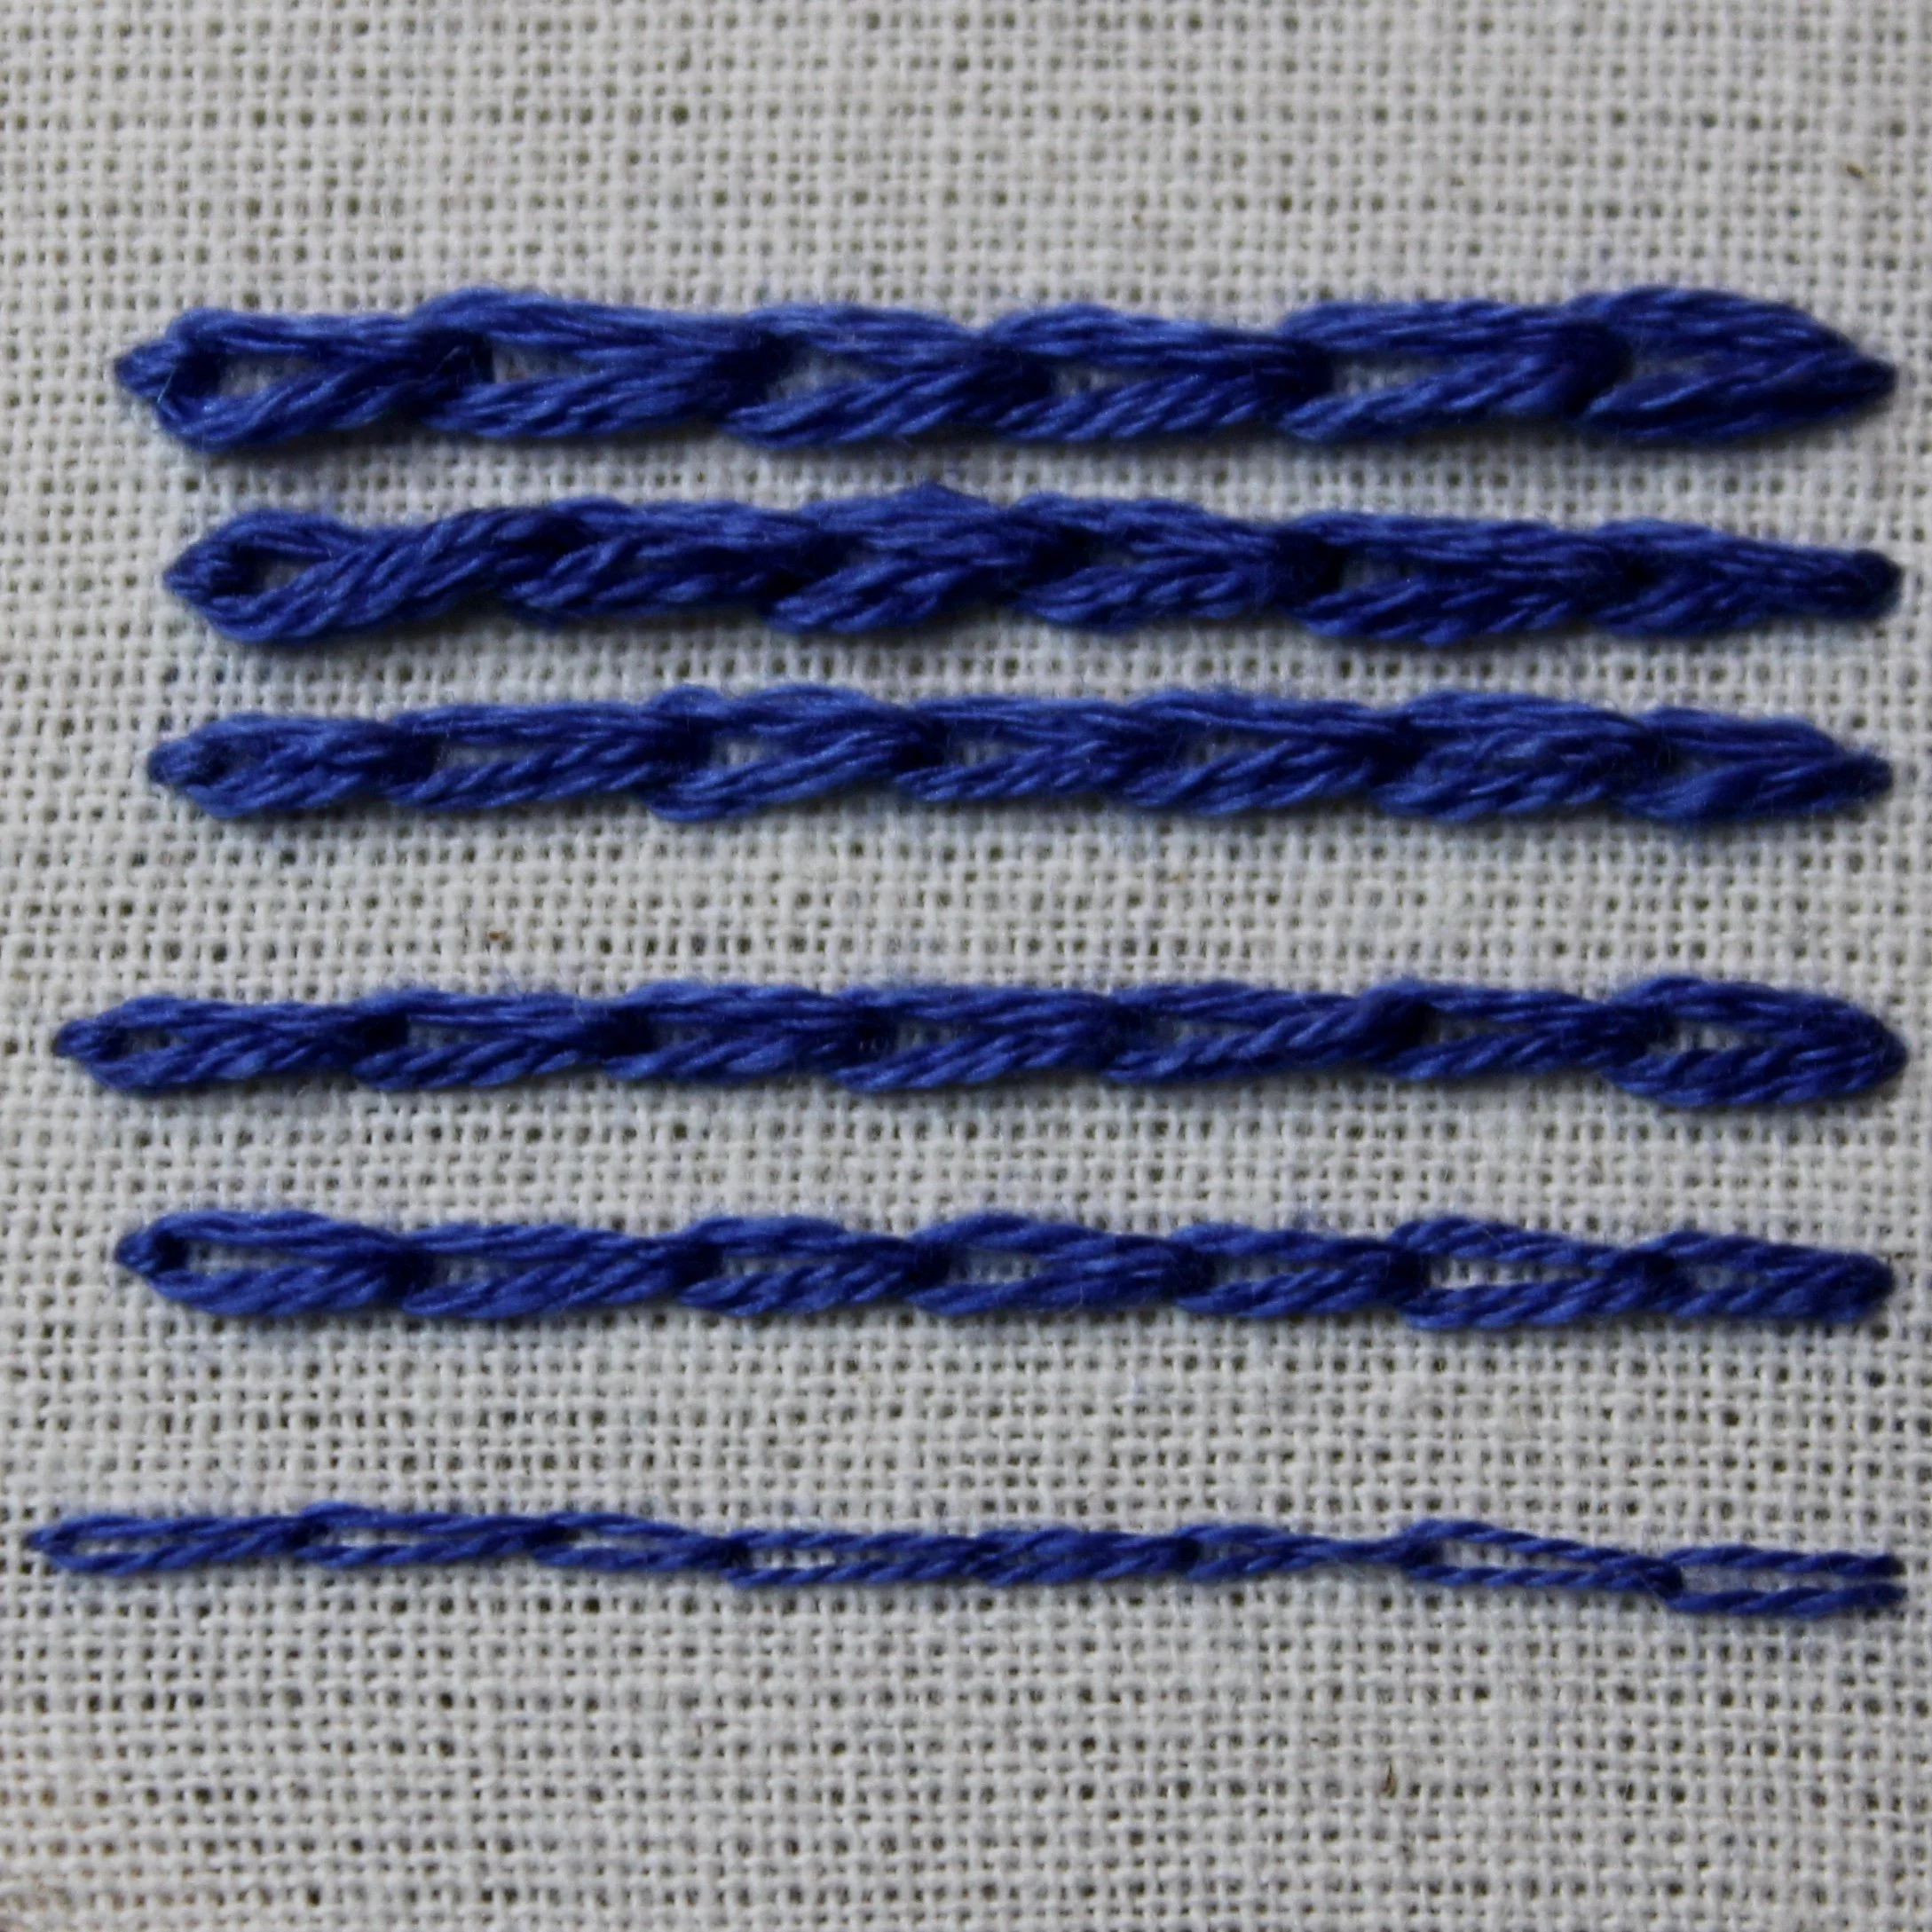
A picture showing blue thread on calico fabric. There are 6 rows of embroidery in chain stitch. Each row is stitched with a different number of threads starting with 1 strand at the bottom and 6 at the top.

Chain Stitch

A picture showing blue thread on calico fabric. There are 6 groups of embroidery in fly stitch and seed stitch. Each row is stitched with a different number of threads starting with 1 strand at the bottom and 6 at the top.

Fly stitch (top), Seed stitch (bottom)

A picture showing blue thread on calico fabric. There are 6 groups of embroidery in cross stitch and french knot. Each group is stitched with a different number of threads starting with 1 strand at the right and 6 at the left.

Cross stitch (top), French knot (bottom)

Want to experiment with the effect different number of strands has on the finished embroidery piece? Then this floral stitch sampler is a perfect project to practice on. It comes with pre-printed fabric and guidance on stitches that you can use, but the final composition of stitches and how to make them is totally up to you.
Enjoyed this blog post? I share embroidery tips and a free embroidery pattern in my monthly newsletter. Sign up here to receive the newsletter on the 1st of each the month.

In tips 3 Tags Thread
Comment
a picture of an embroidery hoop that is wonky overlayed with a blue square with the text - hand embroidery, how to deal with a wonky hoop, www.embellishedelephant.co.uk

How to deal with a wonky hoop

April 6, 2022

The best hoops are nicely round, the inner and outer hoops fit snuggly together meaning they grip the fabric and hold it drum tight for stitching.

A wonky hoop won’t hold your fabric tight enough to give you enough tension to create great stitches. I’ve learned this the hard way. I went on holiday for 2 weeks with plenty of embroidery to keep me busy but only one hoop. I didn’t check that hoop before packing it and spent the whole holiday cursing that hoop!

1 - Rotate the hoops

Try rotating the inner hoop around before adding the fabric to find the best fit and minimise the size of any gaps. Once you’ve found the best fit, mark the edge of the inner and outer hoop in pencil so you can align them back up when you’ve added the fabric.

2 - Wrap the inner hoop

Wrapping fabric tape around the inner hoop can help prevent the fabric getting marked or creased when it is in the hoop. It also helps to bulk out the inner hoop and potentially reduce any of the gaps as the fabric tape gets squished where the hoop it snug and fills the gap where it isn’t.

3 -Ditch it!

Some hoops are just beyond saving and it is worth preventing hours of frustration by just deciding it’s not worth trying to stitch with that hoop.

If you are thrifty and don’t want to just throw it out then it can be used for framing (where the fabric can be held taut with gathering stitches) and/or remove the outer part of the hoop when displaying the finished embroidery.

It could also be used for non-embroidery projects such as a macramé wall hanging

You shouldn’t find any wonky hoops in my kits! I’ve tried and tested a range of hoops from different brands and only use hoops I know are the best. I check the hoops before I add them to my kits to avoid giving you the challenge of a wonky hoop. Why not take a look at the range of kits I have available here.

Enjoyed this blog post? I share embroidery tips and a free embroidery pattern in my monthly newsletter. Sign up here to receive the newsletter on the 1st of each the month.

In tips 3 Tags Hoops
Comment
A pink background with a hand holding a knot in the end of a thread to the left hand side. Overlayed is a blue square with the text how to create a quilters knot

How to create a quilters knot

March 16, 2022

I used to create a knot at the end of a thread by taking a few centimetres at the end, folding it over into a loop and then knotting that to get a big enough knot. It used up quite a lot of thread and left me with four ends that could be caught up in my subsequent stitching.

And then at a workshop someone demonstrated a quilters knot - it was like magic, so quick and simple and I’ve not looked back!

Traditionally it is used in quilting as it is small enough to pop through one layer of fabric but big enough to say put and not pop through the second layer therefore remaining hidden.

It’s a similar technique to the once used to create a French knot, just without the fabric.

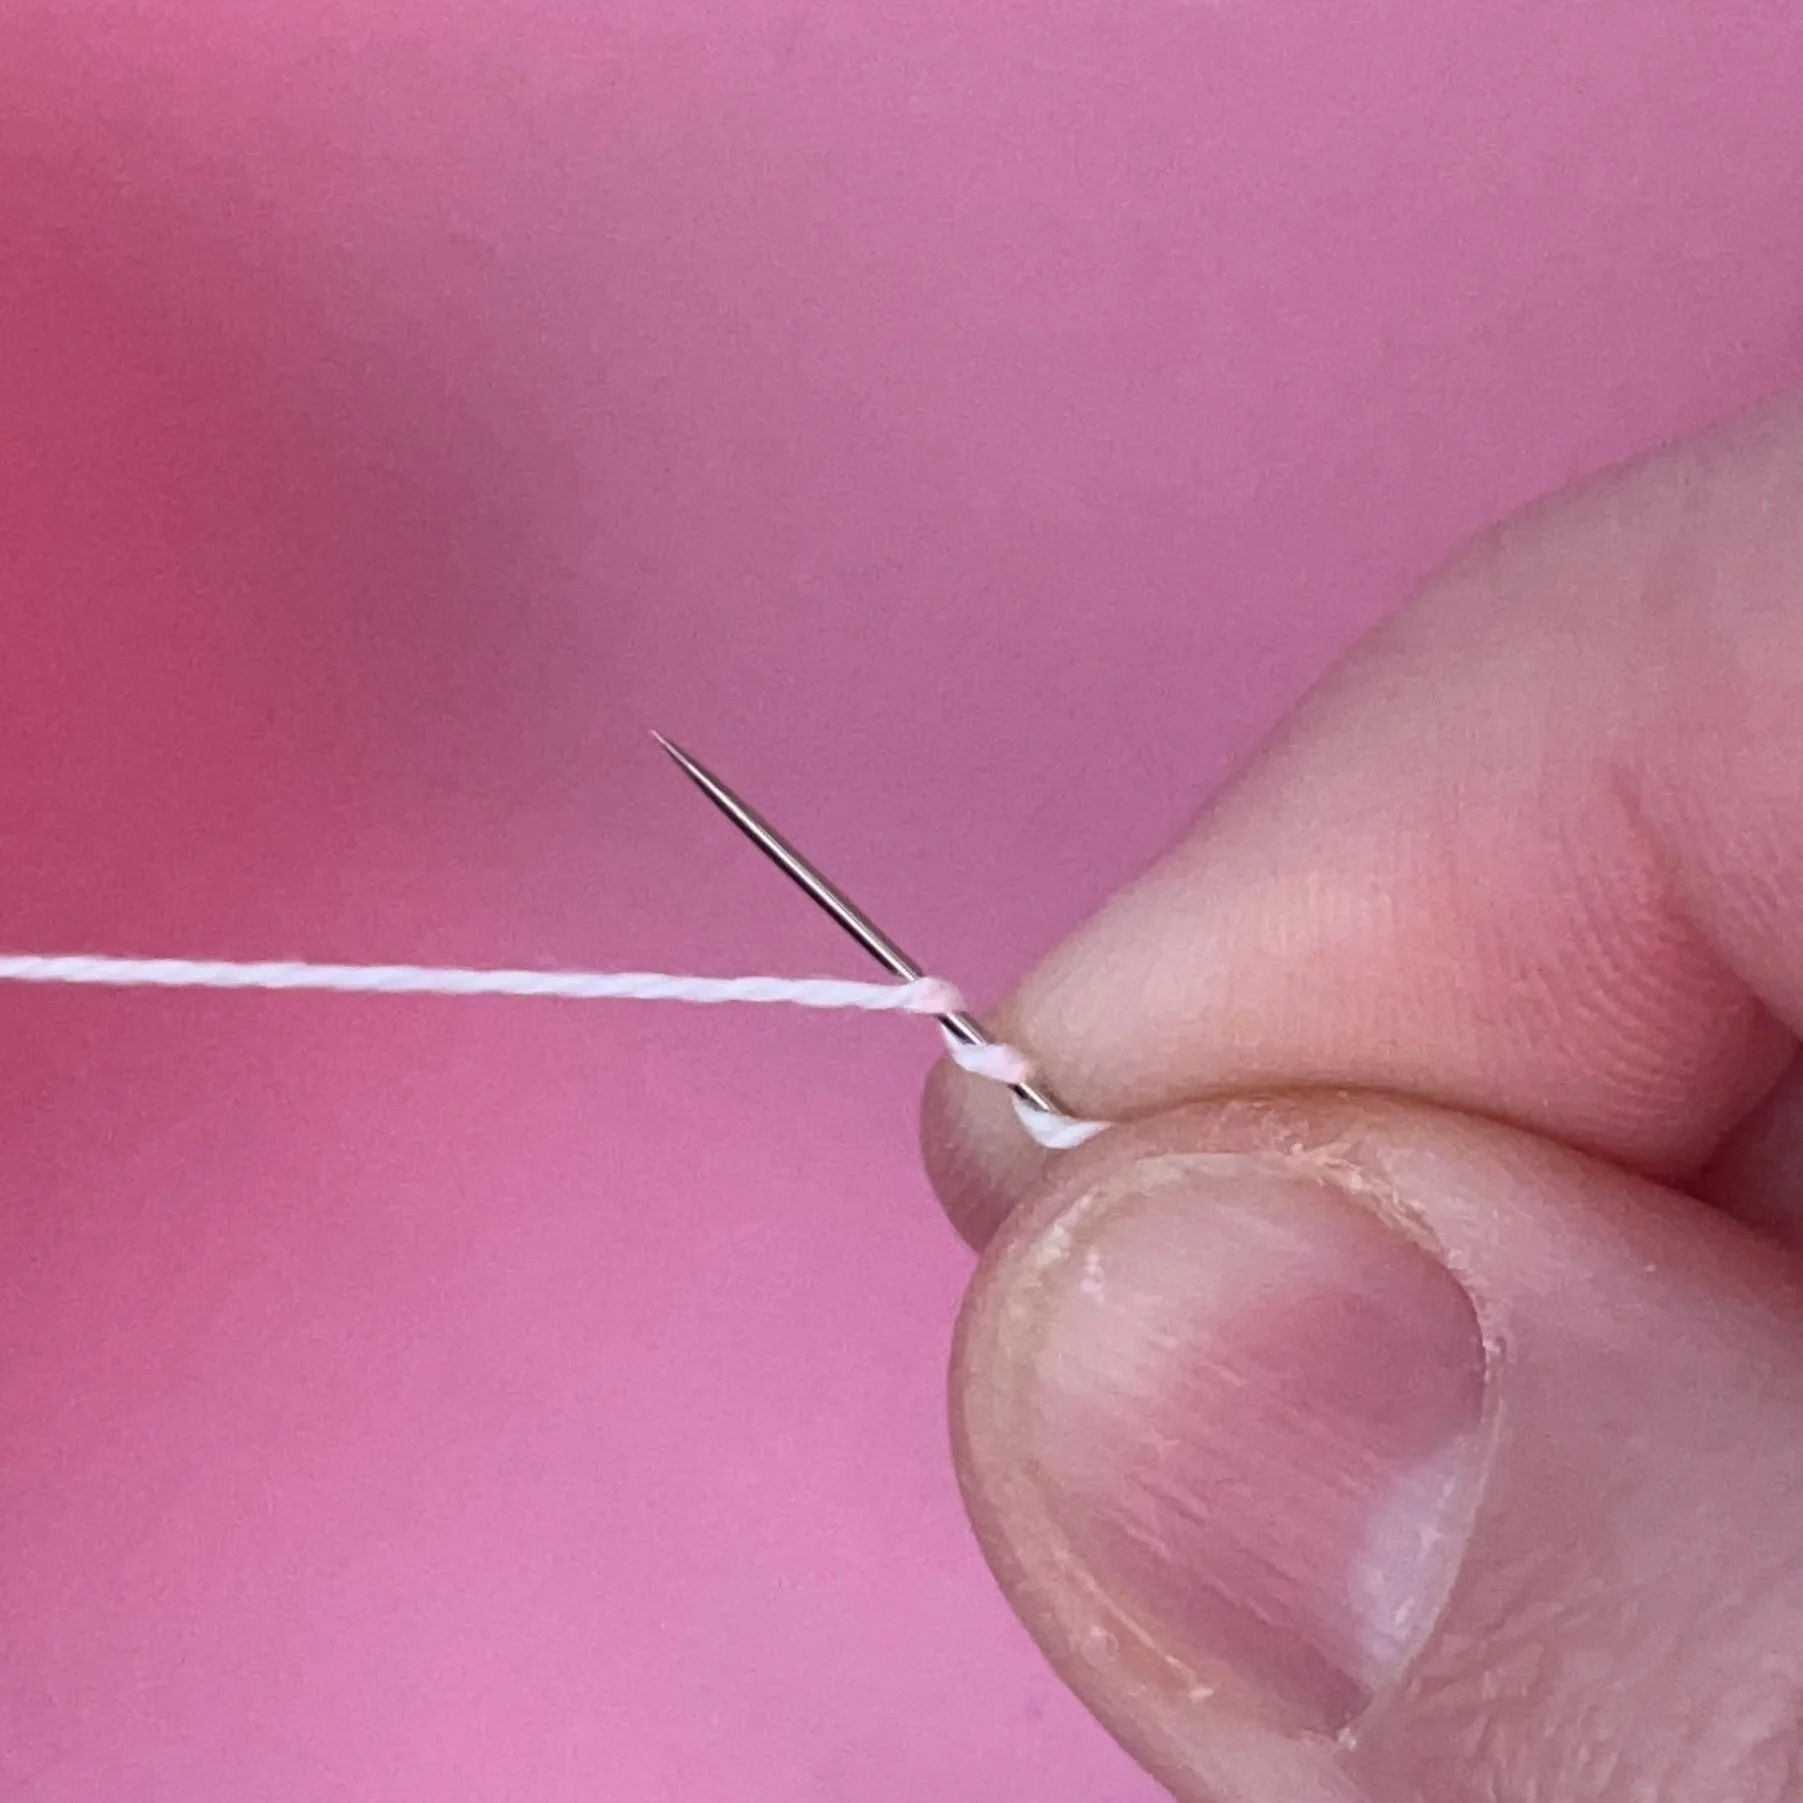
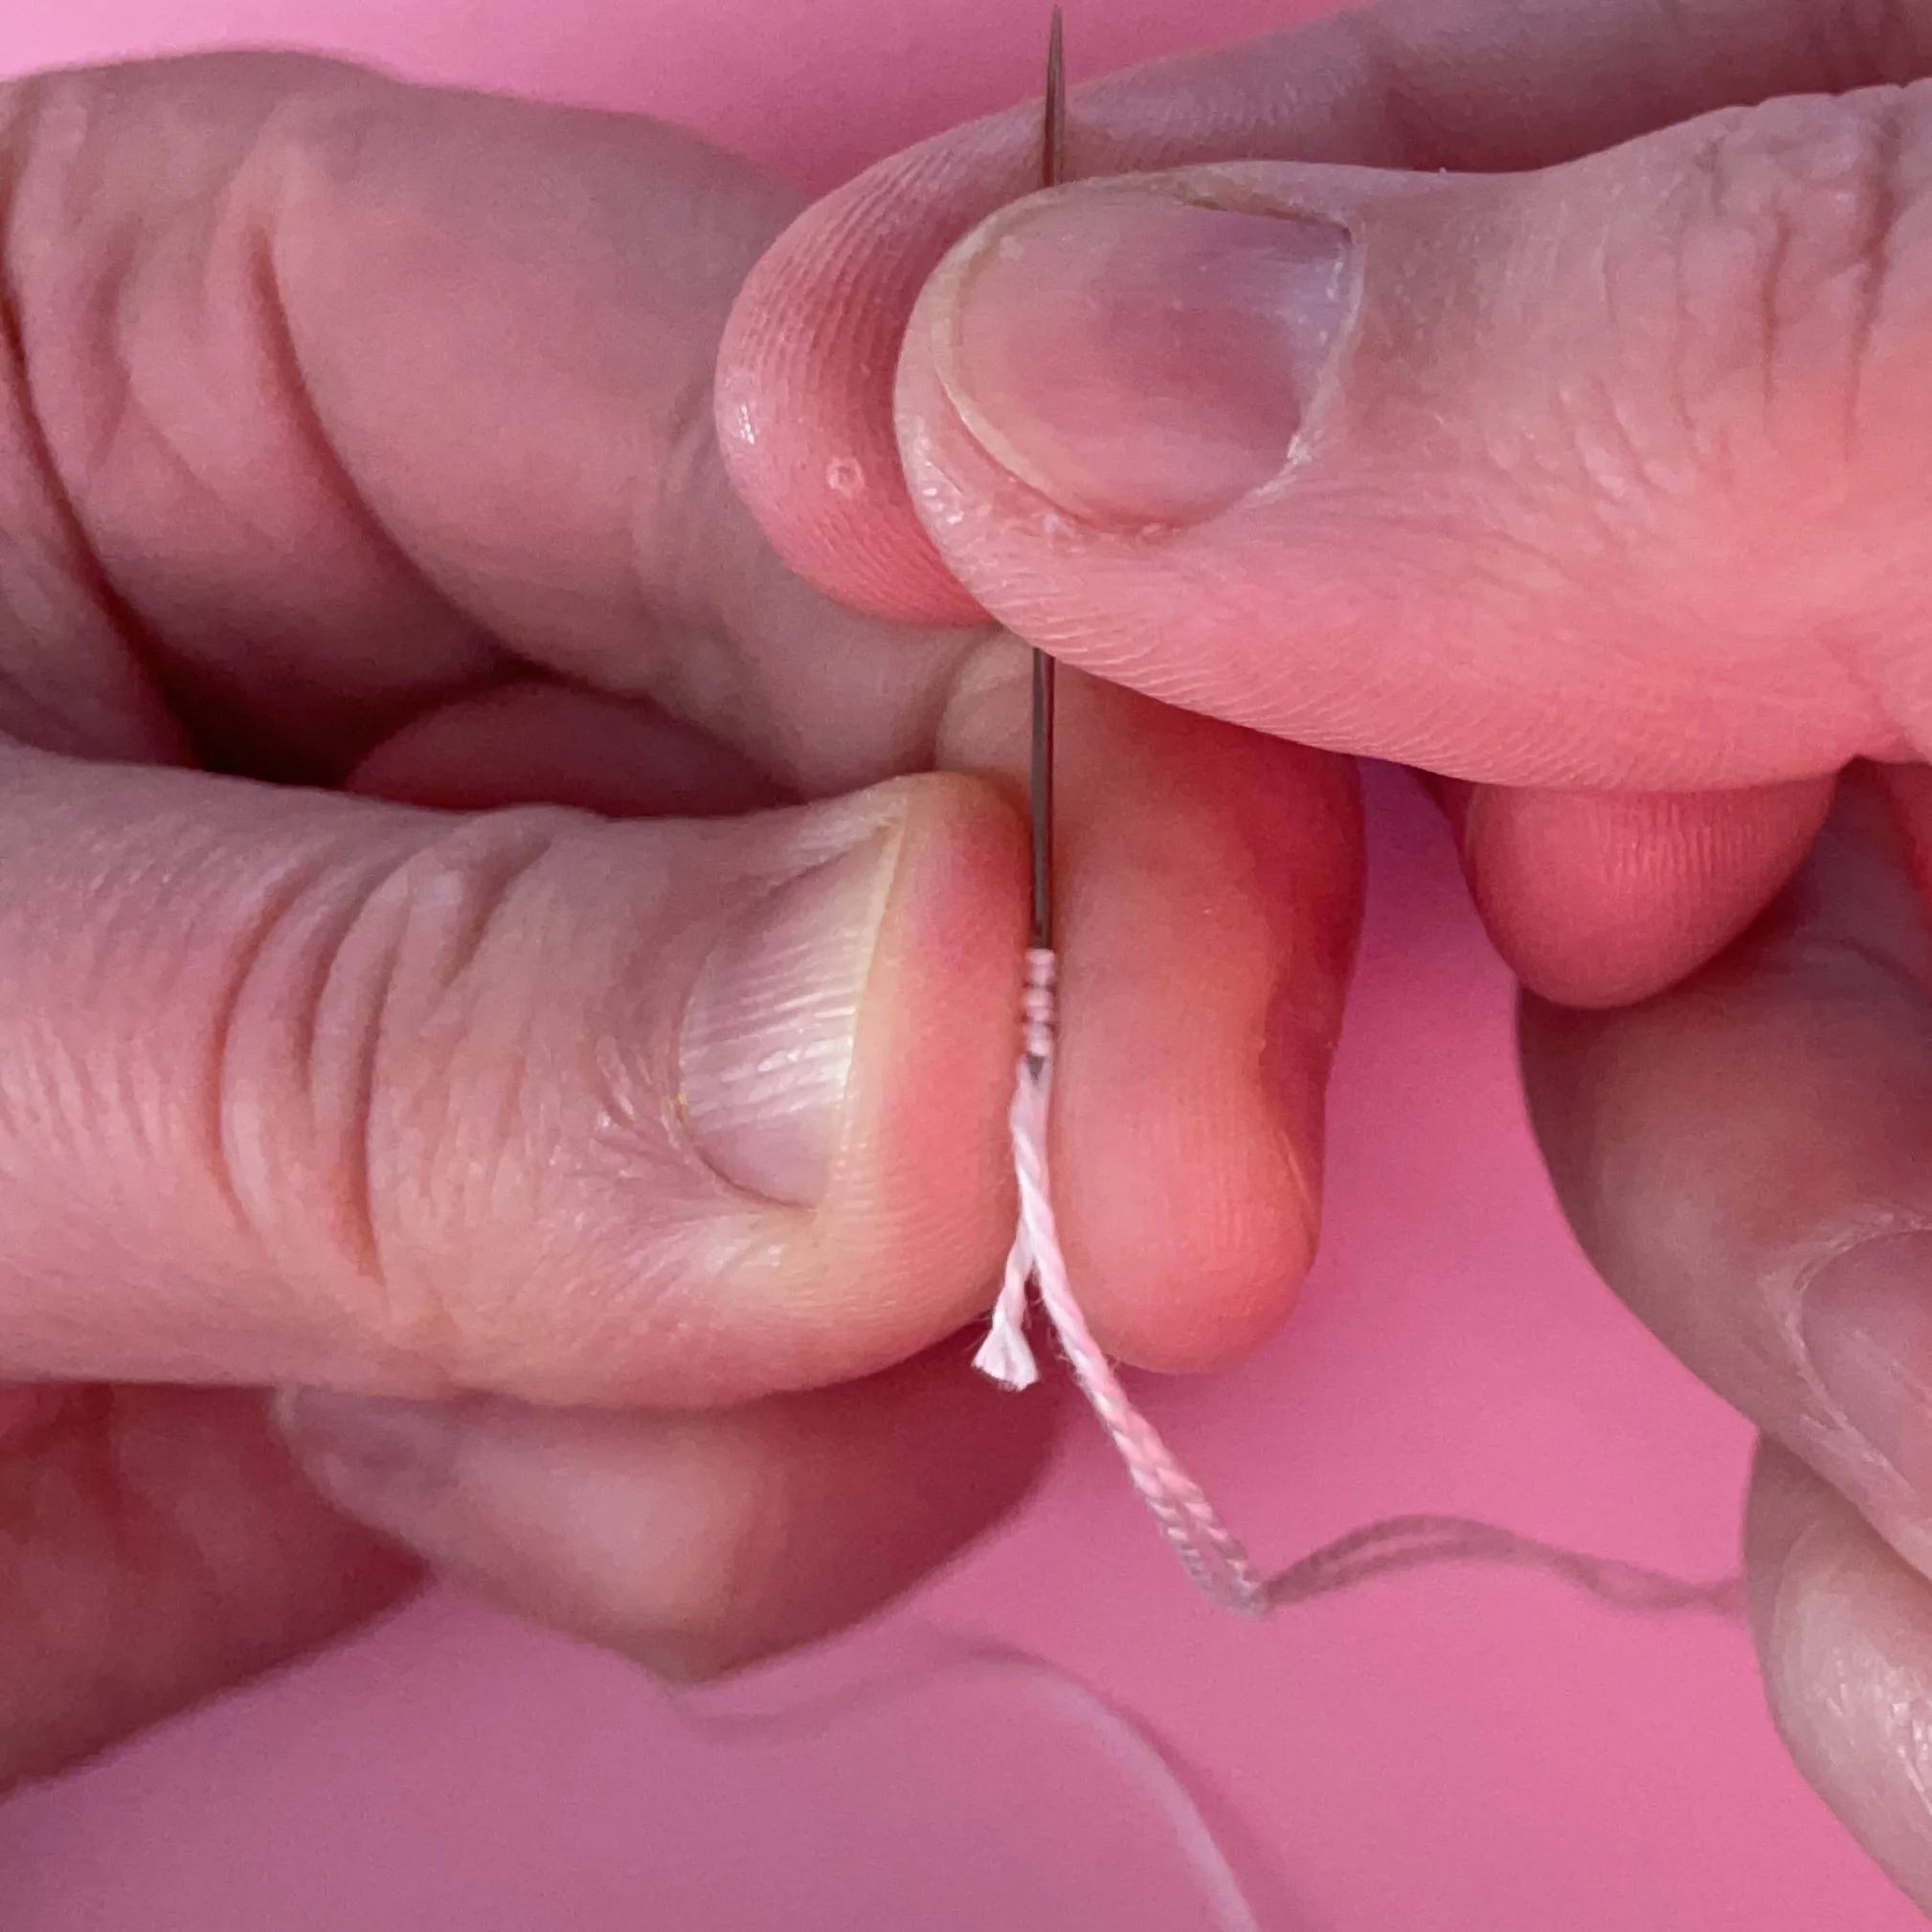
A pink background with a close up of a hand holding a needle. White thread is wrapped around the needle three times

Wrap around the needle

Take the end of the thread (furthest from the needle) and wrap it round the needle a few times.

Use the thumb and finger of one hand to hold the end against the needle and your other hand to create the wraps.

The more wraps there are, the larger the knot. I find at least four are needed for most fabrics.

on a pink background a close up of two hands, the right is holding the top of a sewing needle while the left is pinching the thread that is wrapped around the needle

Move the wraps

With one hand holding the needle, use the other to hold the wraps together. Then carefully move the wraps down the needle, over the eye and down to the end of the thread.

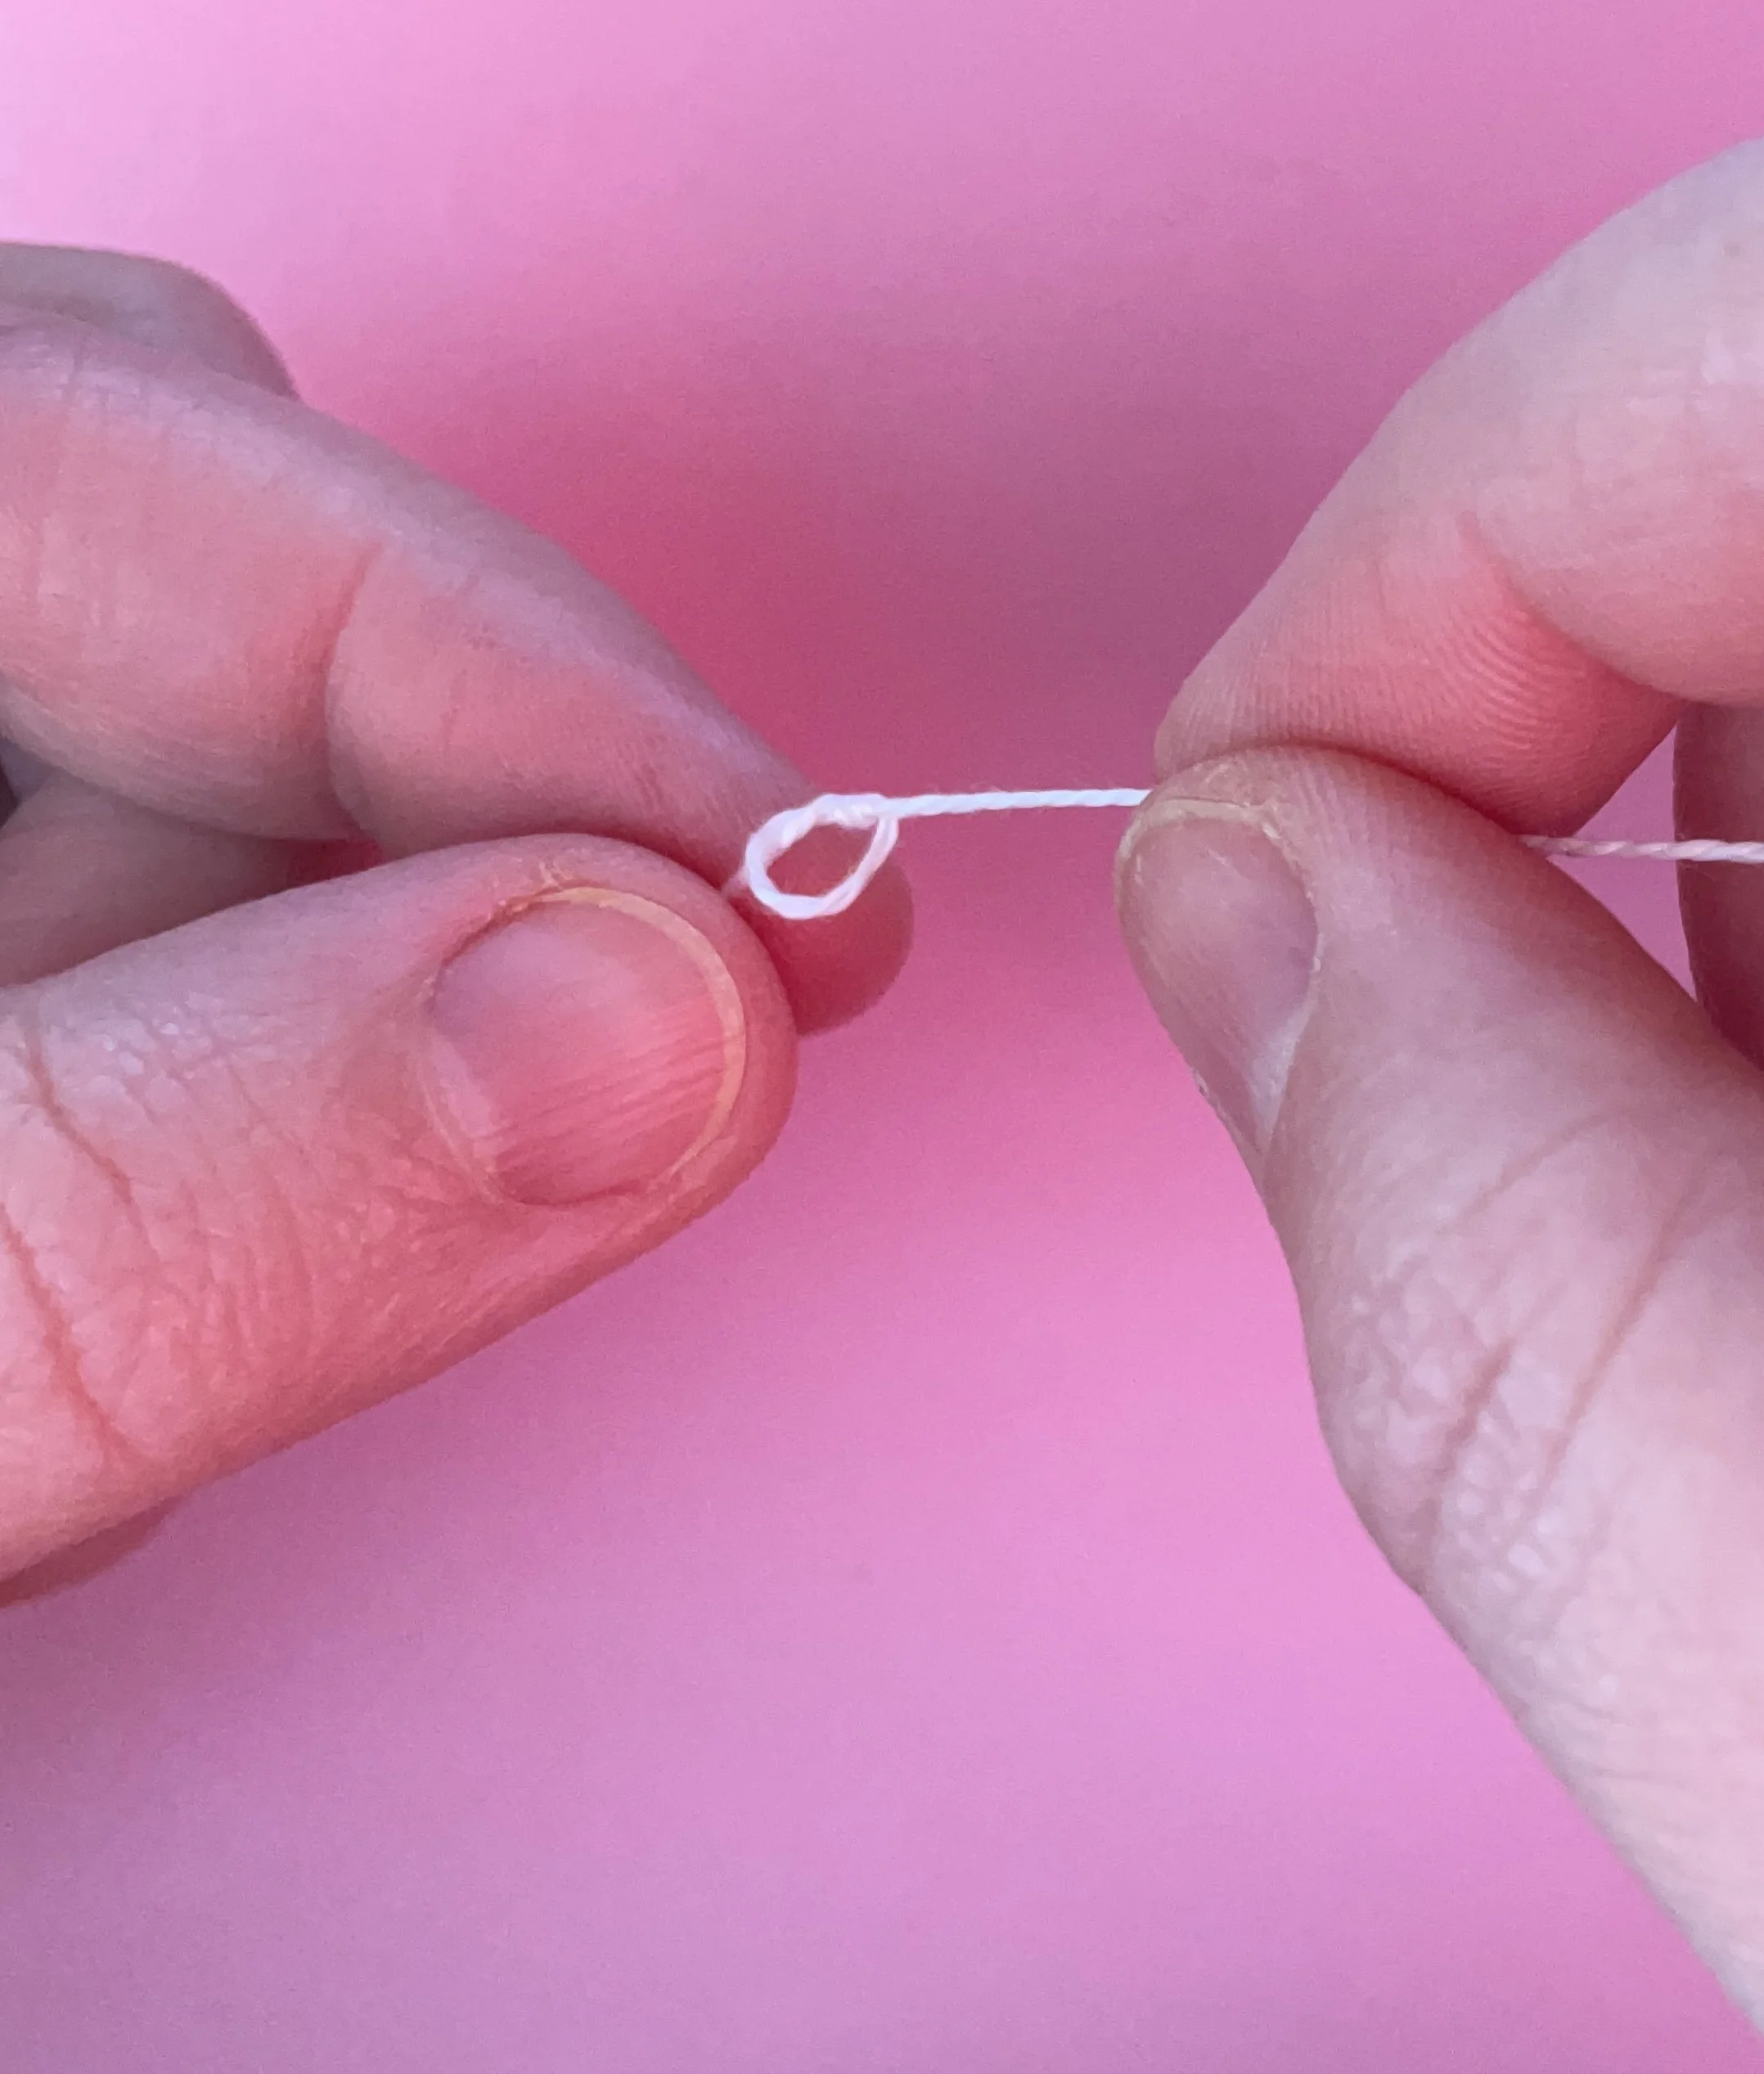
On a pink background a close up of two hands holding a white thread with a loop about to be pulled tight to create a knot

Pull the knot tight

When the wraps reach the end of the thread, pull them tight and they will form a knot.

Want to practice your quilters knots? Then head over to my shop and browse the kits I have on offer and before you know it you’ll be knotting and stitching like a pro!

Enjoyed this blog post? I share embroidery tips and a free embroidery pattern in my monthly newsletter. Sign up here to receive the newsletter on the 1st of each the month.

In tips 3 Tags knots
Comment
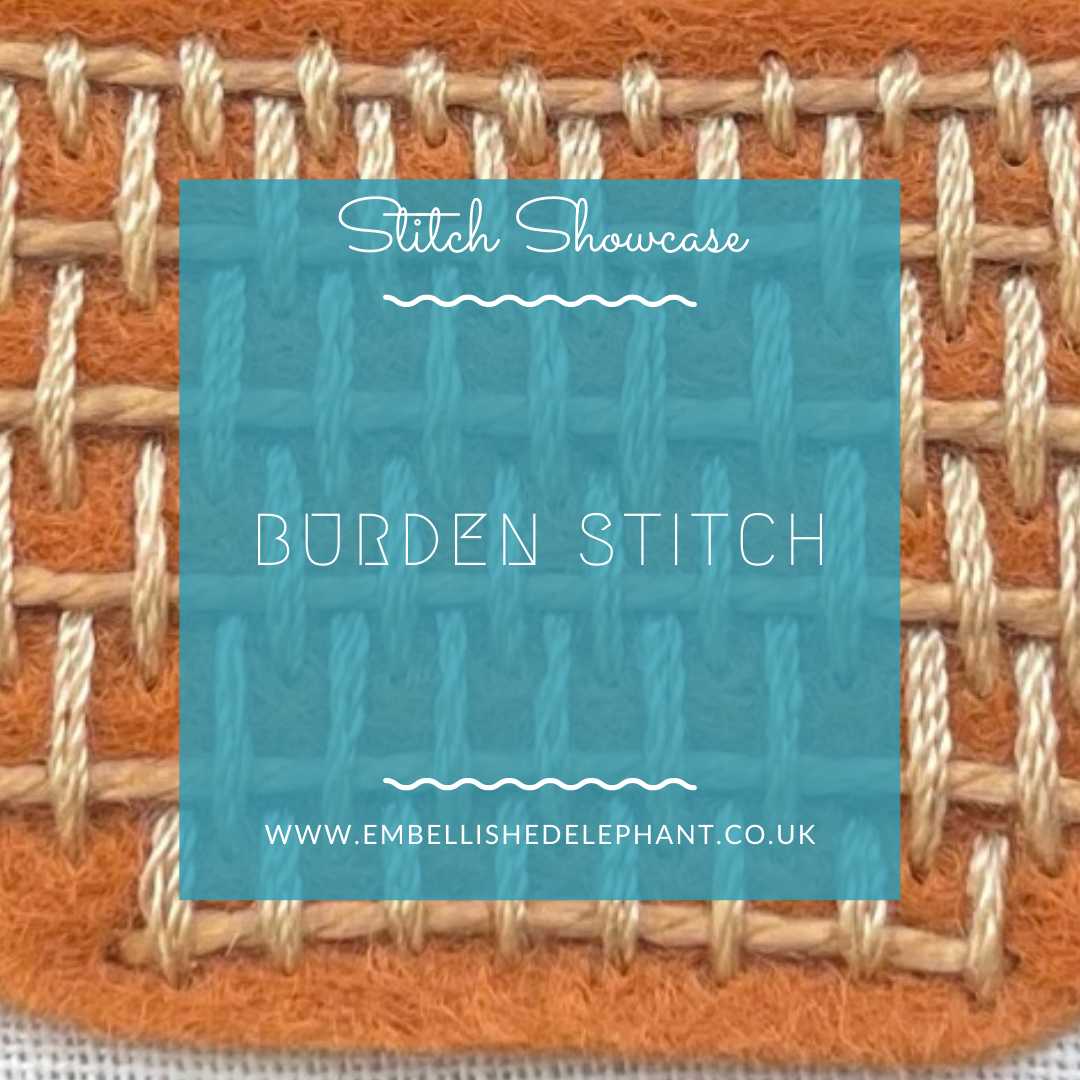
A photo of burden stitch in light brown thread stitched on an orange felt background. Overlayed is a blue square graphic with the text stitch showcase burden stitch

Stitch Showcase: Burden Stitch

March 9, 2022

With my houseplant collection of craft kits, I’m always on the look out for stitches that would look good as pot or basket decorations. When I came across this stitch, I knew I wanted to try it out.

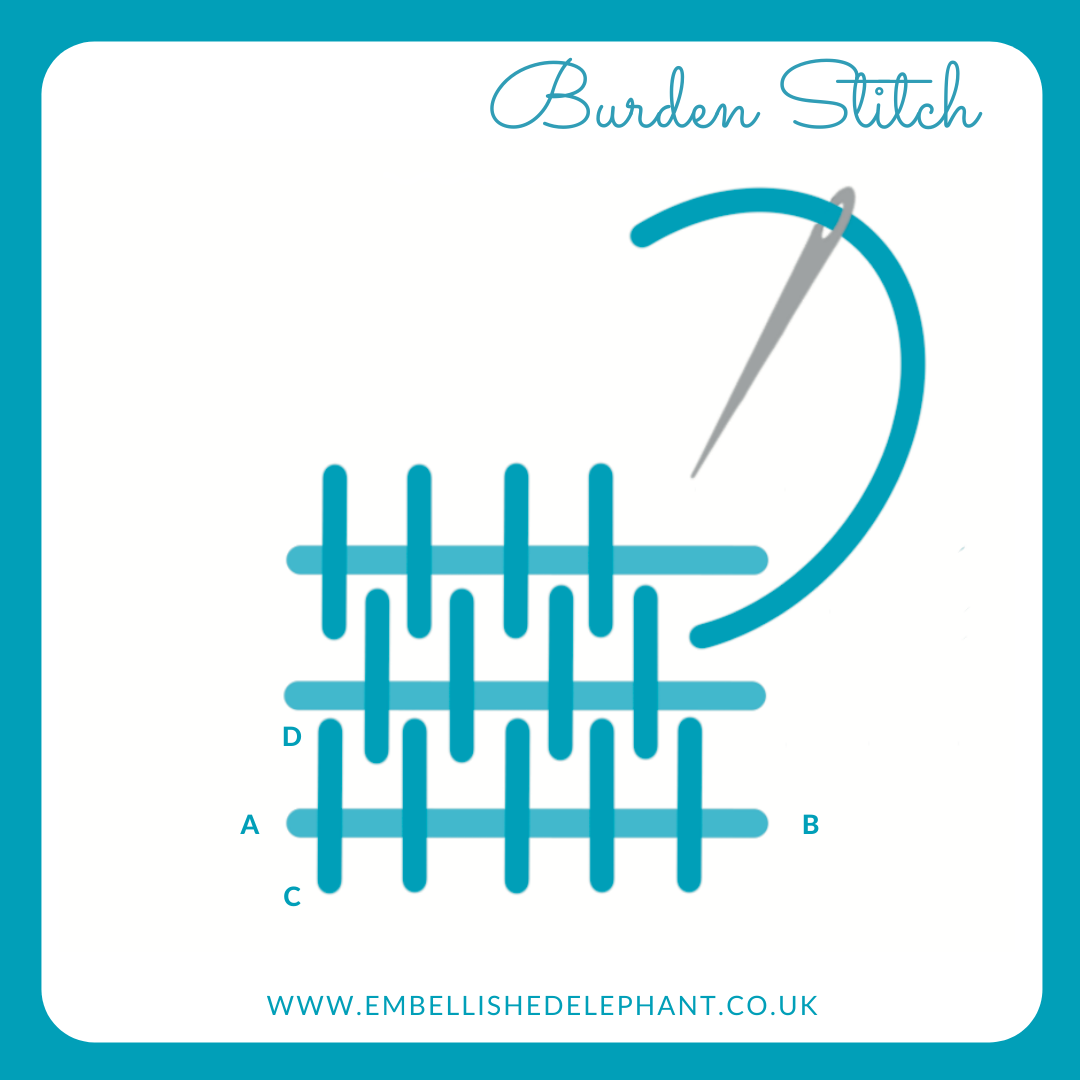
  • Lay down parallel rows of horizontal stitches (A to B)

  • Start at the bottom corner, add a stitch at right angles ending just below the next horizontal stitch (C to D)

  • Keep adding vertical stitches, evenly spaced, with enough gap between each to fit a stitch on the next row

  • For the next and subsequent rows, place the vertical stitches between those of the previous row.

An illustration of an embroidery stitch labelled as Burden Stitch. There are three lines of parallel horizontal stitches. At right angles shorter vertical stitching are overlayed over the long horizontal stitches.

Want to have a go at this stitch? Keep an eye out for the palm house plant kit that it heading into my shop very soon. Alternatively, you could use this stitch instead of any of those I recommend in the guidance for any of my houseplant kits. You can find the full range of houseplant kits here.
Enjoyed this blog post? I share embroidery tips and a free embroidery pattern in my monthly newsletter. Sign up here to receive the newsletter on the 1st of each the month.

In stitch showcase 2, 100days Tags Stitch Showcase, Couching Stitch
Comment
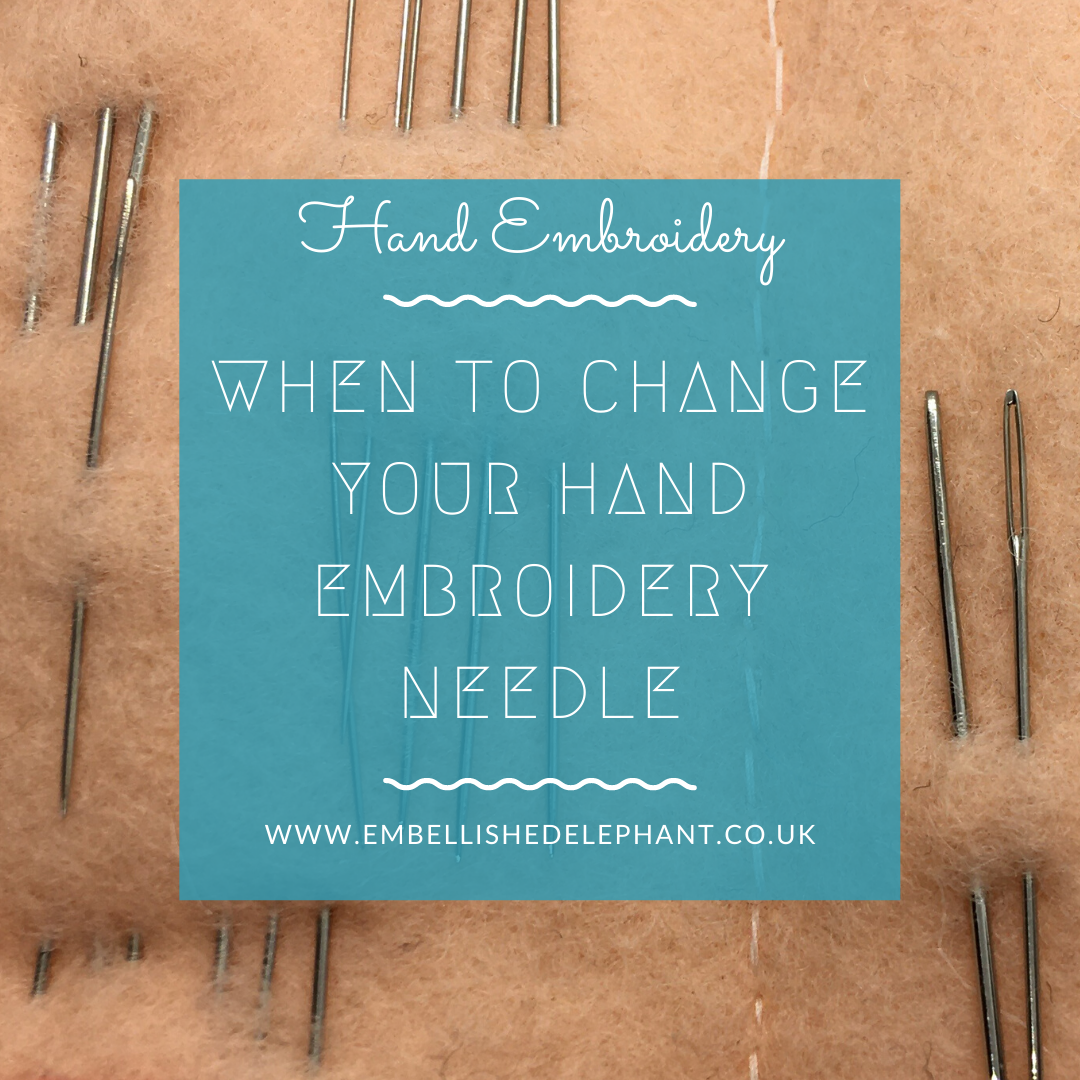
image of hand embroidery needles woven into a felt needle case. Overlaid is blue square with text saying Hand Embroidery - When to Change Your Hand Embroidery Needle

When to change your hand embroidery needle

March 2, 2022

I used to do a lot of beadwork and beading needles are very long and very thin. Over time the needle is stressed as it passes through the beads and all of a sudden when you give it a little tug it snaps and can be a bit of a shock.
I’ve found that hand embroidery needles snap less often as they are a little thicker so how do you know when to change them?

1 - It starts to bend

For me this is much more common that a snapped needle. I find that I often don’t notice how bent a needle has got until it’s laid on a flat surface like a table. You can keep stitching with a bent needle but it can be difficult to stitch with if you need to be very active.

2 - It is tarnished

The oils on your fingers can tarnish a needle over time. If the needle is plated then the metal plate may wear as the needle passes through the fabric. Take a look at your needles and see whether the centre of the needle is a slightly different colour or duller than the ends. You can try washing the needles to see if the colour goes back to normal, if that doesn’t work then it’s best to put it to one side.

3 - It is snagging

Over time the surface of the needle shaft may become roughed up and start snagging on the fabric. I also find that lower quality needles can have this problem from the start. Replace a needle as soon as you start of feel the snagging.

4 - It goes blunt

If you are finding that you are having to use more and more force to piece the fabric then the needle may be blunter than you need. Try switching to a new needle to determine if it was the needle or whether it was something else making it harder work like the bulk of stitches on the back of the work. Needles can be sharpened if they do go blunt.

Finally, what do you do with any needles you no longer have use for? If you need to dispose of them, don’t place them lose in the bin as they may escape and hurt someone. Weave them into a bit of fabric or cardboard or place them in a bag. Needles and pins are made from steel (hence why magnetic needle minders work) so they might be able to be recycled anywhere that also accepts things such as nails and bolts.

All my kits come with one needle that will get you through the project and plenty more future projects. But if you already have enough embroidery needles in your life, just drop me a message when you order and I can leave the needle out.

Enjoyed this blog post? I share embroidery tips and a free embroidery pattern in my monthly newsletter. Sign up here to receive the newsletter on the 1st of each the month.

In tips 3 Tags Needles
Comment
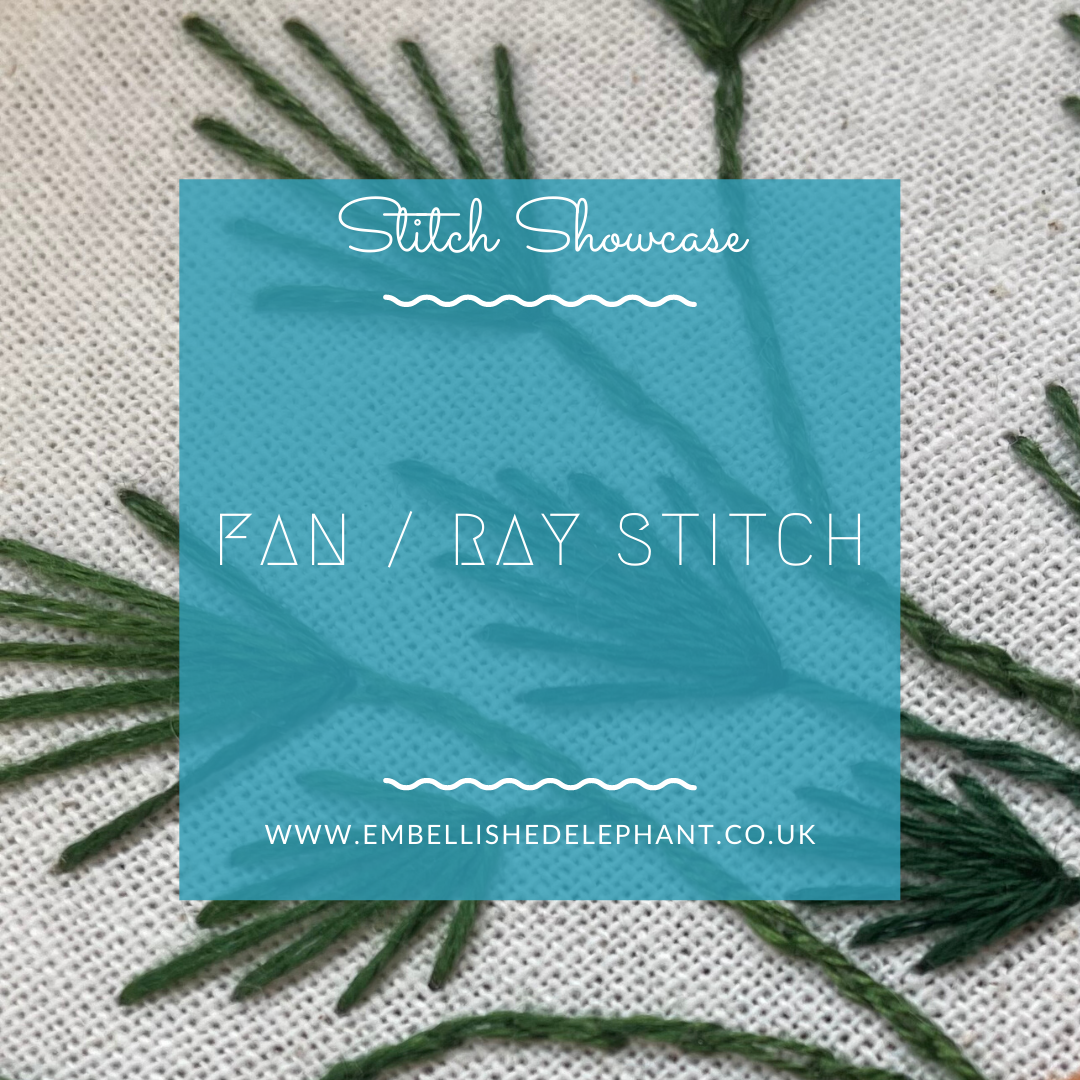
A close up of green embroidery thread on calico fabric. The thread is stitched in fan stitch to create palm leaves. Overlaid is a blue square with the text Hand Embroidery - Fan/Ray stitch

Stitch Showcase: Fan Stitch

February 23, 2022

Fan stitch is also commonly called ray stitch, I prefer the name fan as I thing it really describes what it looks like. To me this stitch conjures up images in my mind of large palm leaves and this stitch can be used to represent leaves.

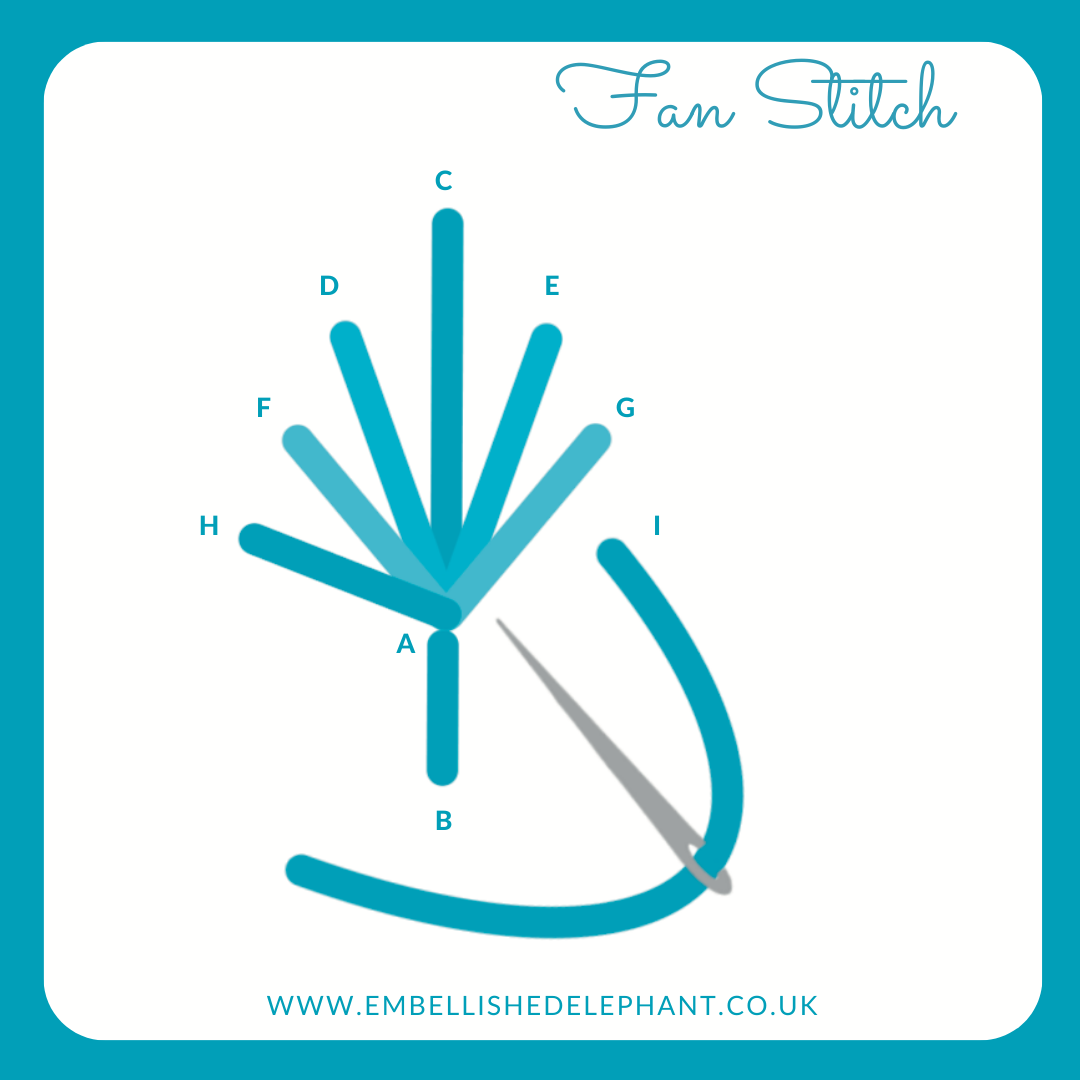
  • Create the base of the fan by stitching one long straight stitch. It is generally about half the length of the fan centre line

  • Now create the central fan line. It should be in a straight line with the base stitch

  • Either draw on guide lines or imagine the shape of a diamond

  • Bring the needle through the fabric a few mm down from the top of the centre line and a few mm away from the centre line. Complete this stitch at the point at which the base and centre lines meet.

  • Repeat on the other side of the centre line, making a mirror image stitch.

  • Repeat for a further two pairs of lines so there are 7 lines in total coming from the base stitch (the centre line and 3 pairs of stitches)

An illustration of how to create the embroidery stitch fan stitch. The illustration is in shades of blue and grey on a white background.

Enjoyed this blog post? I share embroidery tips and a free embroidery pattern in my monthly newsletter. Sign up here to receive the newsletter on the 1st of each the month.

In stitch showcase 2, 100days Tags Stitch Showcase, Isolated Stitch
Comment
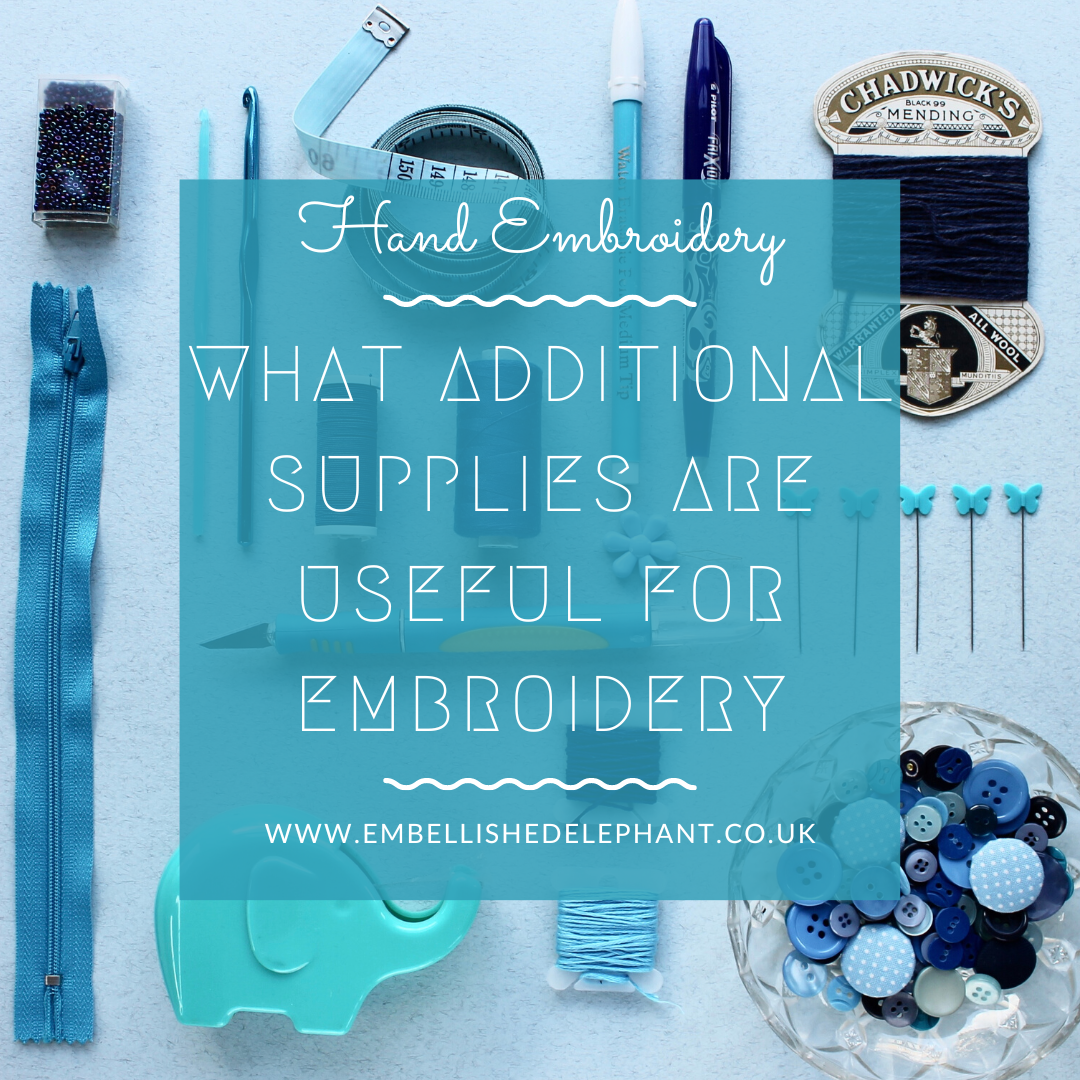
on a blue background, there are lots of different blue coloured craft supplies laid out. Overlayed is a blue square with text saying - hand embroidery, what additional supplies are useful for embroidery

What additional supplies are useful for embroidery?

February 2, 2022

When starting out with embroidery you need just a few supplies (that I cover here). But if you are hooked and want to do more and more embroidery what other supplies might it be useful to invest in (or ask for as gifts).

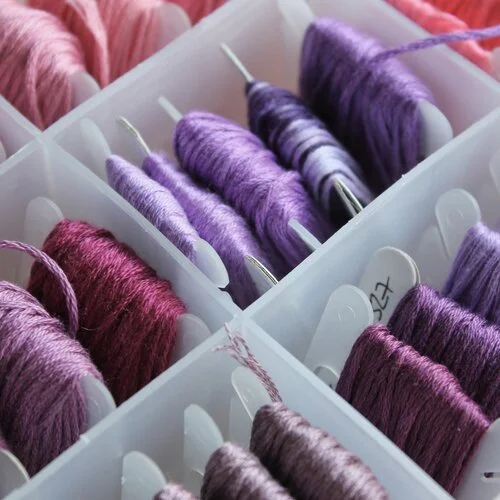
A picture of lots of pink and purple embroidery floss wound onto thread bobbins and stored in a plastic bobbin box

Thread storage

If you’ve stitched a few projects you’ve probably got a growing stash of threads. Investing in some thread storage really helps in finding the colours you need (and ensuring you don’t end up buying skeins of colours you already have).

This blog post covers different storage options, but my favourite is thread boxes and bobbins.

A wooden embroidery hoop stand sitting on a bright pink cutting mat, the stand is holding an embroidery hoop with a partially complete houseplant embroidery

Embroidery Stand

If you are really hooked on embroidery then you may be stitching for hours on end and finding that you get cramp in your hoop holding hand.

An embroidery stand can hold your hoop for you. It also frees up your non-stitching hand so you can use one hand on the top of the fabric and another underneath.

This stand slips under your leg as you are sat stitching to hold it still.

I tend to make sure that I take regular breaks rather than use a stand but I do use on for really large pieces which are much heavier.

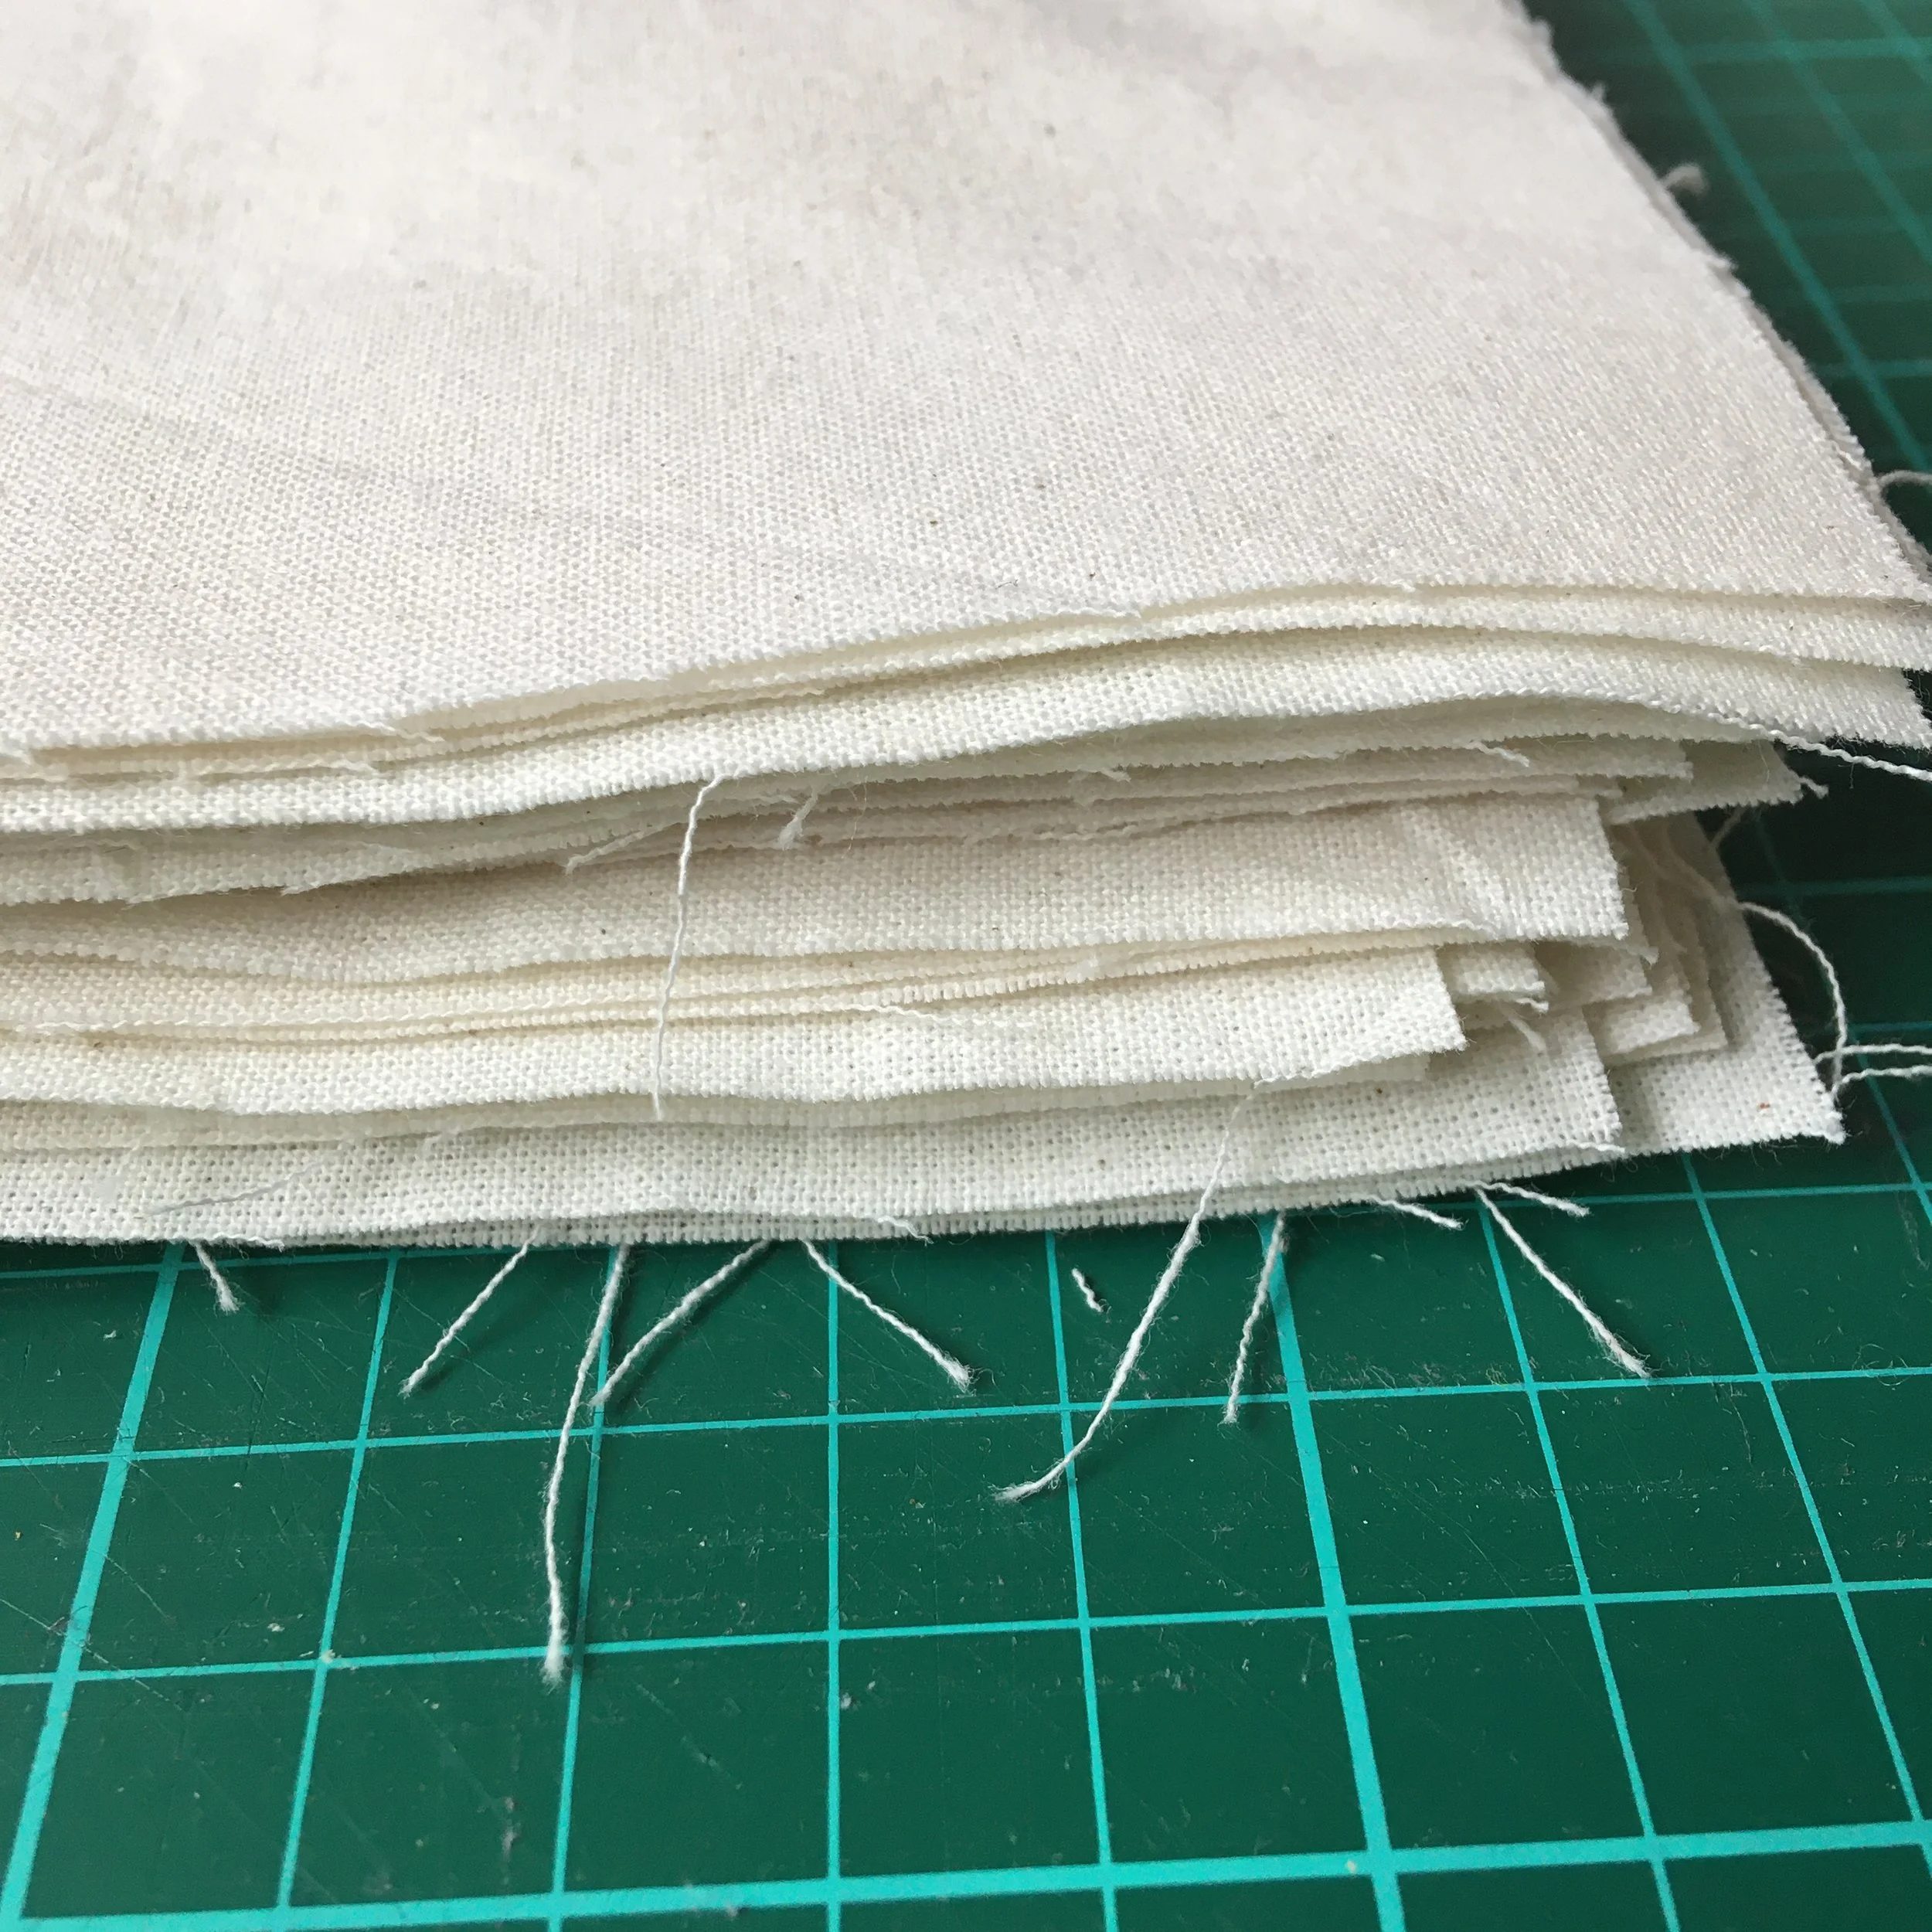
an image of a green cutting mat with a pile of pre-cut calico fabric

Cutting mat, rotary cutter & quilting ruler

You can cut up fabric for stitching on just using scissors but if you are wanting to make life a little easier for you then a cutting mat, rotary cutter and quilting ruler makes life so much simpler.

I will buy a length of calico, wash it (so there is not shrinkage) and iron it (another great investment is to get an iron purely for your crafting). Then I’ll cut up the fabric into lots of squares for different sized hoops so I always have fabric ready to stitch on.

a side table next to a sofa, on the side table is a wooden crate with items such as embroidery magazines, also on the table is a flexible neck table lamp

Daylight bulb or lamp

Especially during the winter if you are wanting to do lots of stitching then investing in a daylight lamp or bulb can be invaluable. It really helps prevent eye strain and in particular when trying to stitch darker colours such as black.

I found that the IKEA NÄVLINGE desk lamp works really well for me. It’s not a daylight bulb but can be easily angled onto my embroidery to give some extra light when I find my eyes straining.

Enjoyed this blog post? I share embroidery tips and a free embroidery pattern in my monthly newsletter. Sign up here to receive the newsletter on the 1st of each the month.

In tips 3 Tags Thread, Hoops, Fabric
Comment
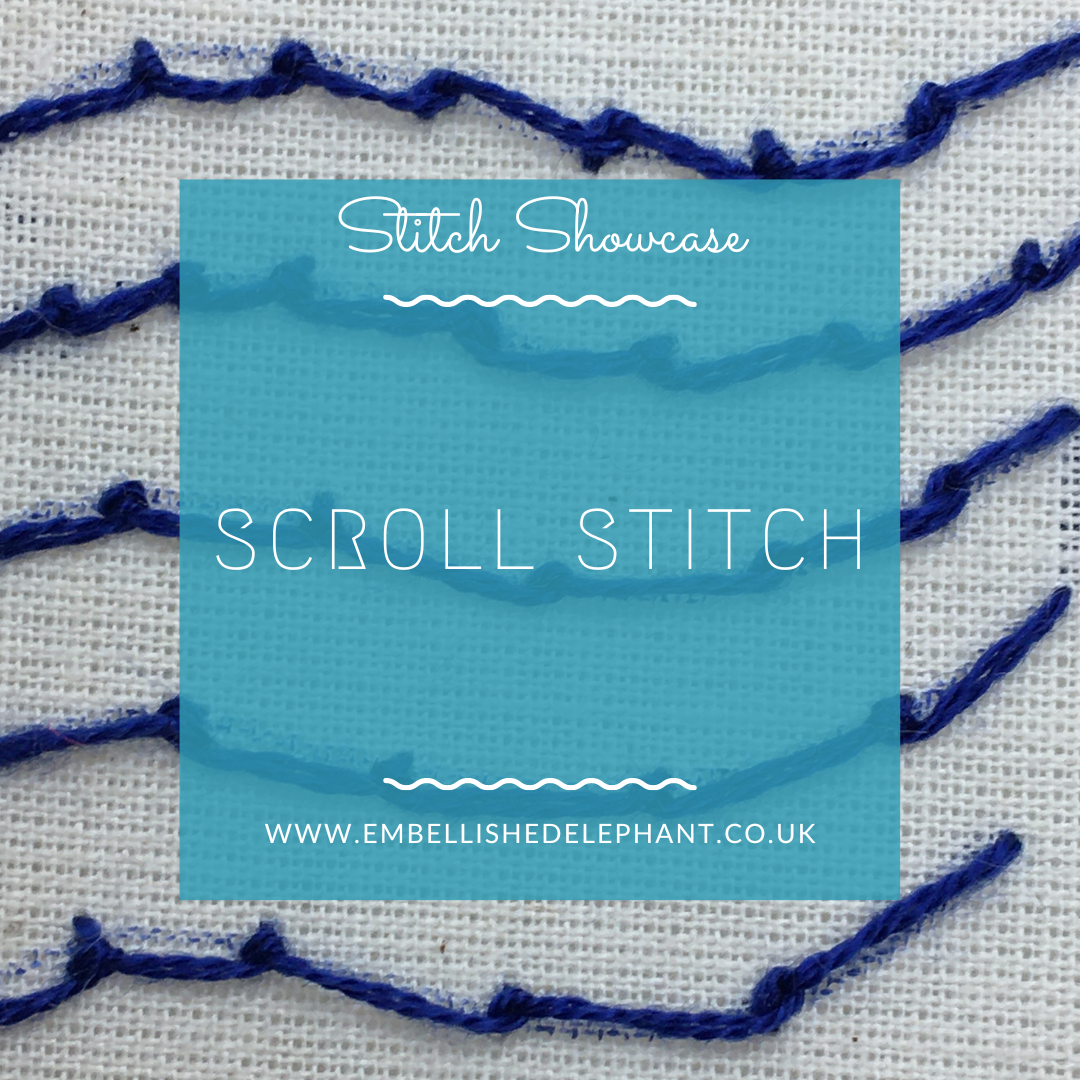
an image of four waves of scroll stitch using blue thread on a calico background. Overlaid is a blue square with text that says - hand embroidery, scroll stitch, www.embellishedelephant.co.uk

Whatever it is, the way you tell your story online can make all the difference.

Stitch Showcase: Scroll stitch

January 26, 2022

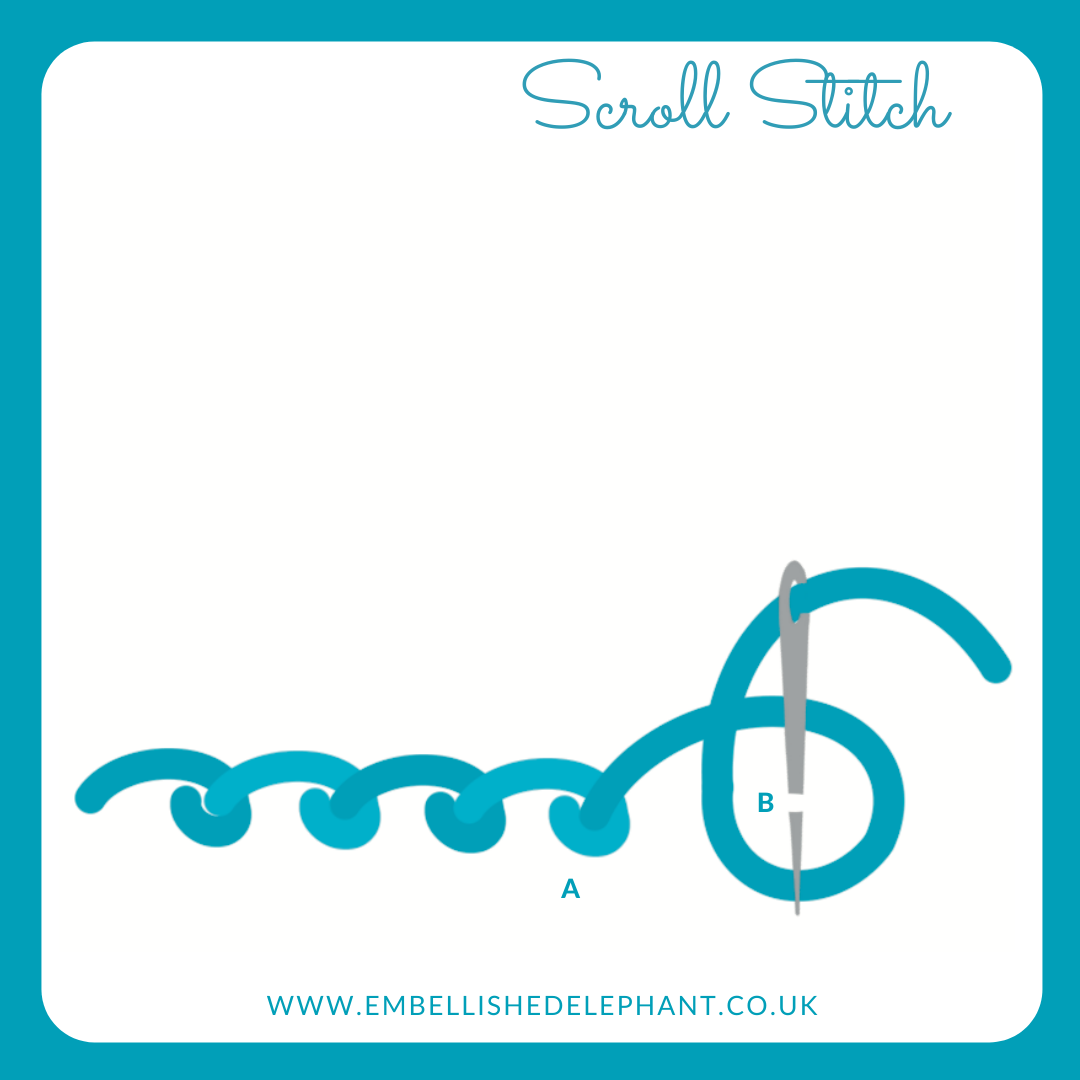
Scroll stitch comprises a knot and a tail and gives a beautiful curved look. Like a lot of stitches it takes a bit of practice to get into the rhythm but once you’ve got the steps you’ll be scrolling onwards.

My top tip if you want to make sure your scrolls are all in the same direction then make sure that you bring the needle through the fabric the same direction each time.

  • Bring the needle up through the fabric at the start of the stitch (A)

  • At the point where you want the scroll part of the stitch to be placed (B) bring the needle down and up through the fabric as close together as possible

  • Leave the needle threaded through the fabric and wrap the floss around the needle from the eye end of the need to the point of the needle

  • Pull the needle through slowly to prevent any thread tangles

  • Repeat for the rest of the scrolls

an illustration of how to create a scroll stitch. The illustration is in blue on a white background and there is a grey needle showing where this should be placed on the fabric

Want to try this stitch? It’s not one that is currently included as a recommended stitch for any of my kits but you can switch this for any of the stitches that decorate the pots in the houseplant collection of kits that you can browse here.

Enjoyed this blog post? I share embroidery tips and a free embroidery pattern in my monthly newsletter. Sign up here to receive the newsletter on the 1st of each the month.

In stitch showcase 2 Tags Stitch Showcase, Line Stitch
Comment
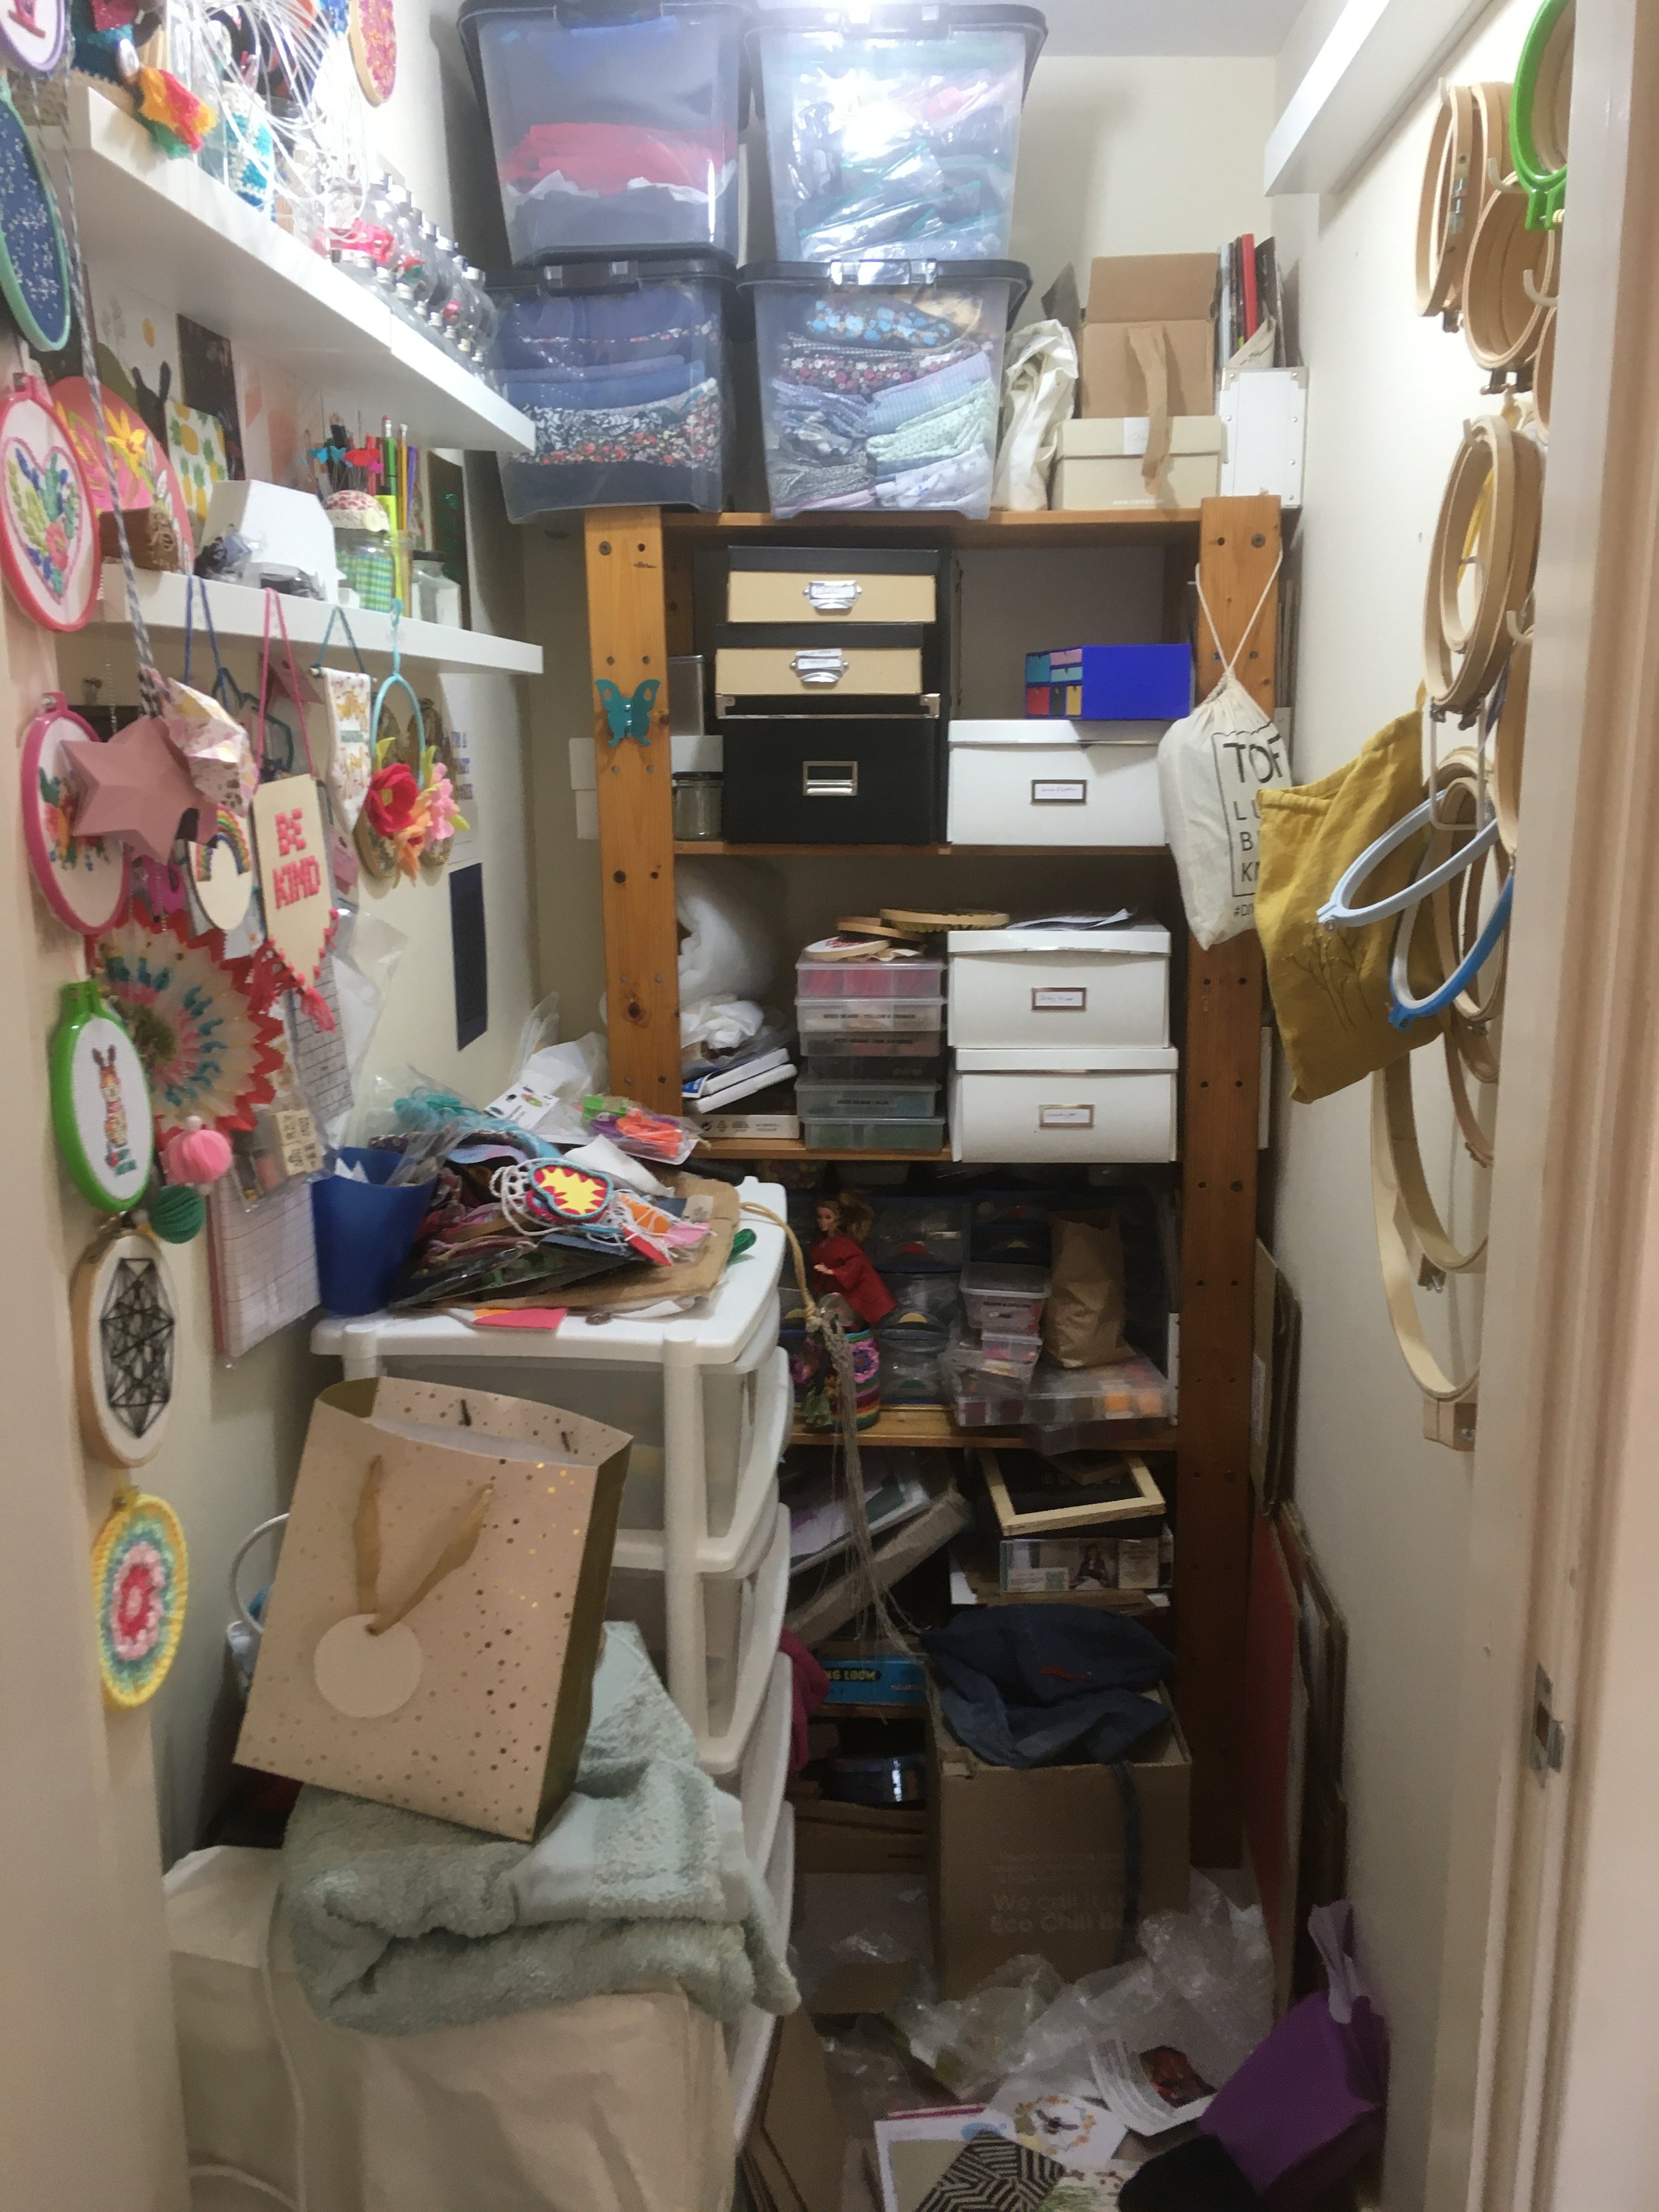
a picture of a cupboard stuffed full craft materials. Overlaid is a blue square with text saying - hand embroidery, ideas for storing craft materials, www.embellishedelephant.co.uk

Ideas for storing craft materials

January 19, 2022

I’ve just moved house. Packing up all my craft supplies I realised just how large my stash has grown. But I also realised in unpacking and trying to put away my supplies in a much larger space that there are lots of different ways to store your materials and you need to fit the storage method to the type and volume of items you have.

You can see how much I crammed into a cupboard approximately 1 metre by 2 metres in the video below.

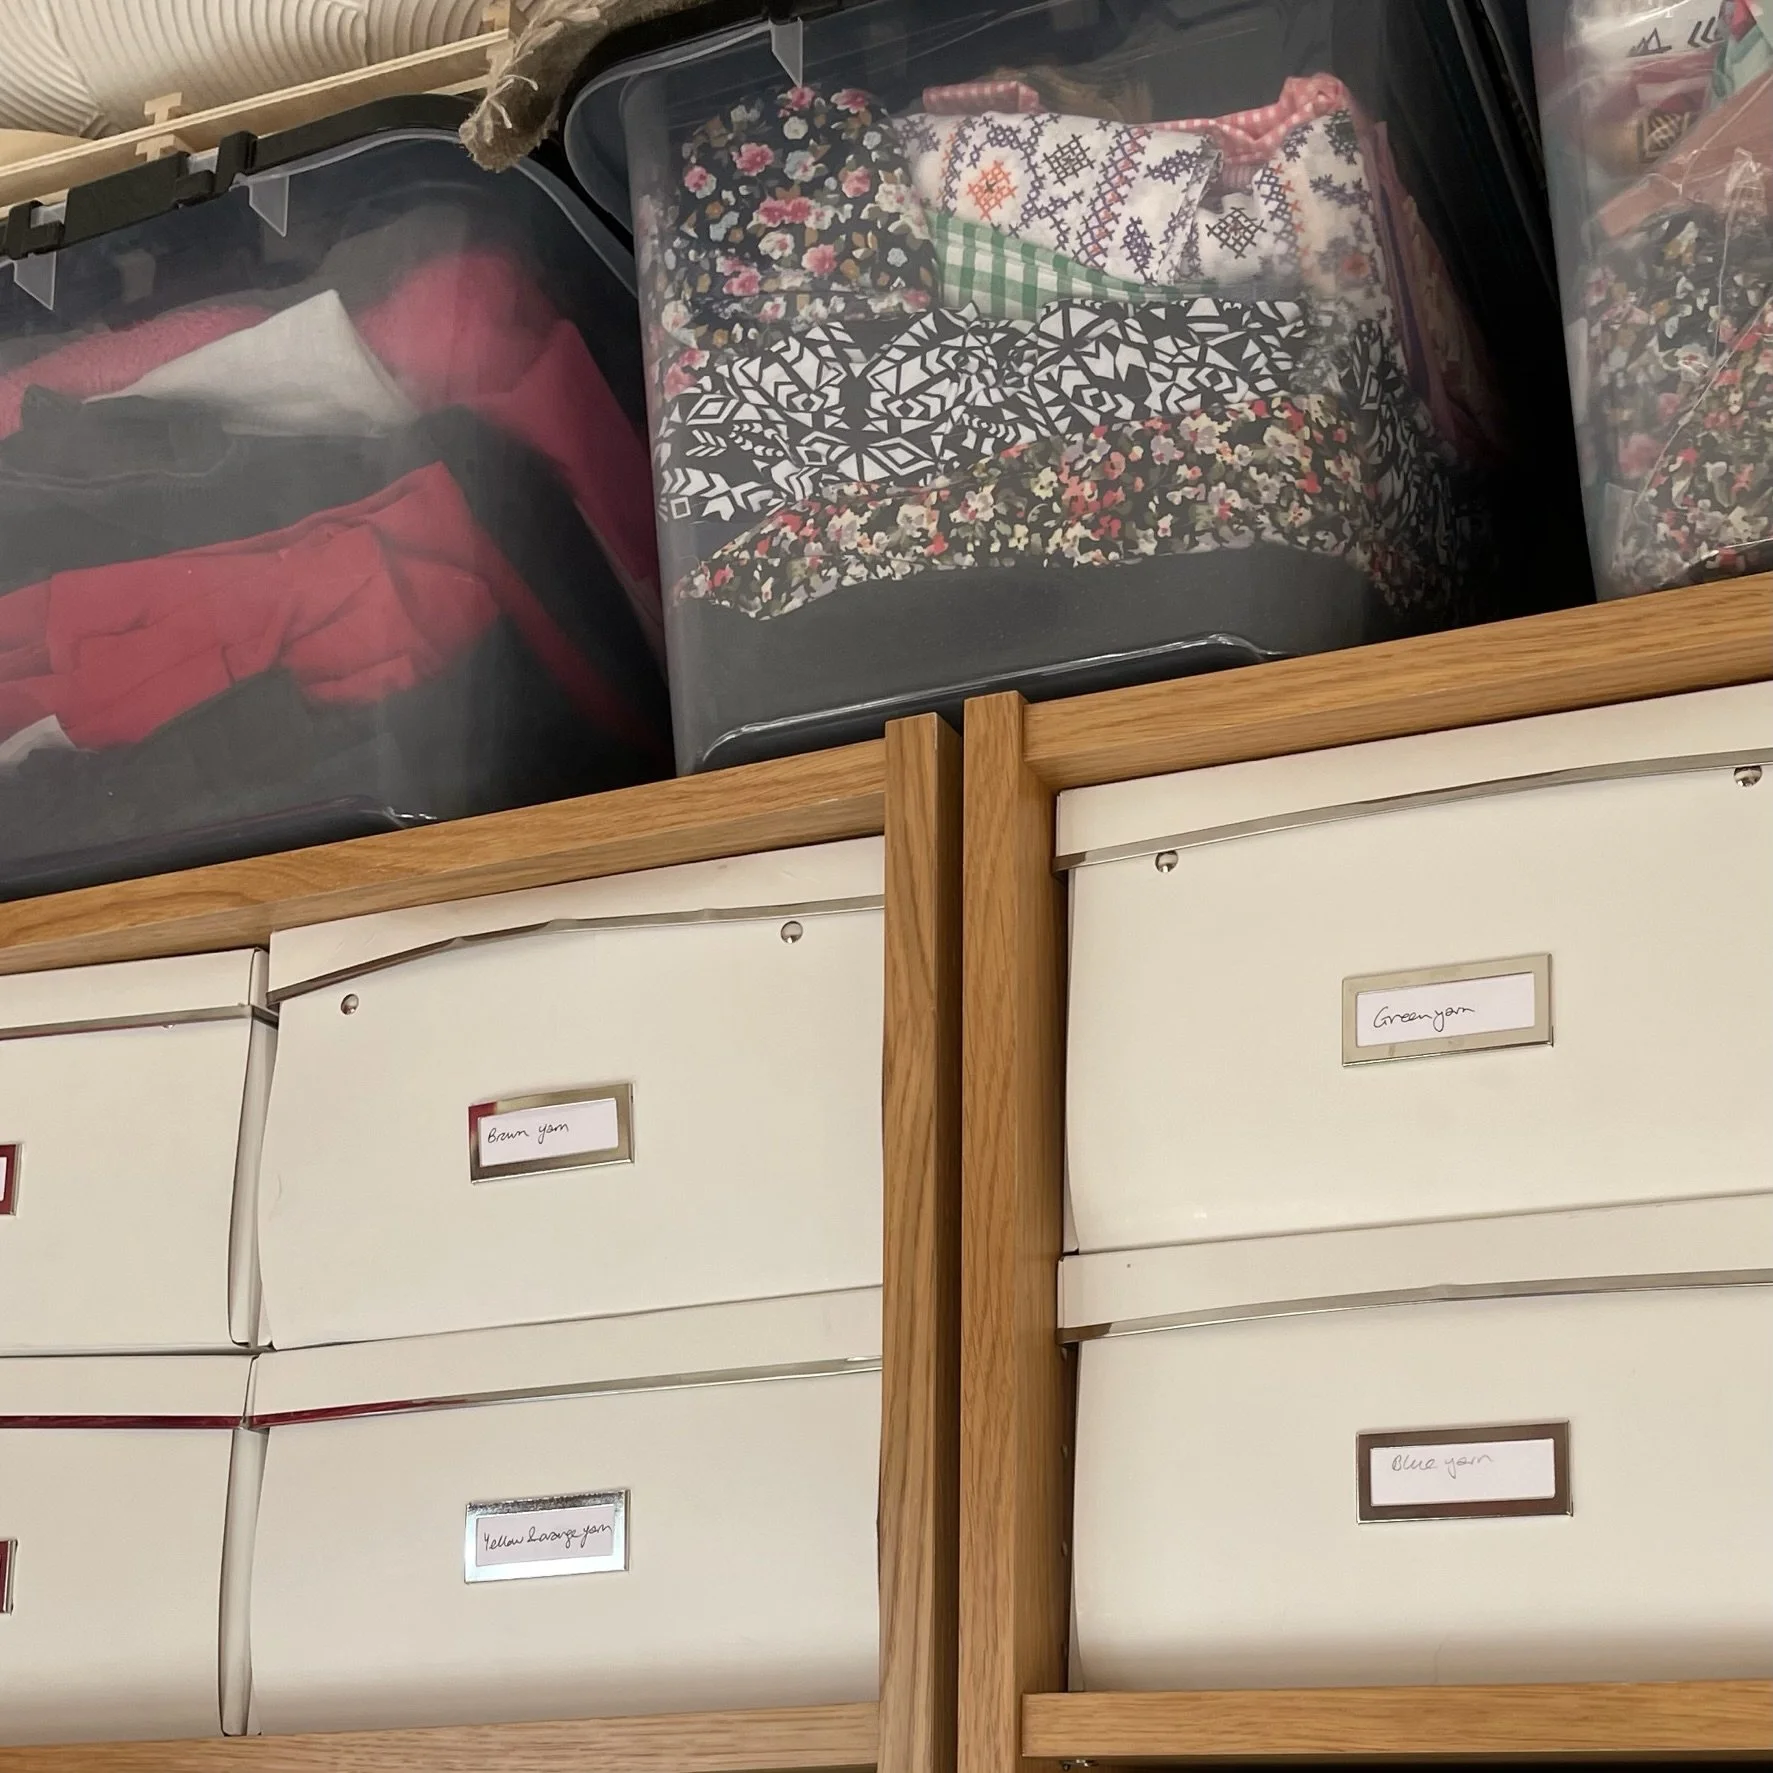
a picture of a bookcase with cardboard storage boxes on the shelves and plastic storage tubs containing fabric on the top

Storage boxes

These are great for items you use less frequently as they keep the dust off.

I use both plastic storage tubs and cardboard boxes making sure I group together items in a way that makes sense eg I have a box for interfacing, bias binding and elastic that I only really need for dressmaking projects.

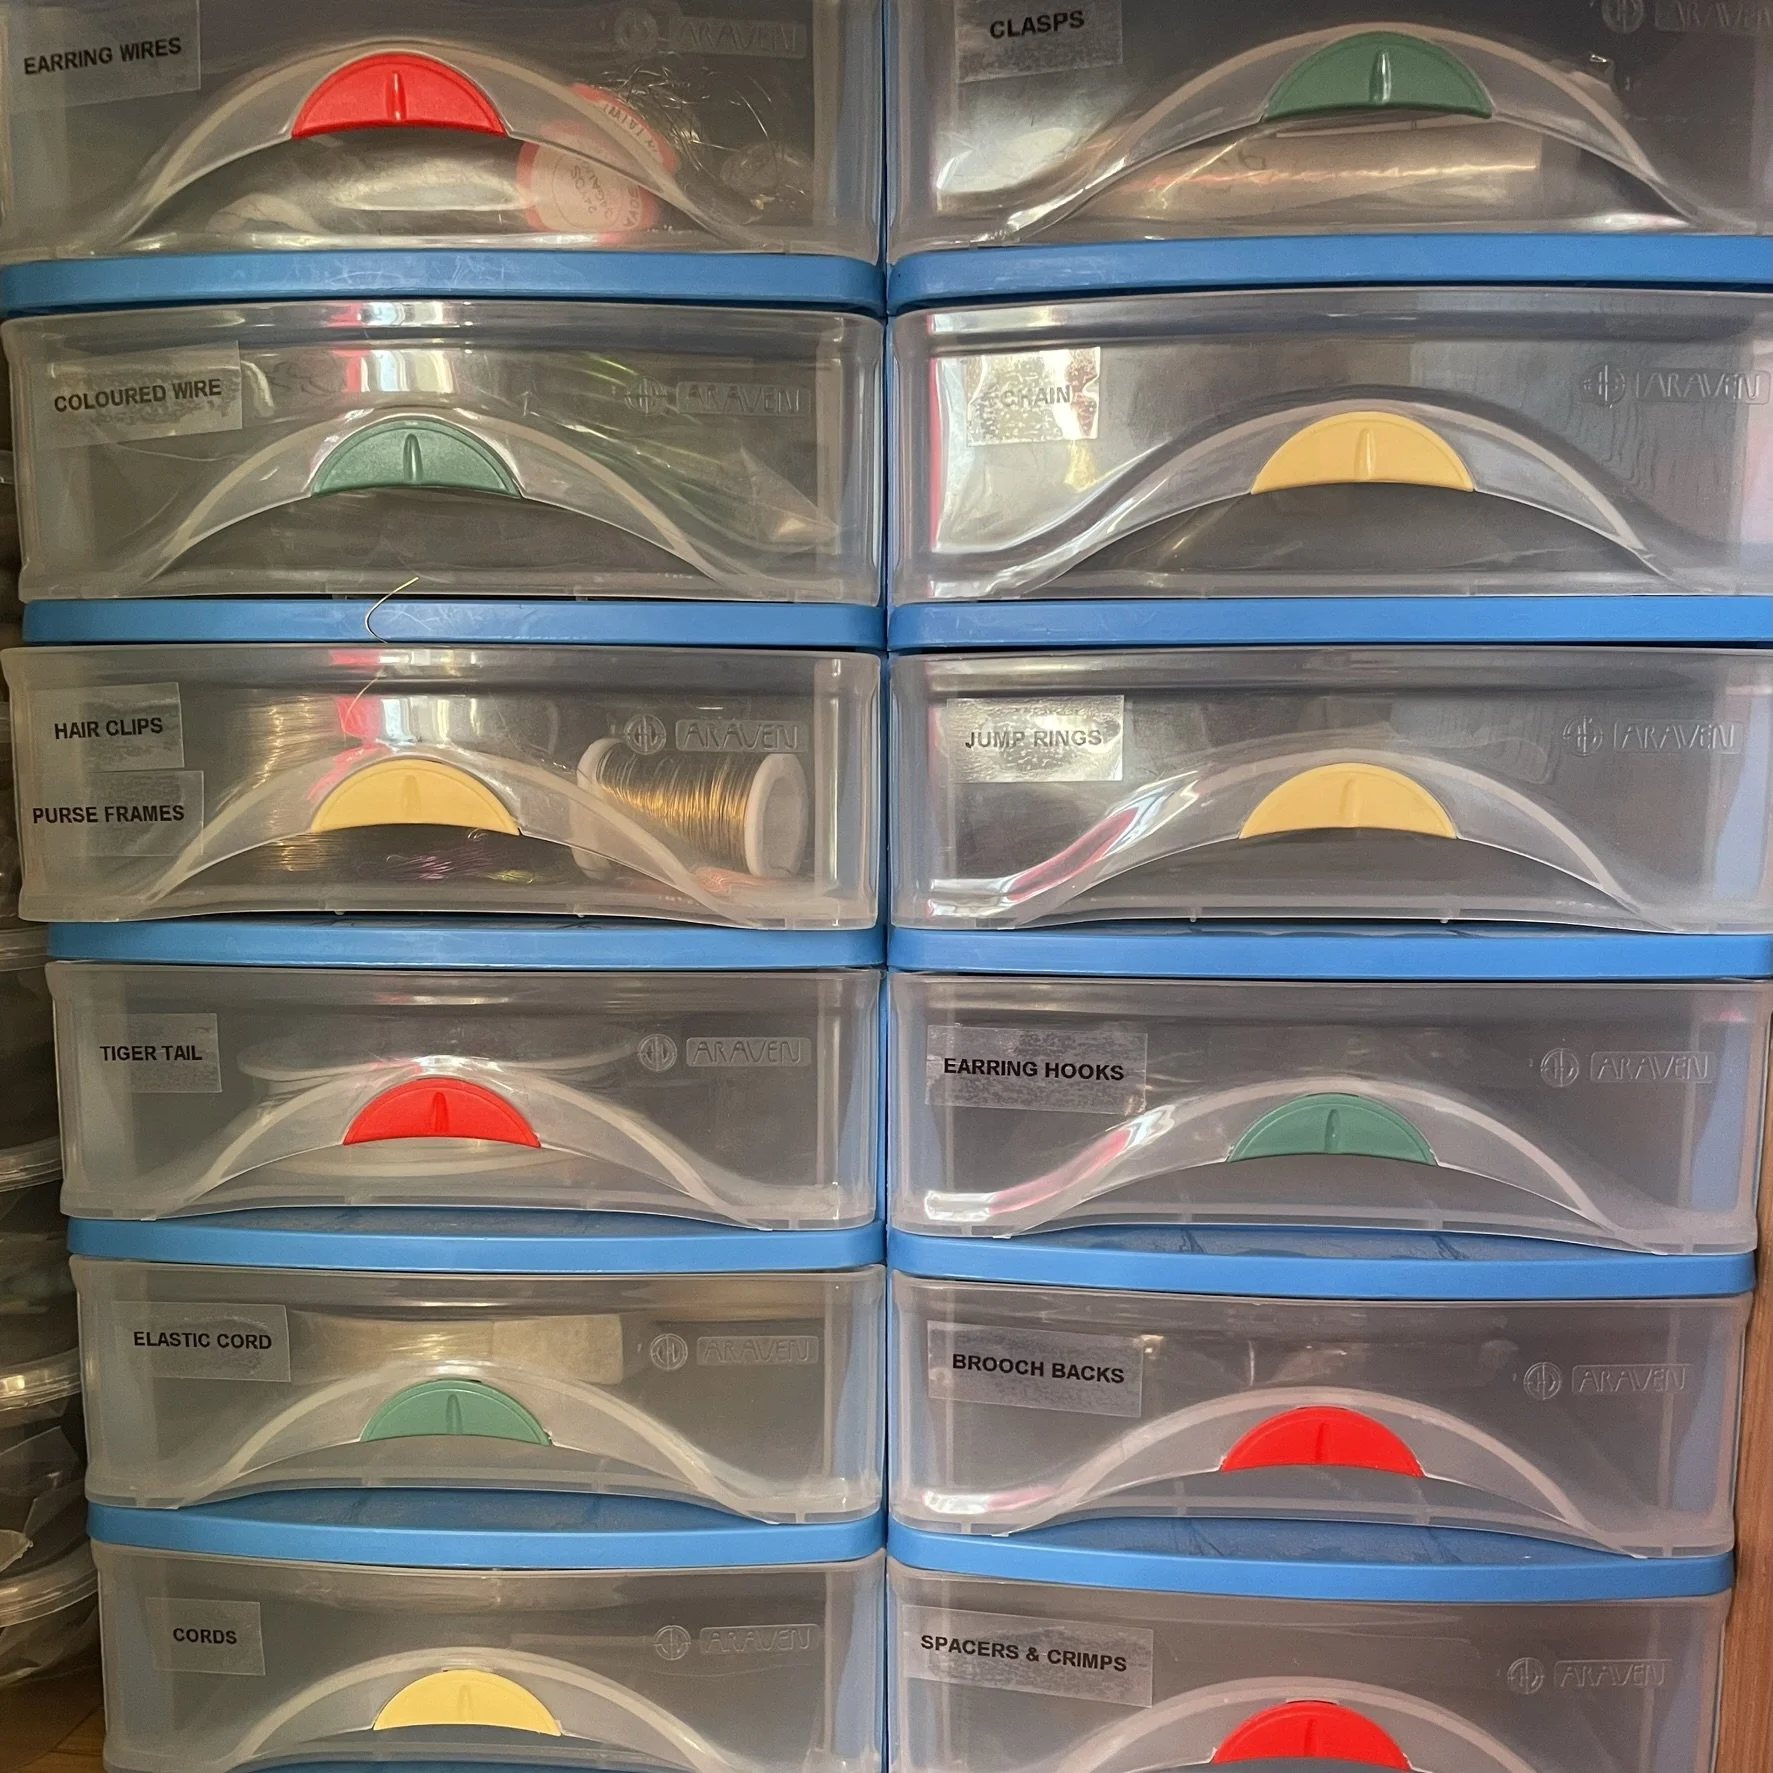
a picture of small plastic drawer unit with a blue frame and clear plastic drawers

Drawer units

Smaller drawer units such as these are great for keeping a few items together such as my jewellery making supplies.

Larger drawer units are perfect for fabric or other bulkier items.

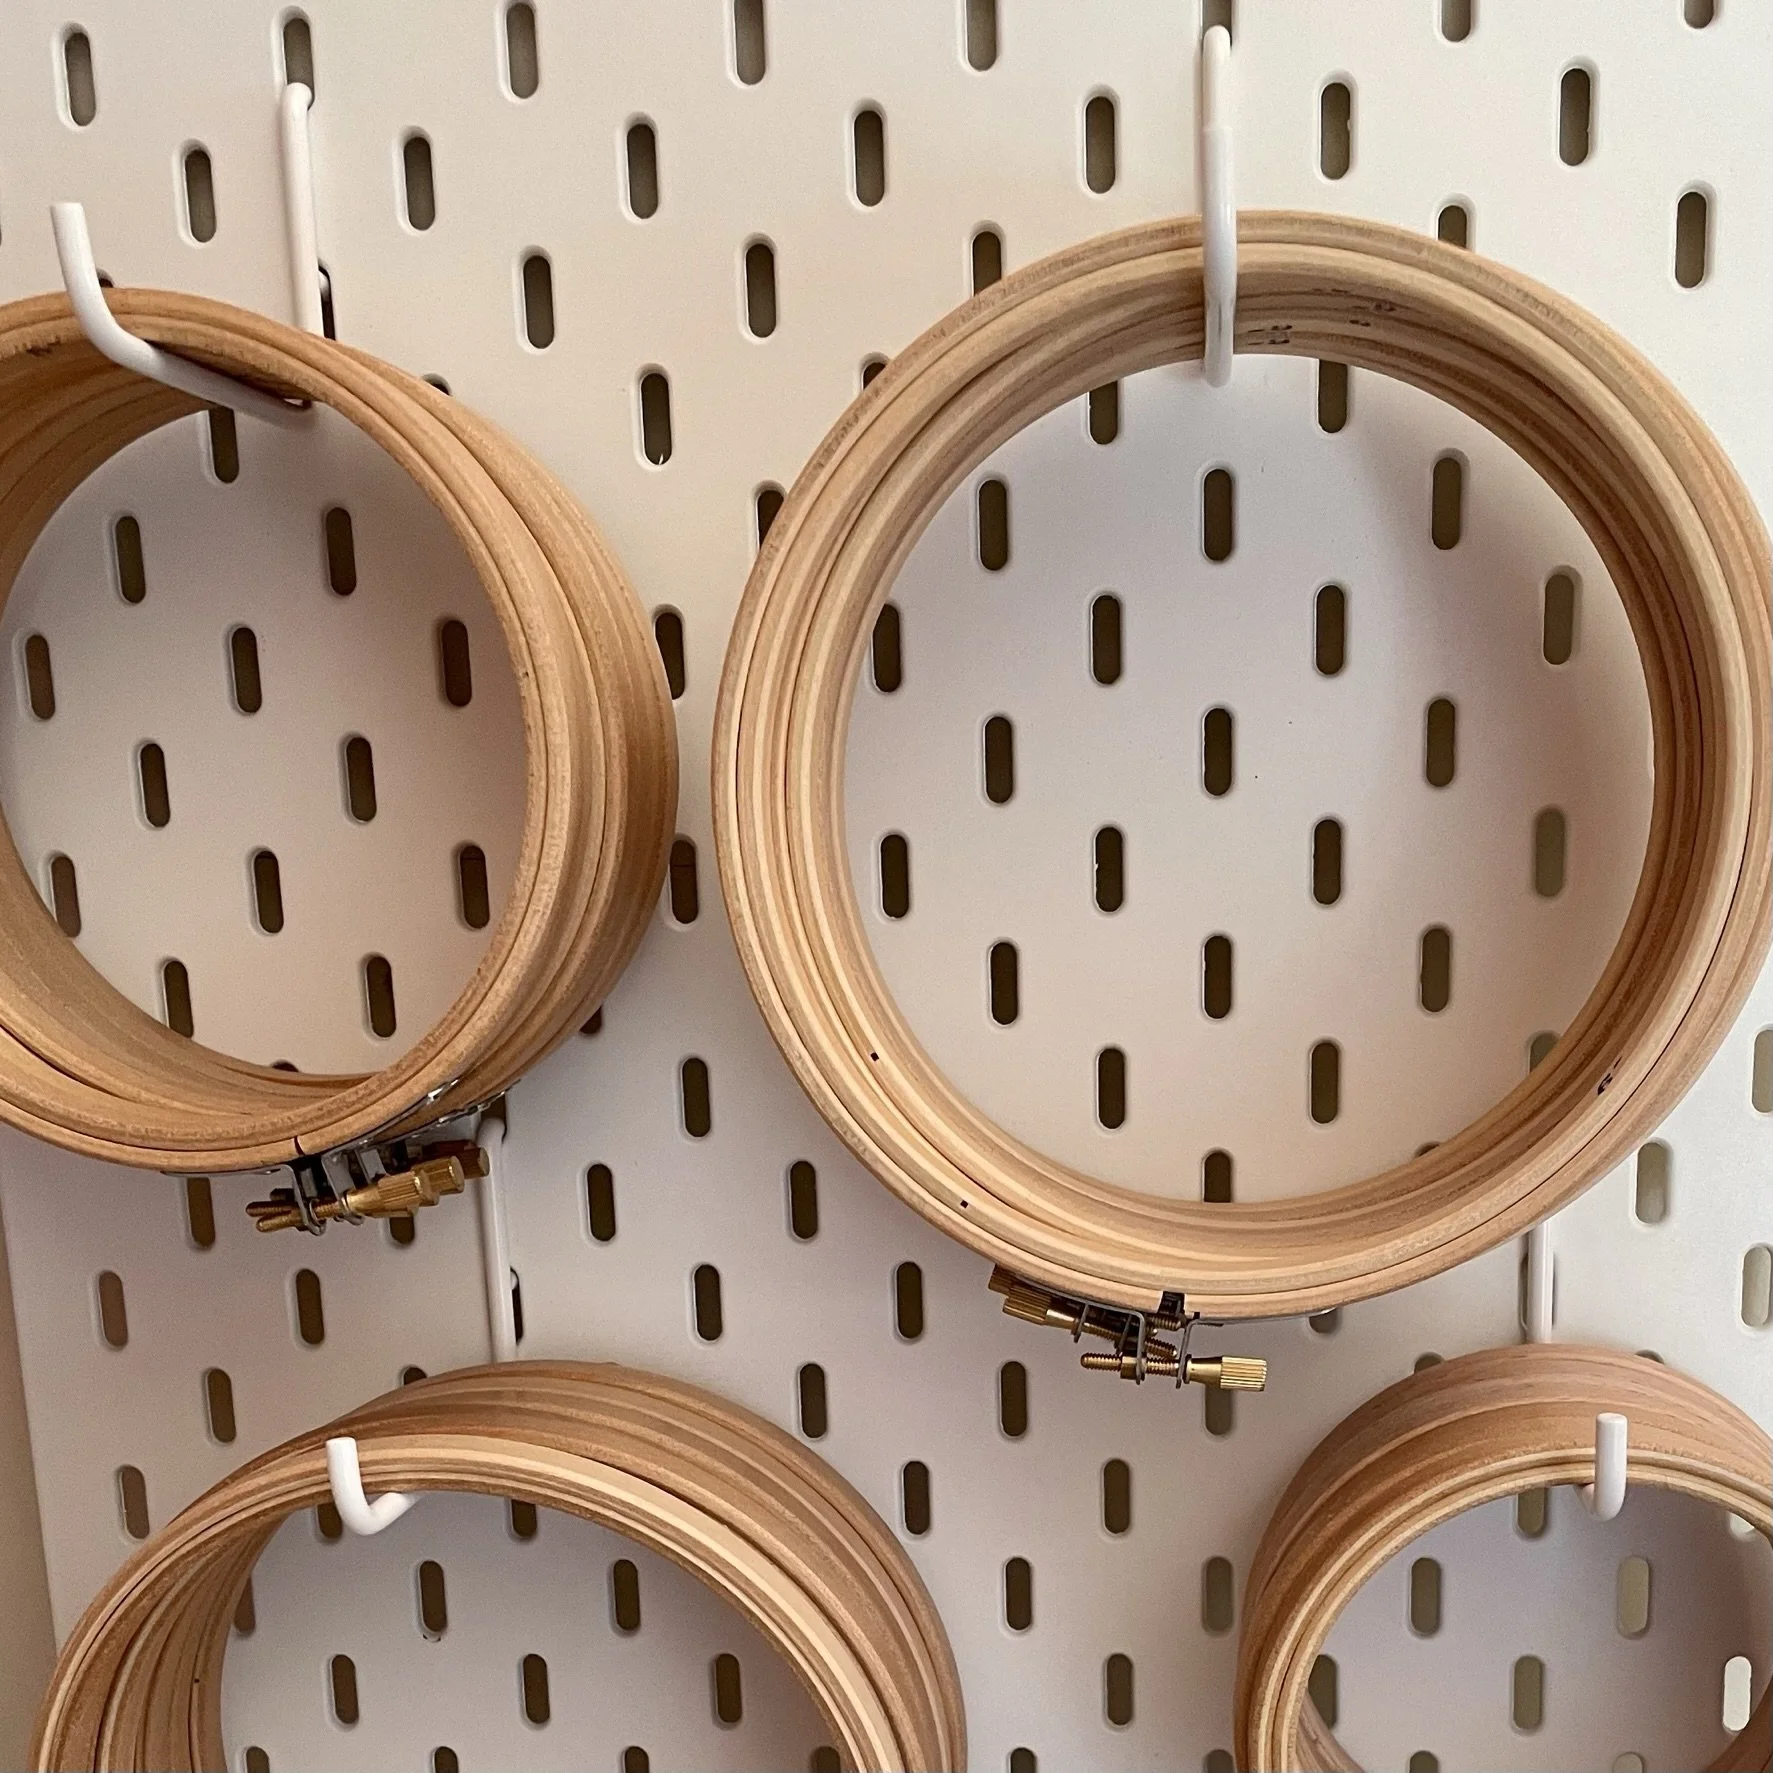
a picture of an ikea pegboard with hooks, on the hooks are a range of different sized embroidery hoops

Peg boards

I am a recent convert to these having seen other crafters on Instagram make use of them. As an embroiderer, these are perfect for storing embroidery hoops which are otherwise quite bulky to store.

an image of two jam jars covered in crochet. In the jam jars stand crochet hoops and double pointed knitting needles

Jam jars

Jam jars are so versatile. I store buttons, safety pins and other small items in the smaller jars. I’ve also add some padding to the top of some jars to make them into pin cushions/sewing supply storage. Larger jars I throw away the lid, cover in crochet and store things such as scissors, crochet hooks etc.

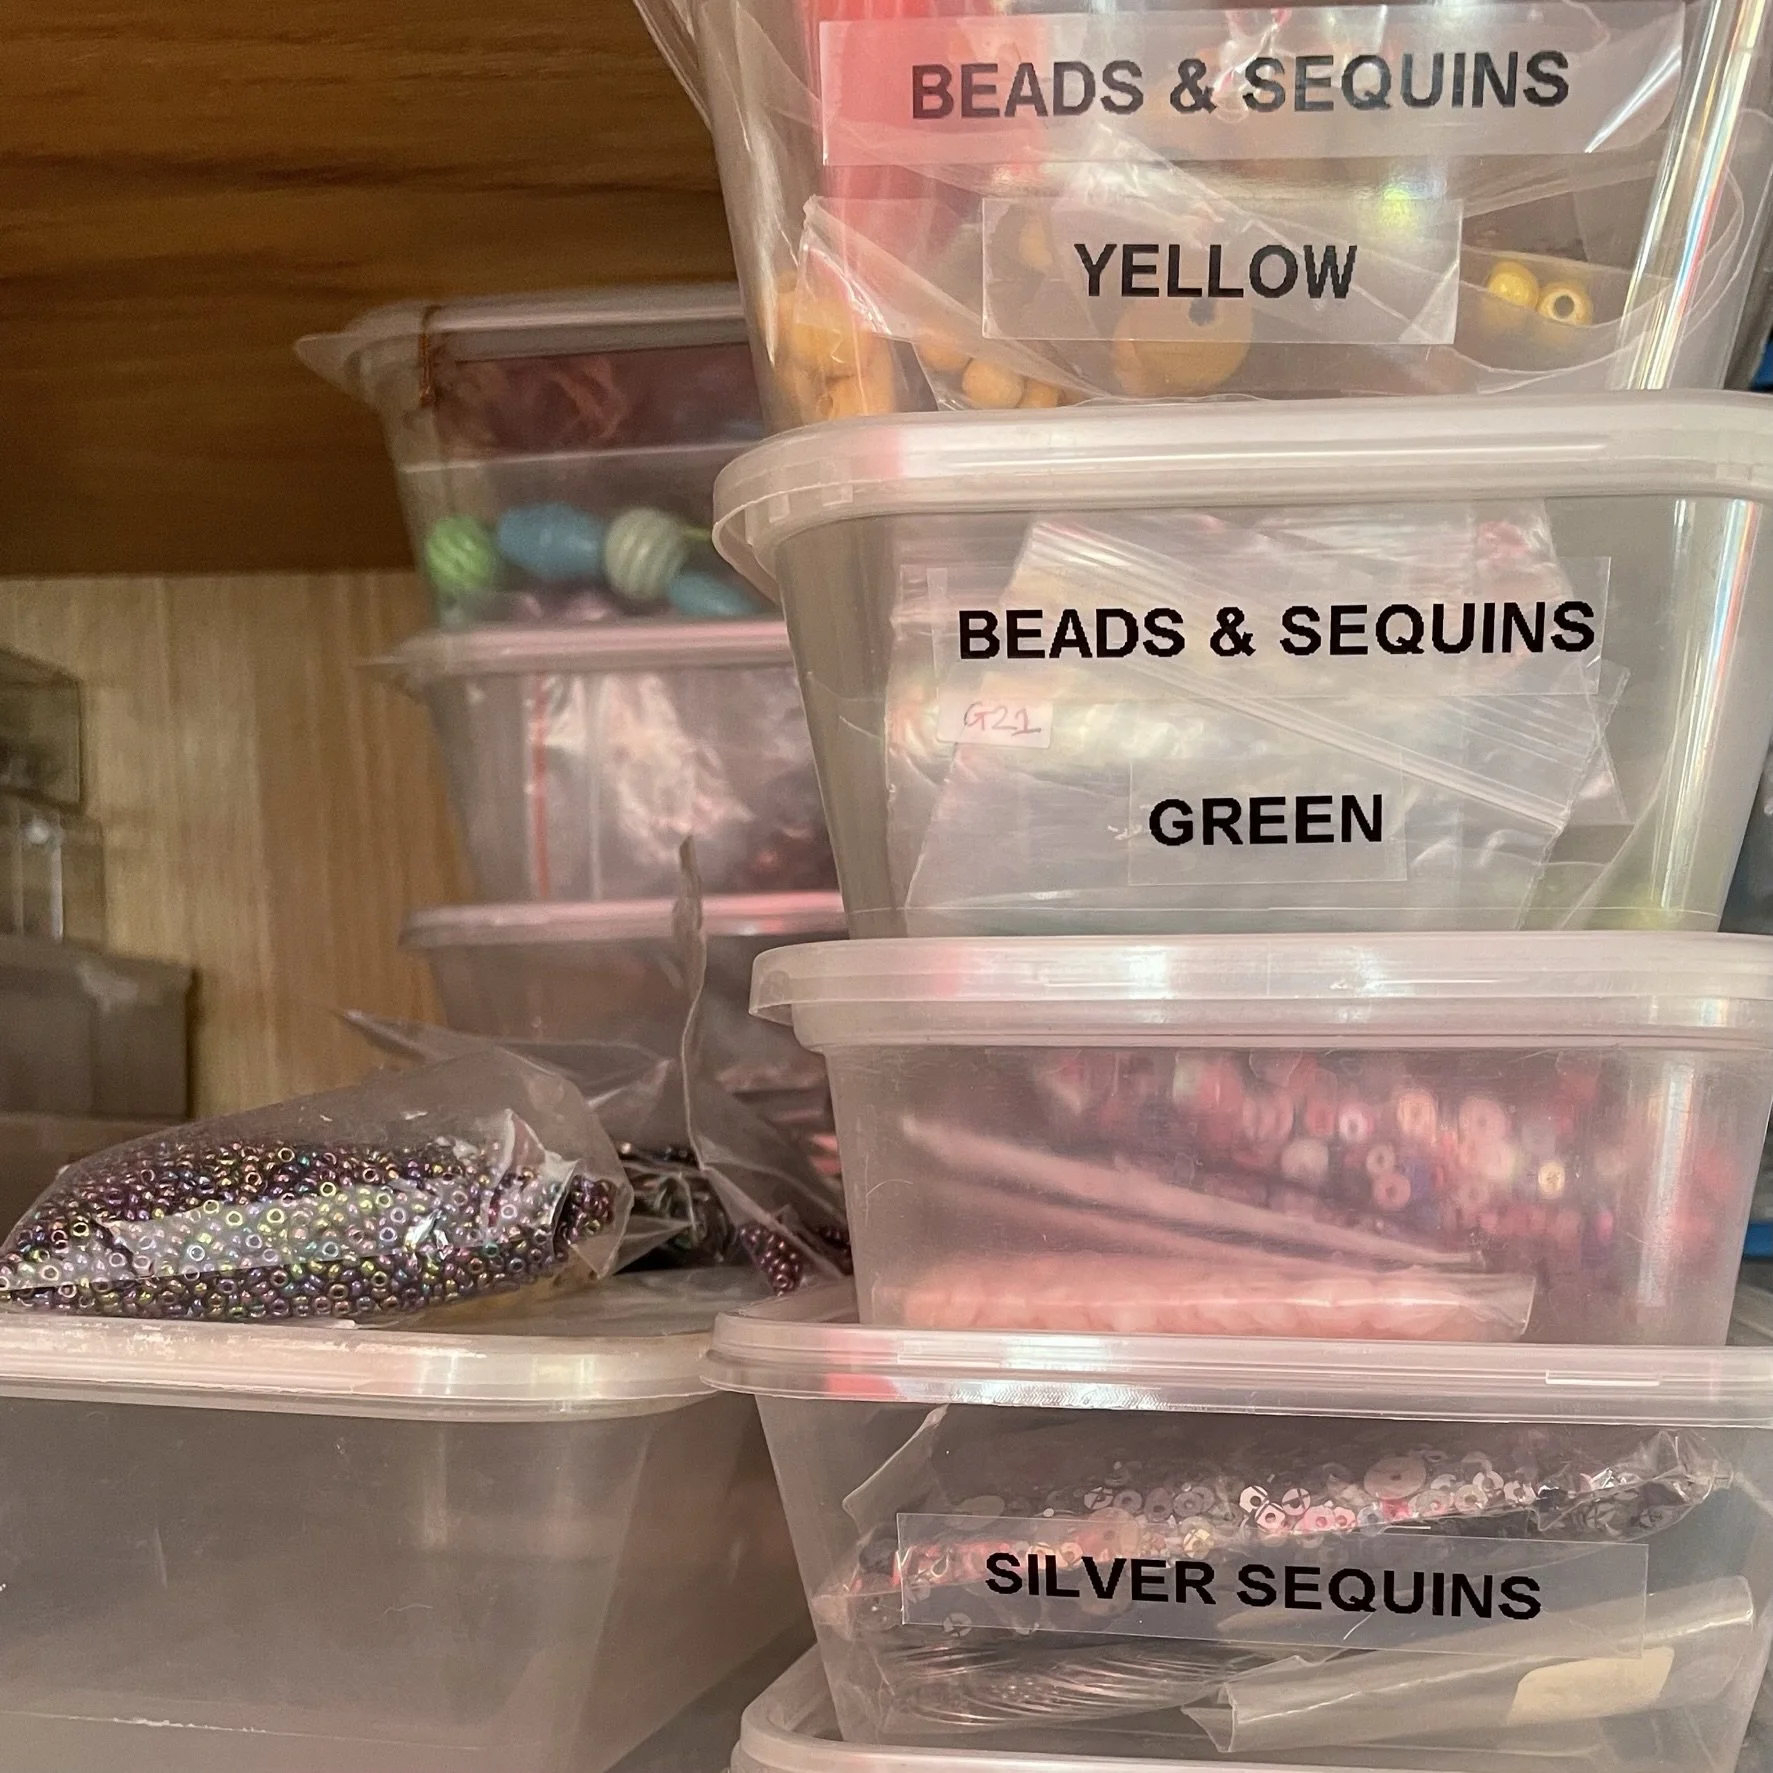
Take away tubs

These stack really well and I’ve found them very useful for storing small items such as beads and sequins.

Enjoyed this blog post? I share embroidery tips and a free embroidery pattern in my monthly newsletter. Sign up here to receive the newsletter on the 1st of each the month.

In tips 3
Comment
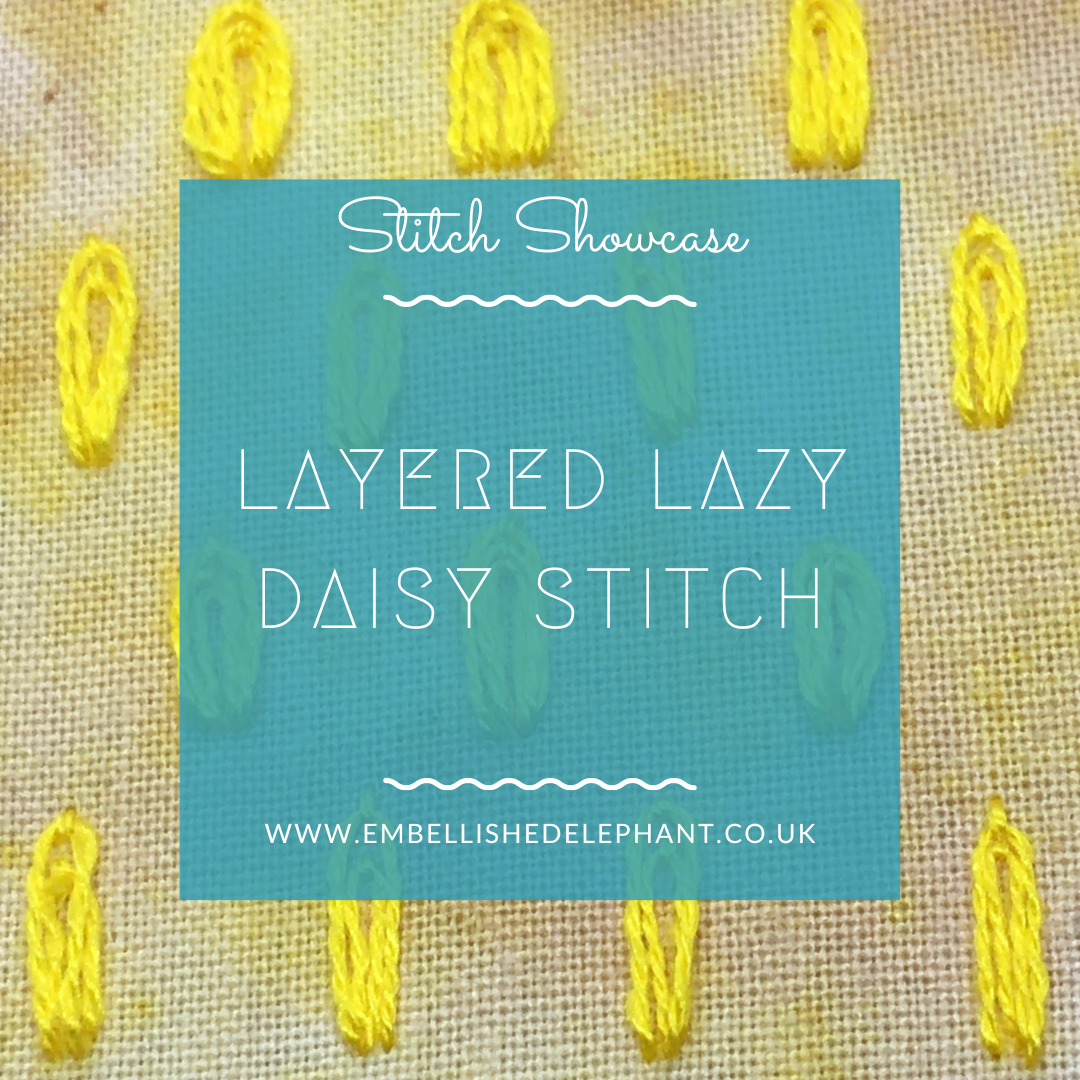
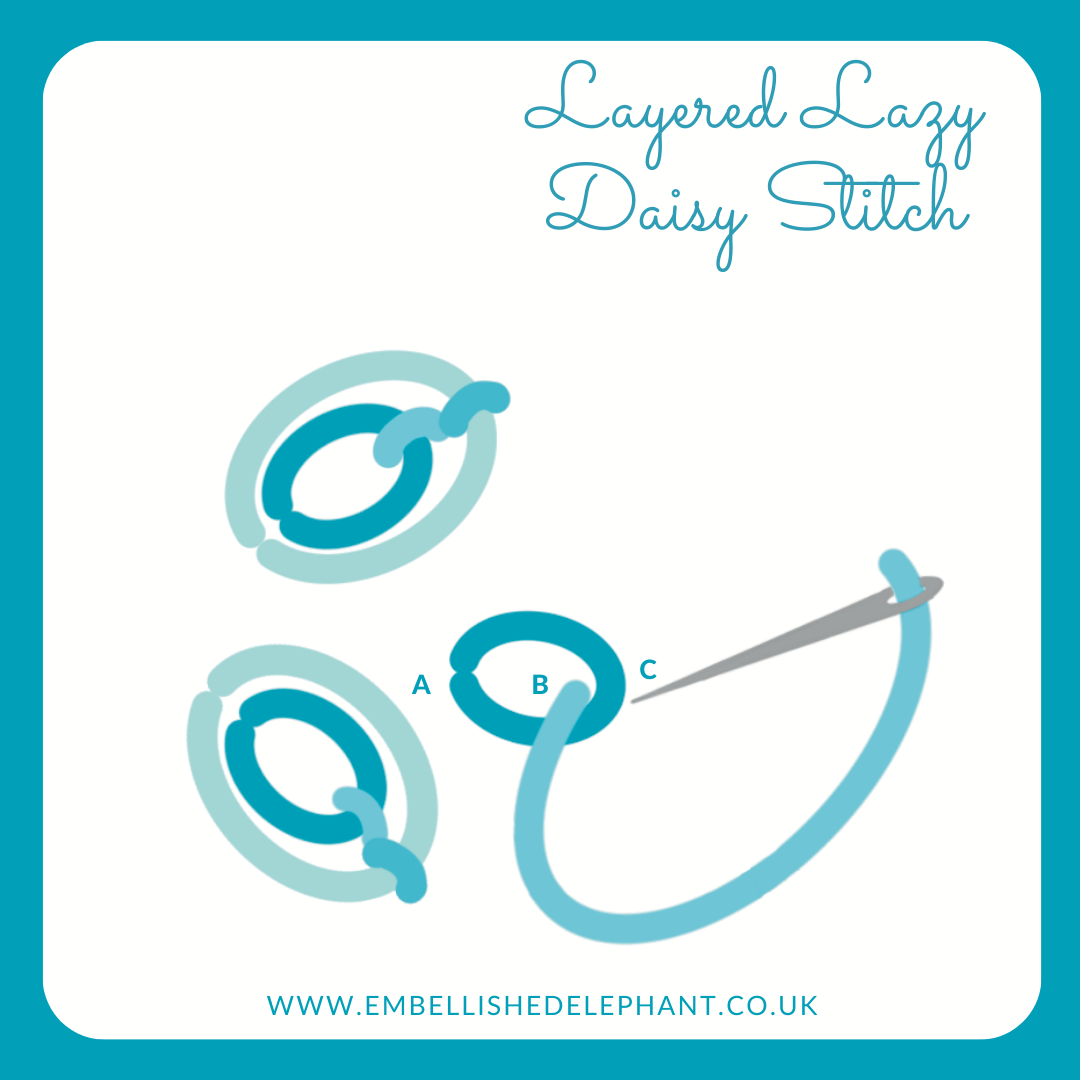
a picture of yellow fabric with yellow layered lazy daisy stitches in rows. Overlaid is a blue square with text saying - stitch showcase, layered lazy daisy stitch, www.embelllishedelephant.co.uk

Stitch Showcase: Layered Lazy Daisy Stitch

January 12, 2022

Layered lazy daisy stitch is a variation of lazy daisy stitch and can be used if you want to fill in the centre of a lazy daisy stitch .

  • I recommend working this stitch by creating the inner lazy daisy and then then outer one

  • Bring the needle up through the fabric at the point where you want your stitch to start (A)

  • Take it back down as close as possible to the original hole

  • Gently pull the thread through until you have a small loop - don't pull fully tight at this point

  • Push the needle up through the fabric at the point where you want the stitch to end, 5mm is a good length (B)

  • Create a tiny straight stitch over the loop so it can’t come loose (C)

  • Repeat the steps above creating the start and end points of the stitch just a millimetre away from the first.

an illustration of the steps to follow to create layered lazy daisy stitch. The illustration is blue on a white background with a blue border

Want to try this stitch? It’s not one that is currently included as a recommended stitch for any of my kits but you can switch this for any of the stitches in the floral stitch sample kit that you can find here.

Enjoyed this blog post? I share embroidery tips and a free embroidery pattern in my monthly newsletter. Sign up here to receive the newsletter on the 1st of each the month.

In stitch showcase 2 Tags Isolated Stitch, Stitch Showcase
Comment
← Newer Posts Older Posts →
No results found

Tags

  • Artists/Designers
  • Basics
  • Christmas
  • colour
  • Couching Stitch
  • Fabric
  • Filling Stitch
  • Finishing
  • Hoops
  • Isolated Stitch
  • Line Stitch
  • London
  • My Makes
  • Needles
  • Raised Stitch
  • Stitch Showcase
  • Texture Stitch
  • Thread
  • Transfer
  • Travel

Latest Posts

Featured
June 1, 2026
Focus on knots
June 1, 2026
June 1, 2026
May 1, 2026
Focus on stranded floss
May 1, 2026
May 1, 2026
April 1, 2026
Focus on raised stitches
April 1, 2026
April 1, 2026
February 15, 2026
Tips for unpicking thread tangles
February 15, 2026
February 15, 2026
February 1, 2026
How to add elements to a basic embroidery pattern
February 1, 2026
February 1, 2026
December 1, 2025
Using yarn in embroidery
December 1, 2025
December 1, 2025
November 1, 2025
What can you learn from vintage embroidery books
November 1, 2025
November 1, 2025
September 1, 2025
What is the difference between cross stitch and embroidery?
September 1, 2025
September 1, 2025
July 1, 2025
How to make time for embroidery
July 1, 2025
July 1, 2025
June 1, 2025
What is stranded embroidery thread?
June 1, 2025
June 1, 2025

Home — Shop — Stockists — Wholesale — Portfolio — Contact — Reviews — Policies — FAQs