• Home
  • Shop
  • Stitch Showcase
  • Embroidery tips
  • Freebies
  • About
  • Contact
Menu

Embellished Elephant

  • Home
  • Shop
  • Stitch Showcase
  • Embroidery tips
  • Freebies
  • About
  • Contact
a picture of the back of piece of embroidery, at the top of the picture you can see two layers of fabric. Overlaid is a blue square with text saying - hand embroidery, how using two layers of fabric can help your embroidery

How using two layers of fabric can help your embroidery

January 5, 2022

My go to fabric for embroidery is a nice bit of calico. It has a nice thread count and weight to it meaning it doesn’t pucker very much when stitching.

When I change things up and use a different type of fabric especially thinner cotton or satin fabric I’ll add in another layer (normally after I’ve stitched a few stitches and discovered that they aren’t behaving quite the way I was expecting).

But when might using two layers of fabric be useful.

an image of an embroidery hoop on a blue background. on the left hand side of the hoop you can see that the inner and outer hoop don't fit together

Fabric not being held tight by the hoop

Sometimes you’ll have a hoop where you’ve tightened the screw as far as it will go but your fabric is still not staying taut.

This may be that the fabric is thin or slippery, or it could be that the inner and outer hoops are slightly misaligned and not as close fitting as in other hoops (such as the one pictured)

If you don’t have another hoop you can use instead, then adding another layer of fabric means that there is just a little bit more for the hoop to grip onto.

a picture of the back of an embroidery, it shows abstract shapes and stitches that suggest couching stitches have been used

Using thicker threads and/or embellishments

Although it may not seem like it when you are stitching, each stitch adds some weight to the fabric. The more stitches there are, the more weight and the more likely the fabric is to pucker.

Beads and sequins also add weight to the fabric and can lead to puckering or sagging fabric.

Adding an under-layer of fabric helps to carry some of that weight. If you are using particularly heavy threads or embellishments then you may want to use a thicker under-layer or even add a third layer of fabric or use interfacing.

This piece had several different cords couched on the front meaning a bit of extra support was needed at the back.
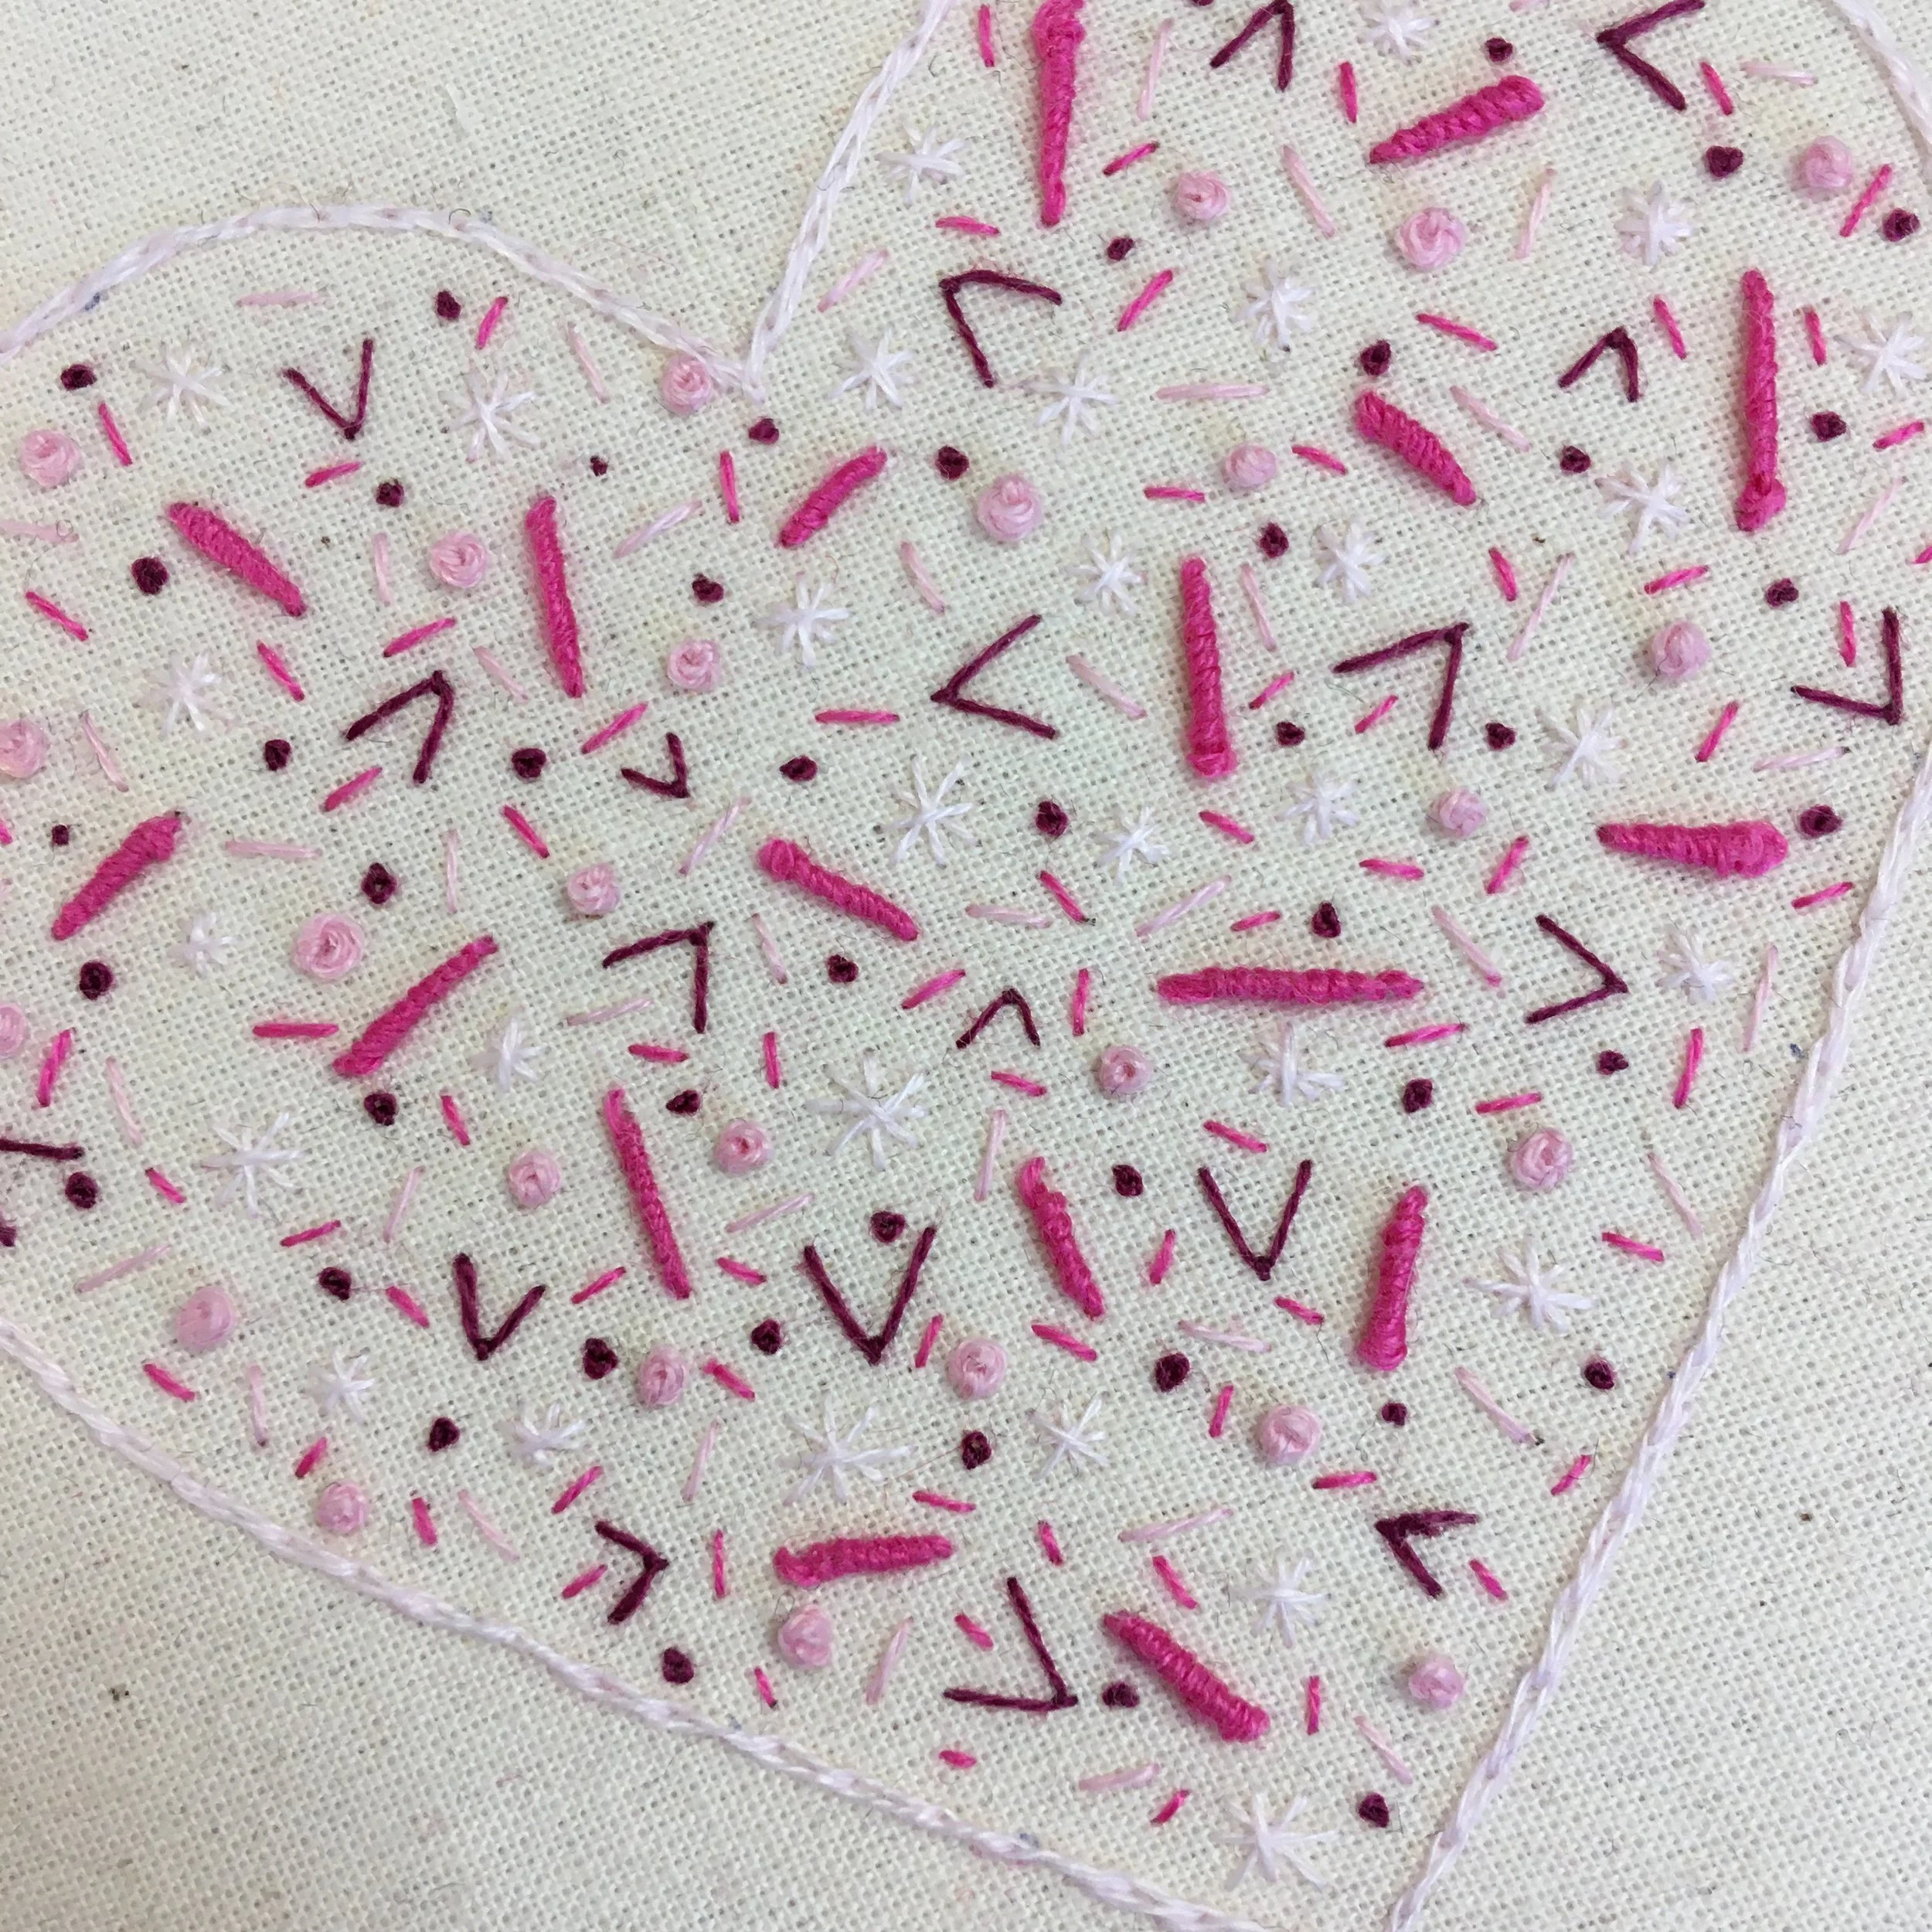
a picture of a heart embroidery made up of lots of isolated pink stitches on calico fabric

Using lots of isolated stitches

There are some designs such as this kit where there are lots of stitches isolated from one another. When stitching a piece like this you could start and tie of a thread after stitching each individual but that ends up being a hassle. The easier thing is to stitch each colour in one go but you end up with thread trails between each stitch which can show on the front of the fabric.

Adding a second layer of fabric helps to hide these thread trails and make it less likely that they can be seen from the front of the fabric.

And if you do use a second layer of fabric what can you use? I tend to use a bit of muslin or a thinner weight calico but you could use any woven fabric.

Enjoyed this blog post? I share embroidery tips and a free embroidery pattern in my monthly newsletter. Sign up here to receive the newsletter on the 1st of each the month.
In tips 3 Tags Fabric
Comment
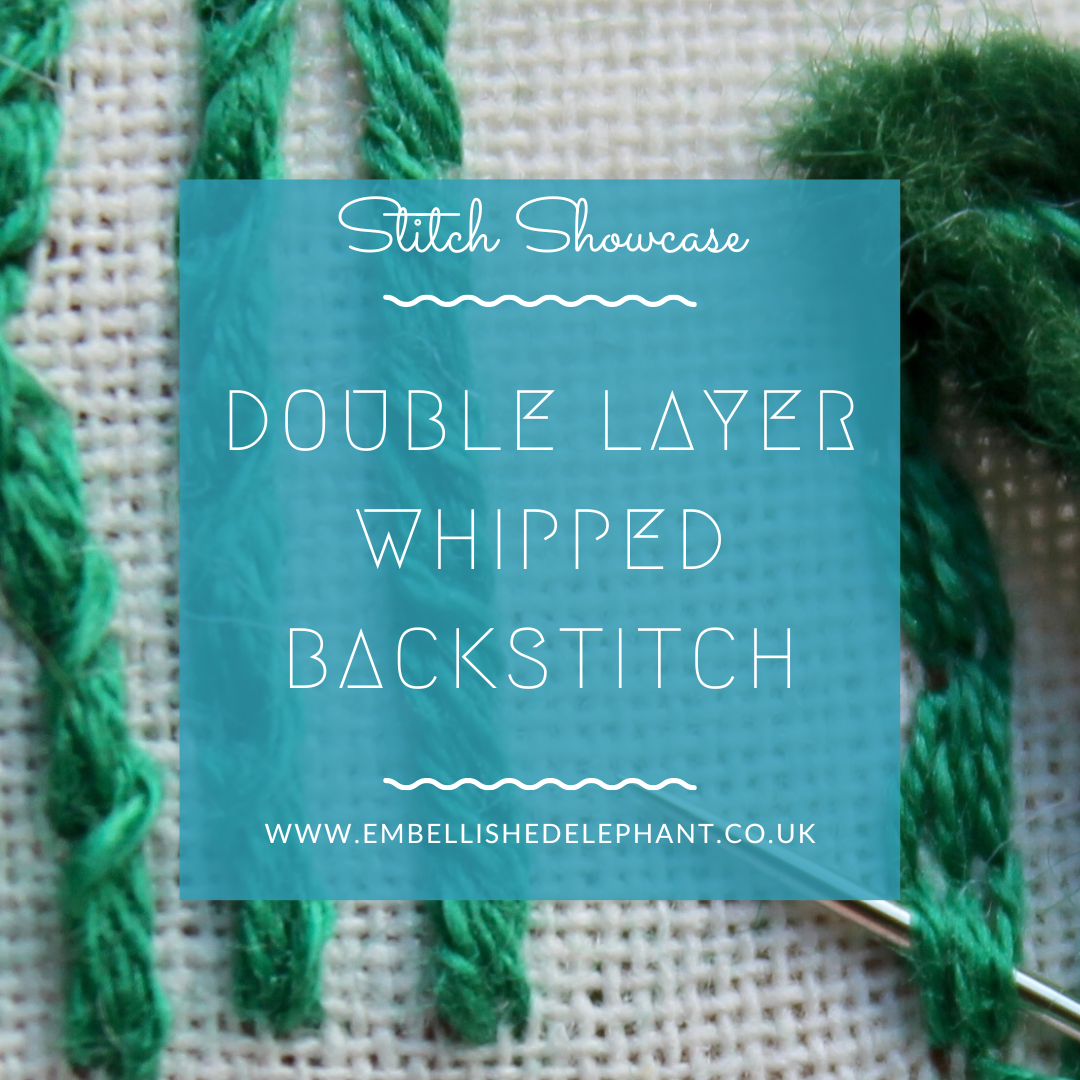
An image of close up of green stitching on calico fabric. Overlaid is a blue square and on it in white text is - stitch showcase, double layer whipped backstitch, www.embellishedelephant.co.uk

Stitch Showcase: Double Layer Whipped Backstitch

December 29, 2021

I came across this variation on whipped backstitch recently and it was a bit of a lightbulb moment. Whipped backstitch is a favourite of mine and with this version you can stitch thicker lines without needing to increase the number of strands of thread being used.

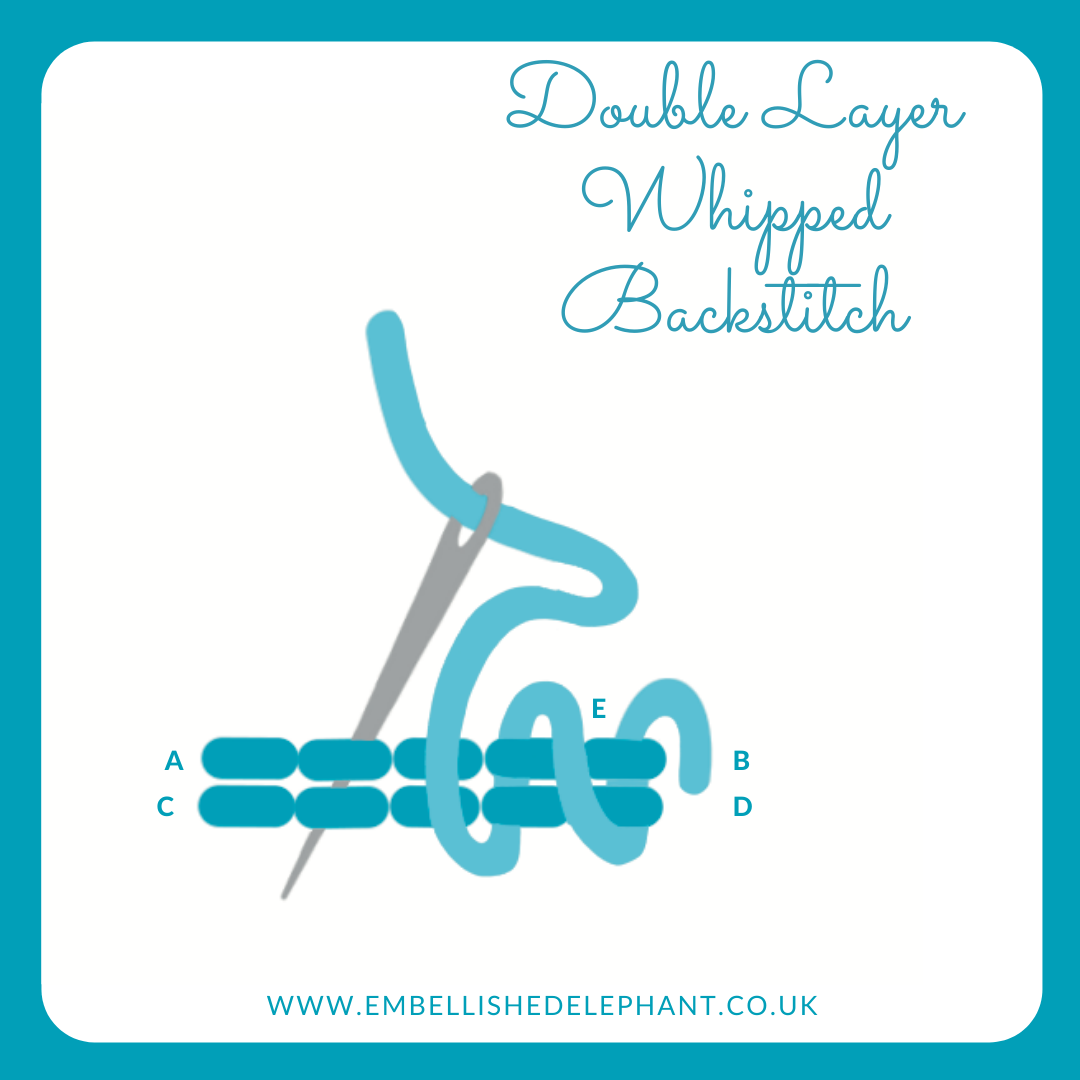
The main difference to whipped backstitch is that rather than laying down just one row of backstitches, you lay down two or three rows as the base to whip around.

  • Backstitch is the foundation and then floss is wrapped around each of these stitches to create a cord effect

  • Start by backstitching the complete length of the line you want to embroider (see here for how to create a backstitch line)

  • Create another row or two alongside the first row

  • To wrap the backstitch, bring the needle up at the end of the backstitch length (B)

  • Pass the needle under the first backstitch from right to left (E)

  • Repeat on the next backstitch again passing from right to left

  • Continue until the floss is wrapped around all the backstitches

  • To finish push the needle back down through the fabric.

An illustration of how to create the double layer whipped backstitch embroidery stitch. The illustration is in blue on a white background.

Whipped back stitch is one of my favourite stitches and I recommend it for many of my houseplant kits. You can switch in double layer whipped backstitch to give the plant stems some extra width.

Enjoyed this blog post? I share embroidery tips and a free embroidery pattern in my monthly newsletter. Sign up here to receive the newsletter on the 1st of each the month.
In stitch showcase 2 Tags Line Stitch, Stitch Showcase
Comment
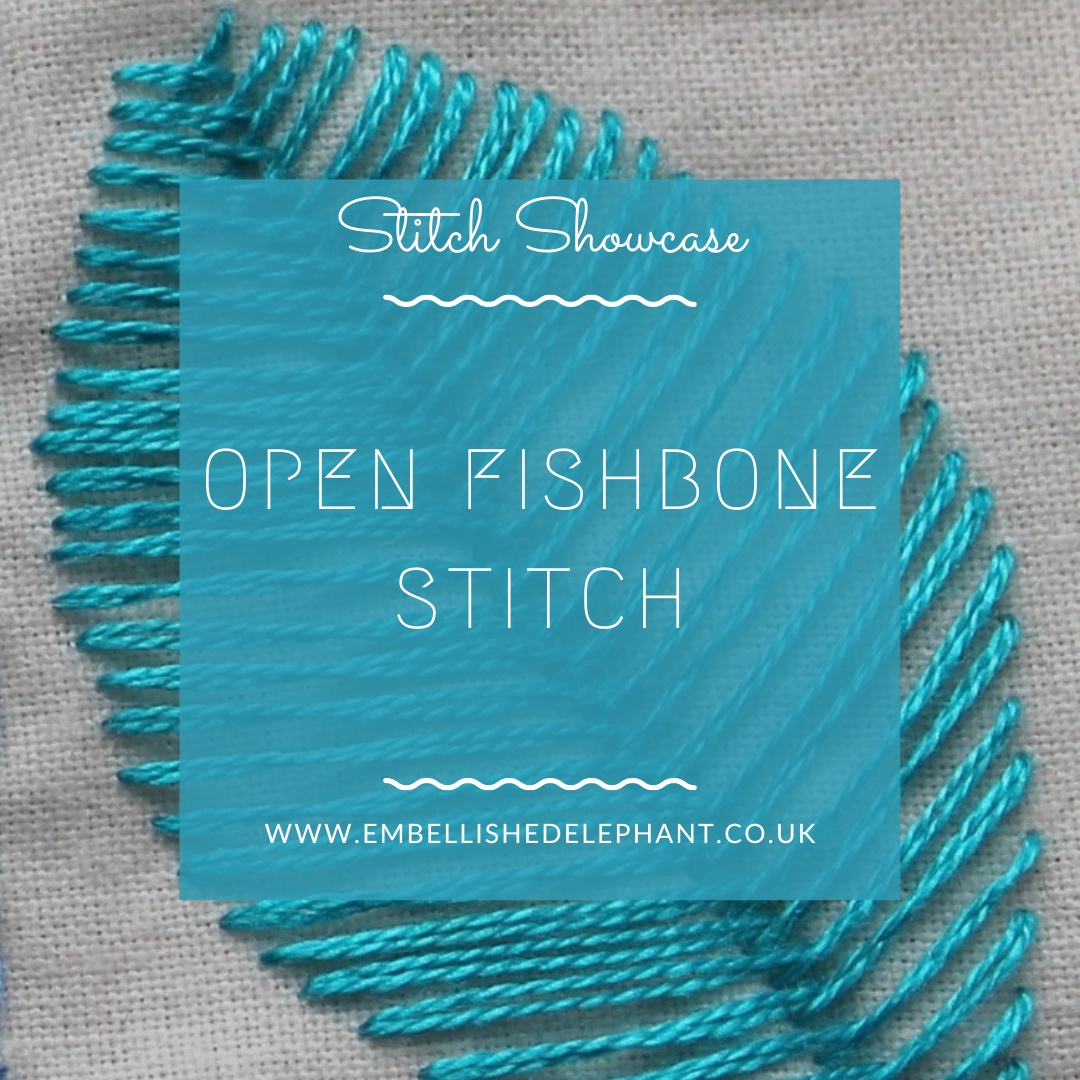
A picture of a close up of an embroidered leaf stitched in blue floss on calico. Overlaid is a blue square with the text - stitch showcase, open fishbone stitch, tutorials for embroidery stitches and ideas for ways to use them,

Stitch Showcase: Open Fishbone Stitch

December 22, 2021

There are a few different variations on the fishbone stitch, including open fishbone stitch and raised fishbone stitch.

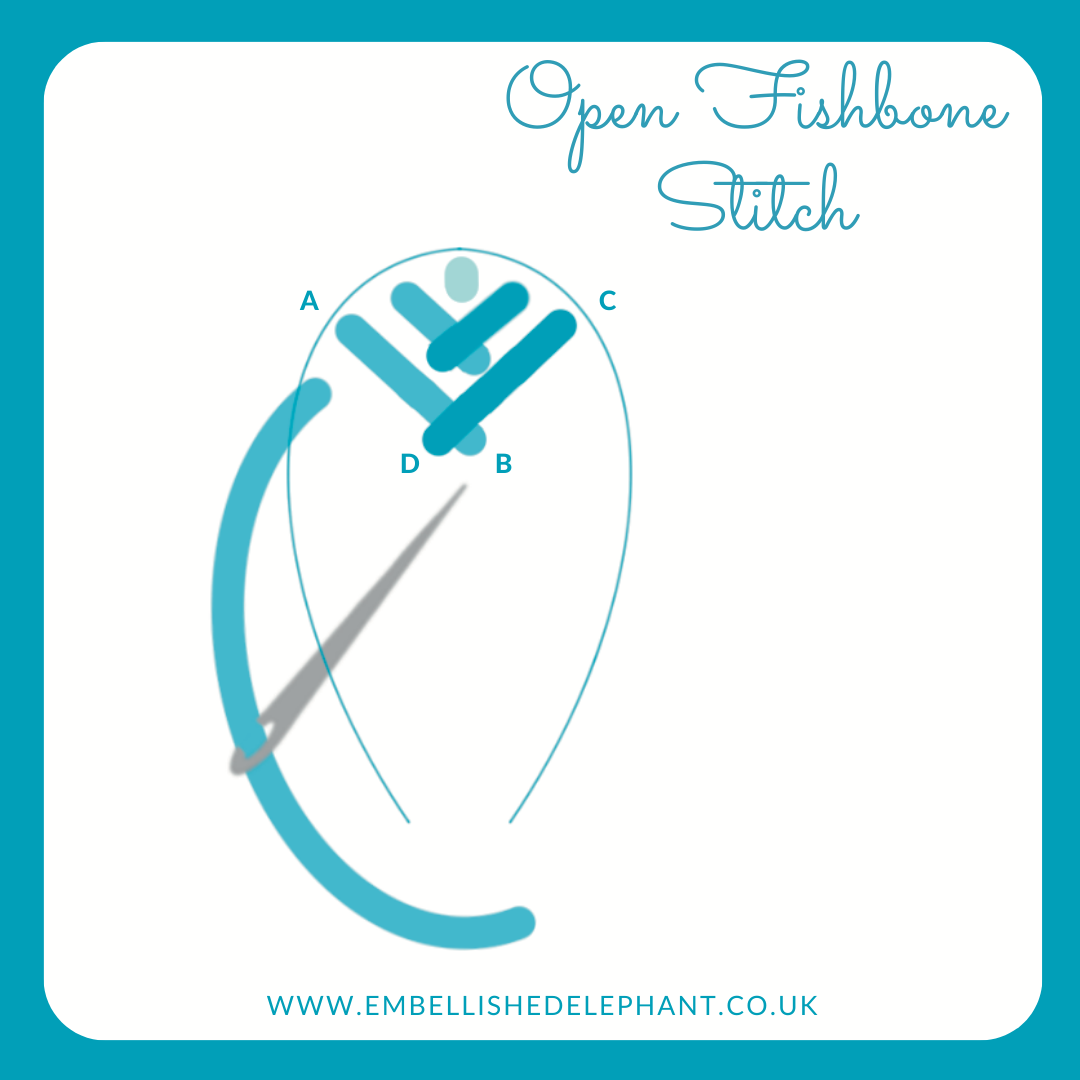
  • At the top of the shape bring the needle up close to the centre top

  • Take the needle down through the fabric at a diagonal angle, completing the stitch just slightly to the other side of the centre of the shape

  • Bring the needle up through the fabric in line with the first stitch but on the other side of the centre line

  • Take the needle down through the fabric at a diagonal angle completing the stitch in line with the first one

  • Repeat all the way down the shape, alternating sides A to B then C to D.

  • Leave a small gap between each pair of stitches and aim to have the same sized gap all the way down the shape.

an illustration of how to create open fishbone stitch. The illustration is in blue on a white background

Enjoyed this blog post? I share embroidery tips and a free embroidery pattern in my monthly newsletter. Sign up here to receive the newsletter on the 1st of each the month.
In stitch showcase 2 Tags Stitch Showcase, Filling Stitch
Comment
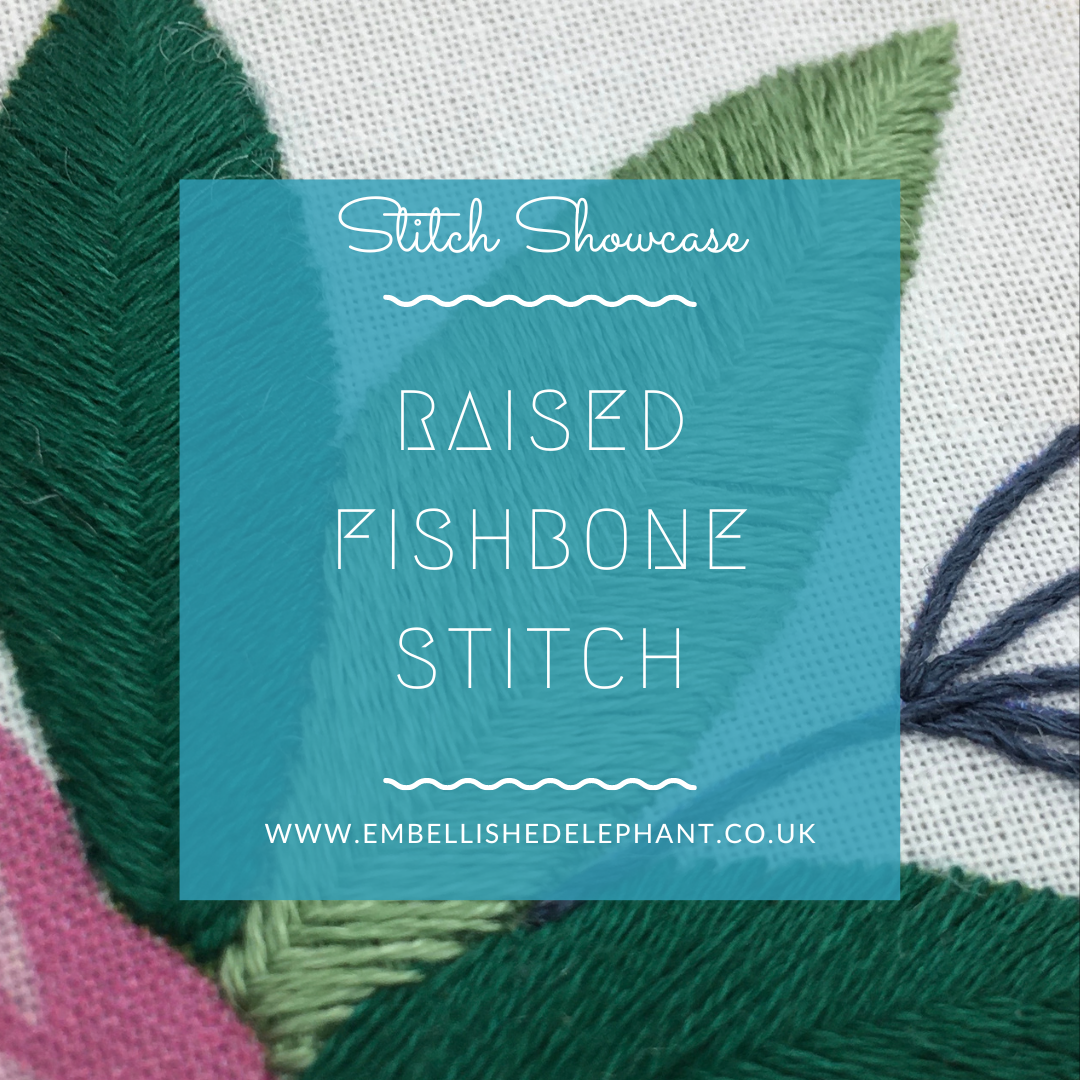
an image of some embroidery leaves in close up. Overlaid is a blue square with text saying - stitch showcase, raised fishbone stitch, www.embellishedelephant.co.uk

Stitch Showcase: Raised Fishbone Stitch

December 15, 2021

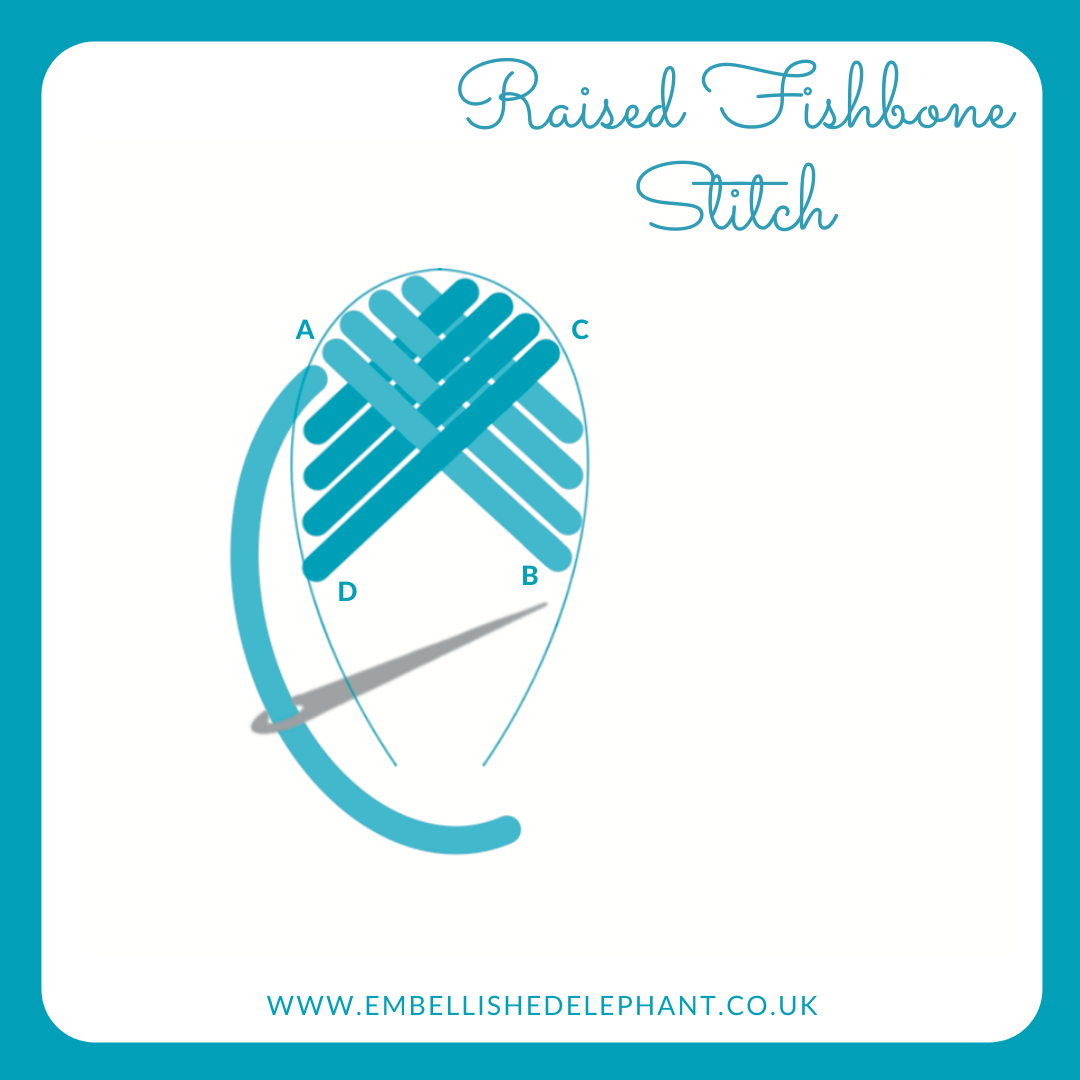
I tend to use satin stitch or leaf stitch when filling in leaves but that stitch does tend to leave tiny gaps at the centre line of the leaf. Raised fishbone stitch is a great alternative as it creates a central line but as each stitch extends to the side of the leaf there are no gaps where the fabric shows through.

  • At the top of the shape bring the needle up close to the centre top

  • Take the needle down through the fabric at a diagonal angle at the edge of the shape

  • Bring the needle up through the fabric close to the start of the first stitch but on the other side of the centre line

  • Take the needle down through the fabric at a diagonal angle at the other side of the shape to the first stitch

  • Repeat all the way down the shape, alternating sides A to B then C to D.

An illustration of how to stitch raised fishbone stitch. The illustration is in blue on a white background

Enjoyed this blog post? I share embroidery tips and a free embroidery pattern in my monthly newsletter. Sign up here to receive the newsletter on the 1st of each the month.
In stitch showcase 2 Tags Filling Stitch
Comment
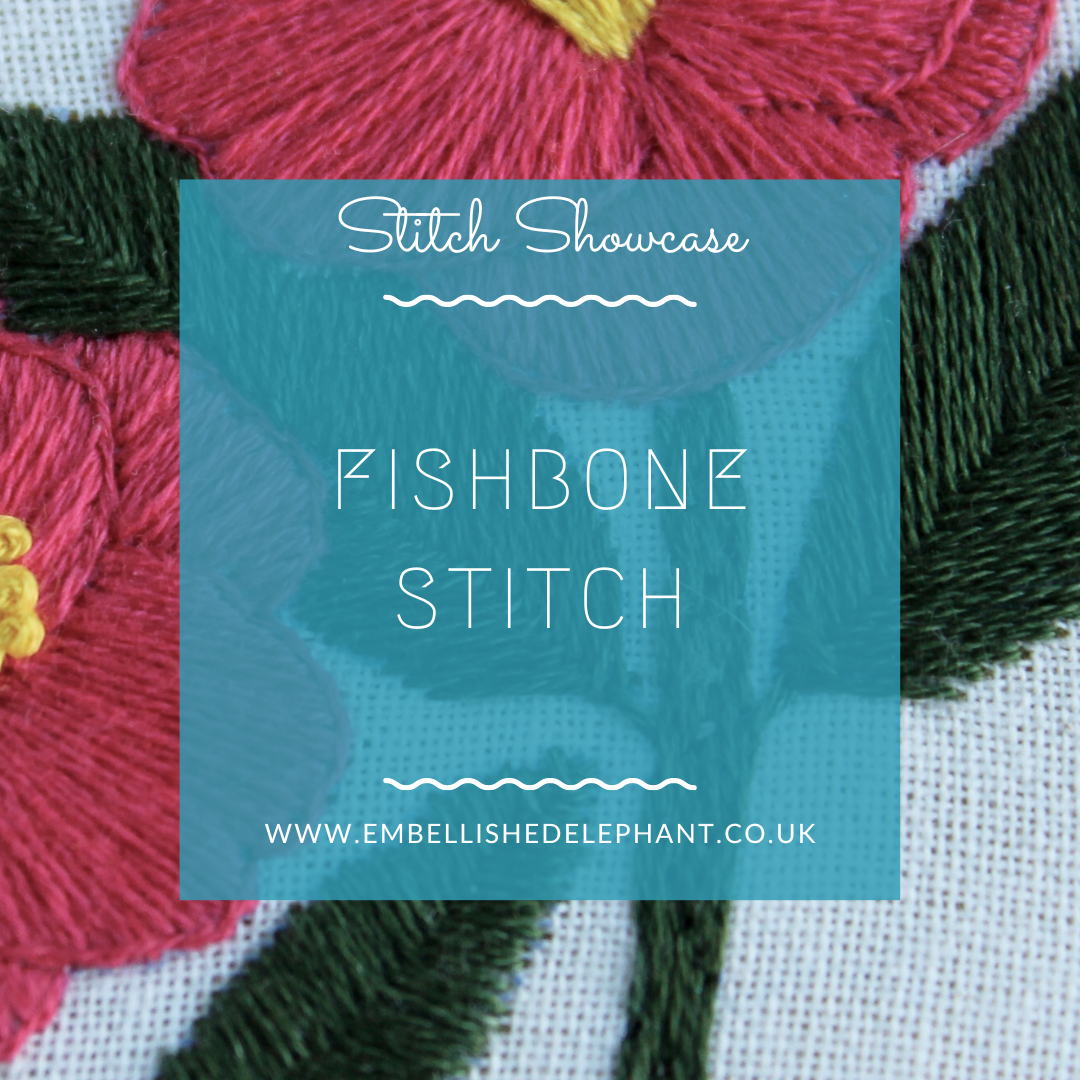
A close up image of an embroidery with bright pink flowers and green leaves. Overlaid is a blue square saying - hand embroidery, fishbone stitch, www.embellishedelephant.co.uk

Stitch Showcase: Fishbone Stitch

December 8, 2021

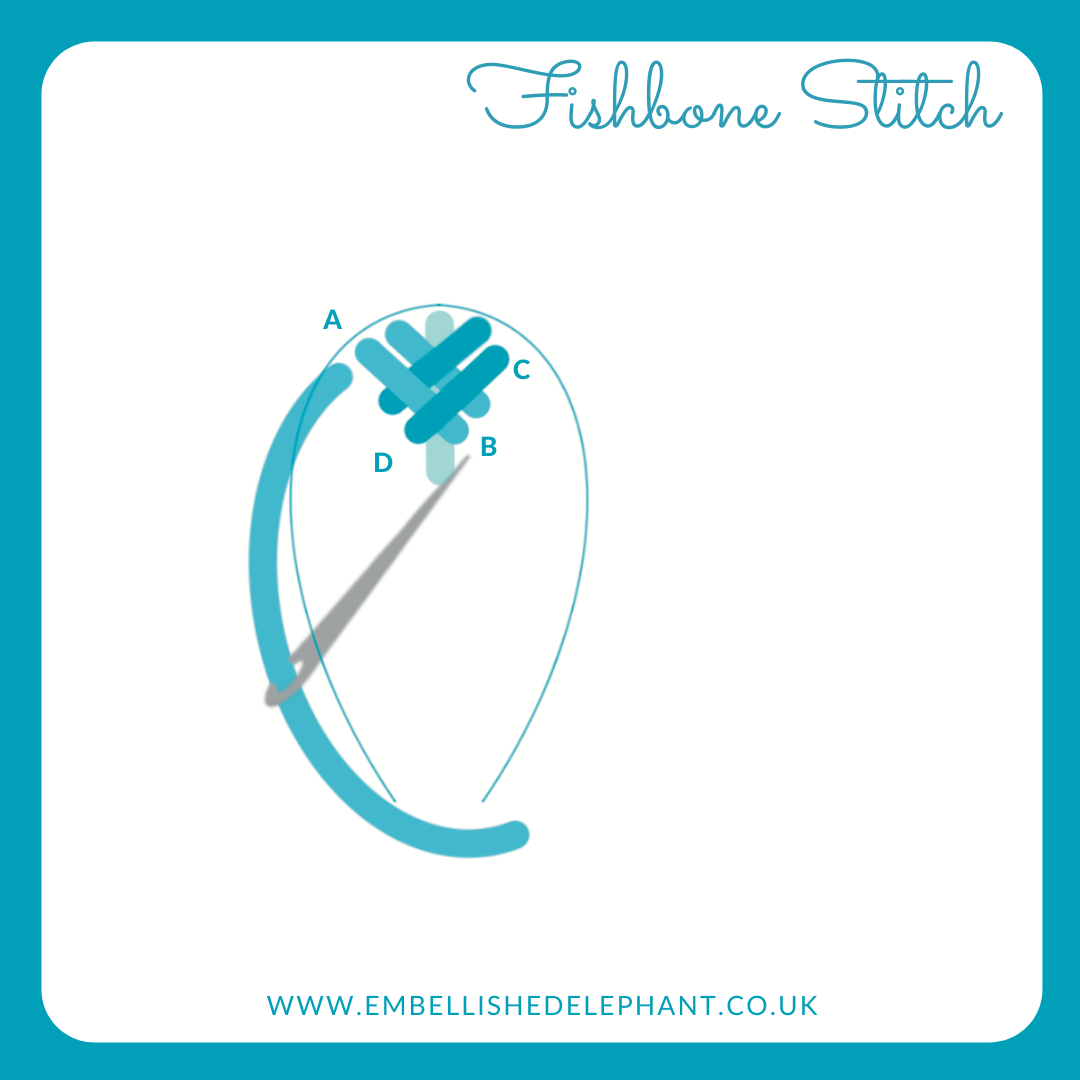
There are a few different variations on the fishbone stitch, including open fishbone stitch and raised fishbone stitch.

  • At the top of the shape bring the needle up close to the centre top

  • Start by creating a vertical line down the centre of the shape about 1cm long

  • Take the needle down through the fabric at a diagonal angle, completing the stitch just slightly to one side of the centre of the shape

  • Bring the needle up through the fabric in line with the first stitch but on the other side of the centre line

  • Take the needle down through the fabric at a diagonal angle completing the stitch in line with the first one

  • Repeat all the way down the shape, alternating sides A to B then C to D.

An illustration of how to create the fishbone embroidery stitch. The illustration is in blue on a white background.

Enjoyed this blog post? I share embroidery tips and a free embroidery pattern in my monthly newsletter. Sign up here to receive the newsletter on the 1st of each the month.
In stitch showcase 2 Tags Stitch Showcase, Filling Stitch
Comment
A picture of the spines of a stack of embroidery books. Overlaid is a blue square with white text saying - hand embroidery, embroidery book gift guide, www.embellishedelephant.co.uk

Embroidery book gift guide

November 24, 2021

As I write this Christmas is approaching and I’ve been asked by my family what gifts I’d like. For the last few years there has always been an embroidery book or two on the list and here are some of my favourites that would make great gifts for yourself or the keen crafter in your life.

They are listed in no particular order and I’ve tried to include quite a diverse selection.

You can shop for all of these books via my bookshop.org embroidery book list *. The links for each book will take you to that individual title.

Please note: I am an affiliate of bookshop.org. This means that I may get a commission if you shop through this link but it doesn’t impact the price you pay. Affiliate links are marked with a (*). And, of course, you are free to purchase these books through a retailer of your choice.

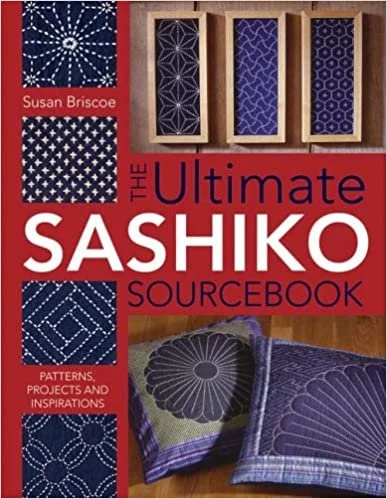
A picture of the front cover of the ultimate sashiko sourcebook by susan briscoe

The Ultimate Sashiko Sourcebook - Susan Briscoe *

Gives ideas for projects and plenty of design options and inspiration. It also gives the meaning behind each of the motif patterns.

Perfect if you like to understand the wider context of hand crafting alongside the practical.

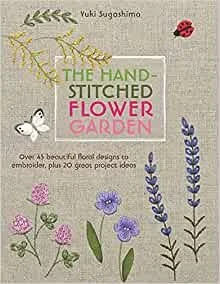
An image of the front cover of The Hand Stitched Flower Garden by Yuki Sugashima

The Hand-Stitched Flower Garden - Yuki Sugashima *

Beautiful and delicate floral, leaf and seed patterns stitched using a range of different embroidery techniques.

Great if you love to stitch seasonally inspired by nature and want to try 3-D embroidery or working with embellishments.

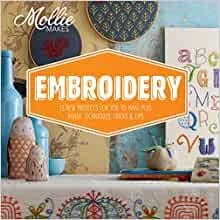
A picture of the front cover of Embroidery by Mollie makes

Embroidery - Mollie Makes *

There are some project ideas but what is really great about this book is the stitch technique section which guides you through how to create lots of different stitches.

A perfect book if you are just starting out with embroidery as it has a very accessible style.

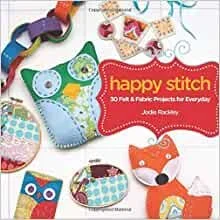
An image of the front cover of Happy Stitch by Jodie Rackley

Happy Stitch - Jodie Rackley

This book combines felt, fabric and simple embroidery stitches to make some fun projects.

A good book for small projects that use a little bit of embroidery. Many projects could be completed with kids.

Amazon link as this book isn’t available on bookshop.org

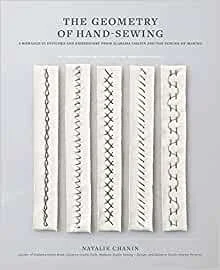
A picture of the front cover of The Geometry of Hand Sewing by Natalie Chanin

The Geometry of Hand Sewing - Natalie Chanin *

The book has a very minimal style and gets you to think about the creation of embroidery stitches by seeing what type of grid it is based on and how this can create stitch variations.

Order this if you like a touch of mathematics with your embroidery, but don’t let you put you off, it is beautiful book to look at too!

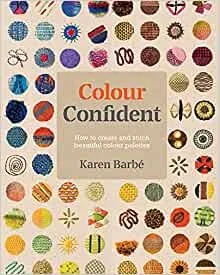
An image of the front cover of Colour Confident Stitching by Karen Barbe

Colour Confident Stitching - Karen Barbé *

The focus of this book is colour rather than embroidery stitches themselves. It isn’t just about colour theory but how to be inspired by colour and build a colour palette for your embroidery.

Great at connecting you with how colour changes how your embroidery can evoke feelings rather than just focussing on how pretty it looks.

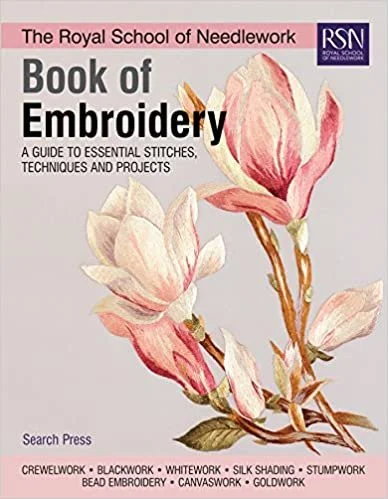
An image of the front cover of the Book of Embroidery by the Royal School of Needlework

Book of Embroidery - Royal School of Needlework *

A detailed reference book covering many different techniques. I bought this as it covered some styles of embroidery I couldn’t find information about online.

The book to buy if you want to explore more techniques and styles and want an authoritative reference point.

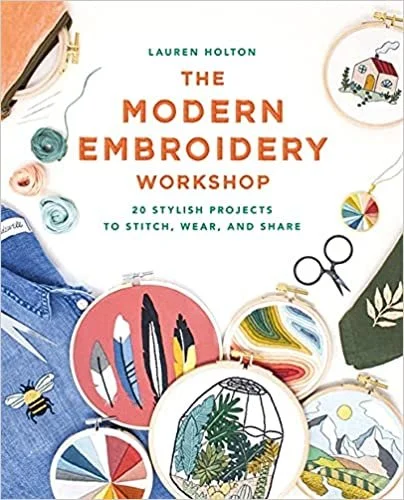
An image of the front cover of The Modern Embroidery Workshop by Lauren Holtman

The Modern Embroidery Workshop - Lauren Holtman *

I bought this book as I fell in love with a couple of Lauren’s patterns online (@larkrising on Instagram).

Buy this book if you want 20 gorgeous embroidery patterns to stitch (the marbling and feathers are my favourites).

My kits also make great gifts for craft lovers, you can browse my shop here.

Enjoyed this blog post? I share embroidery tips and a free embroidery pattern in my monthly newsletter. Sign up here to receive the newsletter on the 1st of each the month.
In tips 3 Tags Christmas
Comment
A close up image of some embroidery materials, a hoop, needle, thread. Overlaid is a blue square with the text - hand embroidery, embroidery kit gift guide, www.embellishedelephant.co.uk

Embroidery kit gift guide

November 17, 2021

(Updated December 2024) As I write this Christmas is approaching and I’ve been asked by my family what gifts I’d like. For the last few years there has always been an embroidery kit or two on the list and here are some of my favourites that would make great gifts for yourself or the keen crafter in your life.

They are listed in no particular order and I’ve tried to include quite a diverse selection and indicate where I’ve personally tried one of their kits. All the businesses included in this post are small female owned businesses.

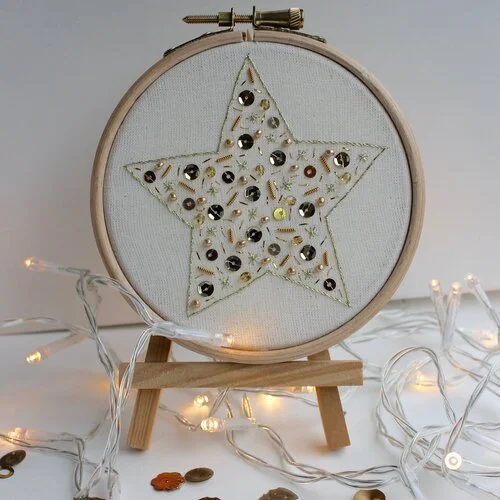
A picture of an embroidery hoop on a small easle with fairy lights around it. On the hoop is a sparkly star embroidery stitched in gold.

Embellished Elephant

Well I couldn’t do a gift guide without suggesting some of my own kits.

I think this star kit would make a great present but you can browse my current collections here.

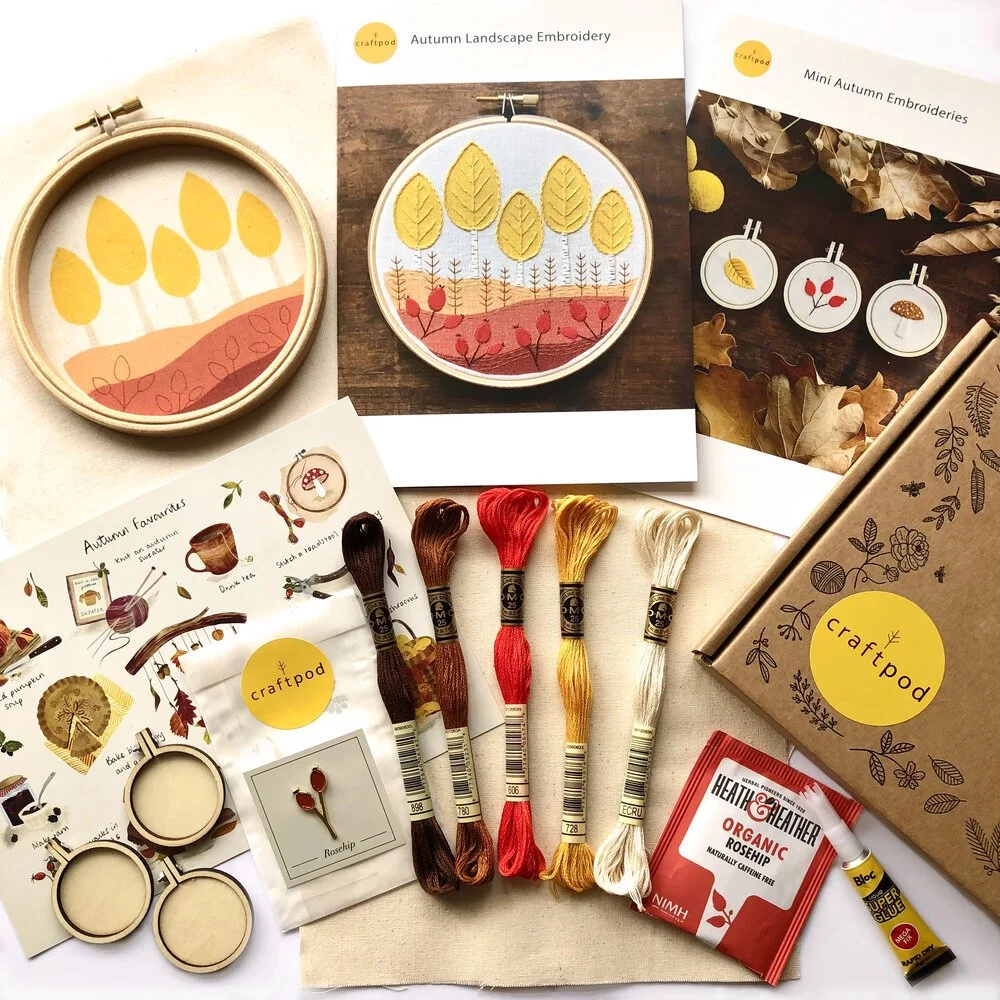
A flat lay picture of the contents of a Craftpod box. Included are instruction booklets, embroidery materials and art prints

Craftpod

I was a subscriber when they did a quarterly craft box, but now they focus on individual kits. Their designs are so beautiful and reflect the changing seasons.

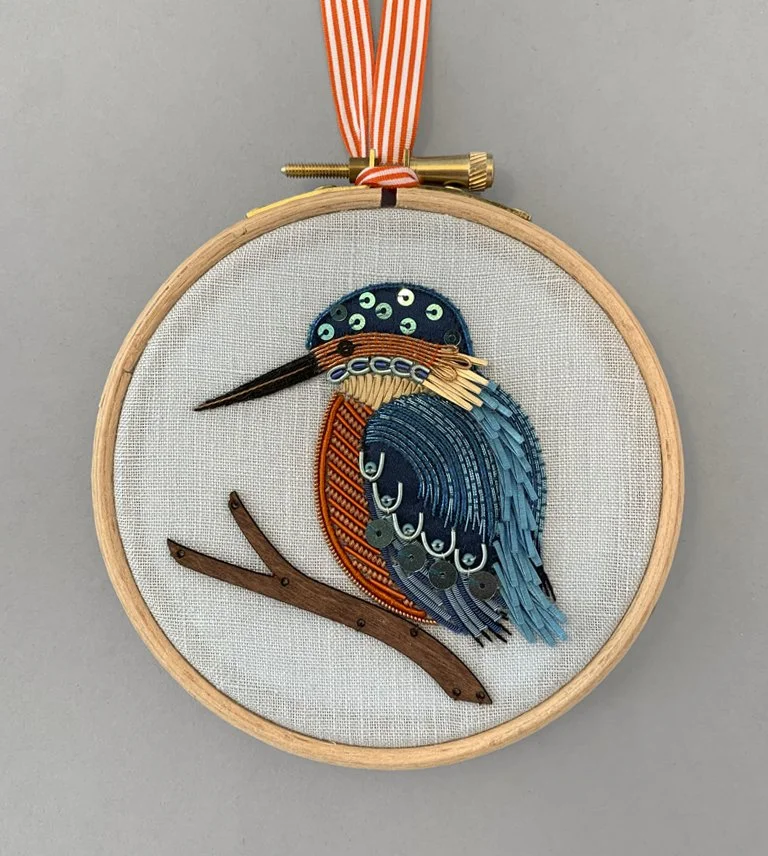
A picture of a kingfisher metalwork embroidery by Becky Hogg

Becky Hogg

I love Becky Hogg’s metalwork embroidery kits. They are so beautiful and I love taking my time to finish these so I get them perfect.

This kingfisher is on my list this year.

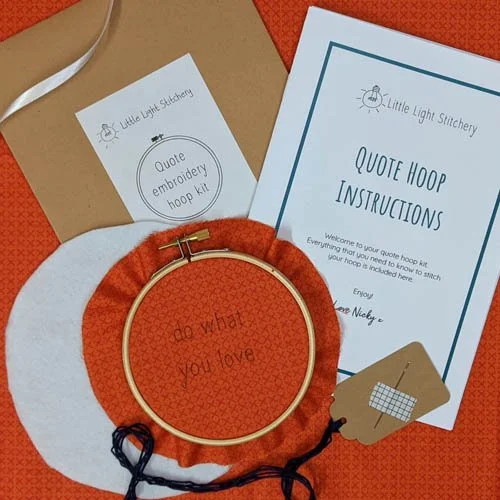
A picture of the contents of The Little Light Stitchery quote hoop embroidery kit including hoop, fabric, instructions and envelopes

Little Light Stitchery

Specialises in word based embroidery so if you want to practice stitching letters then this is a great choice. You can pick your fabric and customise your quote.

*I’ve not tried any kits from here (yet)

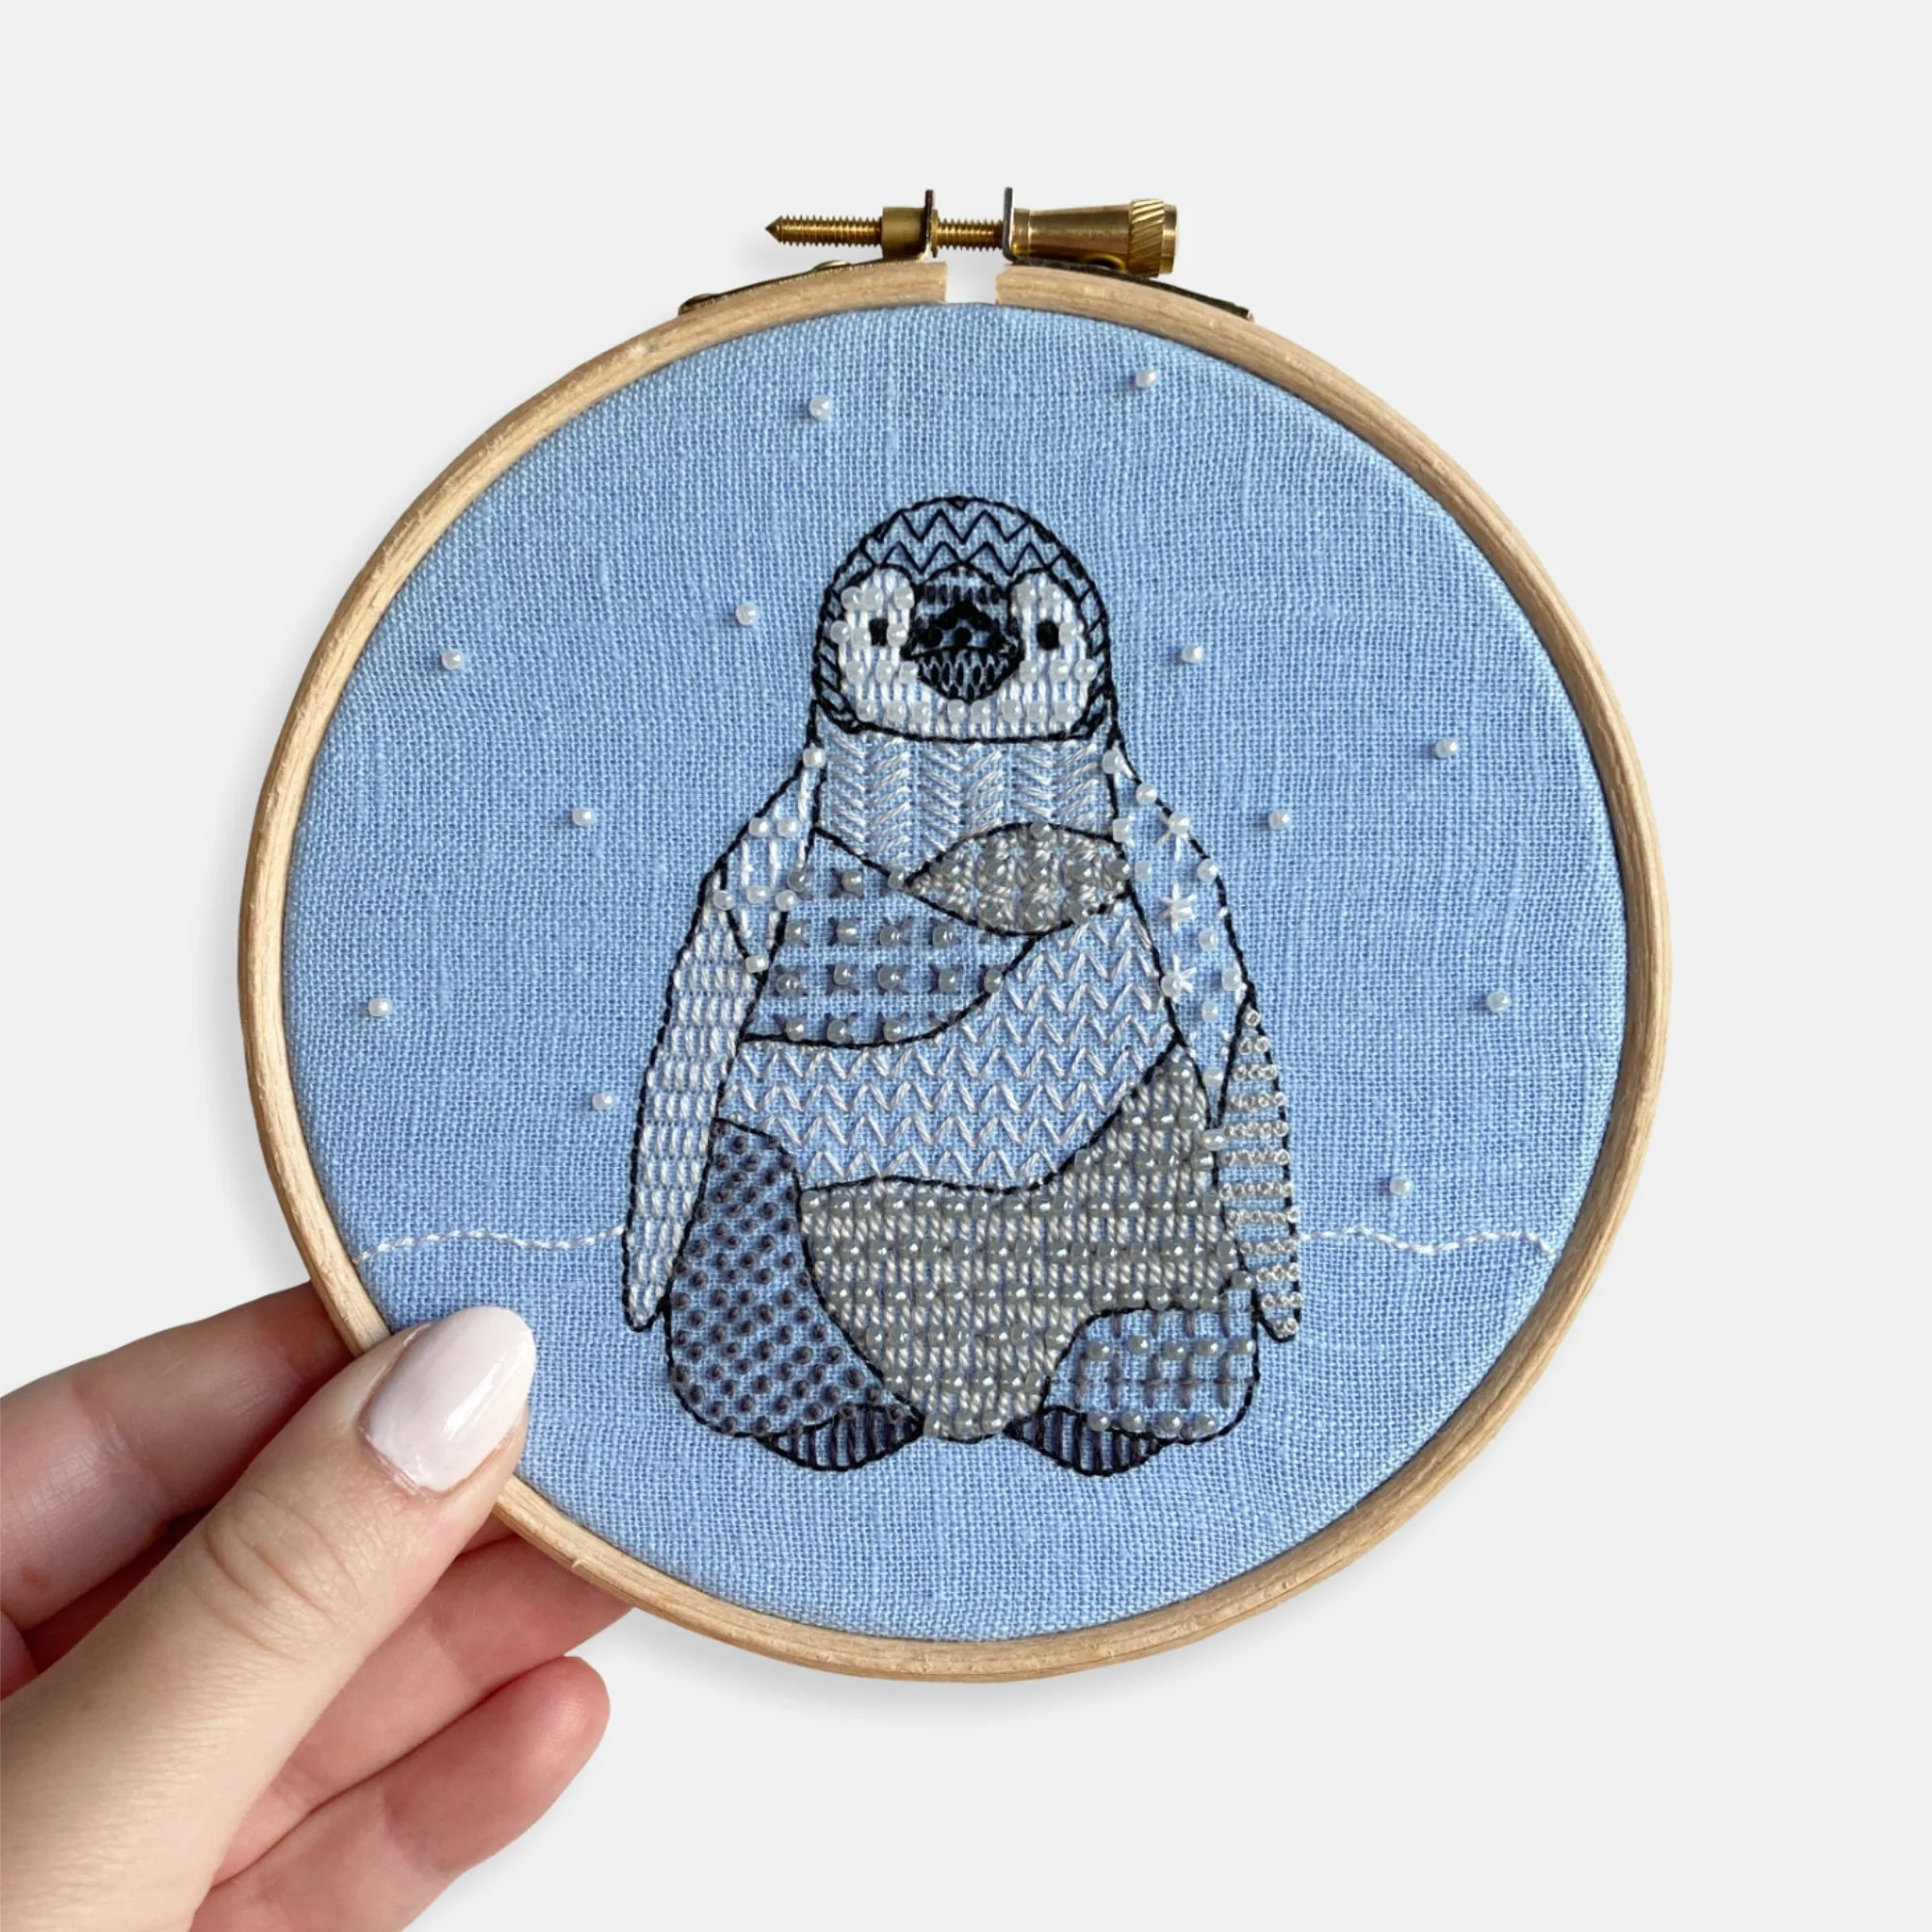
A picture of a hand holding an embroidery hoop. Stitched on the hoop is a penguin on a blue background. Kit designed by Kirsty Freeman Design

Kirsty Freeman Design

My favourite are the animal designs that are made up in a patchwork style of different stitches.

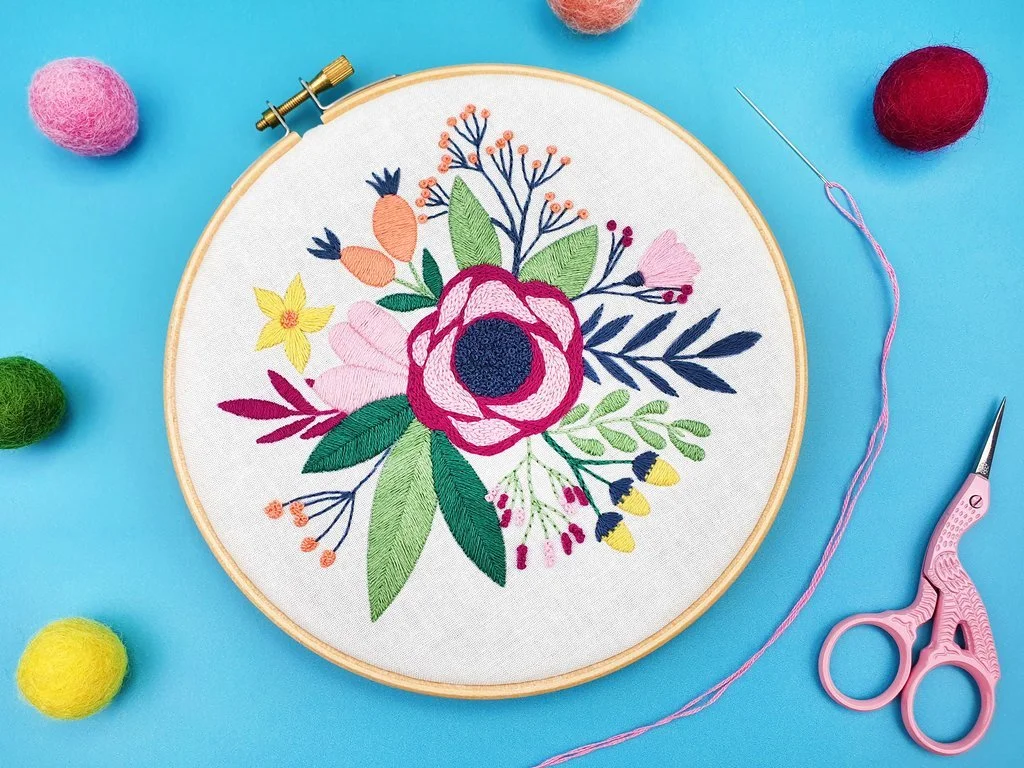
A picture of an embroidery hoop on a blue background. On the hoop is stitched a colourful floral bouquet. Design by Oh Sew Bootiful

Oh Sew Bootiful

These kits are all pre-printed onto fabric meaning it is super simple to get started with stitching.

I’ve tried this one but there are plenty of beginner options perfect if you’ve never picked up a needle and thread before.

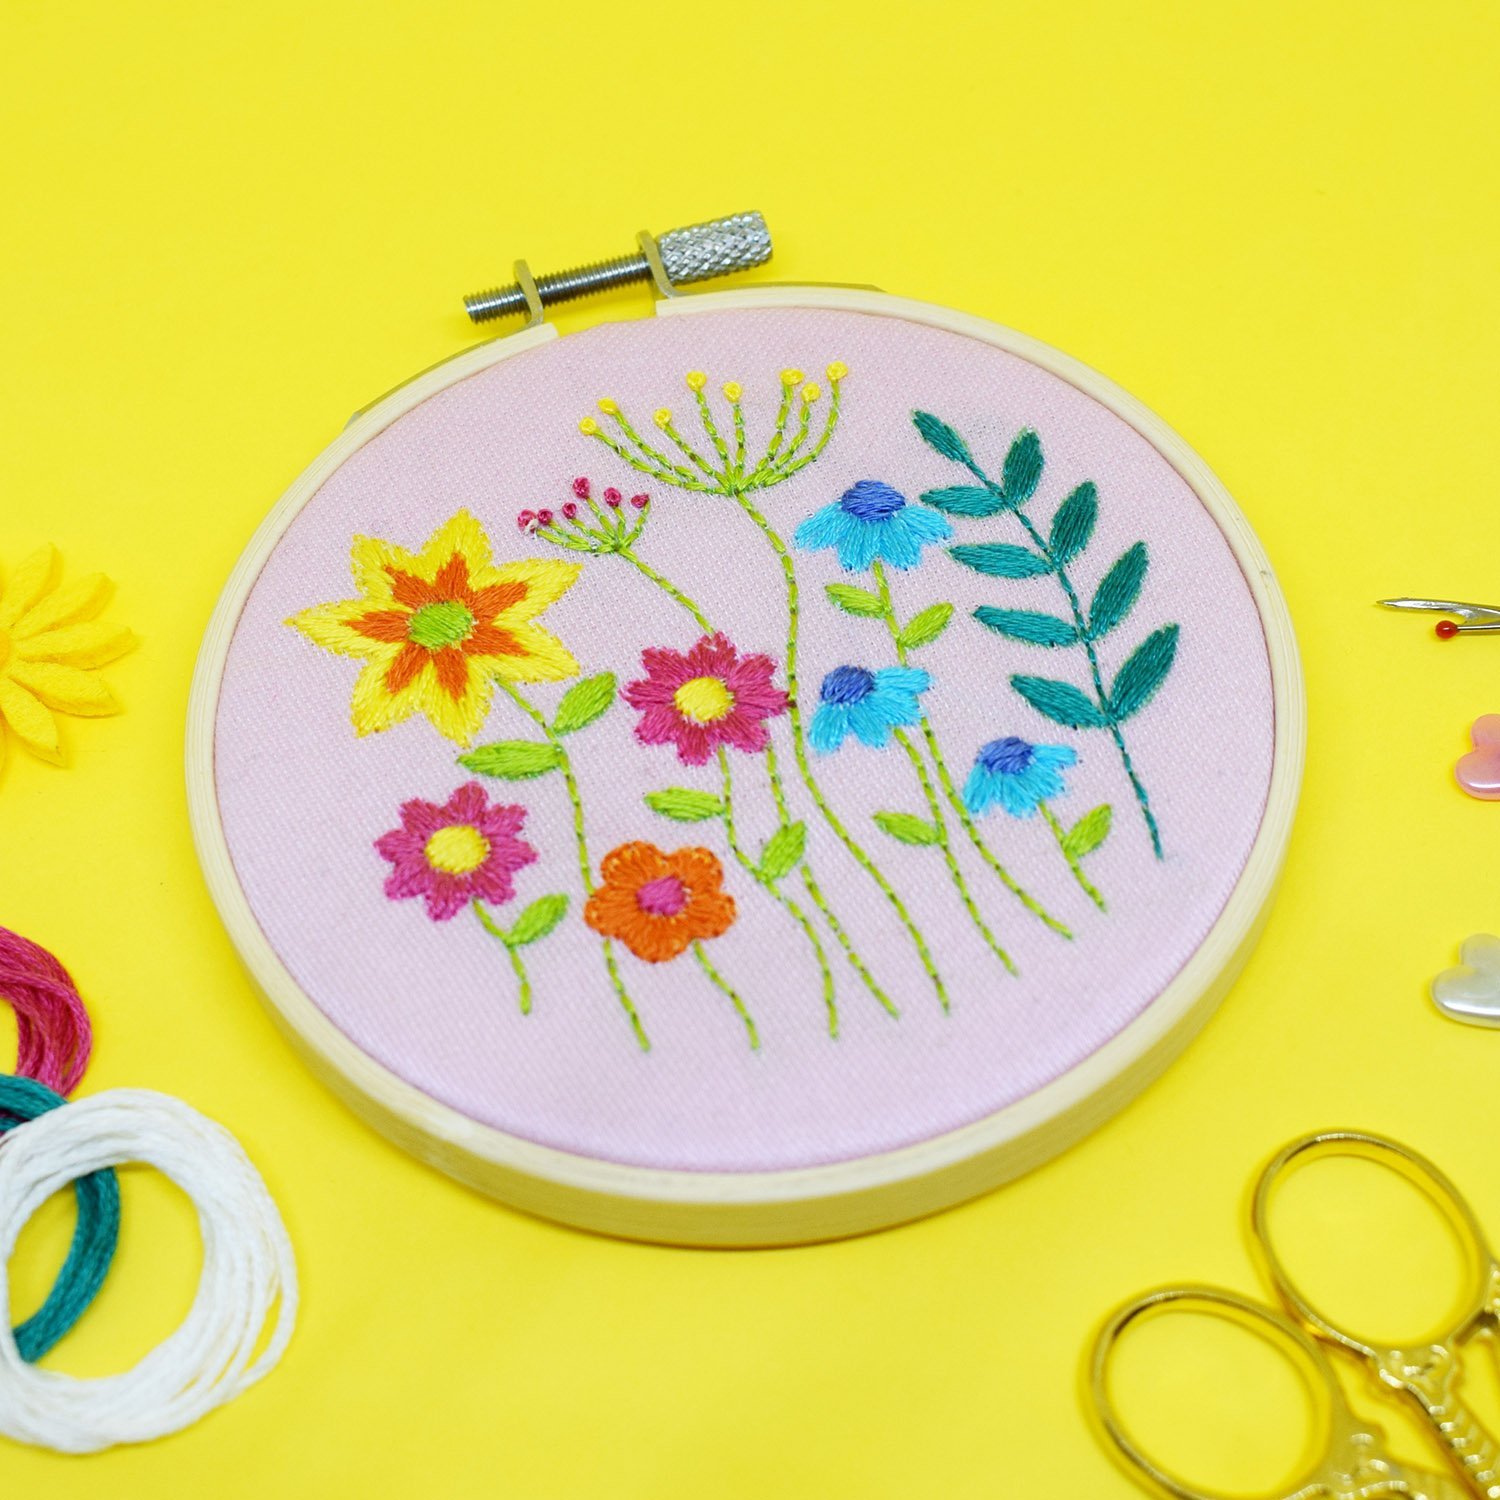
A picture of an embroidery hoop on a yellow background. On the hoop is stitched a range of different colourful flowers. Design my The make arcade

The Make Arcade

Alongside embroidery kits, they have cross stitch, felt sewing kits and more.

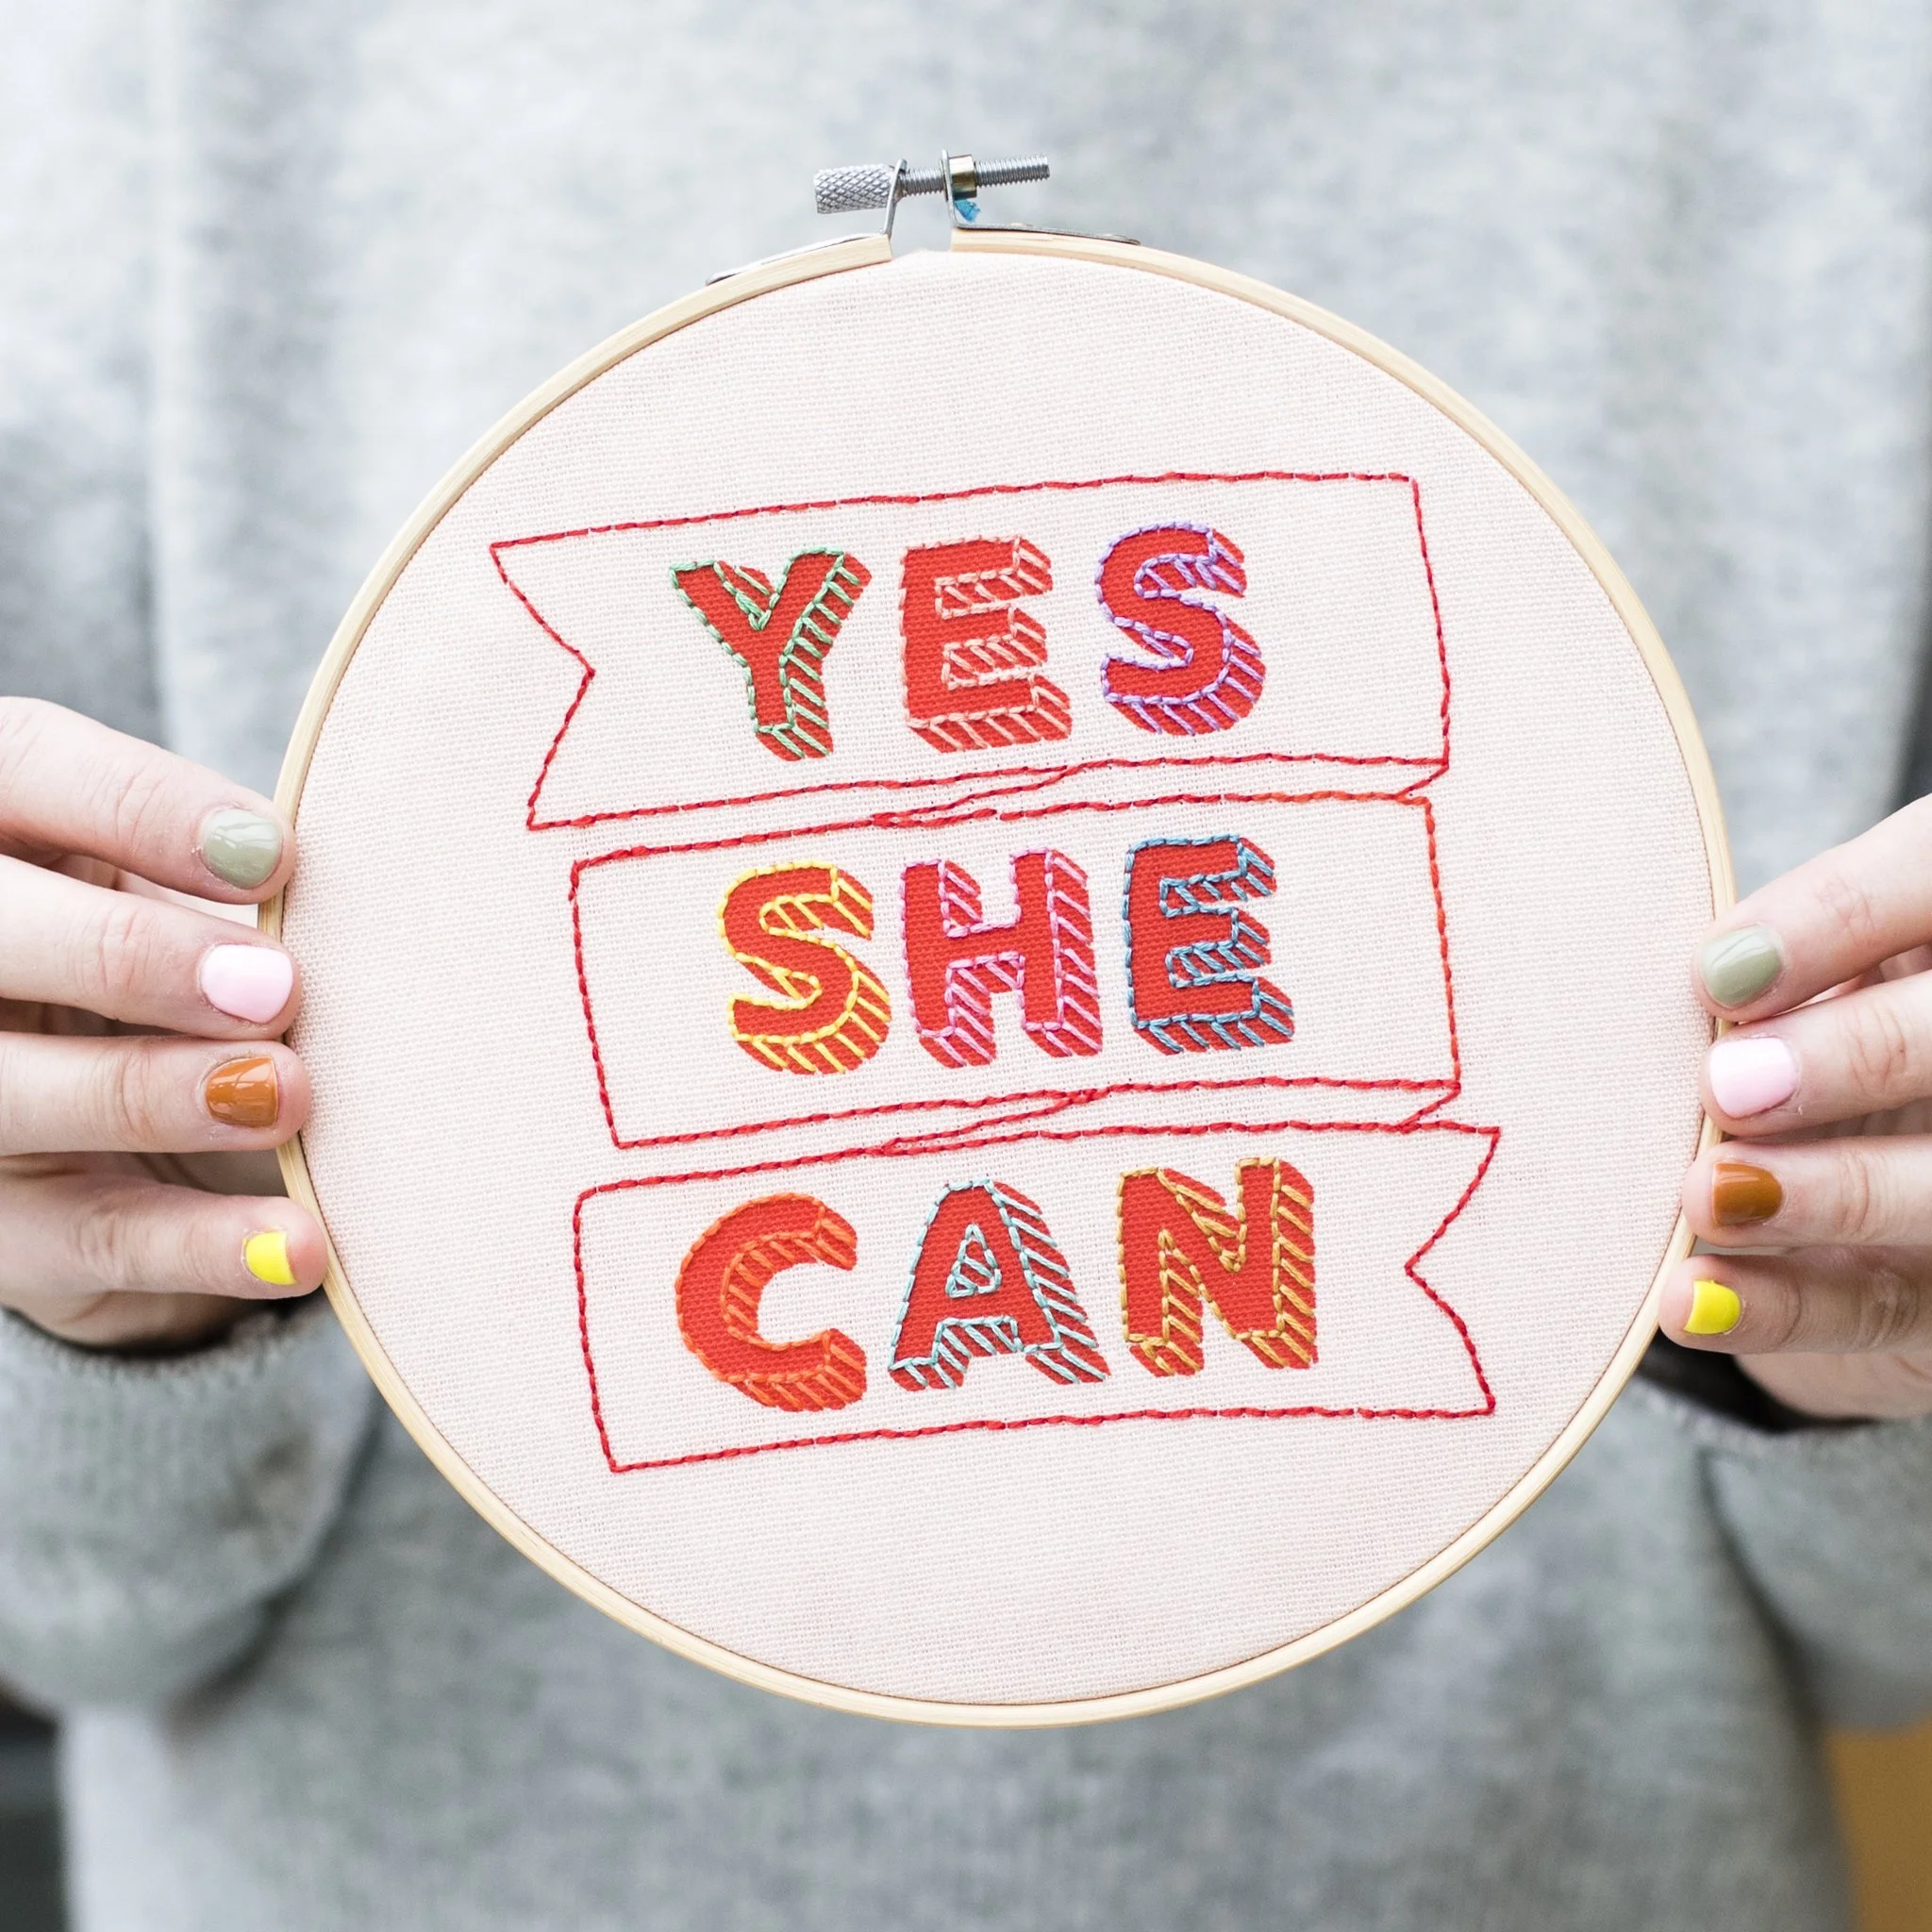
A picture of two hands holding an embroidery hoop. On the hoop is stitched the words - yes she can. Design by Cotton Clara

Cotton Clara

The wooden banner embroidery kits are favourites of mine but there is a growing selection of embroidery kits too, including a monthly hoop club.

A picture of an embroidery hoop on a pink background. On the hoop is stitched a terranium with various succulent plants in green and purple. Design by Wimperis embroidery

Wimperis Embroidery

You can get kits as on-offs on on a bi-monthly subscription and get full skeins of floss, the design pre-printed onto fabric and full instructions for the stitches used.

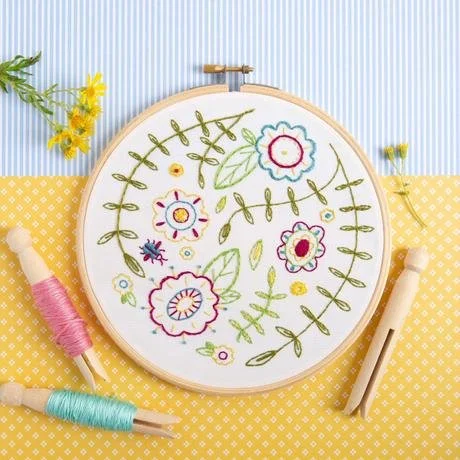
A picture of an embroidery hoop with flowers and leaves stitched on it. Design by Hawthorn handmade

Hawthorn Handmade

A bit like Oh Sew Bootiful, designs come pre-printed onto fabric and tend to be designed more for beginners as they mostly use line stitches.

I’ve tried the kit pictured and alongside the embroidery kits they also have some felt stitch kits too.

A picture of a small ginger and white cat toy with embroidered details. Design by Kiriki Press

Kiriki Press

A Canadian business which has a few UK stockists. Offers beautiful embroidered dolls and stitch samplers.

I’ve stitched this cute cat and a bear.

Enjoyed this blog post? I share embroidery tips and a free embroidery pattern in my monthly newsletter. Sign up here to receive the newsletter on the 1st of each the month.
In tips 3 Tags Christmas
Comment
A picture of the back of some pink embroidery on calico. Overlaid is a blue square with white text saying - hand embroidery, what is 'thread chicken' and how to win

What is 'thread chicken' and how to win!

November 10, 2021

If you’ve been crafting for a while you will no doubt have played thread chicken or thread roulette (although you may not have called it that)! I’ve encountered it in embroidery, knitting, crochet and dress making.

It’s where you have just a few more stitches to make to finish a line or section and it will be touch and go whether you will get there with the thread you have left on your needle. Extreme thread chicken kicks in when you have no more of that thread in your stash!

You may decide not to play and just tie off and start a new length of thread. That’s OK & it’s probably perfectly normal not to be competitive with inanimate craft materials.

But I like to use every possible inch of my materials to reduce wastage so I’ve learned a thing or two about playing this game and how to maximise my stitching.

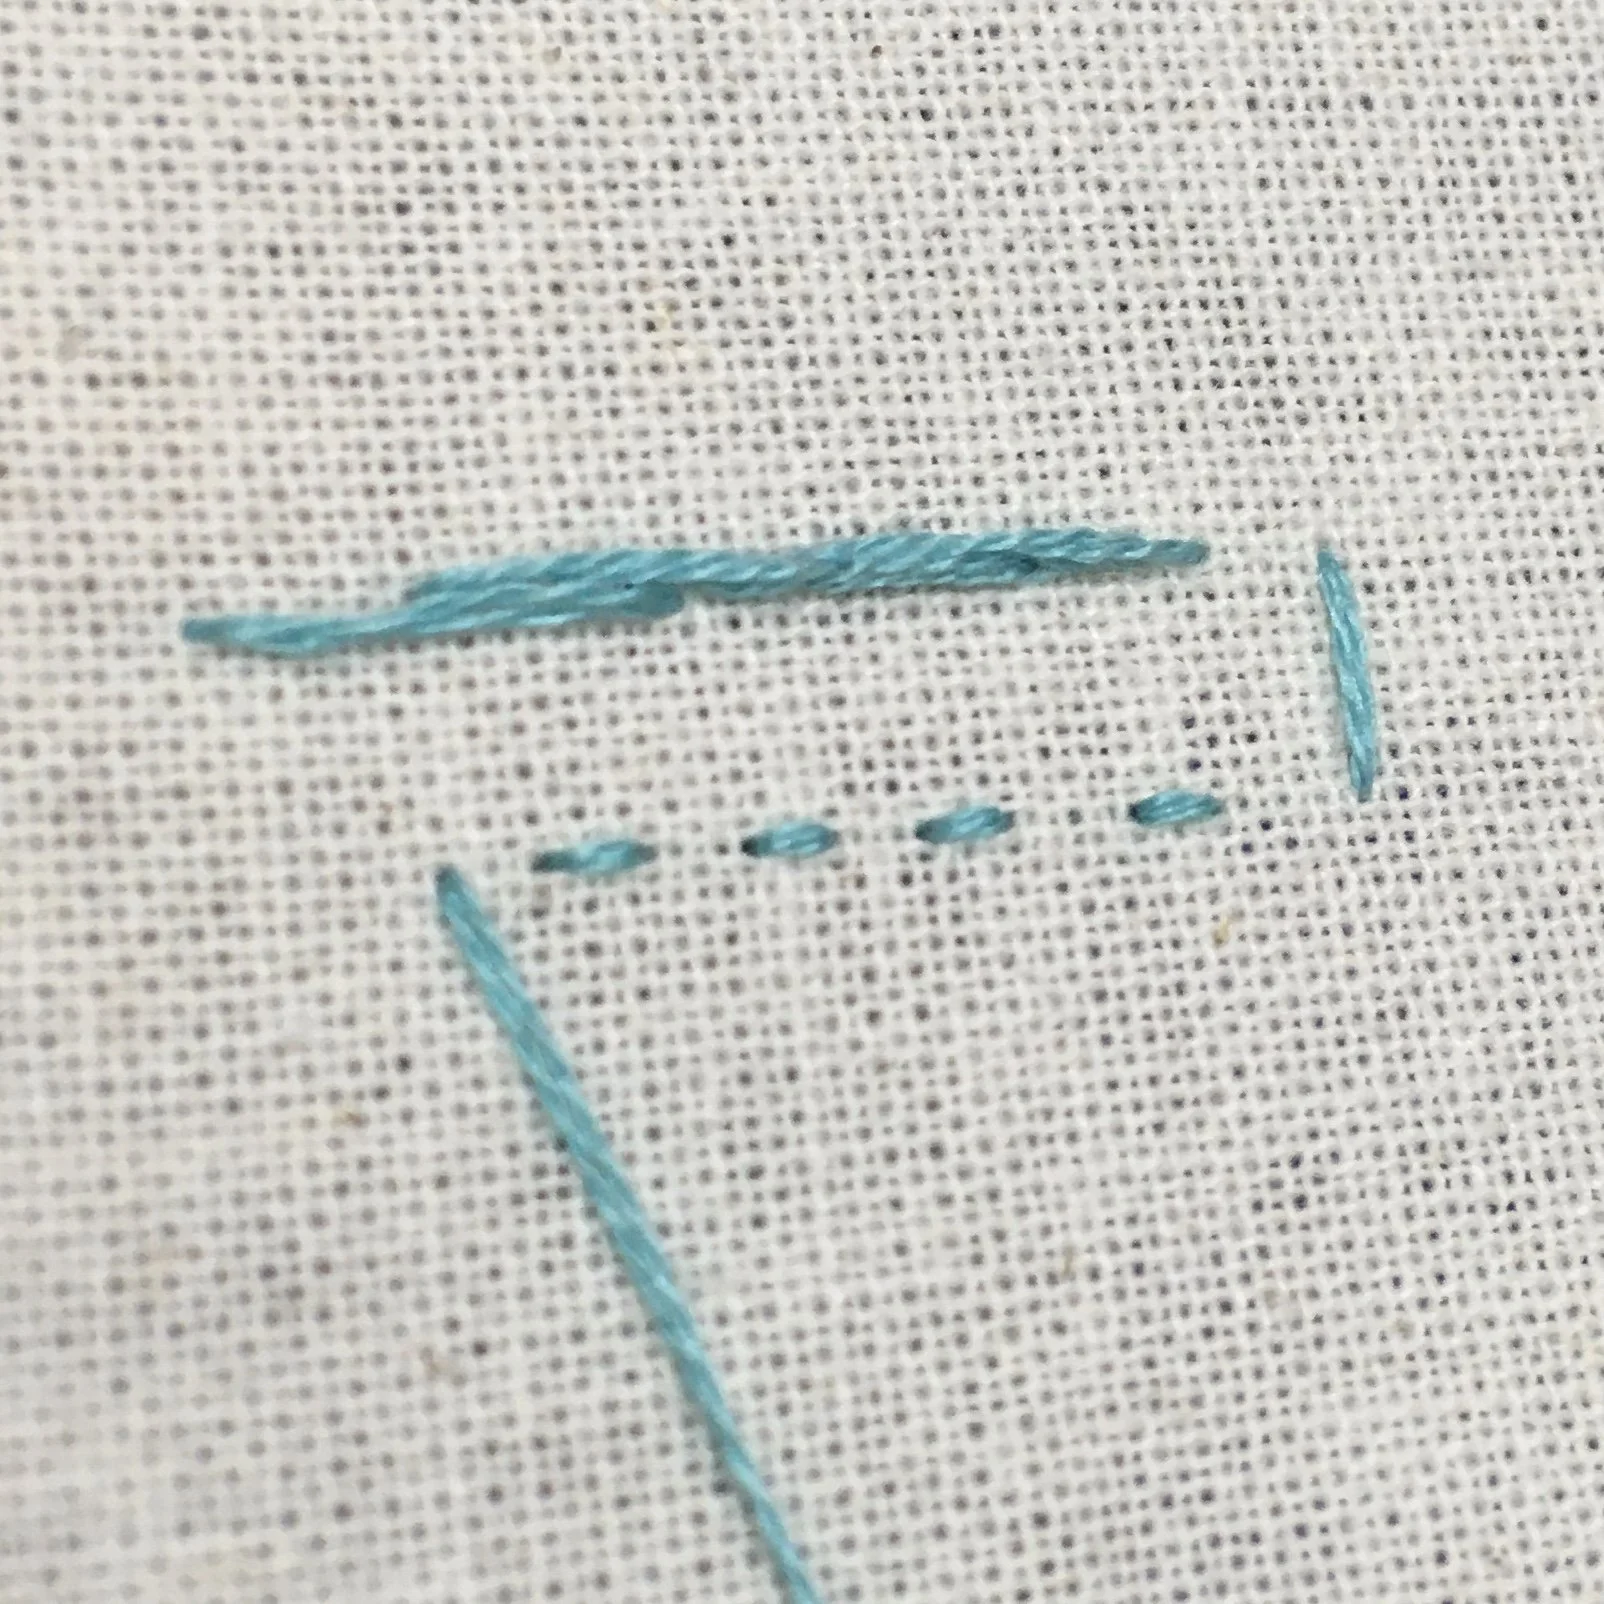
A picture of the back of an embroidery showing how much thread is used for two different stitch methods.

Efficient Stitching

Some stitches have more than one method for how to stitch them for example back stitch and split stitch. In each case one method uses slightly more thread per stitch than the other.

This is what the two different split stitch methods look like from the back. You can see that the method that splits the stitch from above (top row of stitching) uses up much more thread than the method that splits the stitch from underneath.

I find that satin stitch is one of the stitches where I play thread chicken most often, I sometimes decide not to stitch fully across the back so that I have enough thread to complete the stitches on the front although this does have an impact on how the stitches lie if you use it for a large area.

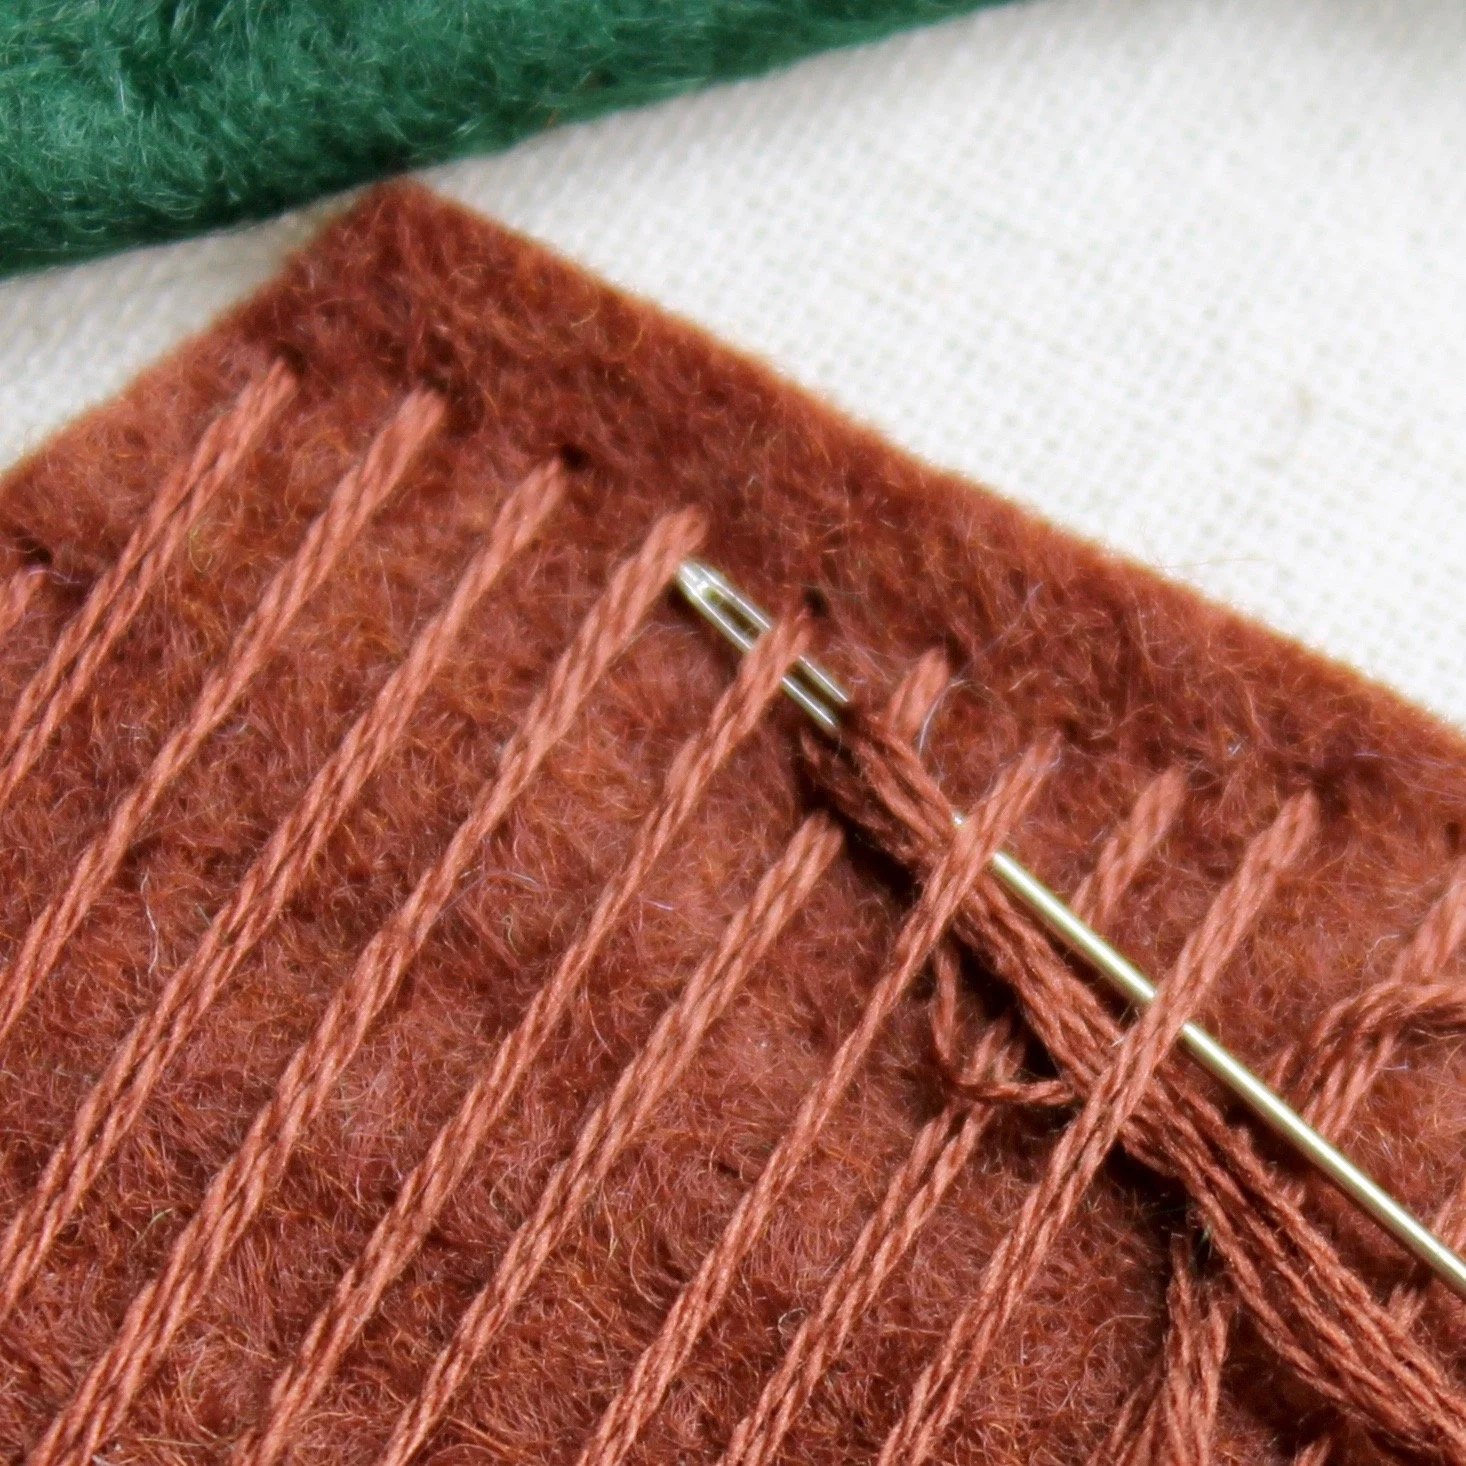
A picture featuring some brown felt with vertical lines of stitching. The threaded needle is weaving between the vertical stitches eye first.

Use your needle creatively

As you get to the very end of your thread you will find it hard to pass the total length of the needle through the fabric. There are a range of options here:

  • switch to a shorter needle - sounds simple but it will buy you valuable room for manoeuvre

  • pass the needle part way through the fabric and then thread the fabric end (this can be tricky if the end of the thread has frayed)

  • depending on your fabric you could even turn your needle around and lead with the eye end of the needle (watch your fingers if you do this though!)

The back of an embroidery showing long lengths of thread linking the different areas of stitching

Managing how you move from one area of stitching to another

If you are stitching in different sections then it may be a more efficient use of thread to tie off, snip and then restart in the new section rather than trail thread across the back of your stitching. It can also help to plan the order in which you stitch sections of the same colour so you are not criss-crossing across the back of your work.

Enjoyed this blog post? I share embroidery tips and a free embroidery pattern in my monthly newsletter. Sign up here to receive the newsletter on the 1st of each the month.
In tips 3 Tags Thread
Comment
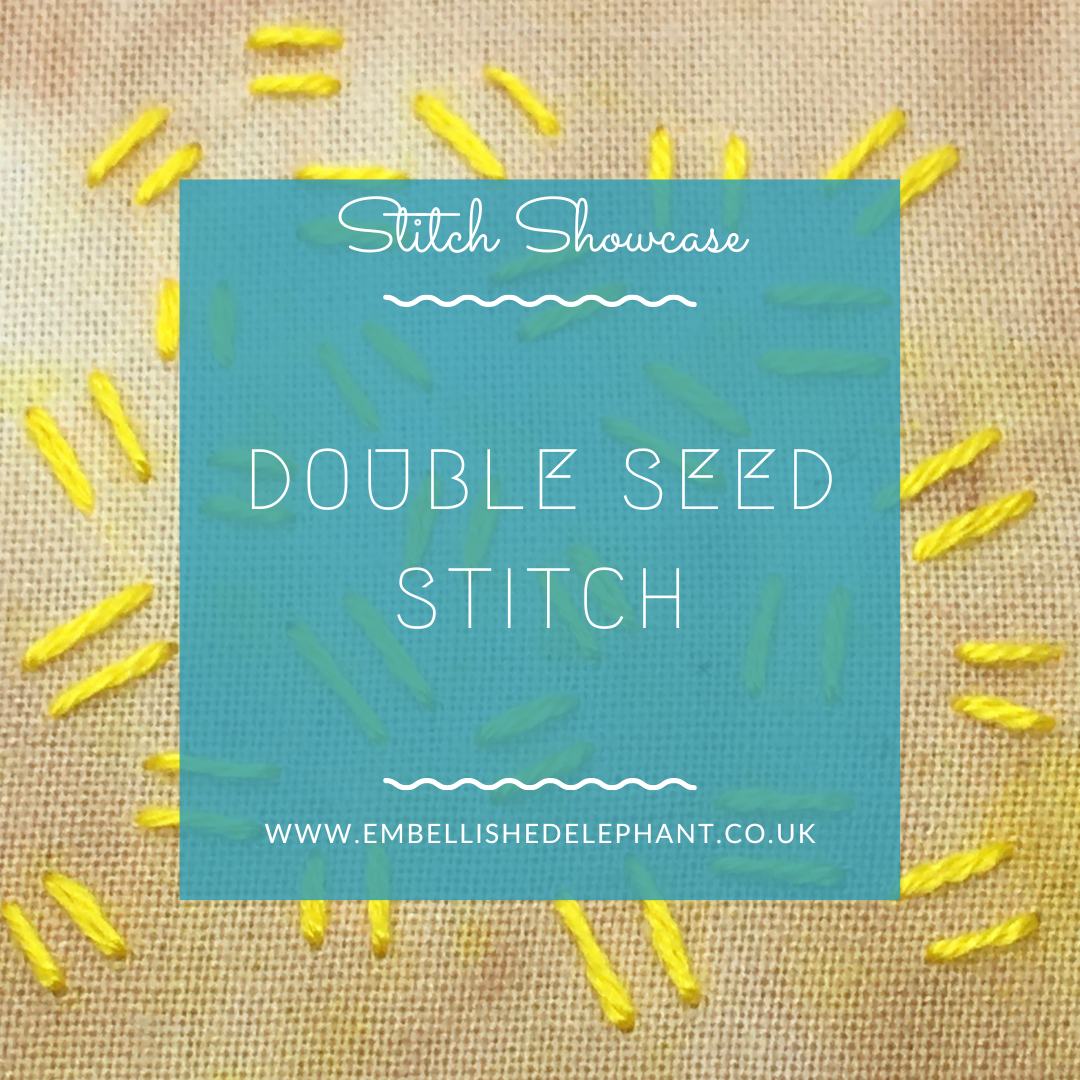
An image of yellow stitching on yellow fabric. Overlaid is a blue square with text in white saying, stitch showcase, double seed stitch, www.embellishedelephant.co.uk

Stitch Showcase: Double Seed Stitch

November 3, 2021

I love this variation on the standard seed stitch. I think it makes the stitched pieces have a more geometric style and look about them.

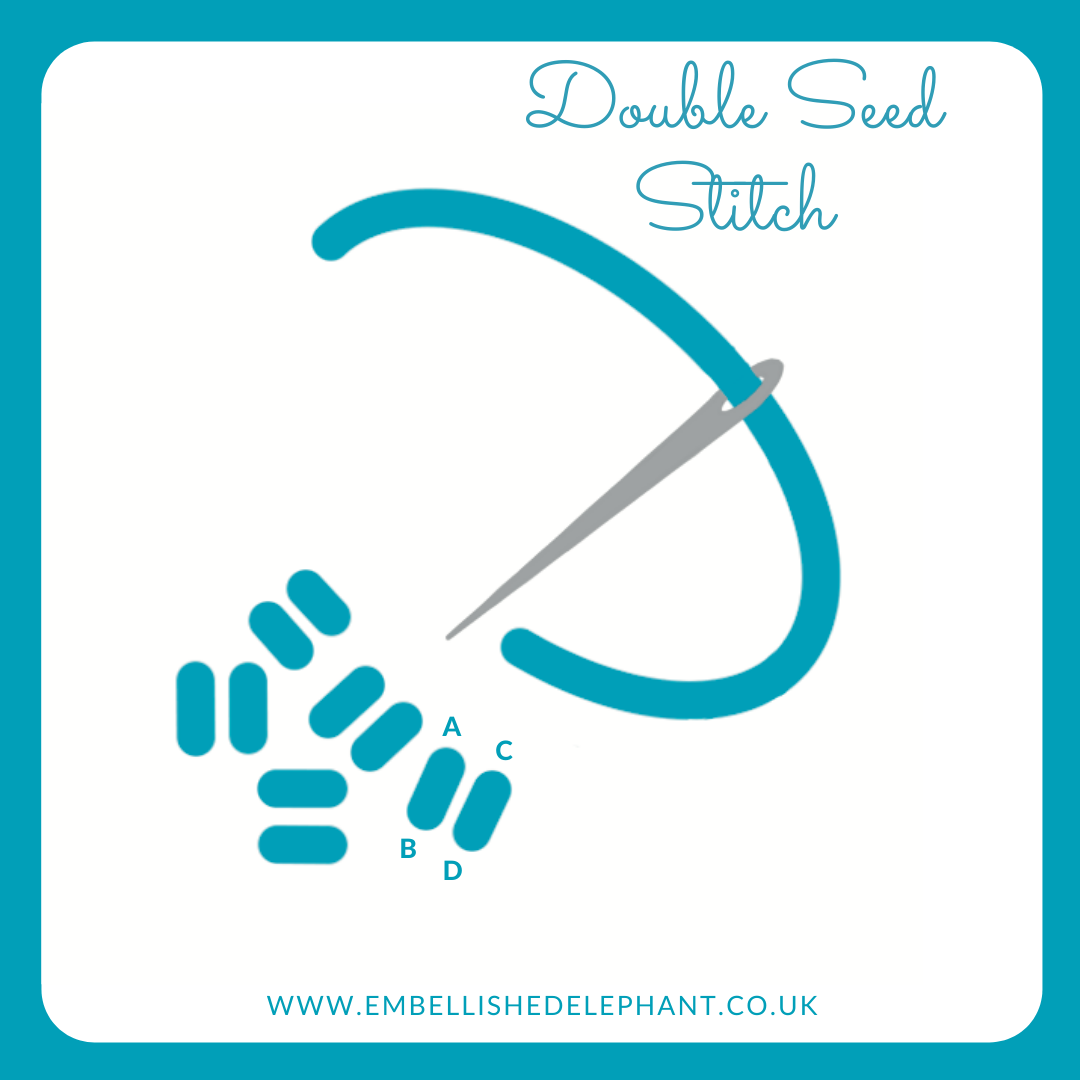
  • Bring the needle up from the back of the fabric (A)

  • Take it back down a few millimetres along (B)

  • Repeat this to create a second stitch that runs parallel to the first (C-D) that is the same length and angle

  • Create the next pair of stitches at a different angle.

An illustration of how to create double seed embroidery stitch. The illustration is in shades of blue and grey on a white background.

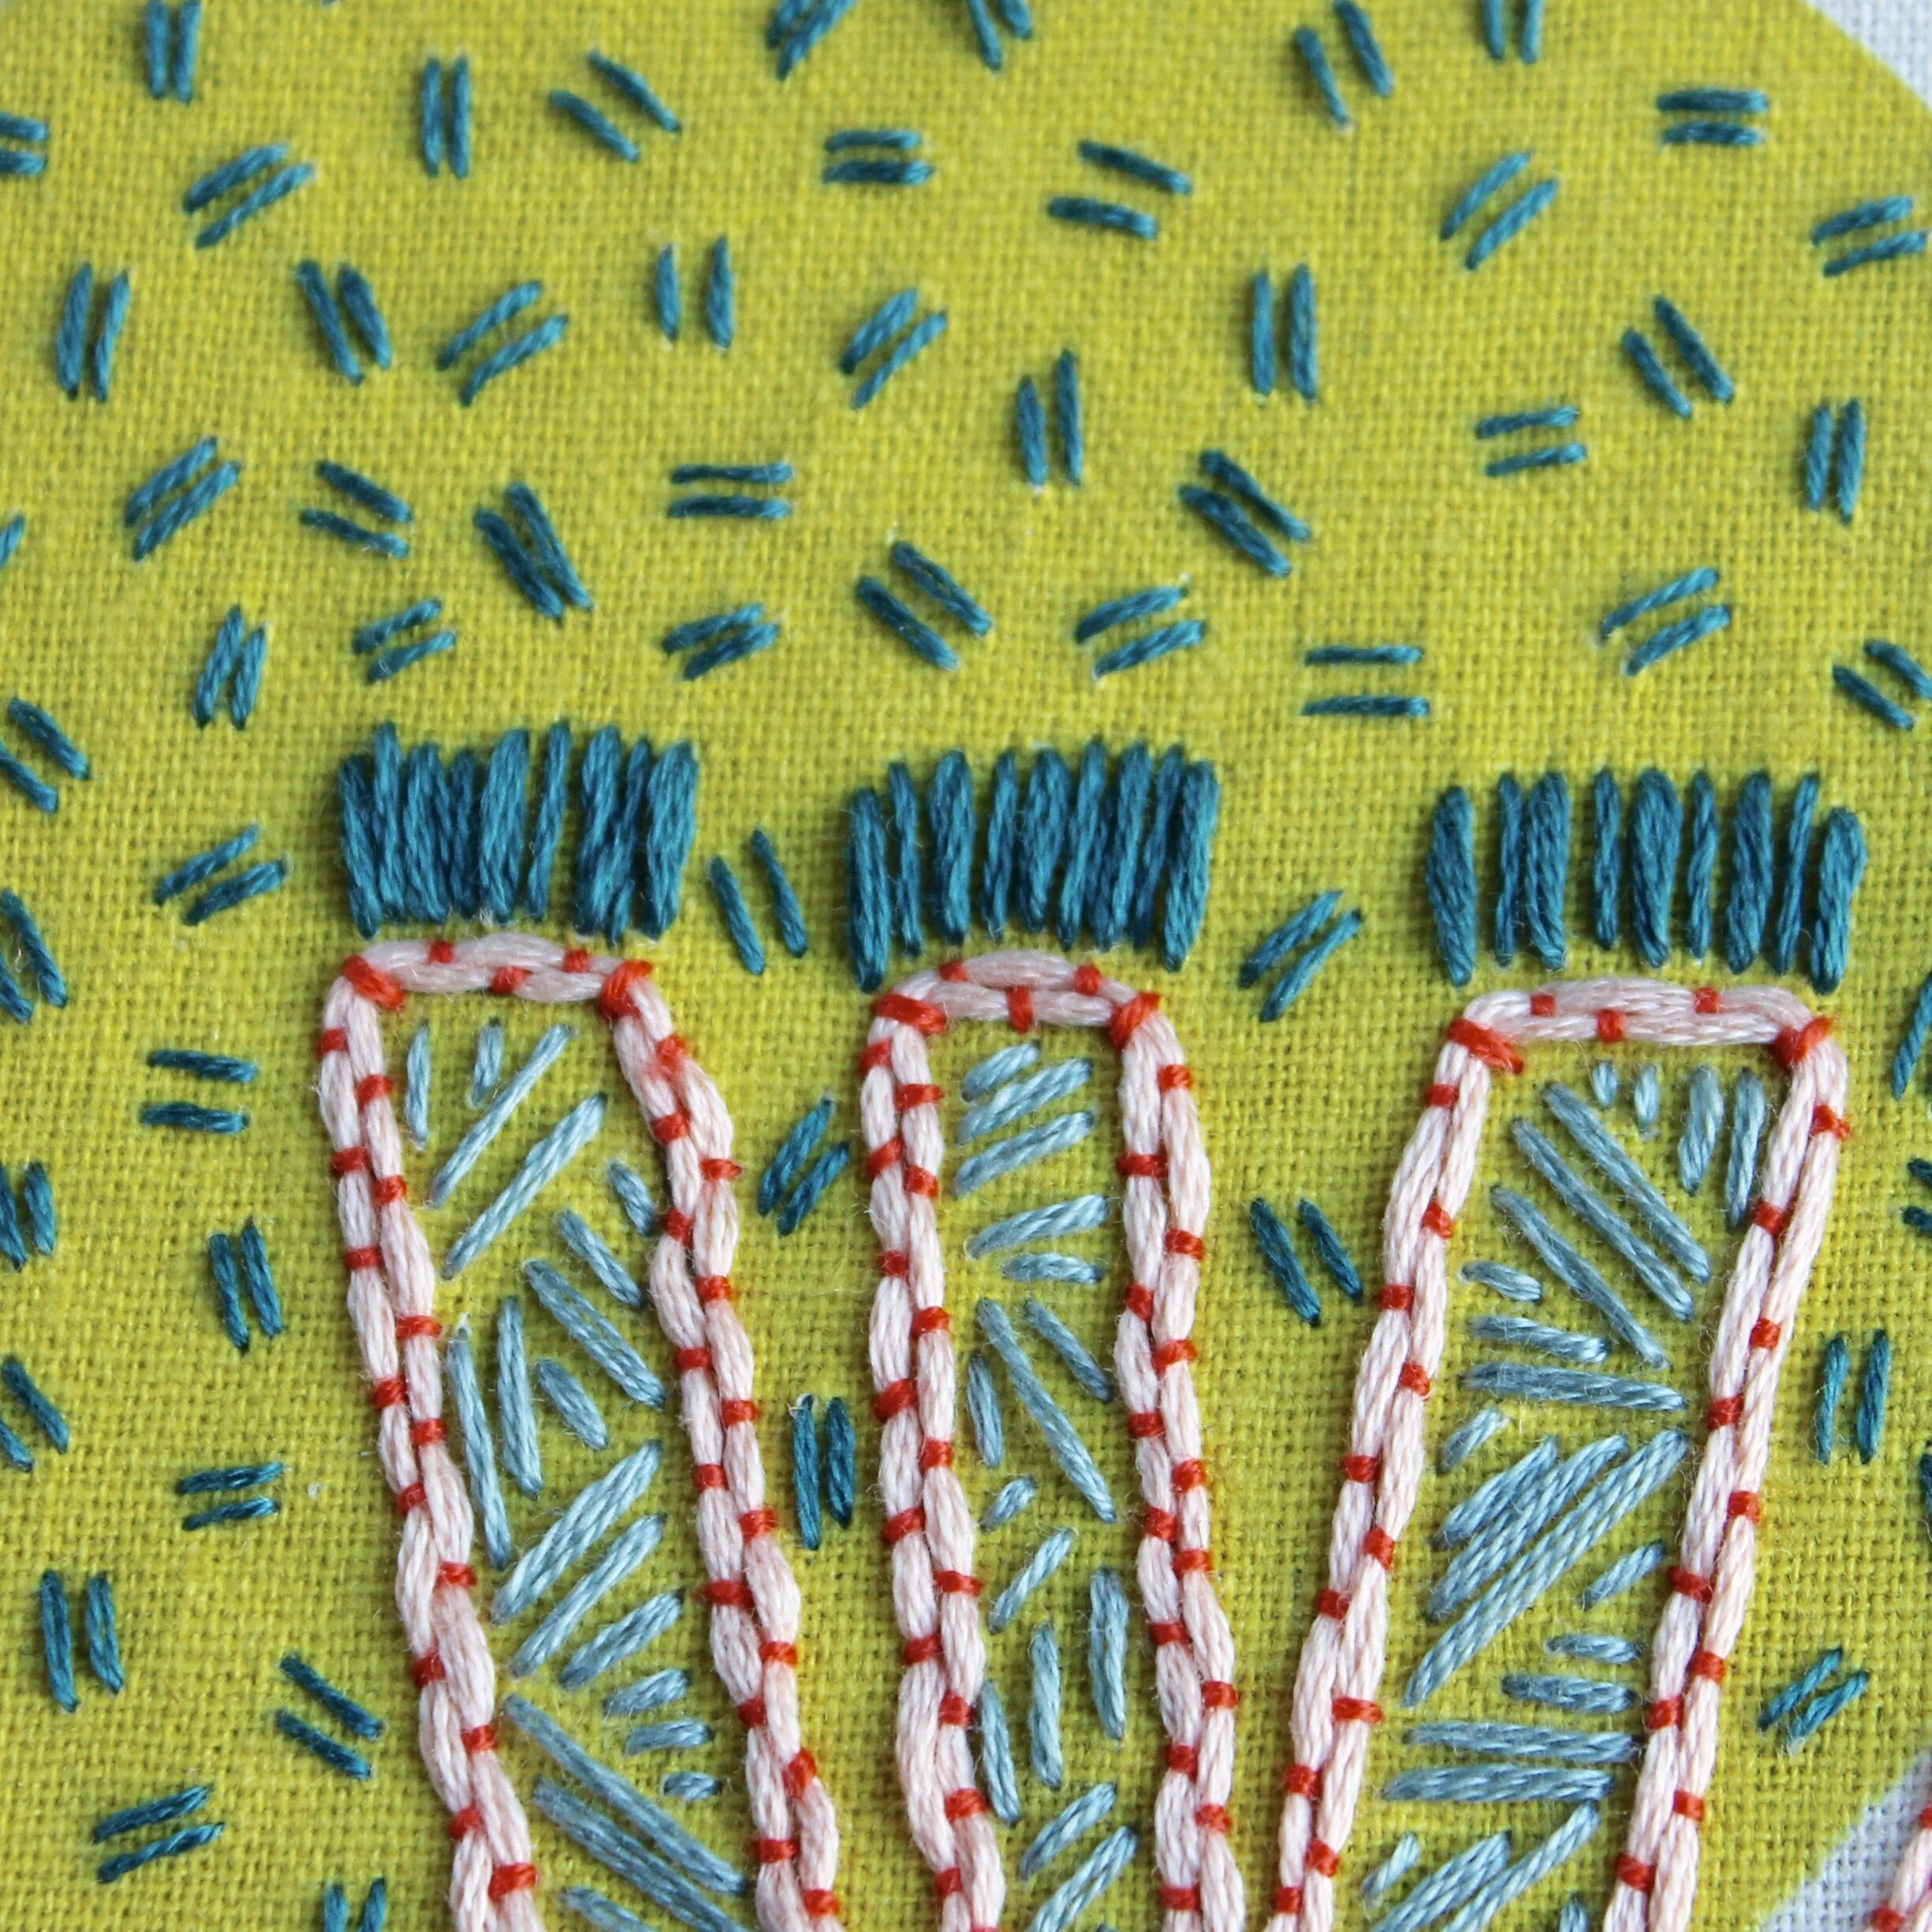
This piece shows how double seed stitch can be contrasted against other stitches.

Want to try this stitch? It’s a stitch I suggest using in my heart stitch sampler kit and floral sampler kit.

Sign up to my email newsletter to get a monthly free embroidery pattern and a round up of Stitch Showcase blogs.

A close up of an embroidery piece featuring double seed stitch in teal thread on a mustard coloured fabric.

Enjoyed this blog post? I share embroidery tips and a free embroidery pattern in my monthly newsletter. Sign up here to receive the newsletter on the 1st of each the month.
In stitch showcase 2 Tags Isolated Stitch
Comment
a picture of lots of skeins of colourful thread in a big pile. Overlaid is a blue square with white text saying, hand embroidery, five ways to store embroidery threads, www.embellishedelephant.co.uk

5 ways to store embroidery threads

October 27, 2021

Trust me, the more embroidery you do the more threads you will accumulate.

I have quite a stash of threads but I was working on a project and just couldn’t find the right green. So I ended up buying six different greens until I found the one that worked for my project.

And, the more threads you accumulate the greater the need for an organised storage solution.

Whichever storage solution you adopt, my top tip is to make sure that you can easily see the brand and shade number so you don’t end up buying a colour you already have in your stash.

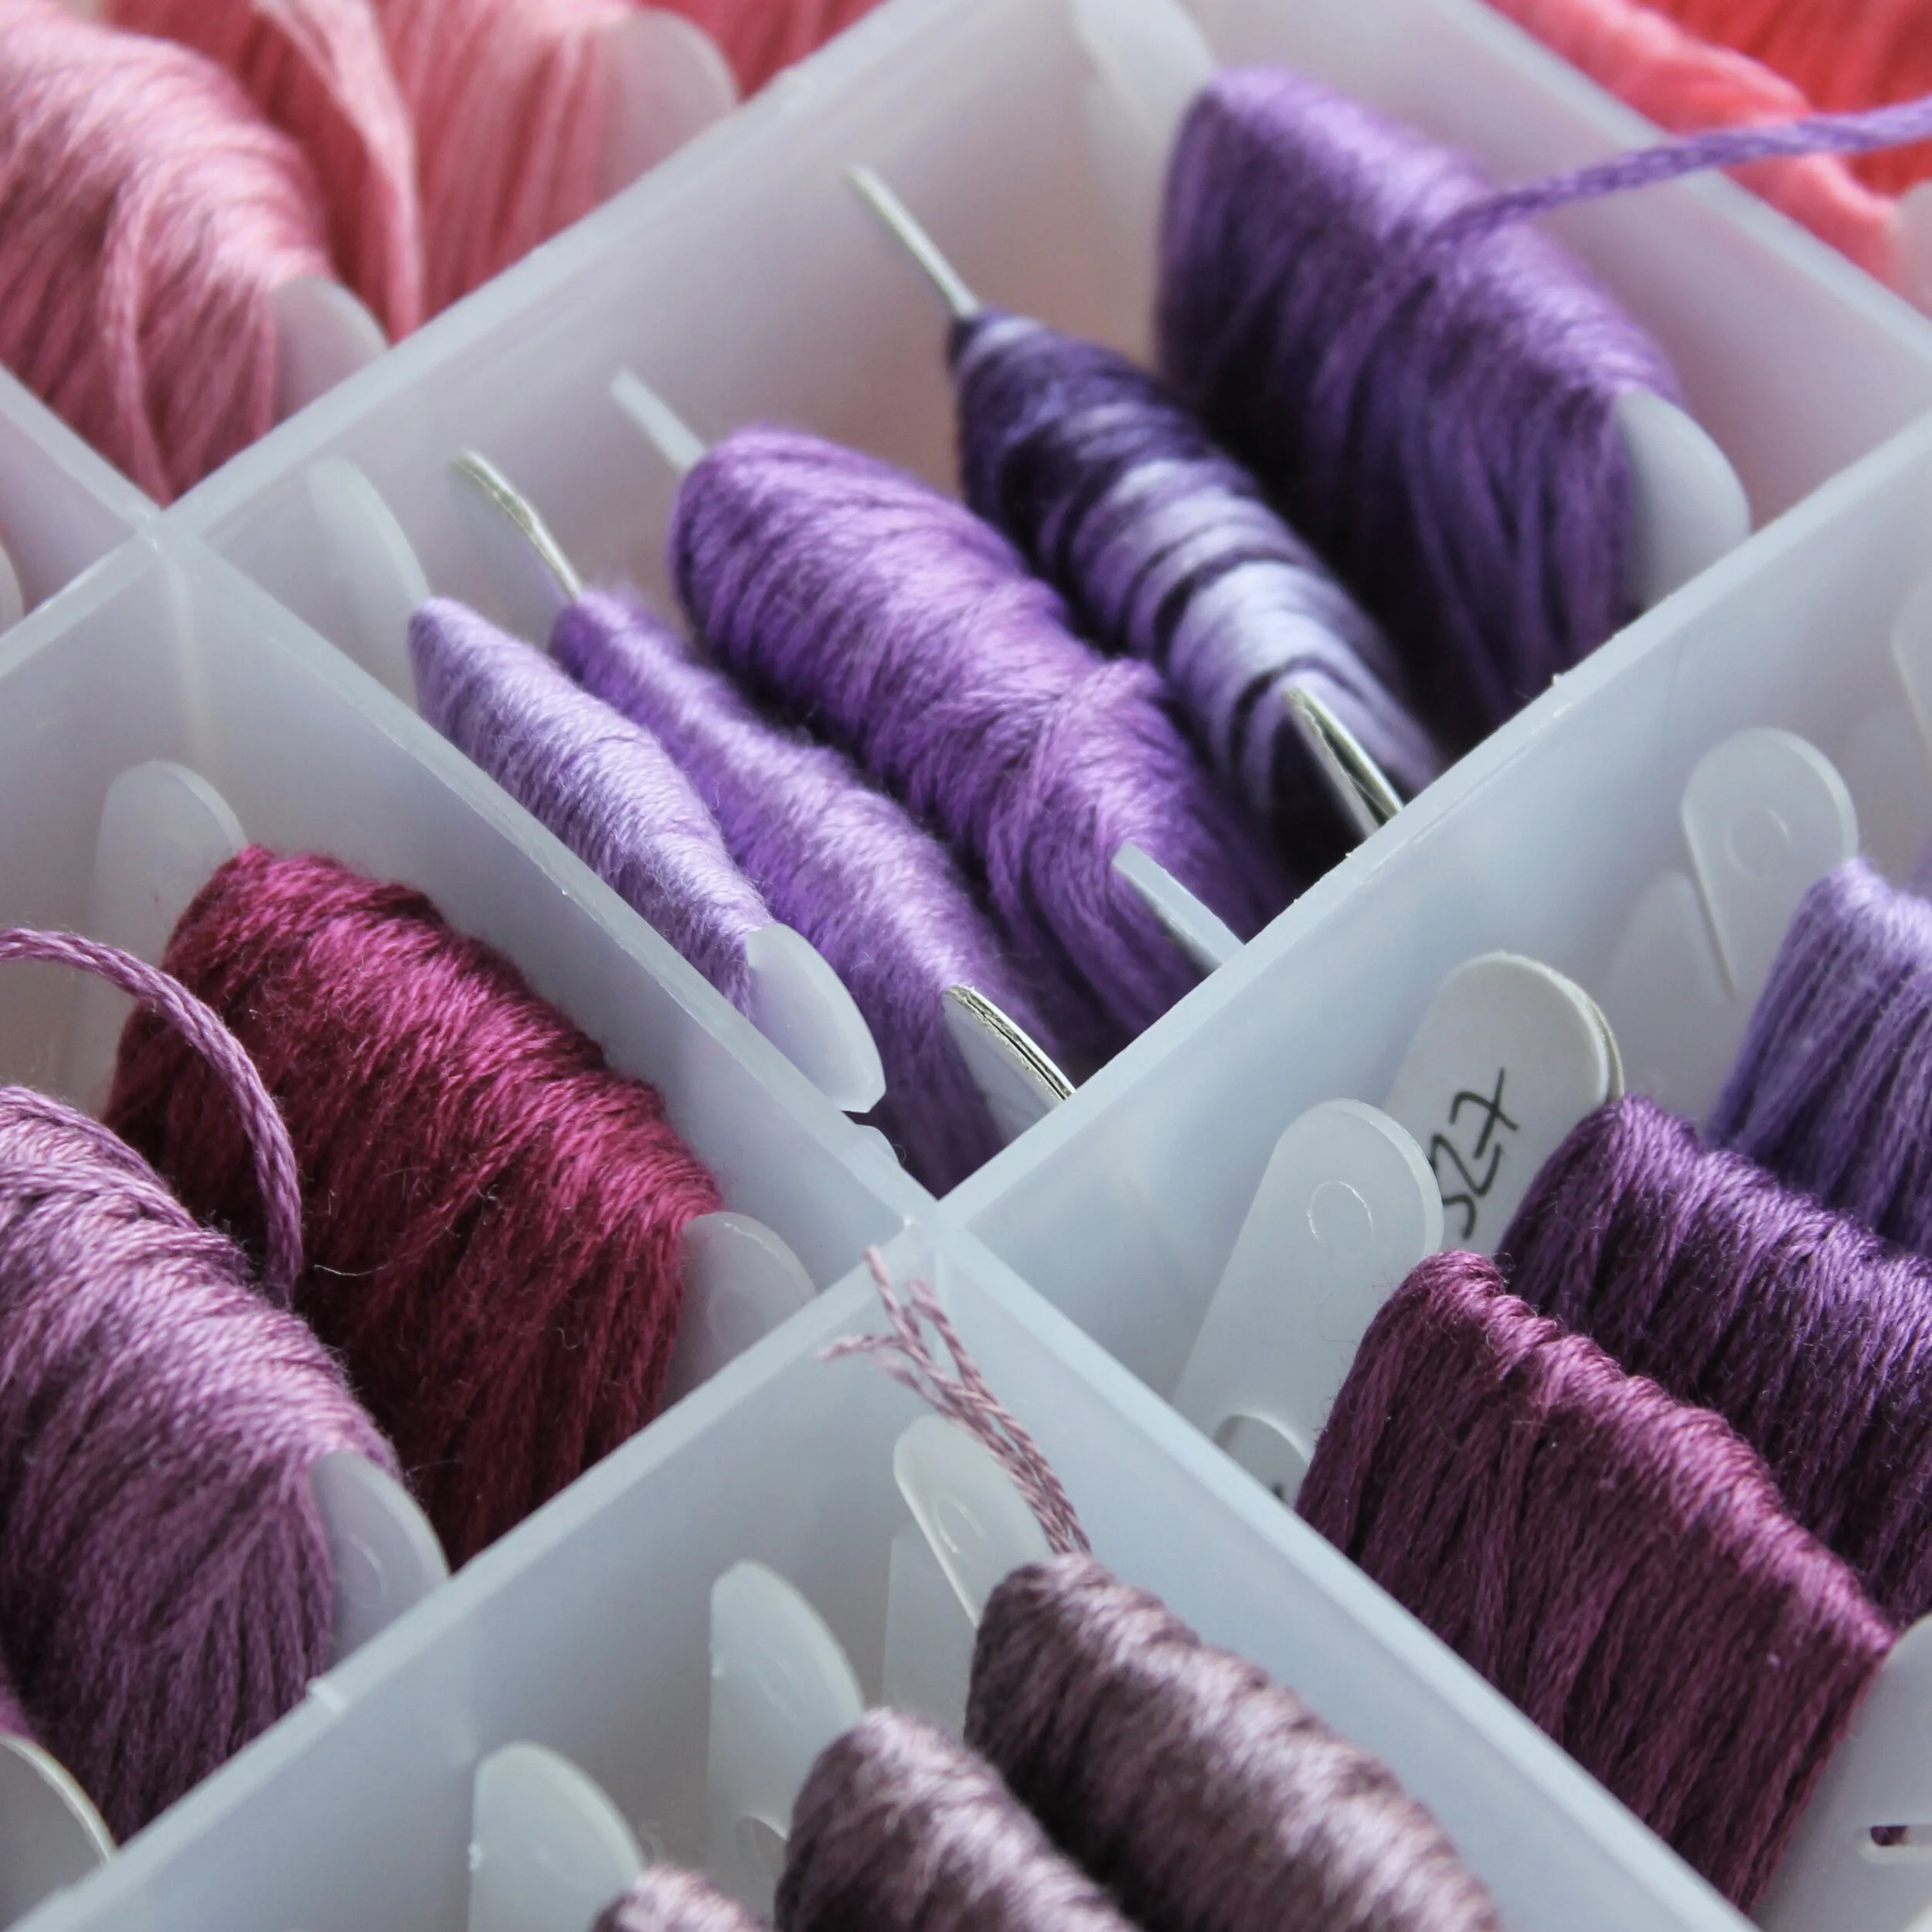
A picture of pink and purple embroidery floss wound onto thread bobbins in a plastic bobbin box

Bobbins

This is my go to method, I love the process of winding the thread onto the bobbin. I store my threads in several boxes organised by colour and I get great joy from opening one of those boxes and seeing all the colours for me to pick from.

The colour number can also be written on the bobbin to help search for an exact shade. Some people store in number order rather than by colour but I love the rainbow look of threads stored by shade.

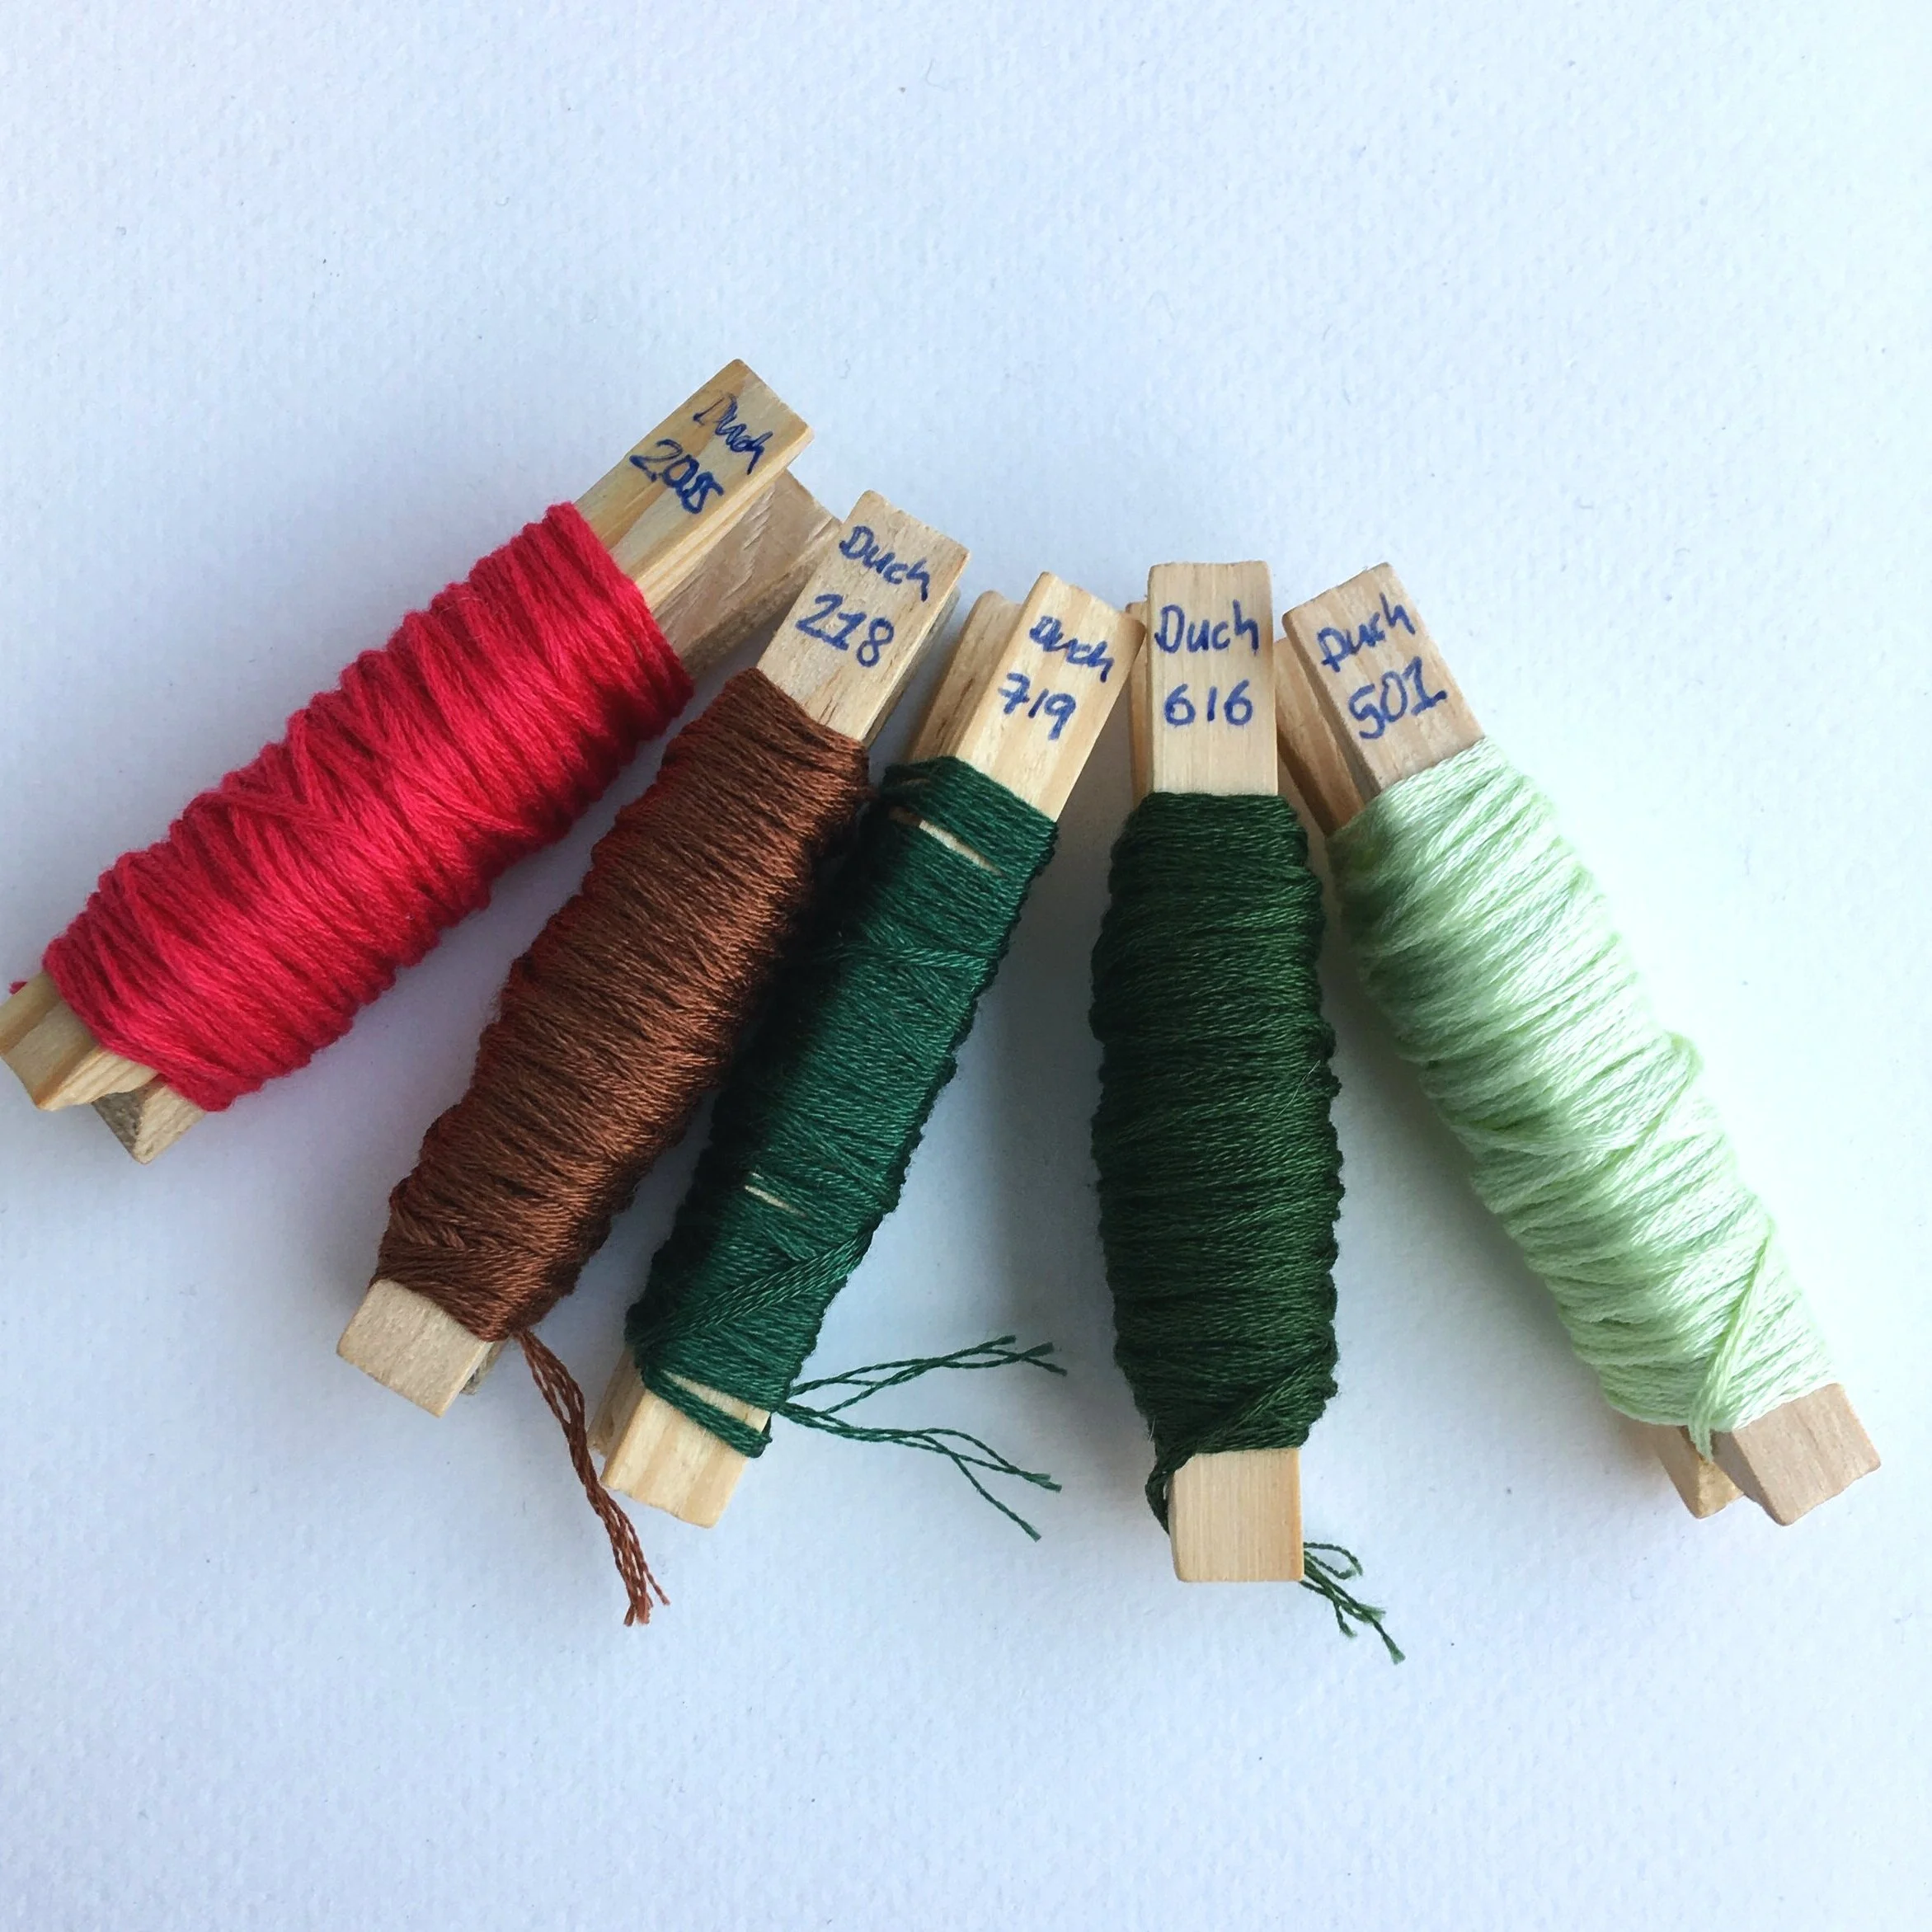
A picture of five wooden pegs, each has a different colour embroidery floss wound onto it with the floss code marked in blue pen at the top

Pegs

This seems to be a popular way of storing embroidery threads if you look at stylised pictures on Instagram. I’ve tried it and I found it was just to bulky for my storage space.

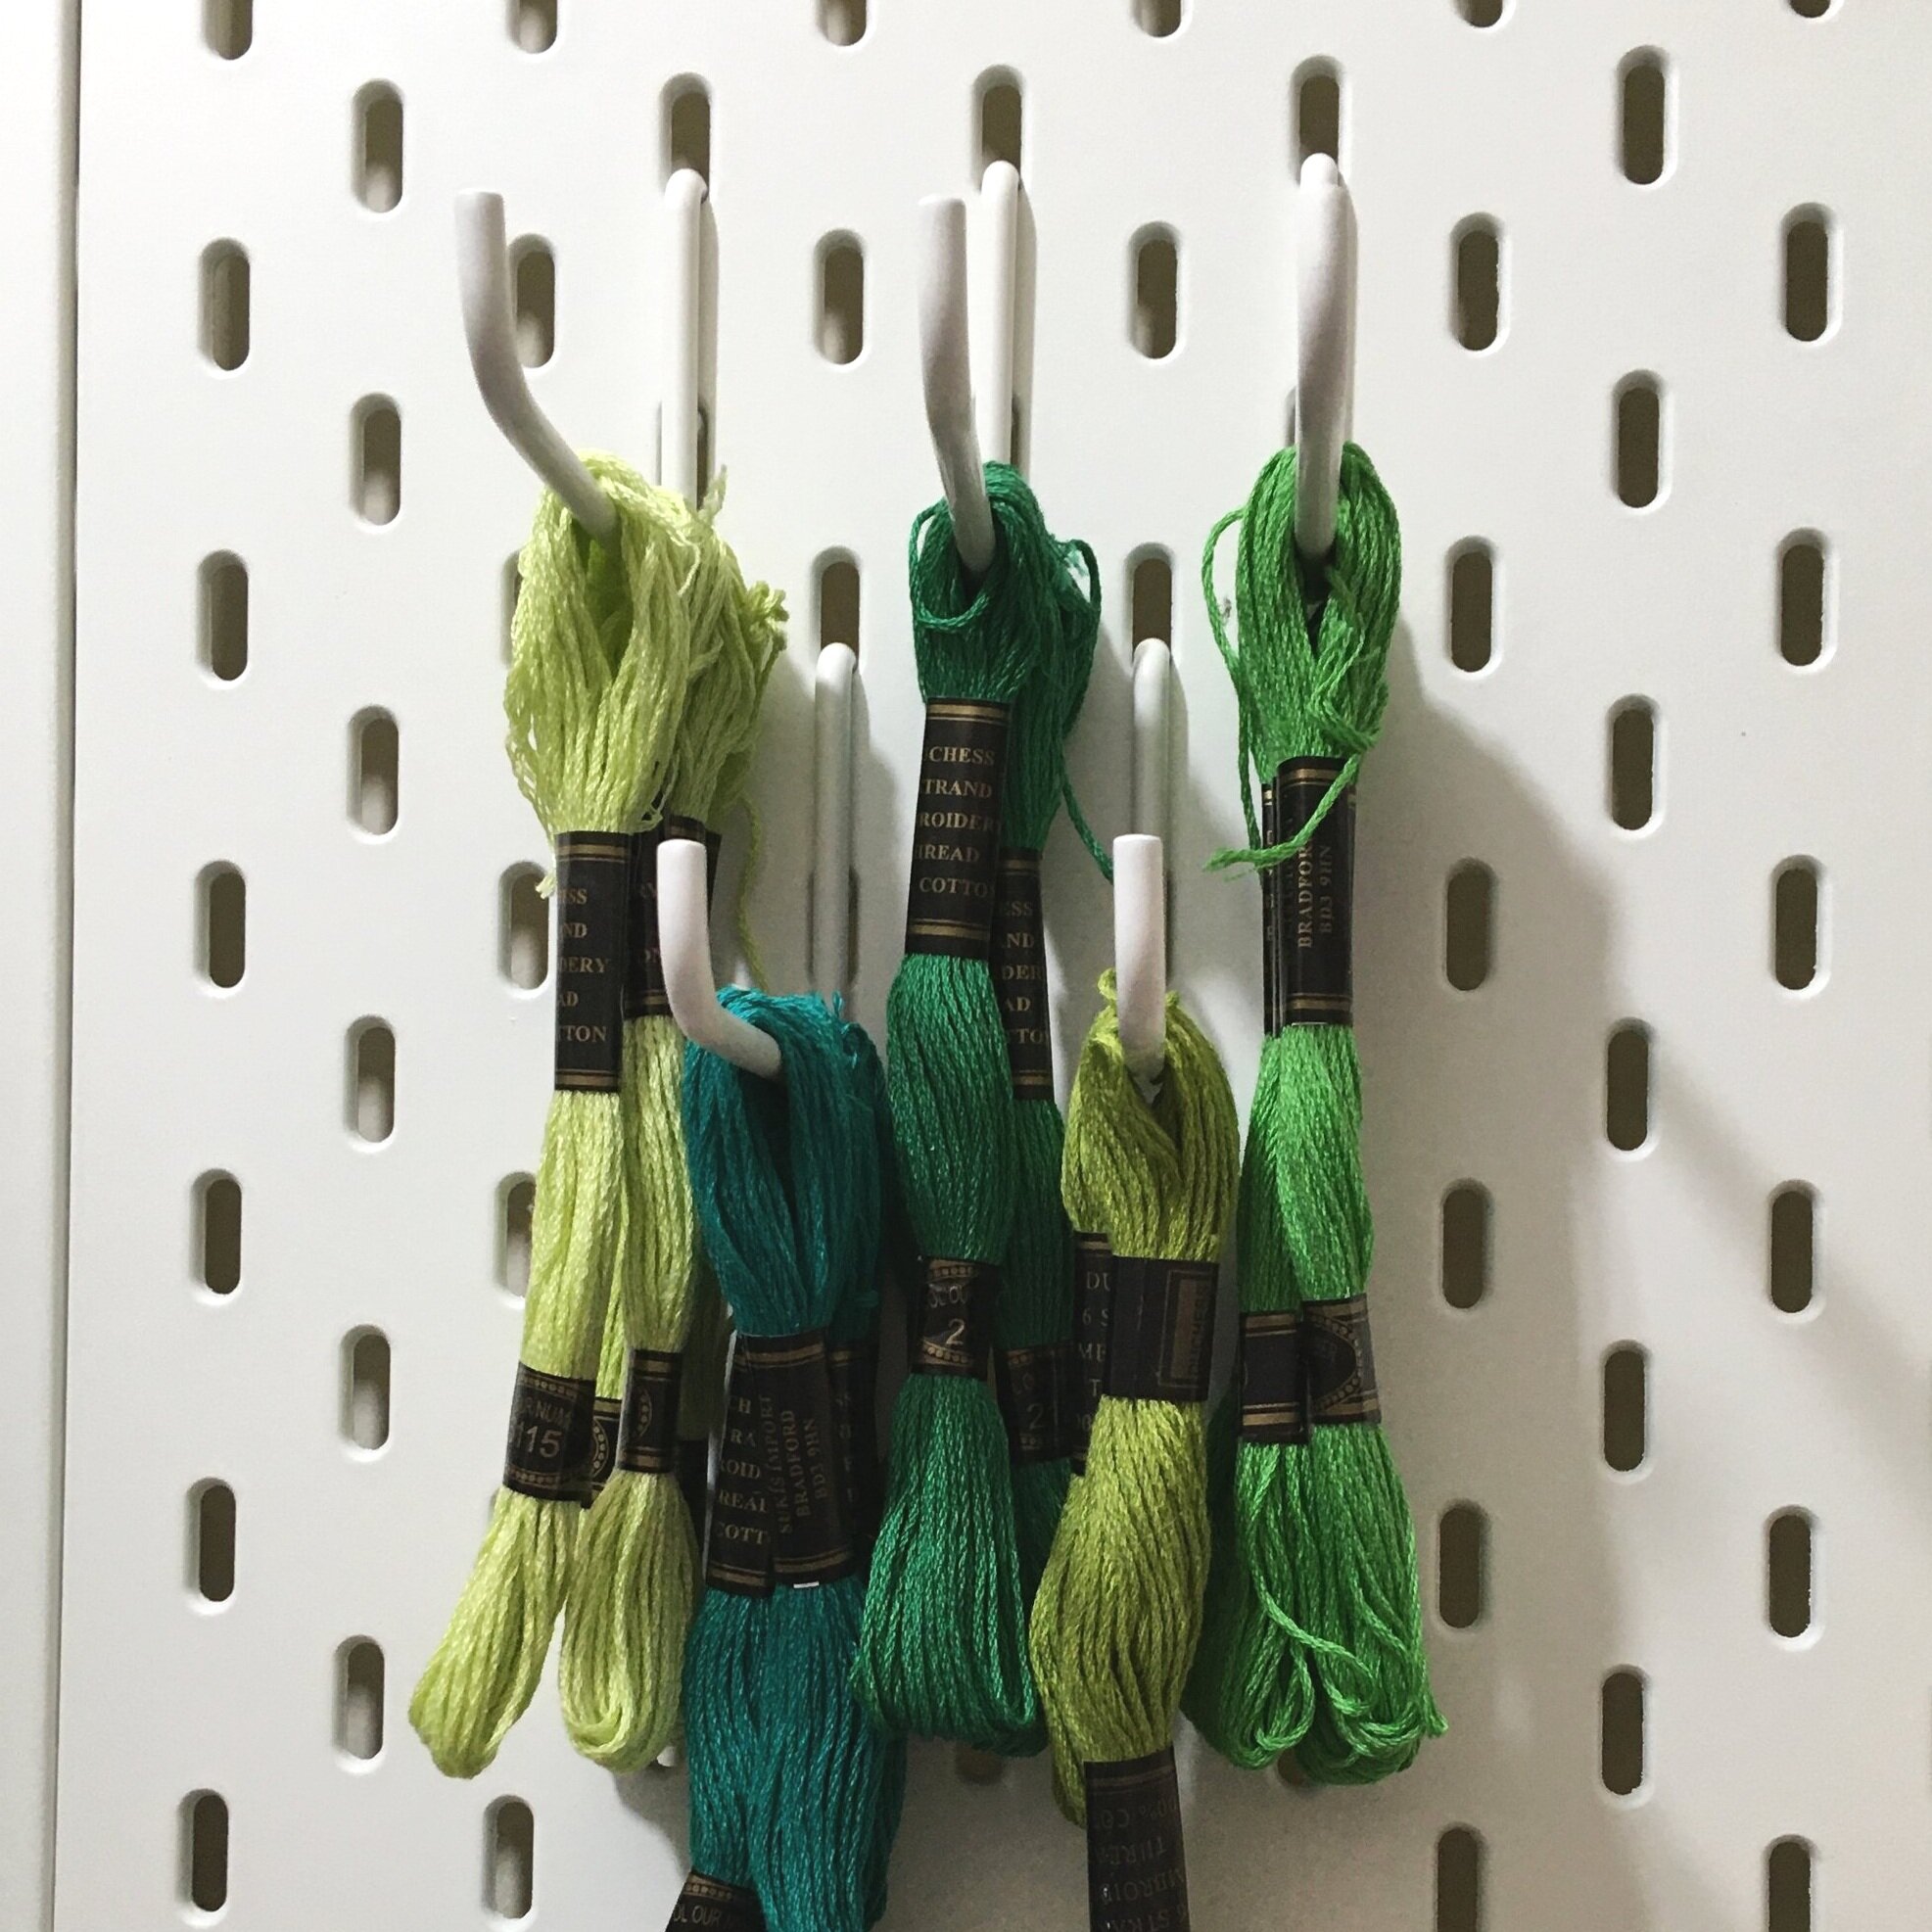
A picture of an ikea pegboard. Hanging on hooks are a range of skeins of green embroidery thread

Hanging

Pegboards are great for all kinds of craft material storage. Floss skeins are suitable for hanging on hooks and give a lovely visual display of colours. It’s a great method if you have several skeins of the same colour as you can hang these together. But I prefer to hang some bulkier craft materials such as hoops on my pegboard wall.

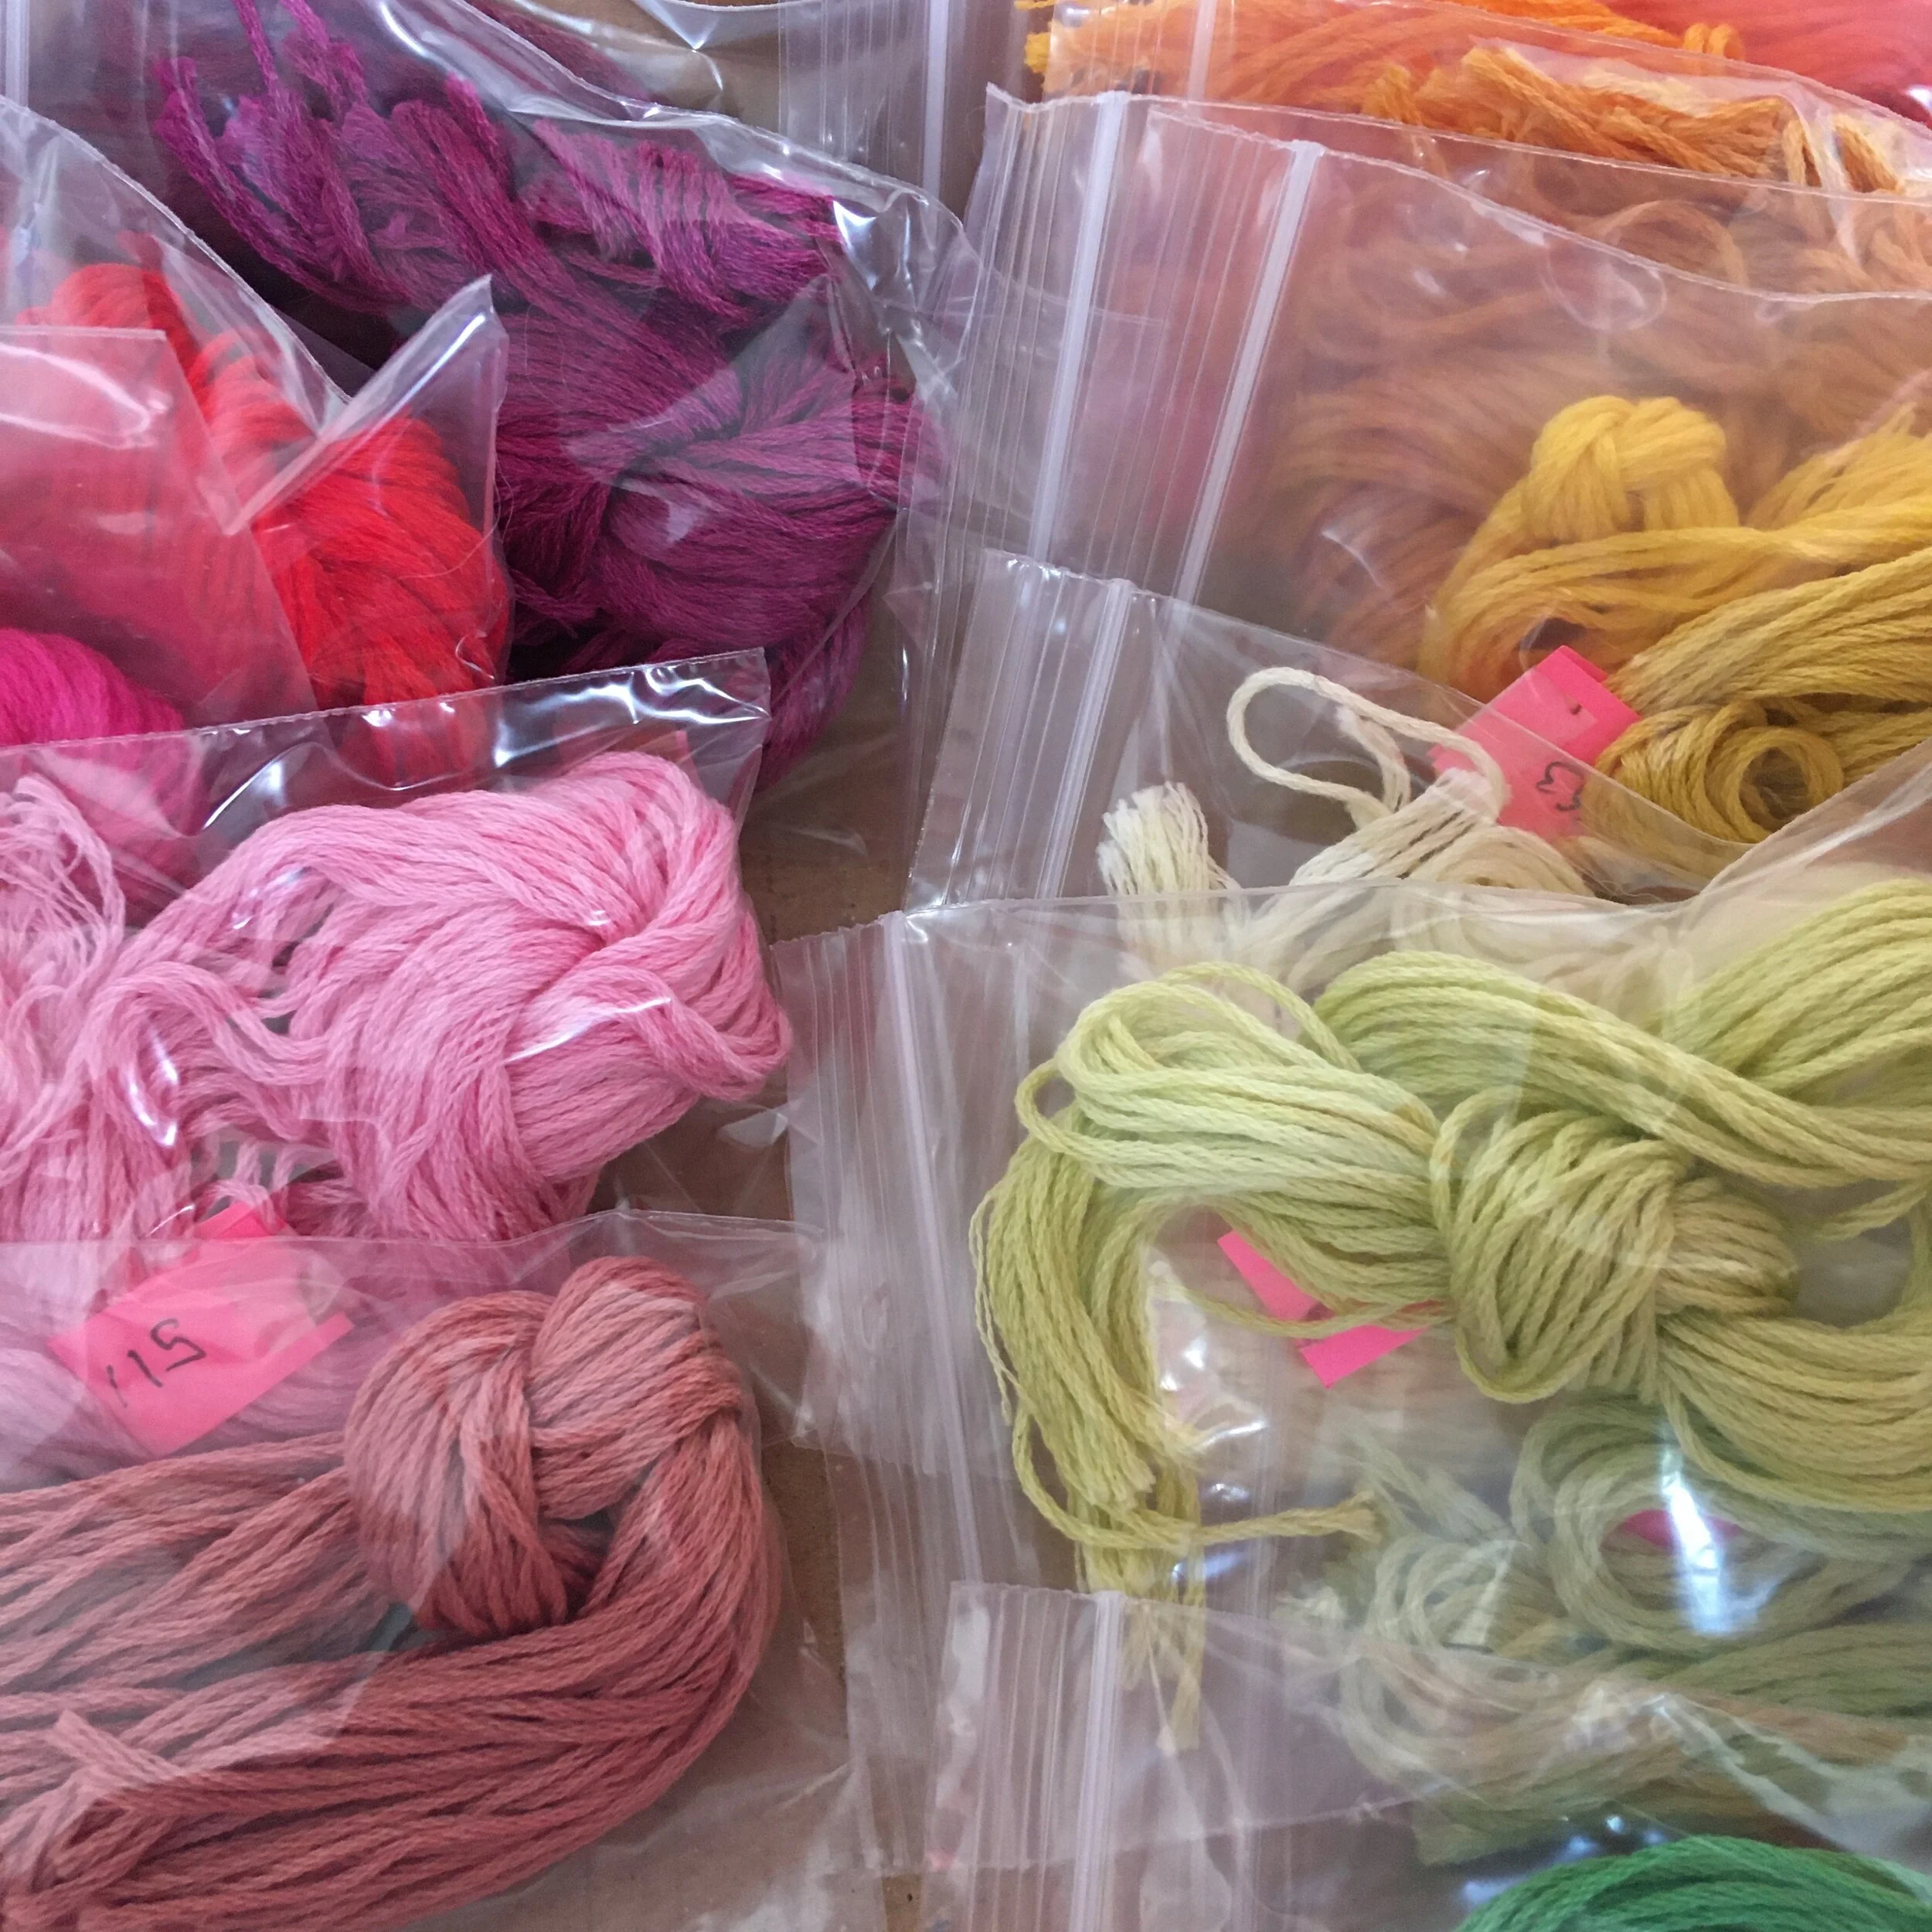
A picture of many different small clear plastic  self seal bags each containing a different colour embroidery floss

Bags

Self seal plastic bags are great for storing individual colours. Larger bags can be used for all threads of a certain colour way.

I tend to use bags to store cut threads and off cuts.

A pile of different coloured embroidery floss skeins

Drawer/Box

This may be the first storage solution you try but it’s going to get messy as more and more threads accumulate - trust me. As you use the skeins, there will often be a tail left and when in a drawer these tails get tangled.

In addition it is difficult to find a particular colour if everything is loose in a drawer.

Enjoyed this blog post? I share embroidery tips and a free embroidery pattern in my monthly newsletter. Sign up here to receive the newsletter on the 1st of each the month.
In tips 3 Tags Thread
Comment
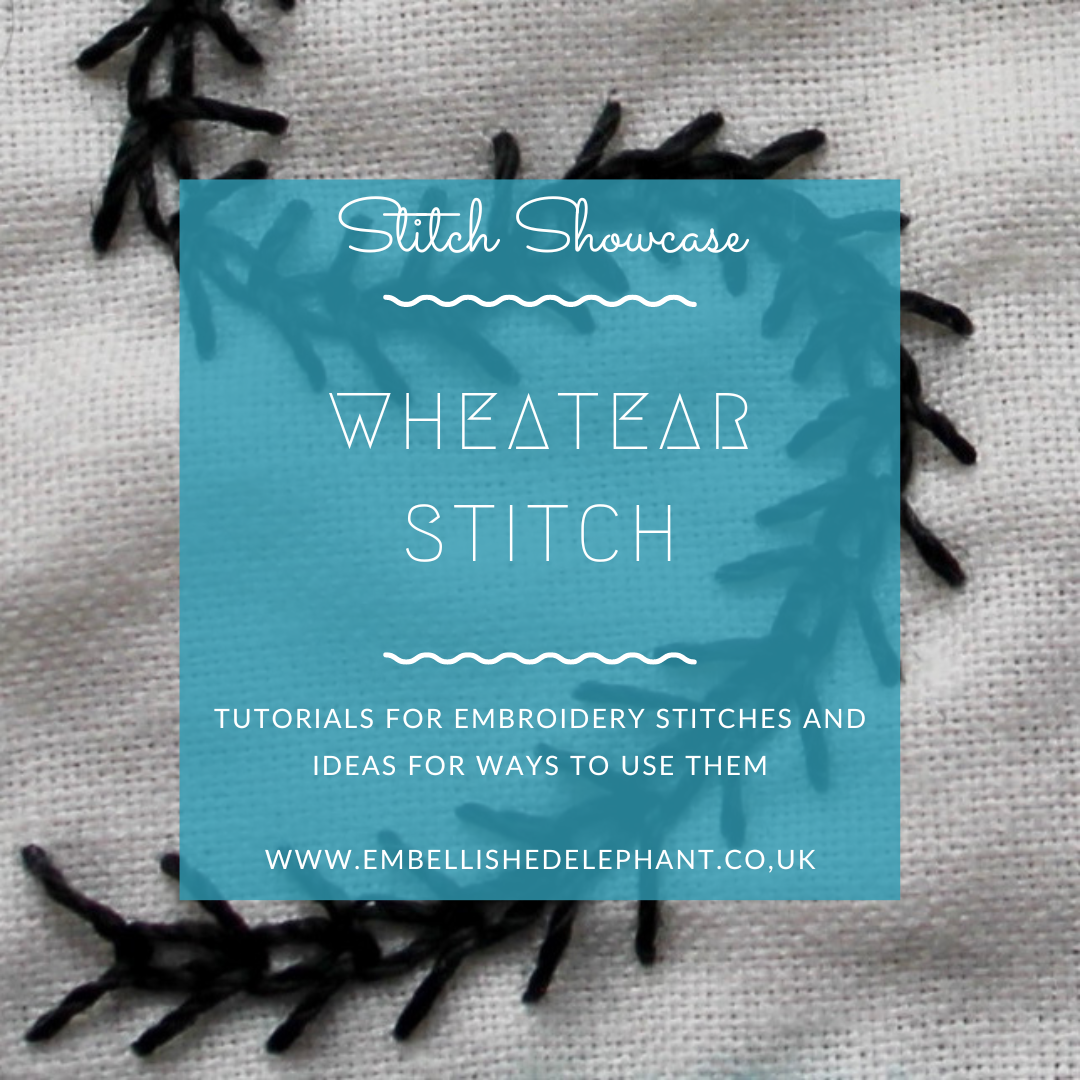
A picture of wheatear embroidery stitch in black on calico fabric. Overlaid is a blue square with white text saying, stitch showcase, wheatear stitch, www.embellishedelephant.co.uk

Stitch Showcase: Wheatear Stitch

October 20, 2021

I was inspired to revisit this stitch one August morning when I went for a walk and my way back to the house was to pass through a field of wheat. I also think this stitch looks a bit like a millipede - especially when stitched in black or brown thread!

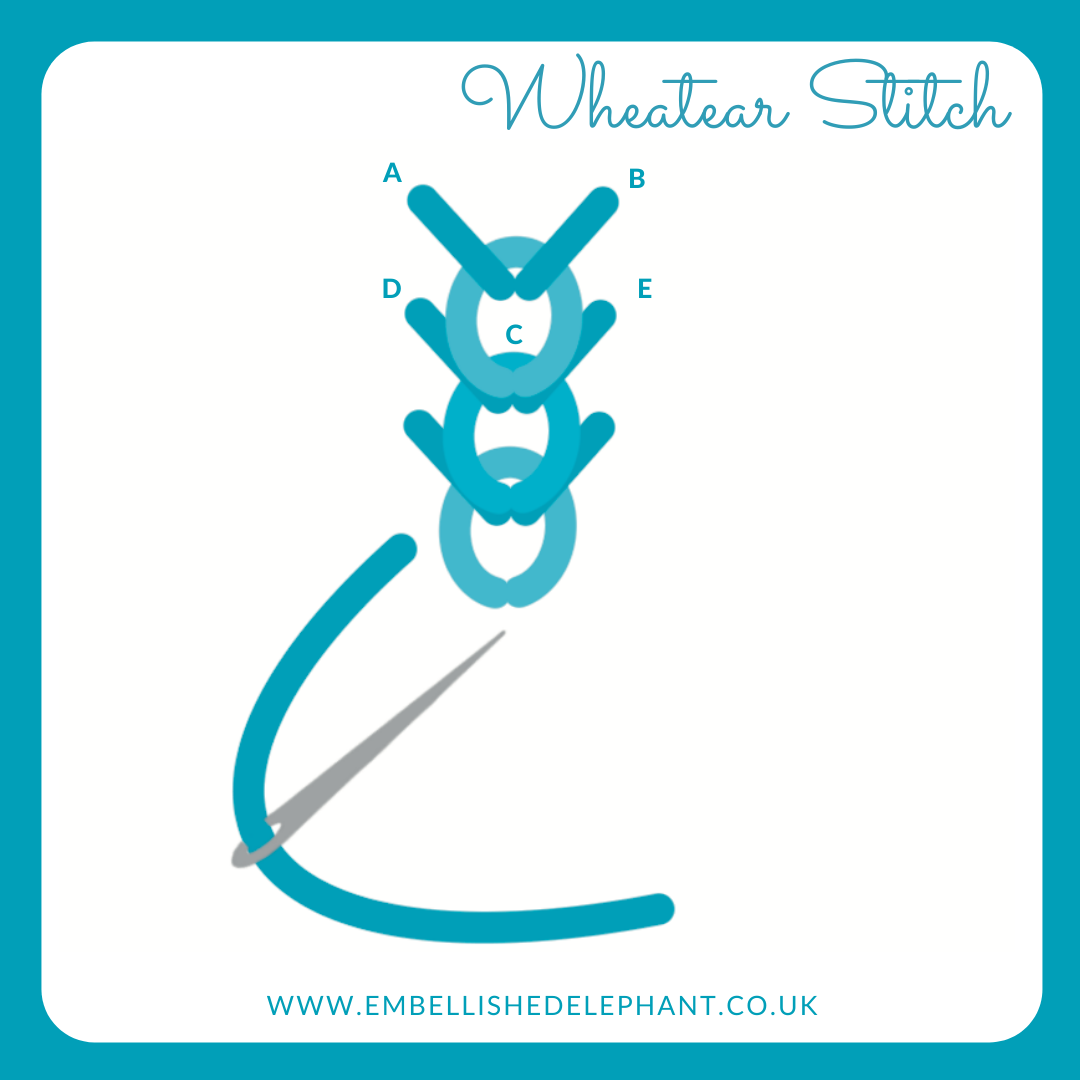
I look at this stitch as being a combination of an arrowhead stitch and a lazy daisy stitch.

  • Start by creating an arrowhead stitch

  • Bring the needle up through the fabric a few millimetres below the point of the arrow

  • Pass the needle under both arms of the arrow without piercing the fabric

  • Take the needle down through the fabric in the same hole it came up through

  • If creating a chain of wheatears, then start the next arrow at the base of the loop of the first stitch.

An illustration of how to create wheatear embroidery stitch. The illustration is in shades of blue and grey on a white background

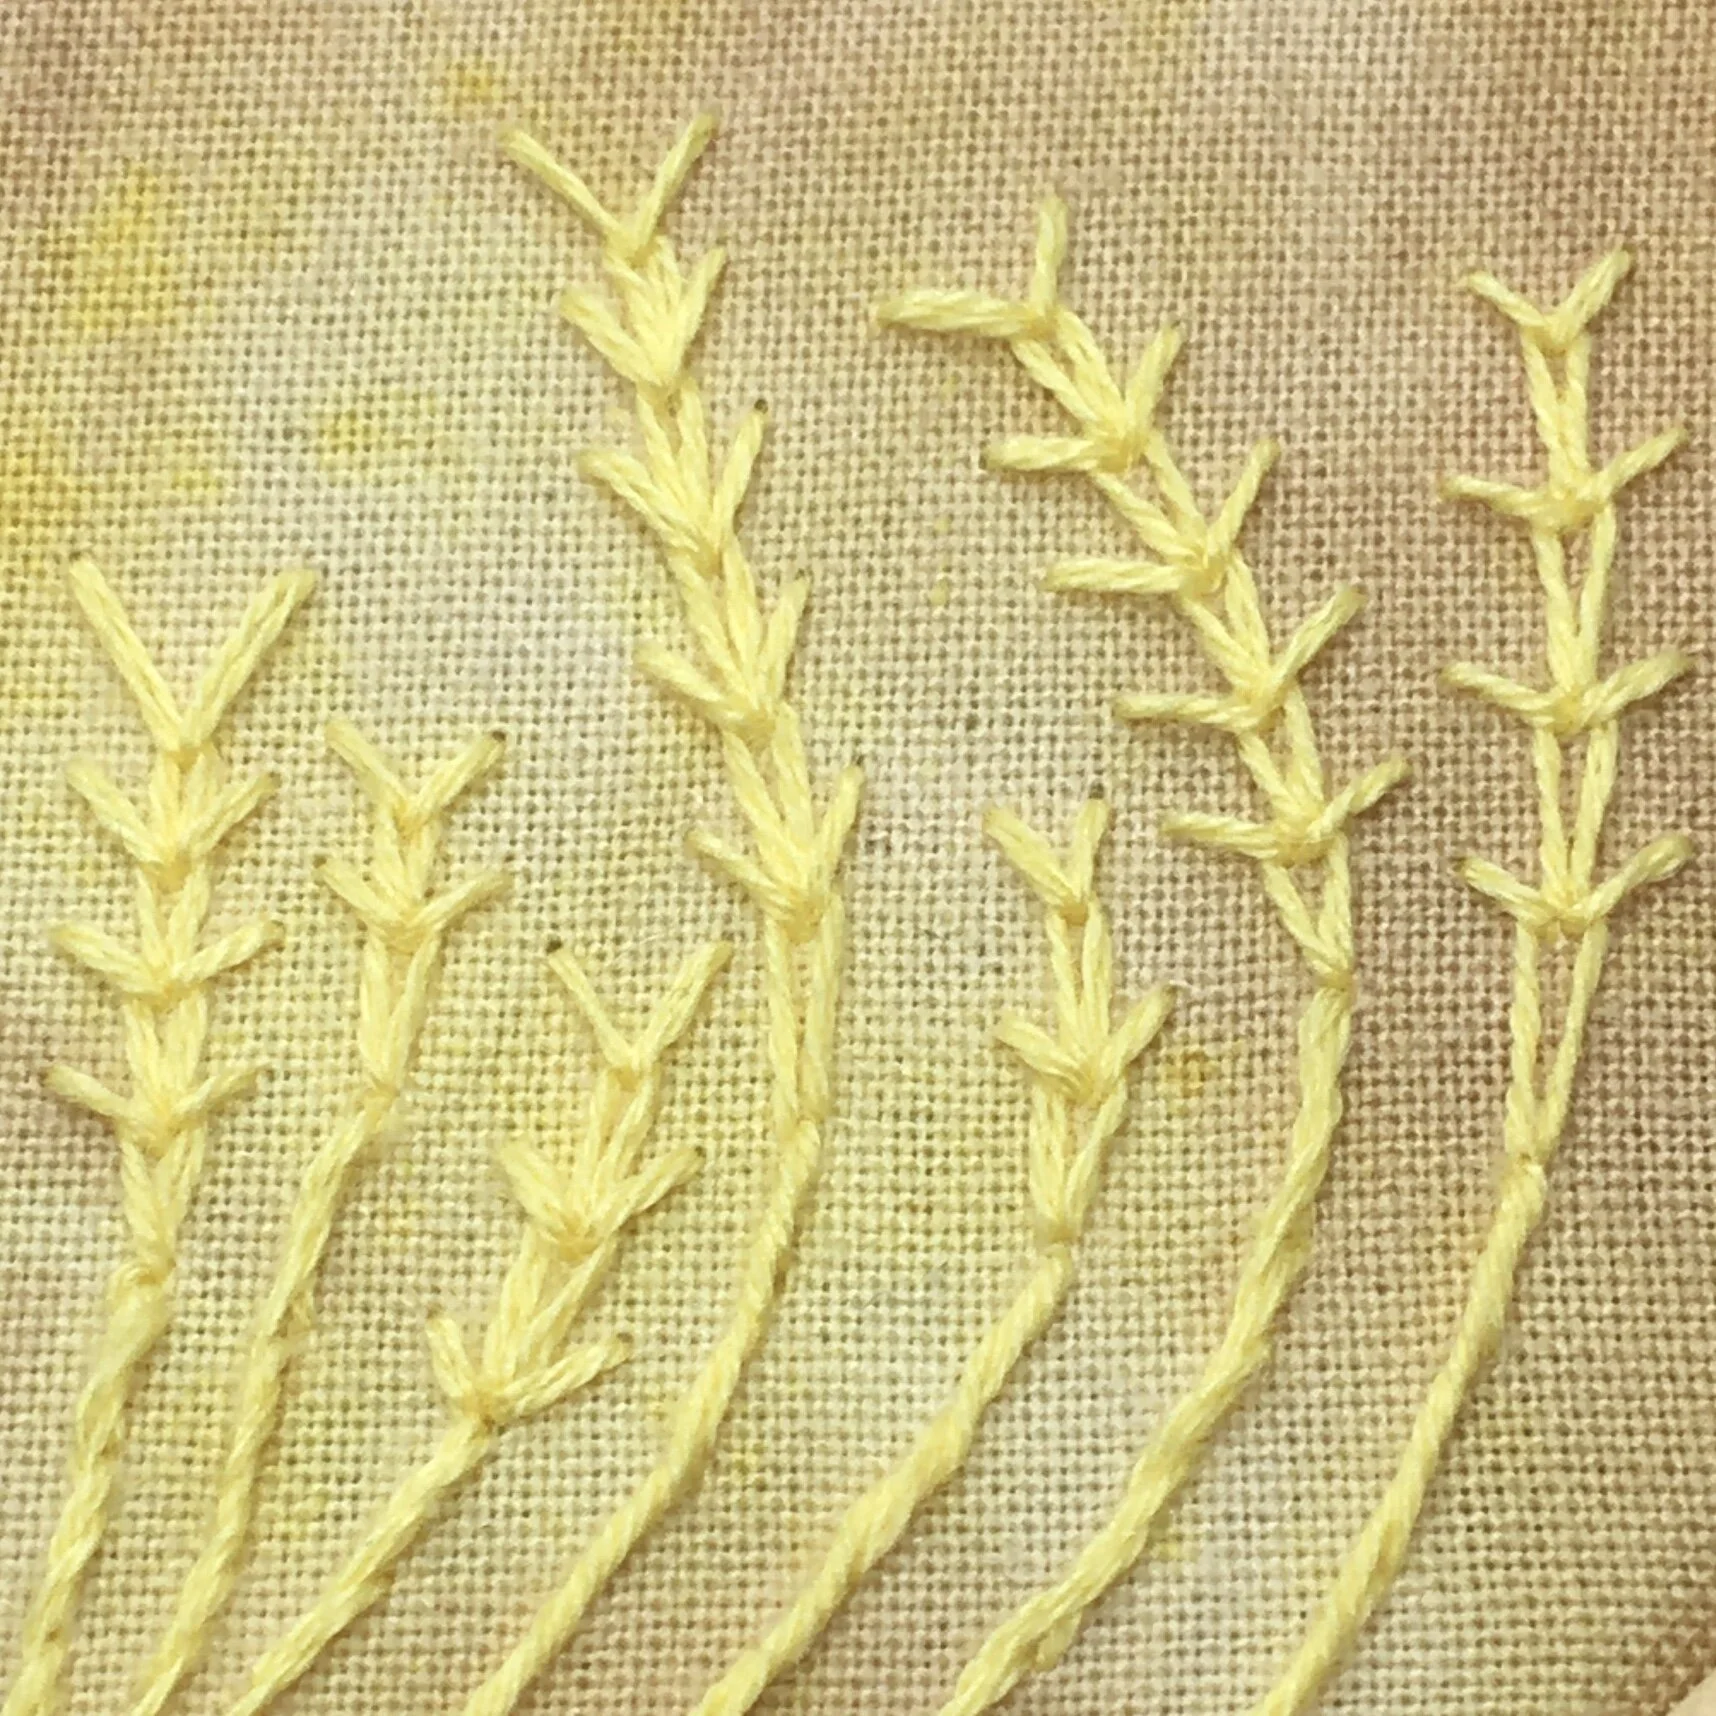
The sample below was stitched with the aim of representing wheat blowing in the wind. The fabric is naturally dyed using turmeric and onion skins.

On hand dyed yellow fabric is stitched columns of wheatear stitch in yellow thread

Enjoyed this blog post? I share embroidery tips and a free embroidery pattern in my monthly newsletter. Sign up here to receive the newsletter on the 1st of each the month.
In stitch showcase 2 Tags Stitch Showcase, Line Stitch
Comment
A picture of needles threaded with yellow floss lying on some calico. Overlaid is a blue square with white text saying - hand embroidery, keeping your needles safe, www.embellishedelephant.co.uk

How to keep your needles safe

October 13, 2021

Have you ever had that panic of dropping a needle and not being able to find it again? The pesky things can lodge themselves in your clothes or soft furnishings where you are stitching such as a sofa, bed or carpet. The chance of skewering yourself or someone else doesn’t bear thinking about!

Most of the time they land longways and eventually after some careful exploration of your surroundings they are found without causing anyone any harm. But occasionally they land point down making it much harder to spot them. I’m relieved to say that in all my years of stitching I don’t recall a time when I’ve not been able to locate a dropped needle.

Here are my tips for making sure you keep your needles safe and you don’t have to face that panic inducing search!

A picture of one embroidery needle threaded with yellow floss. the needle is resting on calico

Keep the needle threaded

It’s much easier to locate a dropped needle if it has a length of thread trailing from the eye. It doesn’t stop the risk of dropping the needle when threading it though.

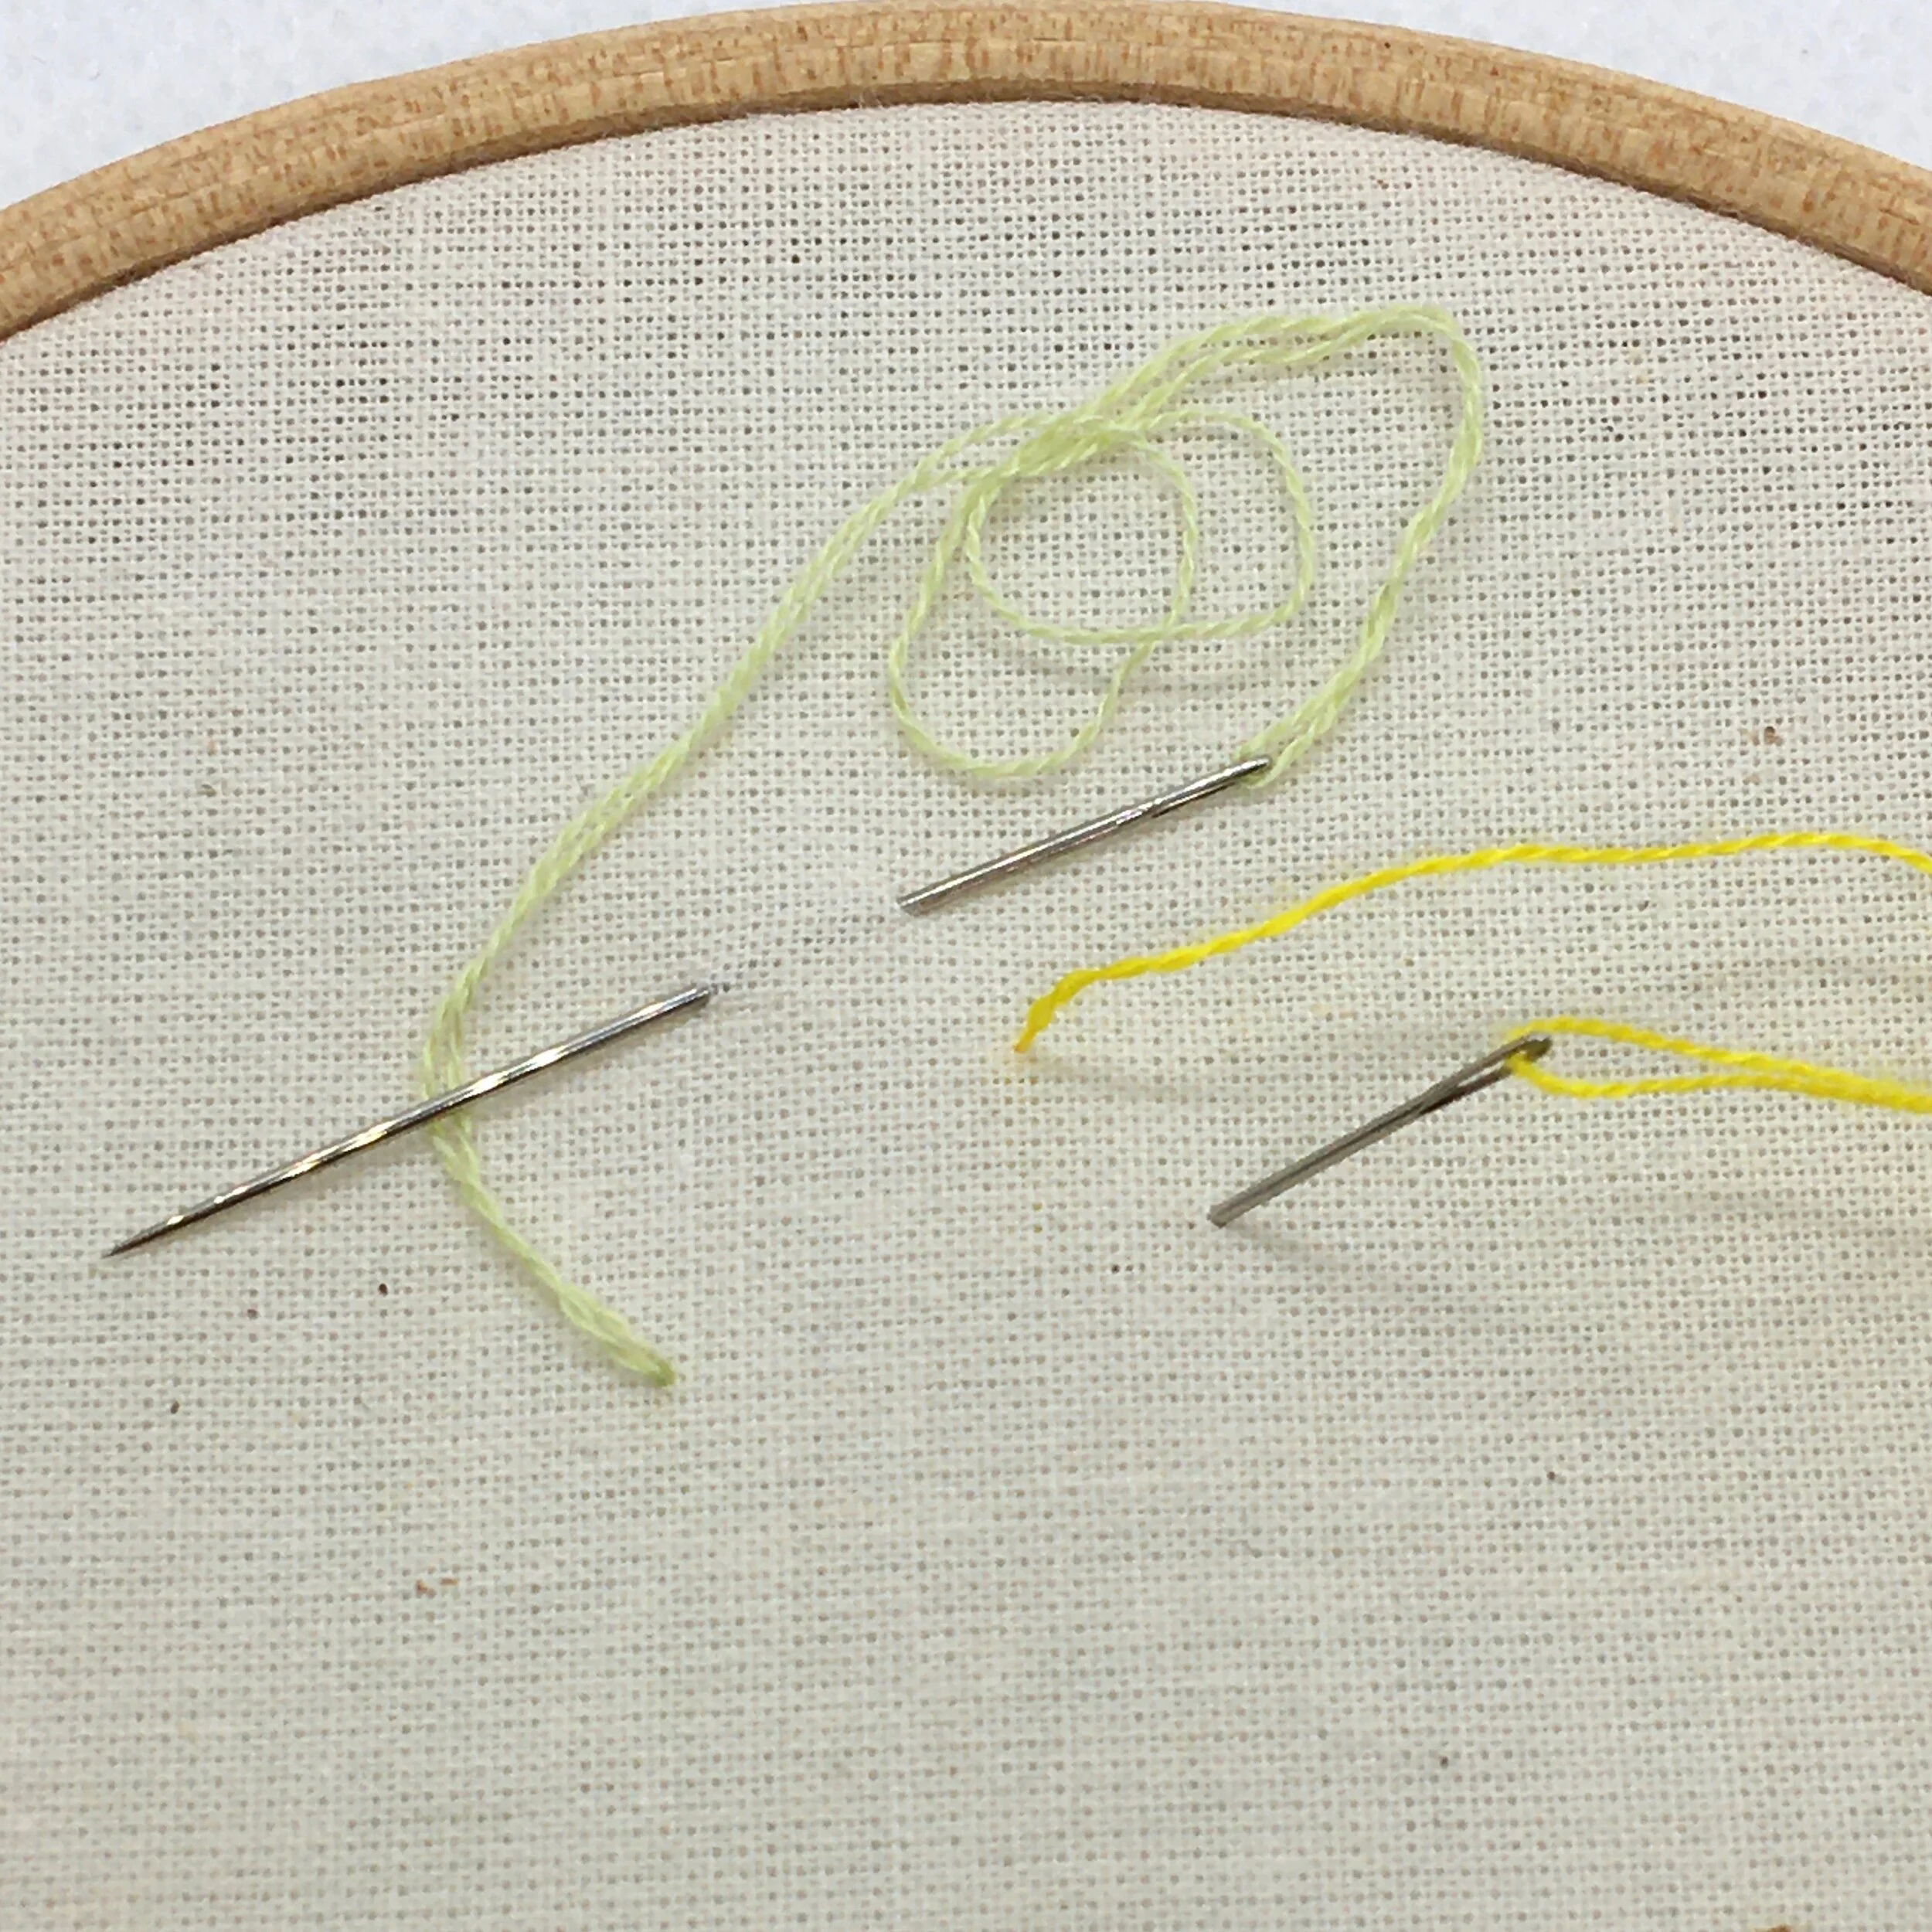
A picture of two embroidery needles placed on an embroidery hoop holding calico fabric

Only use one needle at a time

There are some embroidery techniques where you need to have more than one needle on the go. But the fewer needles you are working with, the less chance there is of losing one. If you are working with more than one needle then remove it from the thread and try a good temporary storage method such as those below.

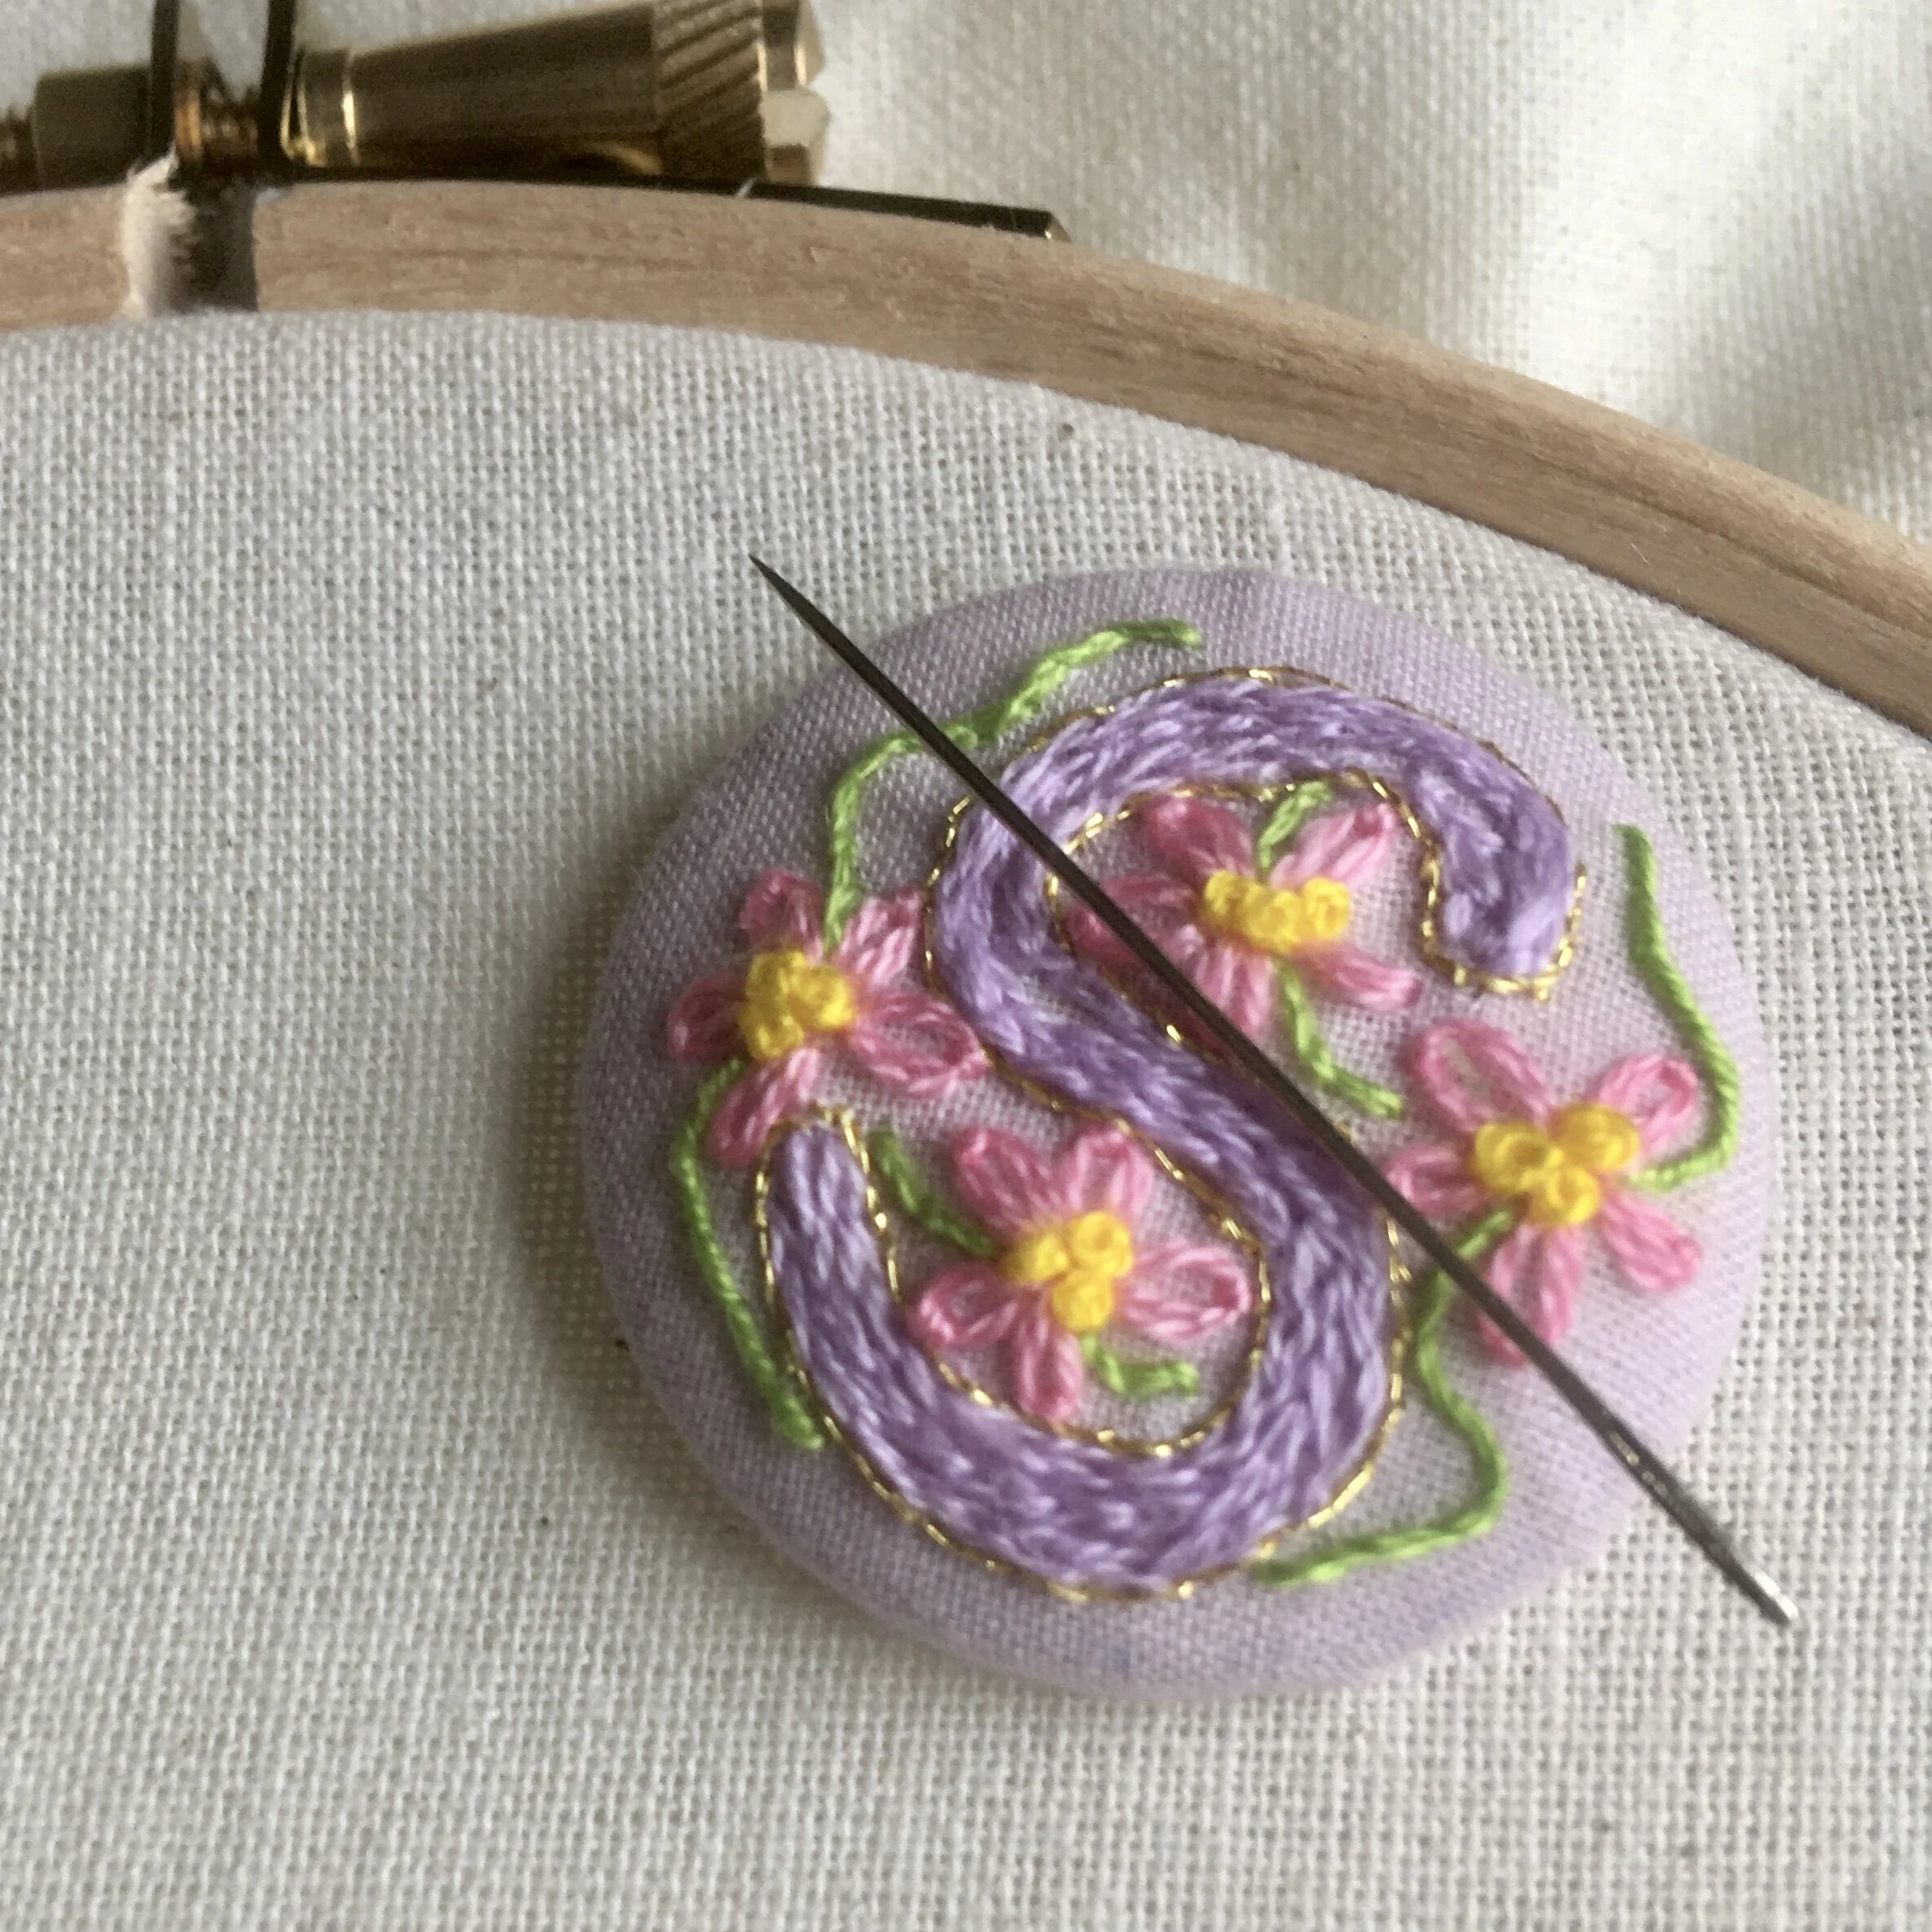
A picture of an embroidered magnetic needle minder. The embroidery shows and S and some flowers. There is an embroider needle resting on it.

Needle minder

This is a magnetic button which clips onto your fabric without making any holes. You can lay your needle on it between stitches or at the end of a period of stitching. They are great for temporary needle storage- when I’ve finished a project I tend to move needles to a needle case. The magnet of needle minders are also great at helping to find a dropped needle.

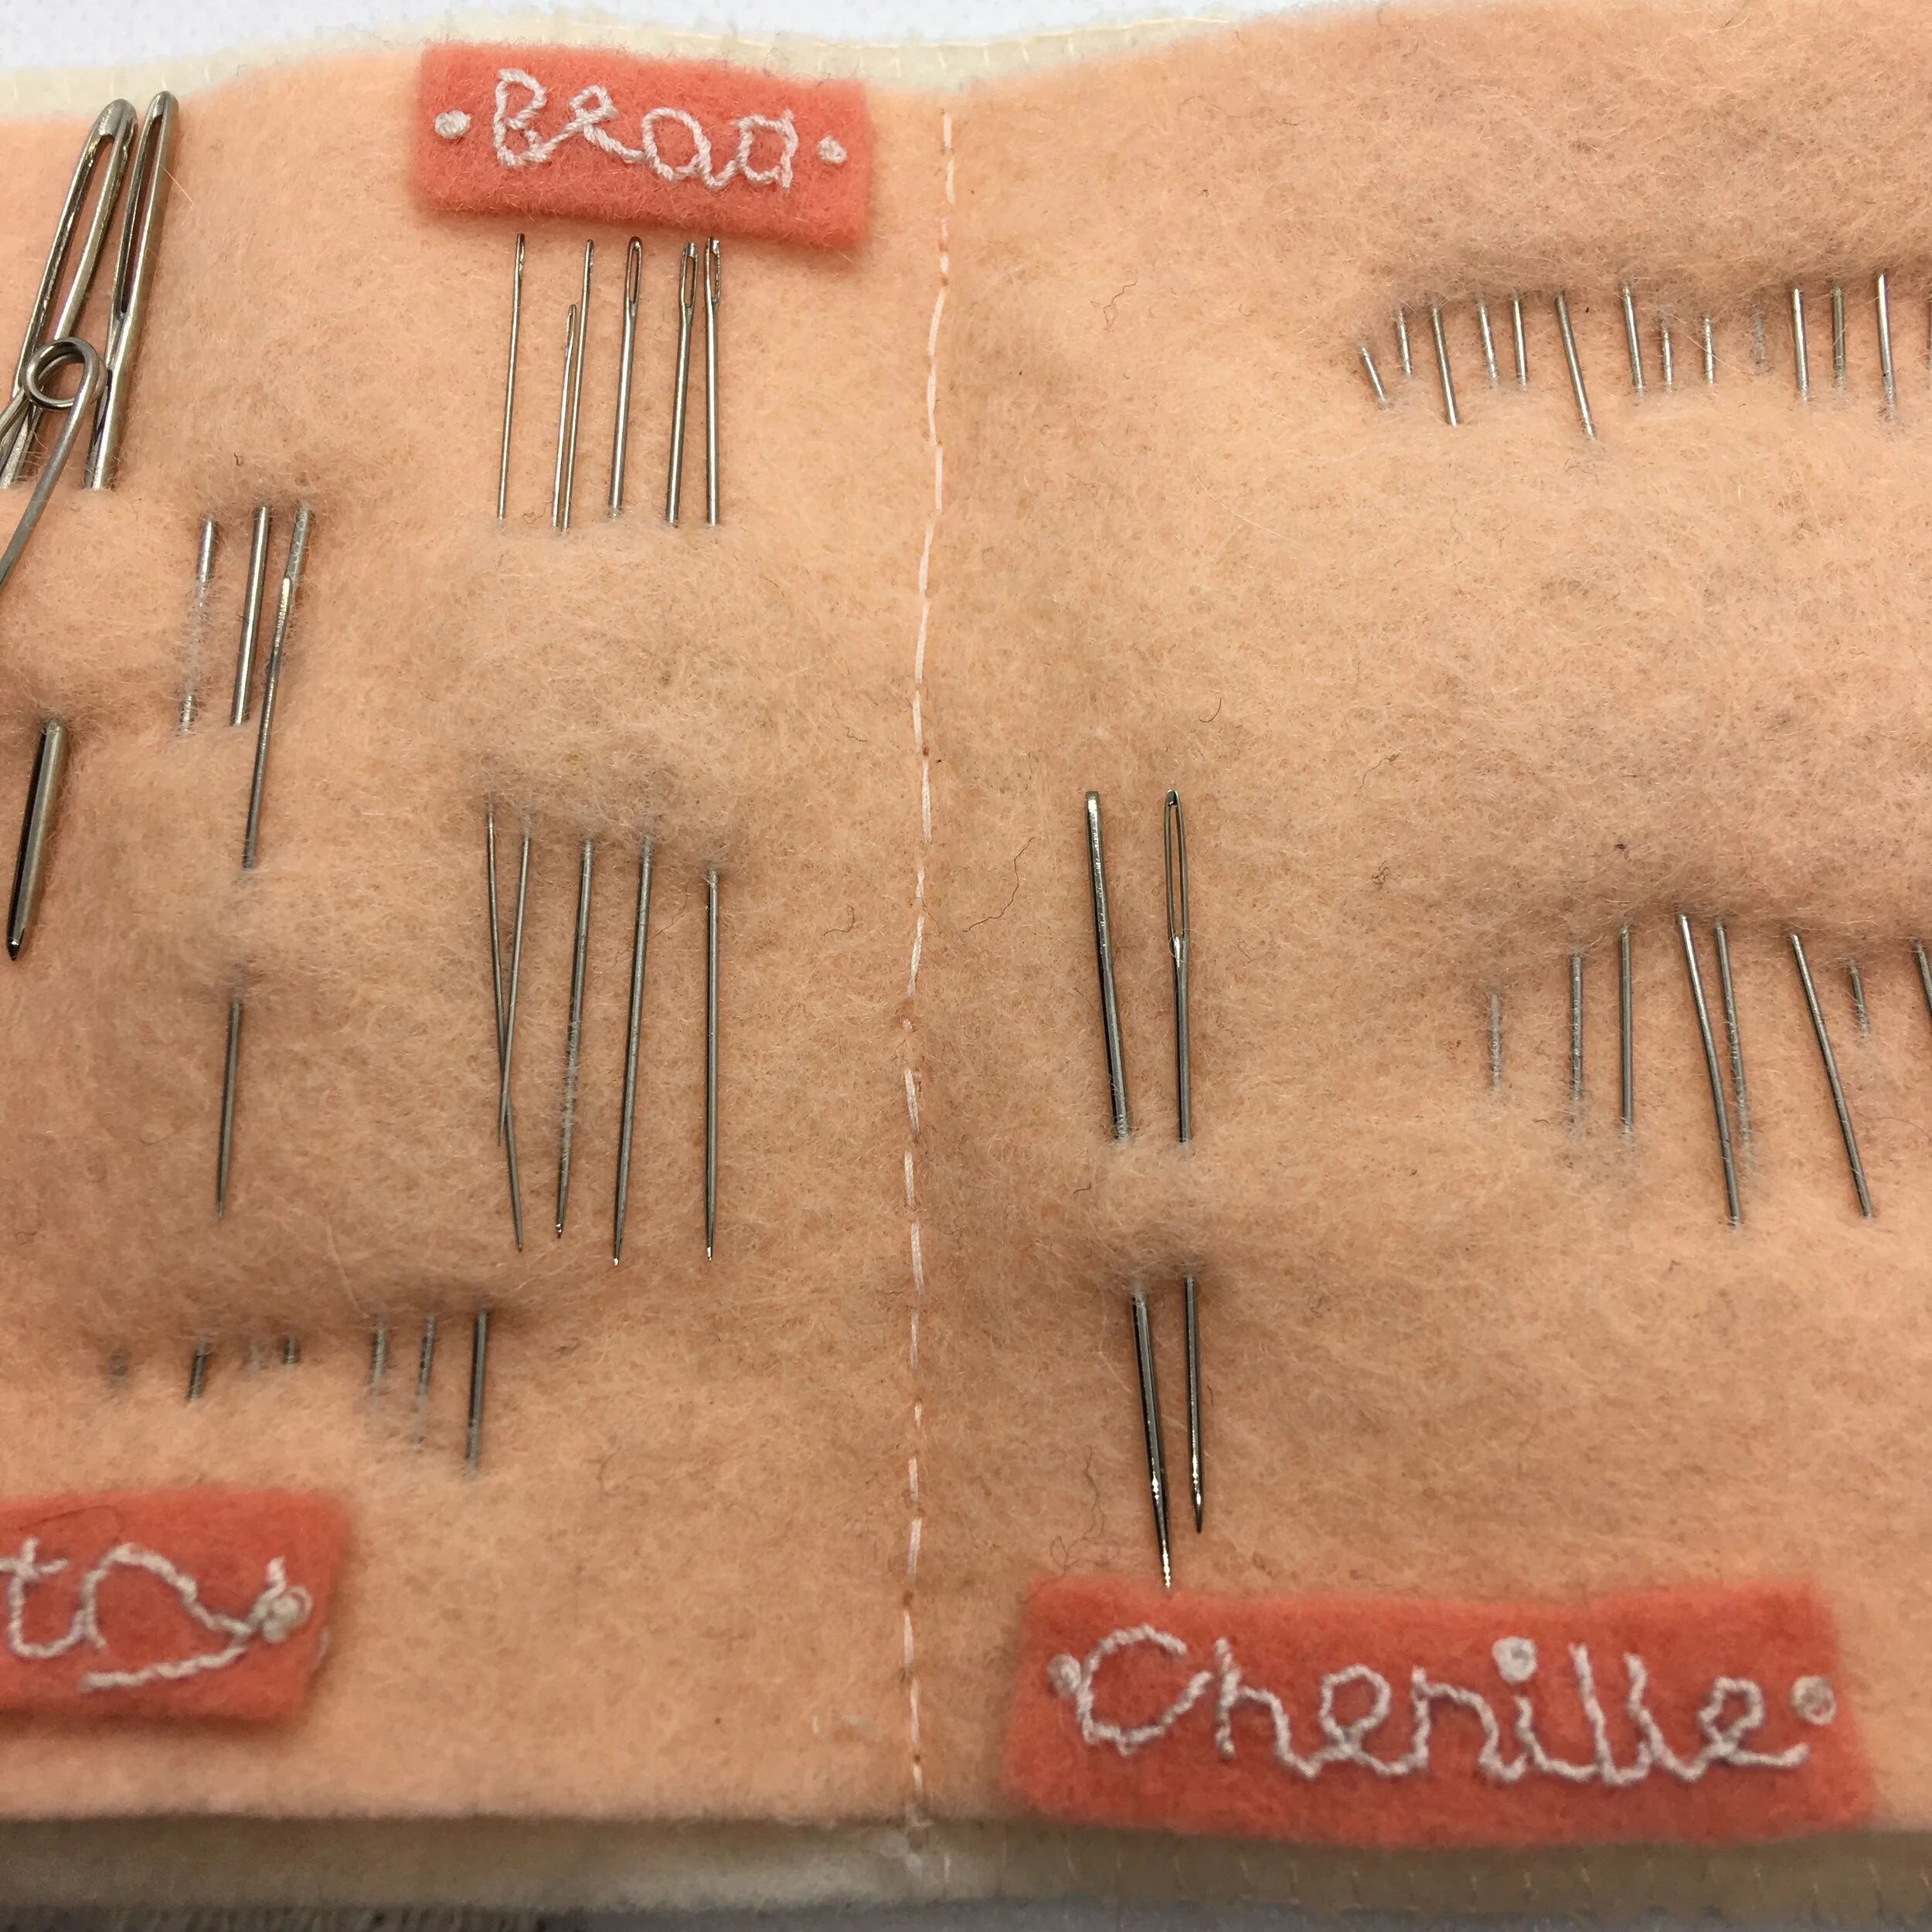
An image of the inside of a needle case.  The peach felts holds lots of different needles. Each group of needles is labelled with an embroidered name showing the needle type

Needle case

Needle cases are another way of storing needles that aren’t in use. I tend to use them for longer term storage rather than temporary storage for a project in between stitching sessions.

I made labels for my needle case in the hope that it would help me find the needles I needed more quickly.

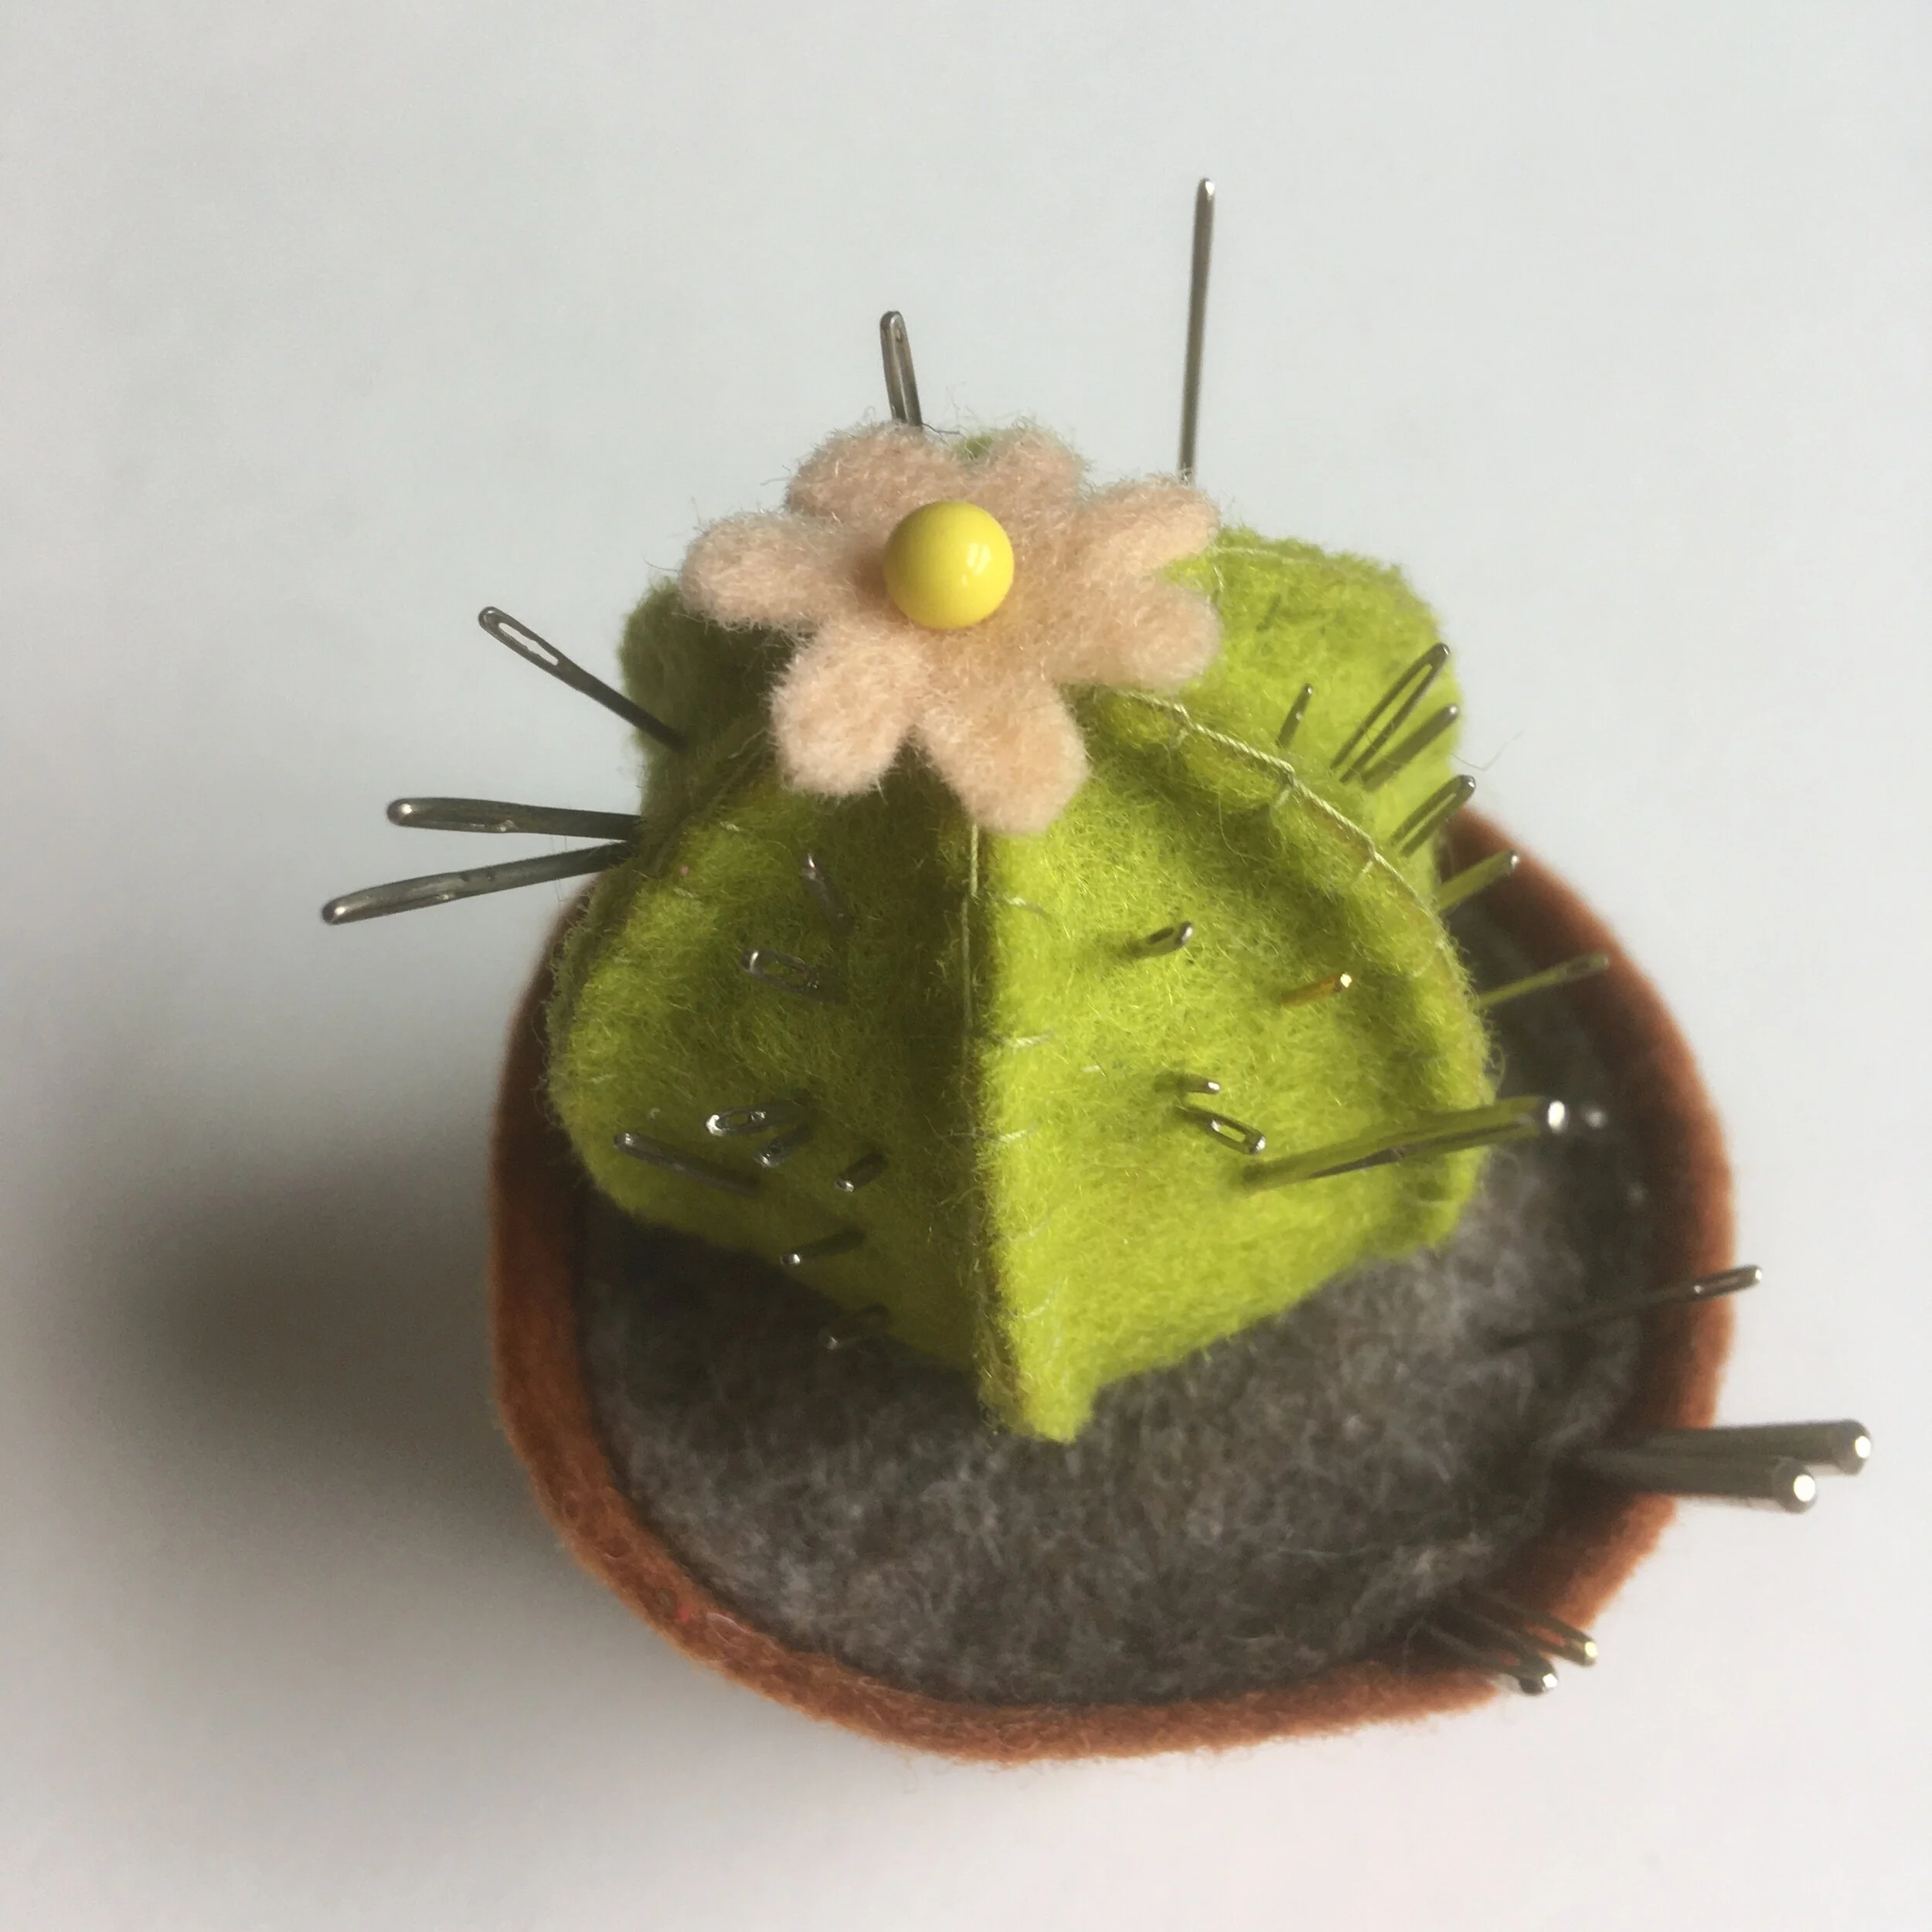
A picture of a cactus pincusion made from felt with a range of needles sticking out from it

Pin cushion

This is a short or long term storage for needles if you’d rather not use a needle minder or needle case. But a pin cushion can end up very spiky if you don’t have a few pins in it too.

Enjoyed this blog post? I share embroidery tips and a free embroidery pattern in my monthly newsletter. Sign up here to receive the newsletter on the 1st of each the month.
In tips 3 Tags Needles
Comment
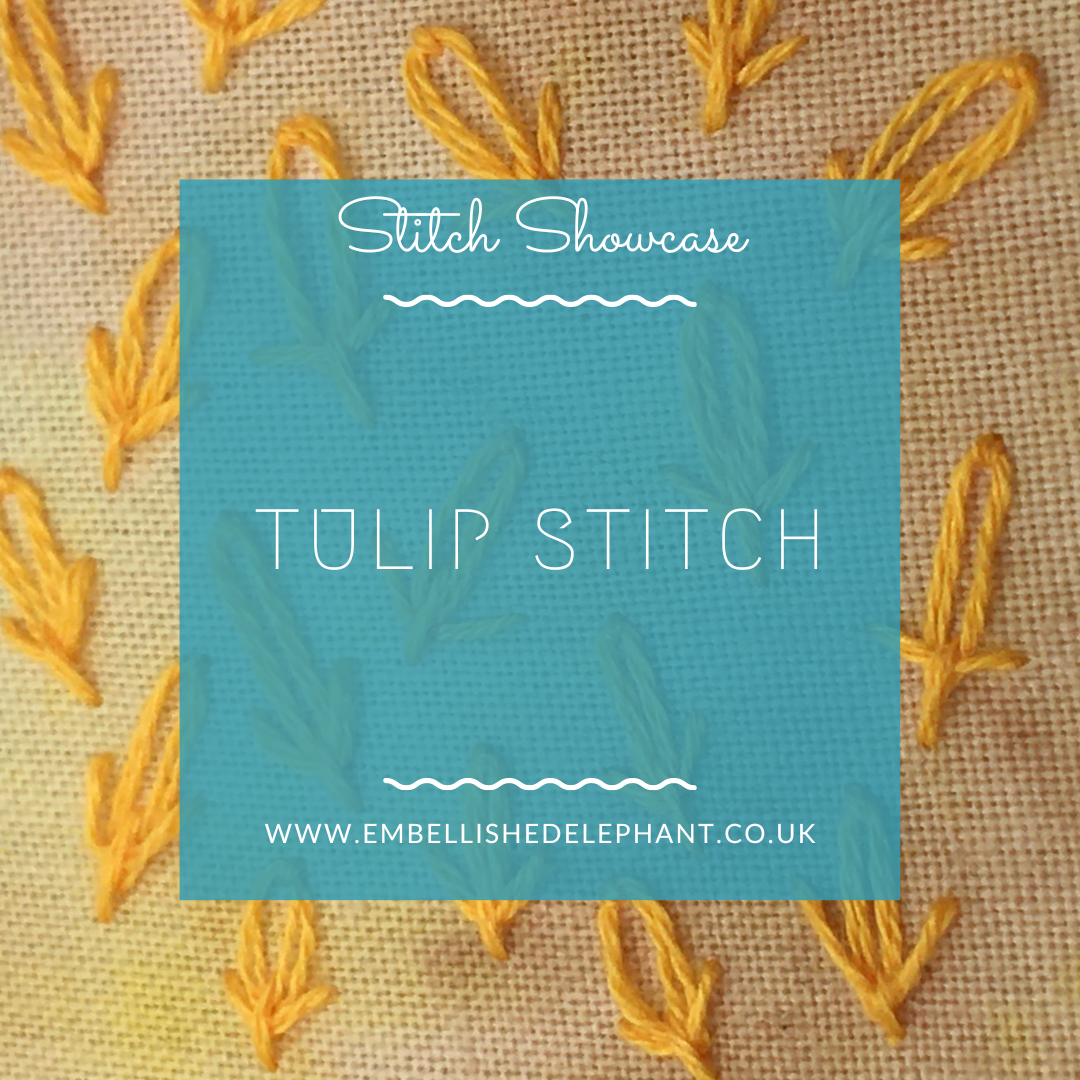
A picture of yellow fabric with small yellow stitches in the shape of tulips scattered. Overlaid is a blue square with white text saying - stitch showcase, tulip stitch, www.embellishedelephant.co.uk

Stitch Showcase: Tulip Stitch

October 6, 2021

I’ve been experimenting with a few stitches that I’ve not tried before - there are so many different stitches.

Tulip stitch is so called as it is meant to look like a tulip flower (I think it looks more like a flower bud!).

When I was designing my free tulip pattern earlier in the year, I considered trying to come up with a design to use tulip stitch but in the end went in a different direction.

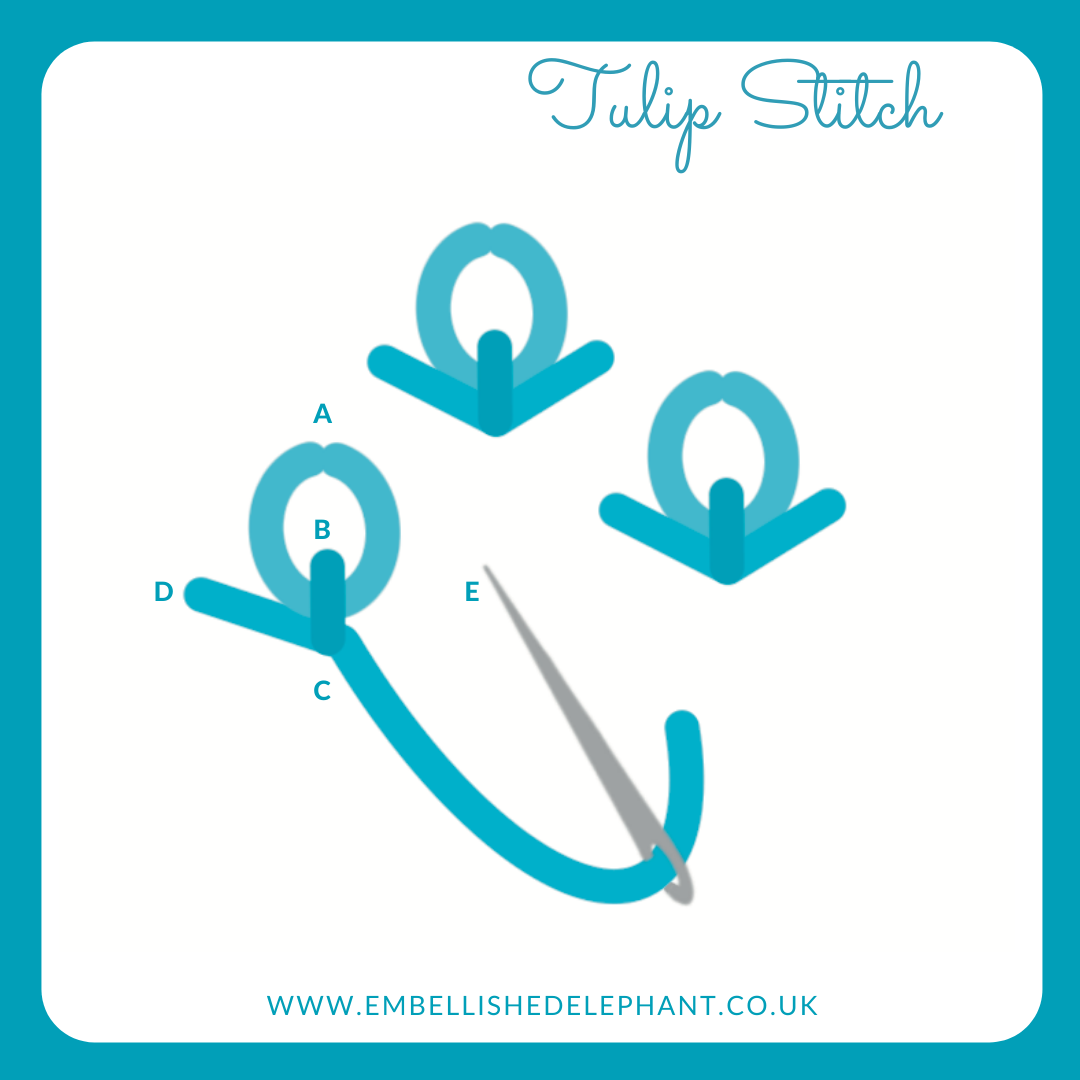
It’s based on a lazy daisy (or single chain) stitch, so if you are familiar with these, then this stitch just needs one extra element.

  • Create the lazy daisy stitch

  • At the bottom of the lazy daisy stitch add a small straight stitch, this will be the stem of the tulip so can be a little bit longer than the straight stitch normally used in a lazy daisy stitch

  • To create the leaf element, bring the needle up through the fabric to one side of the tulip

  • Pass the needle underneath the ‘stem’ but don’t pierce the fabric

  • Take the needle down through the fabric to the other side of the tulip as symmetrically as you can.

An illustration showing step by step guide to tulip stitch

Enjoyed this blog post? I share embroidery tips and a free embroidery pattern in my monthly newsletter. Sign up here to receive the newsletter on the 1st of each the month.
In stitch showcase 2 Tags Stitch Showcase, Isolated Stitch
Comment
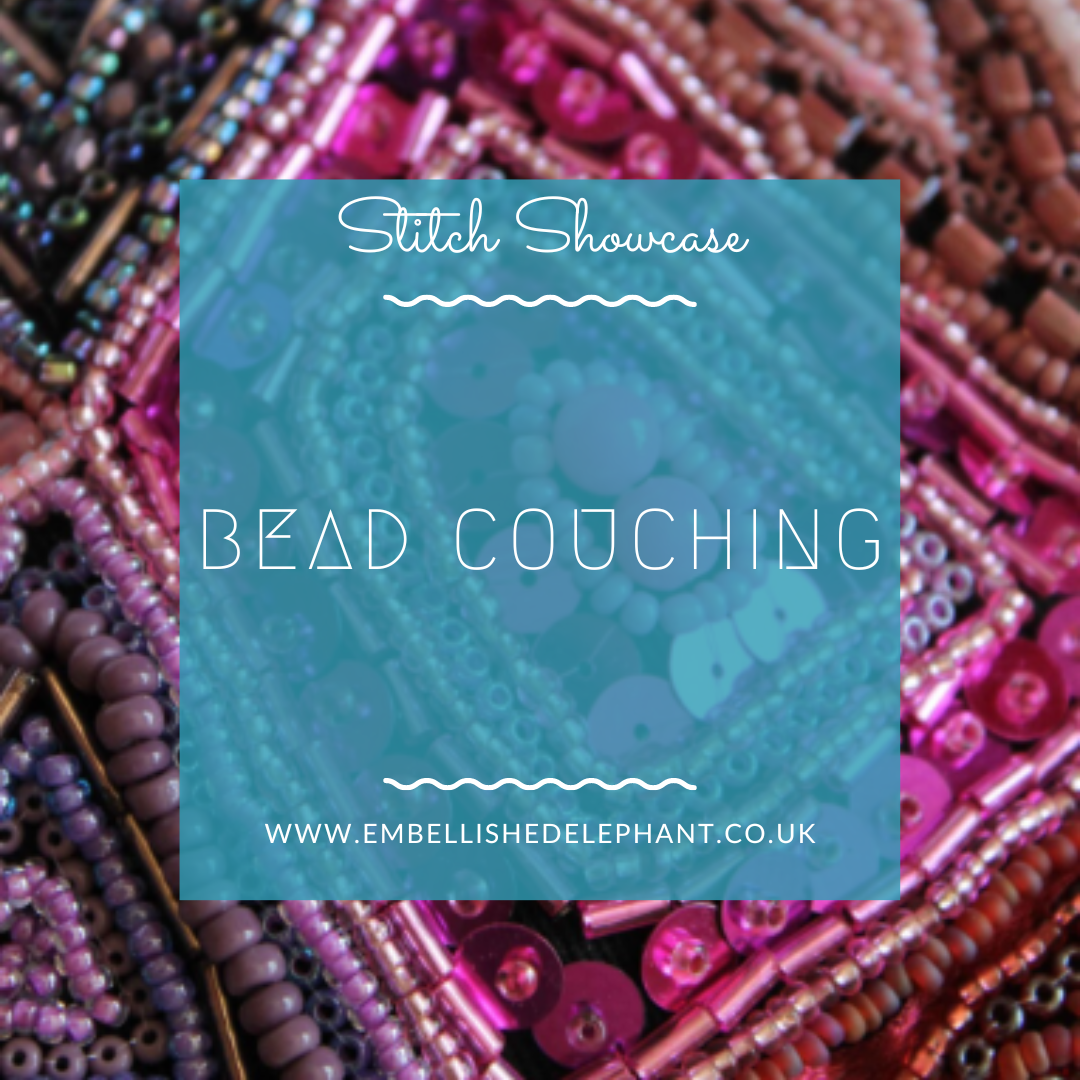
A picture of pink bead couching rows. Overlaid is a blue square with white text saying - stitch showcase, bead couching, www.embellishedelephant.co.uk

Stitch Showcase: Bead Couching

September 22, 2021

Beads were my first crafting love affair. One summer holiday I went to a workshop on bead weaving and was hooked. My first craft business was selling bead woven bracelets to classmates at school.

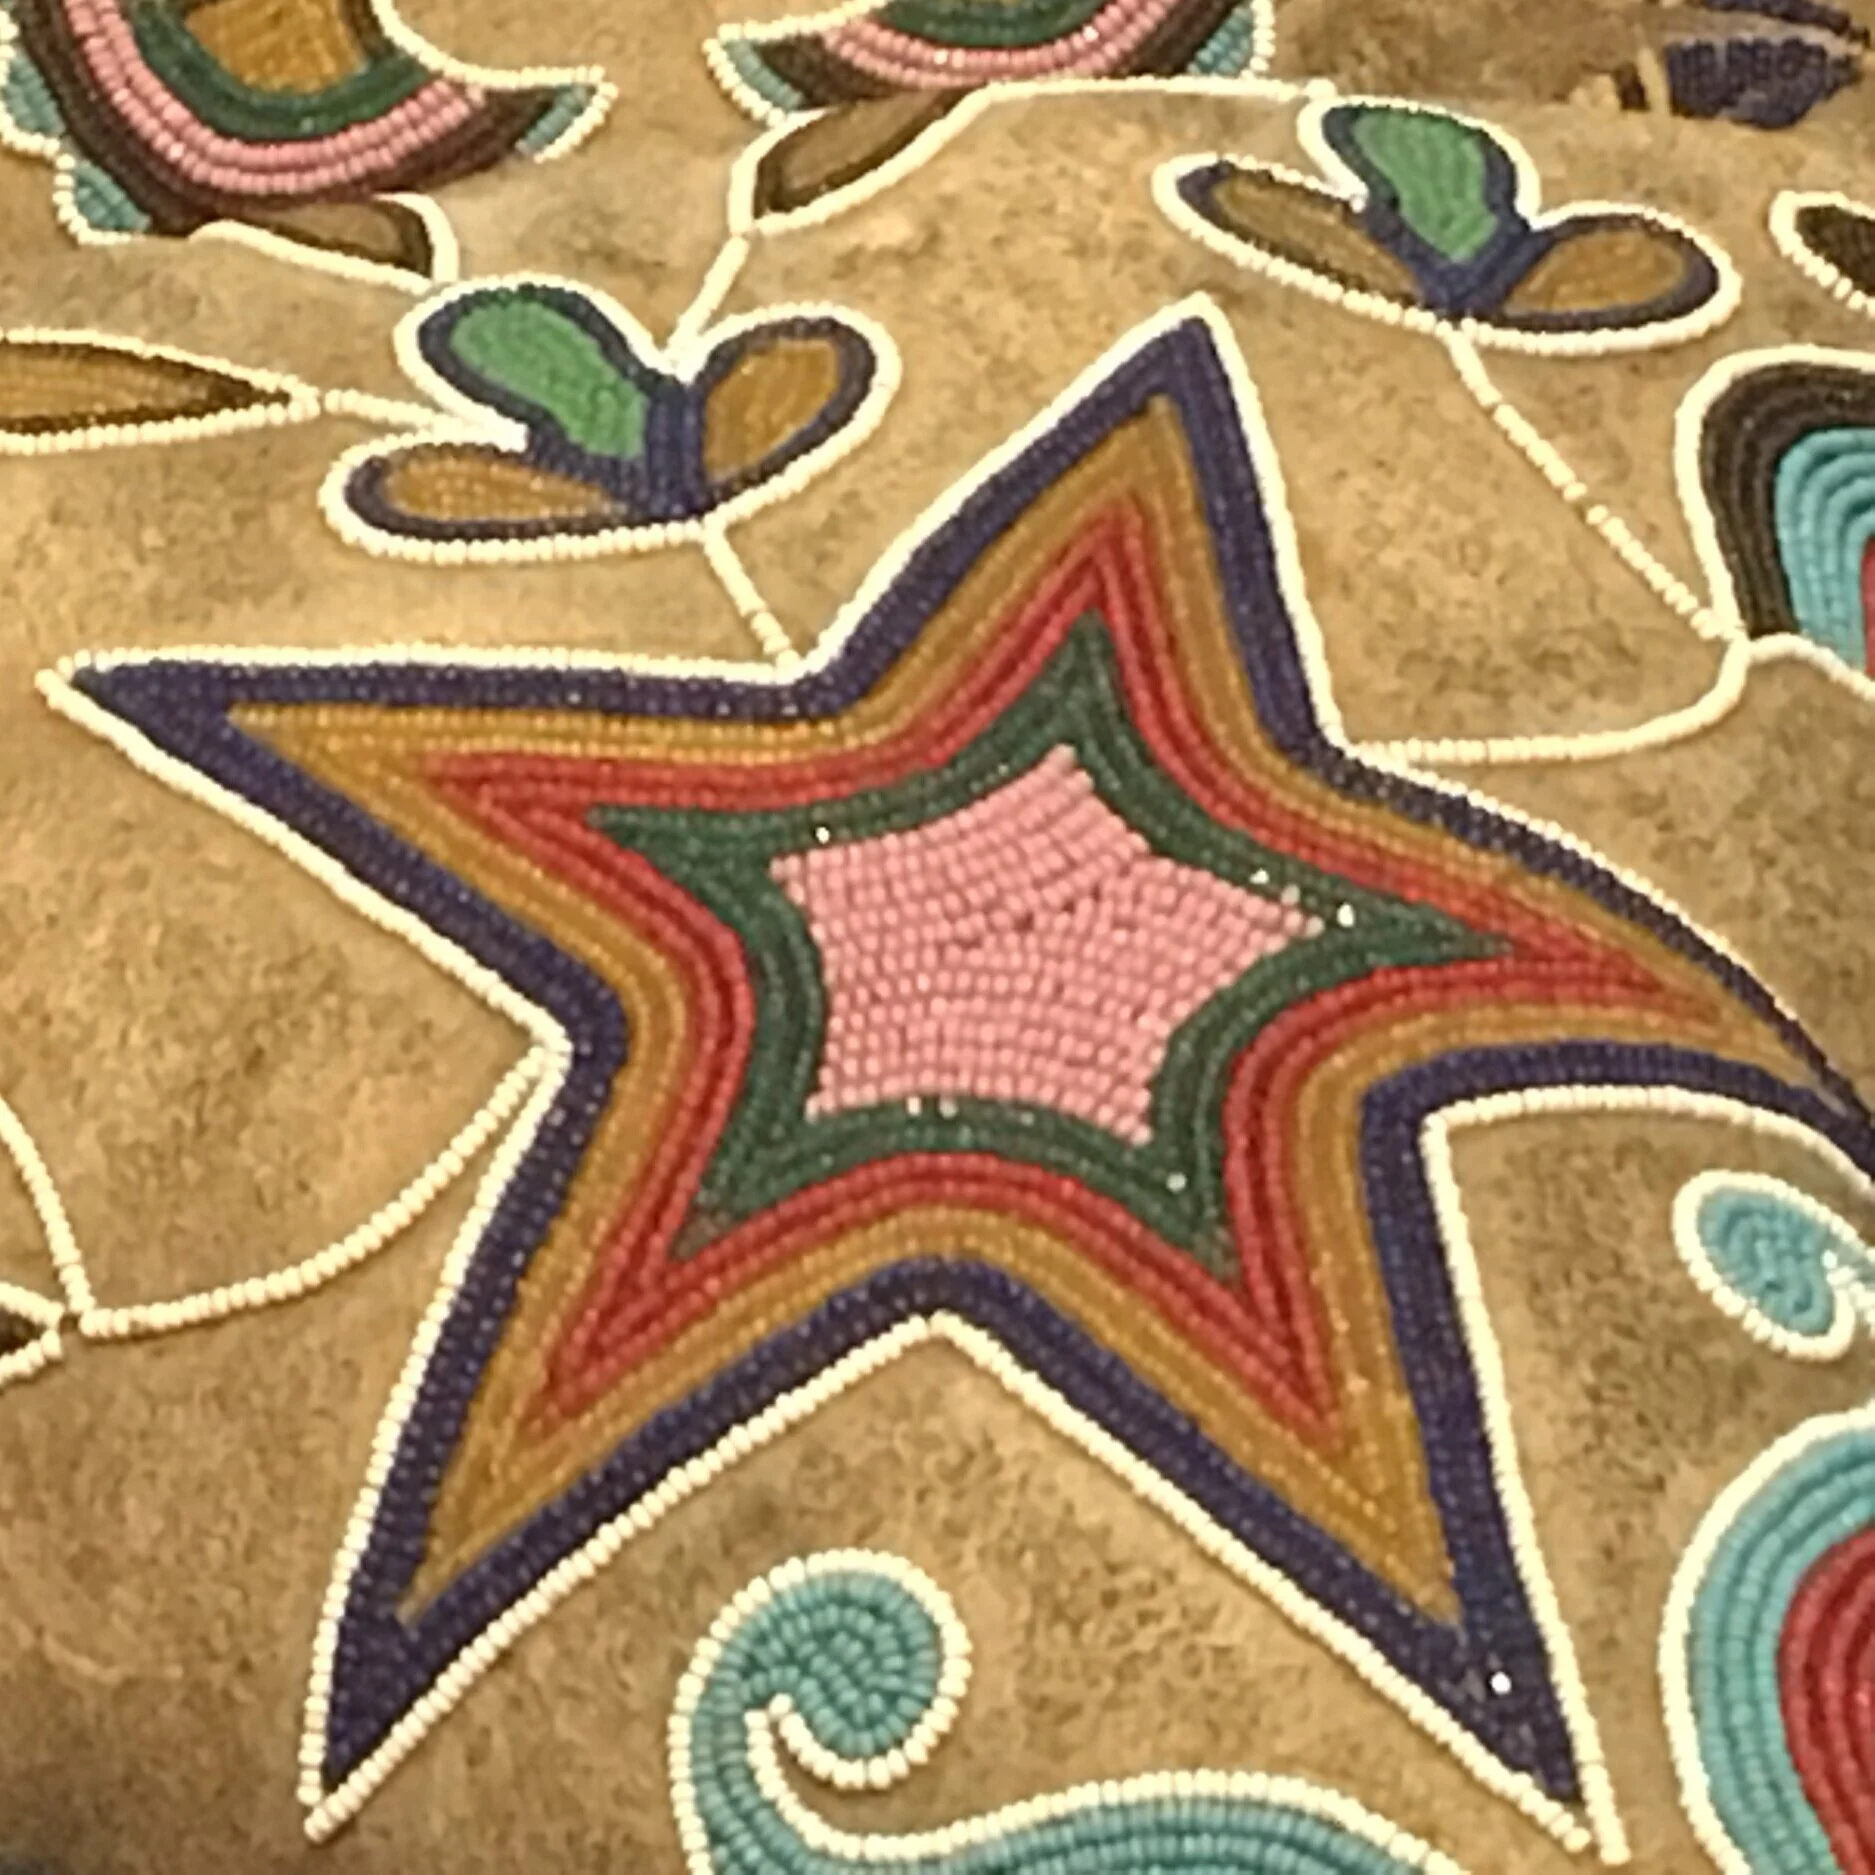
As my interest in beads developed I learned more about the techniques Native Americans used beads to decorate their belongings. One of the techniques used is bead couching.

Couching in embroidery is when small stitches are used to hold a thread on the surface of fabric. The principle with bead couching is very similar.

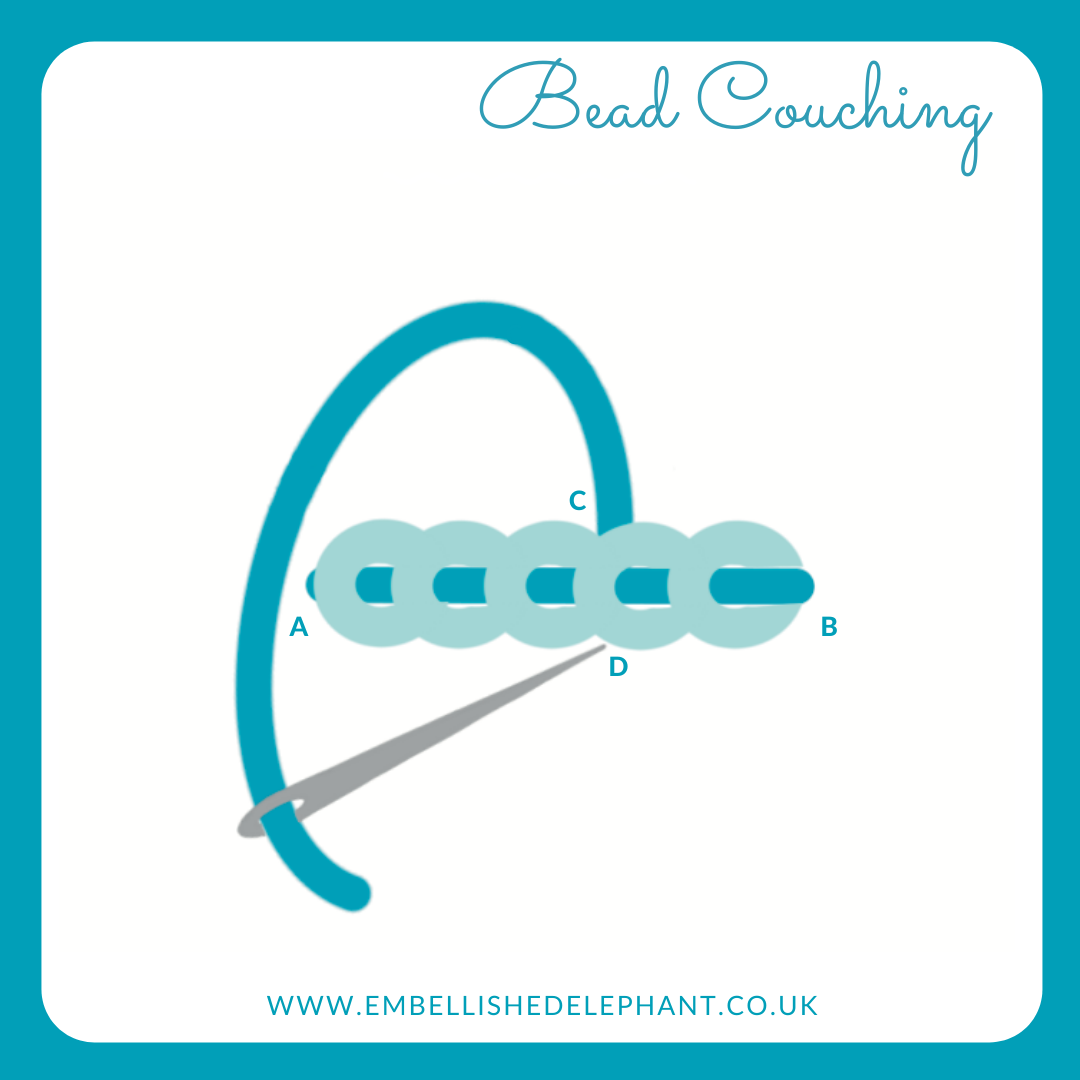
  • Bring the needle up through the fabric (A), thread on a small number of beads (between 3-6 is ideal)

  • Take the needle down through the fabric at the end of the row of beads (B) as close to the last bead as possible

  • Bring the needle up through the fabric about 2 or 3 beads along and make a tiny stitch over the string of beads to couch the string to the fabric.

An illustration of how to couch beads. The background is white and the illustration is shades of blue

An alternative method is:

  • Bring the needle up through the fabric (A), thread on a small number of beads (between 3-6 is ideal)

  • Take the needle down through the fabric and bring it up through the fabric about 2-3 beads along

  • Pass the needle through these two beads and then thread 3 or 4 beads onto the needle and repeat

This technique of passing the needle through the string of beads helps to make sure the beads sit flat to the fabric and there are no gaps between each bead.

A close up image of some native american beadwork in the shape of stars and flowers on leather

If you would like to have a go at bead couching, then why not take a look at my floral sampler kit where you can try this technique alongside a range of other stitches.

Enjoyed this blog post? I share embroidery tips and a free embroidery pattern in my monthly newsletter. Sign up here to receive the newsletter on the 1st of each the month.
In stitch showcase 2 Tags Stitch Showcase, Line Stitch, Filling Stitch
Comment
A picture of a A5 pip box with the contents of an embroidery kit inside. Overlaid is a blue square with with text saying - hand embroidery, what to do with the box once you've made your kit, www.embellishedelephant.co.uk

What to do with the box once you've made your kit

September 15, 2021

The kits I design are sent out in an A5 mailer box. I chose these boxes for a number of reasons including that they are recyclable and they fit through the letterbox.

But what do you do with the box once you’ve stitched your kit? You can store the instructions and any leftover materials in it but here are some other ideas.

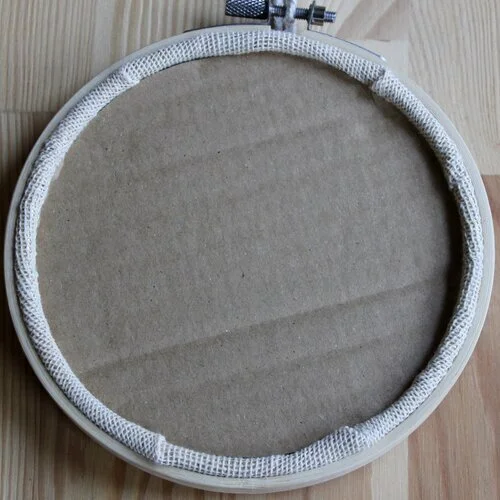
A picture of the back of an embroidery hoop where the fabric is tucked in and held in place with a circle of cardboard

Use it to back your hoop

This is my current favourite way to back a finished embroidery hoop as it is so simple.

Draw round the inner hoop on a bit of cardboard. Cut it out inside the line. Gather the lose fabric at the back of your hoop (you can sometimes get away with not having done this). The cardboard backing should fit snuggly in the back of the hoop. If it doesn’t fit then carefully trim a small amount all the way around.

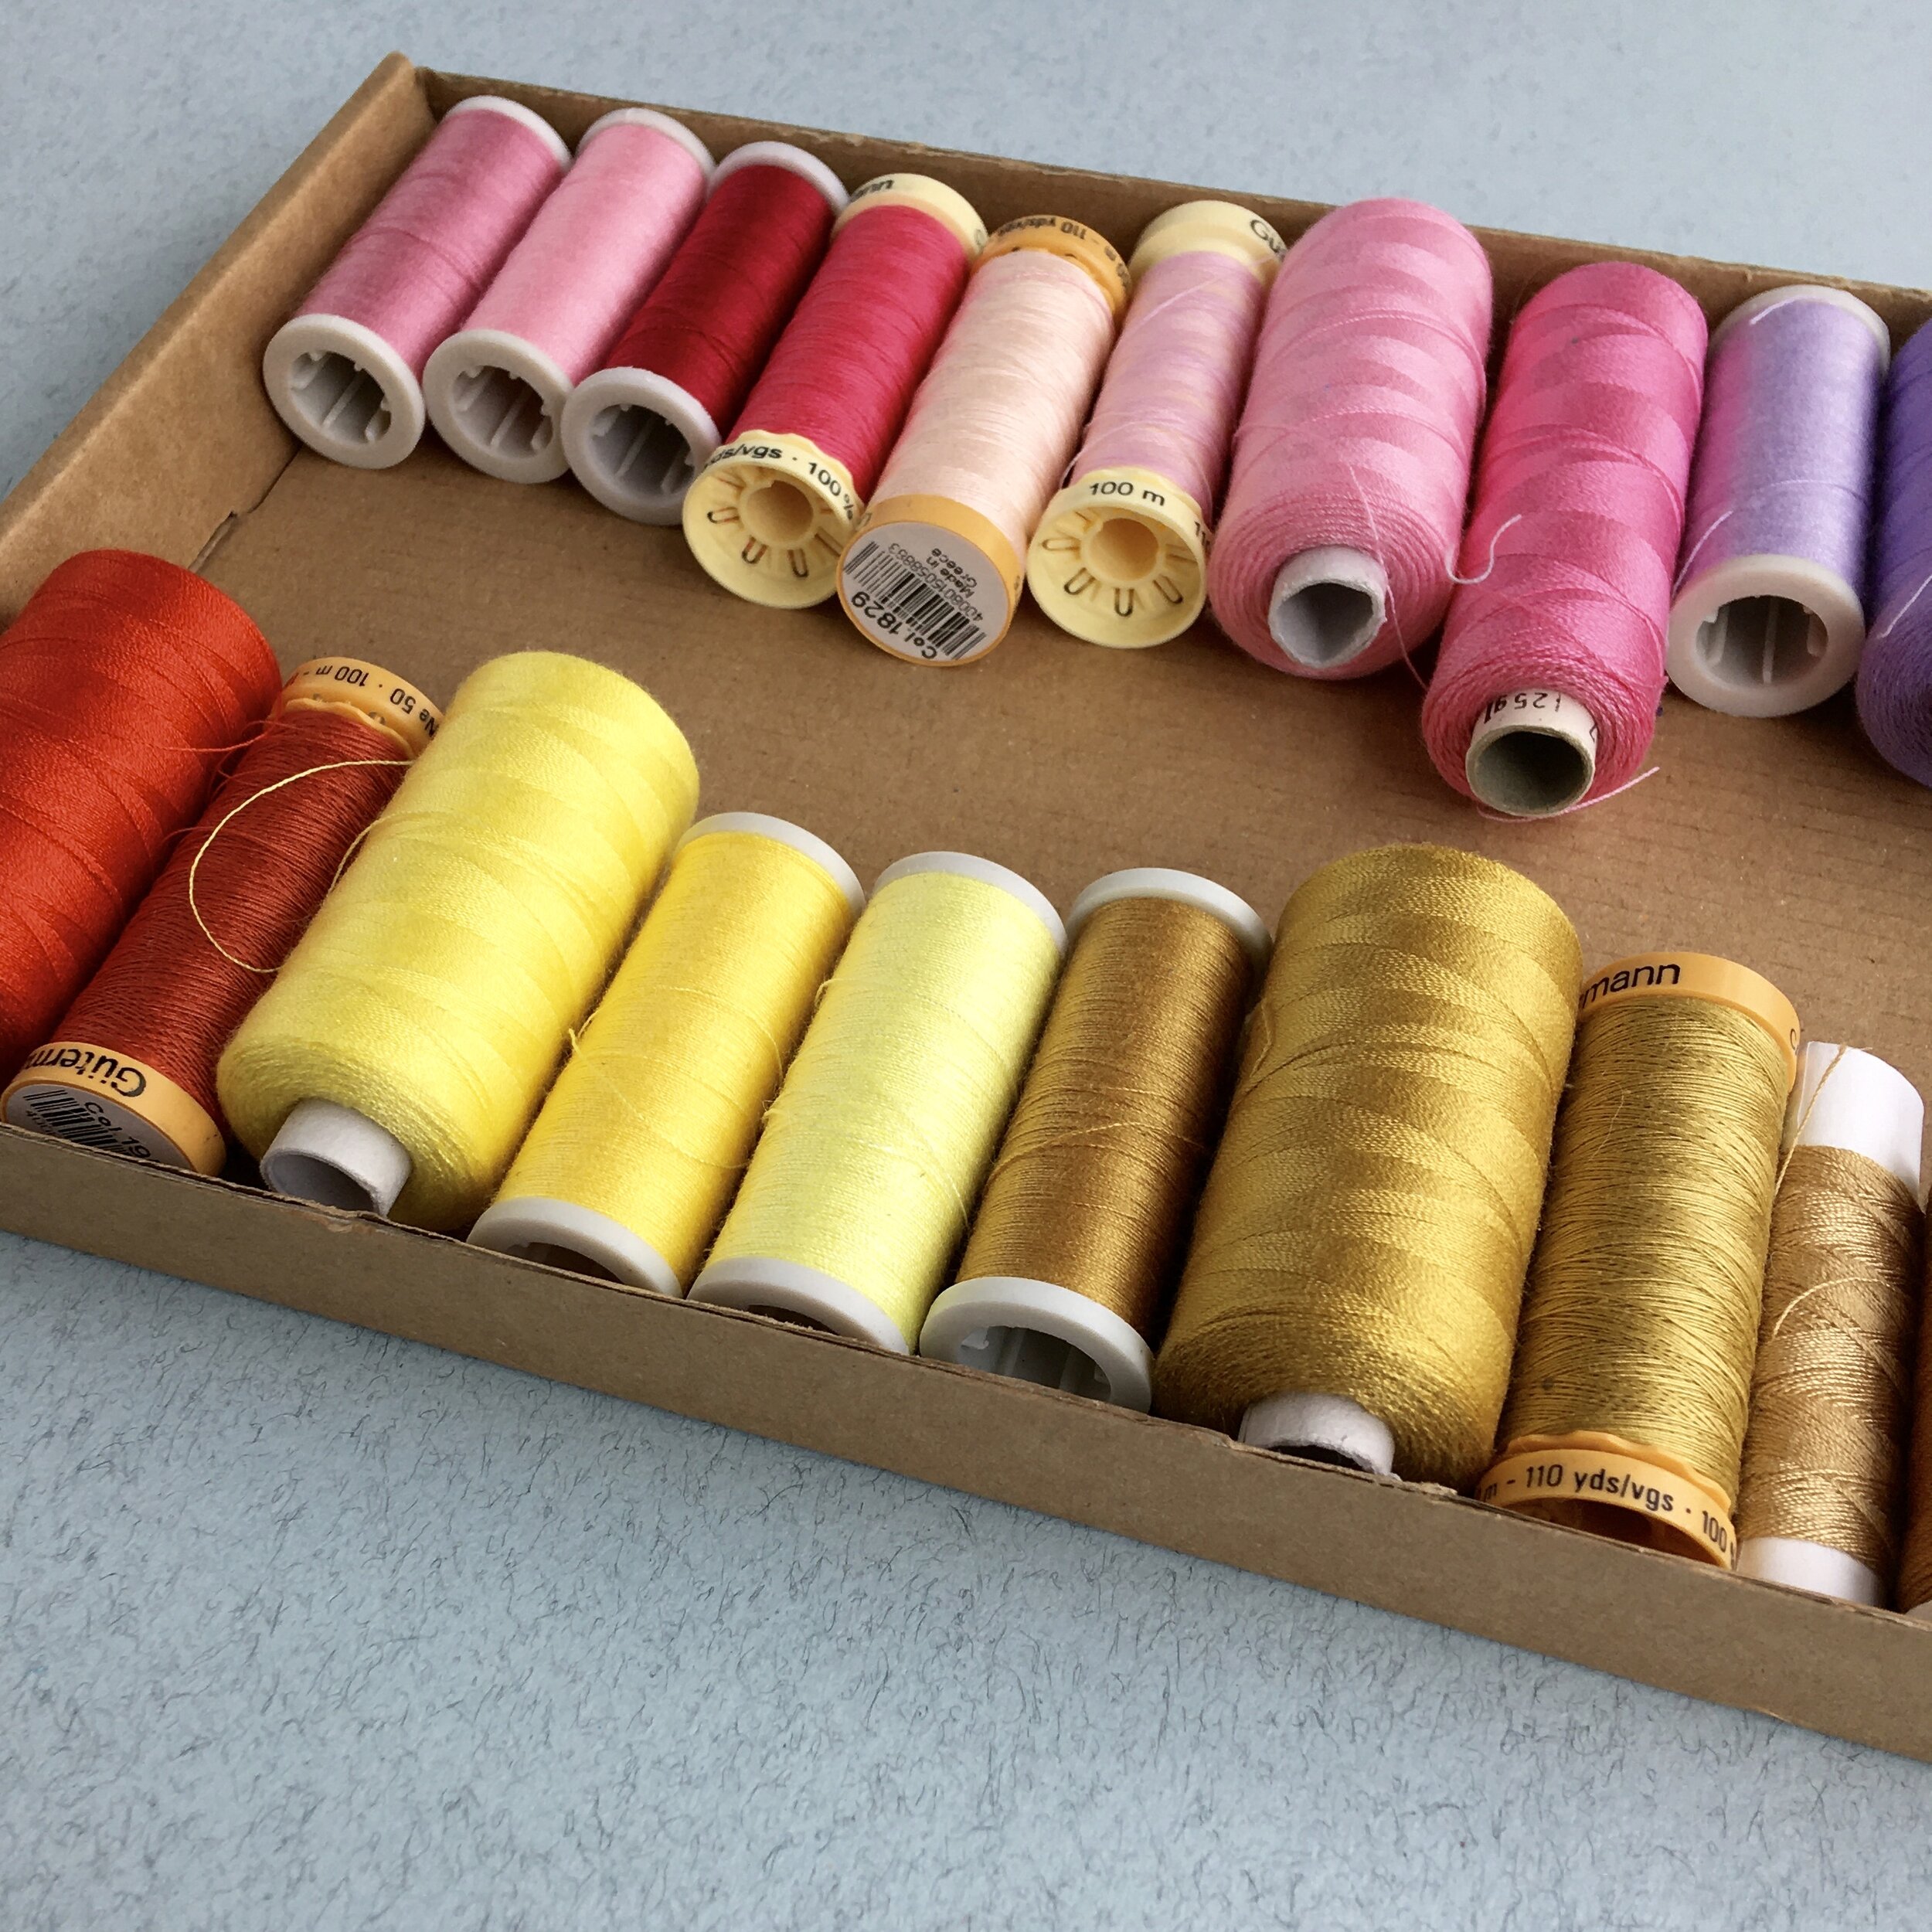
A picture of an A5 large letter box with the lid cut off to create a tray. In the tray are spools of thread in pinks and yellows

Create a tray to store your craft project/materials

If the box is damaged or you’ve used the top of the box to back your hoop then the rest of the box makes a great storage tray.

I’ve recently used some of these boxes to organise my sewing threads. Previously all of my sewing threads were jumbled up in a draw in my craft cupboard and it was difficult to see whether I had the right colours for my projects.

Using these boxes as trays has really helped to organise this drawer and they stack neatly on top of each other.

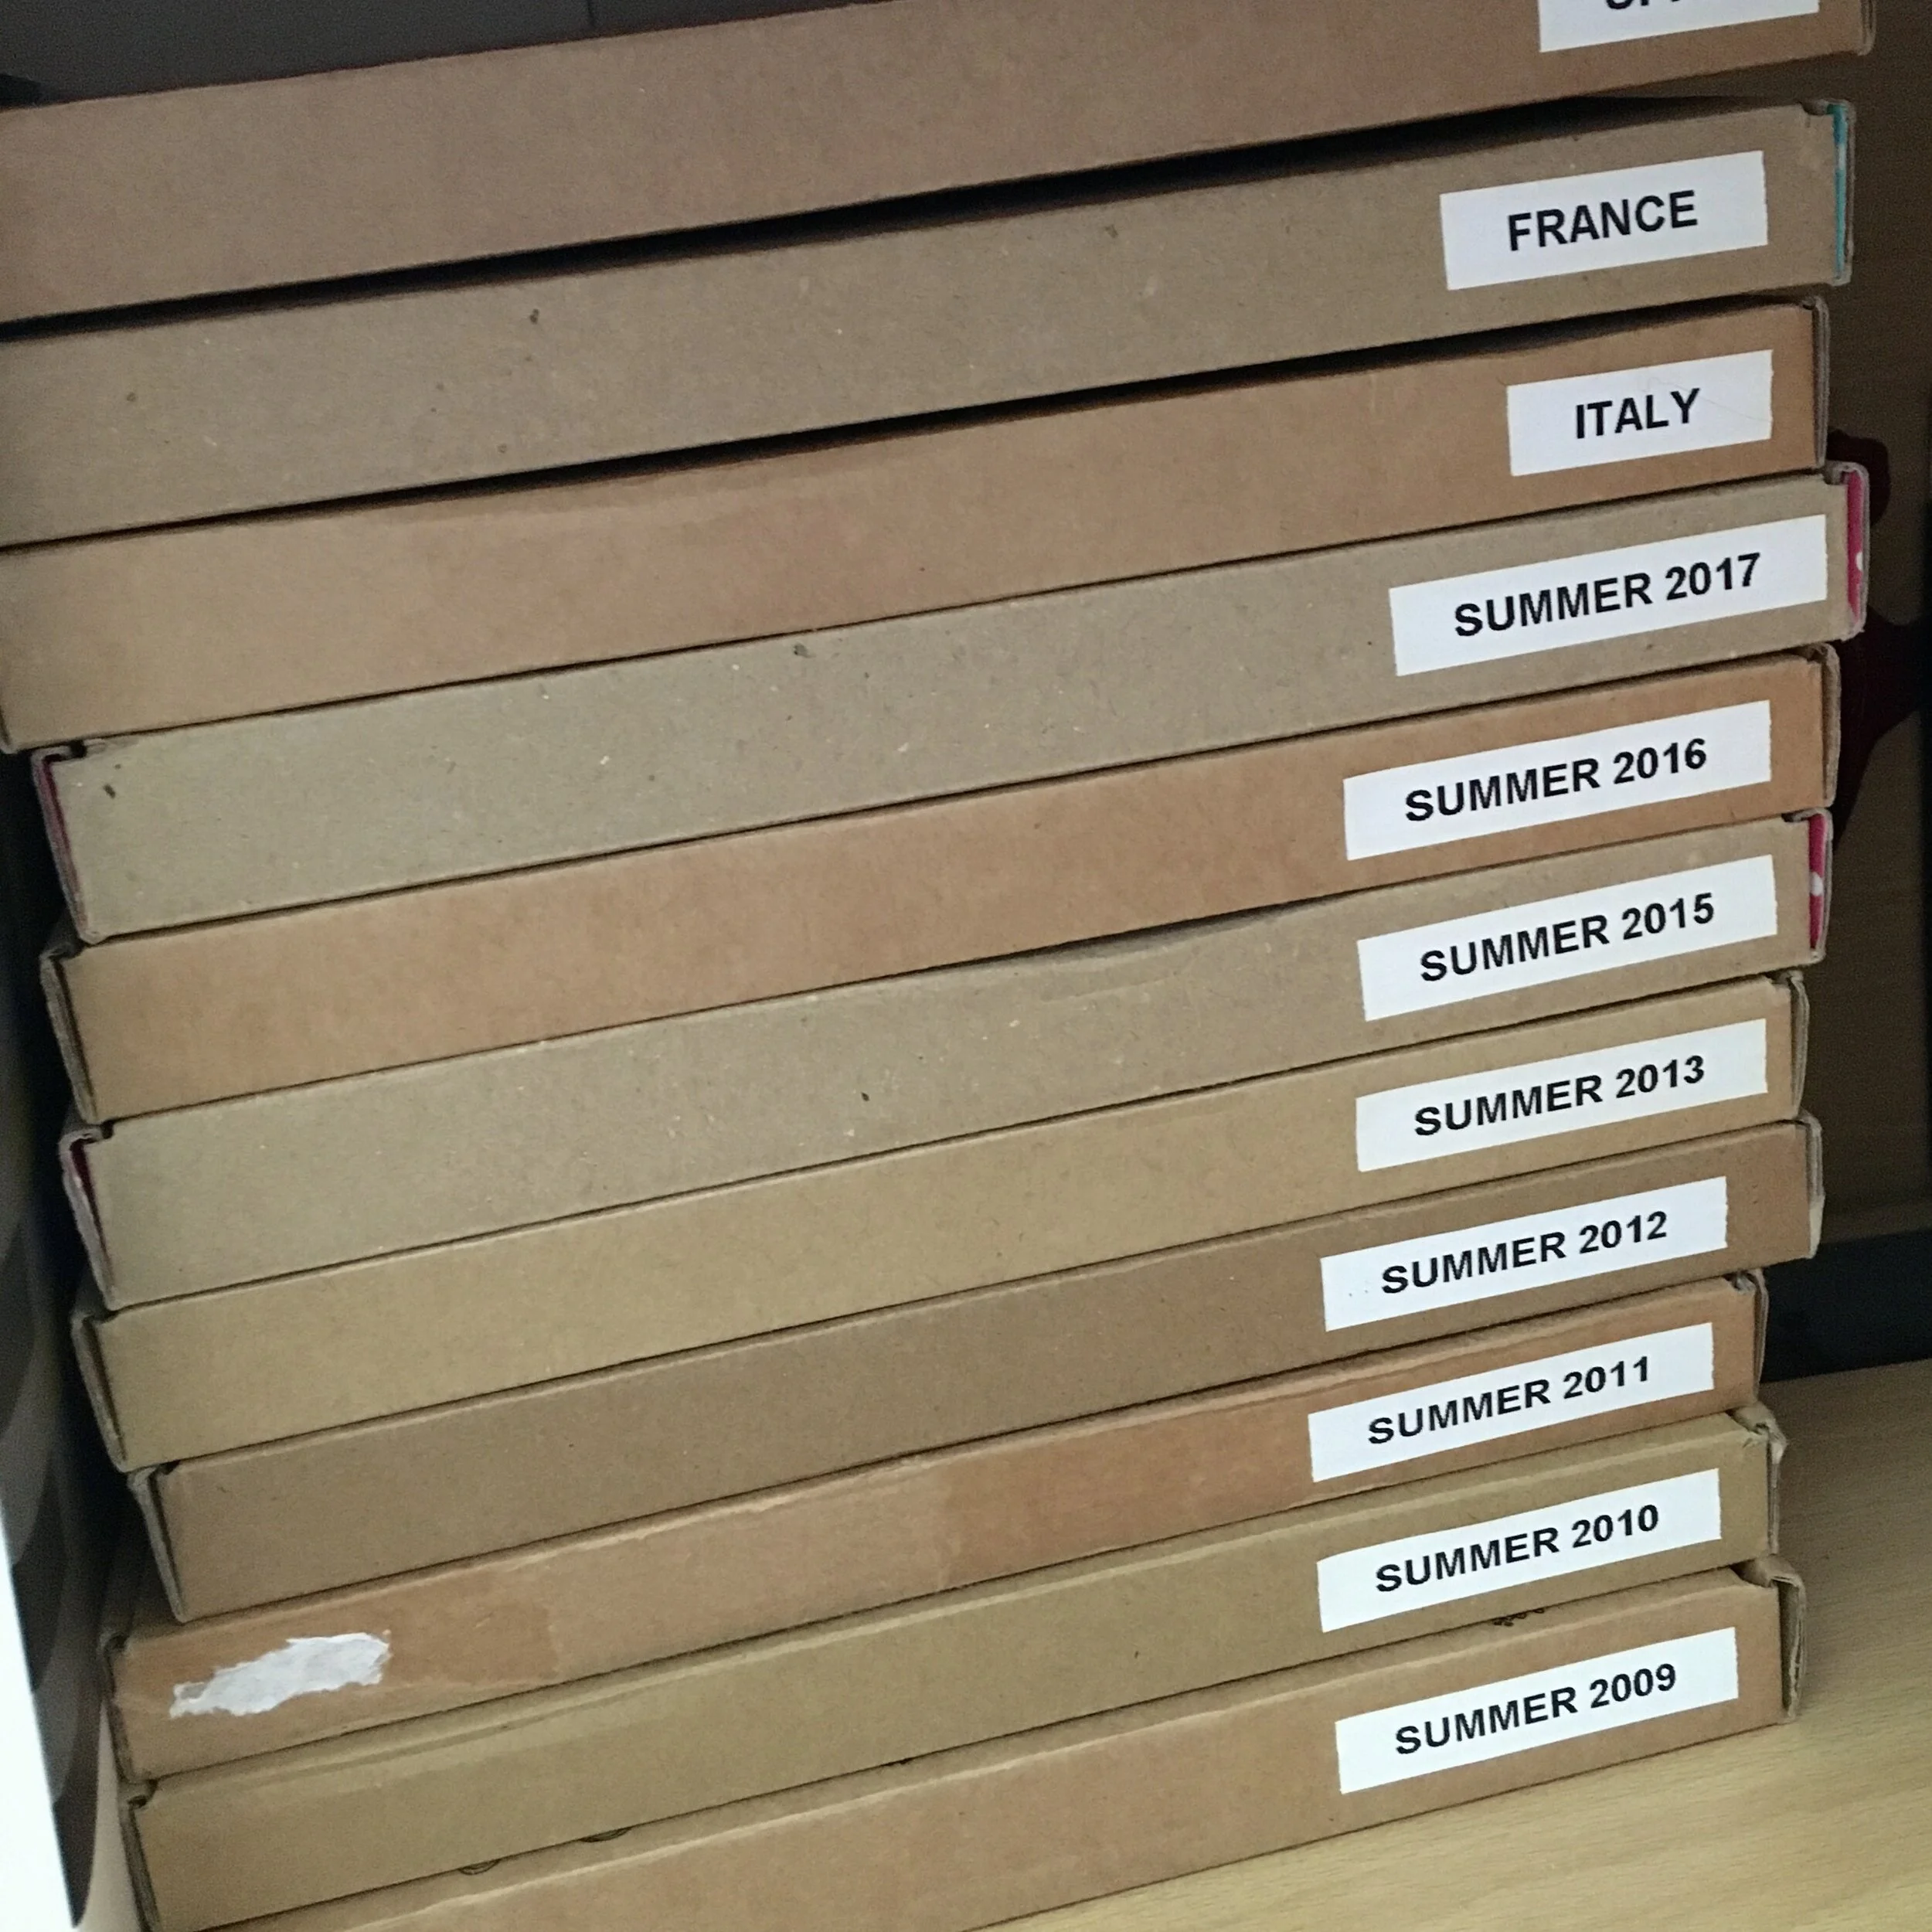
A stack of A5 large letter postal boxes with labels on the right hand spine

Store keepsakes

Whenever I come back from travelling I have a bunch of little items such as museum entrance tickets, postcards etc that I keep as reminders of the trip. These boxes are perfect for storing all of this bits and pieces in.

You can keep the box plain (I remove all the postage labels etc) or you can cover it in decorative paper. I label all my boxes so that I can easily find what I need when I want a trip down memory lane.

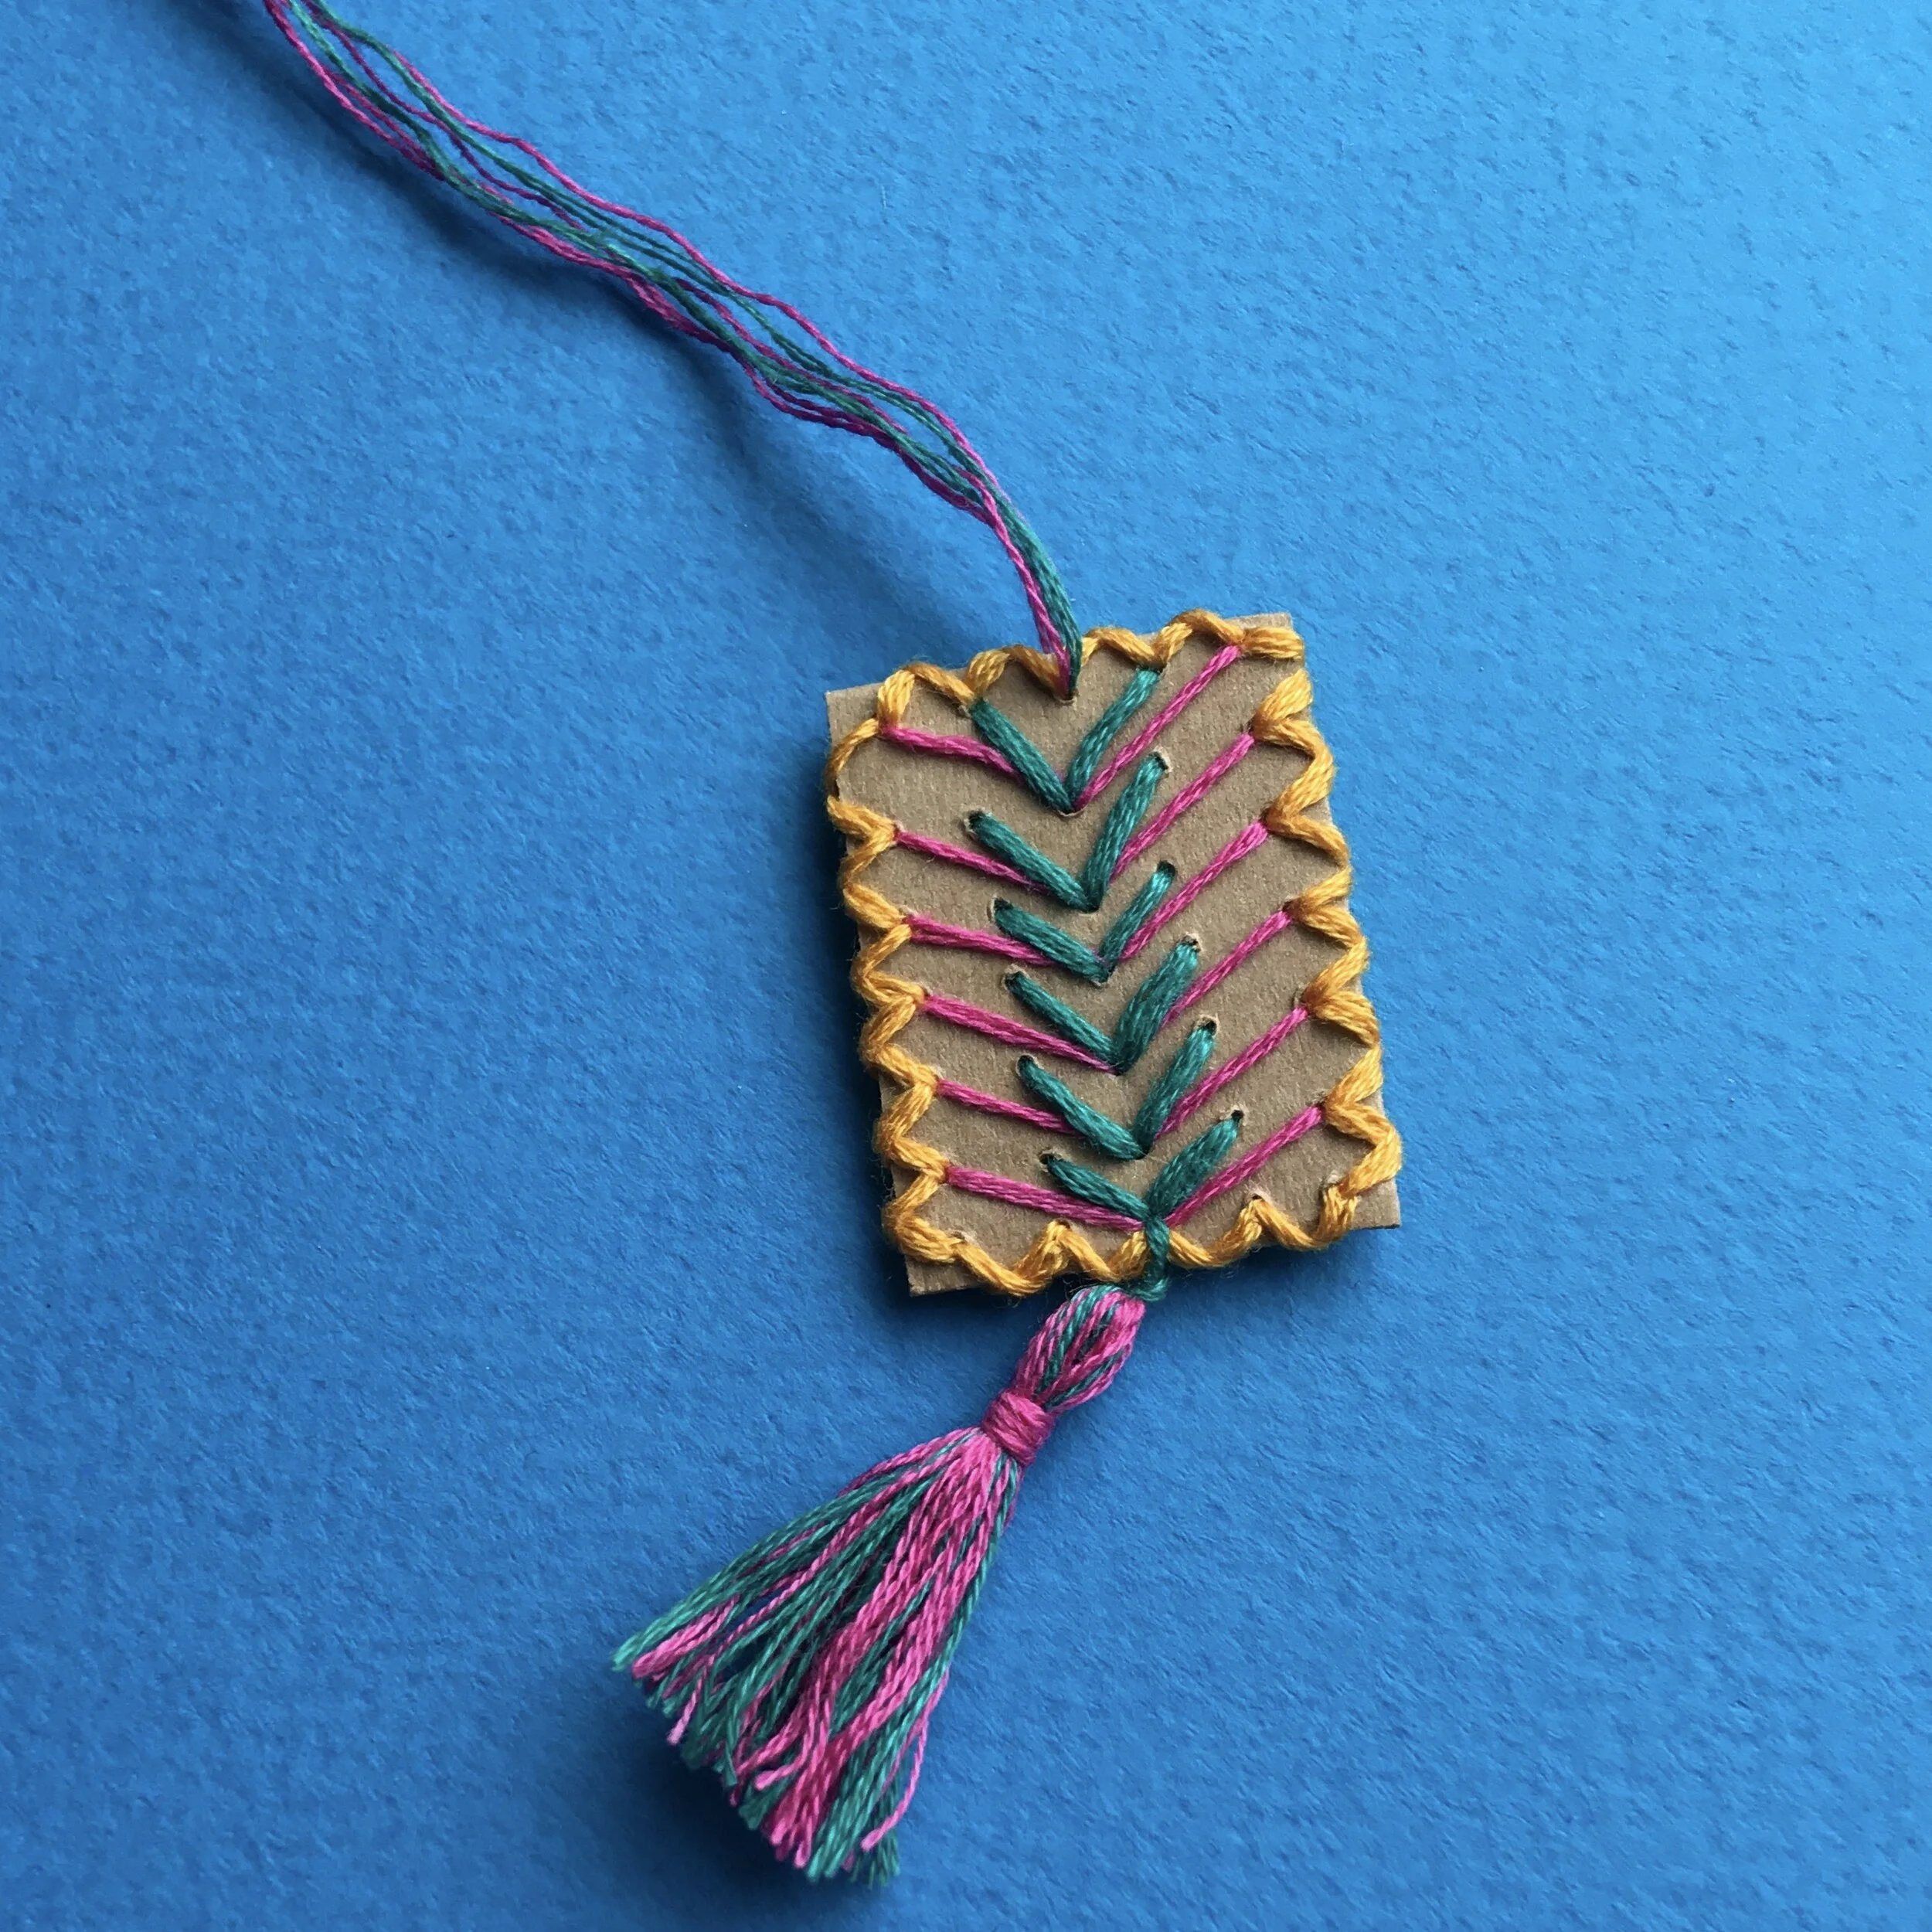
A picture of a small rectangle of cardboard with embroidered details and a tassel at the bottom

Embroidered cardboard jewellery

A great way to use up any embroidery thread from your kit as well as the cardboard box.

Cut out a shape from your box & plan your design. Create holes for you to stitch through using a pin and something to protect your surface such as a cutting mat (or another piece of cardboard). Get stitching!

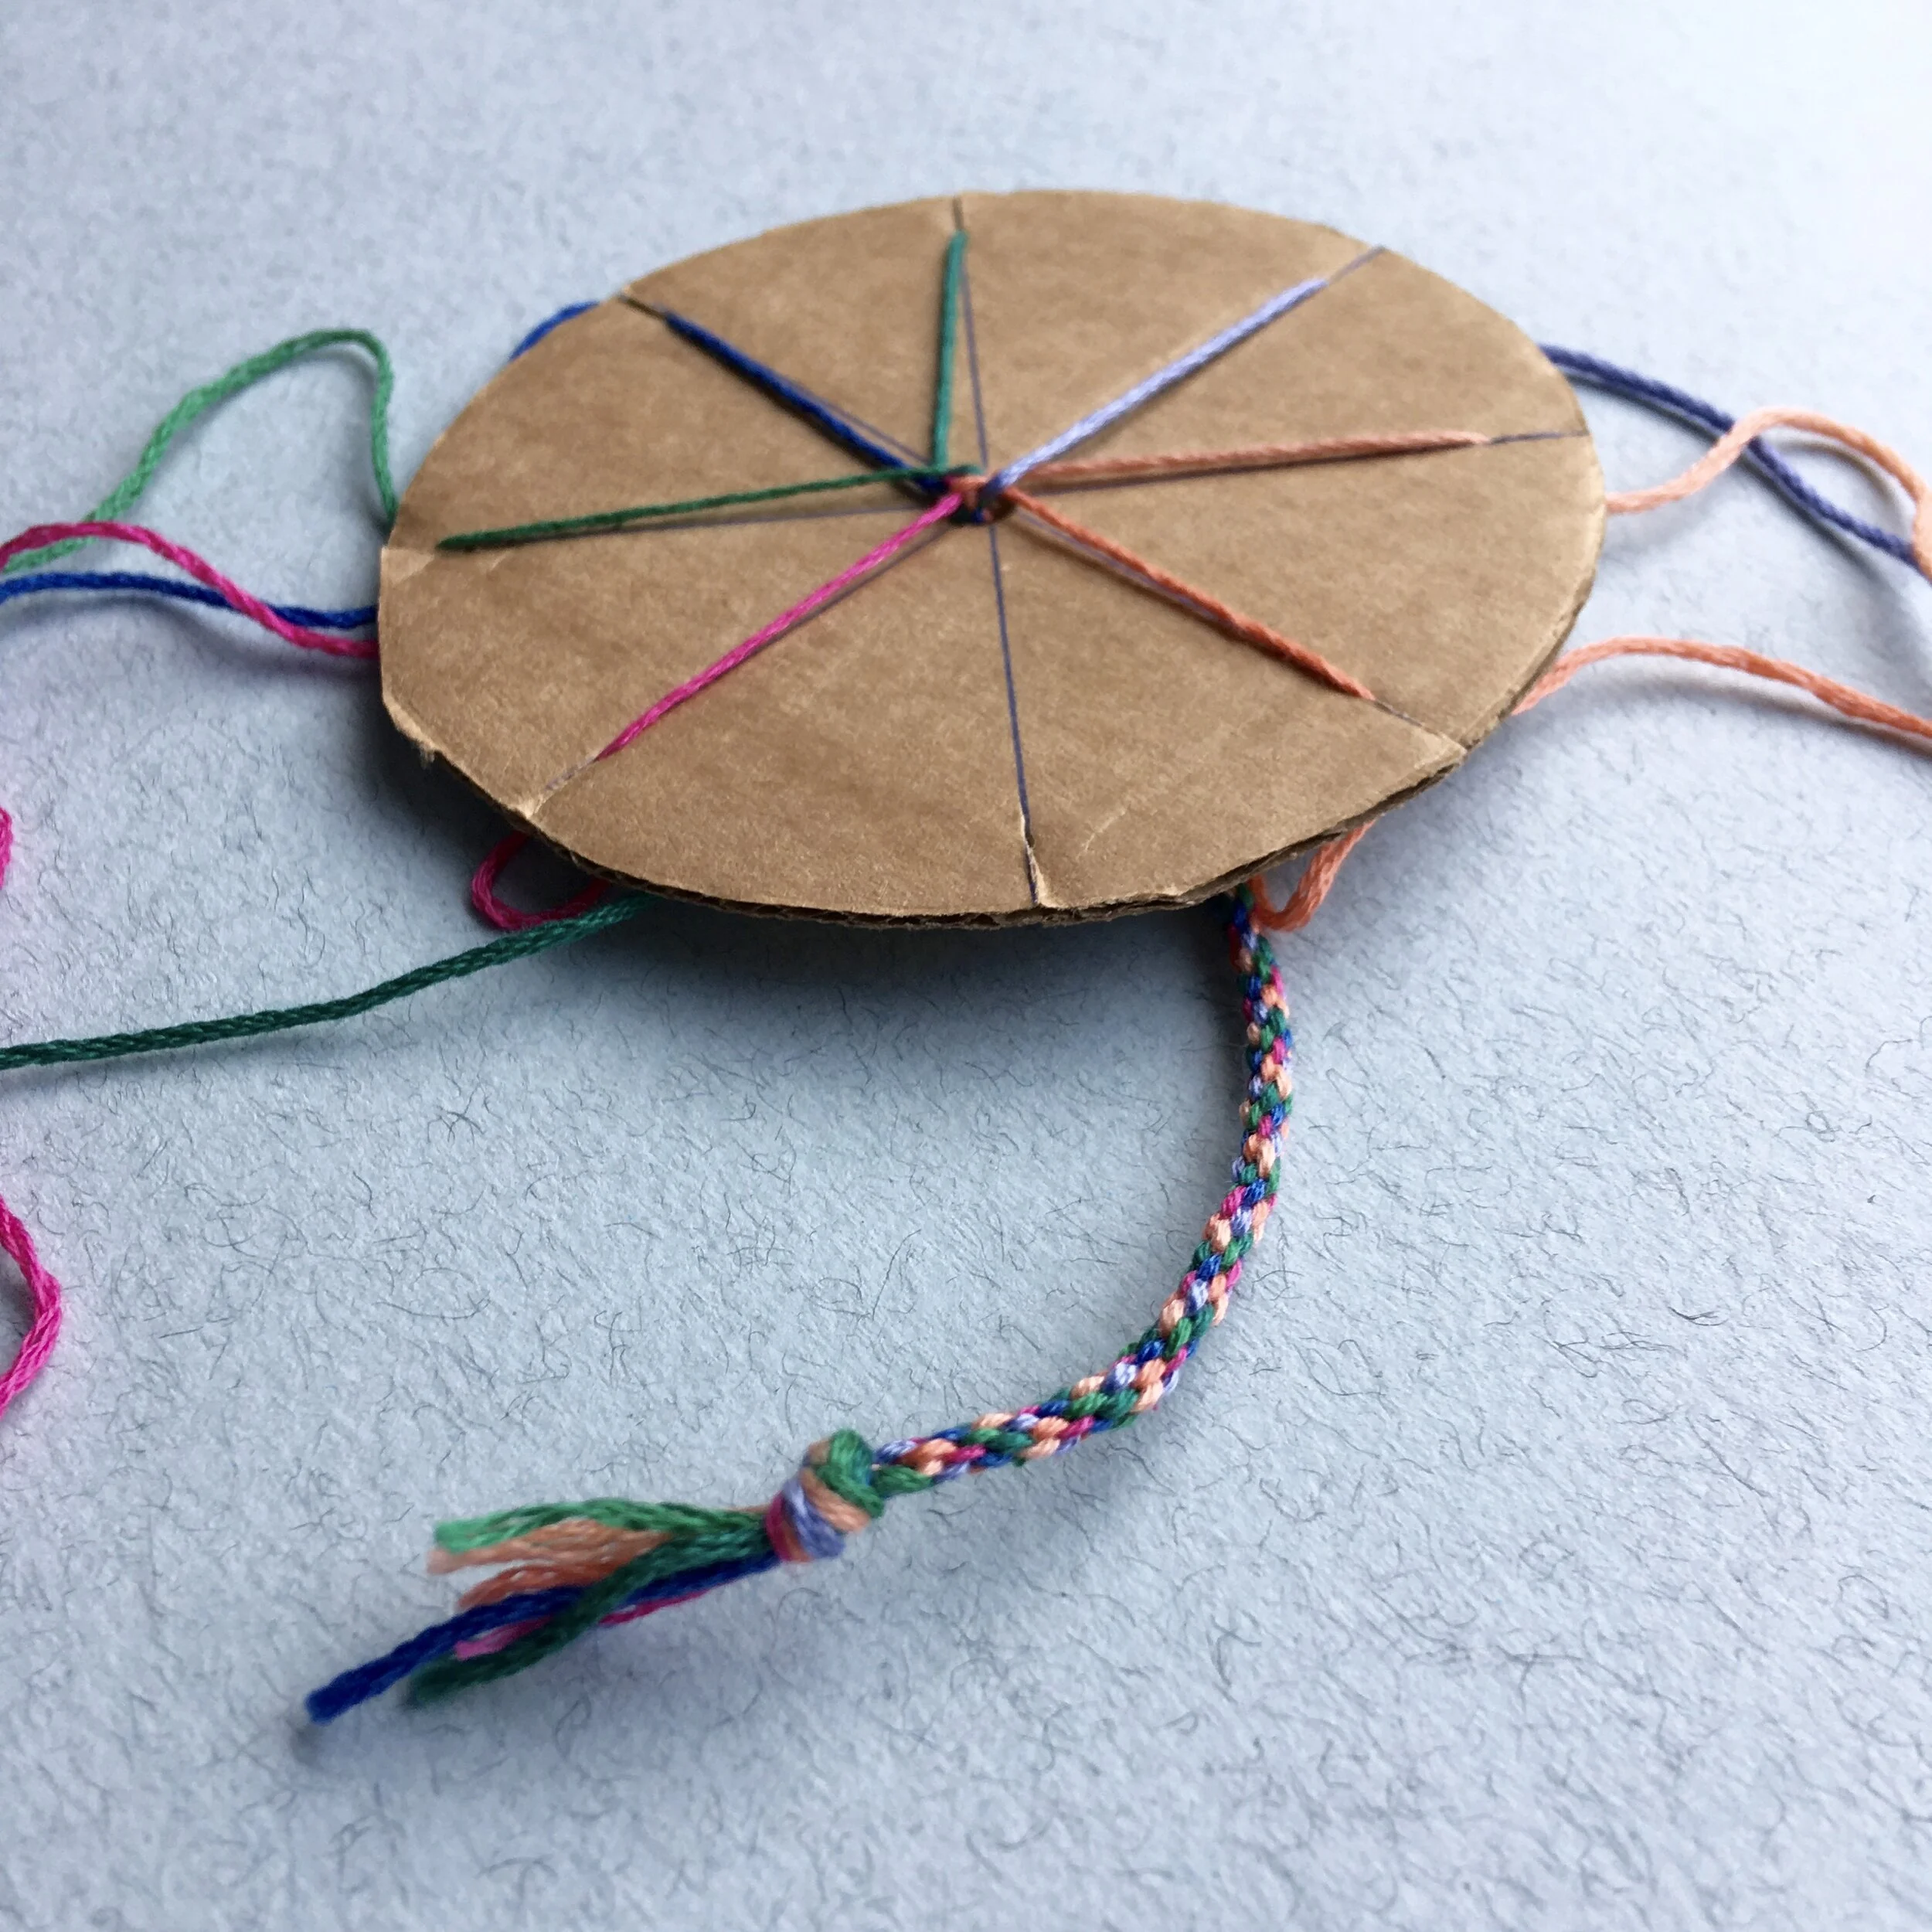
A circle of cardboard with 7 strands of thread, trailing out of a central hole in the cardboard is a colourful braid

Friendship bracelet loom

Another great way to use up any embroidery thread. There are plenty of tutorials on YouTube about how to make a cardboard loom and start making bracelets such as this one.

And if you want to think about Christmas here is a bonus idea - cardboard Christmas tree decorations.

Enjoyed this blog post? I share embroidery tips and a free embroidery pattern in my monthly newsletter. Sign up here to receive the newsletter on the 1st of each the month.
In tips 3 Tags Hoops, Reuse
Comment
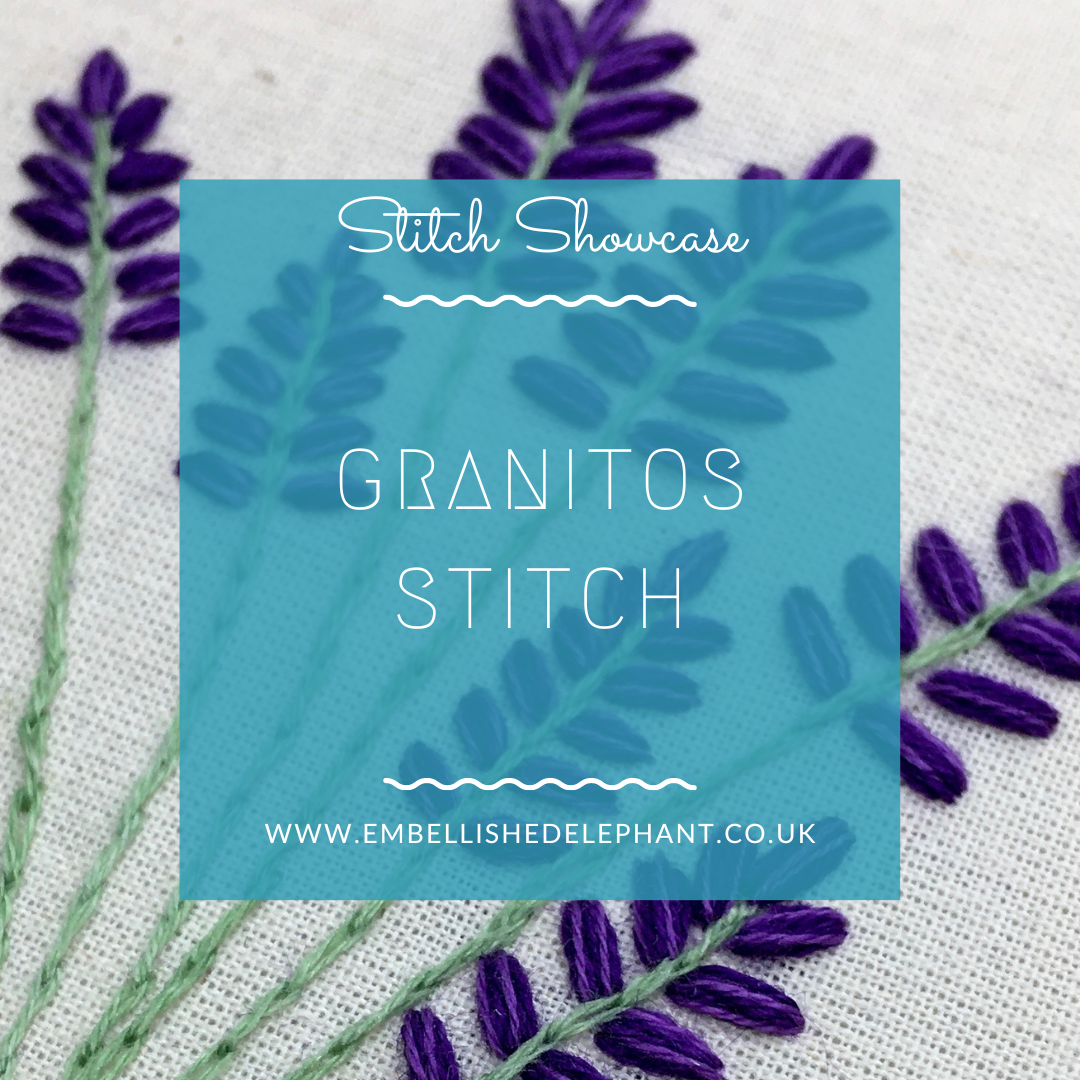
a picture of lavender embroidery stitched using granitos. Overlaid is a blue square with white text saying - stitch showcase, granitos stitch, www.embellishedelephant.co.uk

Stitch showcase: Granitos stitch

September 1, 2021

I see this stitch as a textured variation on a satin stitch. It creates a raised bump on the fabric and looks like a grain (hence the name granitos).

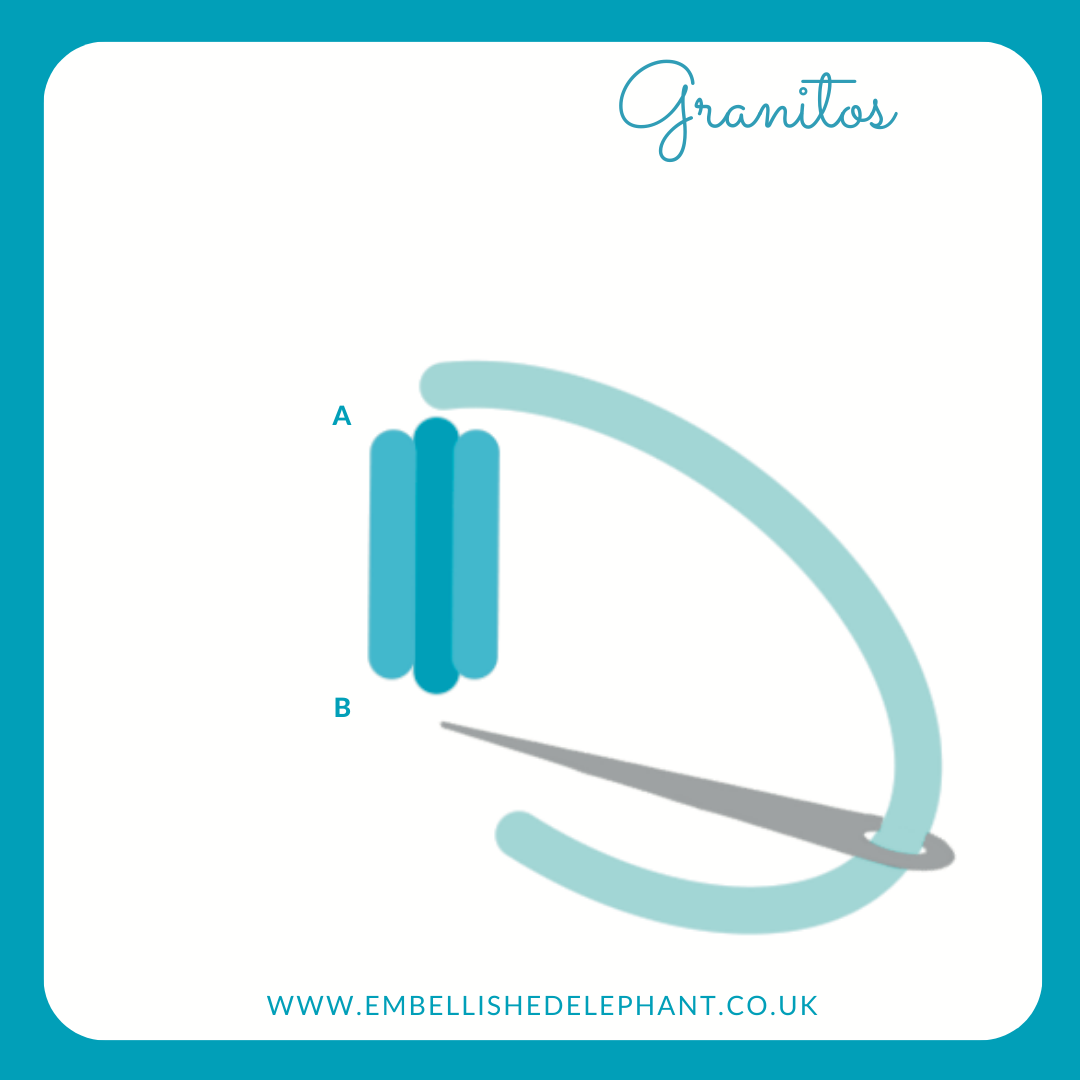
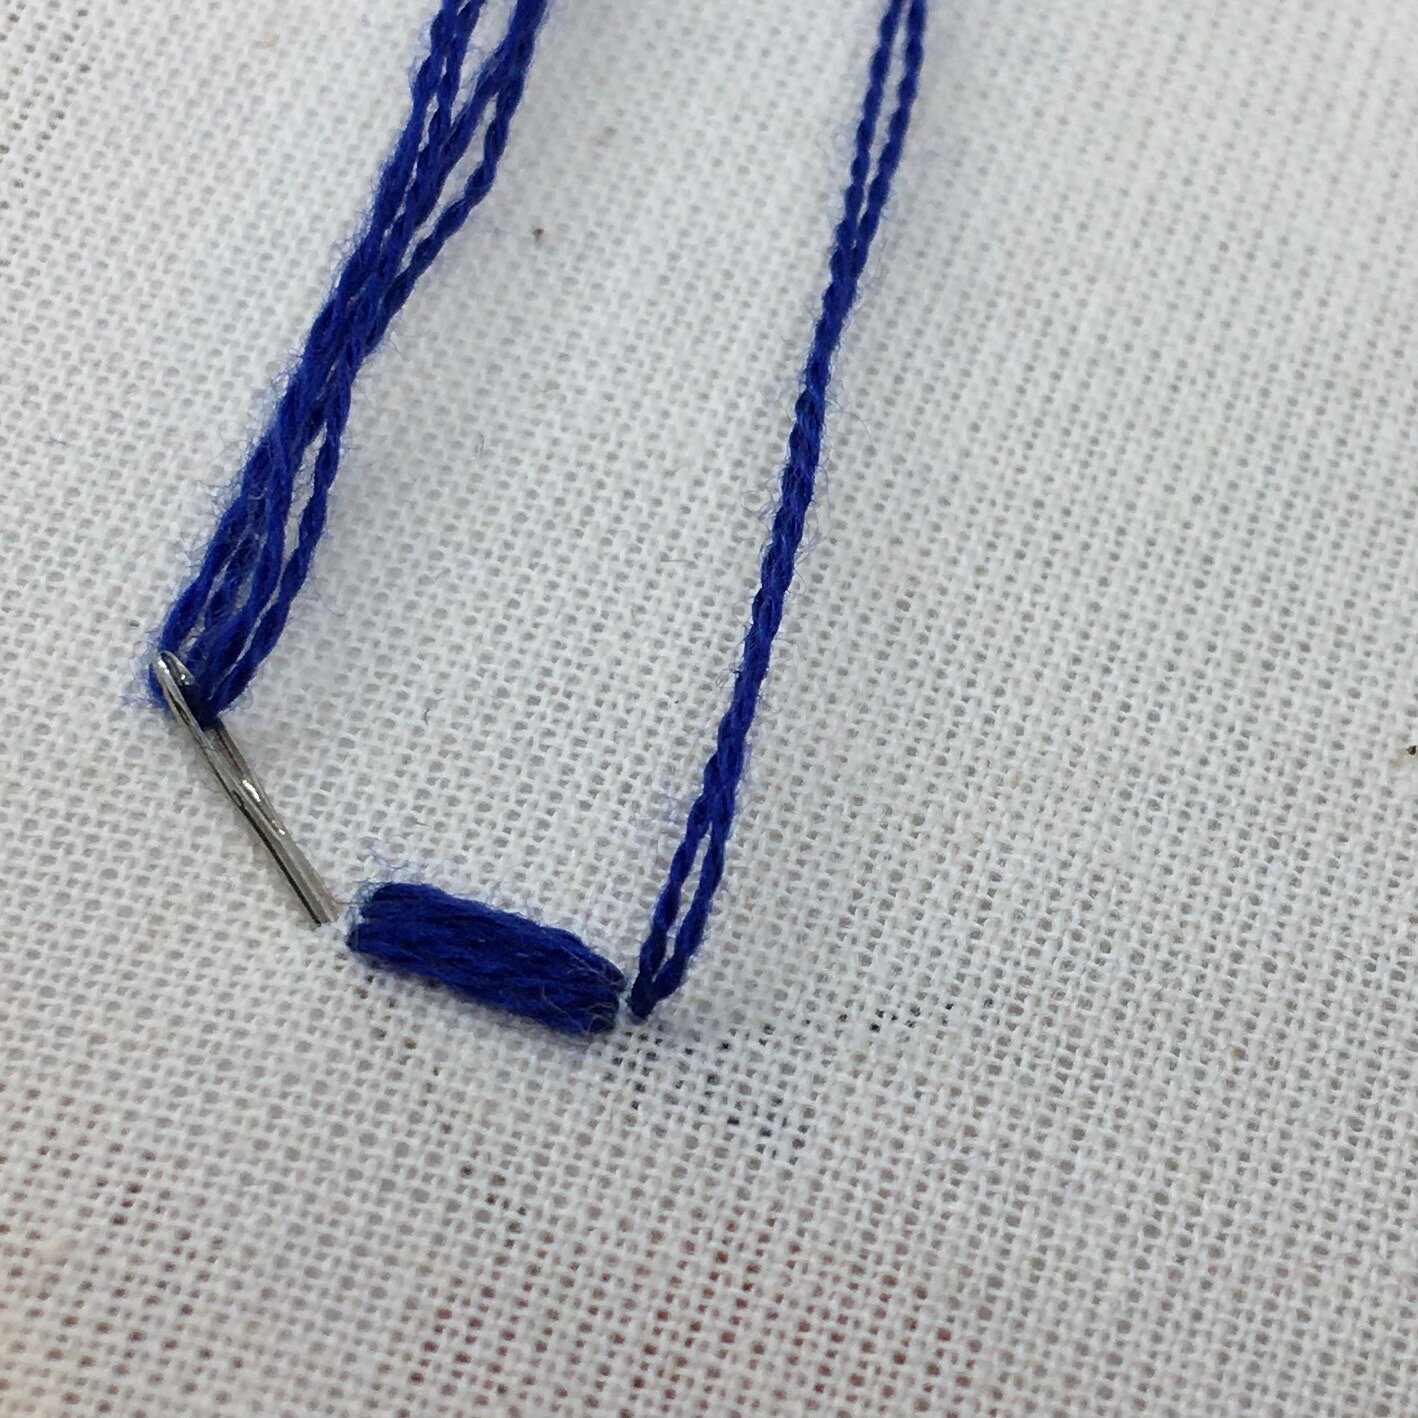
  • Create a straight stitch slightly shorter than the finished length of stitch

  • Bring the needle up through the fabric as close to the first stitch as possible without going through the same hole. Complete the stitch as close to the first stitch as possible

  • Add another stitch the other side of your first stitch so there are three stitches lying right next to each other

  • The final step is to layer some stitches over this base. Working at the centre of the base stitches, bring the needle up a tiny bit away from the base stitch to create a little point. Bring the needle back down a tiny bit away from the base stitches at the other end

  • Stitch through these exact holes a couple more times to create more of a bump. Try using a different shade of thread for these layering stitches for some definition.

An illustration of how to create granitos stitch - it is white background with blue illustration and text
An image of blue stitching on calico showing how to create granitos stitch

Want to try this stitch? It’s a stitch I suggest using in my lavender kit.

Sign up to my email newsletter to get a monthly free embroidery pattern and a round up of Stitch Showcase blogs.

In stitch showcase 2 Tags Stitch Showcase, Isolated Stitch
Comment
An image of basket weave embroidery stitch in brown. Overlaid is a blue square with white text saying - hand embroidery, four texture stitches for embroidery, www.embellishedelephant.co.uk

Four Texture stitches for embroidery

August 25, 2021

What do I mean by texture stitches? My definition are stitches that stand away from the fabric in some way, that give an added dimension to embroidery that other stitches may not.

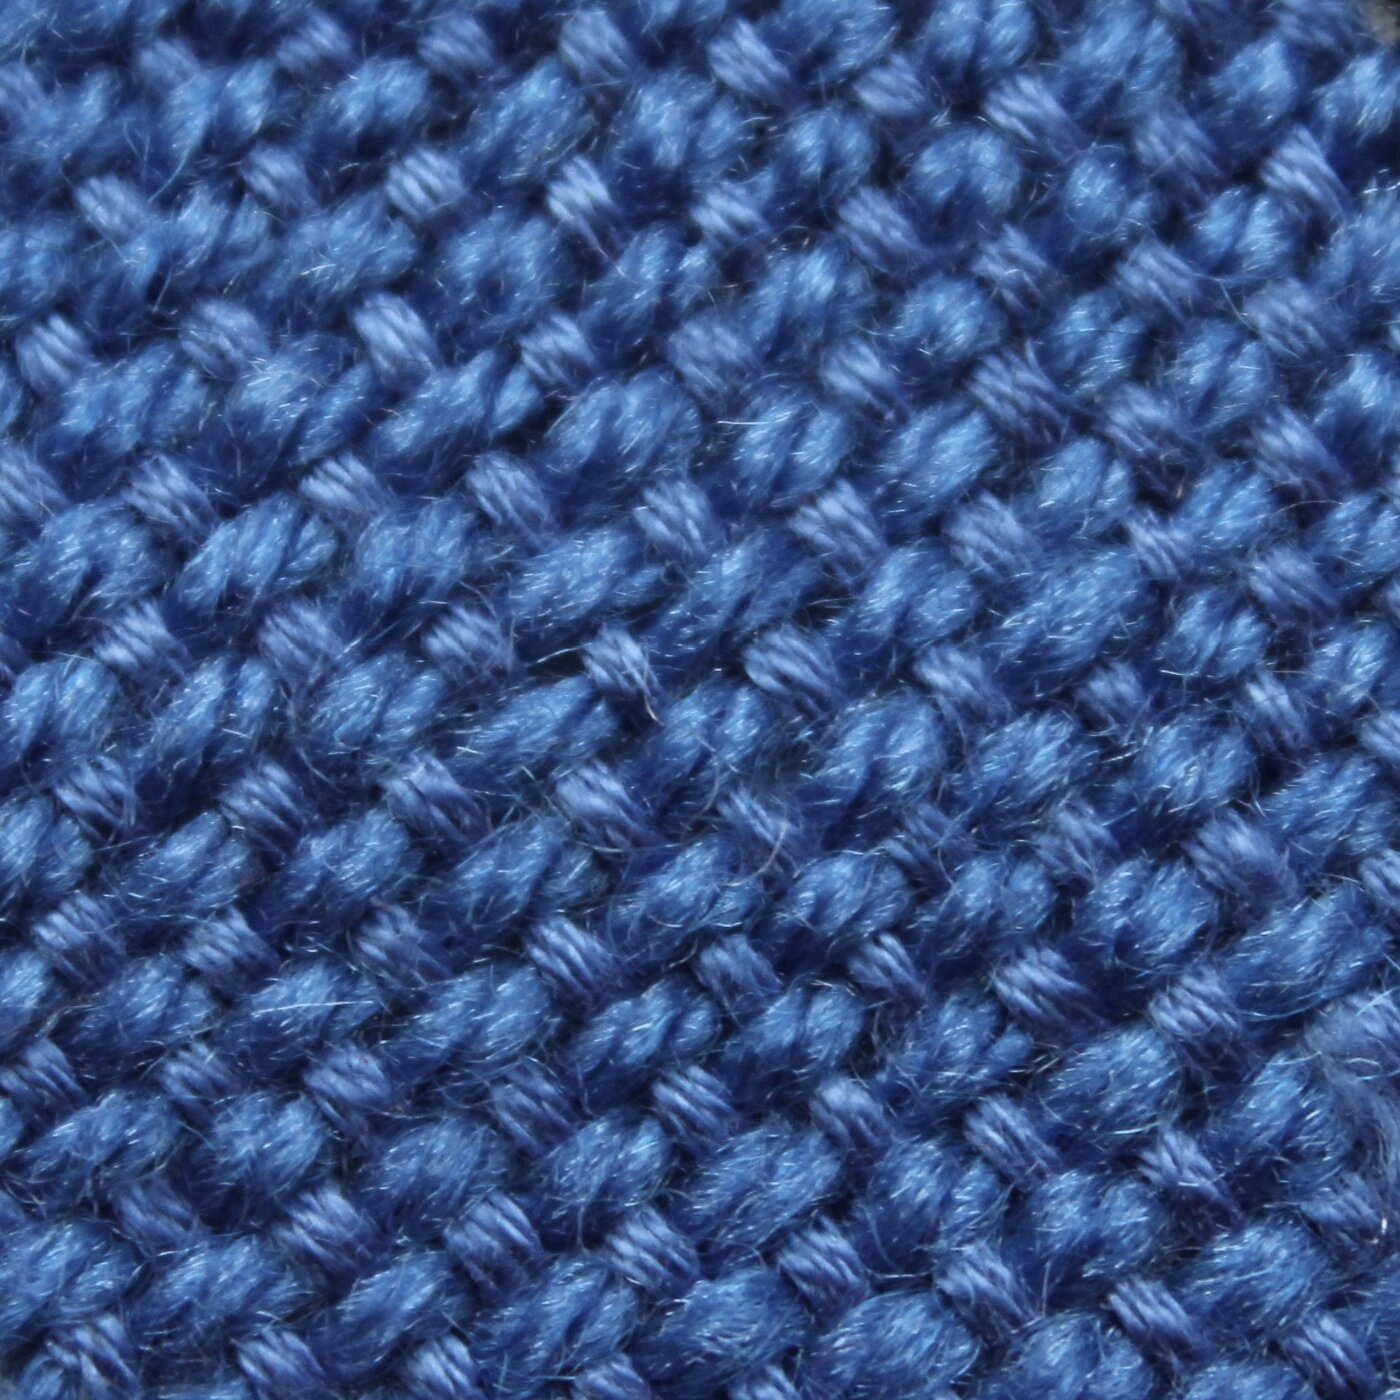
A close up image of needle weaving stitch in blue

Needle Weaving

If you’ve ever woven with a loom then needle weaving is a version of this just on a much smaller scale. It’s also the same technique you’ll use if you need to darn a sock or jumper.

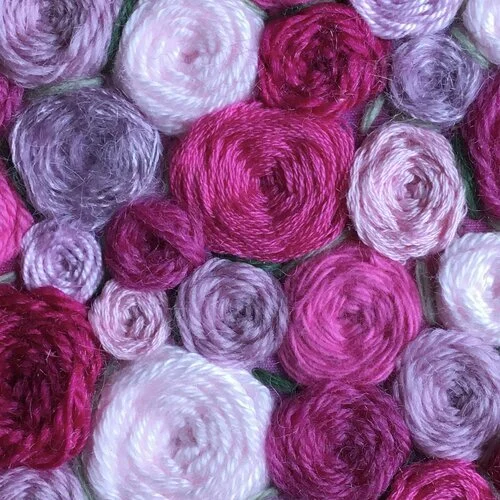
A close up image of woven wheel embroidery stitch in pinks and purples.

Woven Wheel

This is created by laying down 5 base stitches and then weaving the thread under and over etc until the base stitches can no longer be seen.

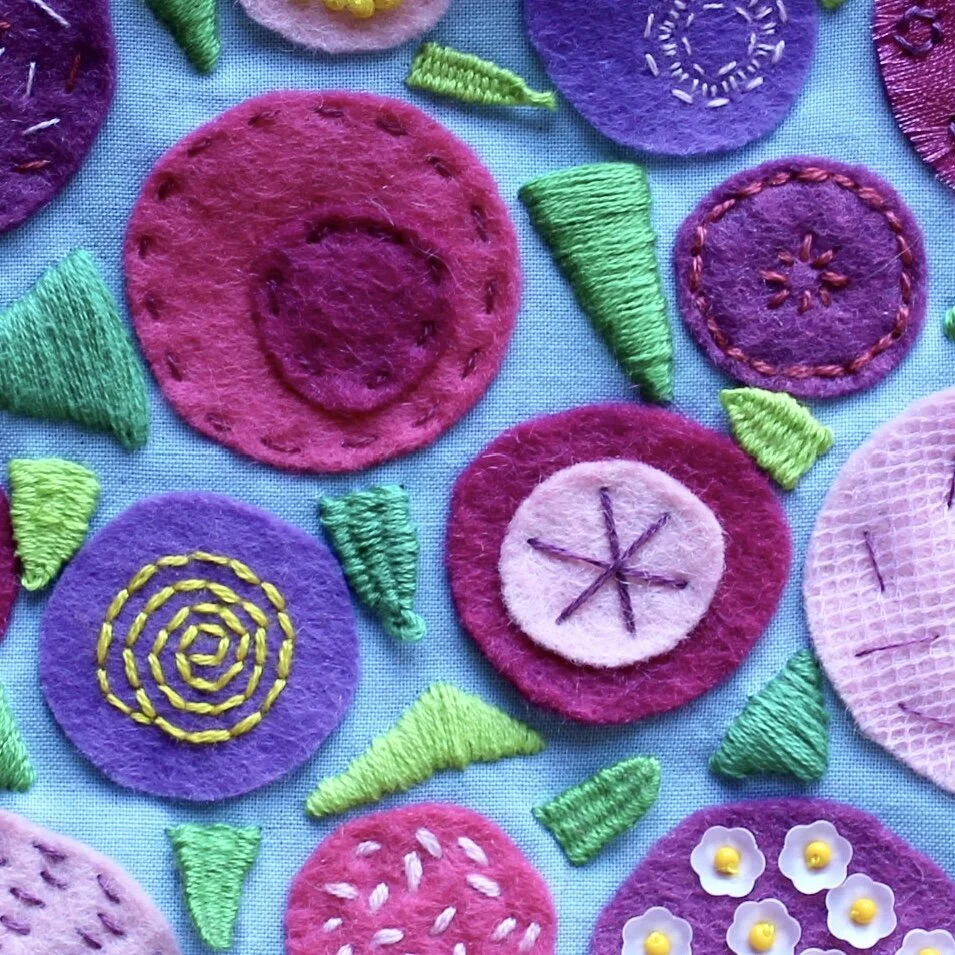
A picture of felt circles in pink and purple with stitching on them. In between these are green sections stitched using woven picot stitch and satin stitch

Woven Picot

Another woven stitch, the base is created by making a triangle using a pin. The thread is then woven under and over the 3 strands of base stitch.

The picots are attached at the base and the tip can be left free or held down by a tiny stitch.

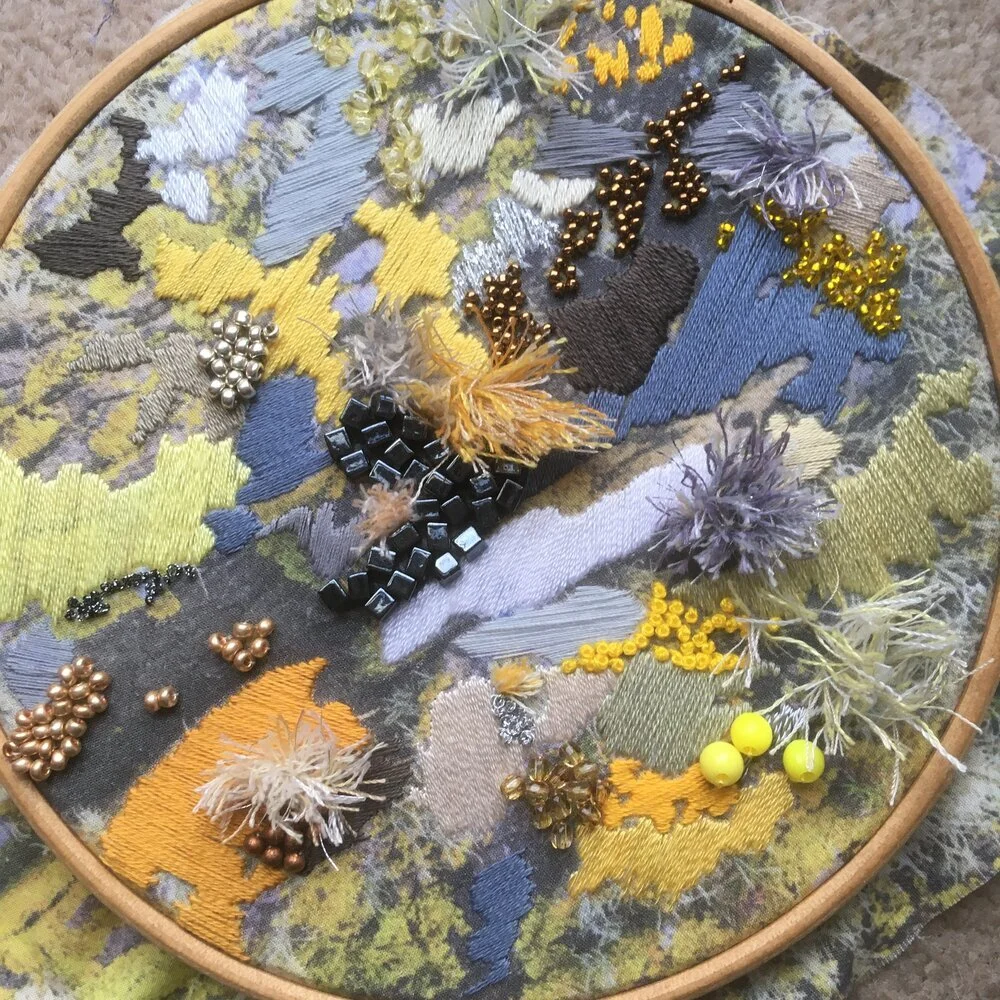
An abstract embroidery using sections of satin stitch, bead work and turkey work stitch

Turkey Work

This stitch is unlike any other as first create a series of loops which you snip into to create the strands. It can be densely packed or wispy - that’s the beauty of this texture.

Enjoyed this blog post? I share embroidery tips and a free embroidery pattern in my monthly newsletter. Sign up here to receive the newsletter on the 1st of each the month.
In tips 3 Tags Stitch Showcase, Texture Stitch
Comment
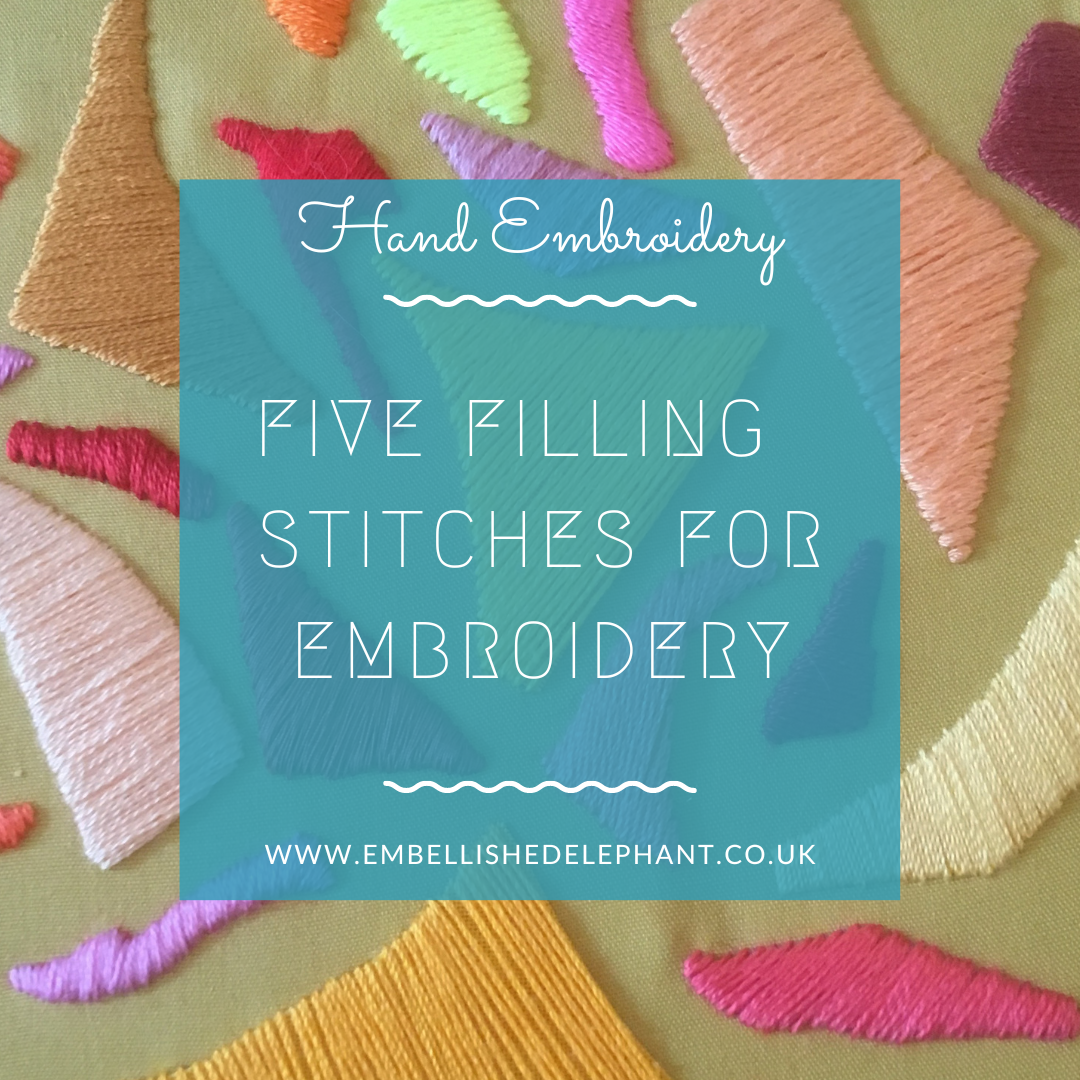
A picture of abstract embroidery shapes stitched in satin stitch in shades of yellow, orange, pink and red on a yellow background. Overlaid is a blue square with white text saying - hand embroidery, five filling stitches for embroidery,

5 filling stitches for embroidery

August 18, 2021

My default stitch for when I need to fill an area in an embroidery pattern is satin stitch but I don’t particularly enjoy stitching it so I’ve been enjoying trying out a range of different filling stitches.

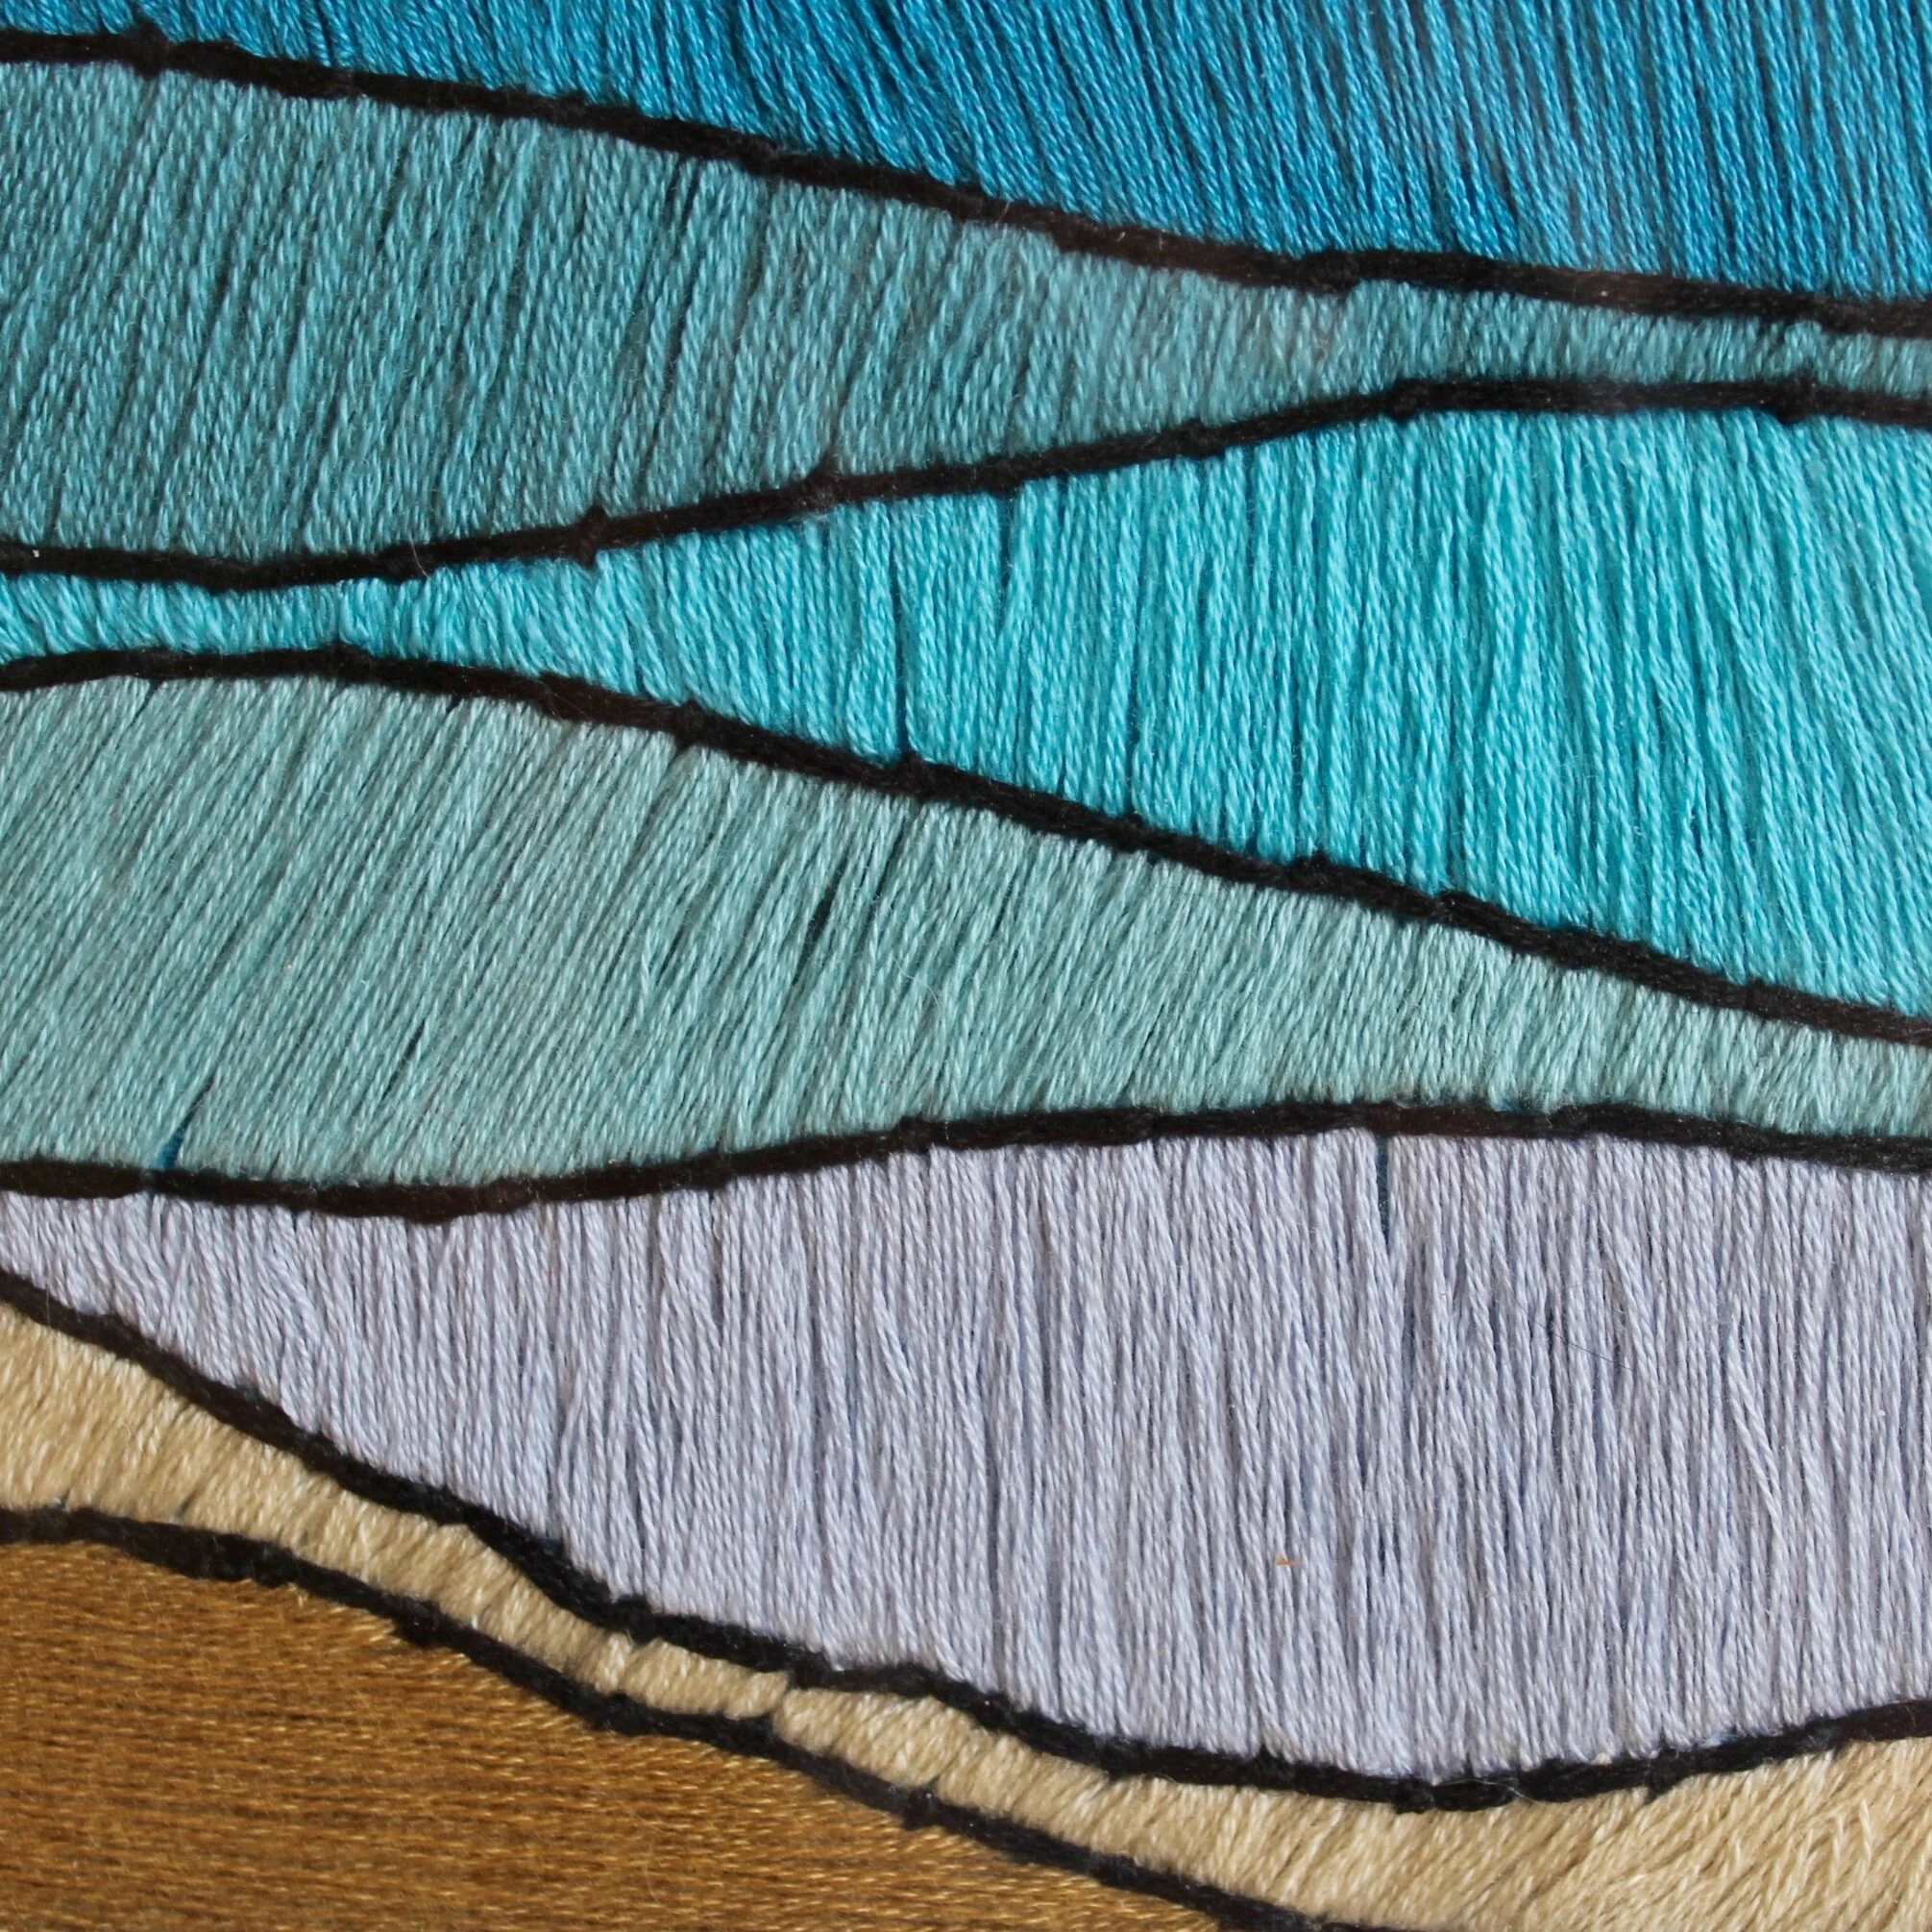
A picture of waves stitched in satin stitch in different shades of blue with black lines between each wave and a beach at the bottom of the piece

Satin Stitch

The stitch that is used the most when areas need to be filled in. It is formed of long straight stitches laid close together.

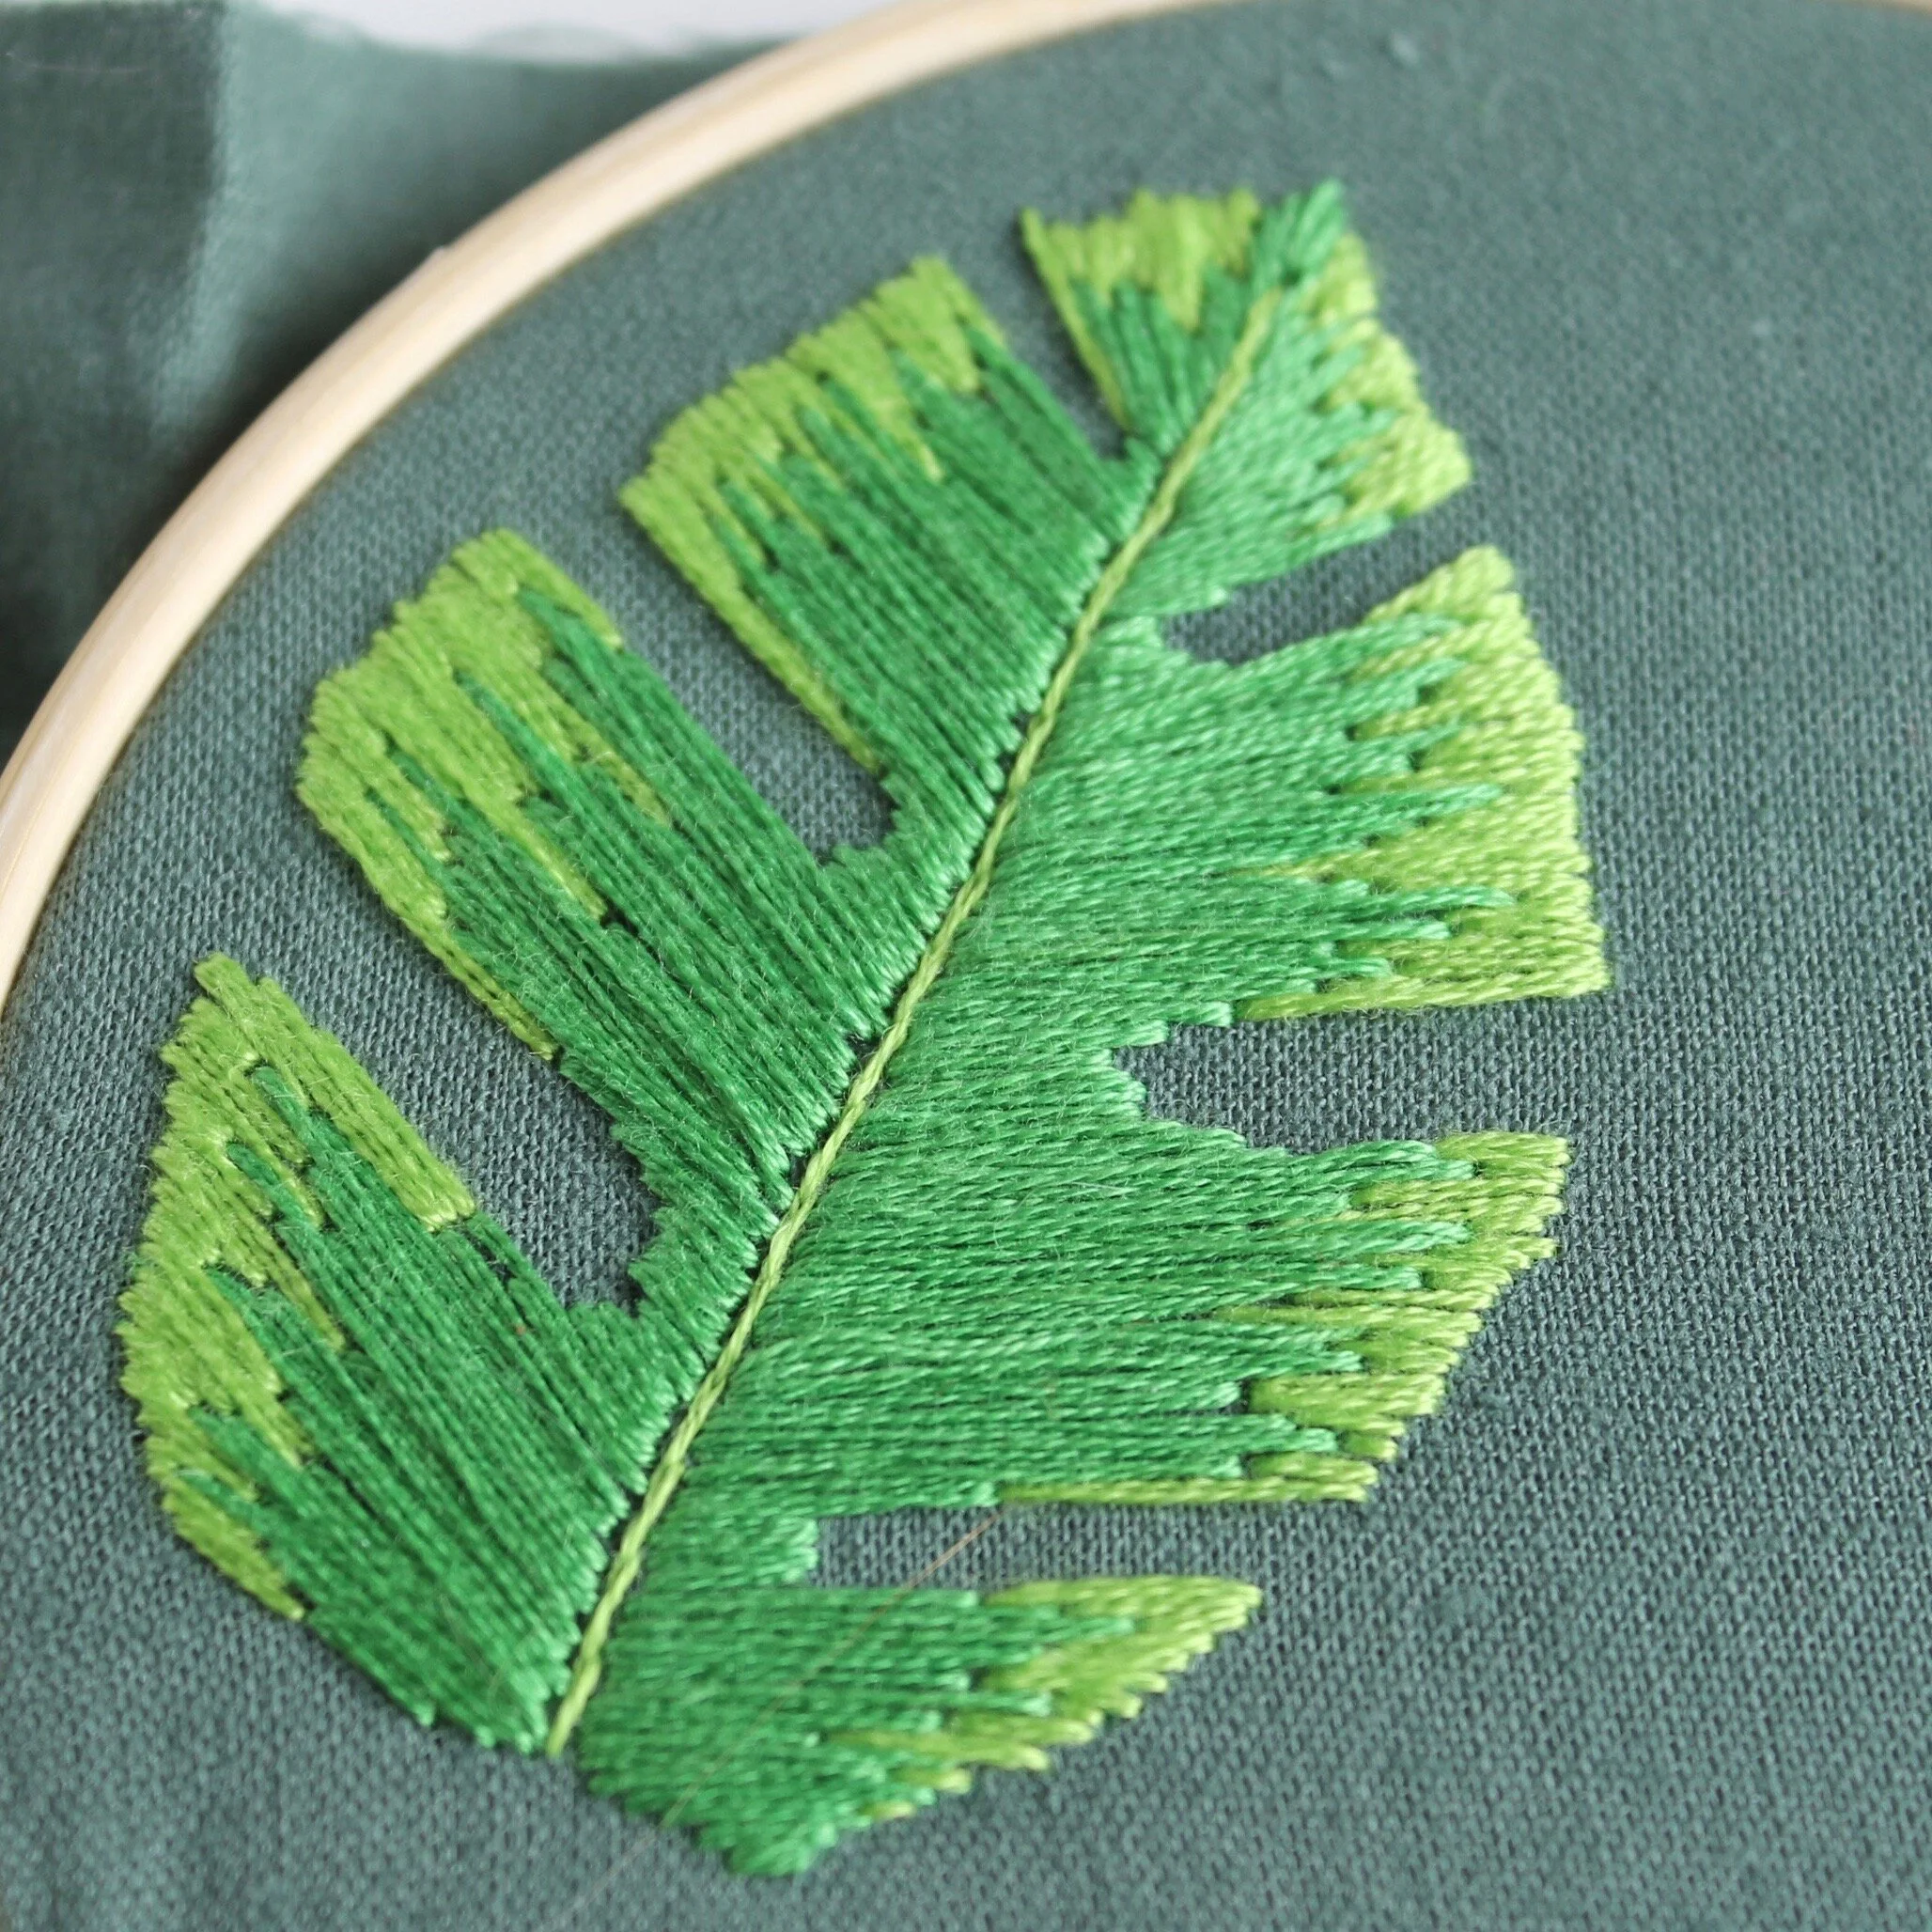
A picture of a monstera leaf stitched in long and short stitch with light green floss at the edges and darker green floss filling the leaves

Long and Short Stitch

This is really just satin stitch split into different sections to fill an area. This gives a much more textured effect that satin stitch and is much better for filling larger areas.

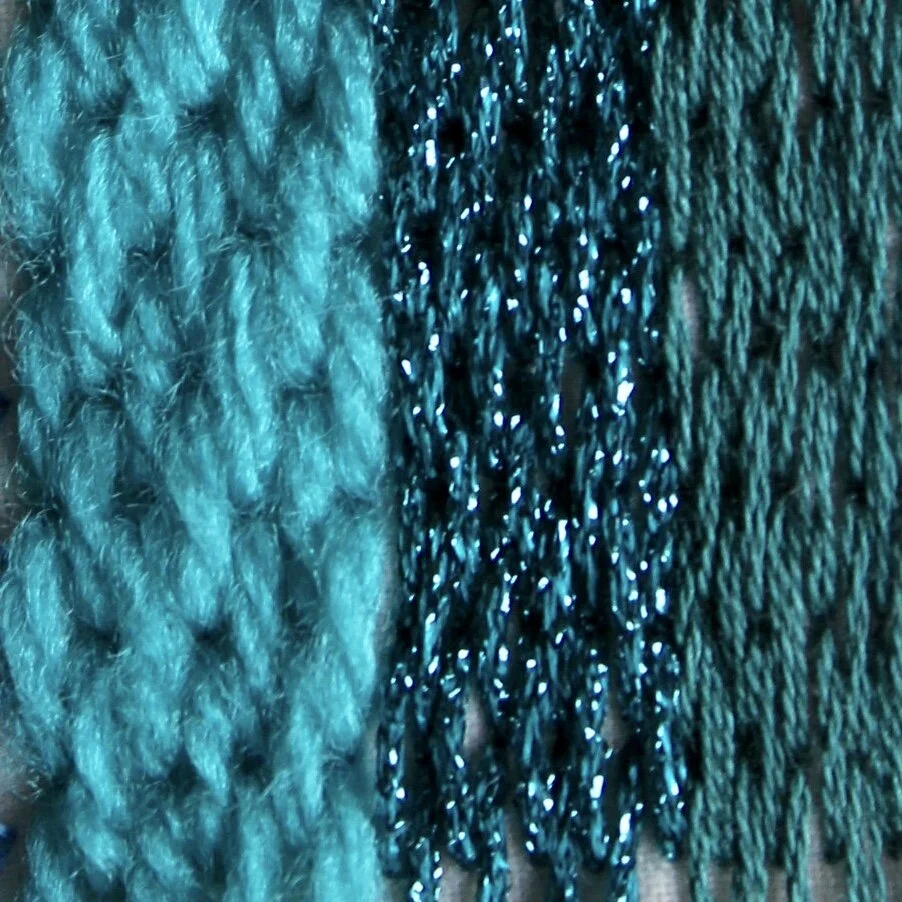
An image of 3 sections of brick stitch in different types of blue thread.

Brick Stitch

Lines of backstitch next to each other and slightly offset to create a brick effect. This stitch just makes you want to touch the embroidery.

A picture of a plant in a basket with the basket stitched using rows of chain stitch close together

Chain Stitch

A chain stitch is a series of small loops and can be used to fill areas or in a line.

a close up of some long thin leaves stitched with leaf stitch

Leaf Stitch

This is a variation on satin stitch. The stitches are angled towards the centre of the leaf and the angle of the stitch is maintained along the length of the stitch.

Enjoyed this blog post? I share embroidery tips and a free embroidery pattern in my monthly newsletter. Sign up here to receive the newsletter on the 1st of each the month.
In tips 2 Tags Stitch Showcase, Filling Stitch
Comment
A picture of small single stitches in different colours stitched on pink dyed fabric. Overlaid is a blue square with white text saying - hand embroidery - five isolated embroidery stitches  - www.embellishedelephant.co.uk

Five isolated stitches for embroidery

August 11, 2021

I love working with isolated stitches, just picking a colour and placing a stitch where I think it will look great. My heart embroidery kit is designed to work in this way. Here are some of my favourites:

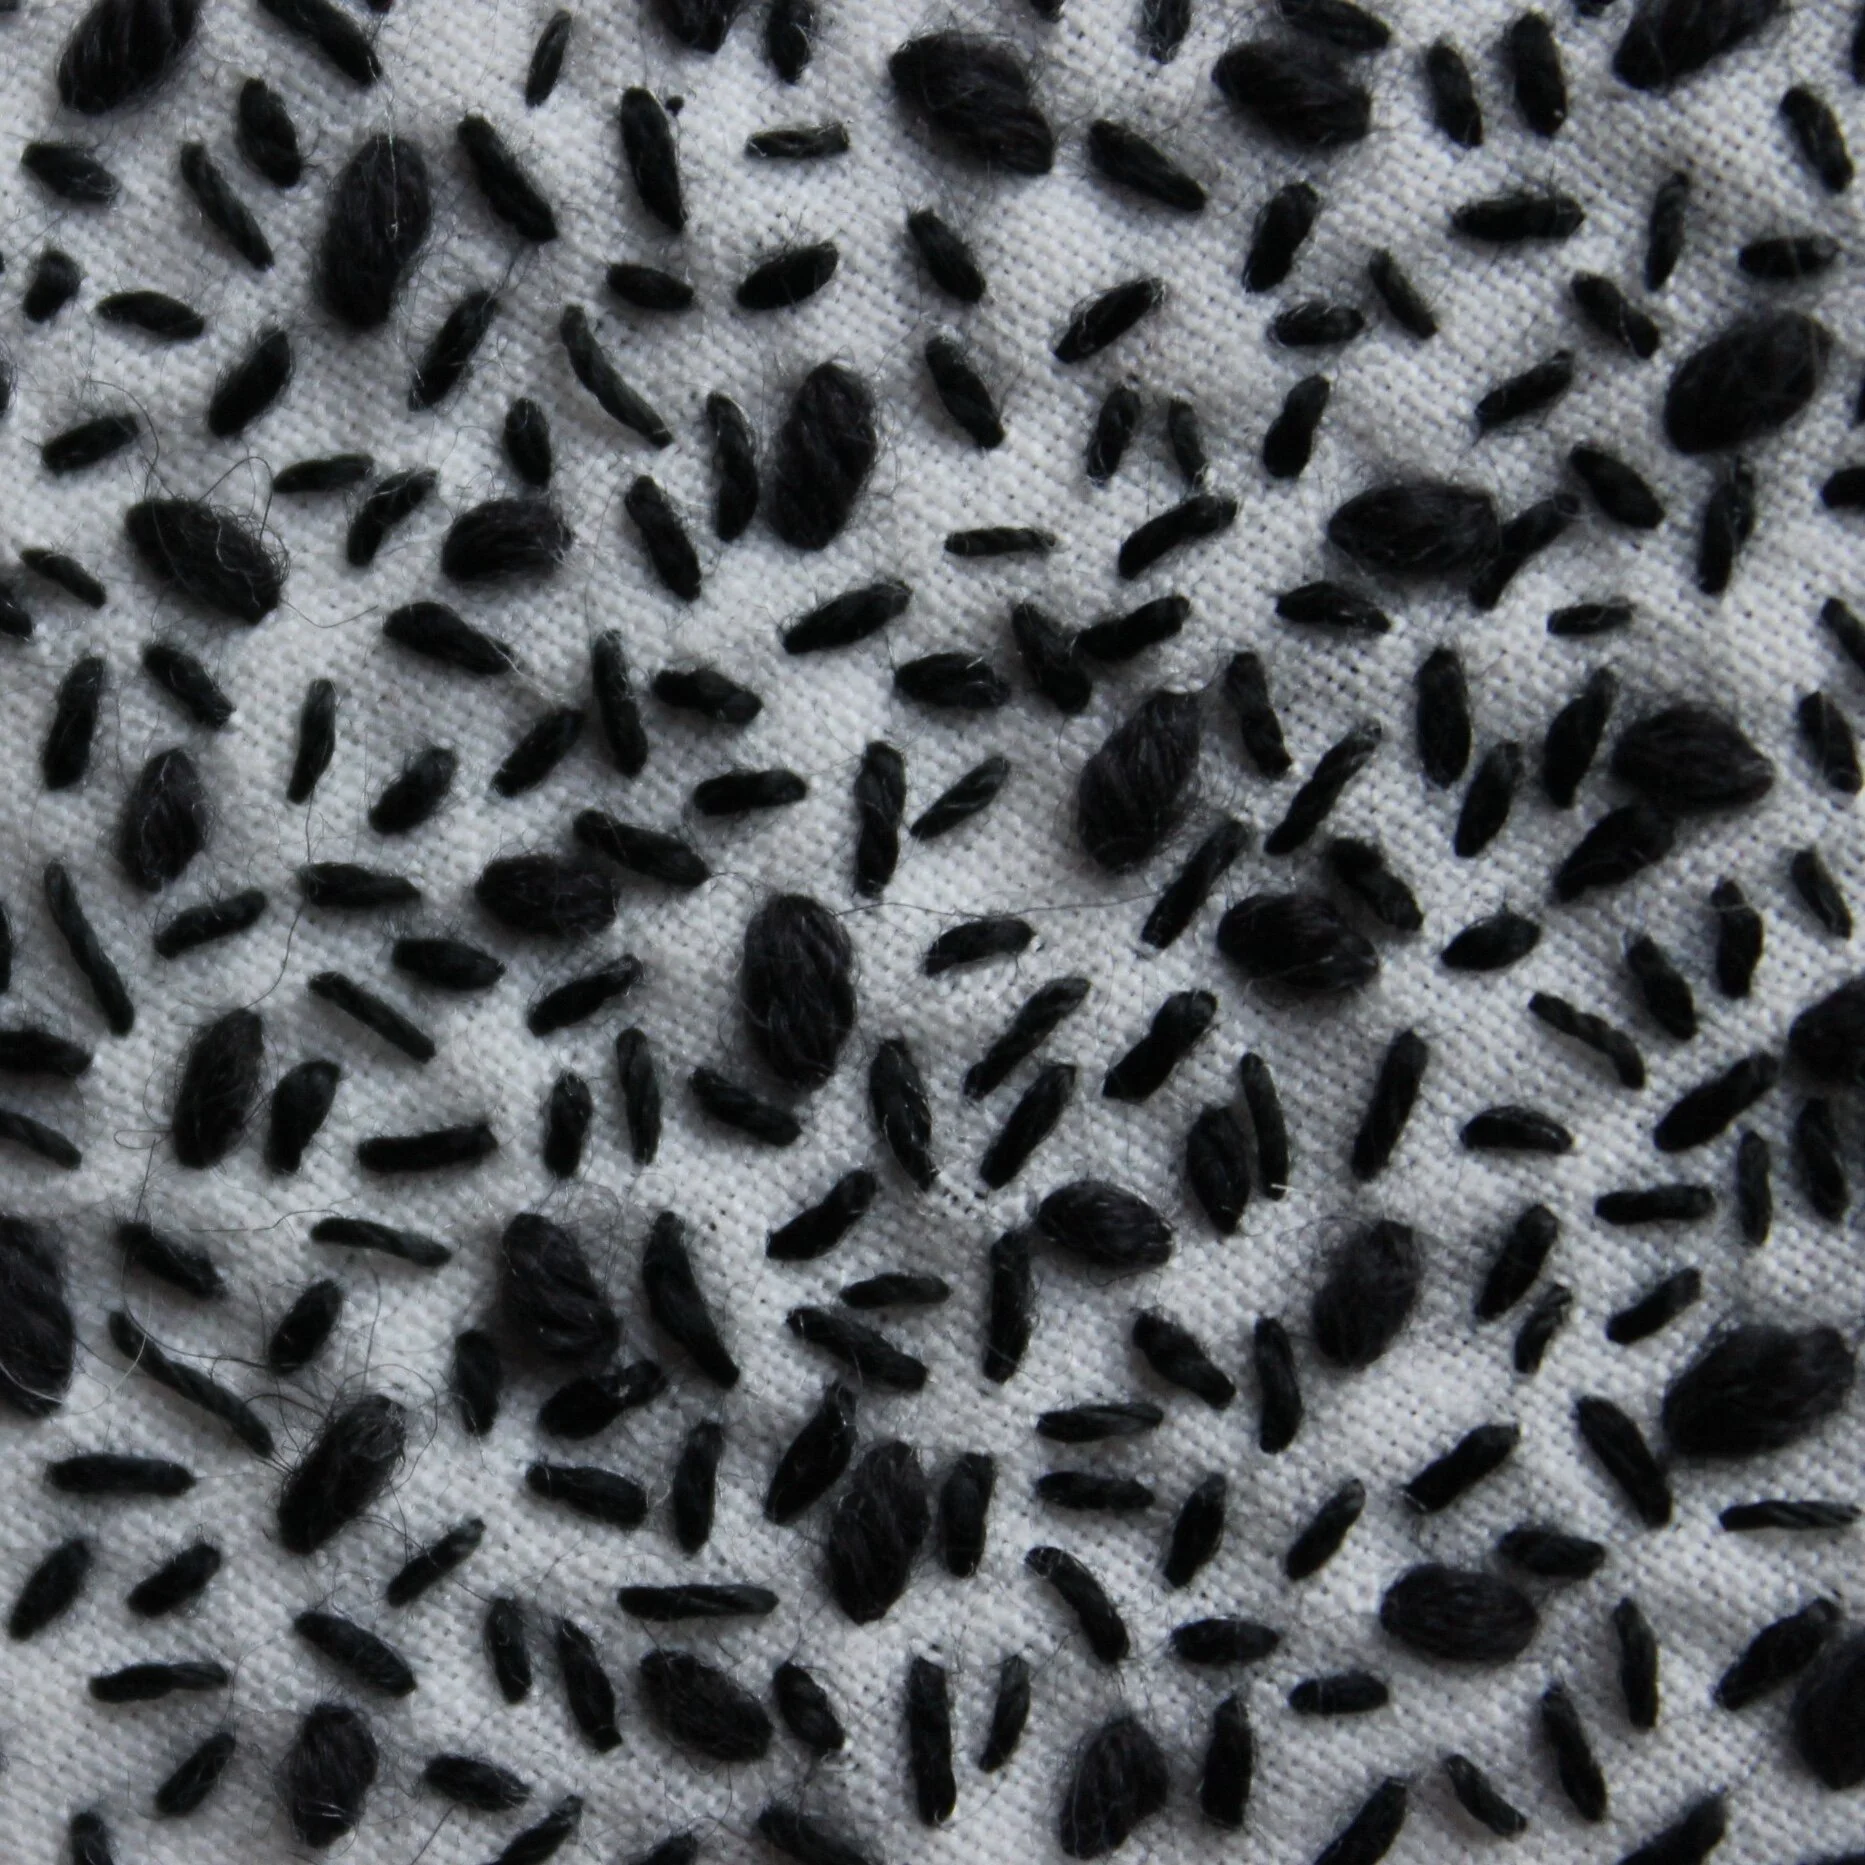
A picture of seed stitch in black thread on calico - this is lots of different small stitches in different directions

Seed Stitch

A series of straight stitches placed at different angles to create a scattered seed effect. The seeds can be the same length or varied. They can even be overalapped.

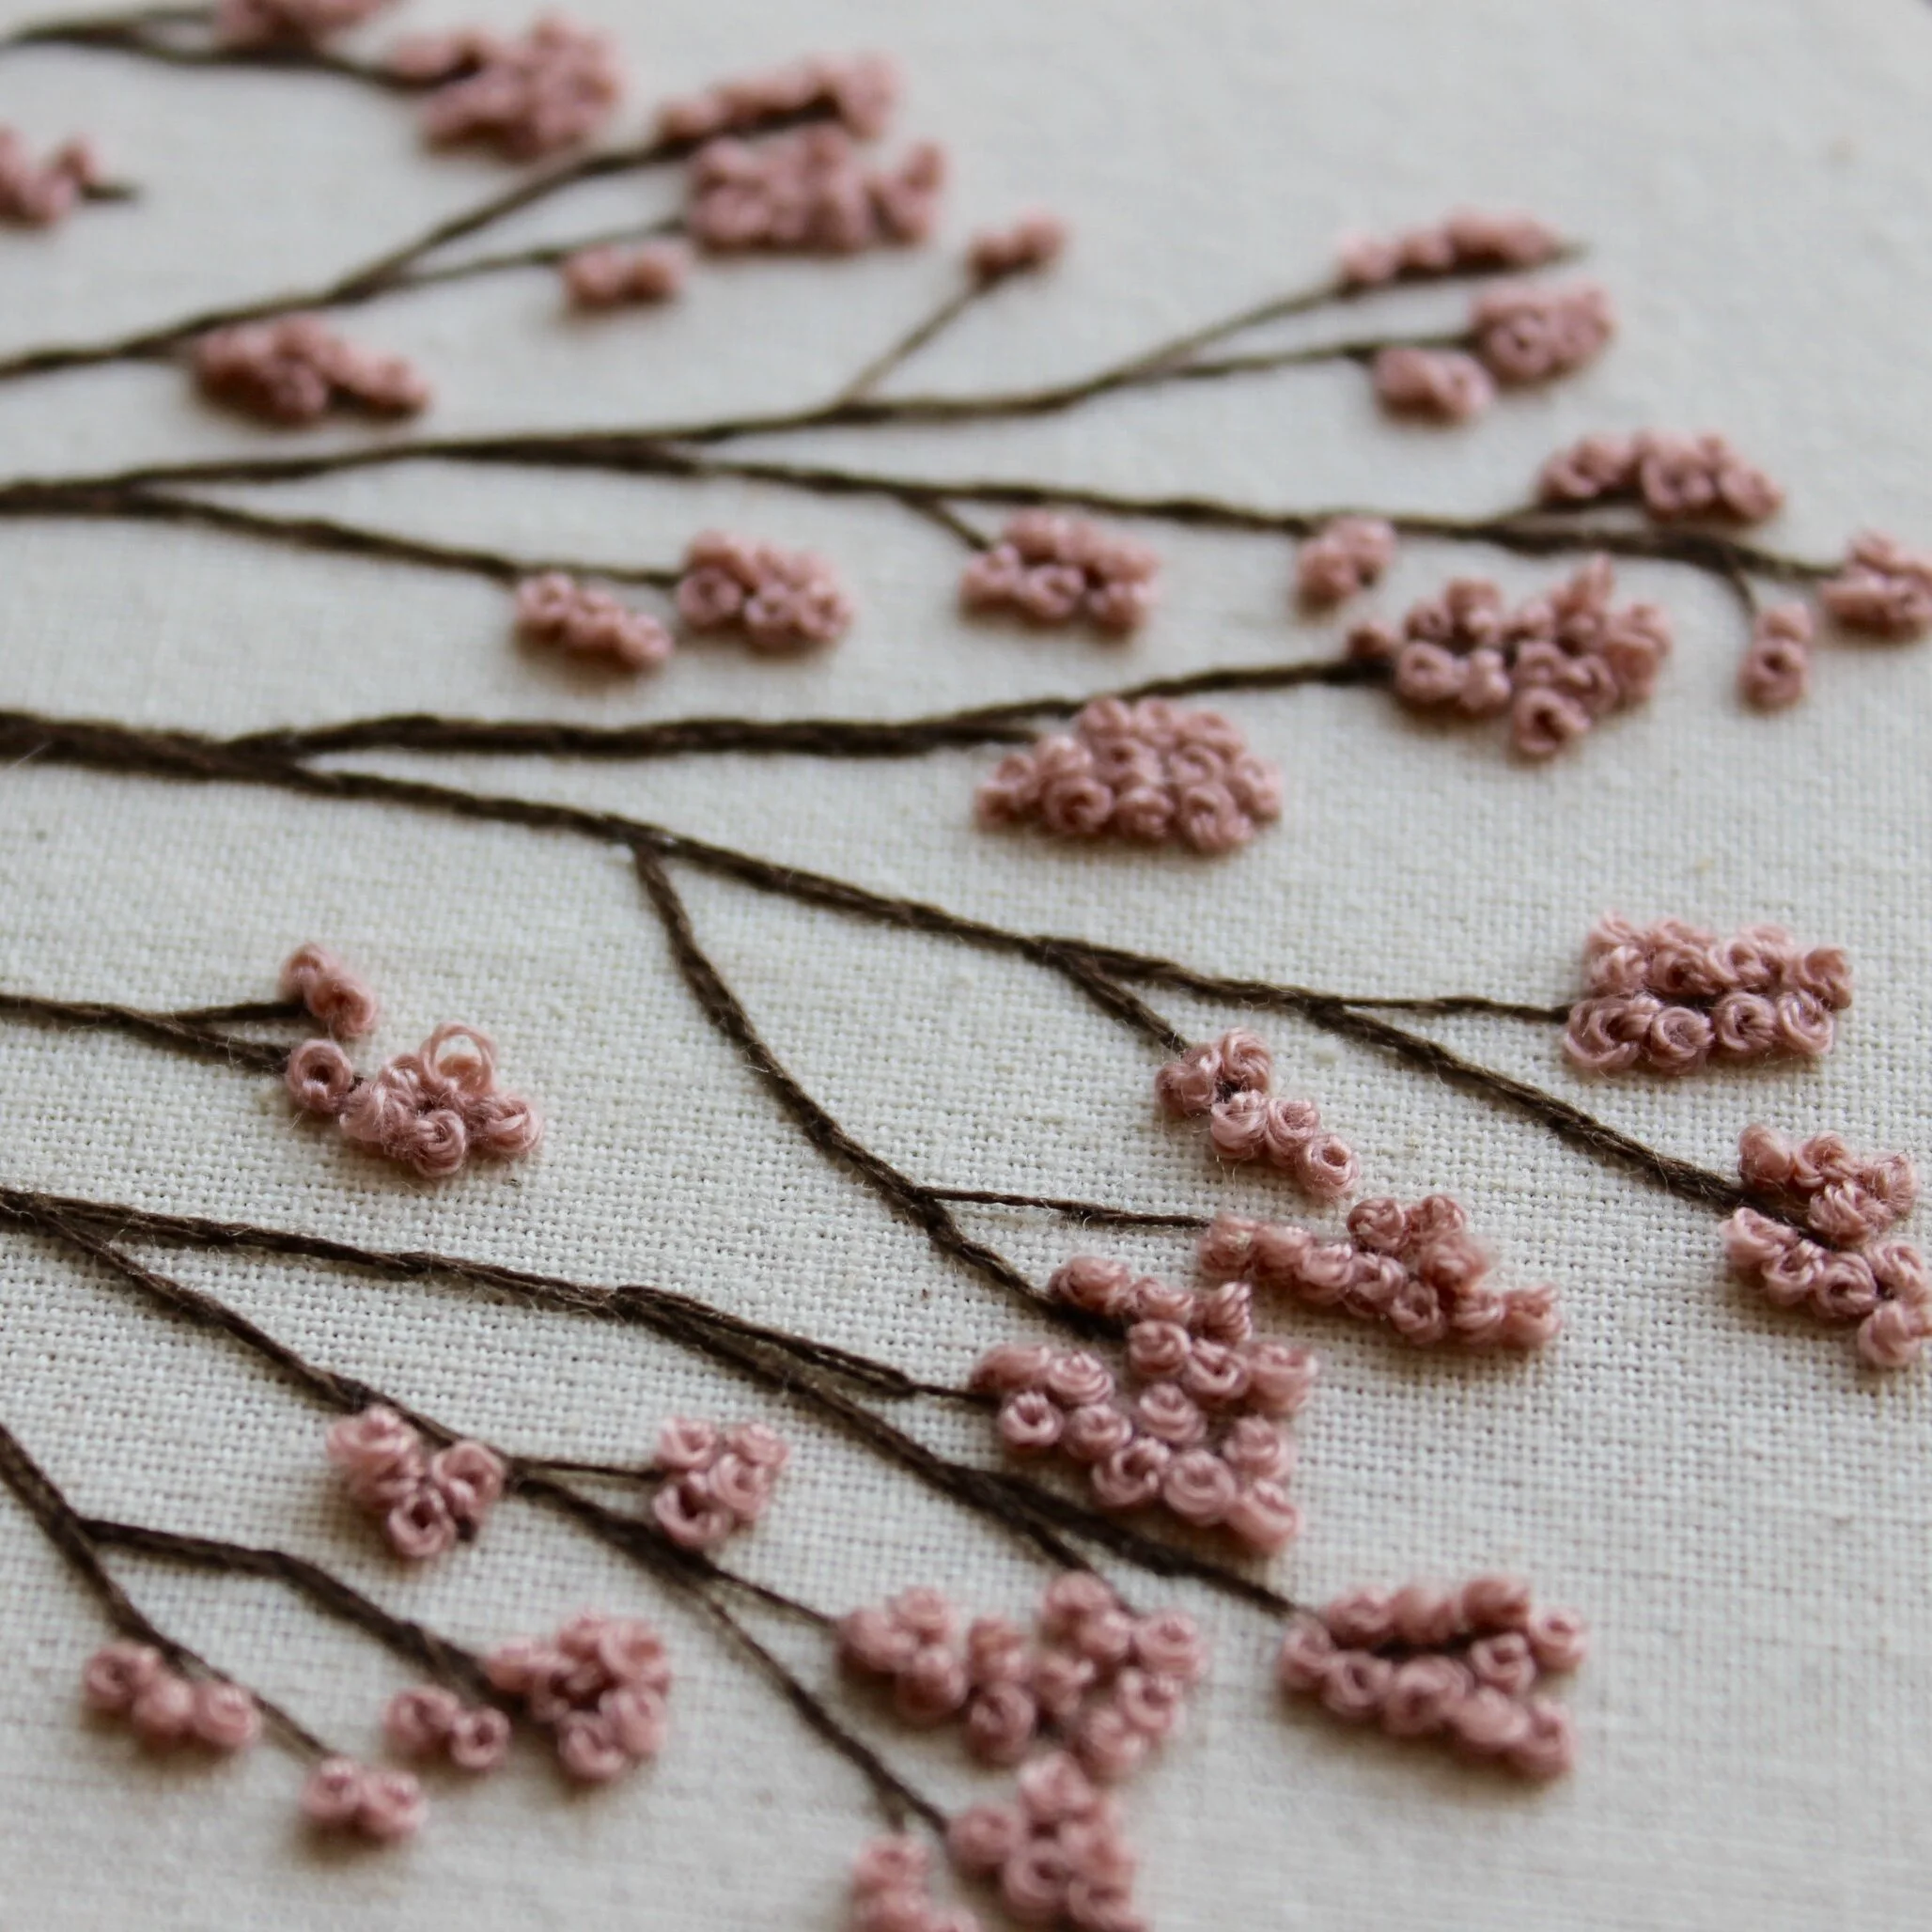
An embroidery on calico with thin brown stitches creating branches. At the end of each branch are clusters of pink french knots

French Knot

One of my favourite stitches, it is unlike any other on this list and is great for bringing texture to embroidery but it does take a little bit of practice!

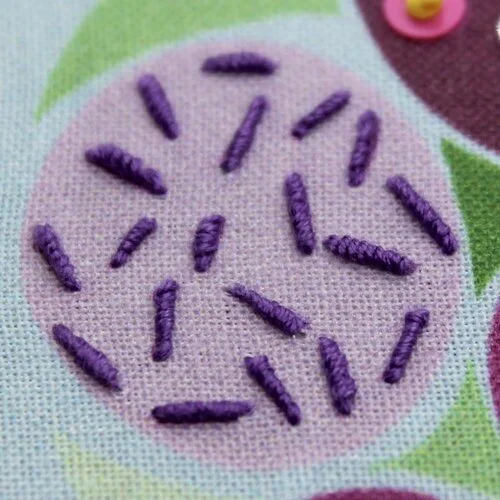
A close up on a purple circle with bullion knots stitched in a random way in purple floss

Bullion Knot

If you think French Knot is hard, then beware of bullion stitch. I’ve been stitching it as much as I can lately as practice really helps. And it is worth the wait as it looks great when you’ve perfected it.


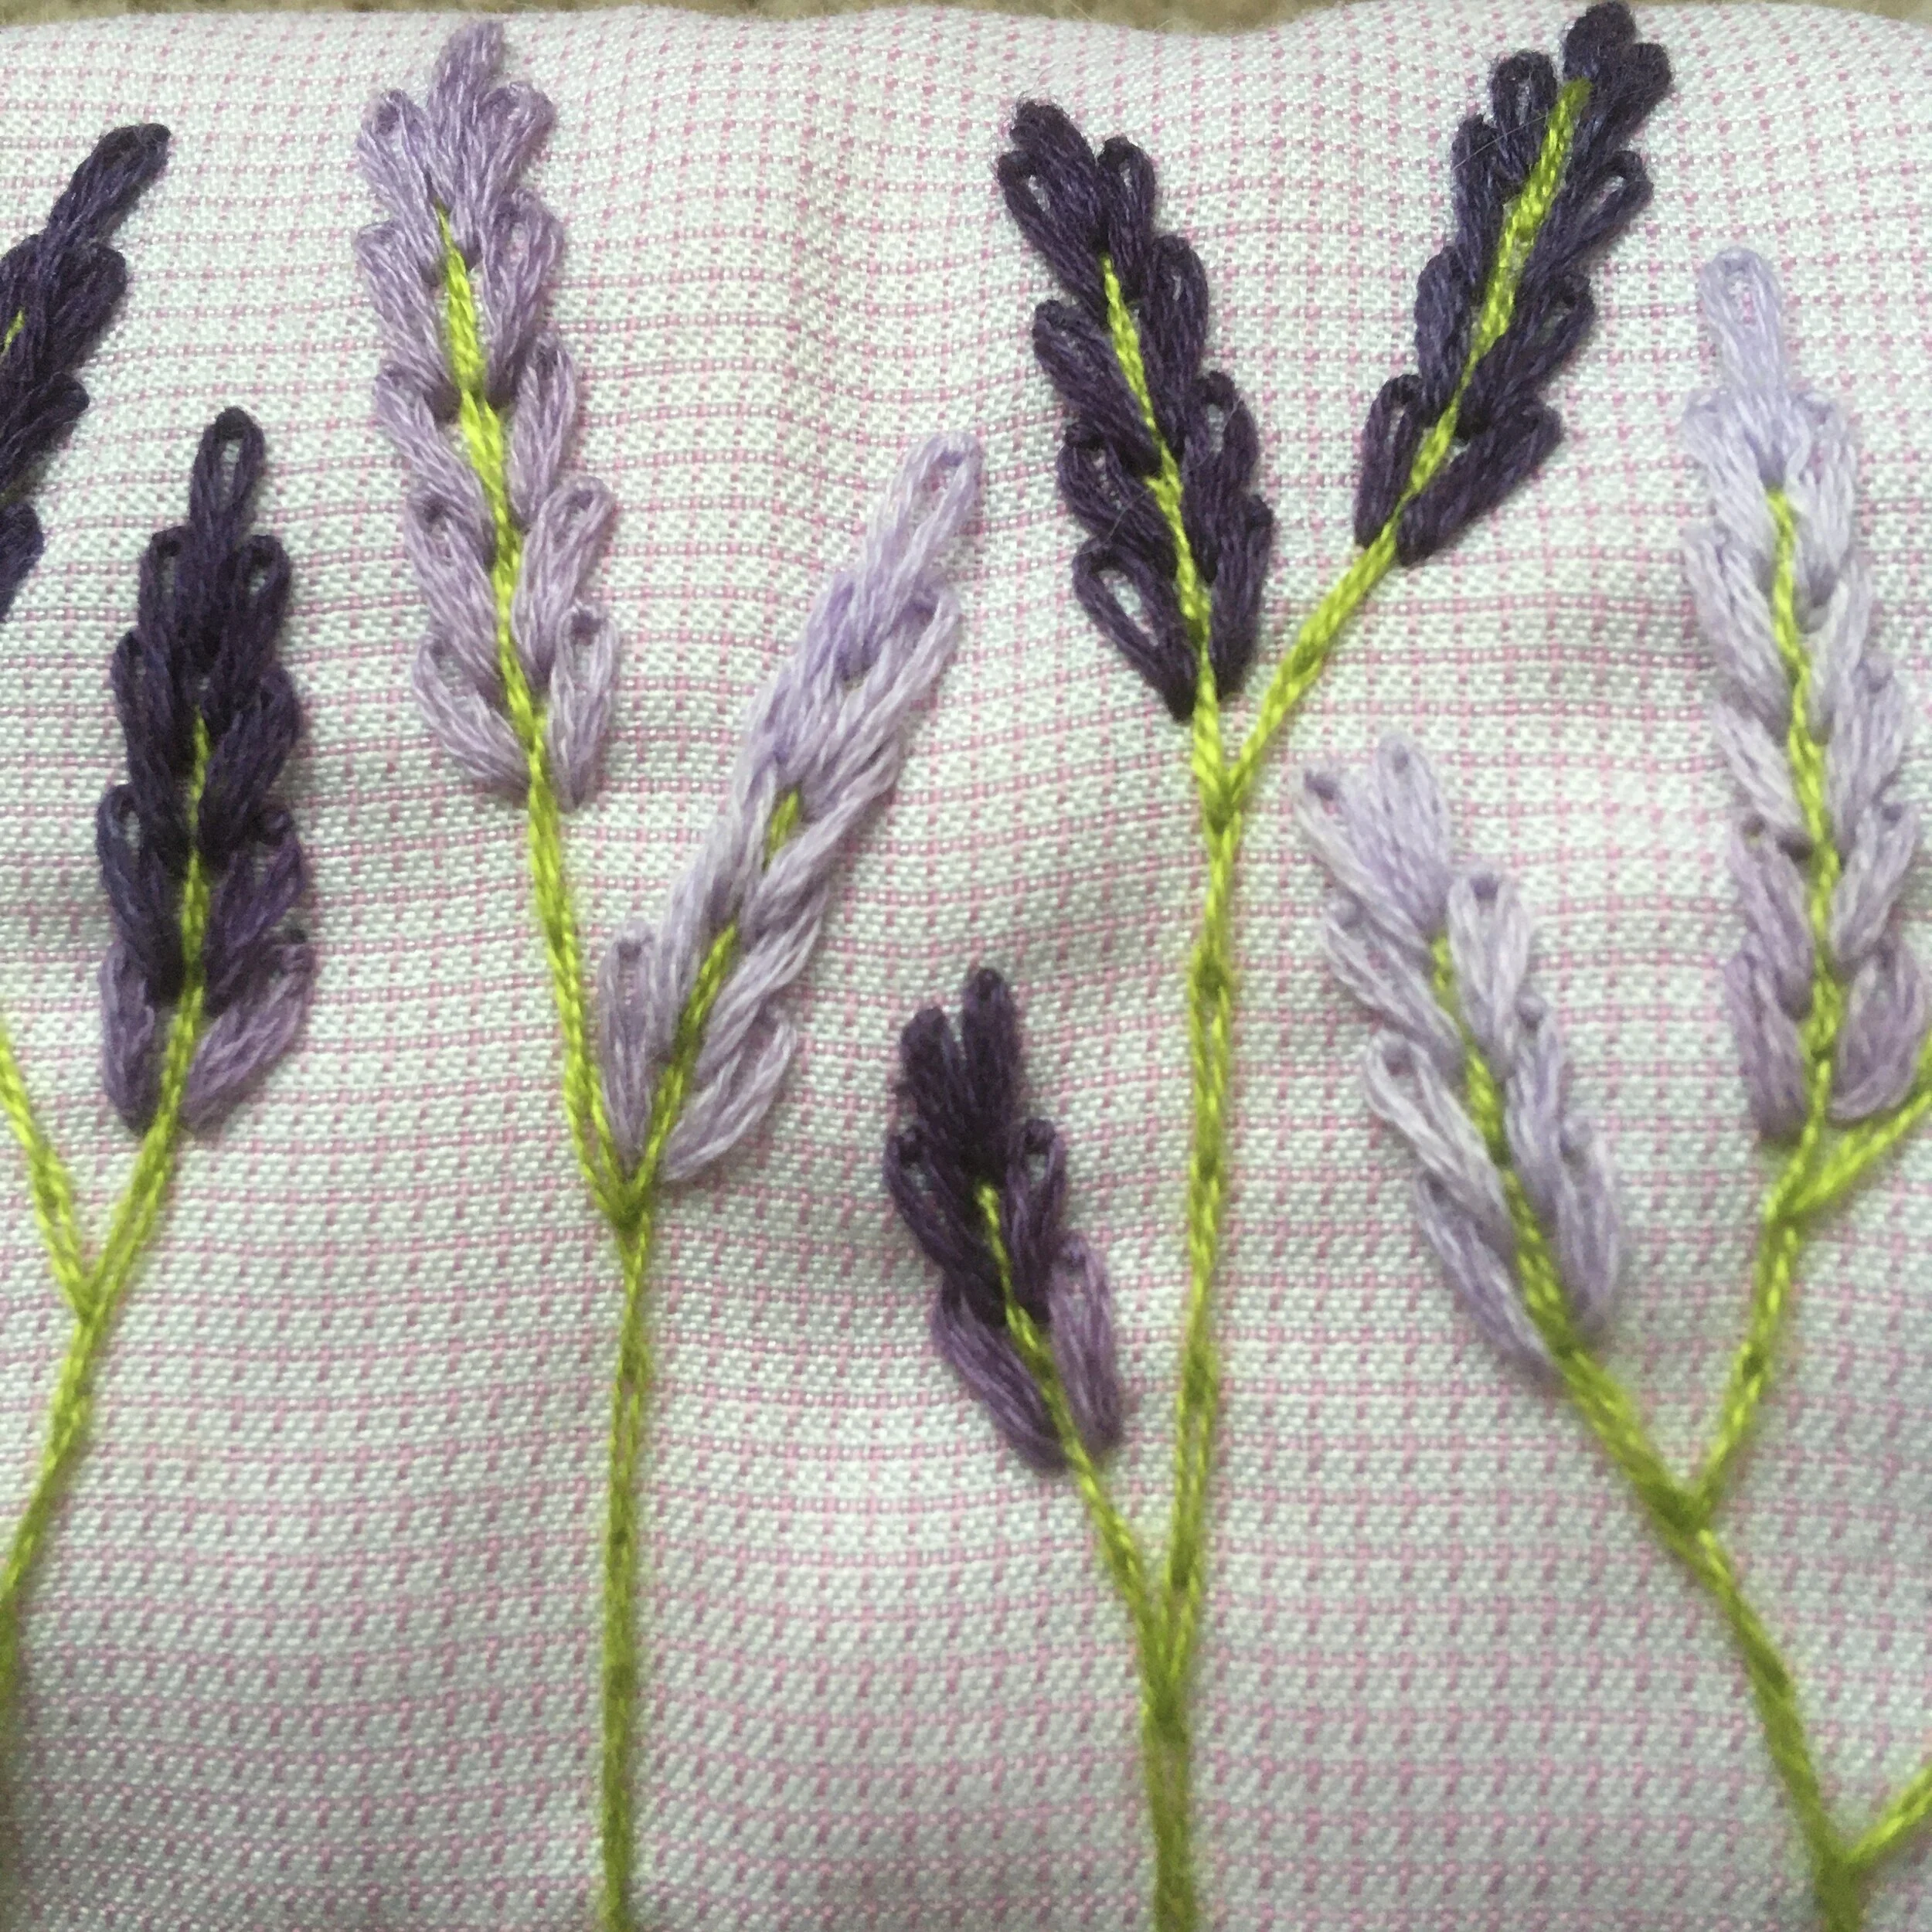
A picture of lavender embroidery stitched using lazy daisy stitch in different shades of purple

Lazy Daisy Stitch

Lazy daisy is just a single chain stitch. It is a series of small loops secured by a tiny straight stitch. It’s great for floral embroidery.

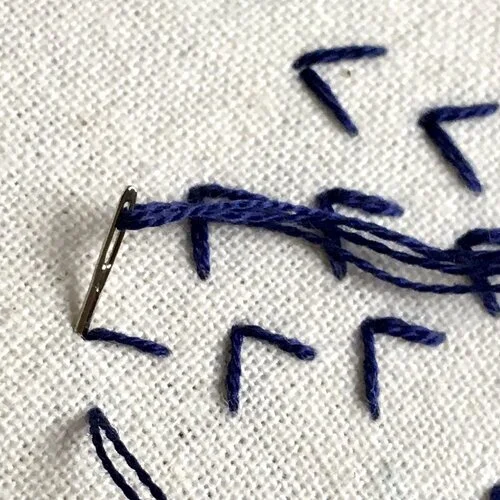
An image of calico background with blue embroidery stitches in the shape of an arrow. The needle is halfway through the fabric in creating the second part of an arrowhead stitch

Arrowhead stitch

A simple V shaped stitch which can also be worked in a line of stitches.

The angle of the V can be varied and the addition of a small straight stitch can create a flock of birds!

Enjoyed this blog post? I share embroidery tips and a free embroidery pattern in my monthly newsletter. Sign up here to receive the newsletter on the 1st of each the month.
In tips 2 Tags Stitch Showcase, Isolated Stitch
Comment
A picture of lines of embroidery stitches in a curved shape, black stitches on calico. Overlaid is a blue square with white text saying - hand embroidery, five line embroidery stitches, www.embellishedlephant.co.uk

Five line stitches for embroidery

July 28, 2021

Of the many and varied embroidery stitches available this group do exactly what they say, they are stitched in a line.

Line stitches are great for borders, outlines and lettering. Below are five types of line stitches that are great for beginners.

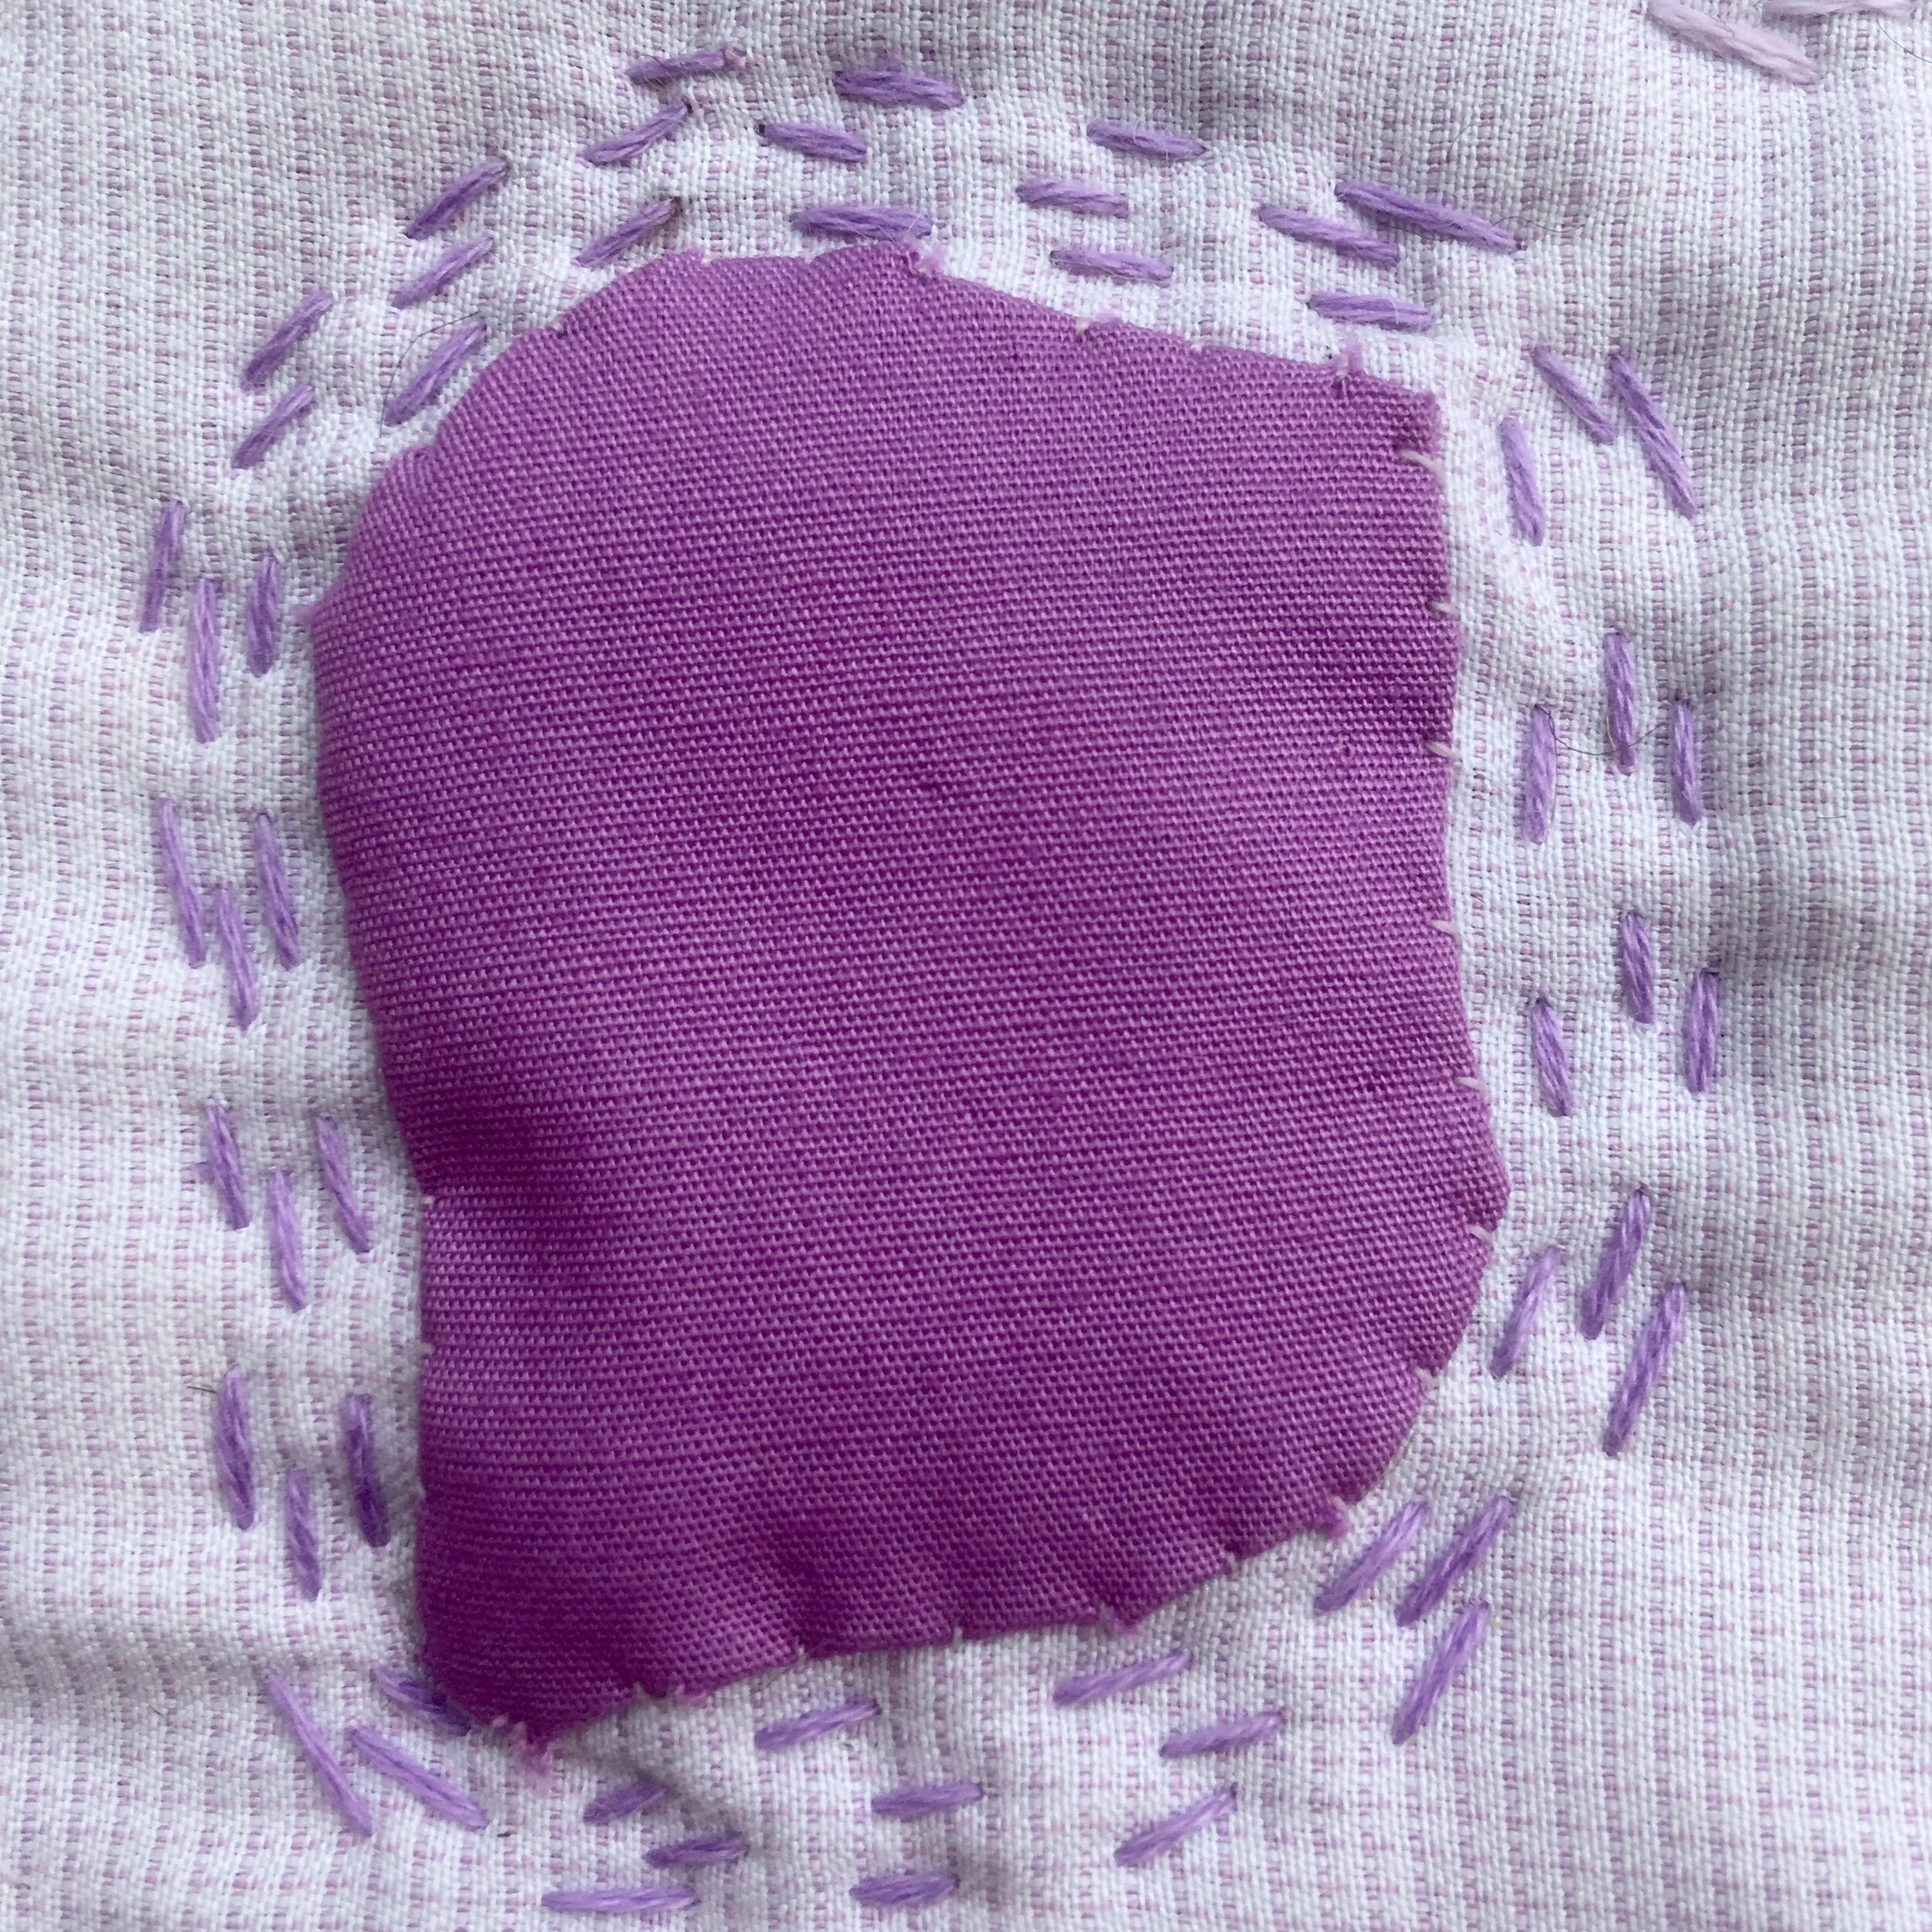
A picture of a purple blob appliqued on a pink checked background. Around the blob is running stitch in purple.

Running stitch

A line of stitches with gaps between each stitch. It’s really useful for gathering the fabric at the back of the hoop. It can also be used on the front of the fabric!

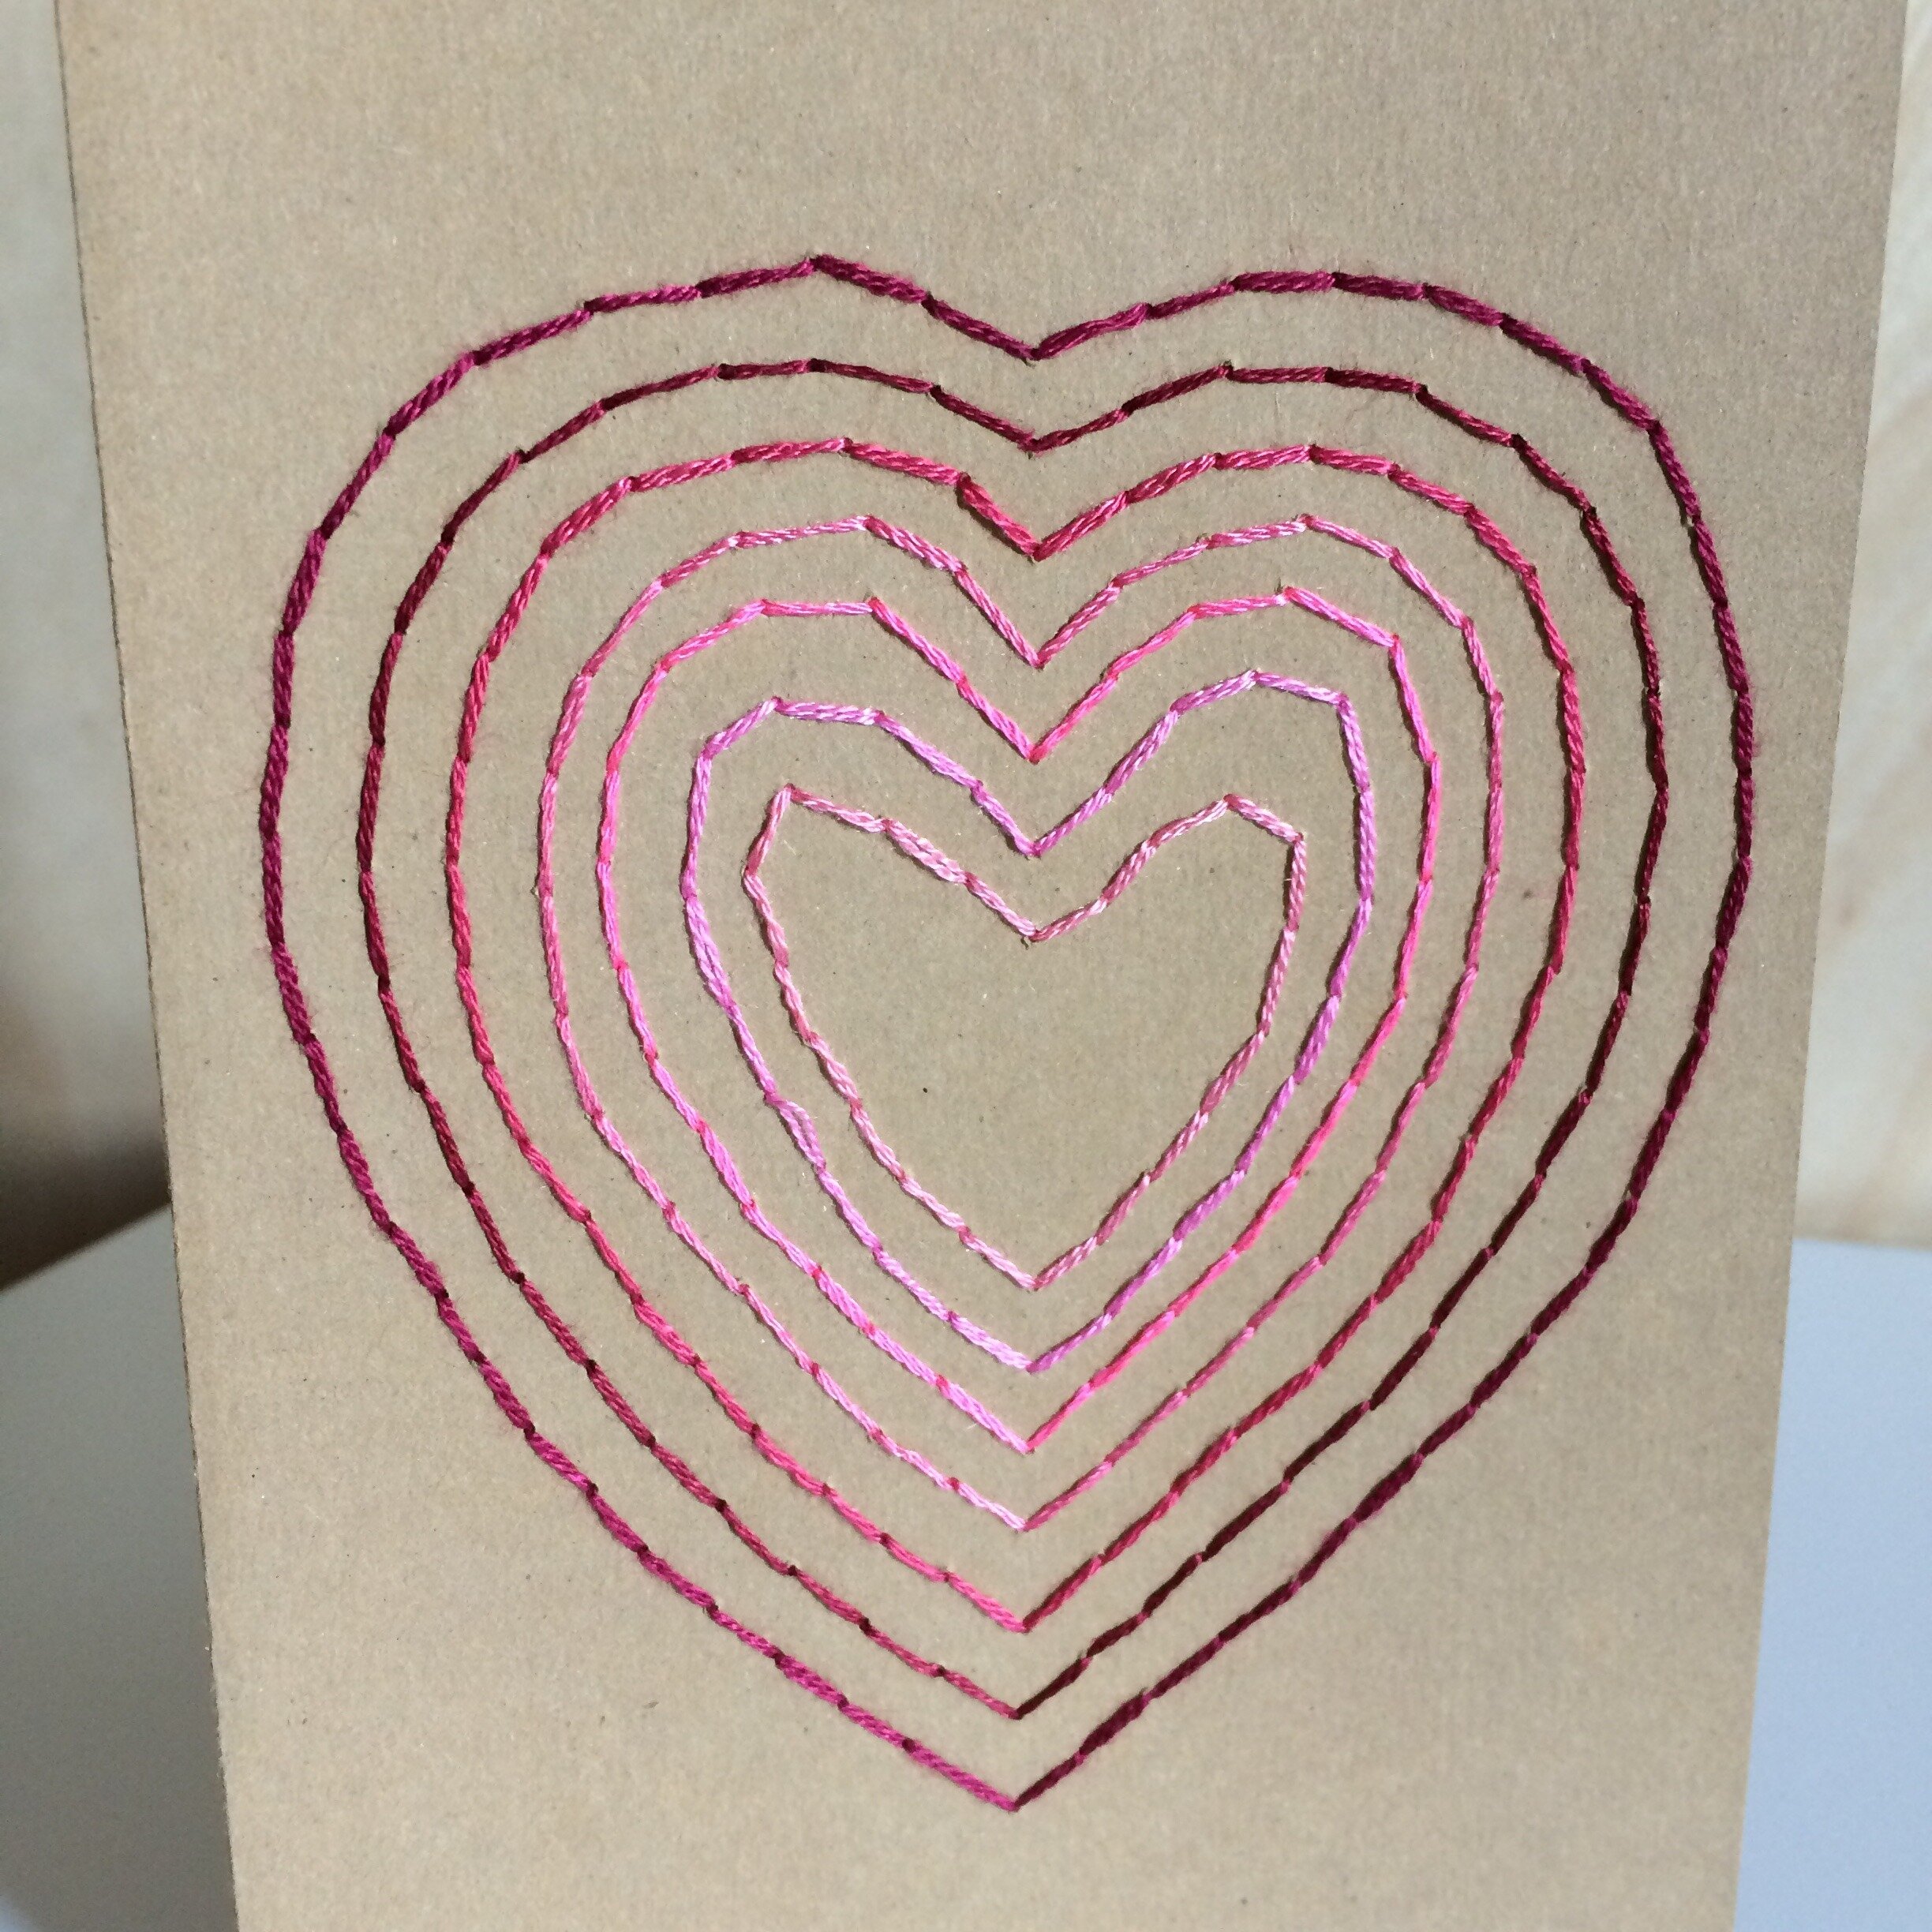
On a brown greetings card is stitched concentric circles in back stitch in a heart shape. The outer most heart is in a Burgundy colour with the inner most heart a light pink

Backstitch

This is probably the stitch you learnt if you did any sewing at school. It’s simply a line of straight stitches.

It is a classic embroidery stitch but I prefer the variation on this - whipped backstitch.

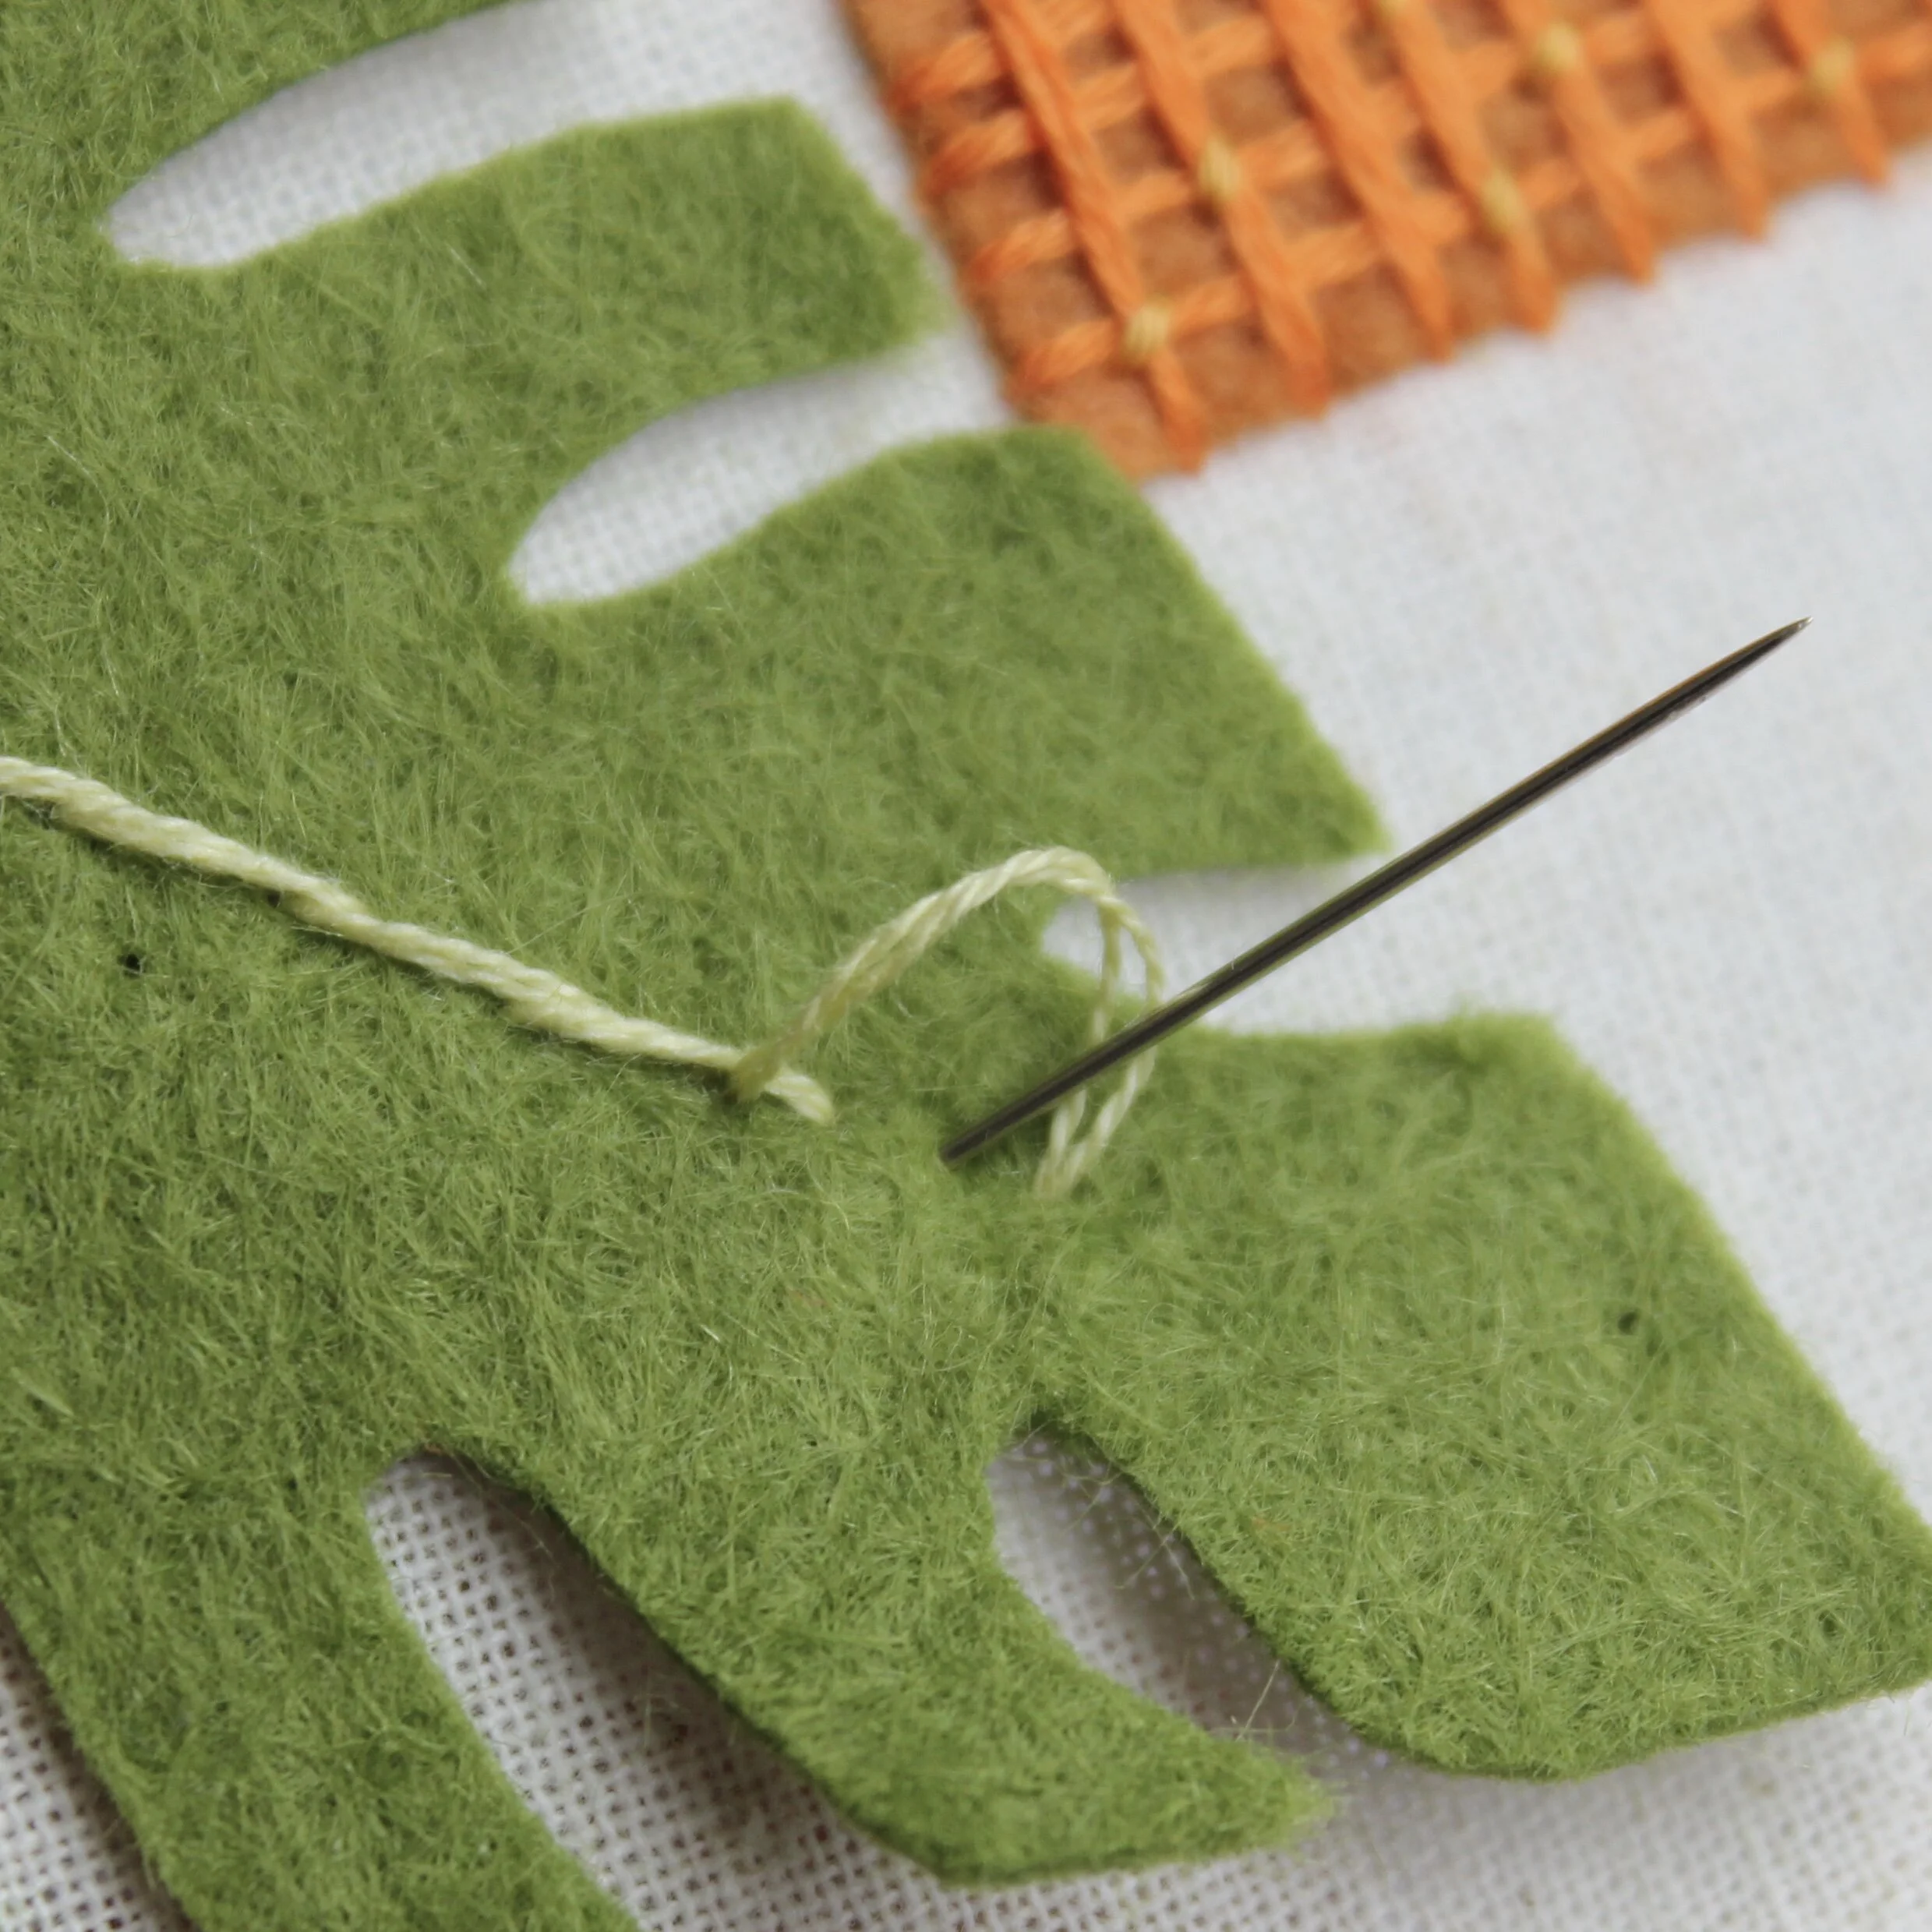
A picture of a felt monstera leaf with a needle coming up through to create a row of stem stitch

Stem Stitch

As the name suggests, this stitch it is often used for stems but can also be great for lettering. It creates a rope like effect.

A picture of a leave with the stem and veins stitched using split stitch

Split Stitch

Great for outlining stitching or as an alternative to backstitch. The needle pierces through the thread and ‘splits’ it.

A picture of rows of couched blue threads showing different methods of couching

Couching

Couching is when a thread or cord is attached to the fabric using small stitches to hold it in place. The couching stitches can be really close together or much further apart depending on the desired effect.

Enjoyed this blog post? I share embroidery tips and a free embroidery pattern in my monthly newsletter. Sign up here to receive the newsletter on the 1st of each the month.
In tips 2 Tags Line Stitch, Stitch Showcase
Comment
← Newer Posts Older Posts →
No results found

Tags

  • Artists/Designers
  • Basics
  • Christmas
  • colour
  • Couching Stitch
  • Fabric
  • Filling Stitch
  • Finishing
  • Hoops
  • Isolated Stitch
  • Line Stitch
  • London
  • My Makes
  • Needles
  • Raised Stitch
  • Stitch Showcase
  • Texture Stitch
  • Thread
  • Transfer
  • Travel

Latest Posts

Featured
June 1, 2026
Focus on knots
June 1, 2026
June 1, 2026
May 1, 2026
Focus on stranded floss
May 1, 2026
May 1, 2026
April 1, 2026
Focus on raised stitches
April 1, 2026
April 1, 2026
February 15, 2026
Tips for unpicking thread tangles
February 15, 2026
February 15, 2026
February 1, 2026
How to add elements to a basic embroidery pattern
February 1, 2026
February 1, 2026
December 1, 2025
Using yarn in embroidery
December 1, 2025
December 1, 2025
November 1, 2025
What can you learn from vintage embroidery books
November 1, 2025
November 1, 2025
September 1, 2025
What is the difference between cross stitch and embroidery?
September 1, 2025
September 1, 2025
July 1, 2025
How to make time for embroidery
July 1, 2025
July 1, 2025
June 1, 2025
What is stranded embroidery thread?
June 1, 2025
June 1, 2025

Home — Shop — Stockists — Wholesale — Portfolio — Contact — Reviews — Policies — FAQs